Basic Load Balancing With the NSX Advanced Load Balancer (ALB)
Overview
With vSphere with Tanzu in vSphere 7.0 Update 2 we got the ability to use the NSX Advanced Load Balancer (ALB), formerly known as AVI networks, as the load balancer in the Supervisor cluster. This opened up a bit of a new world for me as I had little to no experience with the product.
Although I think I'll mostly be dealing with the ALB through Tanzu I thought I'd test it as a regular Load Balancer as well to test, and understand how the stuff really works.
This will be a write up of how I set it up for basic load balancing of web traffic in my existing vSphere environment
Architecture
First a few short words on how the ALB is working. This will by no means be very detailed, take a look at the documentation for more
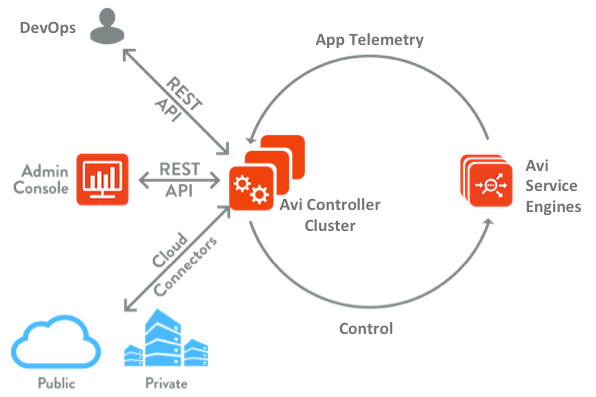
The ALB consists of an Avi controller (cluster), and Avi Service engines. Load Balanced applications and services will be represented by a Virtual Service and a Server Pool.
All management is done through the UI, CLI or API on the Avi Controller. The controller is normally deployed as a three-node cluster which makes up the control plane. The controller works with underlying Orchestrators, which is a connection to supported Clouds (e.g. a vCenter server), for deploying Service Engines (SEs). The SEs perform the data plane operations and do the "actual" load balancing work. The SEs hosts Virtual Services which is the service a client/user connects to. The Virtual Service forwards the traffic to an applicable and available member of the Server Pool
HW requirements
The Avi controller requires 8 vCPU, 24 GB RAM and 128 GB of storage. In a production environment you'll need three of these. In my lab environment I'm running it with 4 vCPUs and 20 GB RAM, since it's a lab environment with limited resources.
The Avi Service Engines require 1 vCPU, 2GB RAM and 10 GB of storage. The number of SEs needed is based on how many applications that Avi is servicing, and the redundancy chosen for those. By default you'll get two SEs when you deploy your first Virtual Service
License
The ALB comes with an evaluation license installed that lets us test the full functionality of the product. Note that there are different licensing editions available that enables different feature sets. E.g. the Essentials license supports only L4 load balancing and legacy HA.
Check the License feature comparison for details.
Deployment
The ALB is deployed as an OVA and the process is very easy. The only information needed is the management IP network details.
For deployment on other providers take a look at the documentation
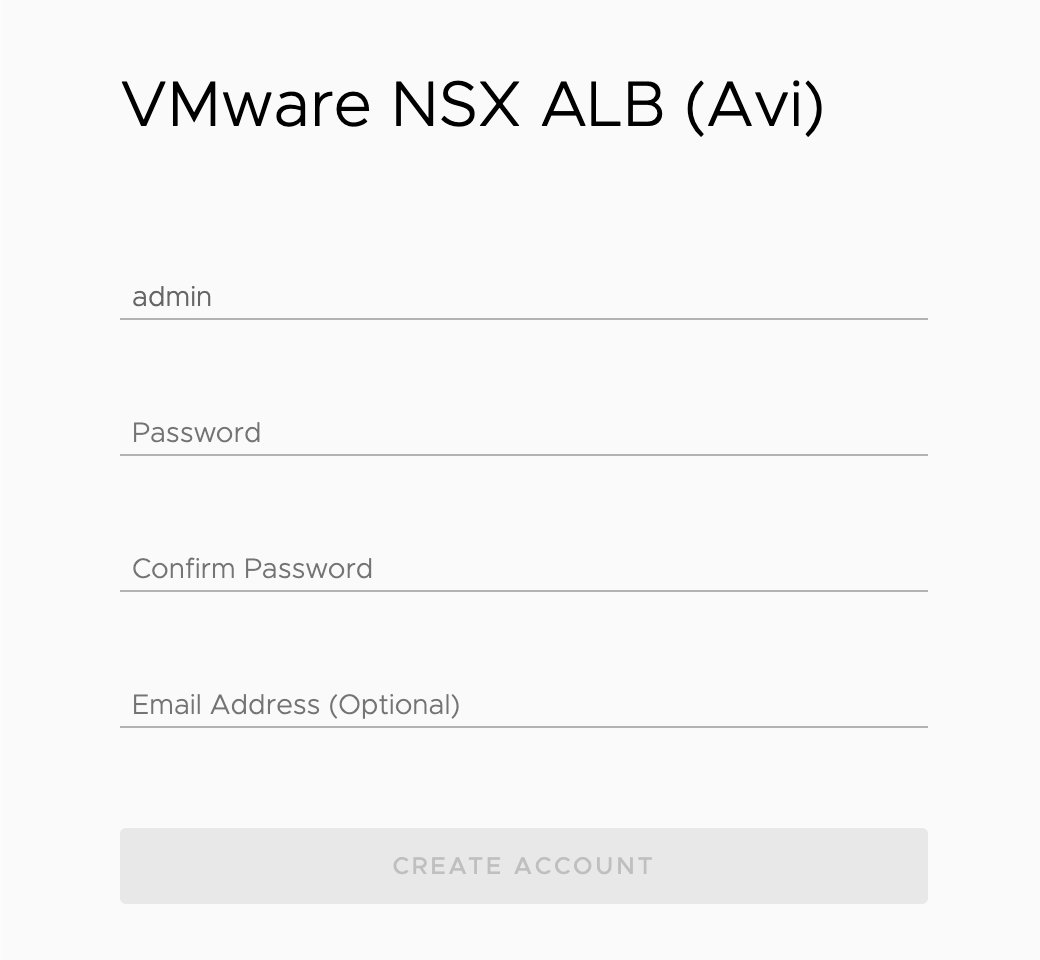
After deploying the OVA and powering on the Avi controller we're met with the admin user setup. Choose a password, and optionally an email address, for the admin user.
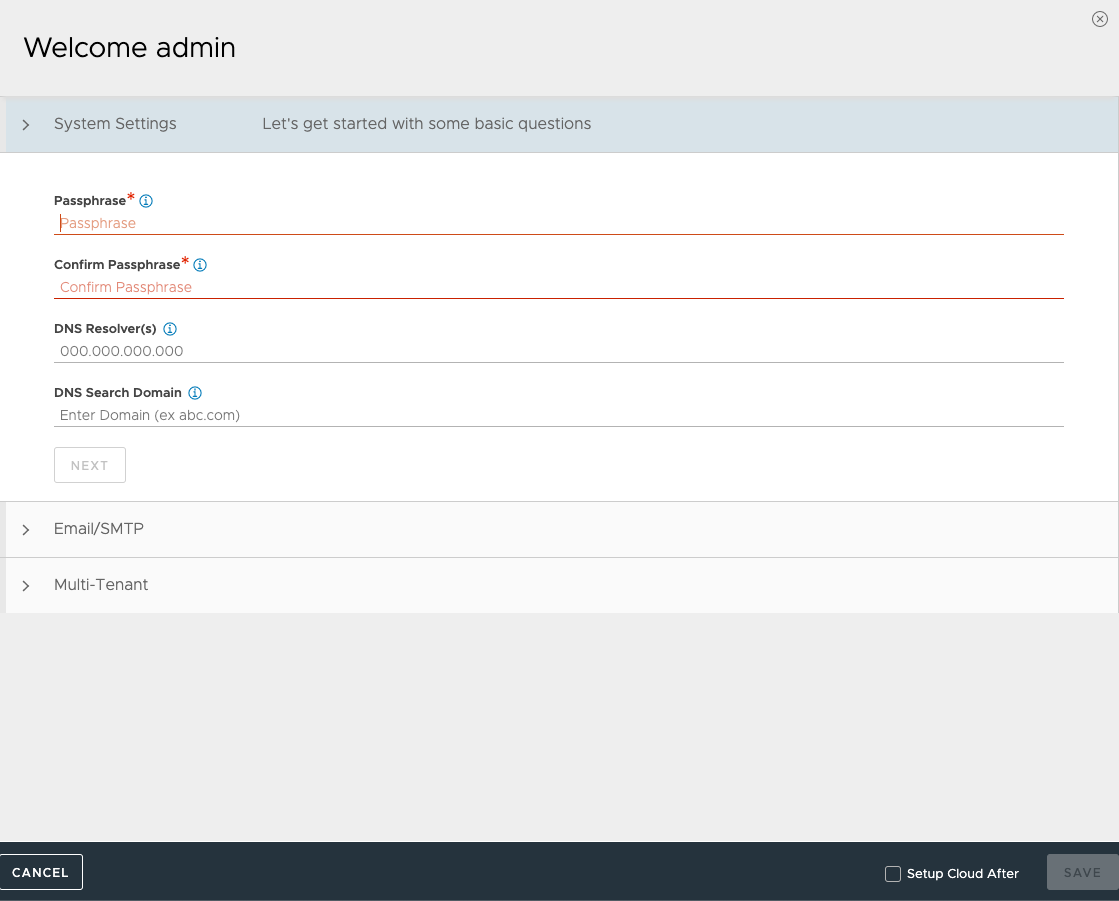
Next step is the System settings which includes a Passphrase used for backups and config exports, DNS information, SMTP information, and Multi-tenancy. In my setup I'm only adding a Passphrase and the DNS info, I set the SMTP to none, and the Multi-tenancy info I leave at the defaults
That's all there is to the initial deployment.
Configure Infrastructure
Before we can start using the Avi Controller we need to connect it to some infrastructure components. This is done through the concept of Clouds, and by specifying the Networks we will use. Optionally we can also add in some routing, but we'll get to that.
Some of the setup is also done through different Profiles which we'll touch upon in due time.
Cloud
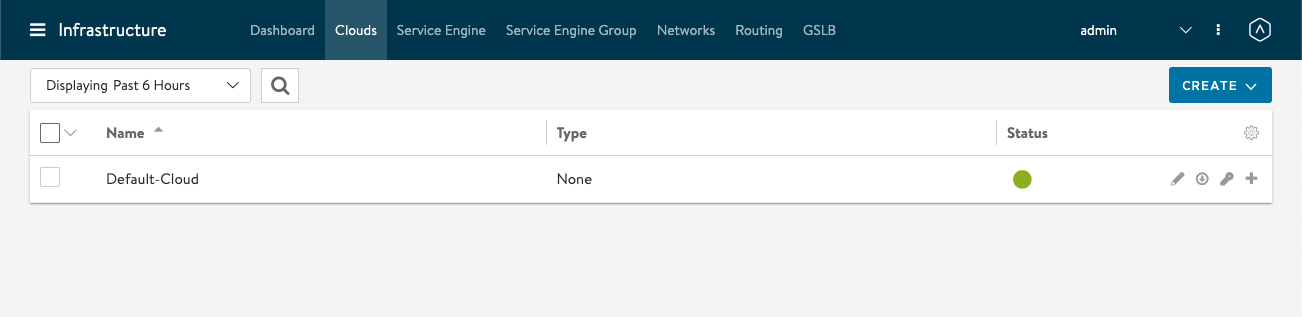
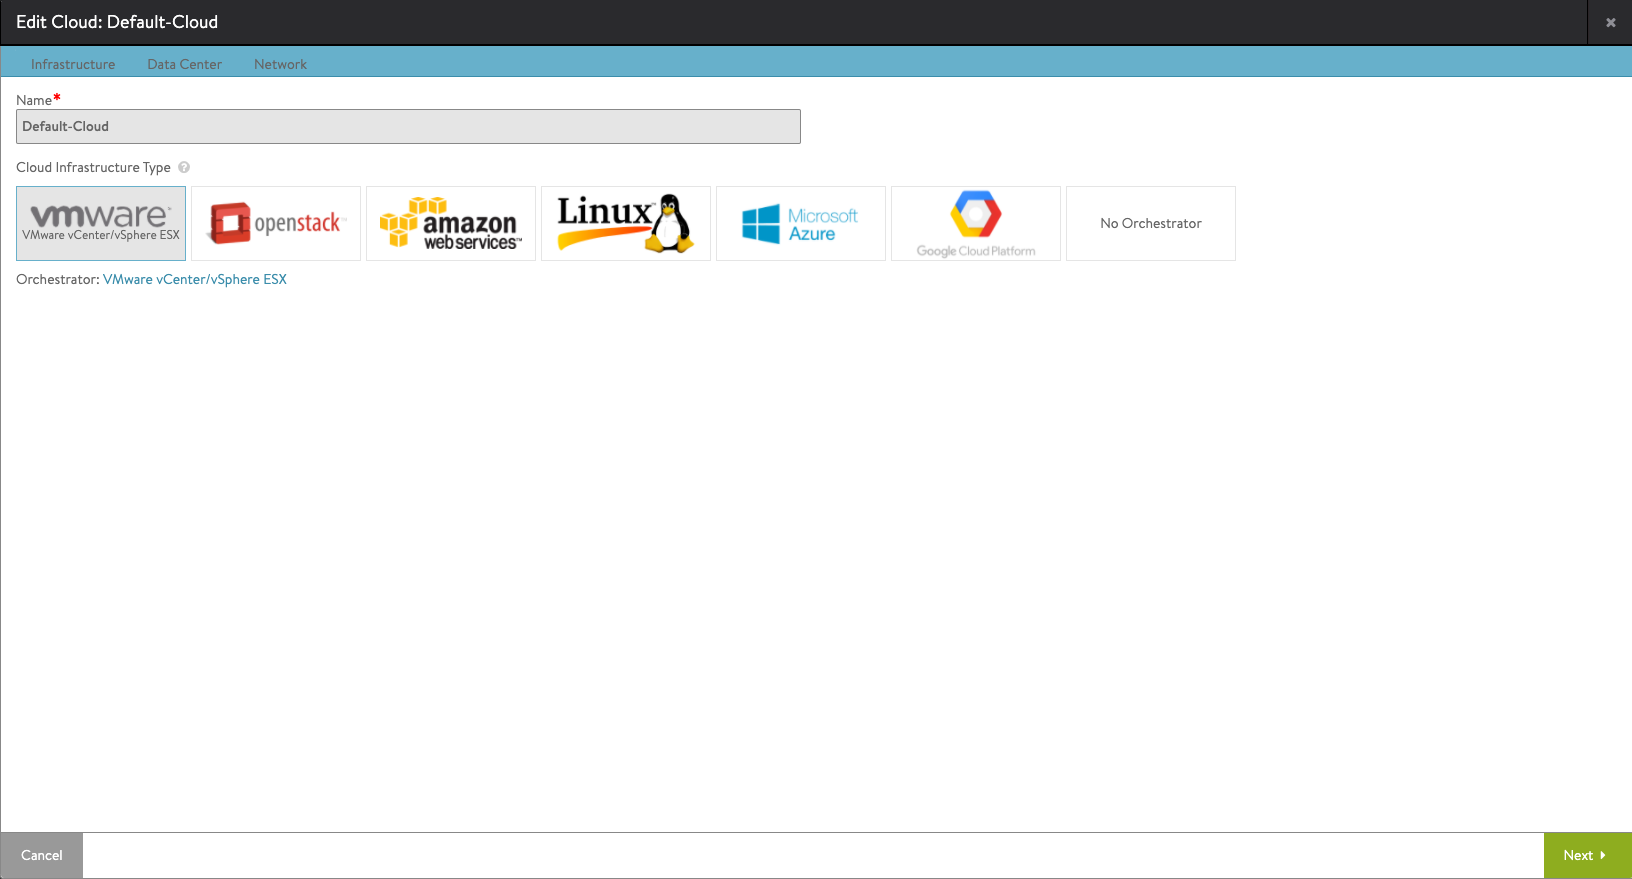
After deploying you'll have one cloud created, the Default-Cloud. If you didn't select to configure this in the initial setup it will be of Type None like in my example
Let's edit the Default Cloud and connect it to our vCenter server.
We'll first select the type, which will be VMware vCenter in my case
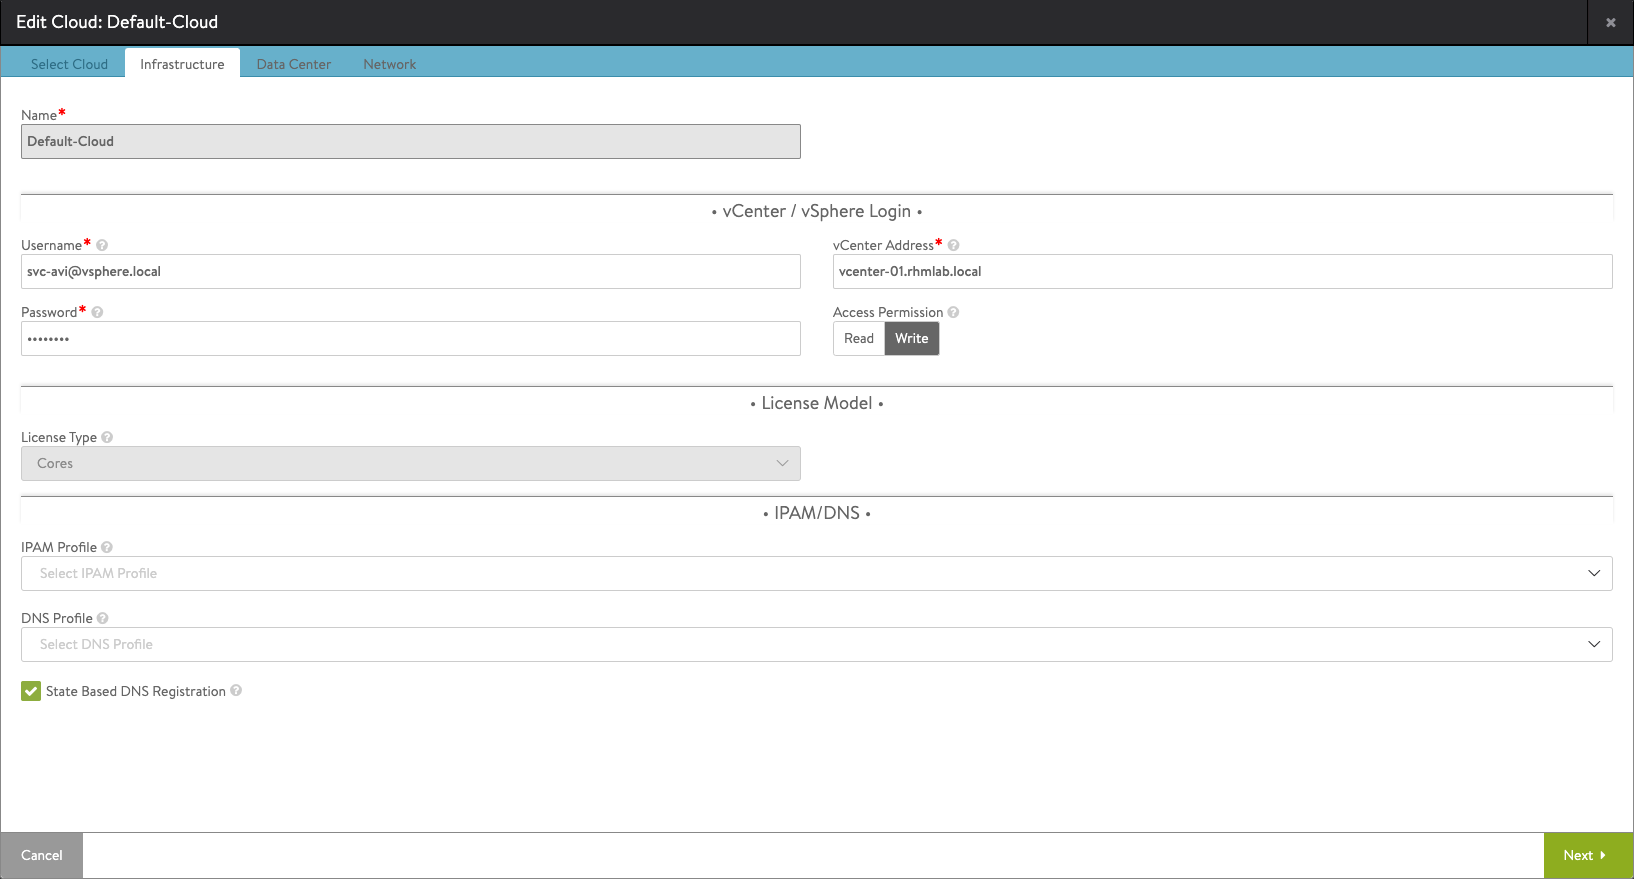
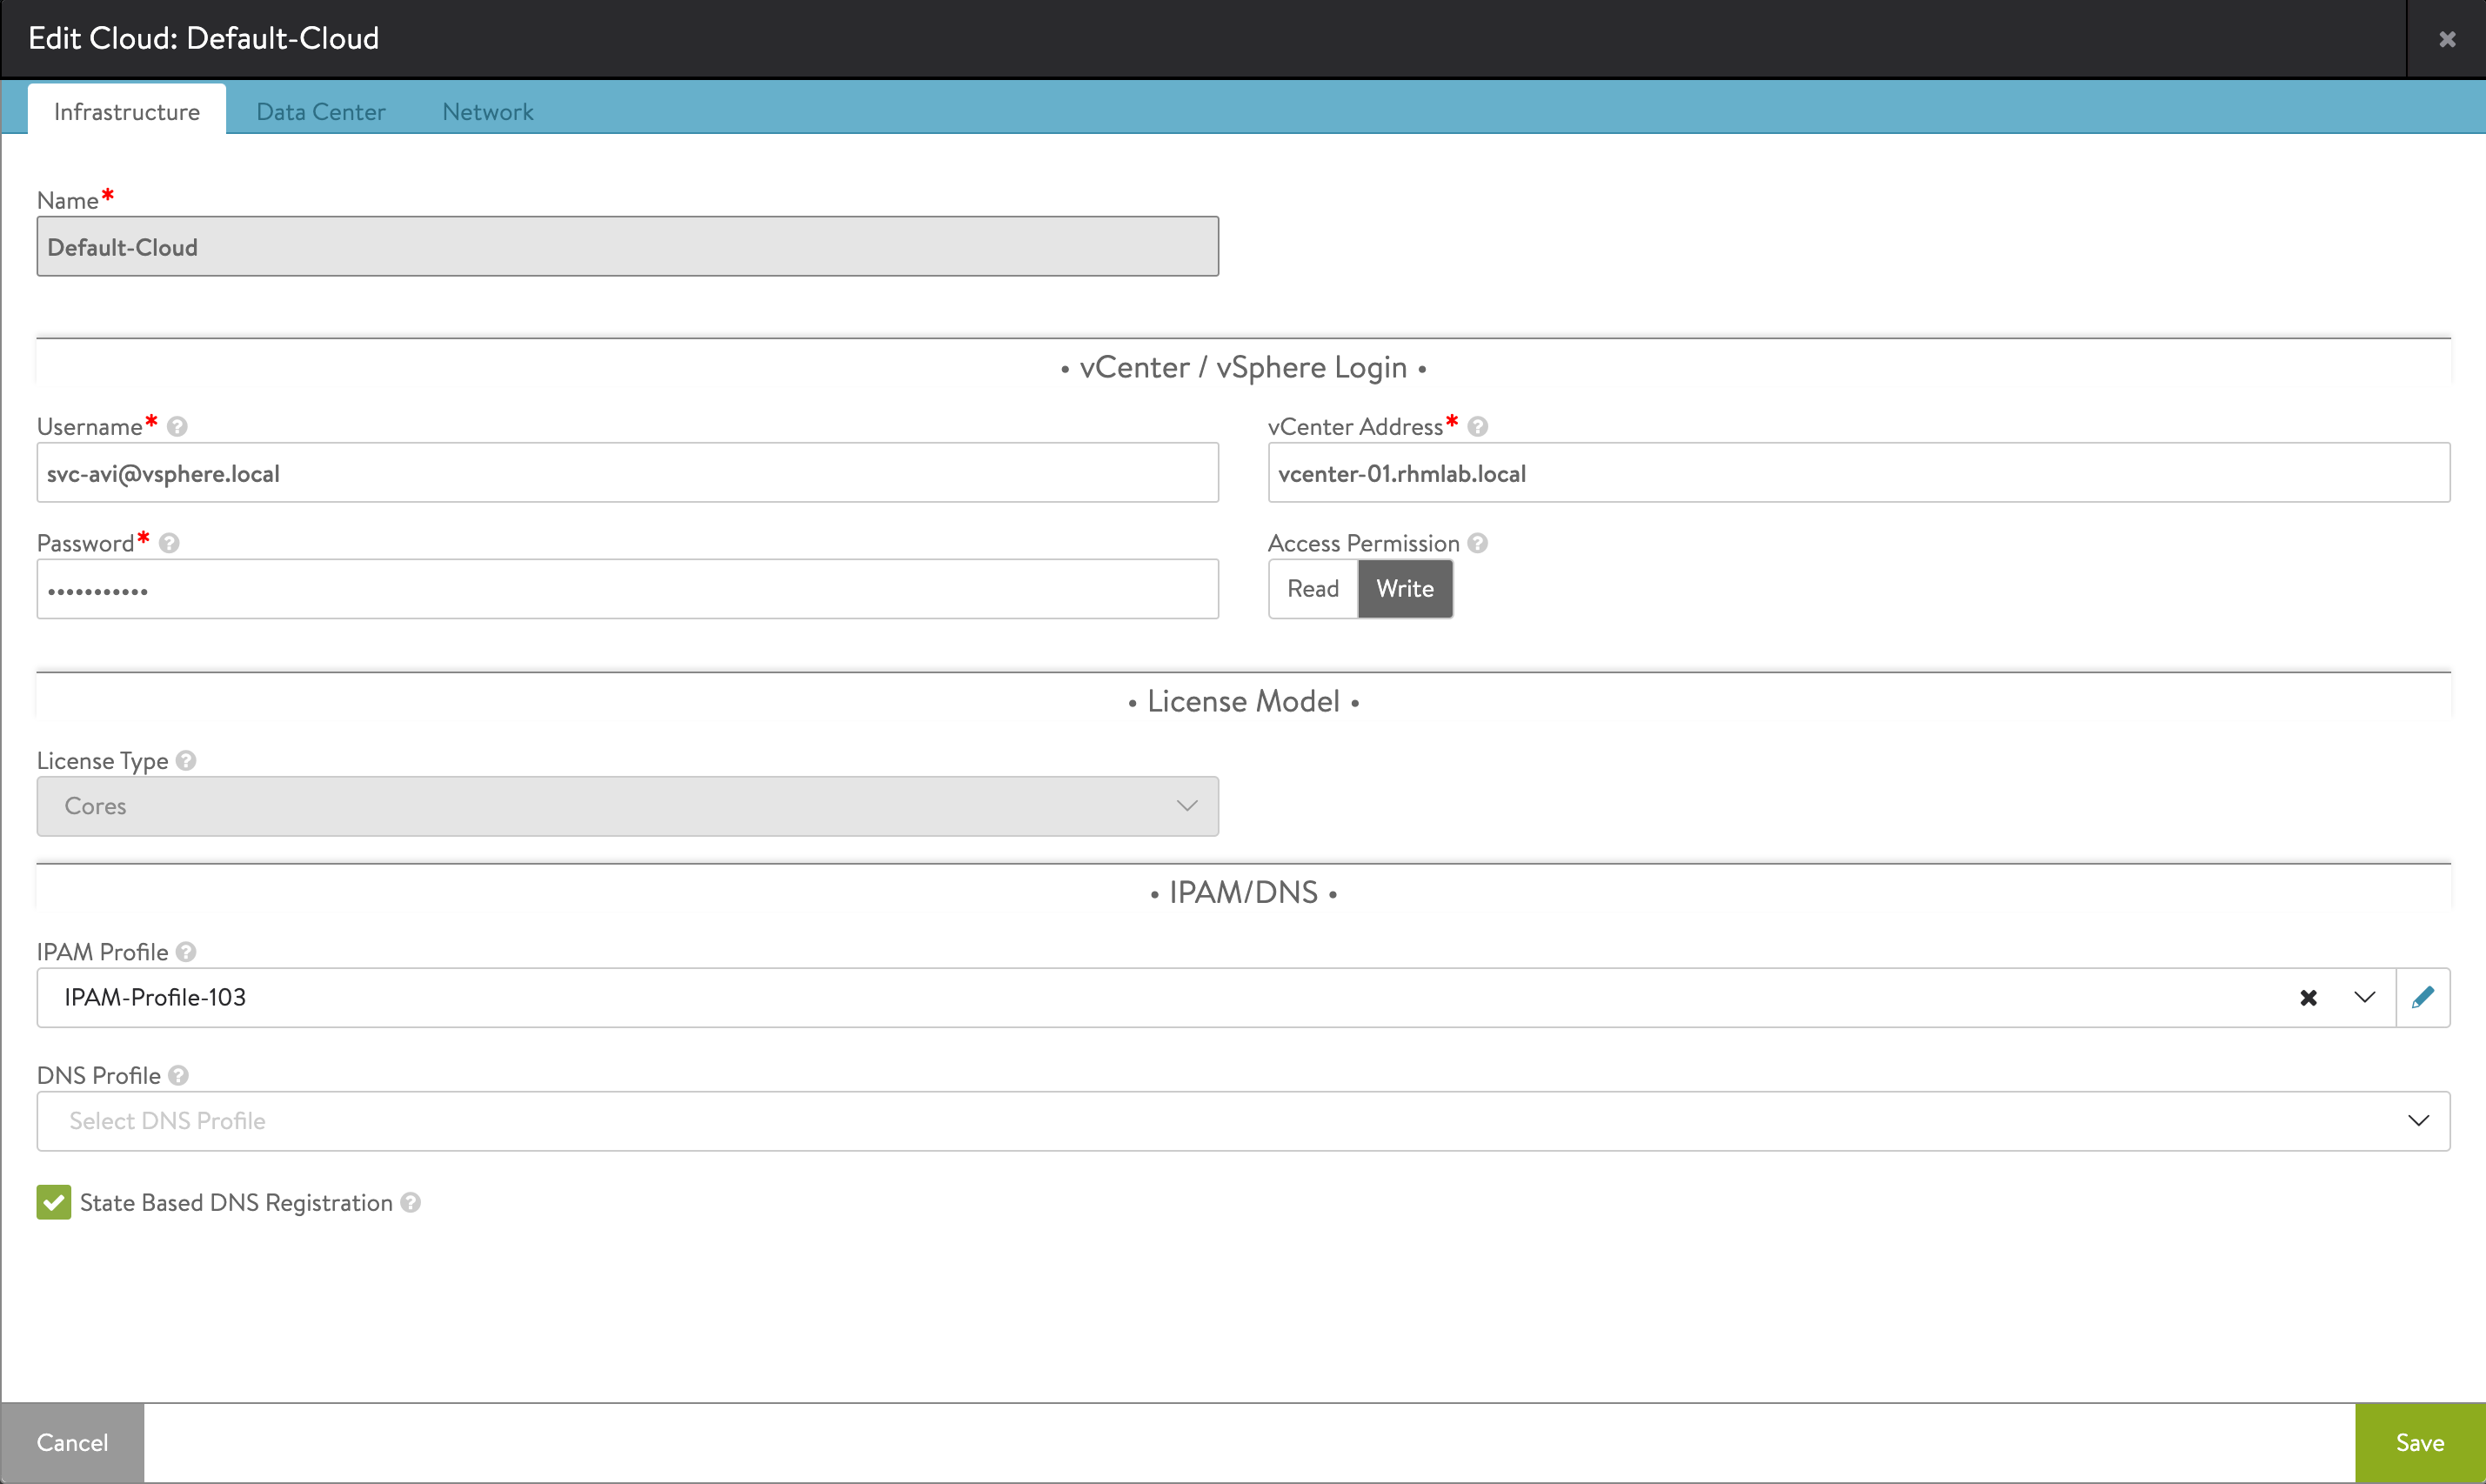
Next step is to add the details about our vCenter. Note that we can add in IPAM and DNS profiles which will be used when deploying to this cloud. We'll do this in a later step.
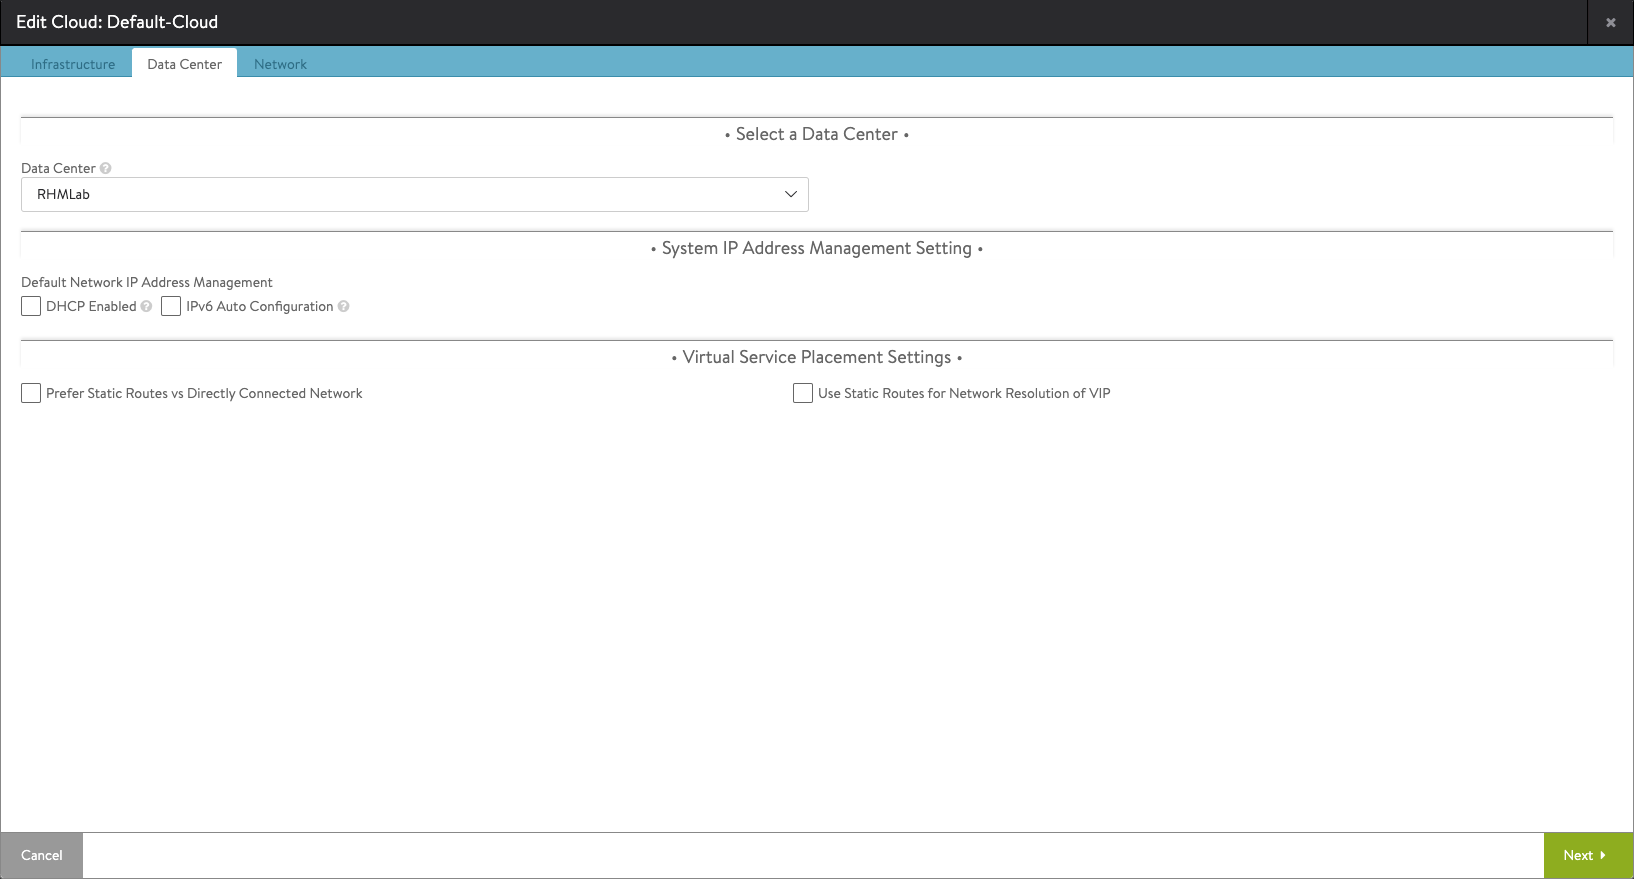
Next we can configure which Data Center in vCenter to connect to, and also specify some IP settings. We'll leave these for now
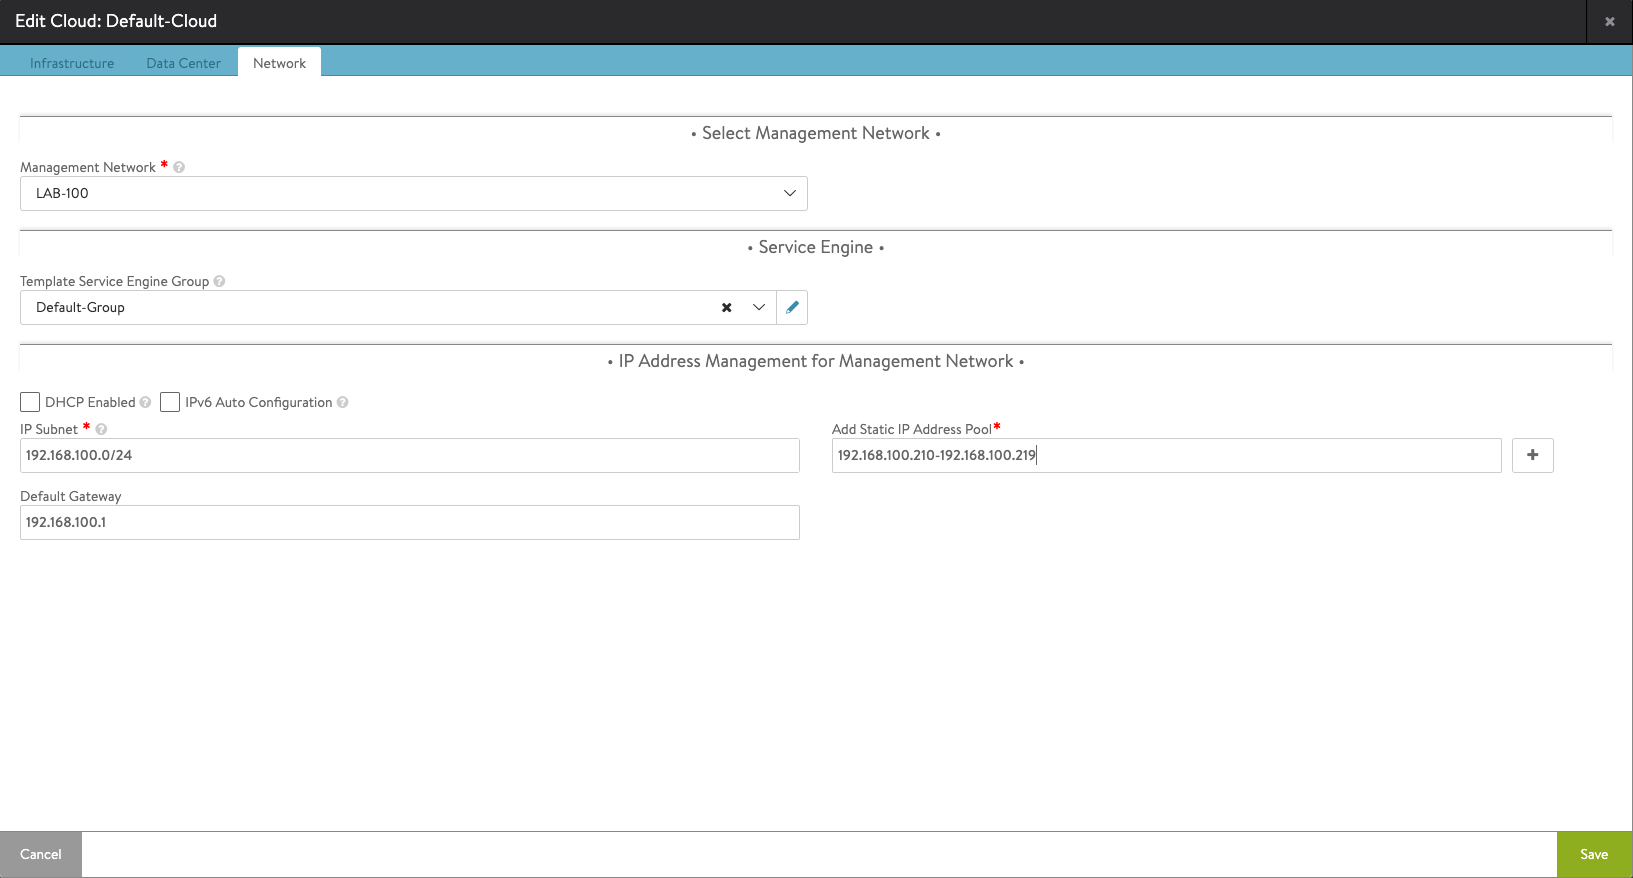
Last step is to select the Management Network port fetched from vCenter. We can also set the template for the Service Engine Group
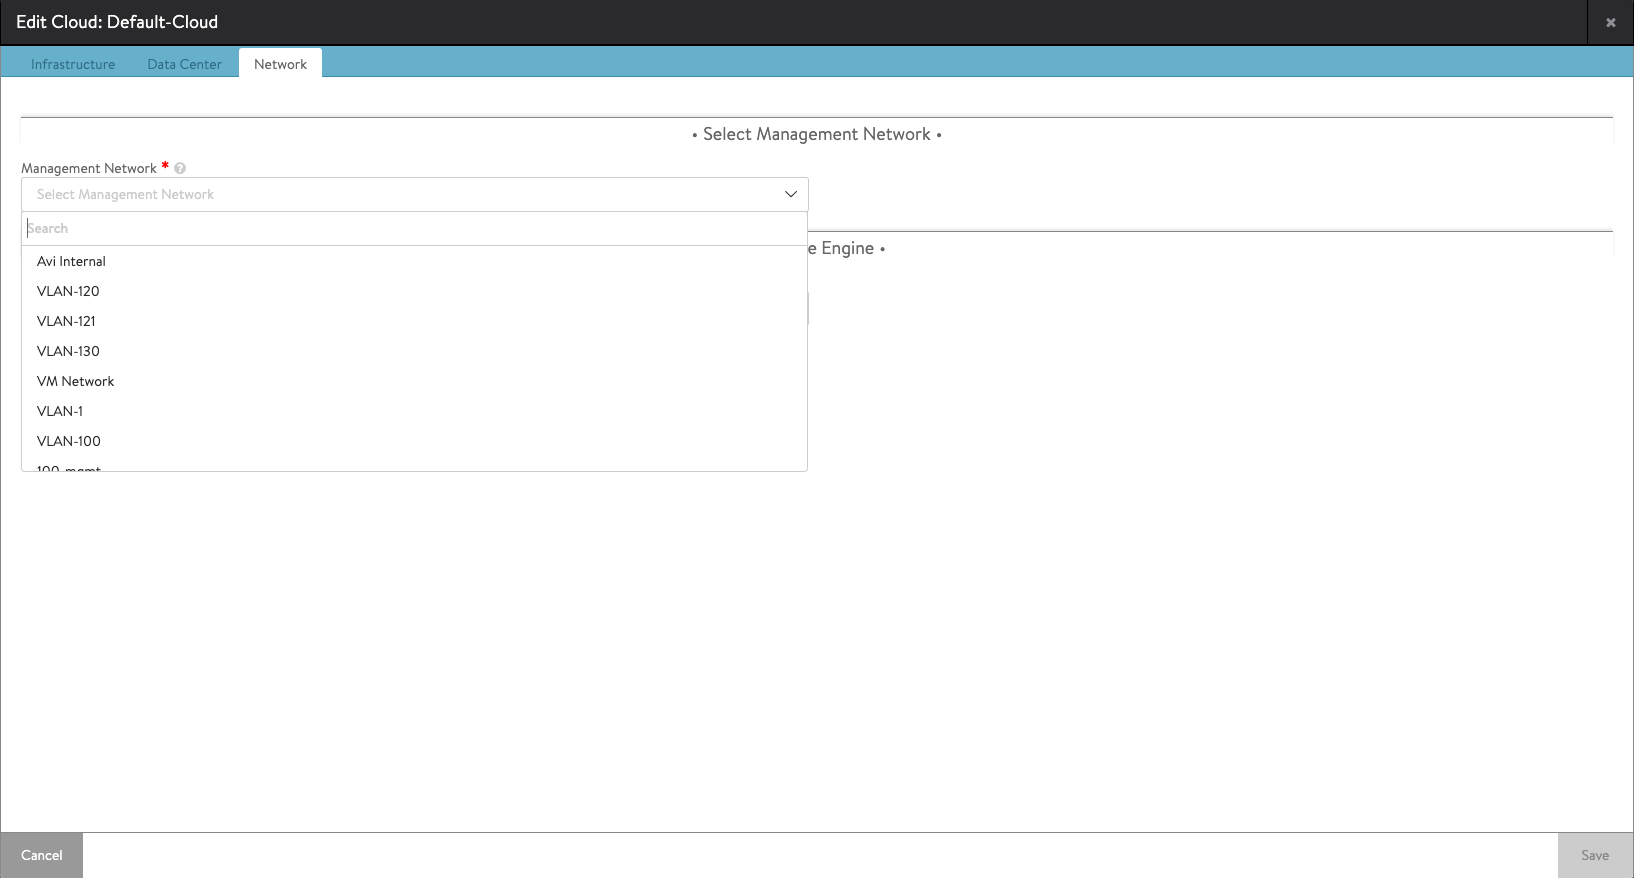
After selecting the network we can also specify the details of the Management network. I've set the subnet and gateway and a Static IP address pool of 10 addresses. These will be used for management addresses for the deployed SEs.
Note that I've also set the Template Service Engine Group to the built-in Default-Group, this is optional.
Networks
When the cloud has been configured we'll go ahead and set up the Networks.
The Network(s) we are configuring here are those for the Virtual Services, i.e. the IP addresses for our load balanced services/applications. These are actually
In my environment I'm using the network LAB-103 which corresponds to VLAN 103 and the subnet 192.168.103.0/24.
We'll edit the Network and hit Add subnet and then add the IP Subnet address, and also hit Add Static IP Address Pool
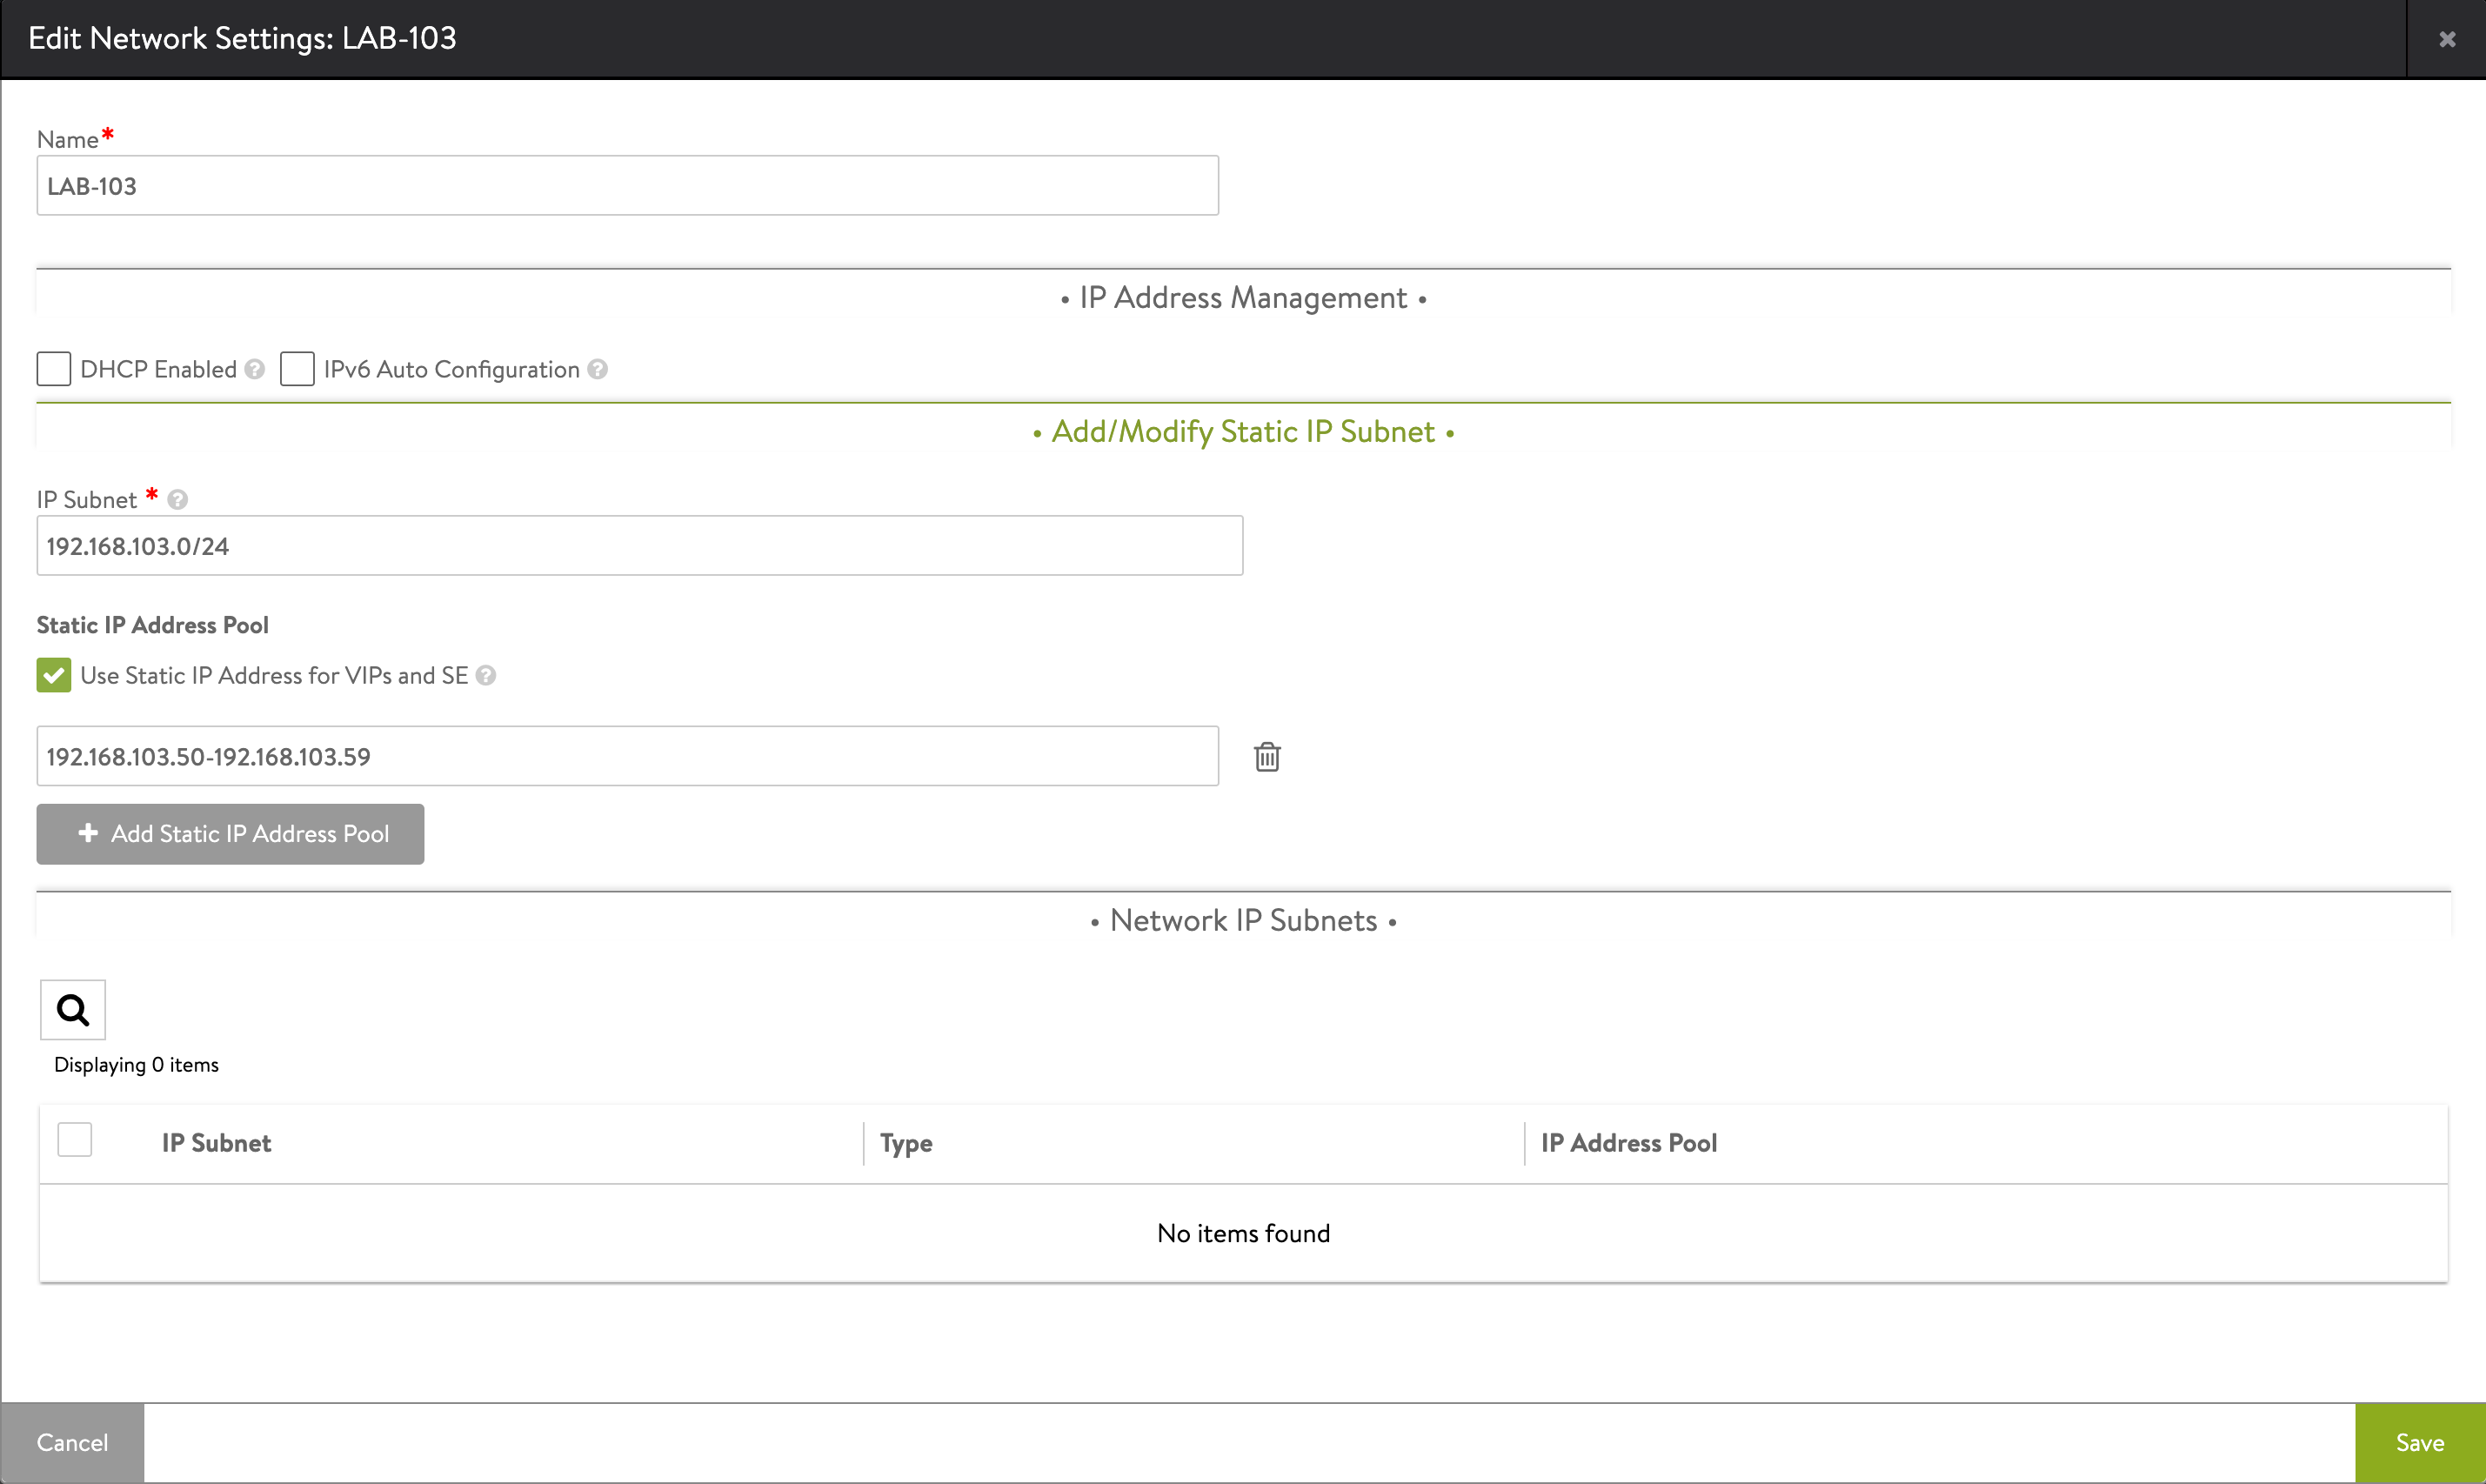
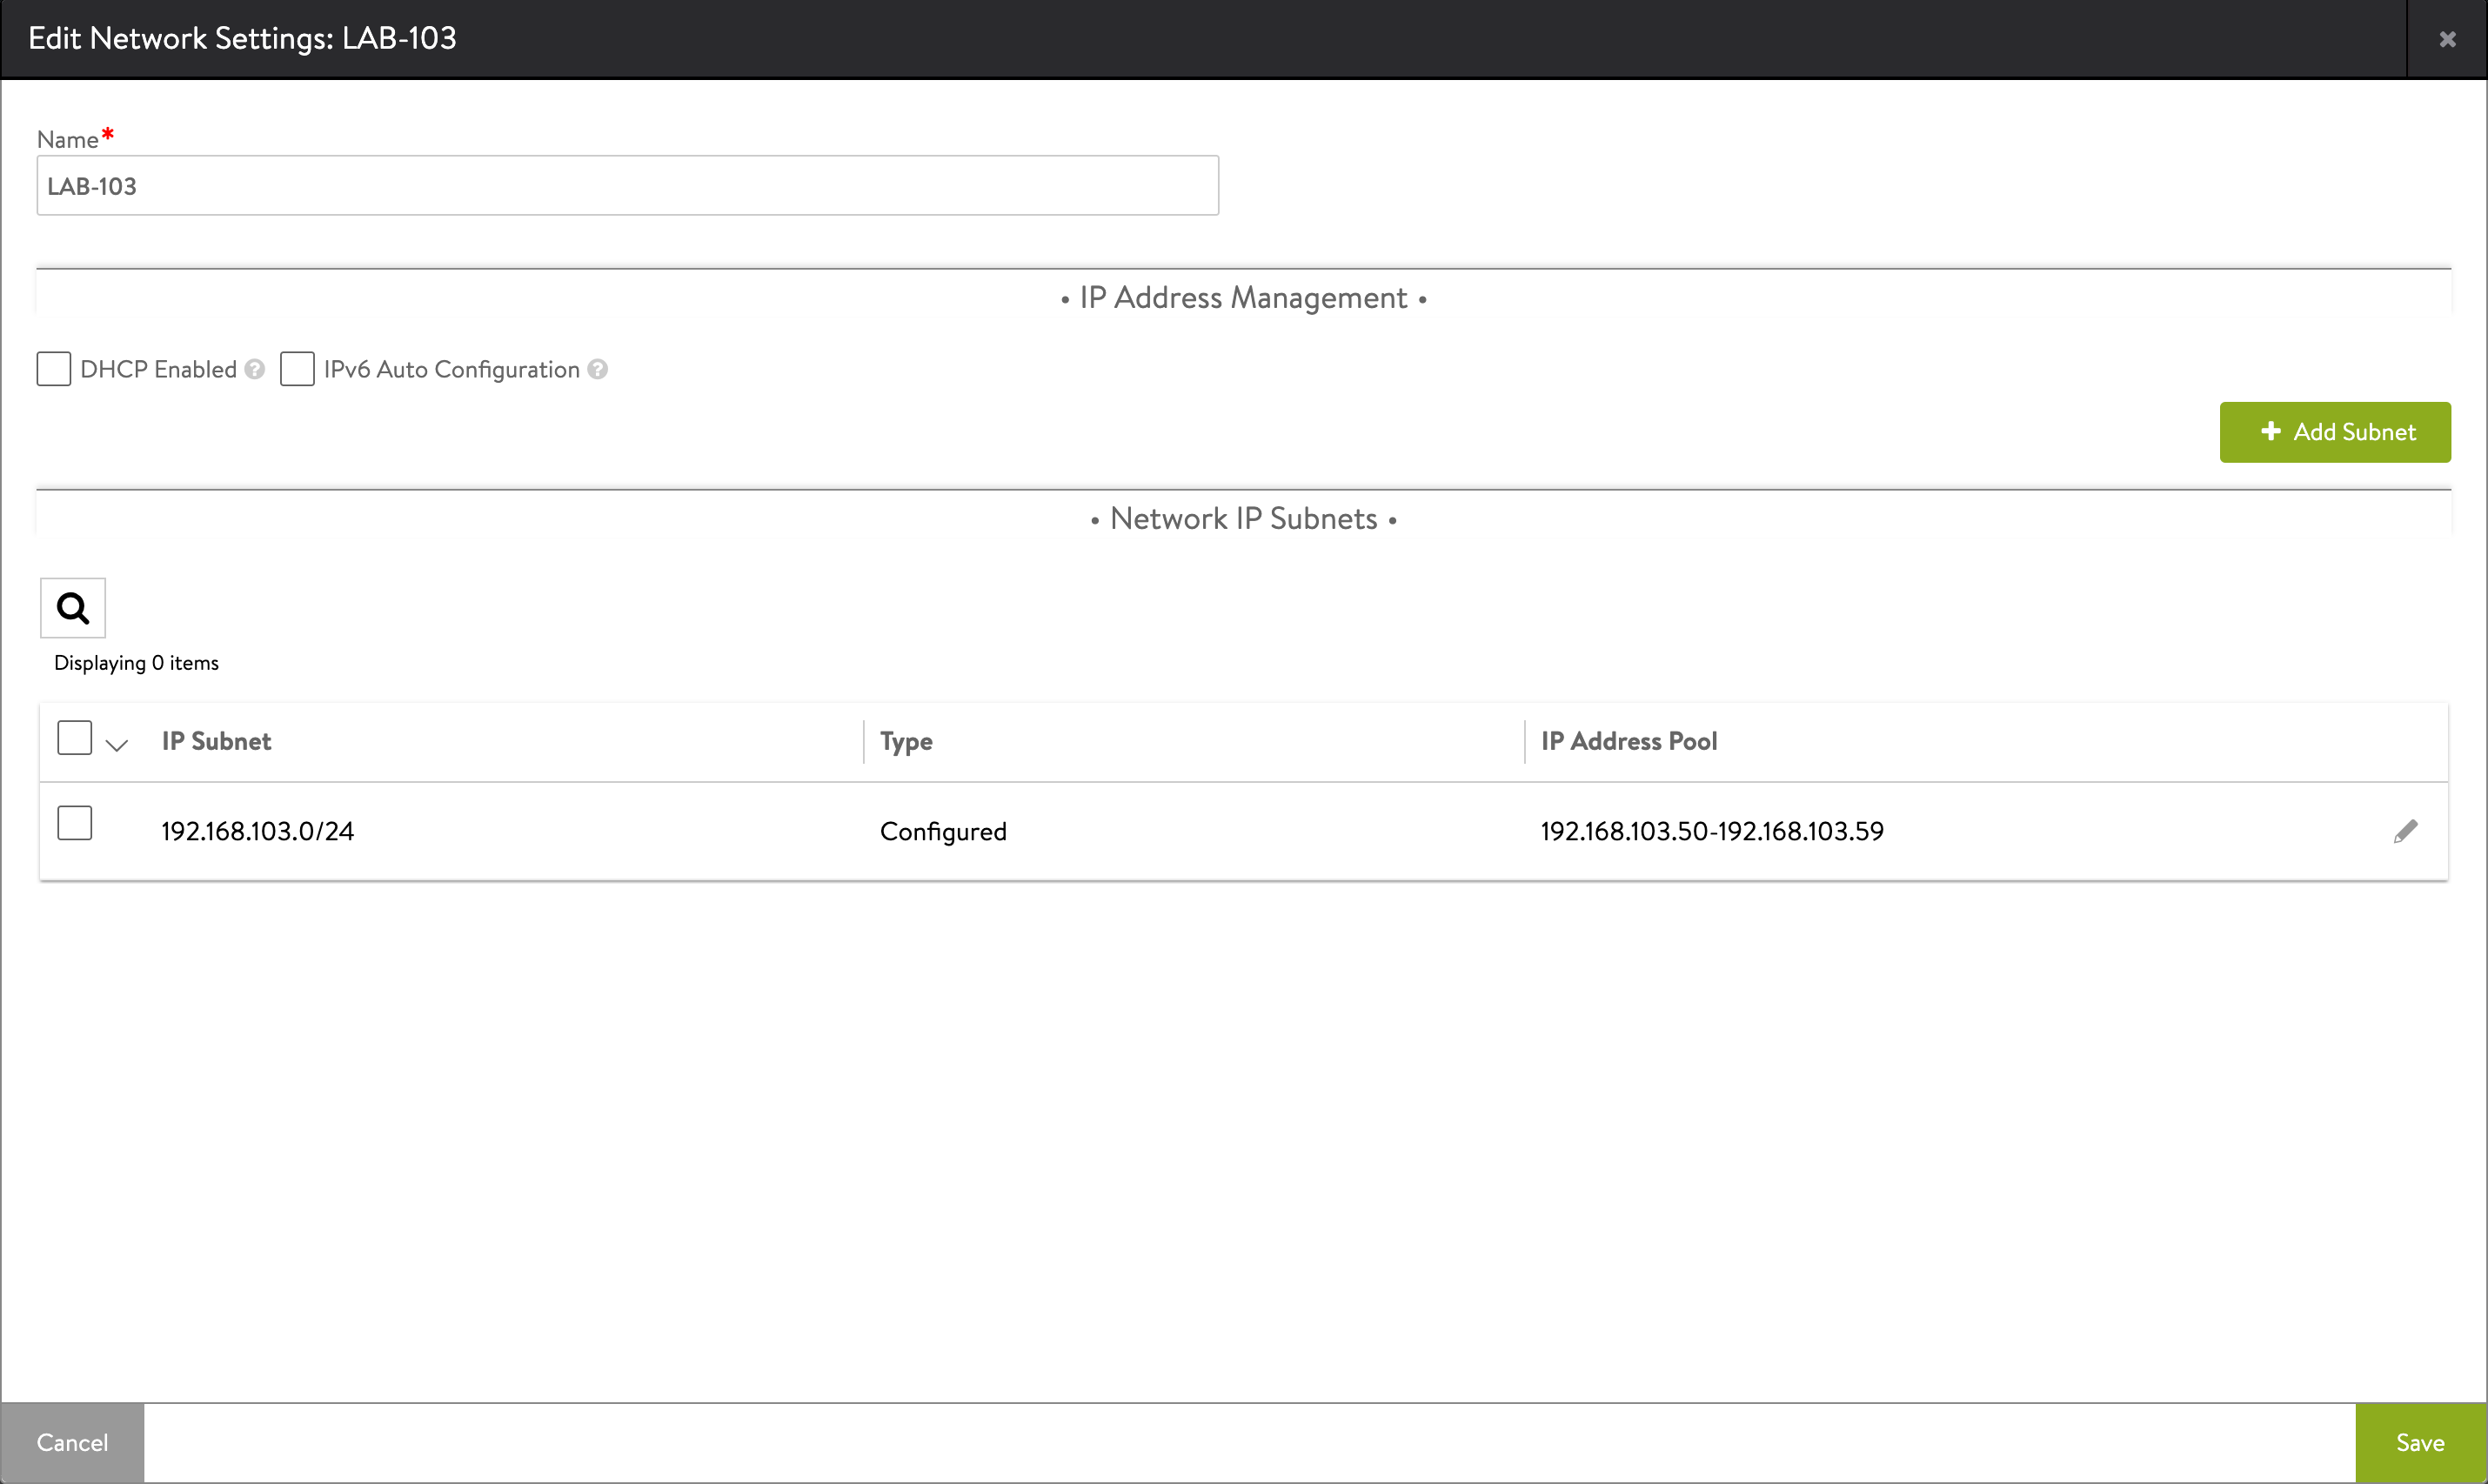
After we've entered our Network details we have the following configuration set
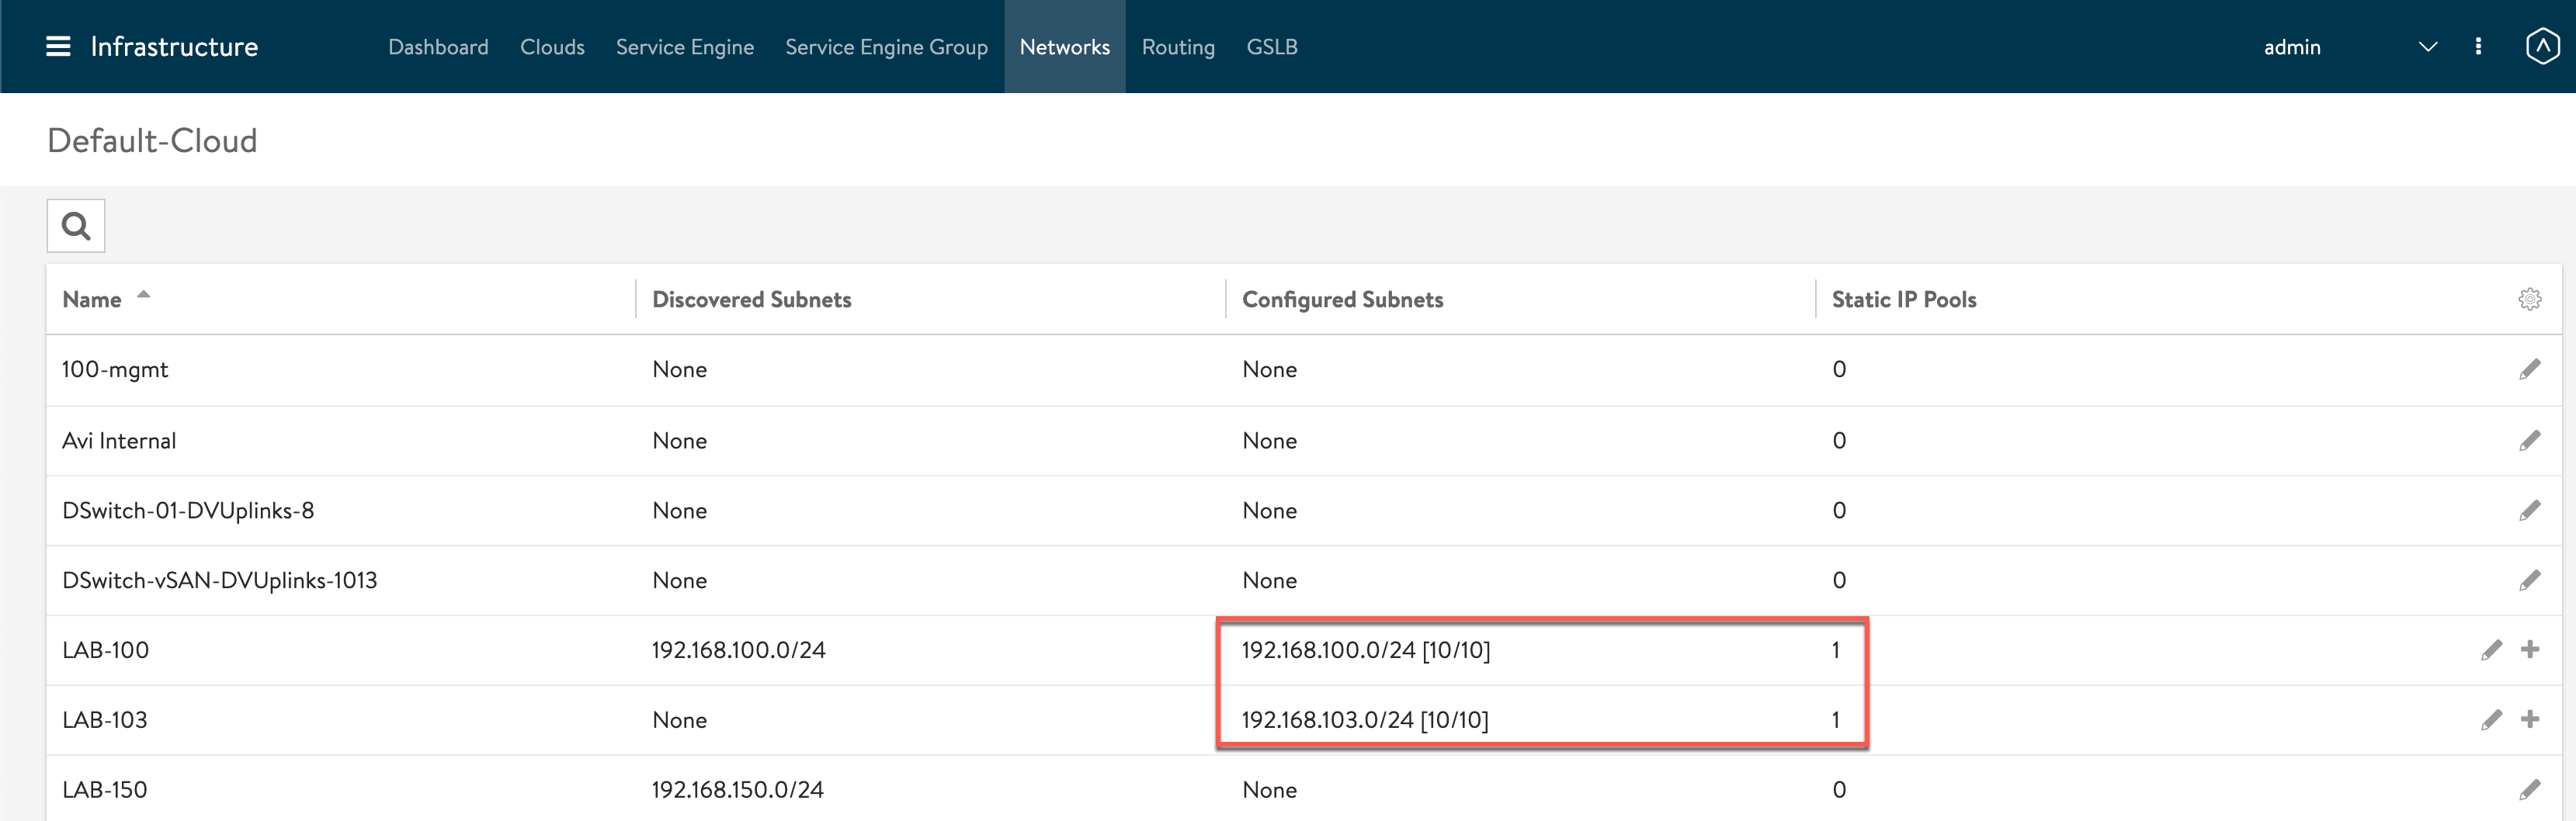
We can also confirm that the network have been configured and that we have 10 addresses available. Note that there's also 10 addresses available in the Management network
IPAM Profile
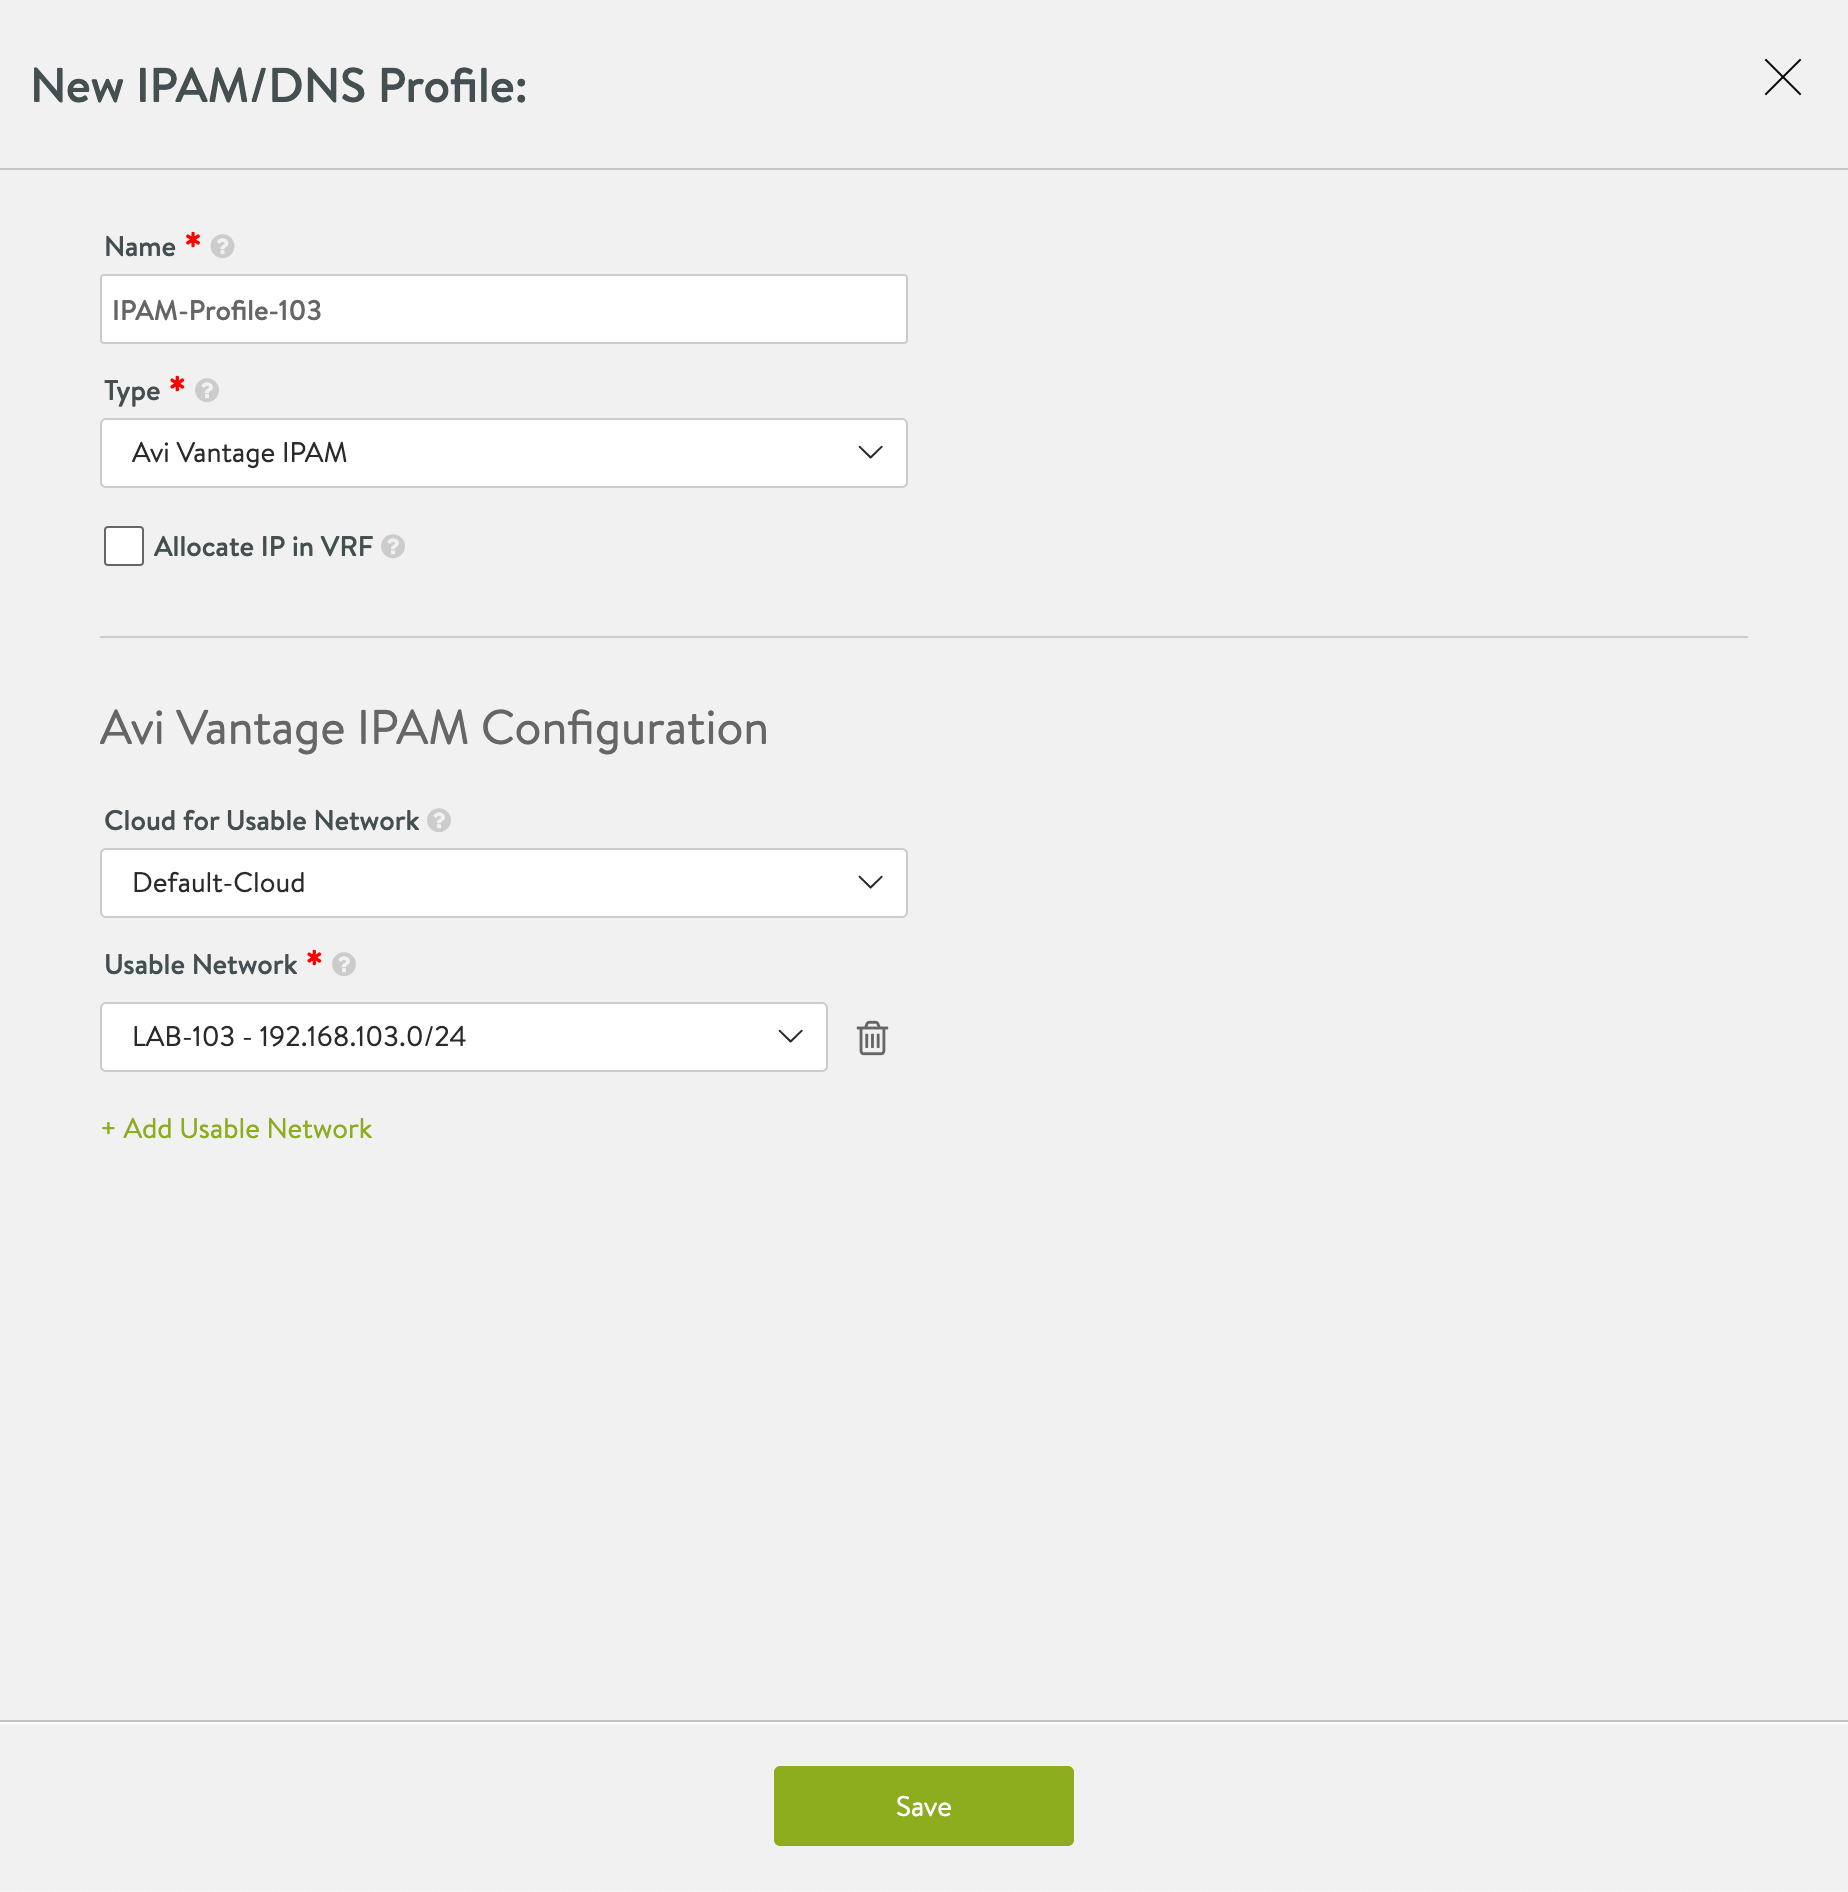
Now, let's create an IPAM profile which we'll use for automatically assigning IP addresses for our Virtual Services.

We'll give the Profile a name, and select the Network in the IPAM configuration. Note that the selection of Clouds are for listing the available networks
After the IPAM profile has been created we'll add it to the Cloud
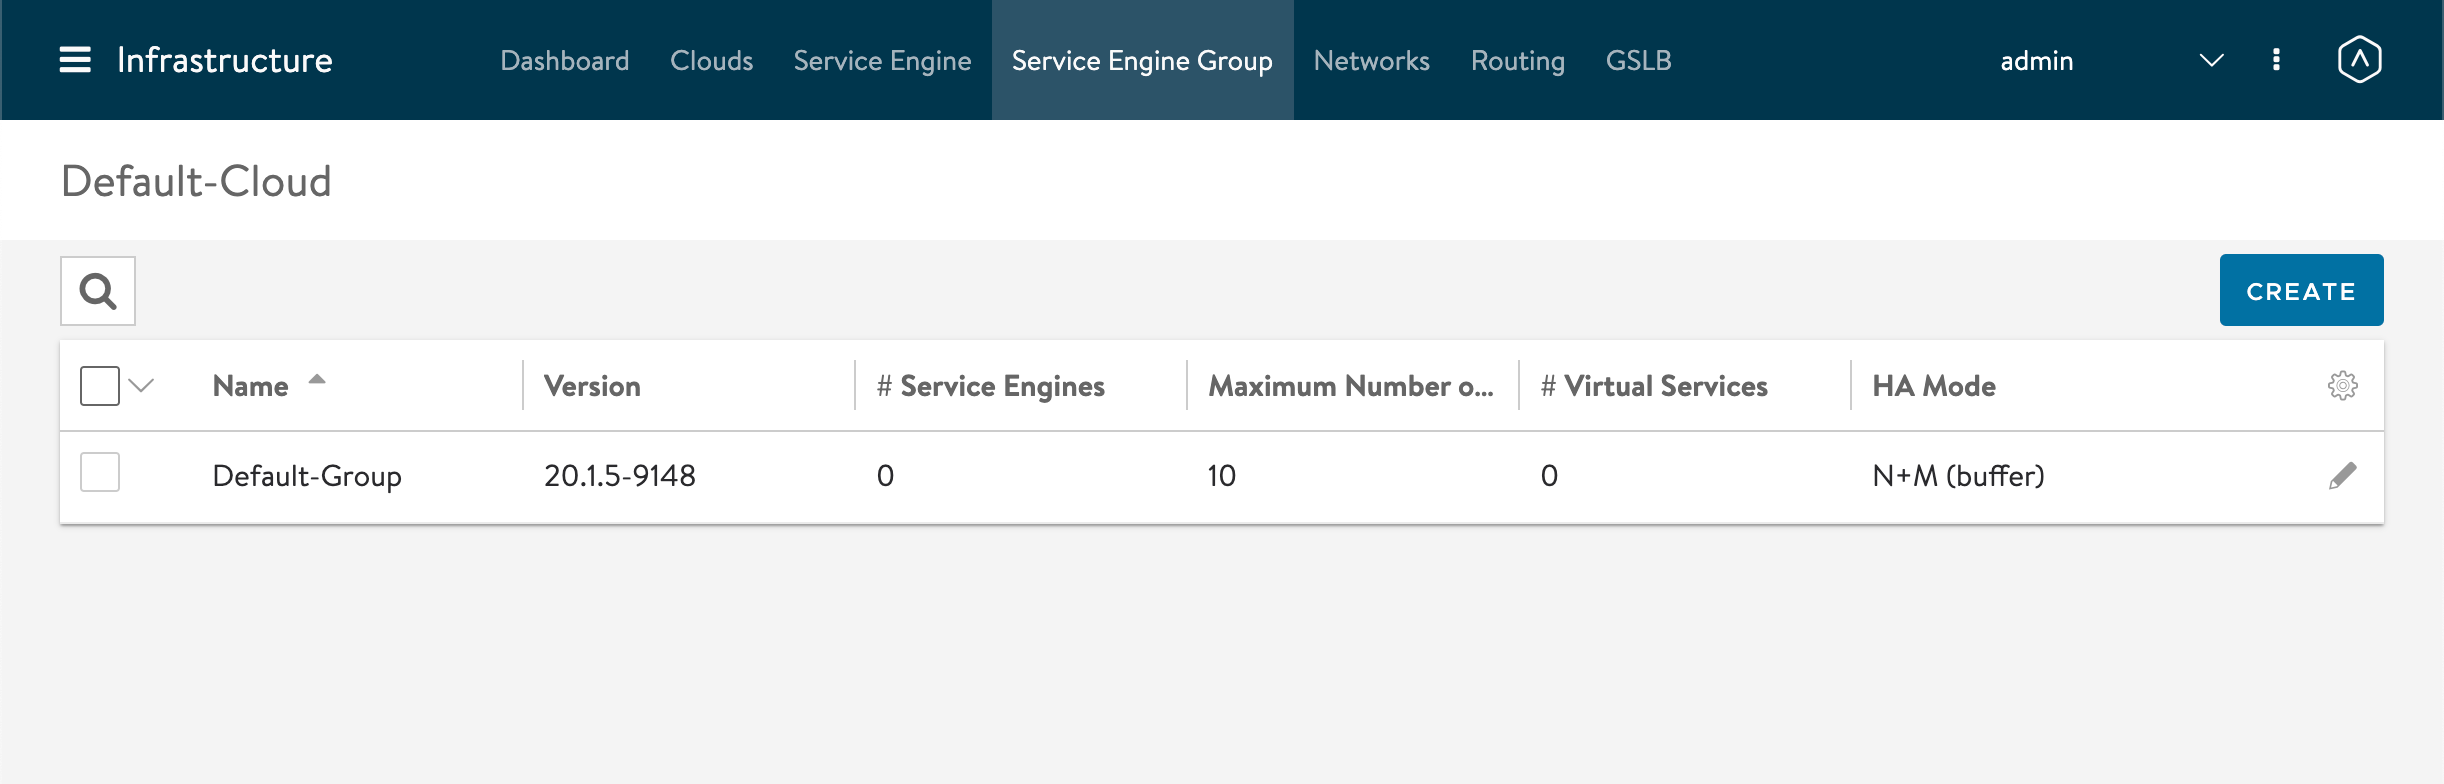
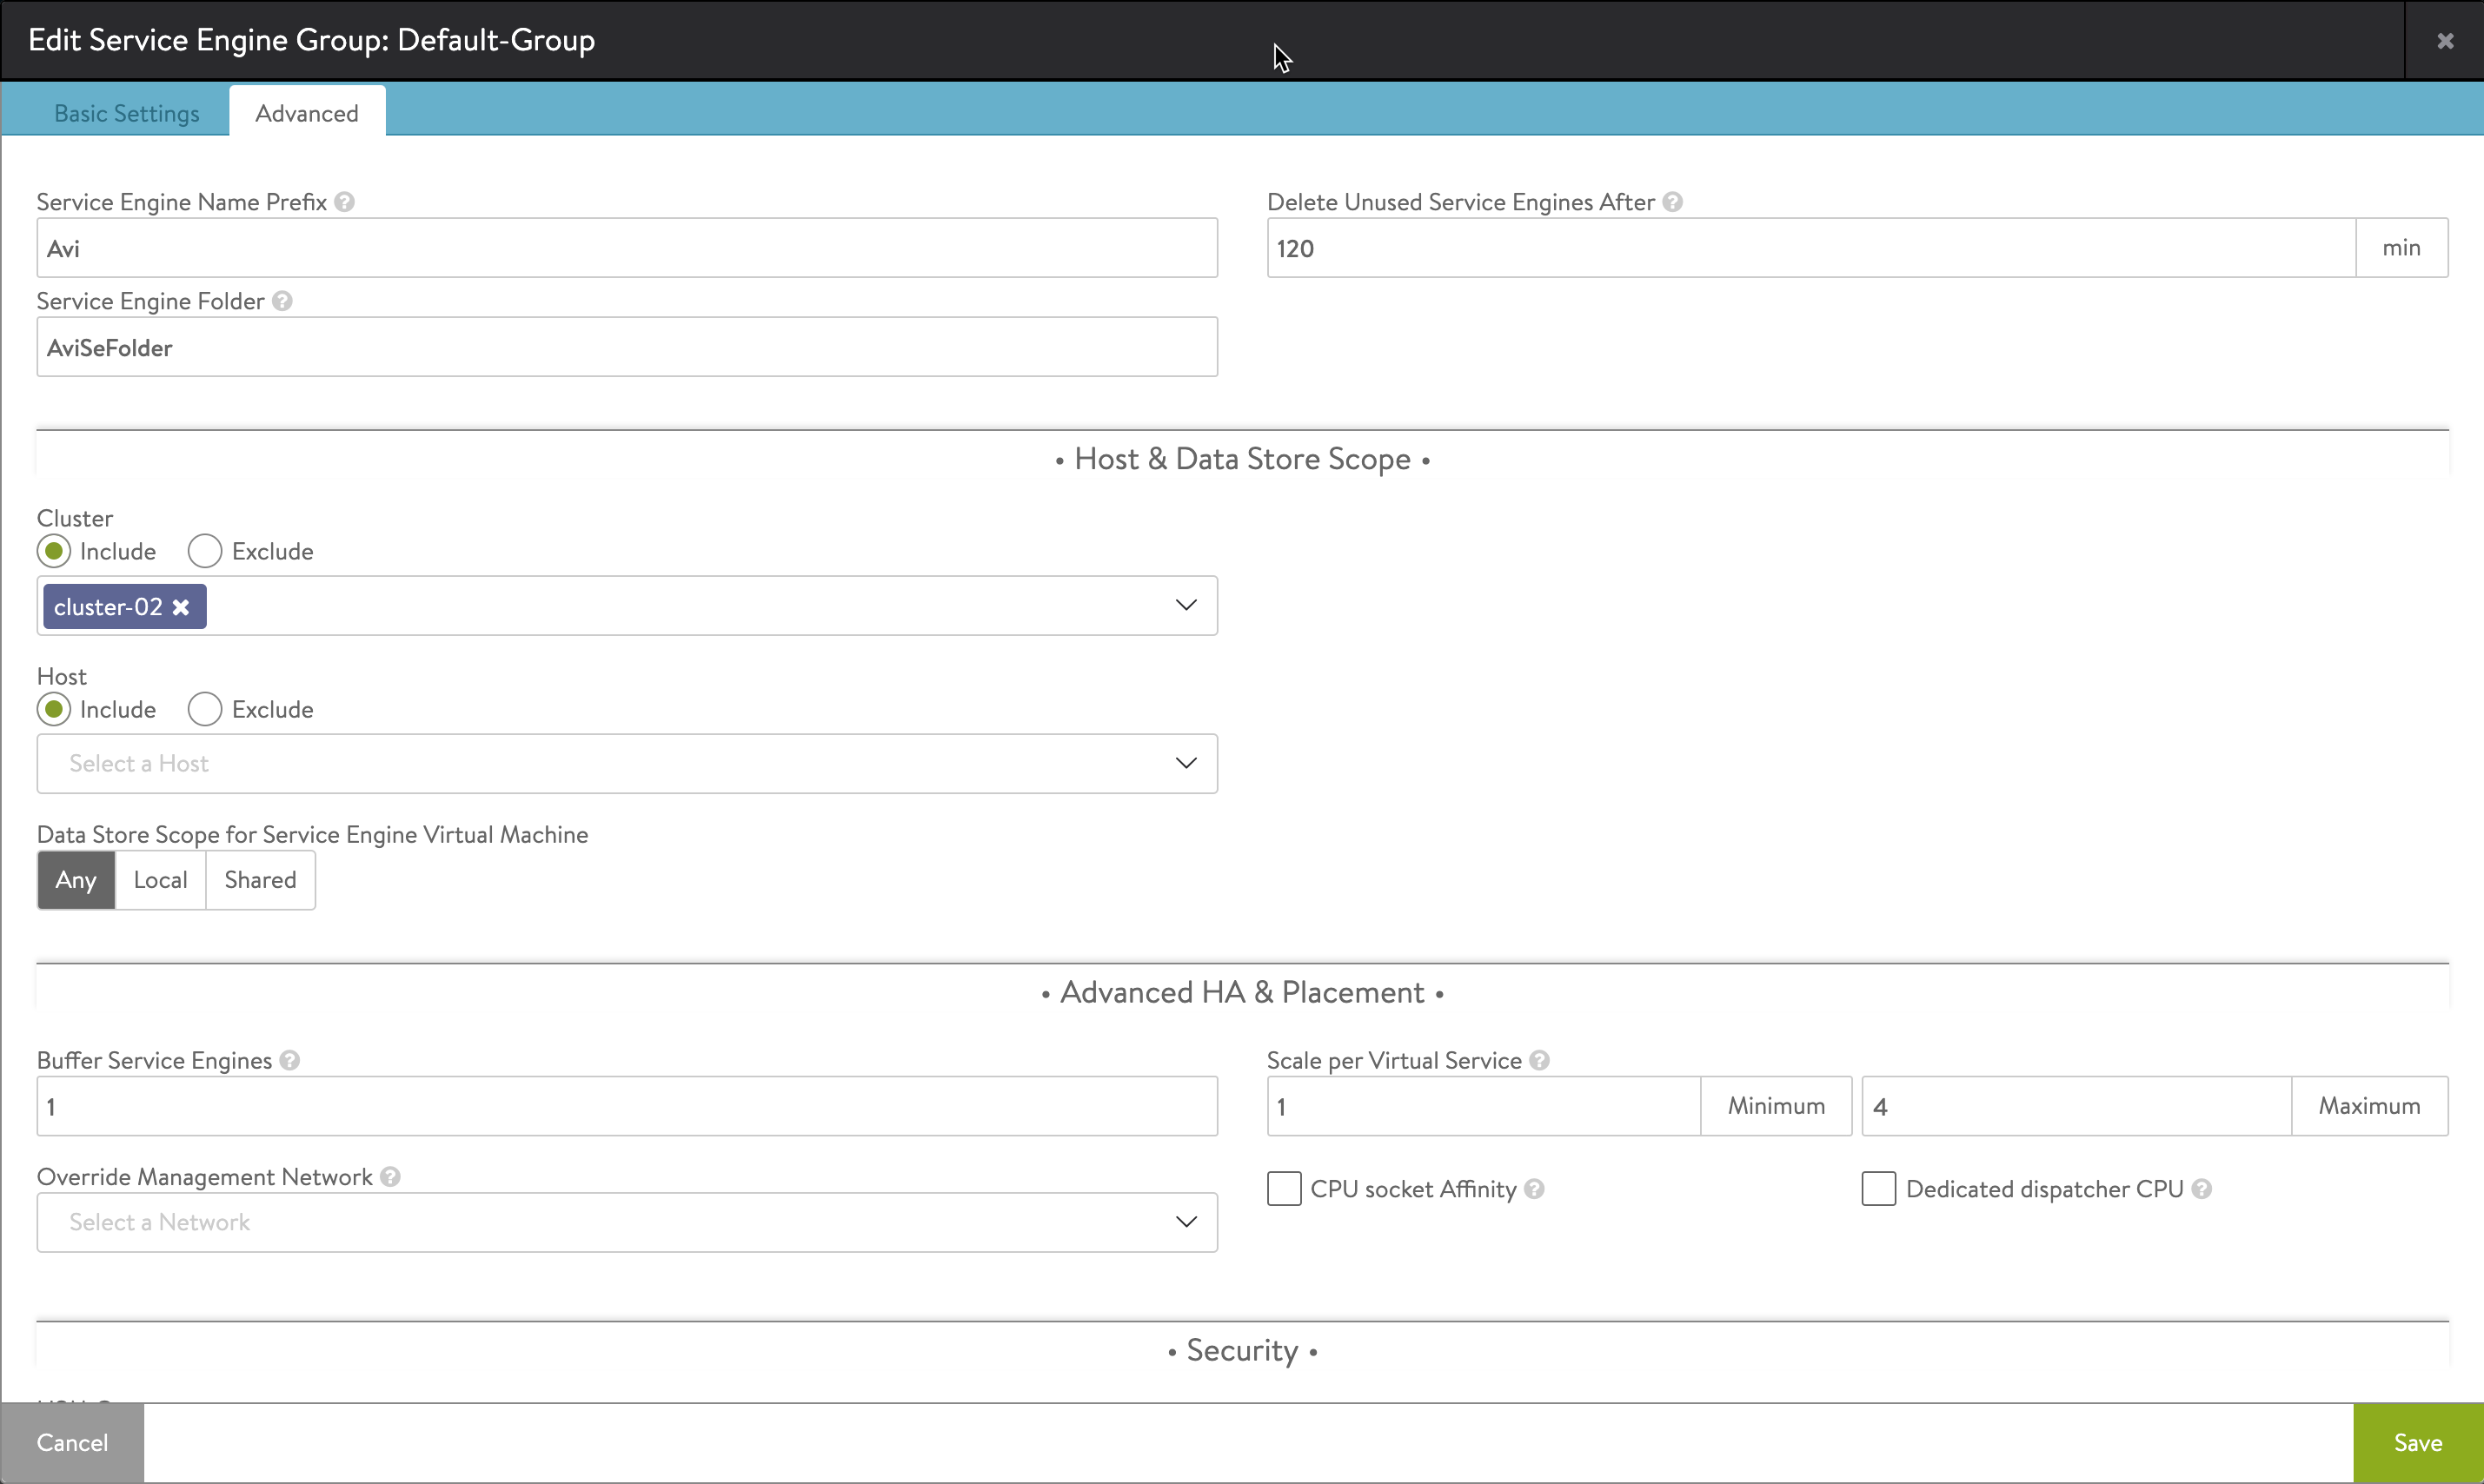
Service Engine Group
Now lets take a quick look at the Default Service Engine Group. The configuration of the Service Engine Group will be used as a template for the deployed Service Engines.
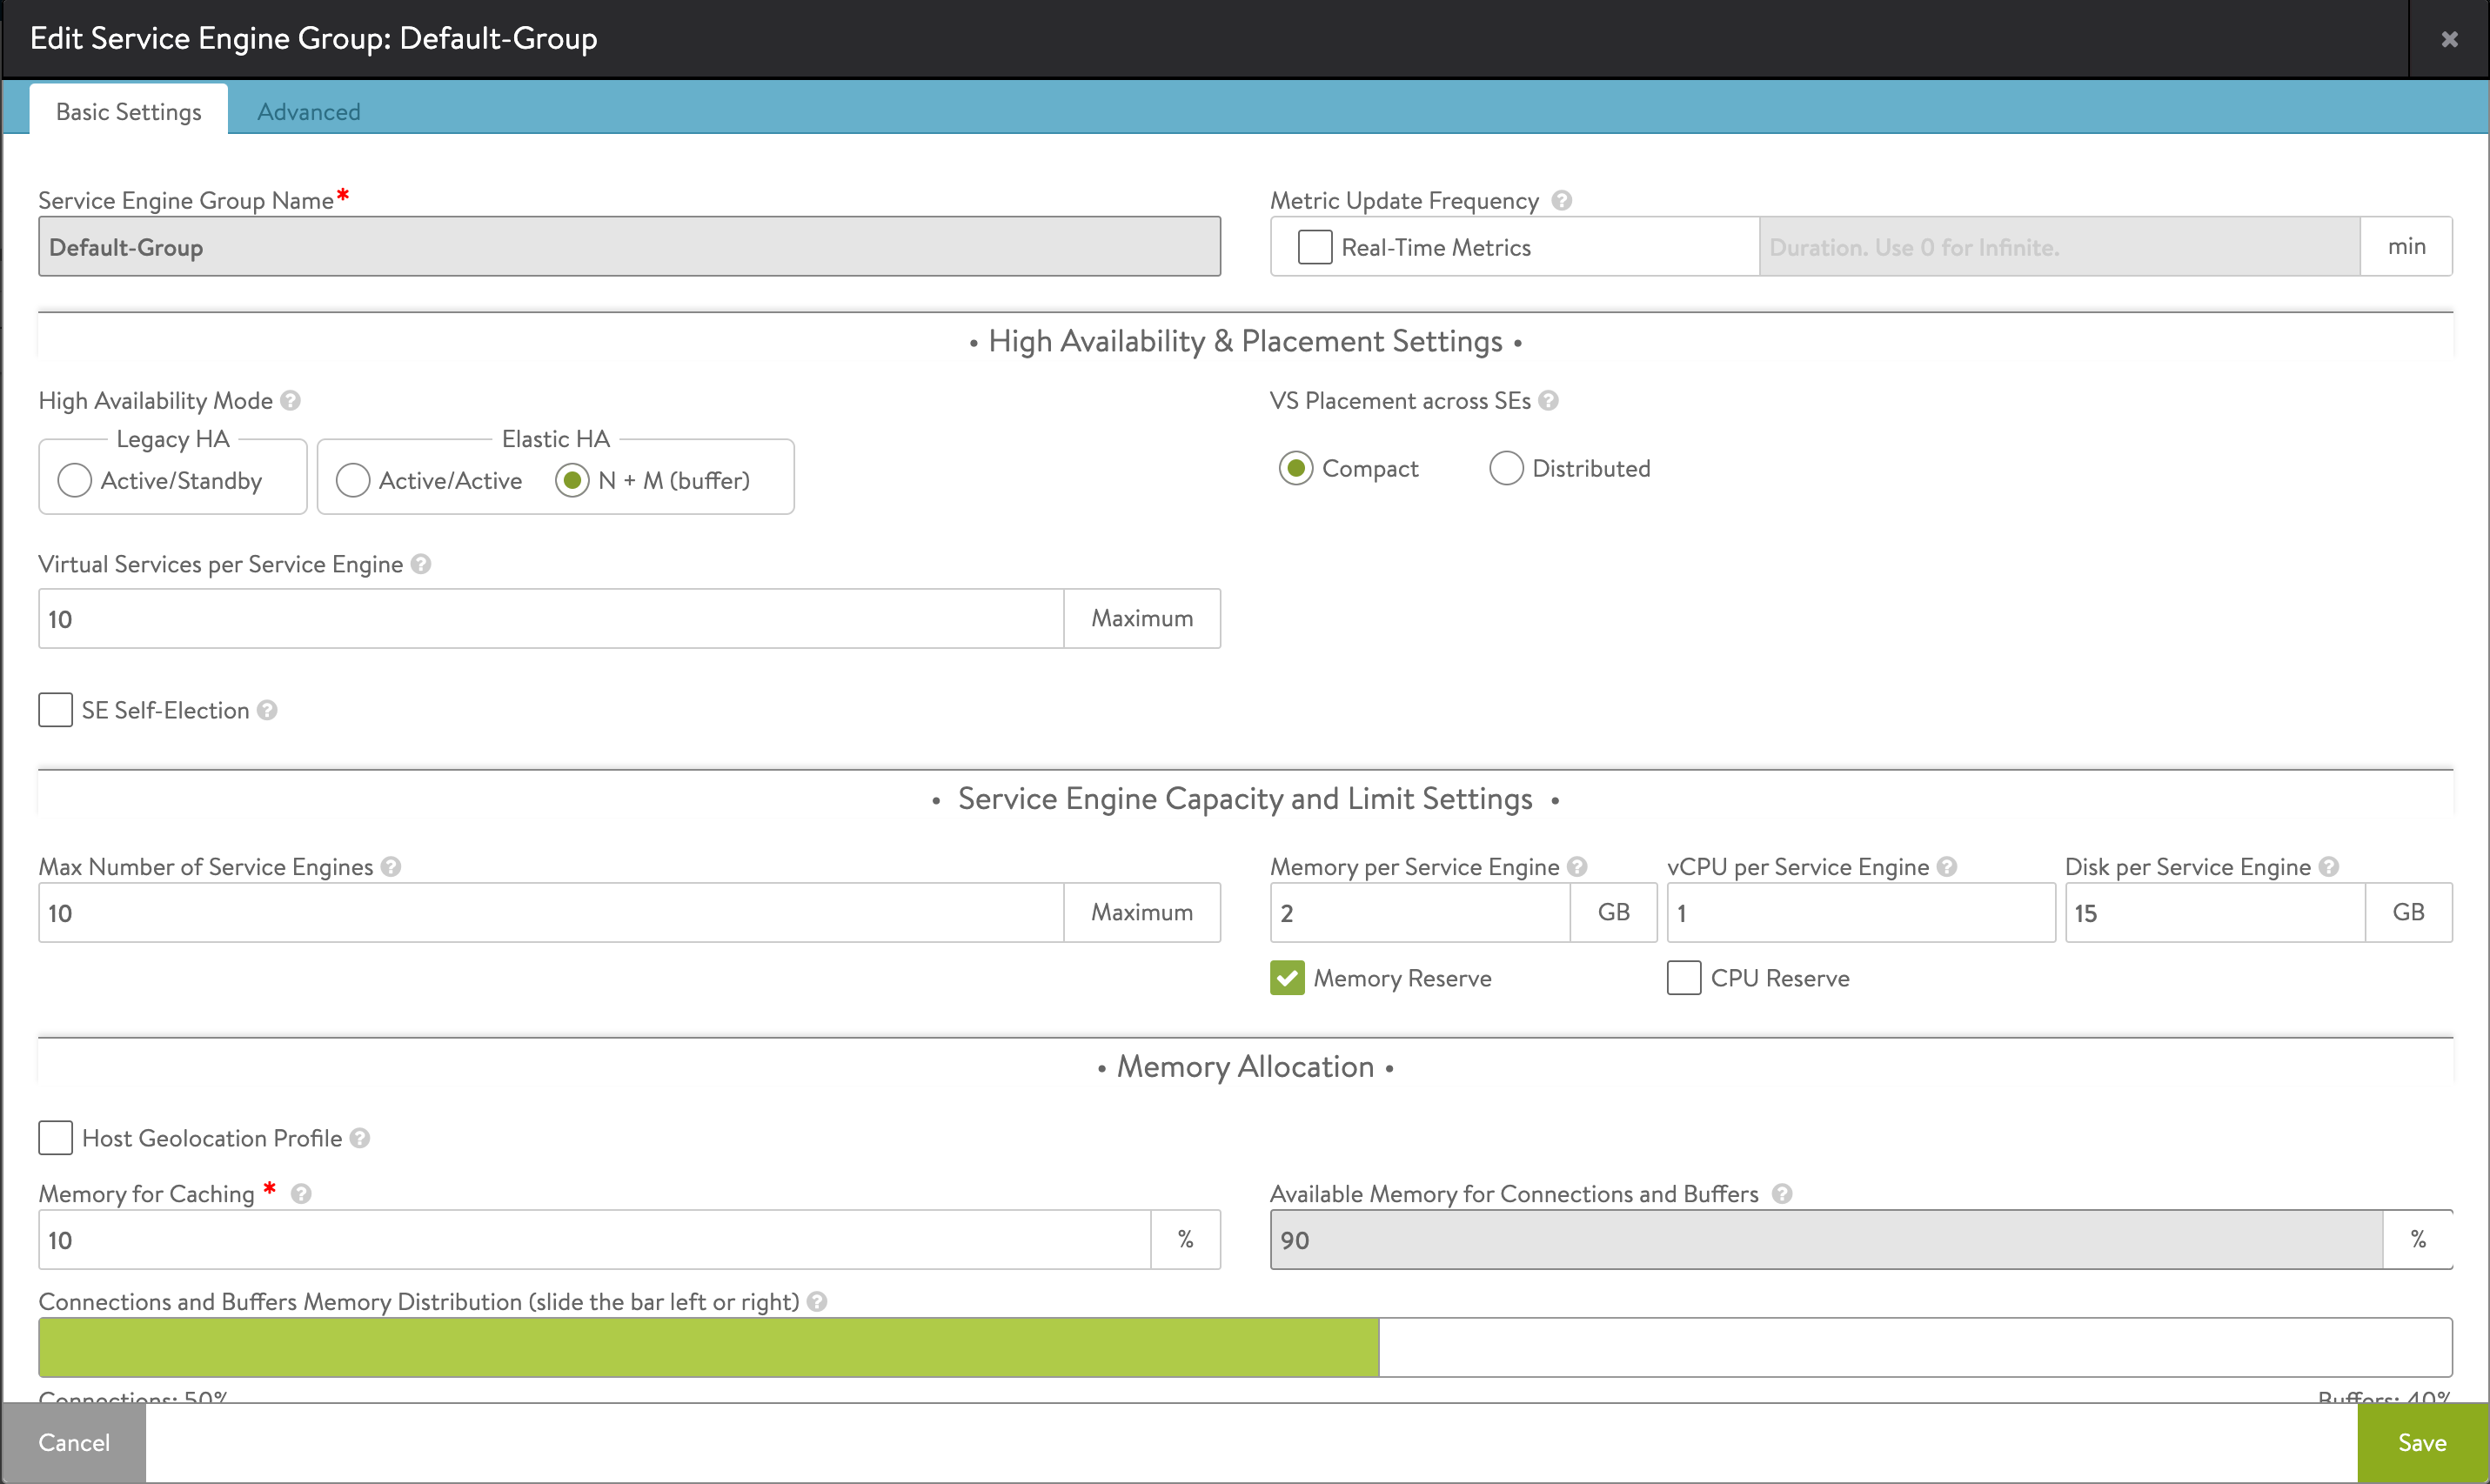
The Basic Settings is covering things like Capacity and limits for the Service Engines, but also High Availability and Placement. Please note that some of the available settings (e.g. HA) depends on the license.
I'm leaving the default settings for now
The Advanced settings lets us set a specific prefix for the SE's and select a specific VM folder. We can also choose which clusters or hosts to use. In my case I'm selecting which Host cluster I want to use.
Routing
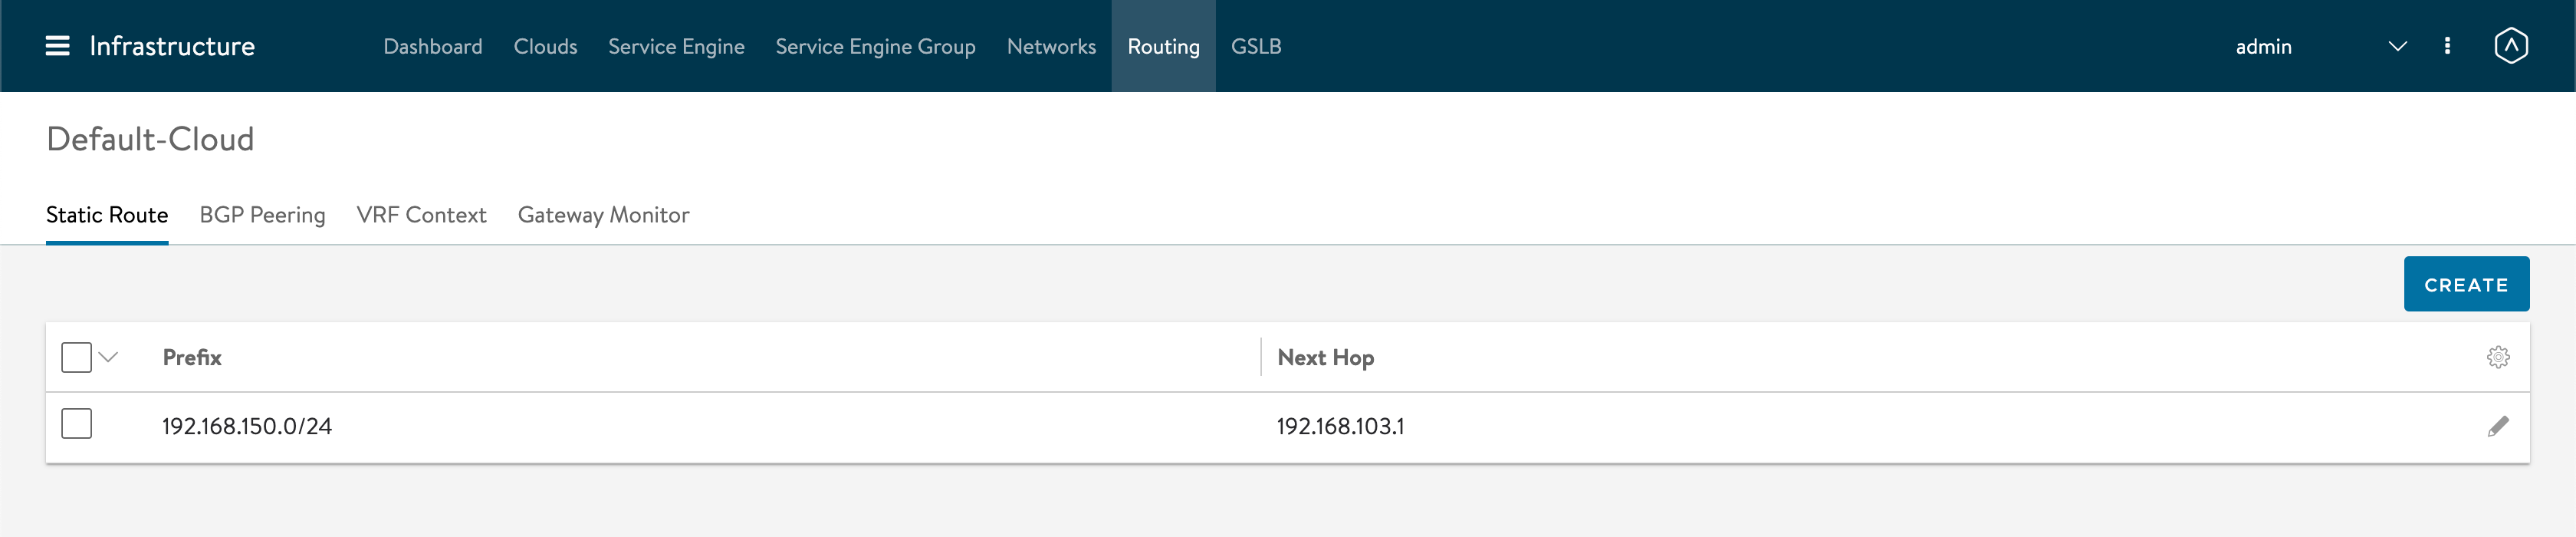
The last config we'll do is to set up routing
For our Service Engines on VLAN 103 to reach the services deployed on VLAN 150 we'll have to set up a specific route
Note that based on your (networking) environment the need of routing might be different than from my setup.
We want to specify that the SE's should use the virtual IP on 103 through it's gateway to reach the 150 network and for that we'll configure first a static route
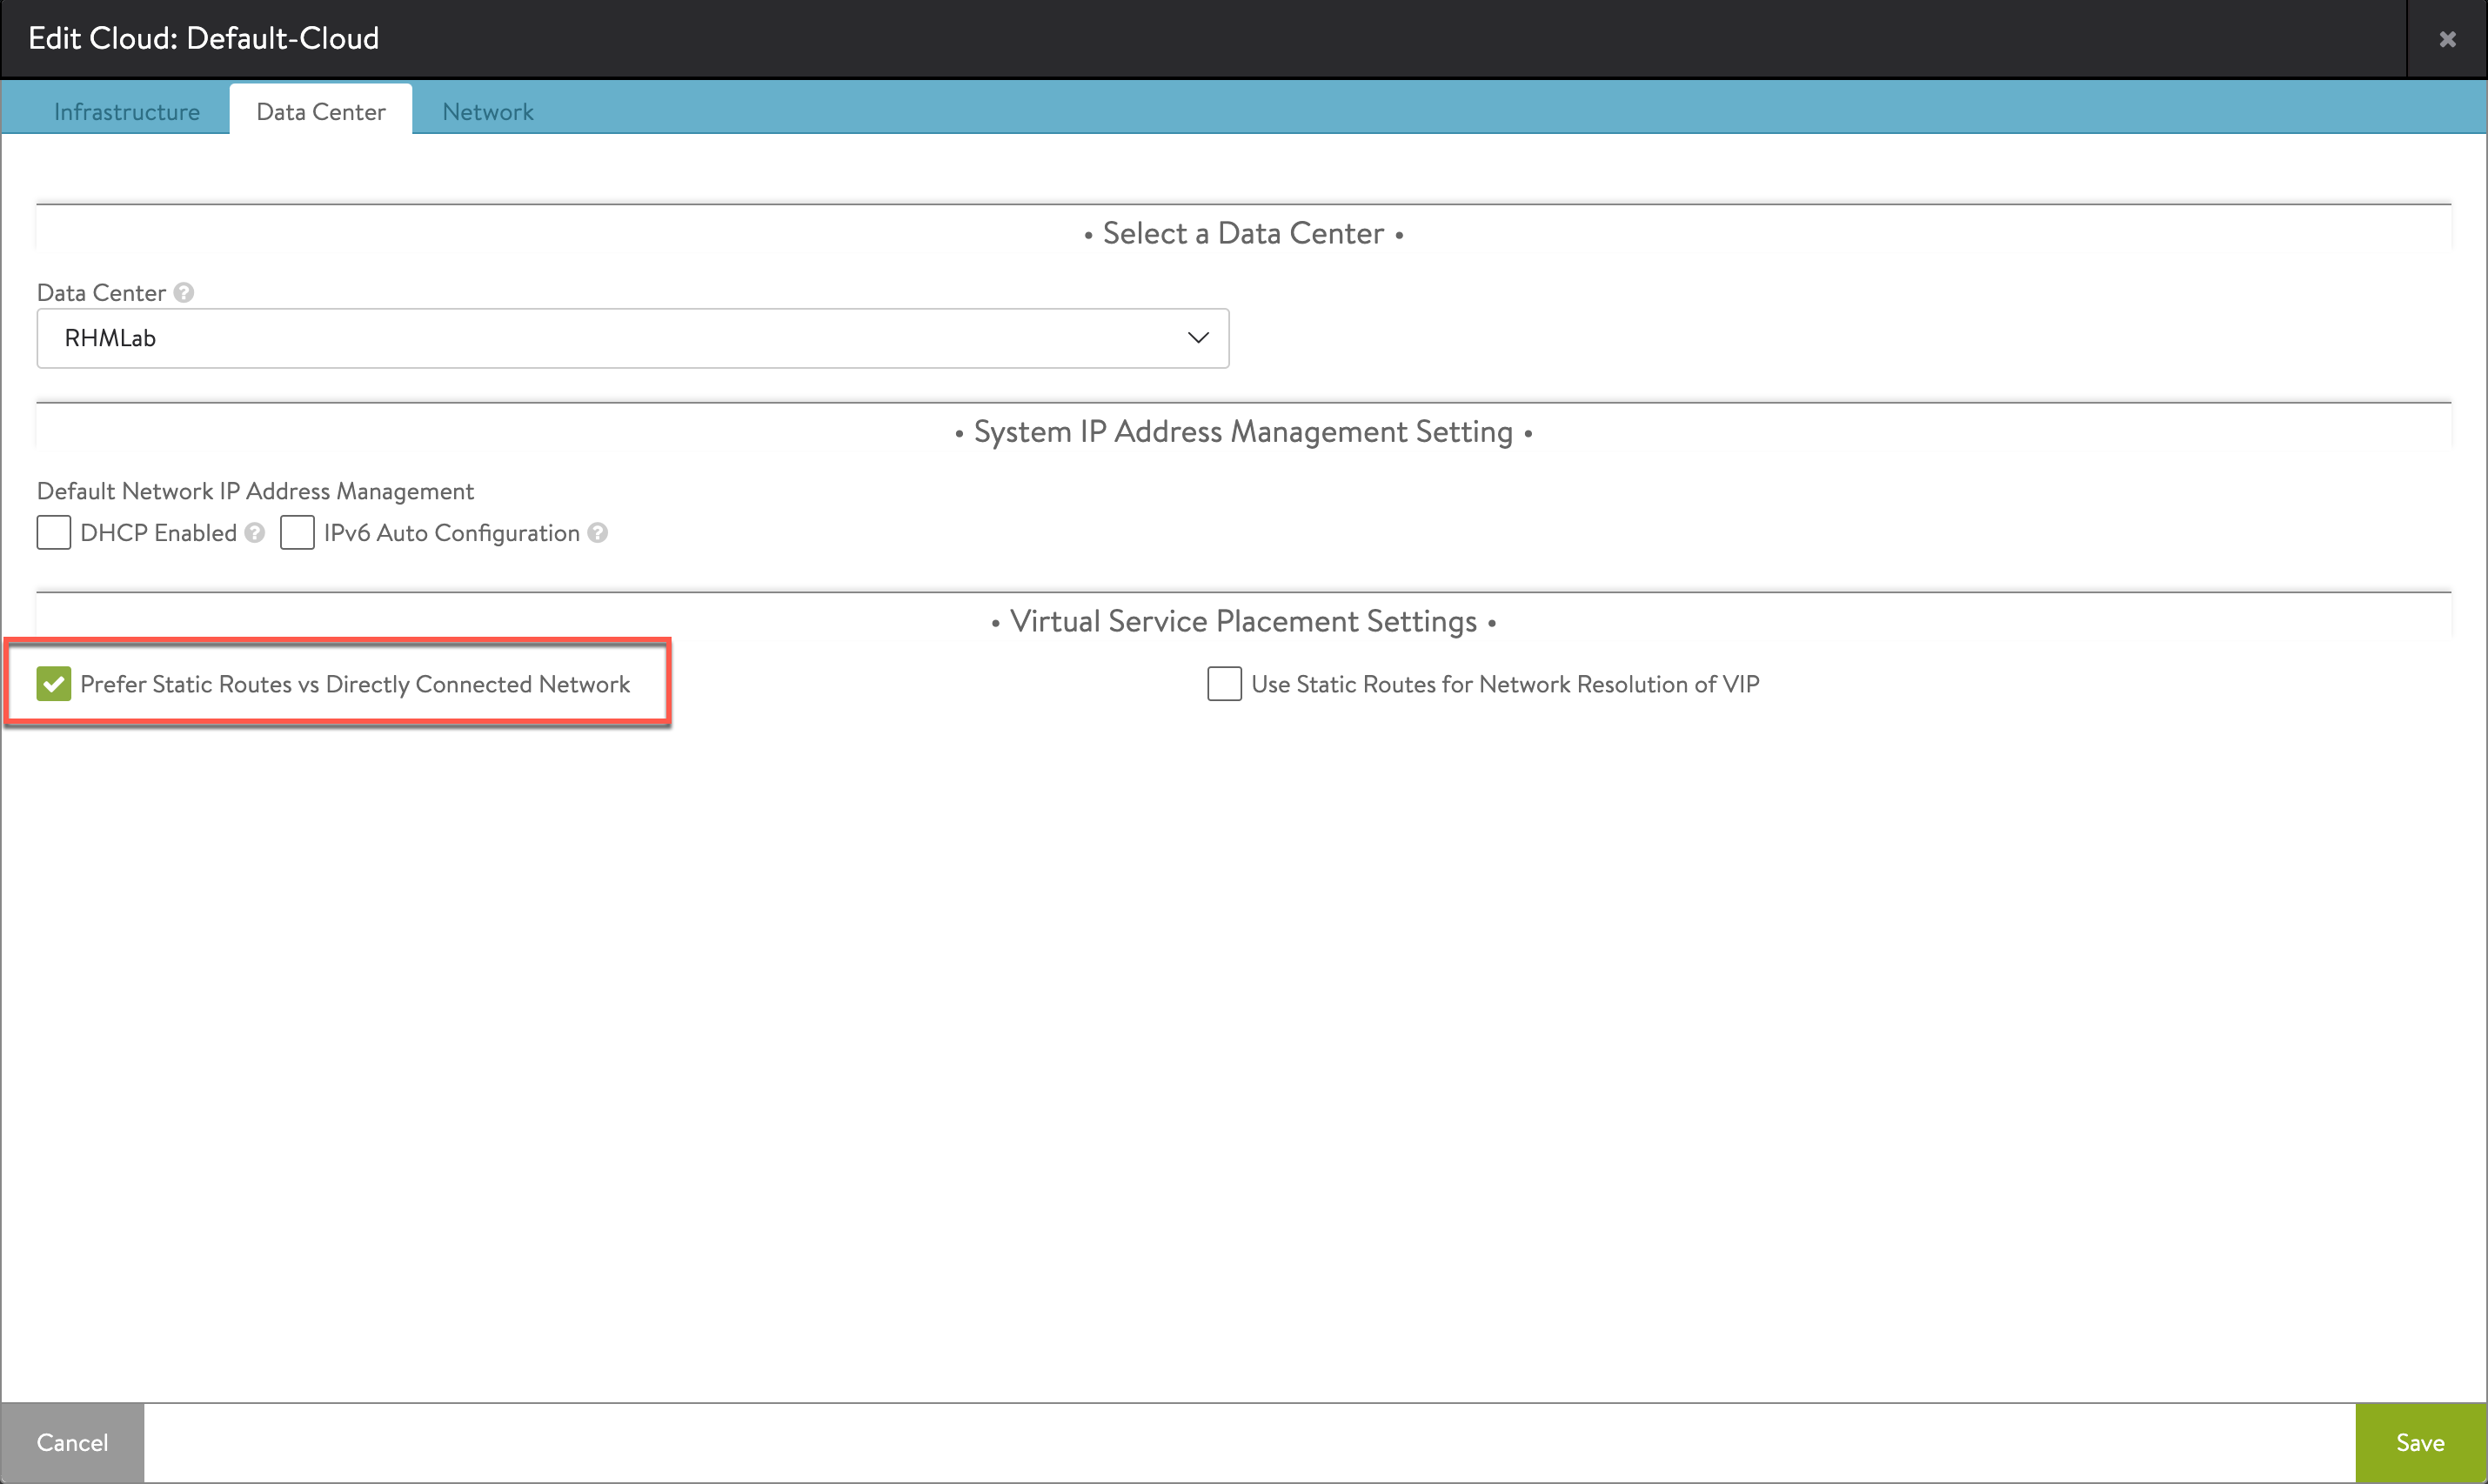
Next, we'll tell our Cloud to prefer these static routes
Test Load Balancing of two Web servers
With all of this set we are ready to test our Load Balancer!
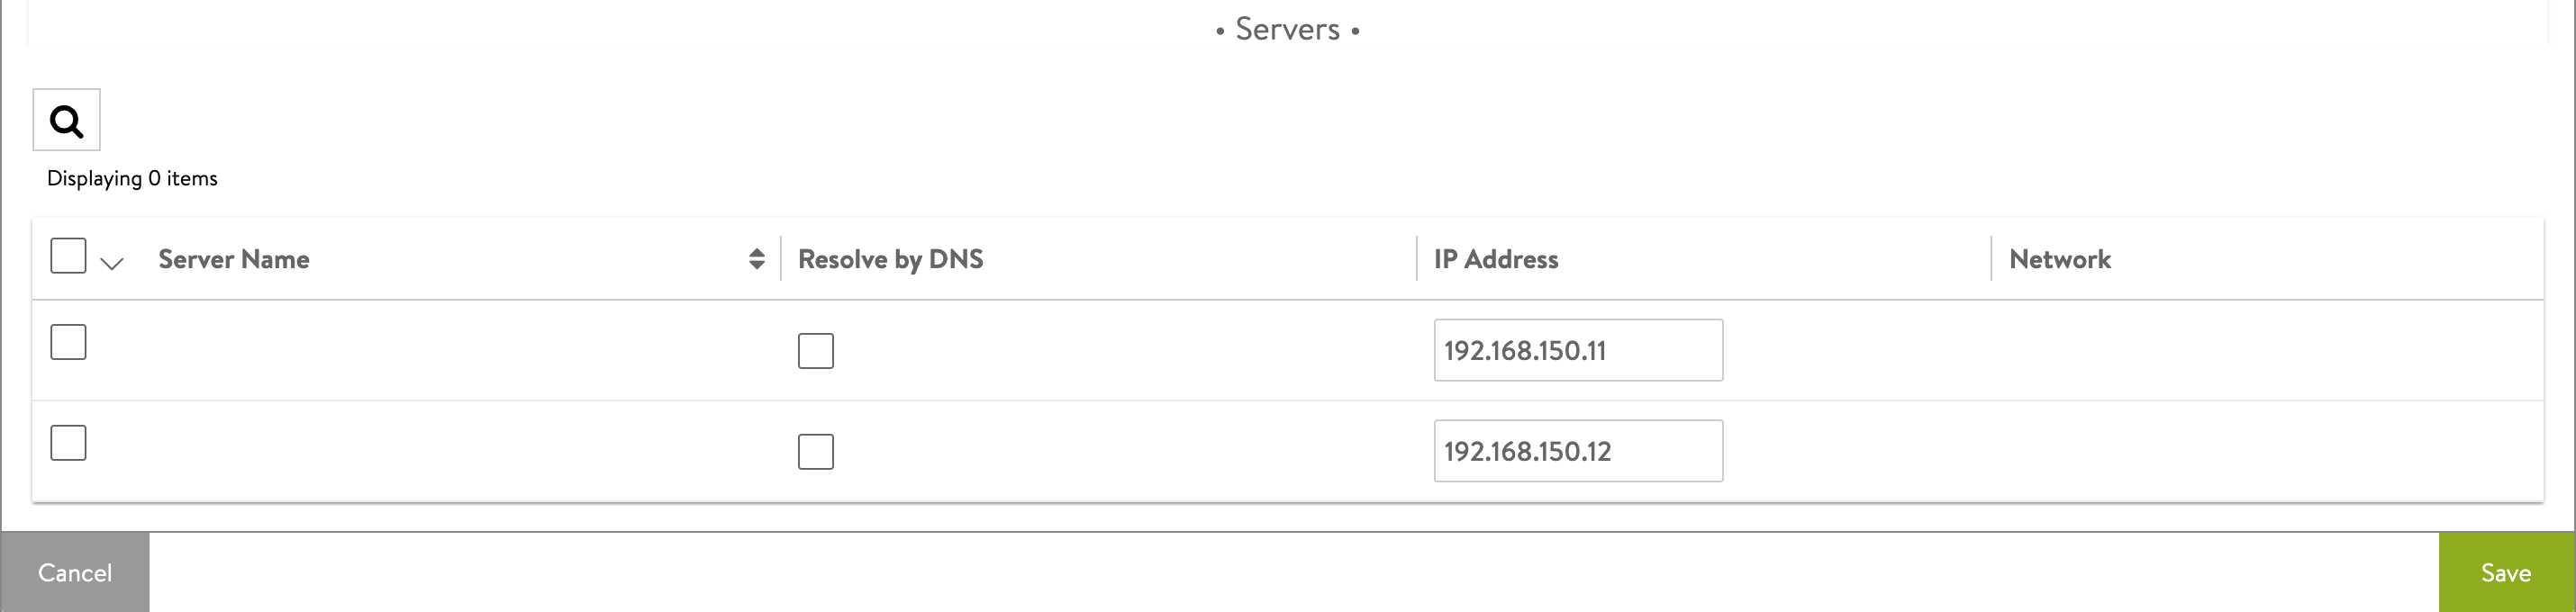
We have two Web servers configured. One yellow and one red which we'll use in our first test scenario. The servers are both residing on the 192.168.150.0/24 subnet, and have the .11 and .12 addresses respectively.

Create Virtual Service
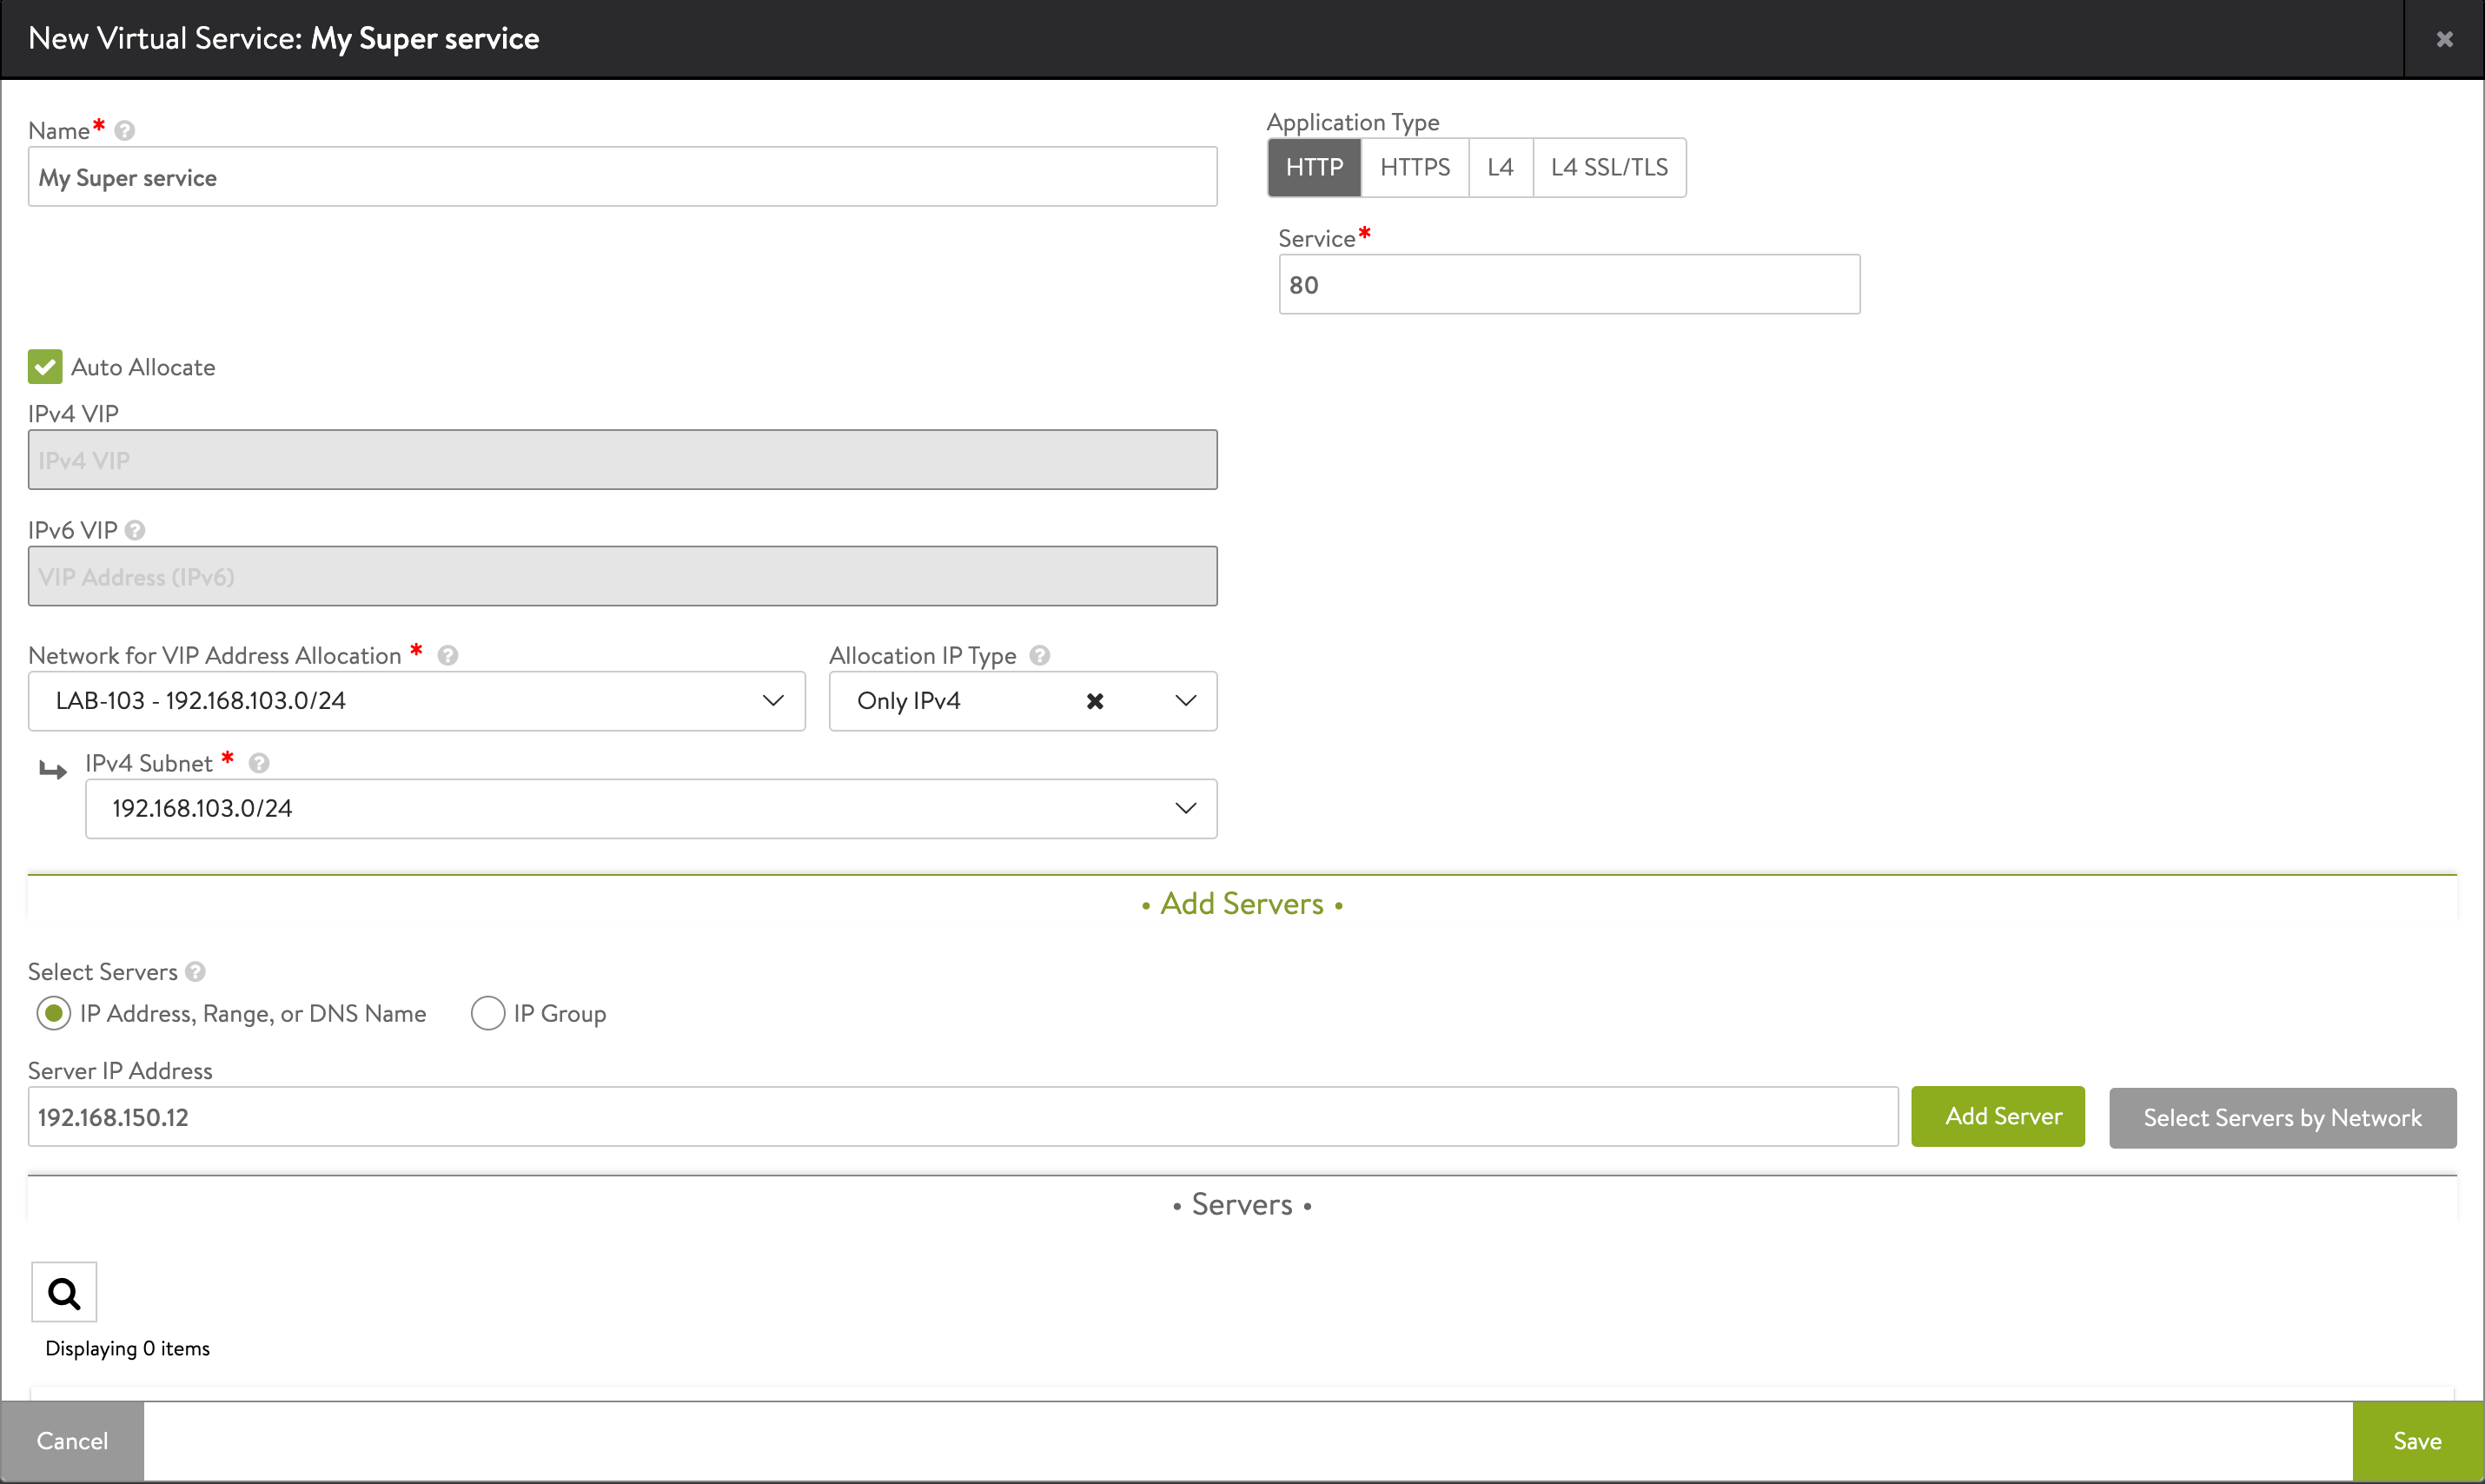
To Load Balance these we'll create our first Virtual Service.
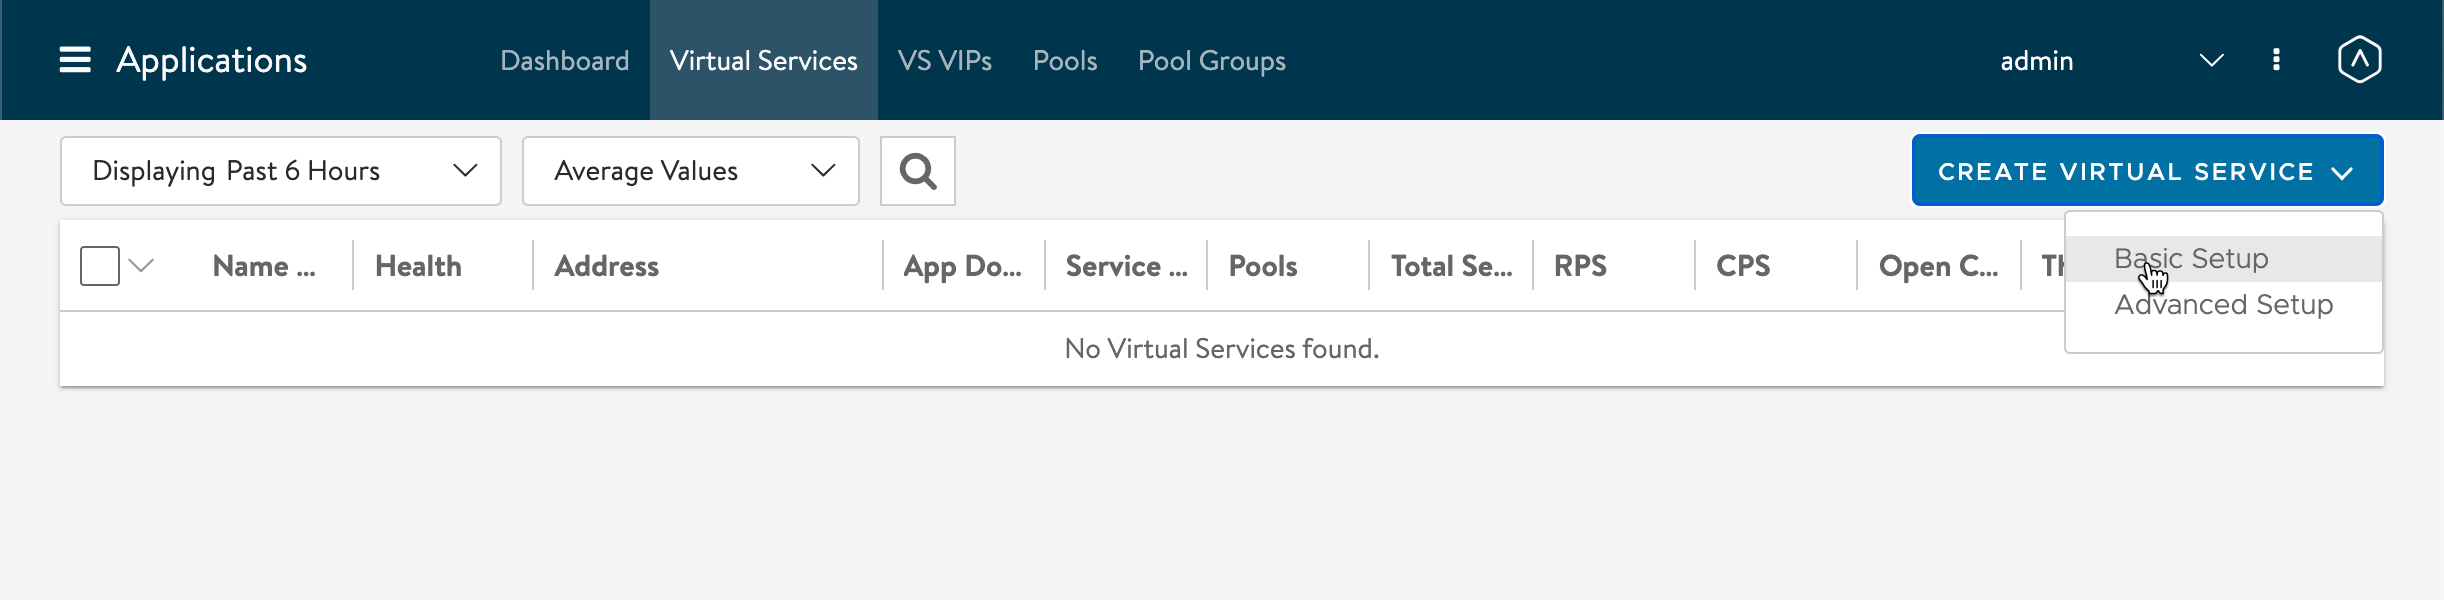
We'll give the service a name, and select to Auto-allocate an IP via the 103 network, and we'll add our web servers. The service will be of HTTP and on Port 80
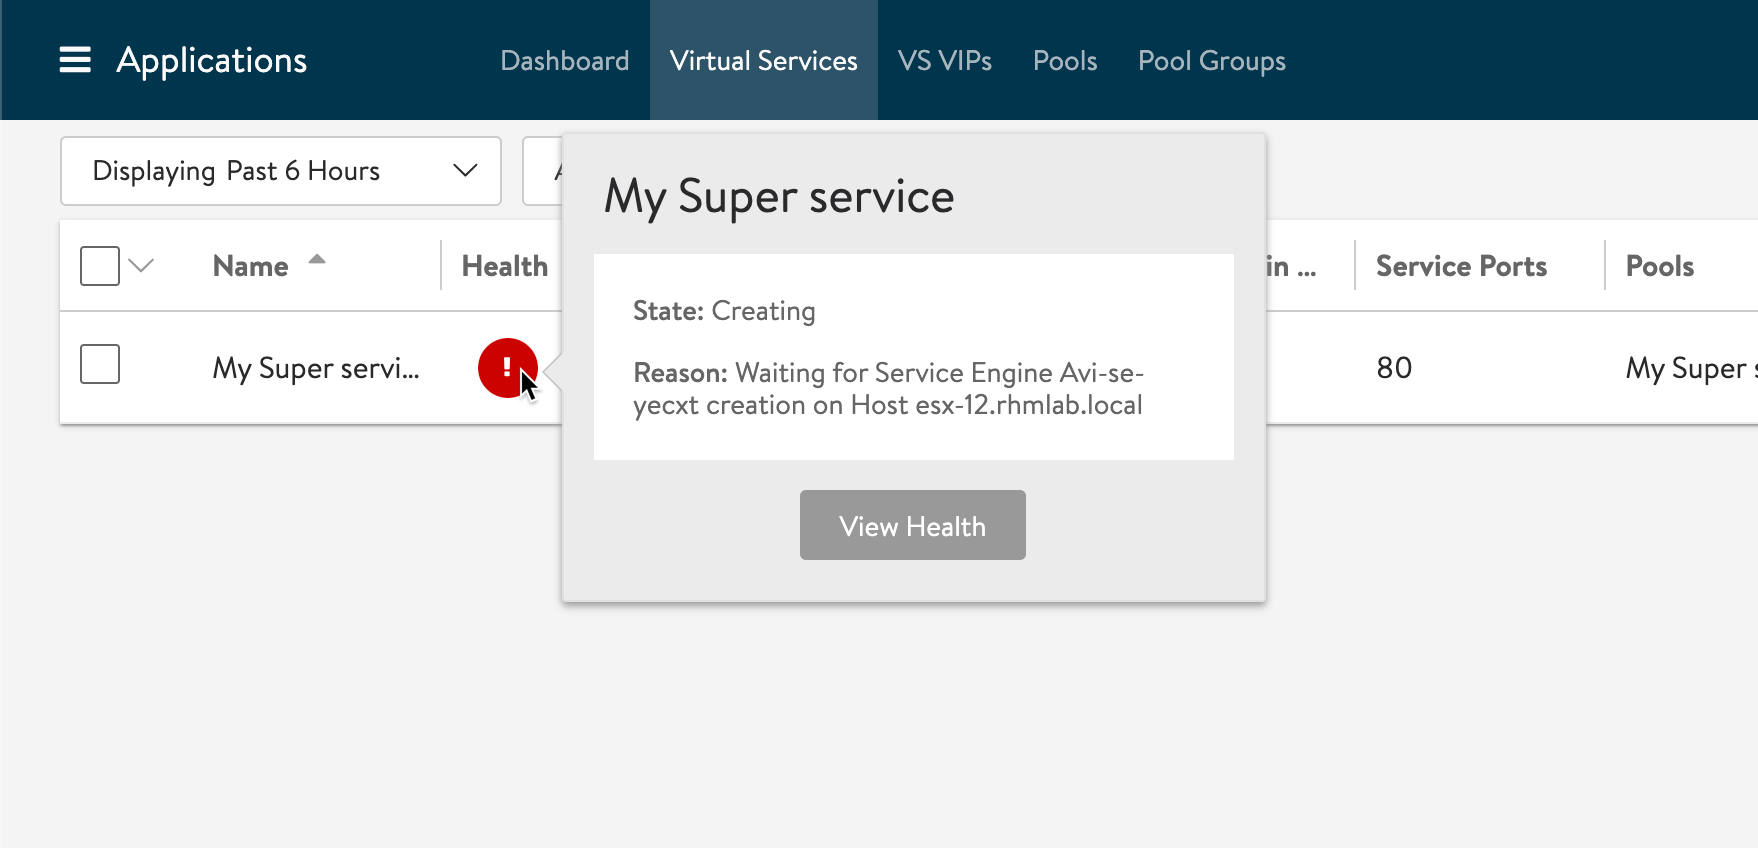
Now the Virtual Service has been created, and since this is our first service the controller needs to deploy some Service Engines to run it on
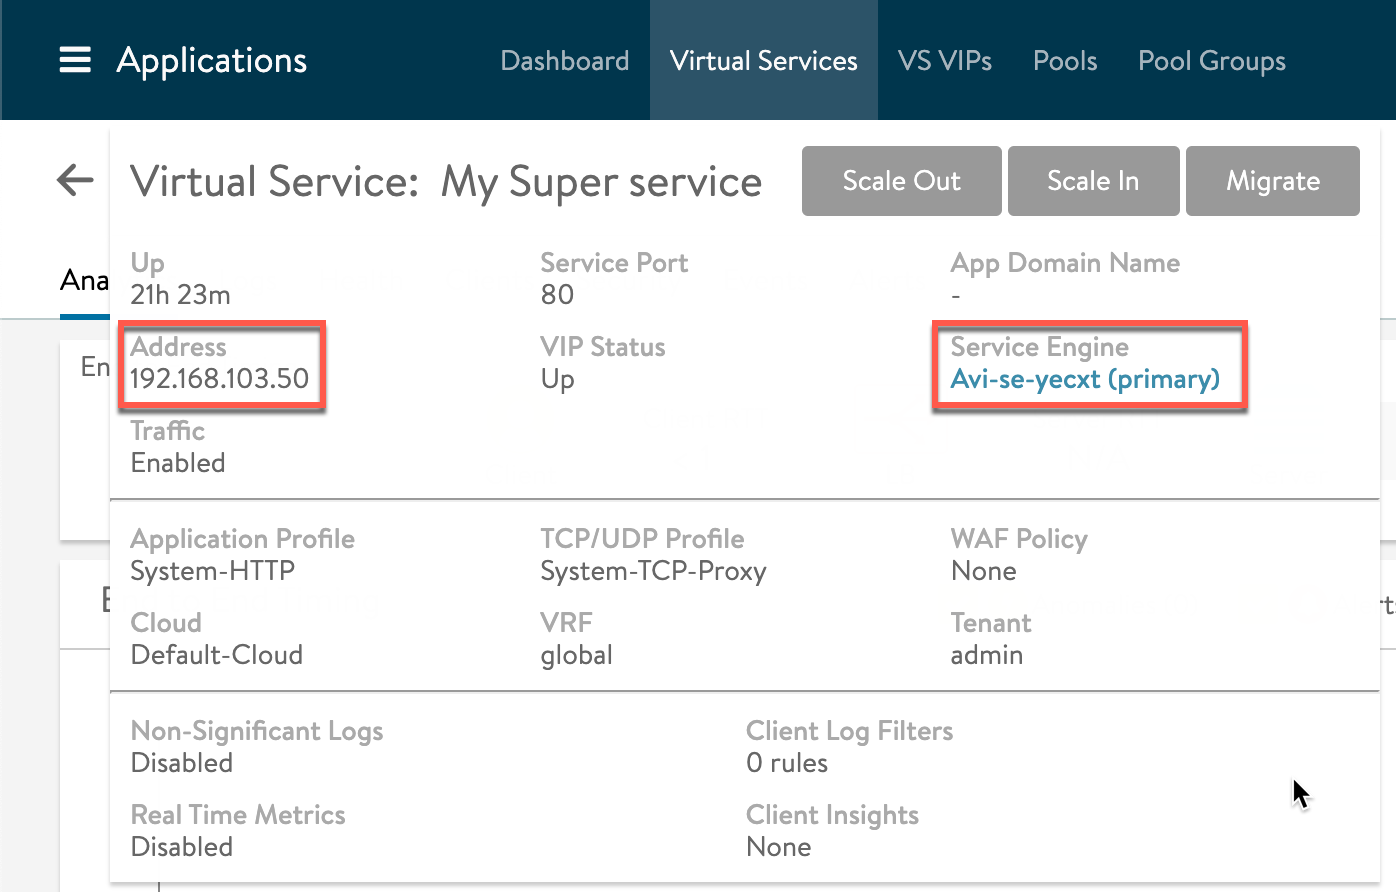
After a few minutes our Service should be up and if we click on our Virtual Service we can get a few more details, like which Service Engine is the active
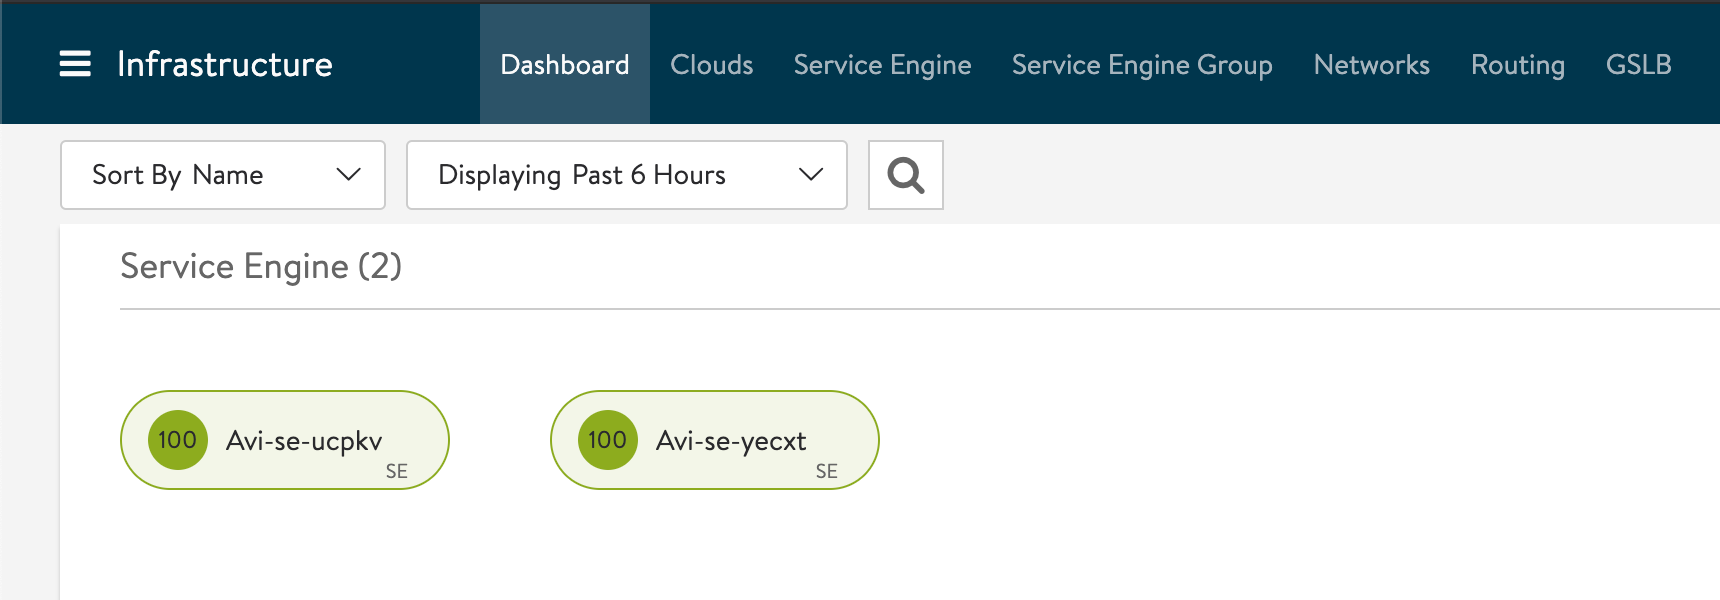
Service Engines deployed
The Service Engines should be deployed and running automatically and we can take a look at them from the Infrastructure menu.
We can also see the Service Engines as VMs in vCenter. Note that they are using management IP addresses from our configured static IP pool in that network
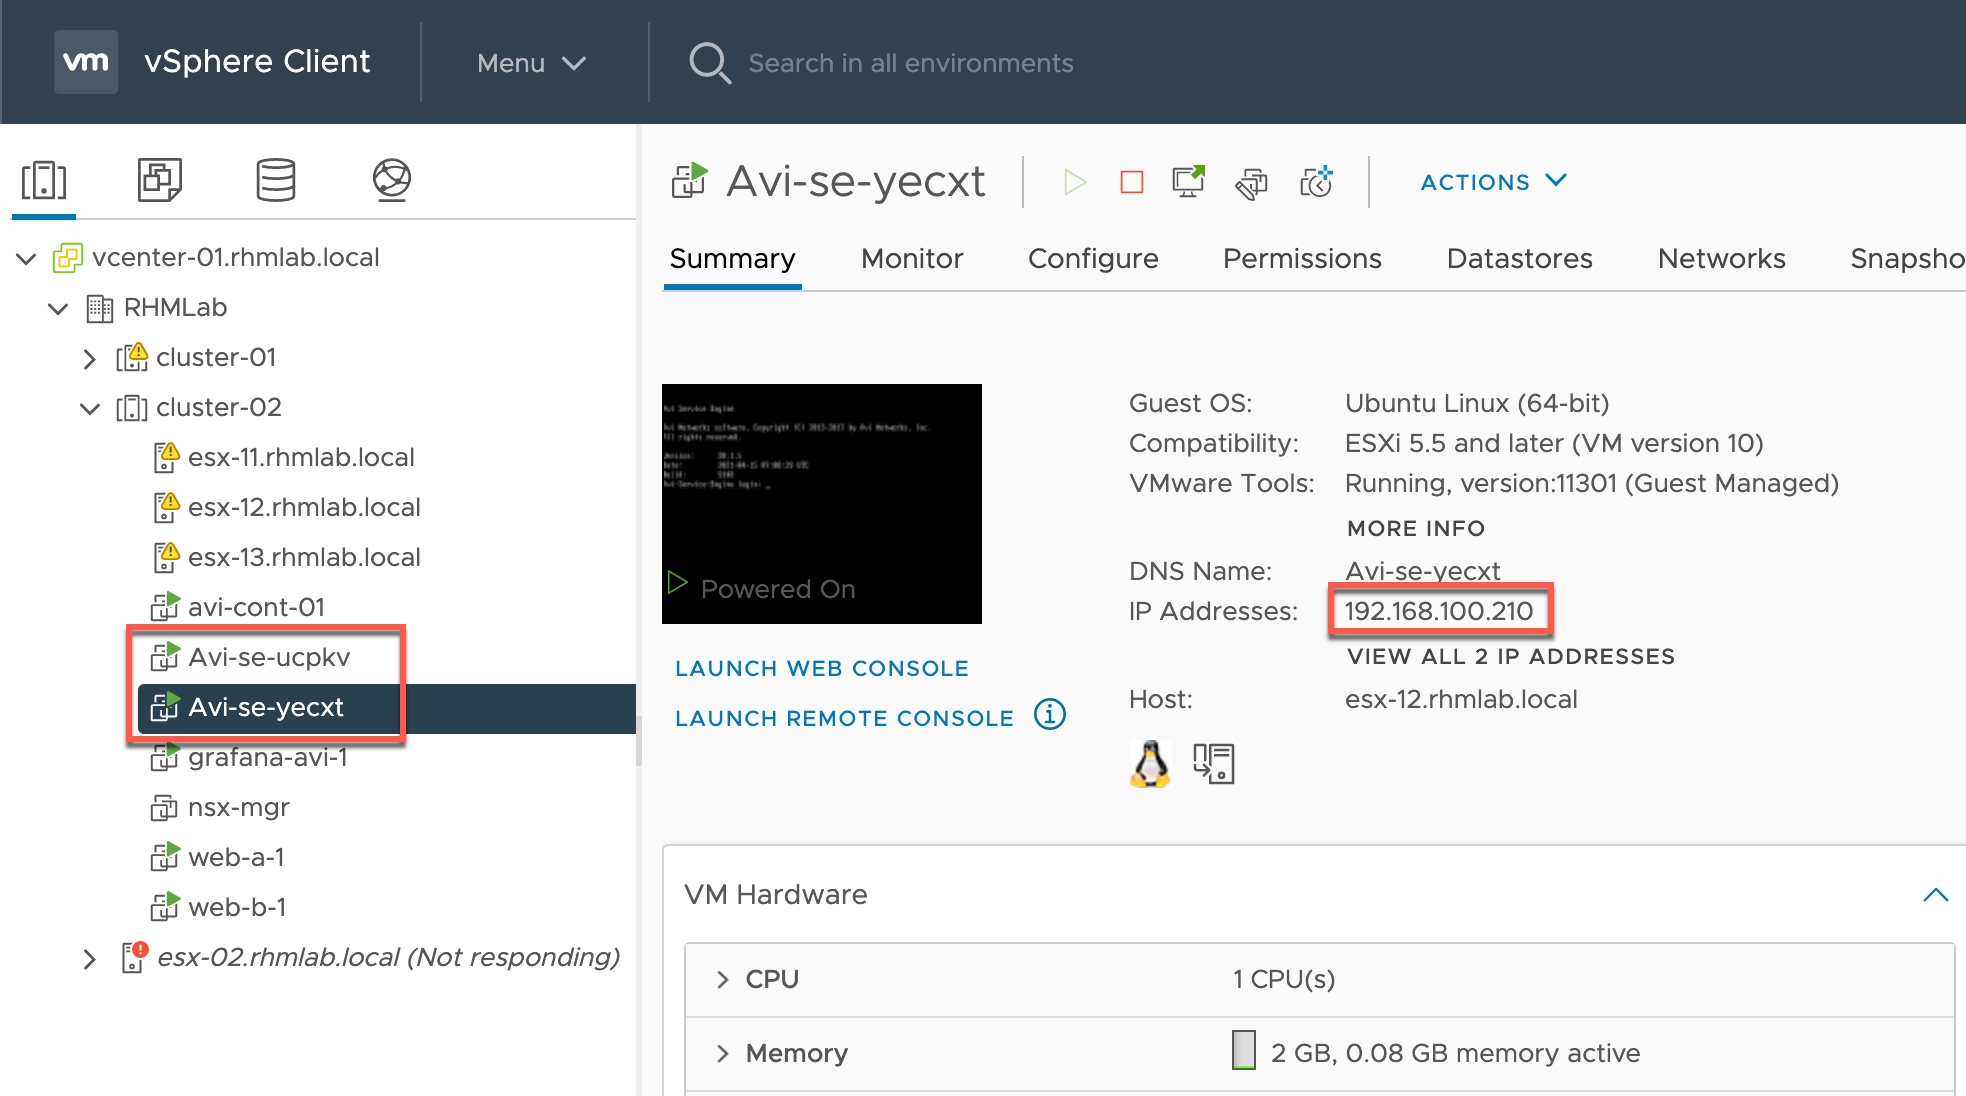
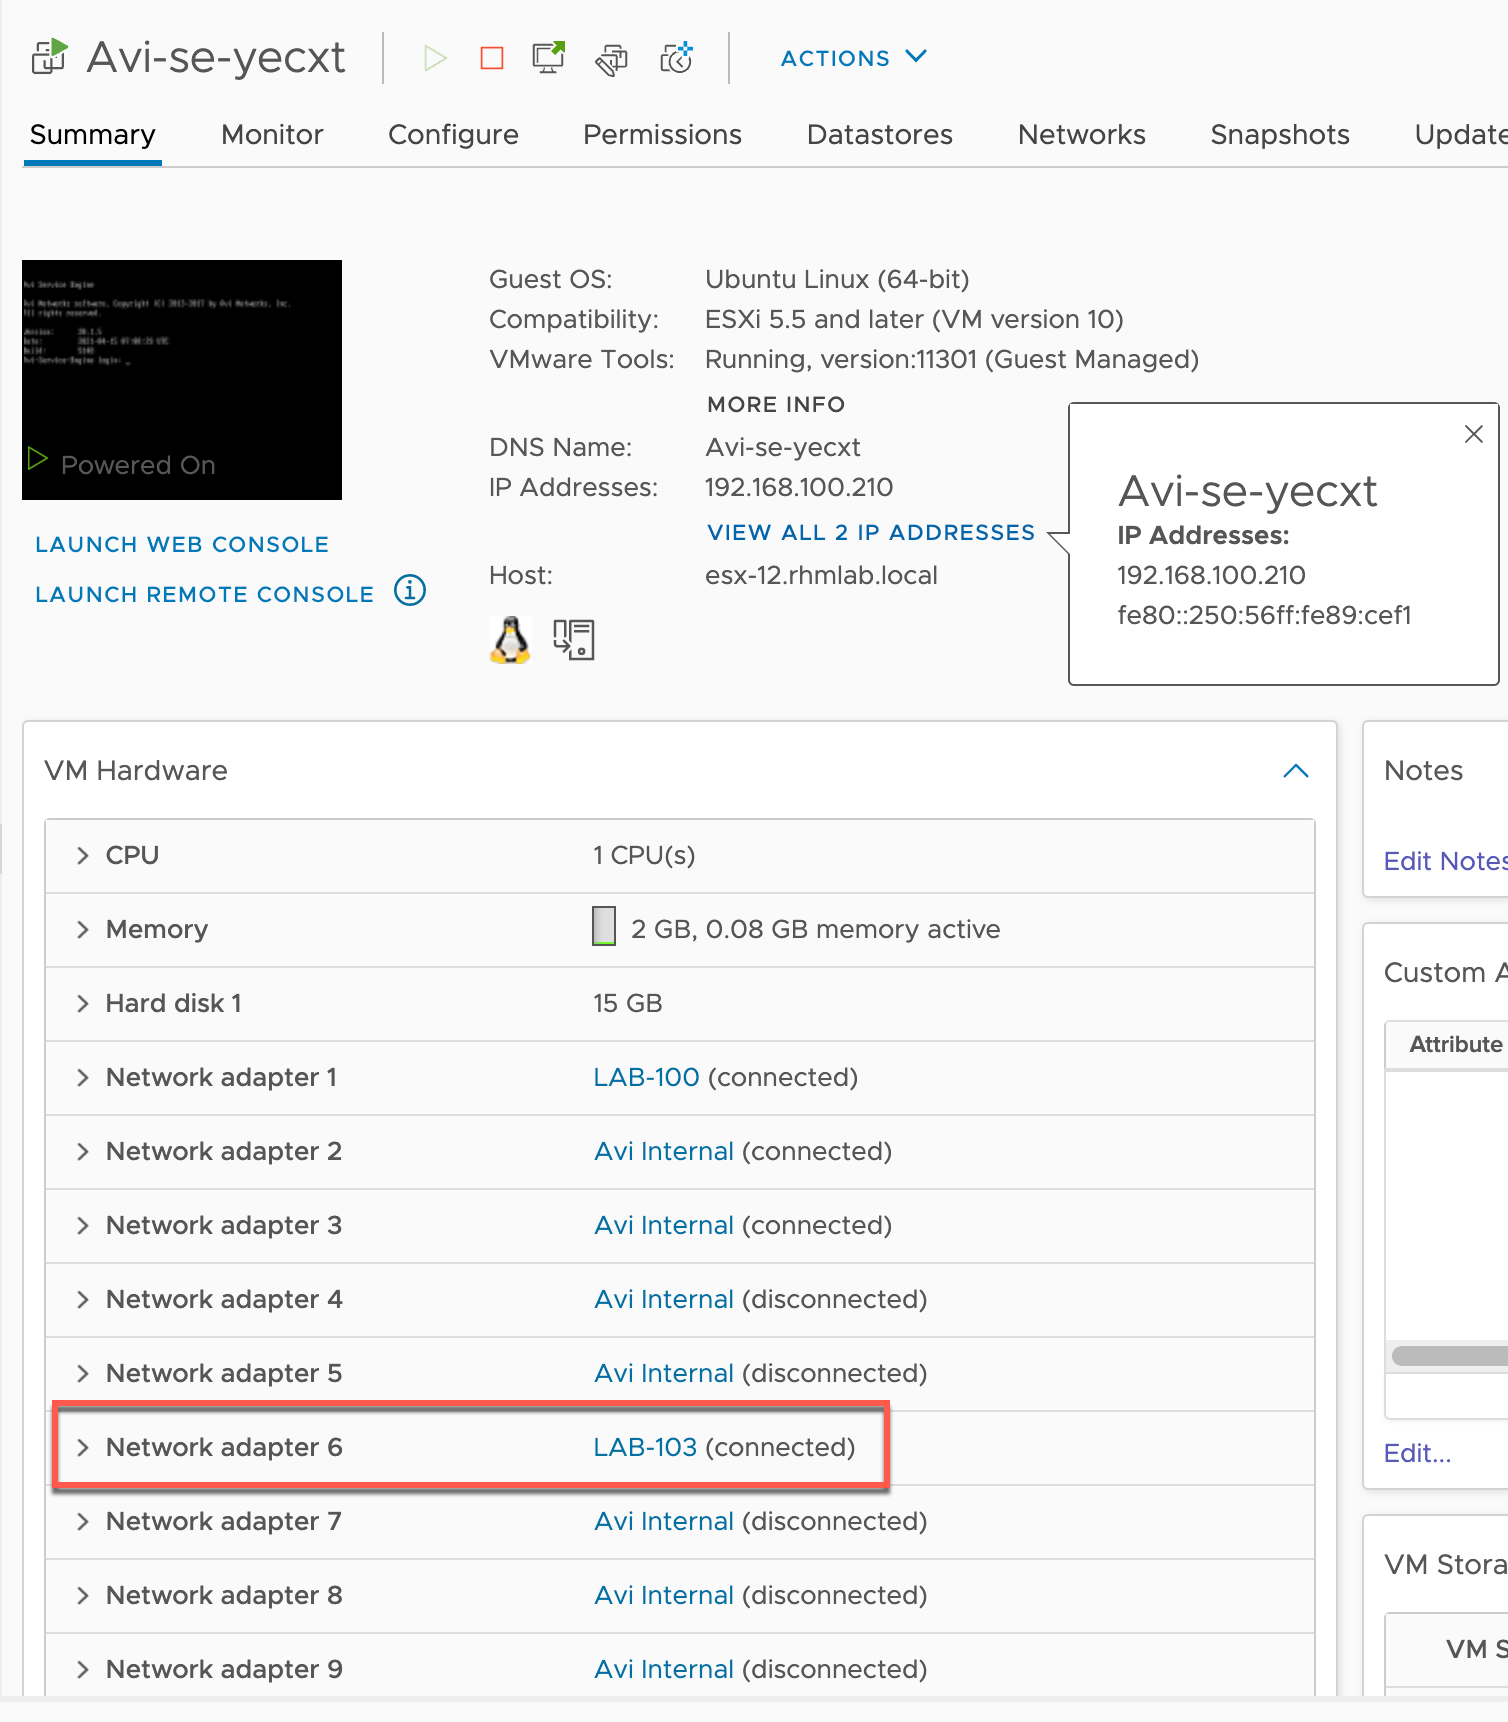
One thing to notice is that the VM has only two IP addresses even though it (the active one) has an IP address on my VLAN 103 as well.
Test load balancing
Everything looks great, let's test our load balanced application to see what happens
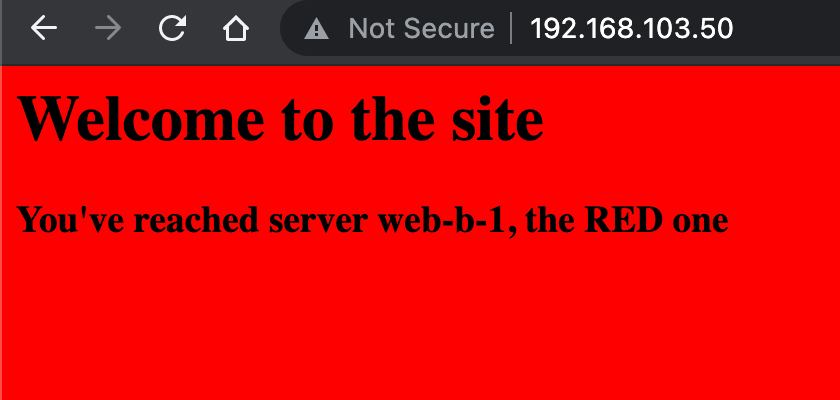
Let's test it with curl to see if we also get the other service in use
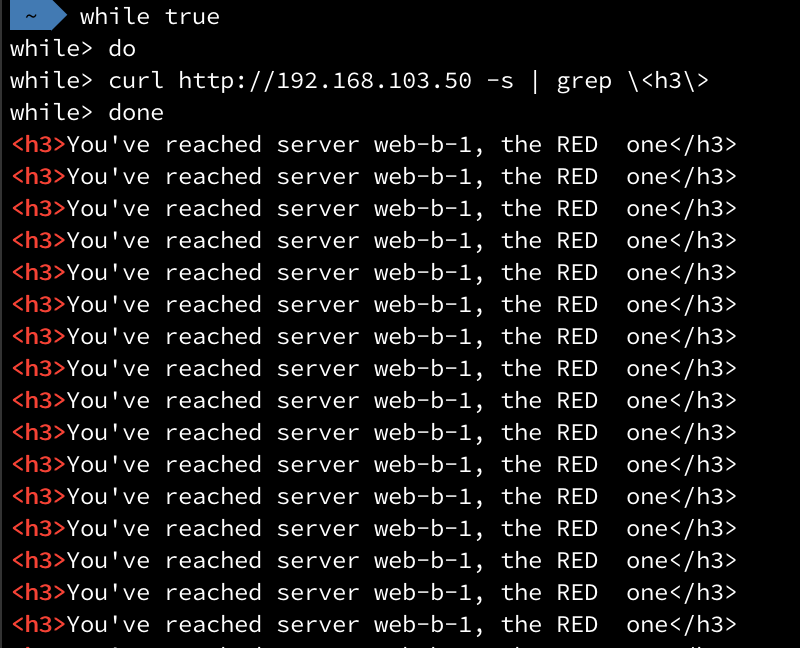
As we can see only the Red server is in use. Why is that?
Well, if we take a look at our Server Pool we can see the load balancing is set to Least Connections by default
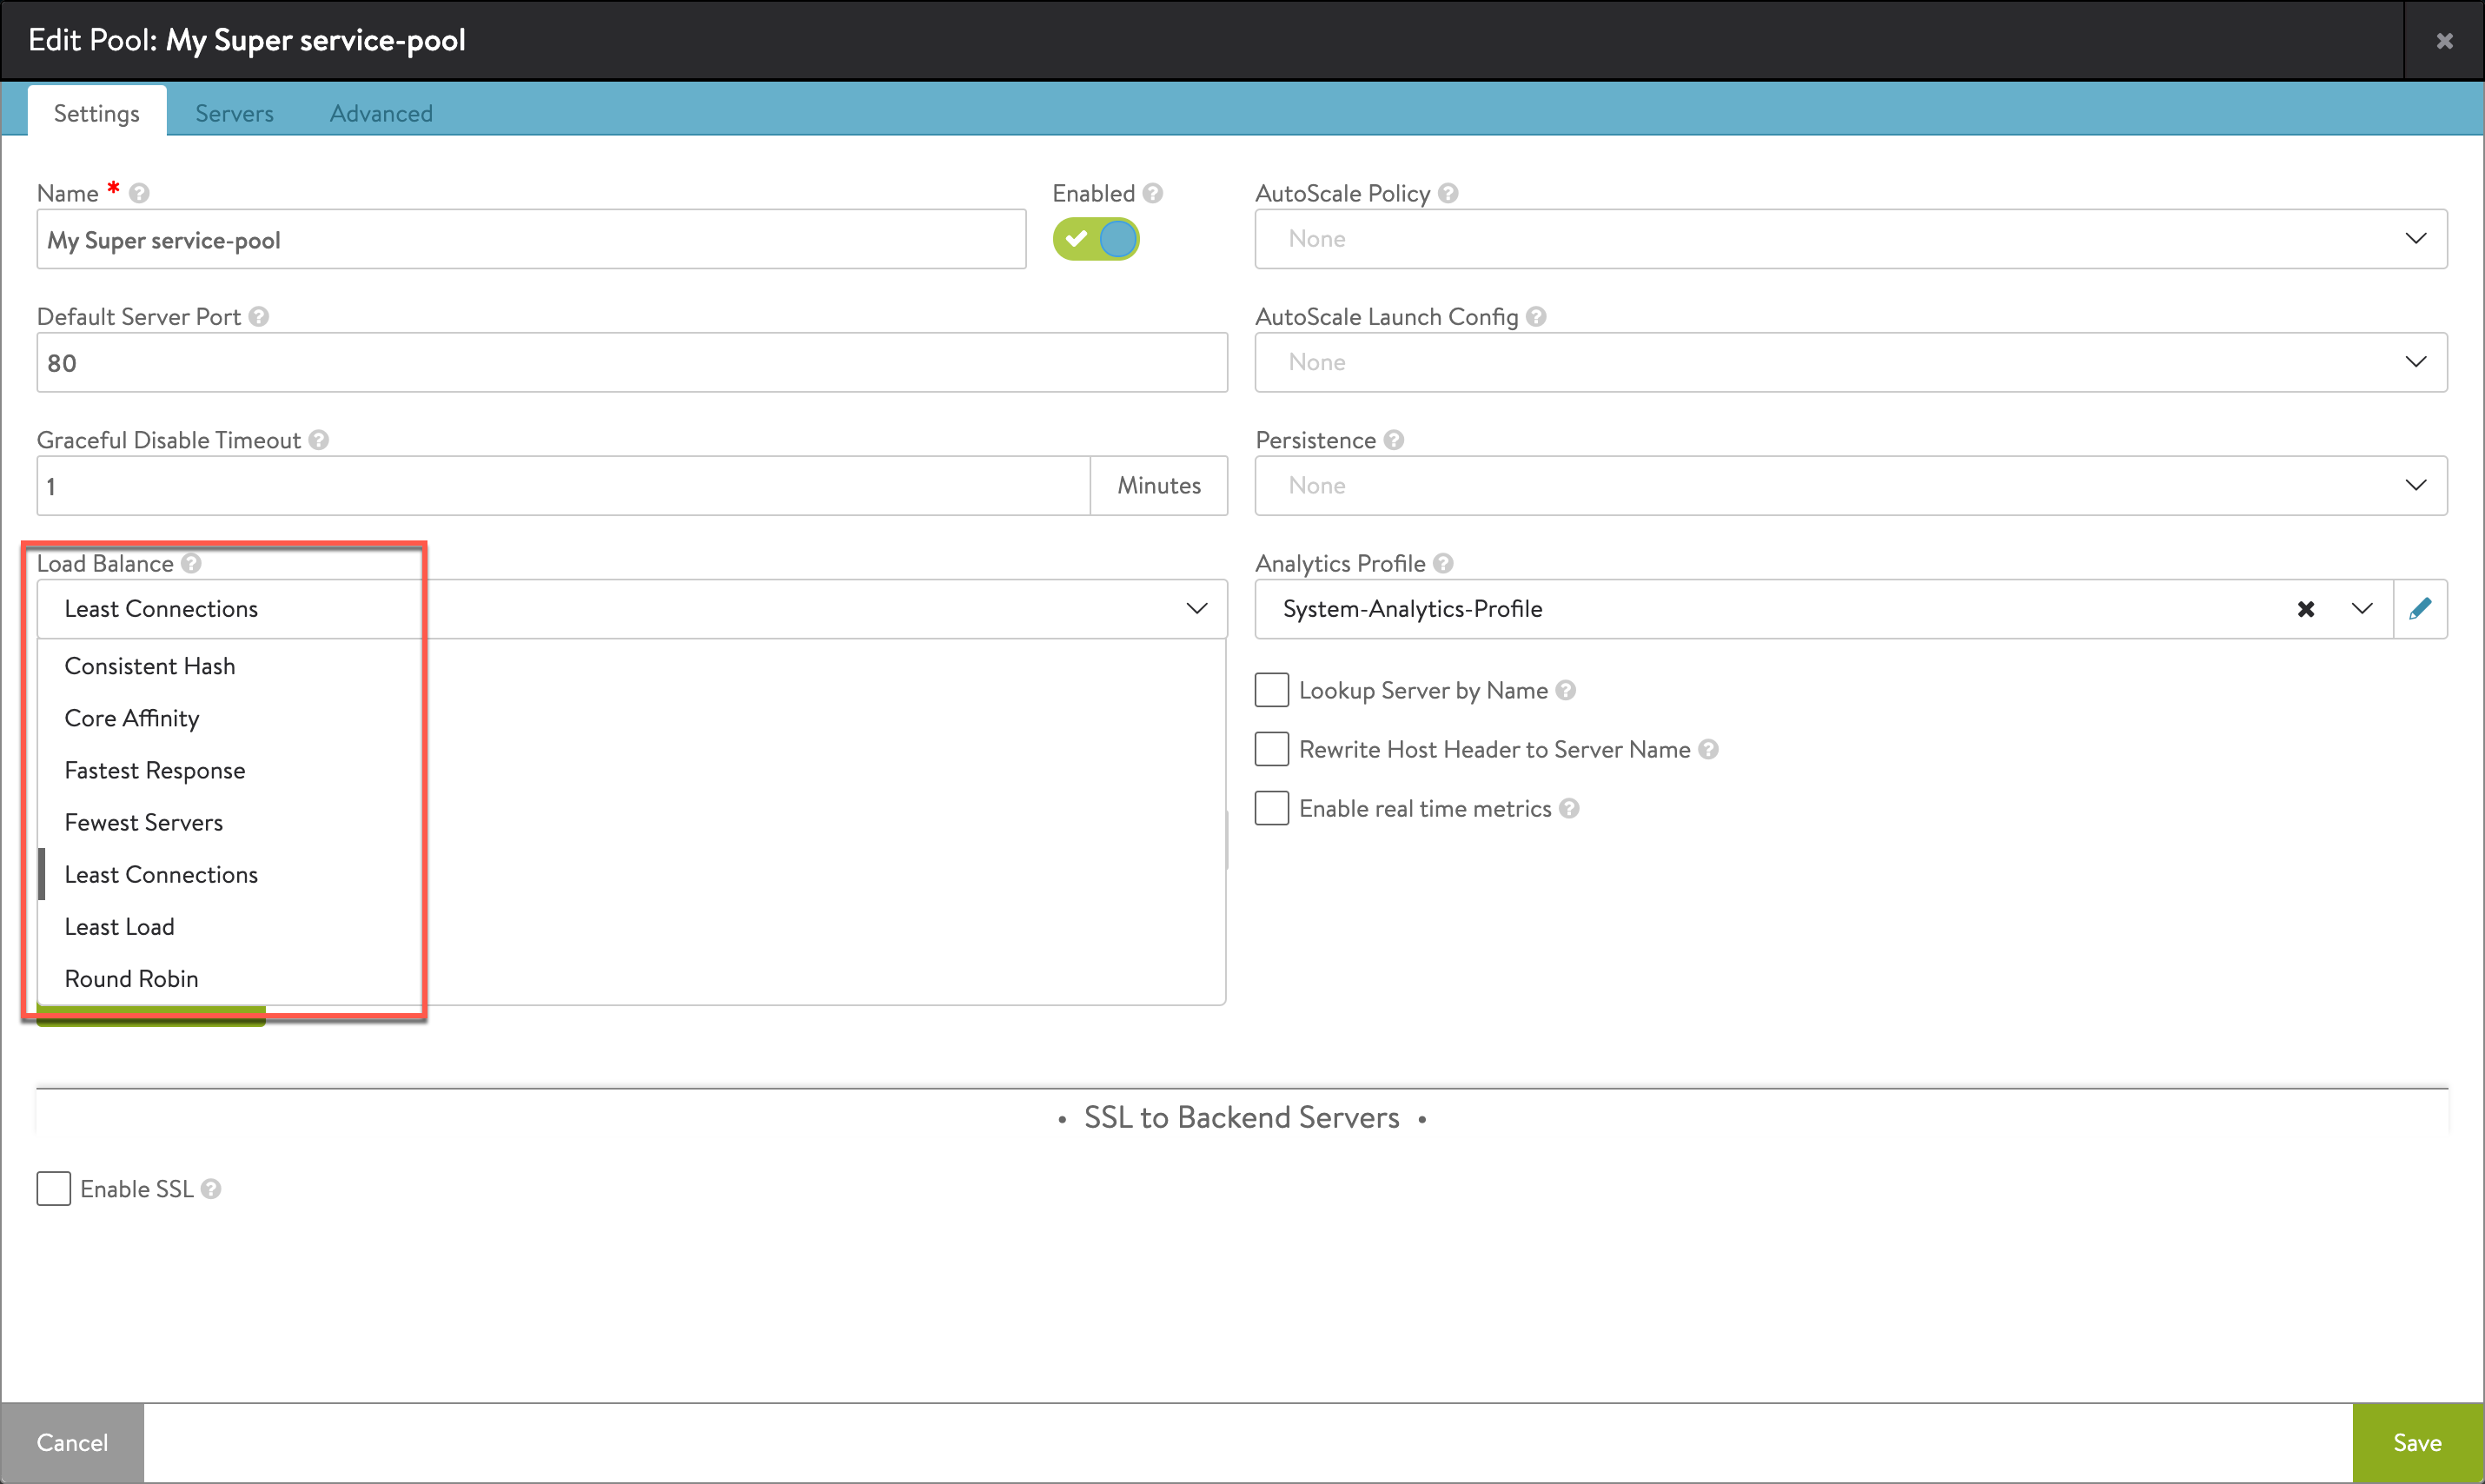
Let's change it to Round Robin and see what happens
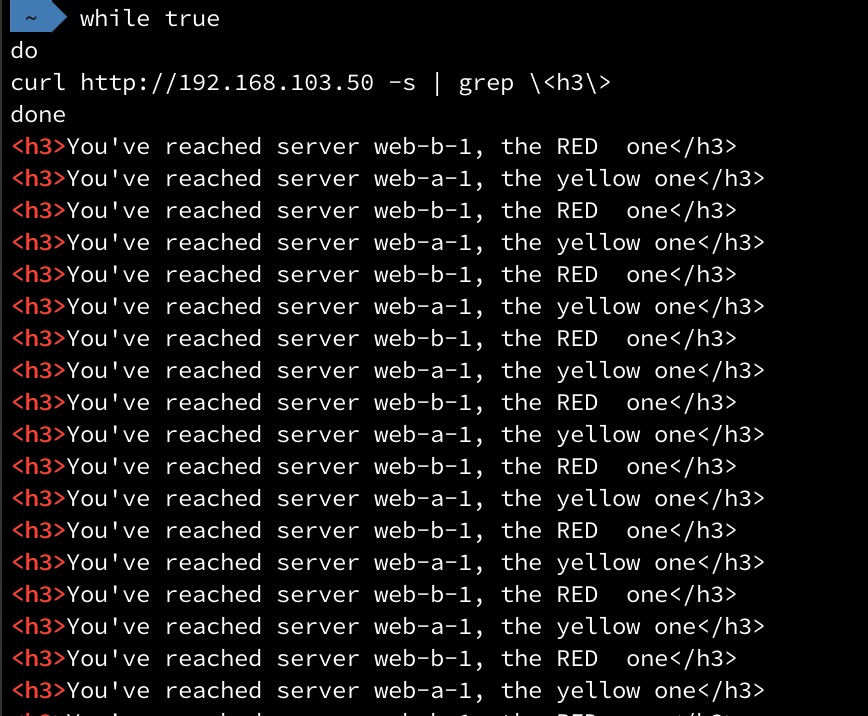
Now we can see that it alternates between the two servers!
Summary
This was a lengthy post, but I wanted to keep all of the initial setup for a basic load balancing scenario in one place.
As we've seen there's lots of possibilities in the NSX Advanced Load Balancer, much much more than I've touched upon in this post.
In upcoming post(s) I'll take a look at a few other scenarios as well.
Thanks for reading!