Configuring a Proxmox cluster
In a previous post we saw how to install and configure a (physical) host as a Proxmox Virtual Enironment (PVE) host
In that post we worked with a single physical host with 1 CPU, 64 GB RAM. The host has 4x1GbE ethernet ports and 2x25GbE SFP+ ports. For storage the host has 1x960 GB NVMe disk which will be used as a boot disk, and 2x3.84 TB SSDs we used for ZFS storage.
In this post we will see how to build a cluster with a second host, and in an upcoming host also how to configure High Availability with a third cluster component running on a virtual machine outside of the cluster.
Note that both host will be configured in the same way with a local ZFS pool for storage and such the cluster won't be sharing storage resources, but by utilizing the built-in ZFS replication we'll be able to come pretty close.
For this post I've prepared the second node by following the same steps as for the host setup in the previous post
Note! The host to add to the cluster must not contain any virtual machines. The Join cluster wizard will fail!
The two VMs existing on my host were for testing purposes and had to be removed to proceed
In a later post I plan to utilize shared storage as well so we can see how to build a "proper" cluster on PVE.
The setup
Below is a simple drawing of the cluster networking design.
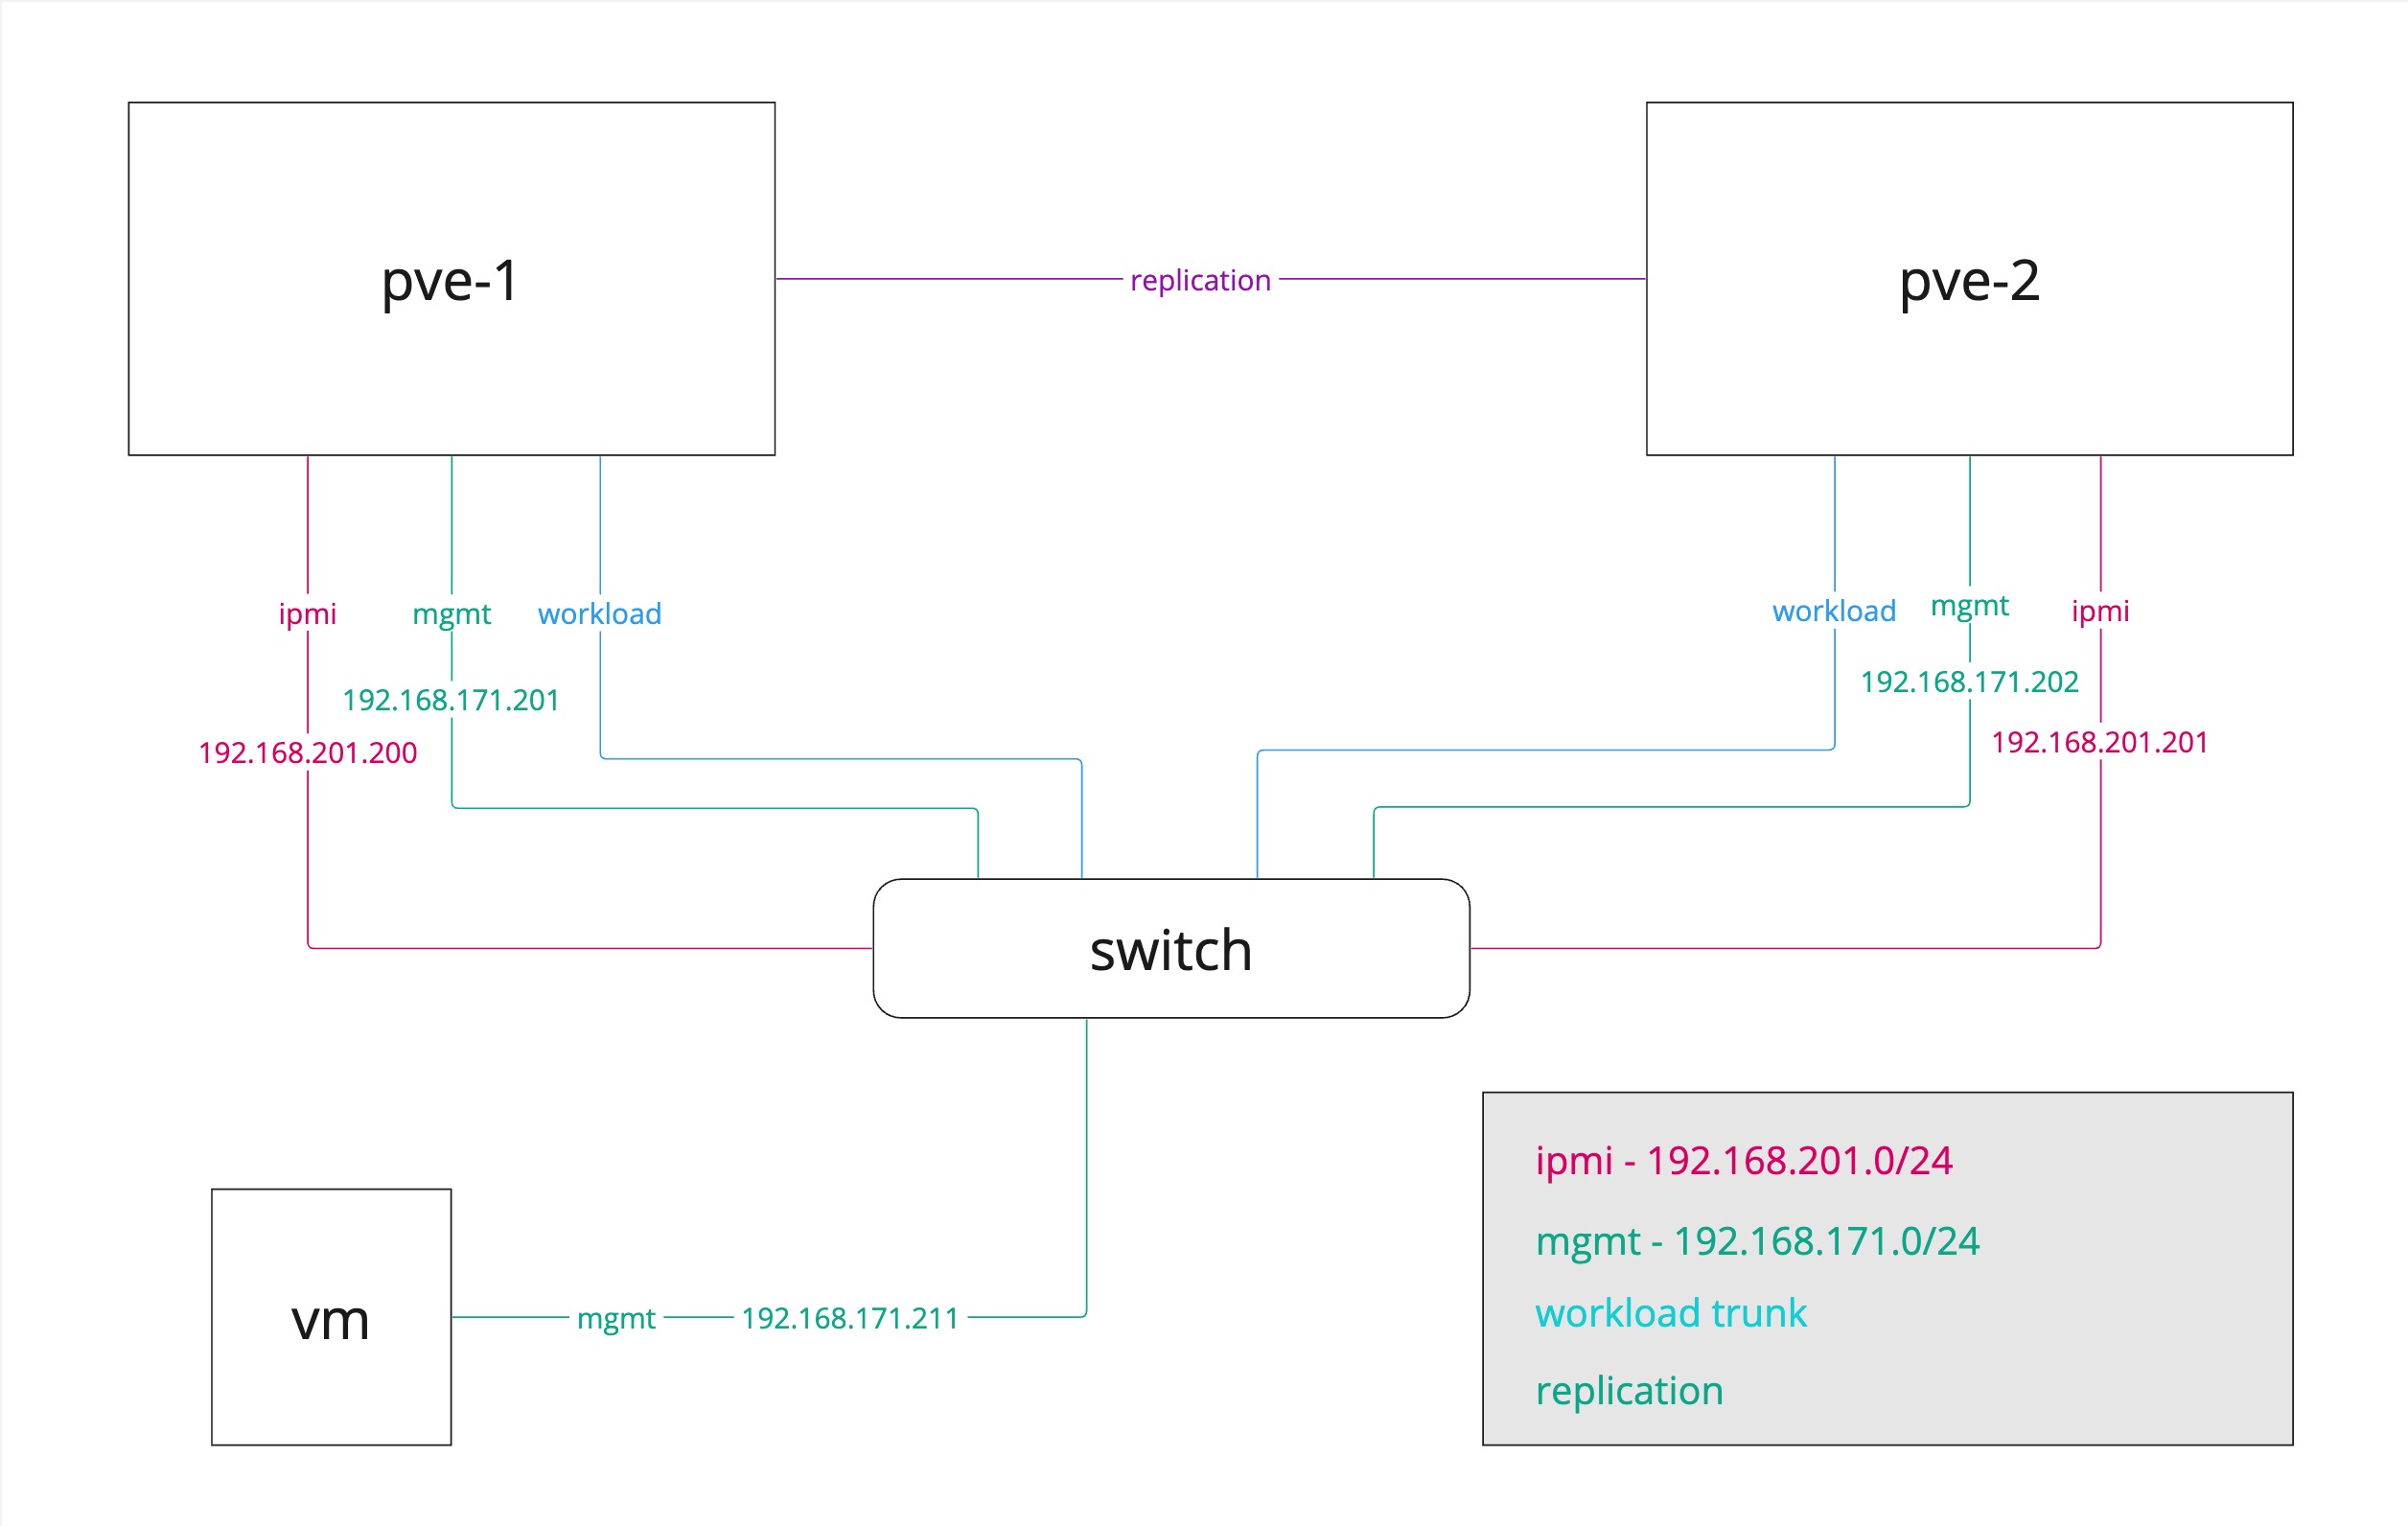
The hosts have a mgmt interface, an IPMI interface for lights-out management, and we'll have an interface that does the networking for the virtual machines. In a production setup we'd probably want to have to interfaces for this, but to keep it simple we'll stick with one interface also for the workload traffic.
Finally we'll have a direct link between the two hosts 25 GbE interface which we'll set up as the migration network between the hosts.
Create a cluster
The PVE hosts come with a cluster management component right in the User interface (and also through the APIs). There's no need for deploying a separate management component.
On our first host we'll go ahead and create a Cluster
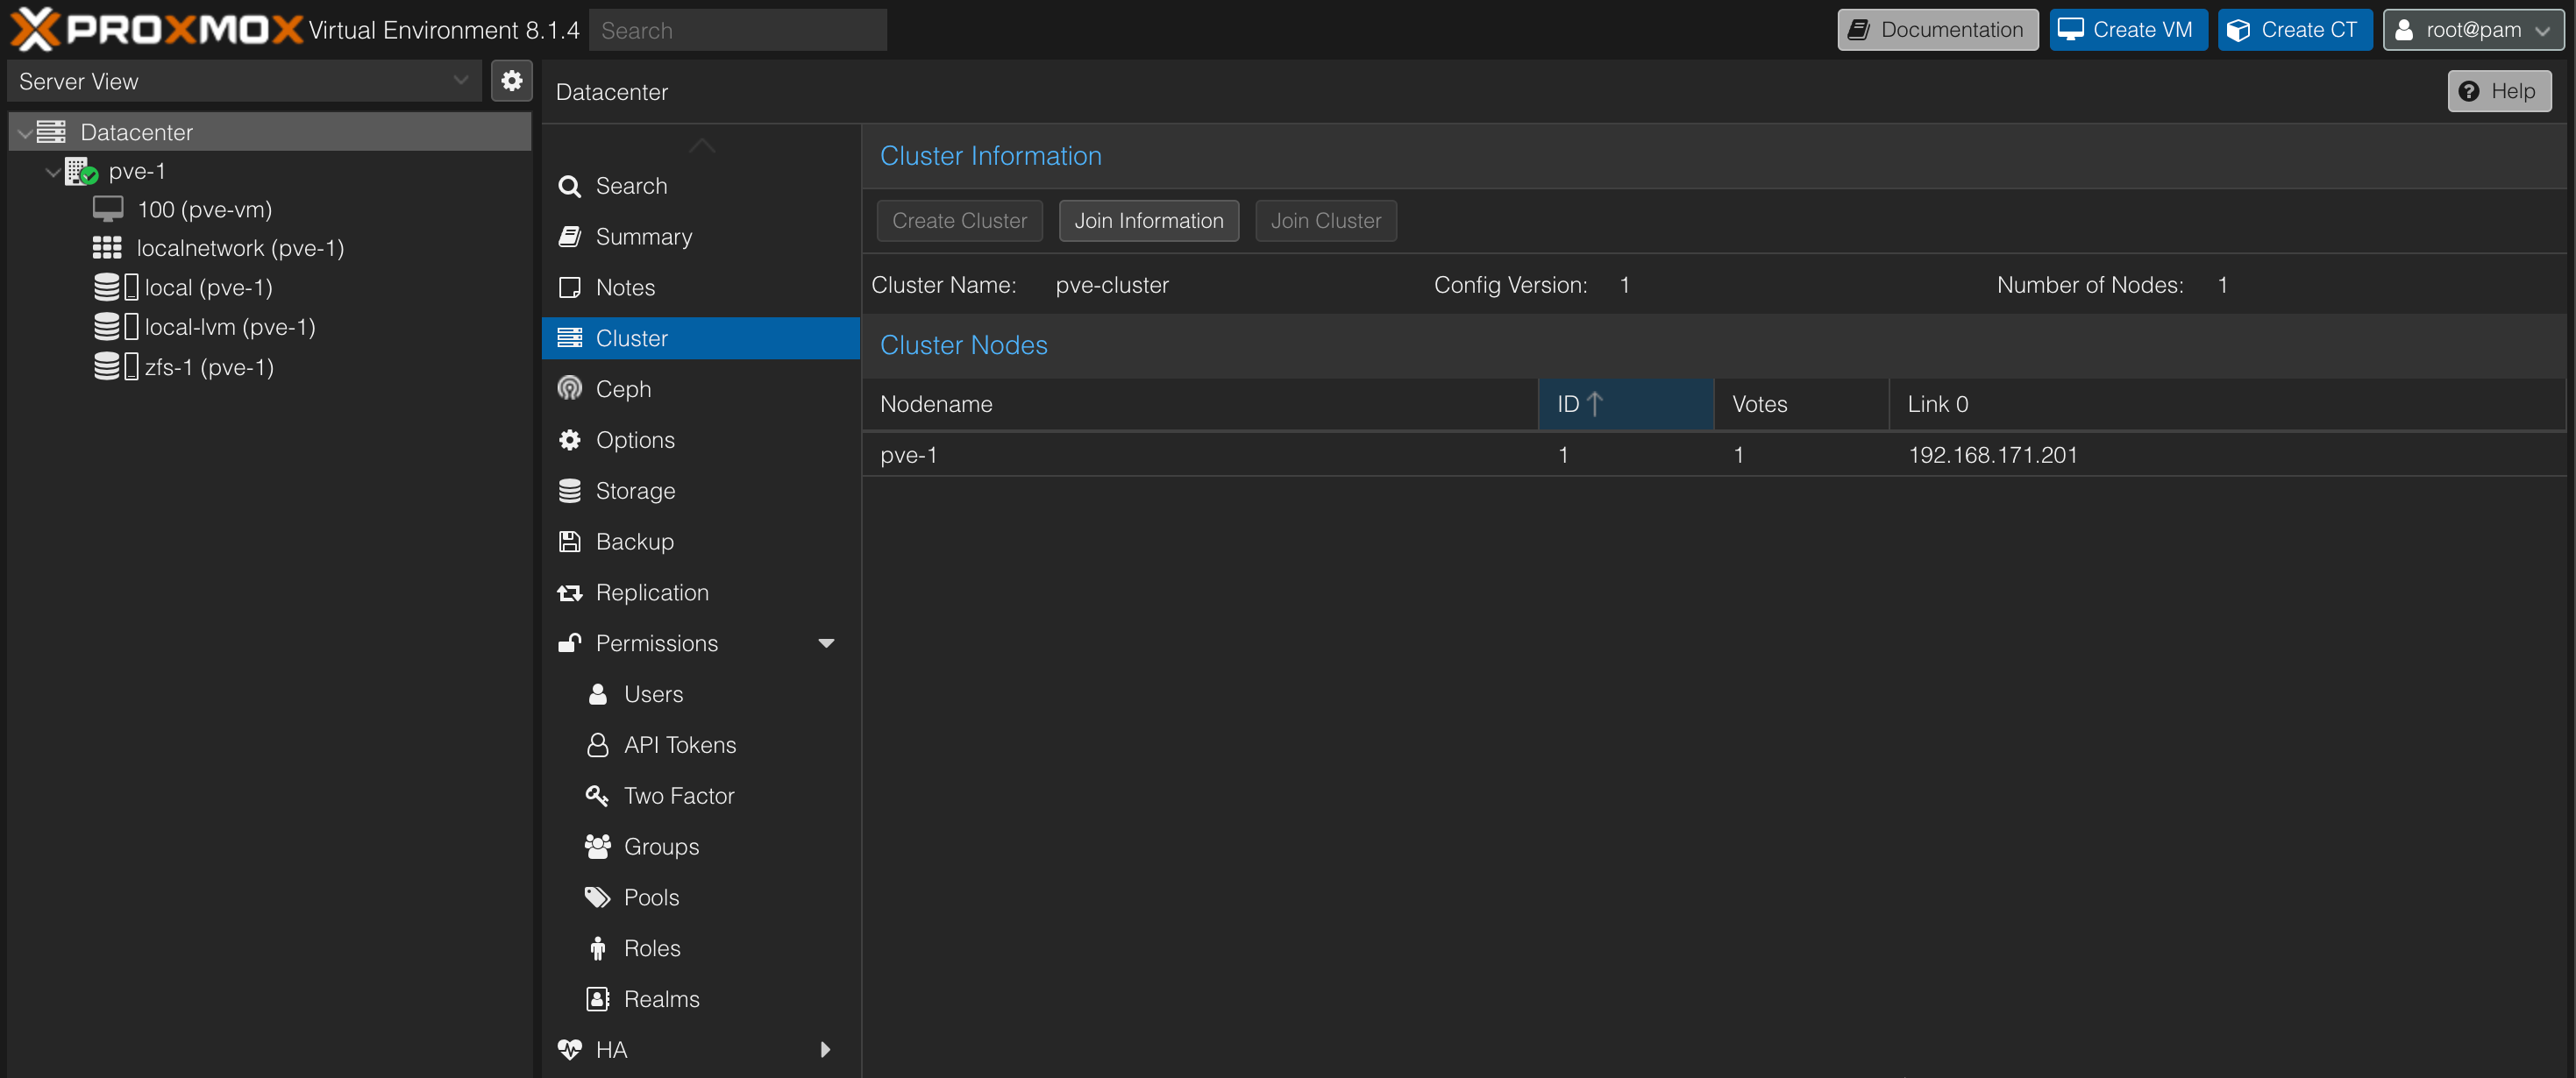
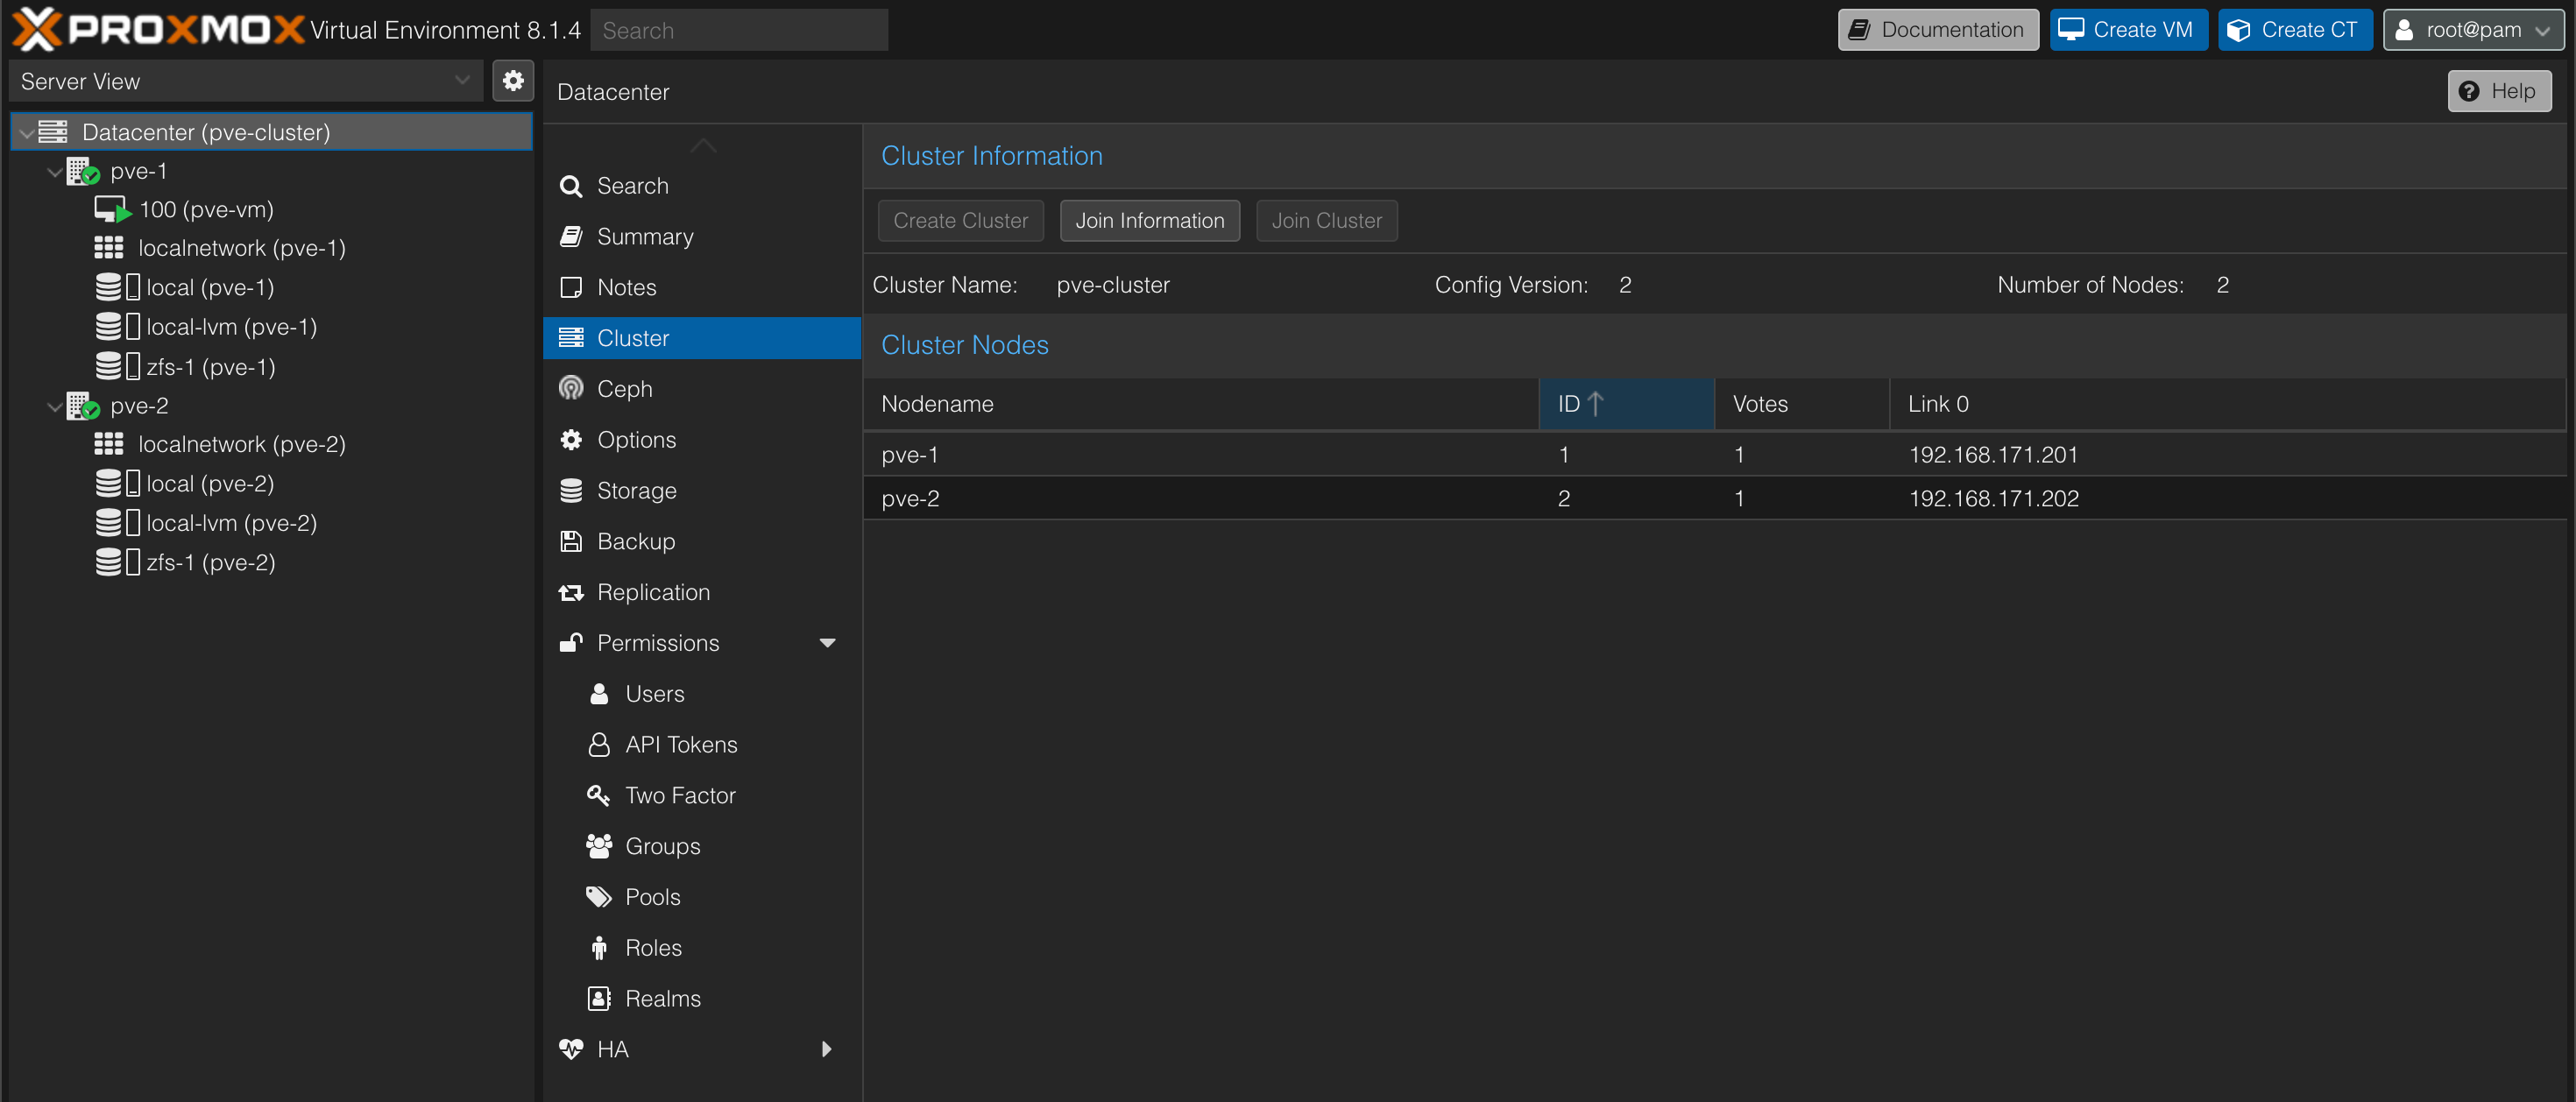
The cluster setup can be found under Datacenter->Cluster
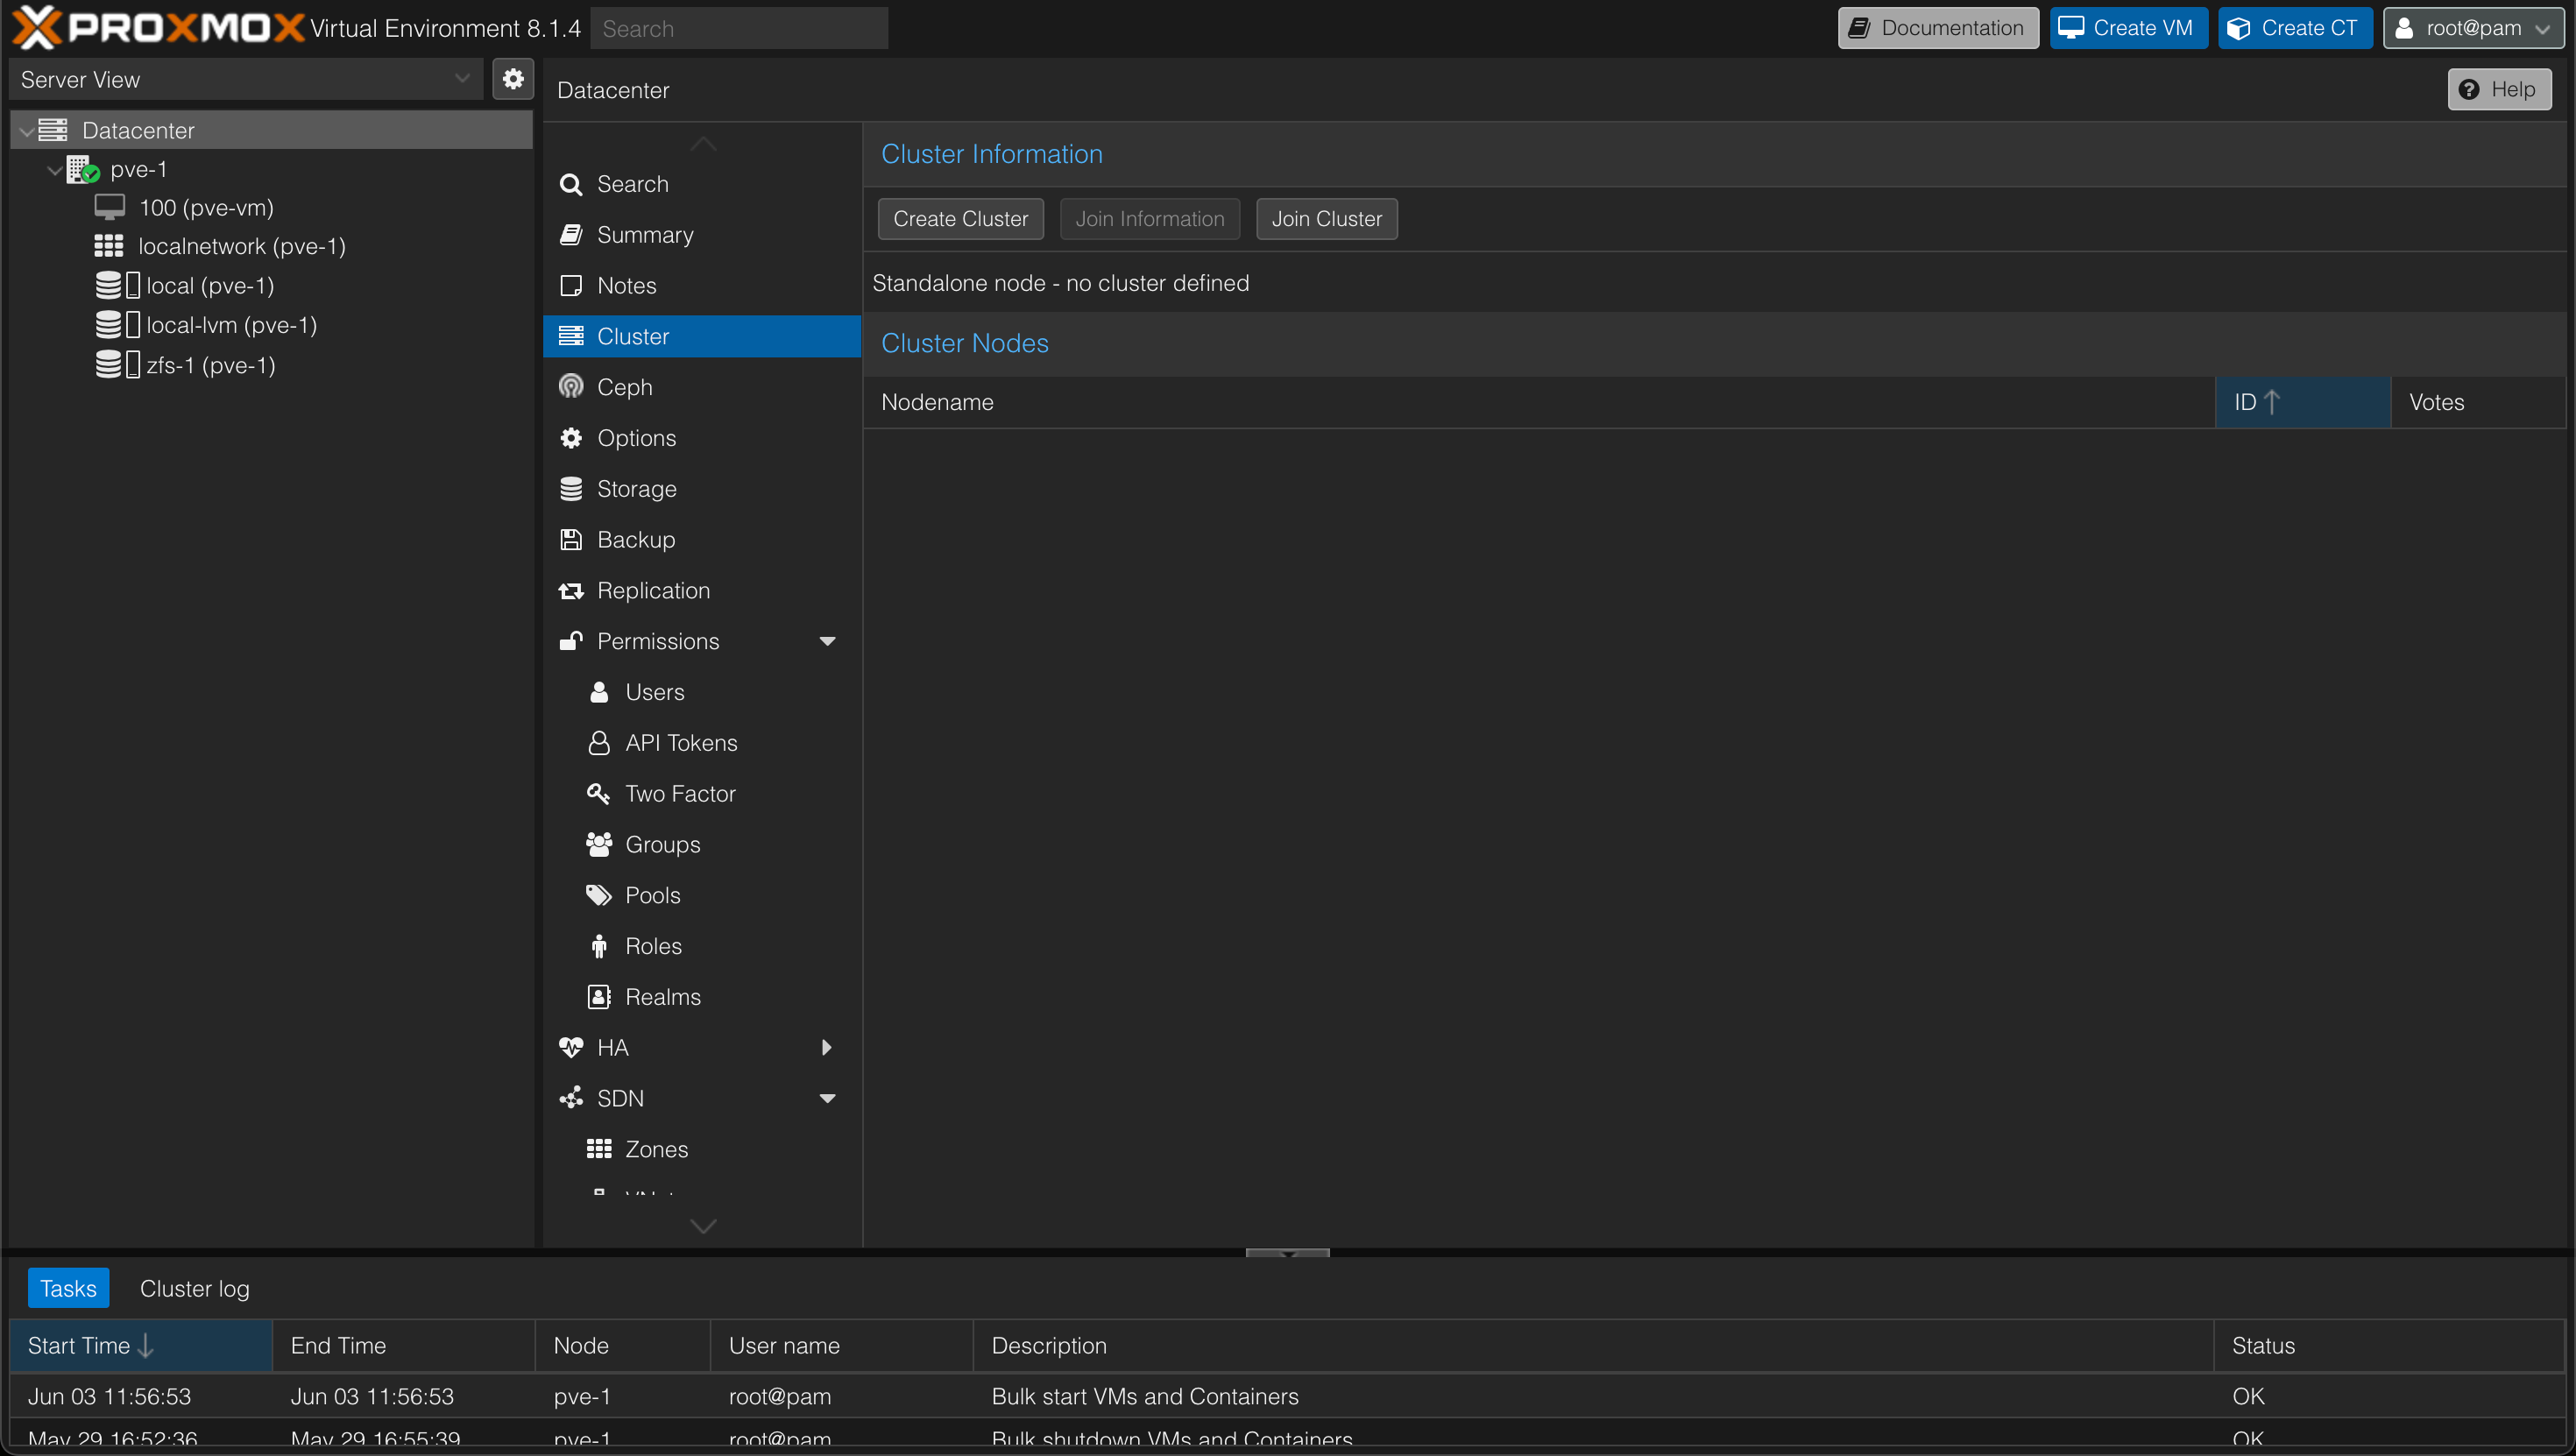
We'll go ahead and hit the Create cluster button. In the dialog box we'll specify a cluster name and the network
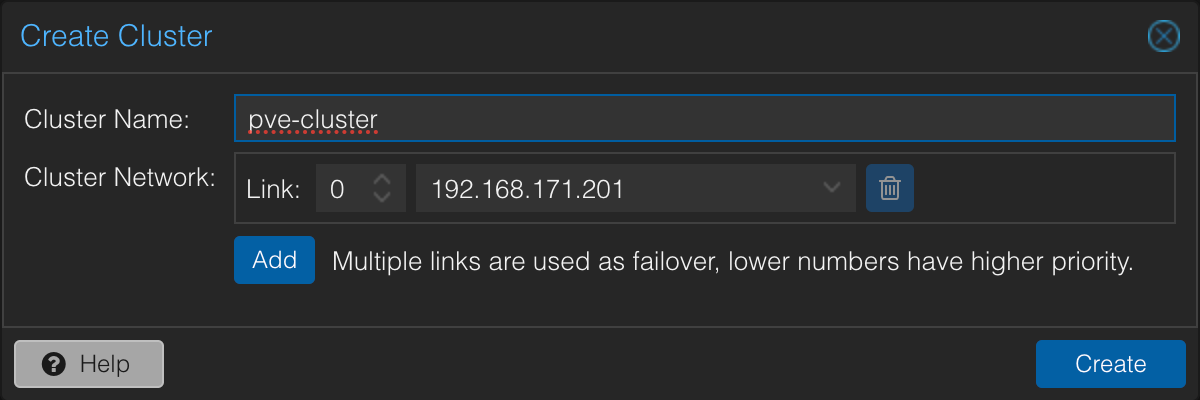
We'll accept the default and let the management network be our cluster network. The best practice from Proxmox is to have a separate cluster network. At least one should separate the storage network and preferably also the VM traffic from the cluster networking. More information about the cluster network can be found in the documentation
This is all that's needed for creating the cluster. The next task is to add a cluster node to the cluster
Add node to cluster
Adding a node to the cluster is a two-step process.
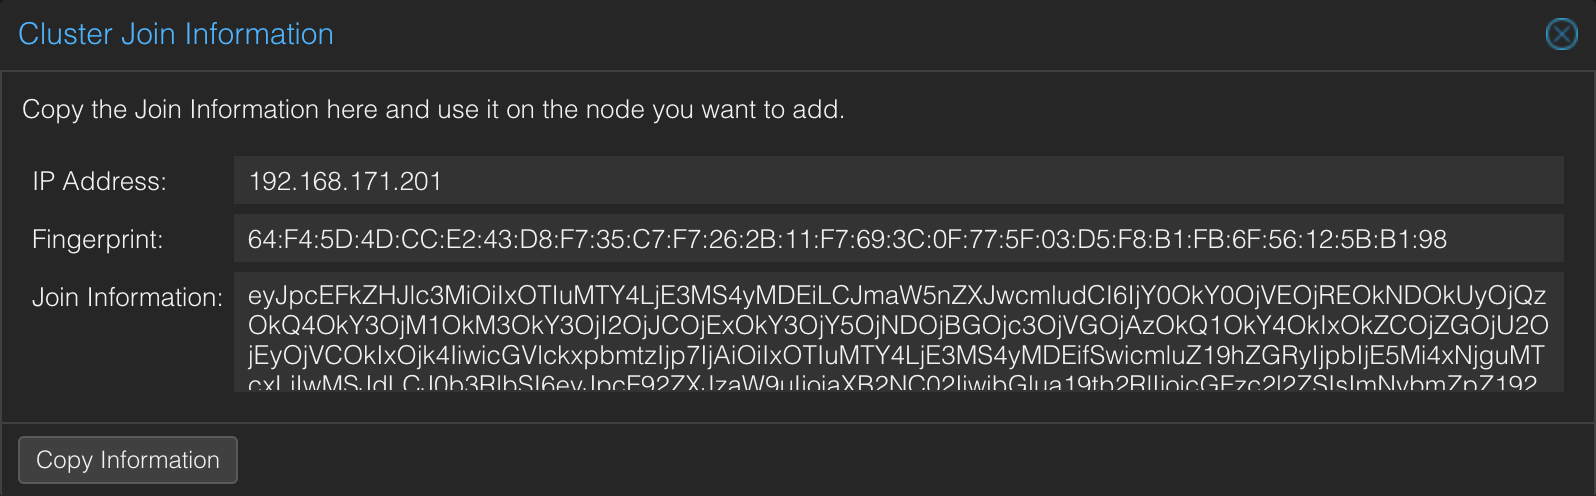
First we'll hit the Join information button to get a key to use when adding the second node to the cluster
Next we'll head over to our second node and the Datacenter->Cluster menu
In the Cluster menu we'll hit the Join cluster button

We'll paste in the key from the first node in the Join information section and our cluster information should be filled. Secondly we'll need to provide the peer/first node root password
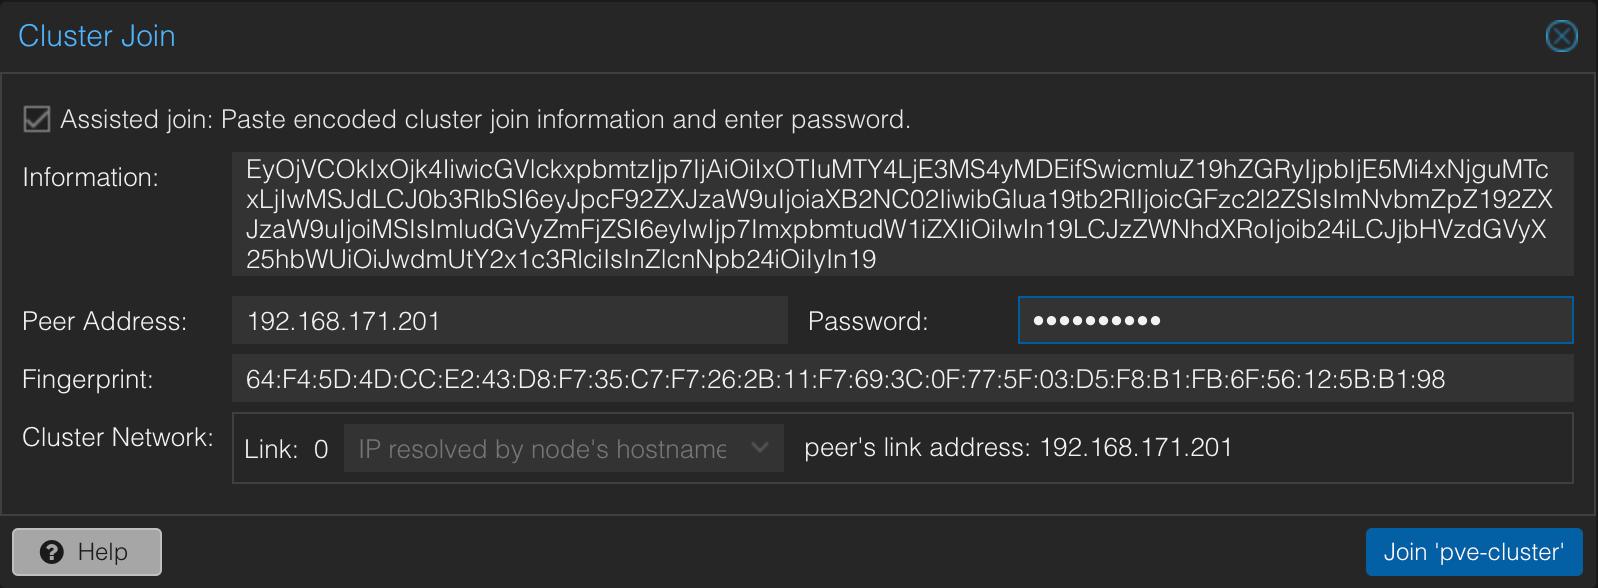
Finally we can hit the Join button and after a short while verify that our node has been added to the cluster.
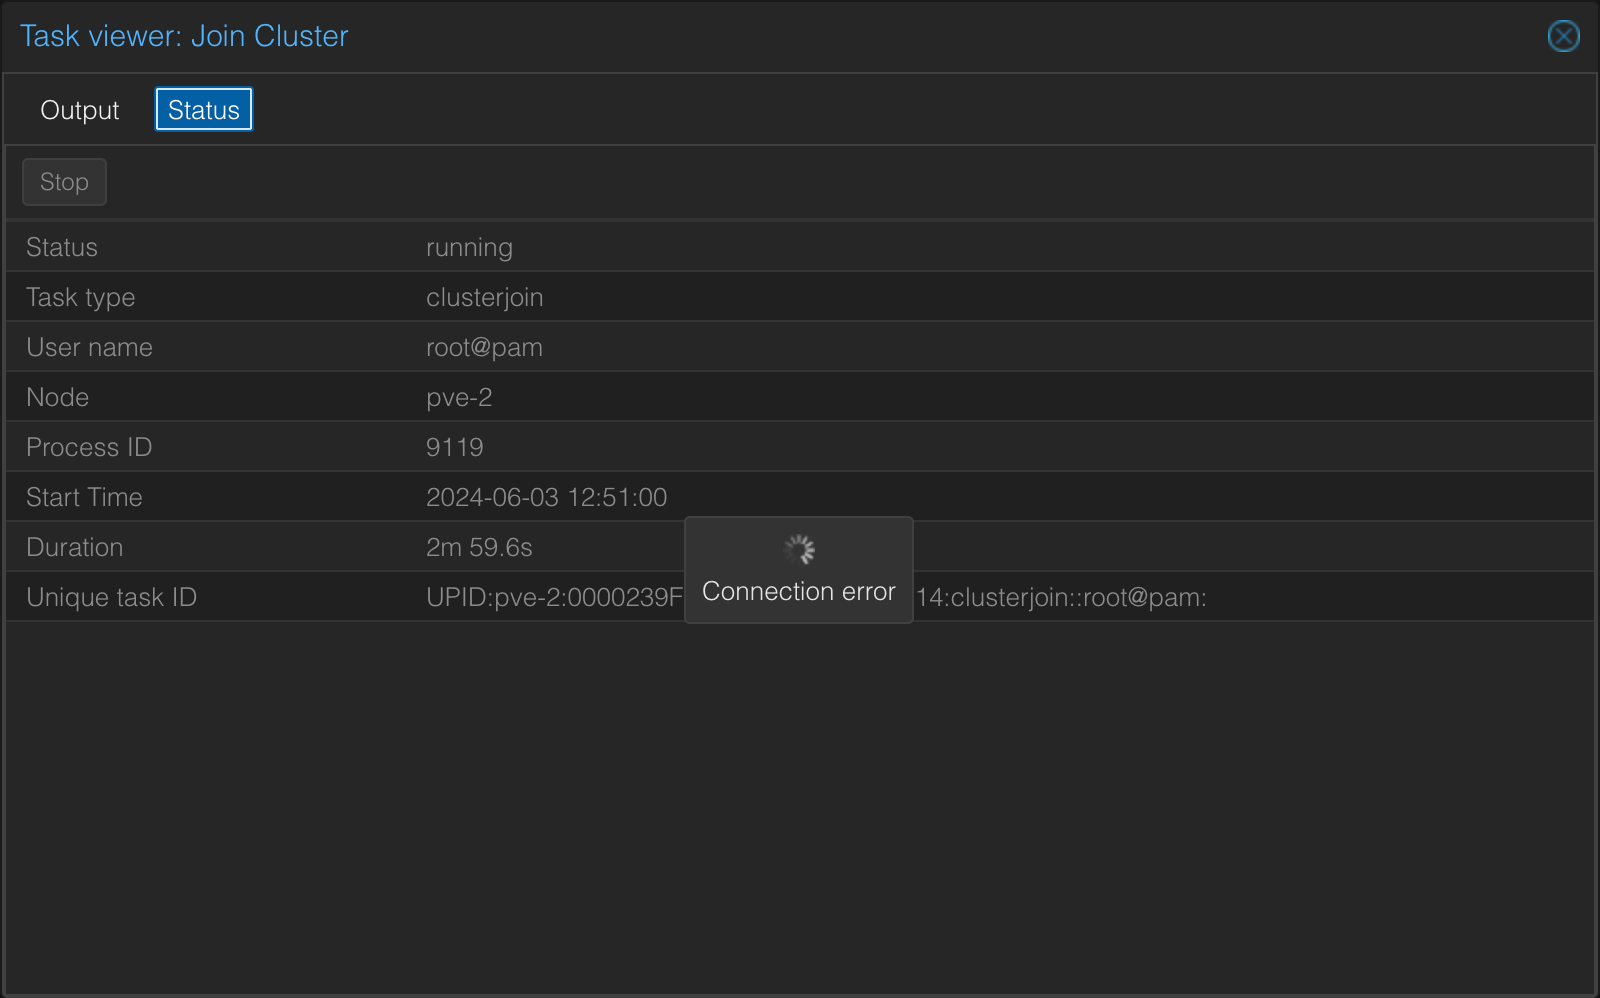
Note! When I added my second node the Task never seemed to finished. When hitting the Status tab I got a Connection error message. Heading over to the first node I could see that in fact my node had joined the cluster, and after a browser refresh on the second node everything seemed fine. Not sure if this is a bug or if there was something on my network just as the task ran
Testing migration of a workload (VM)
Before setting up the rest of the cluster let's test a migration of an existing virtual machine.
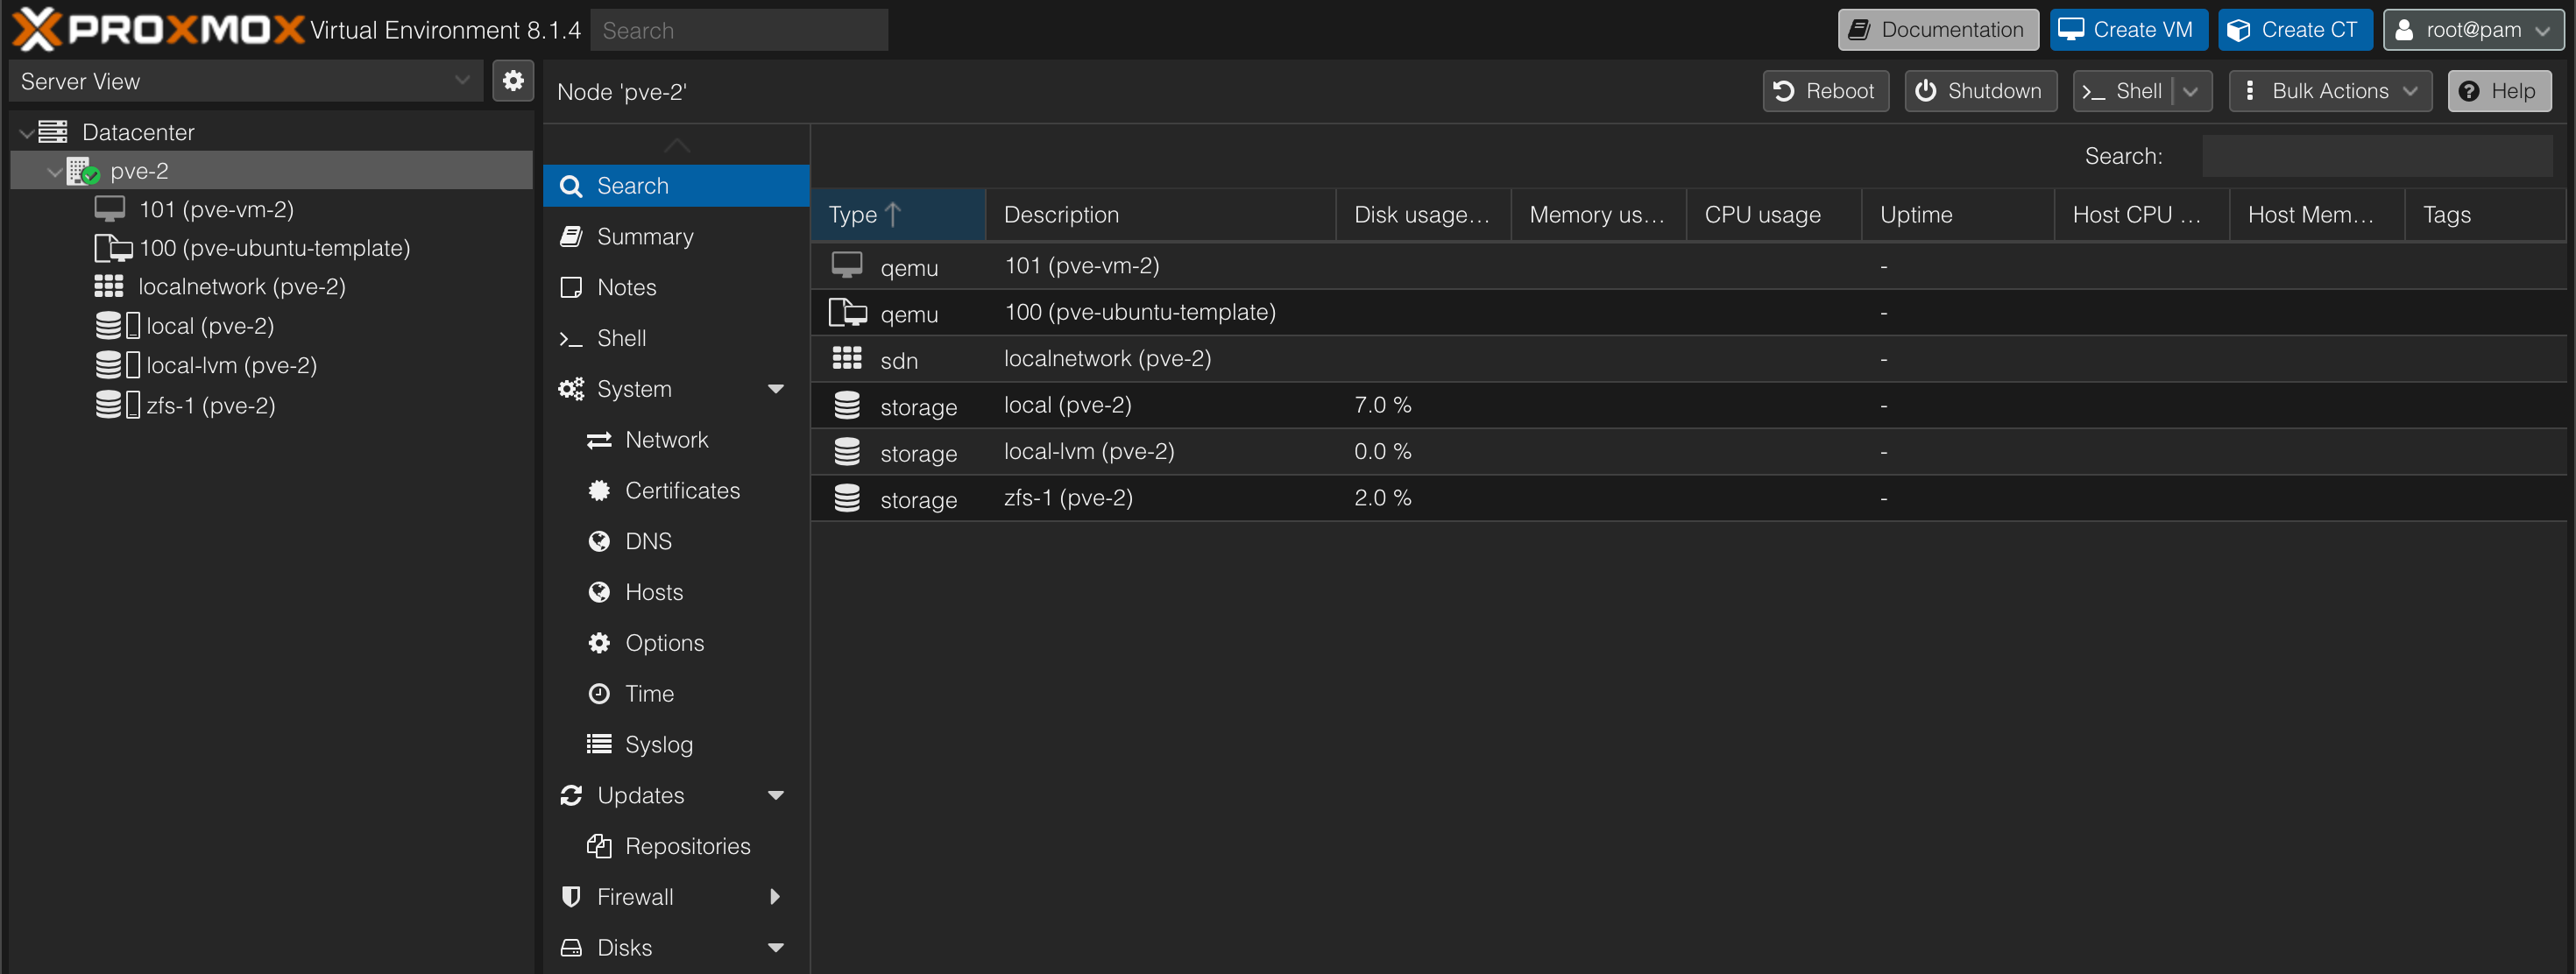
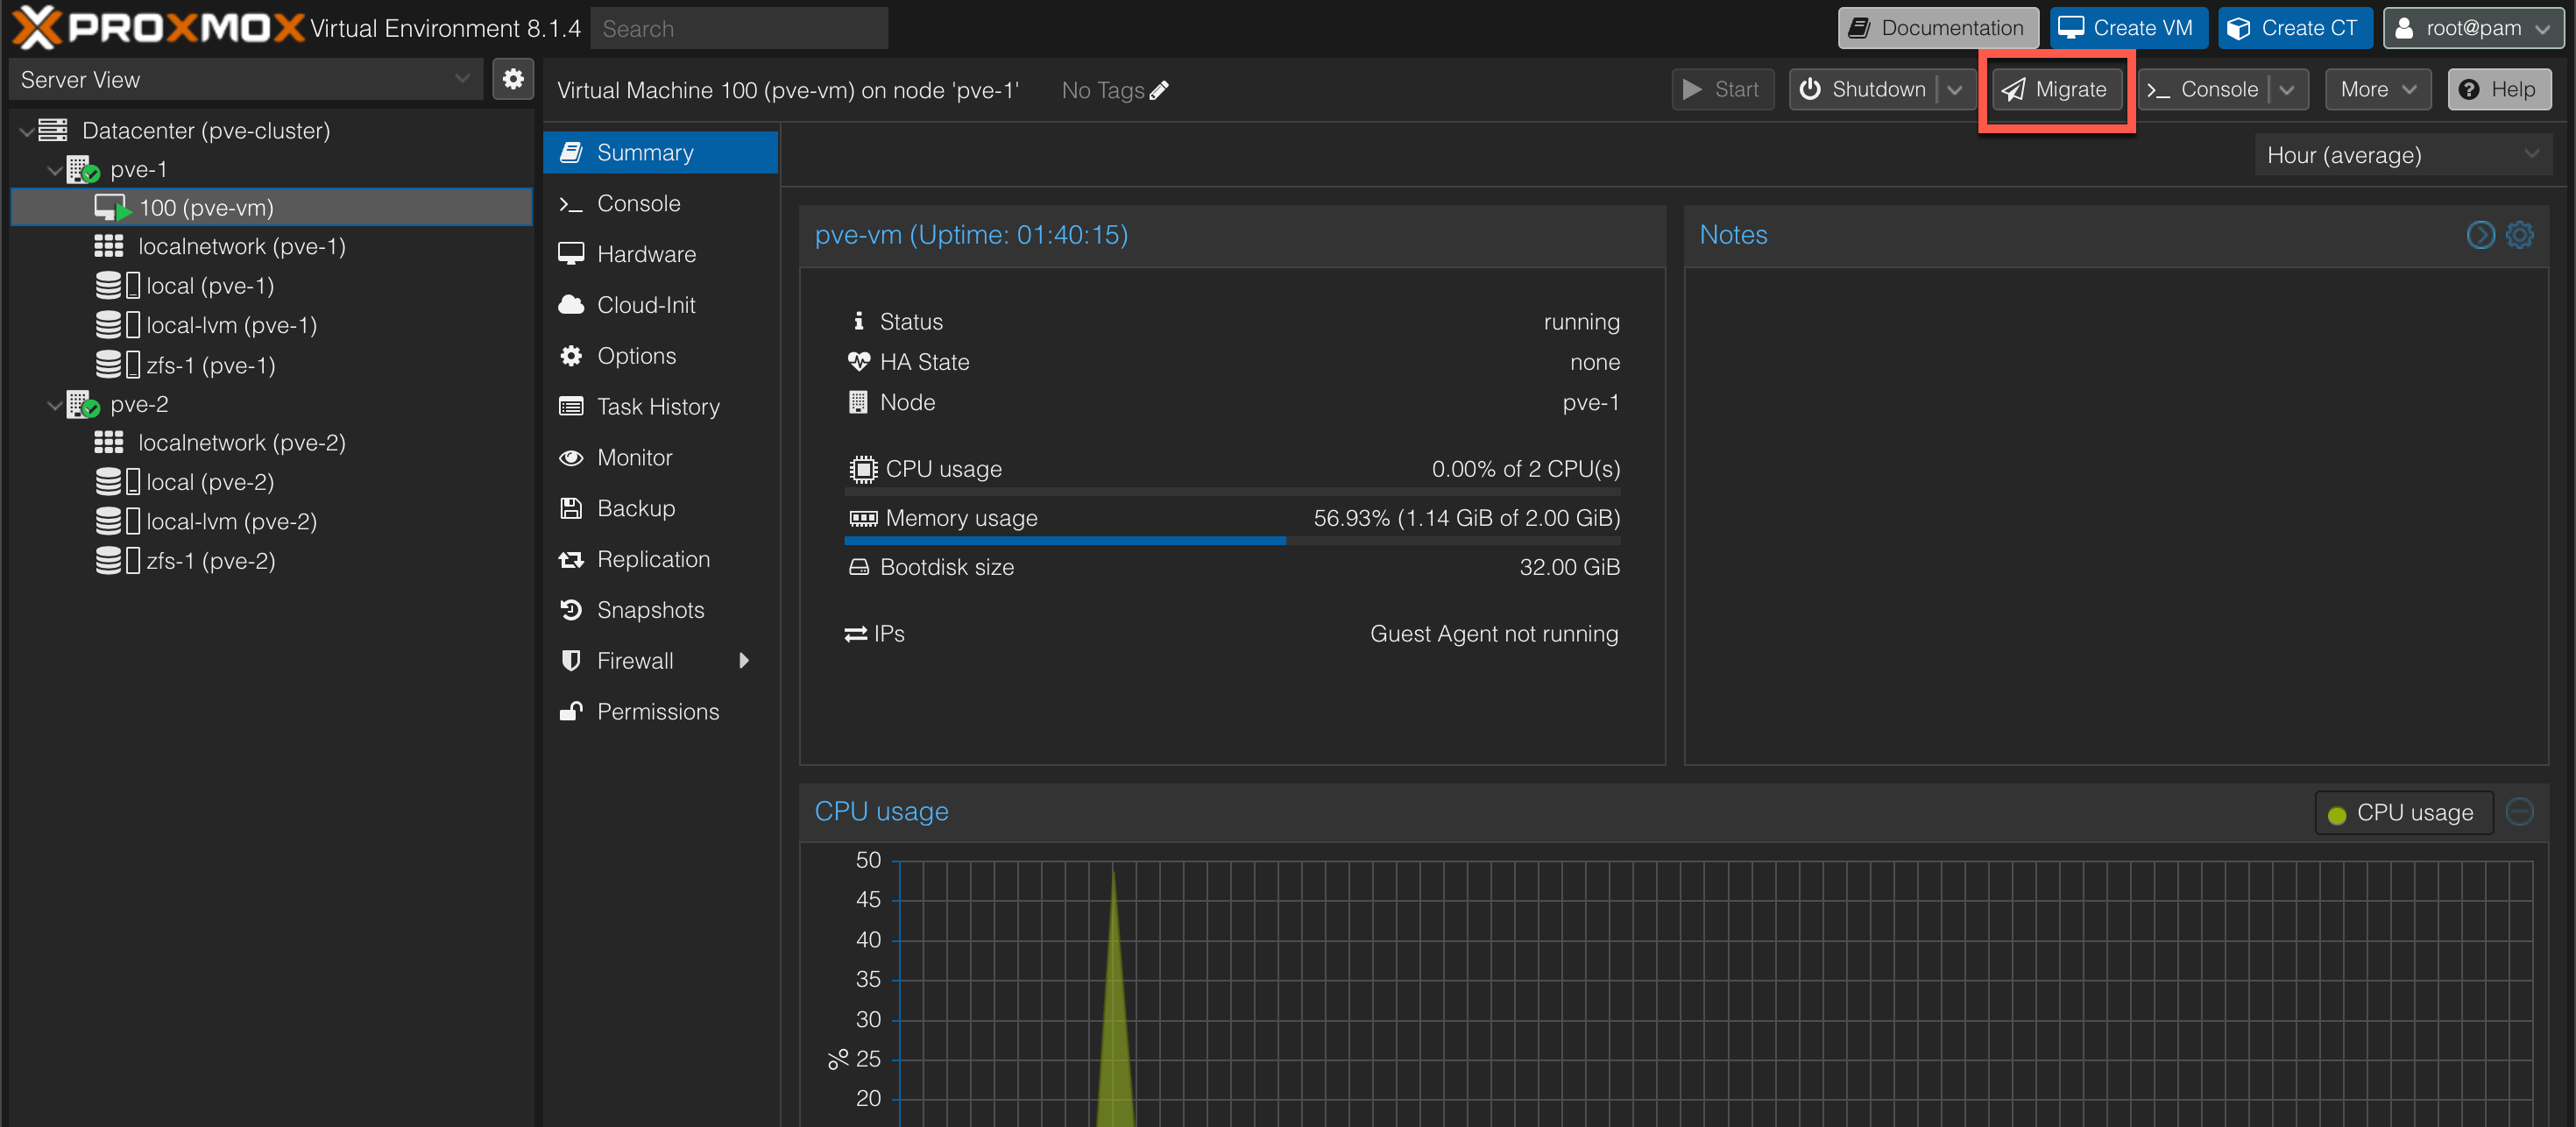
The VM pve-vm exists on the pve-1 host and is running on the local zfs-1 pool. We have a corresponding zfs-1 pool on the host pve-2 which will be used for VM storage on that host.
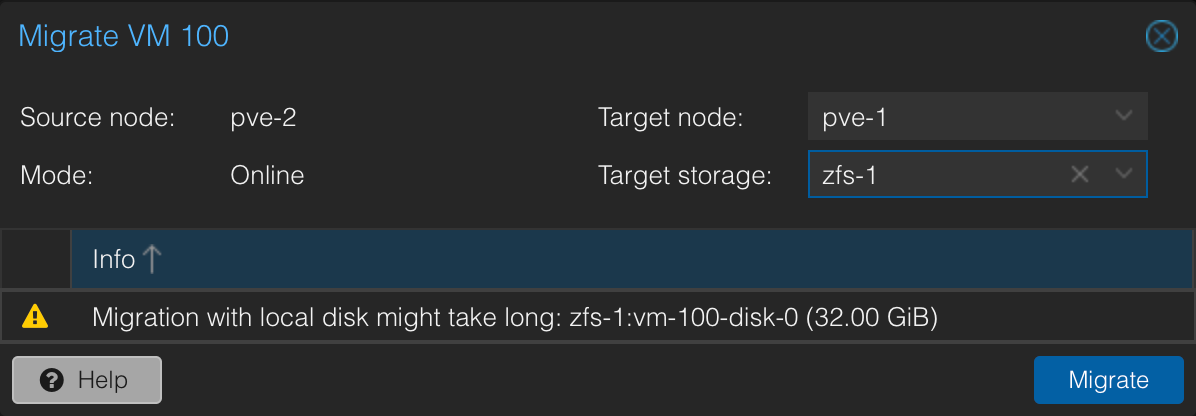
We'll head over to the VM and hit the Migrate button
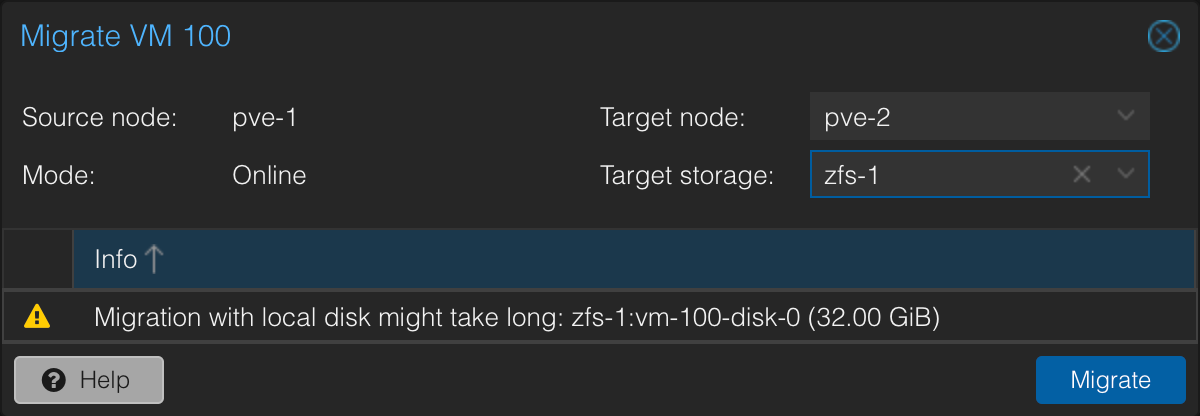
A dialog box appears letting us select the node to migrate to and the storage
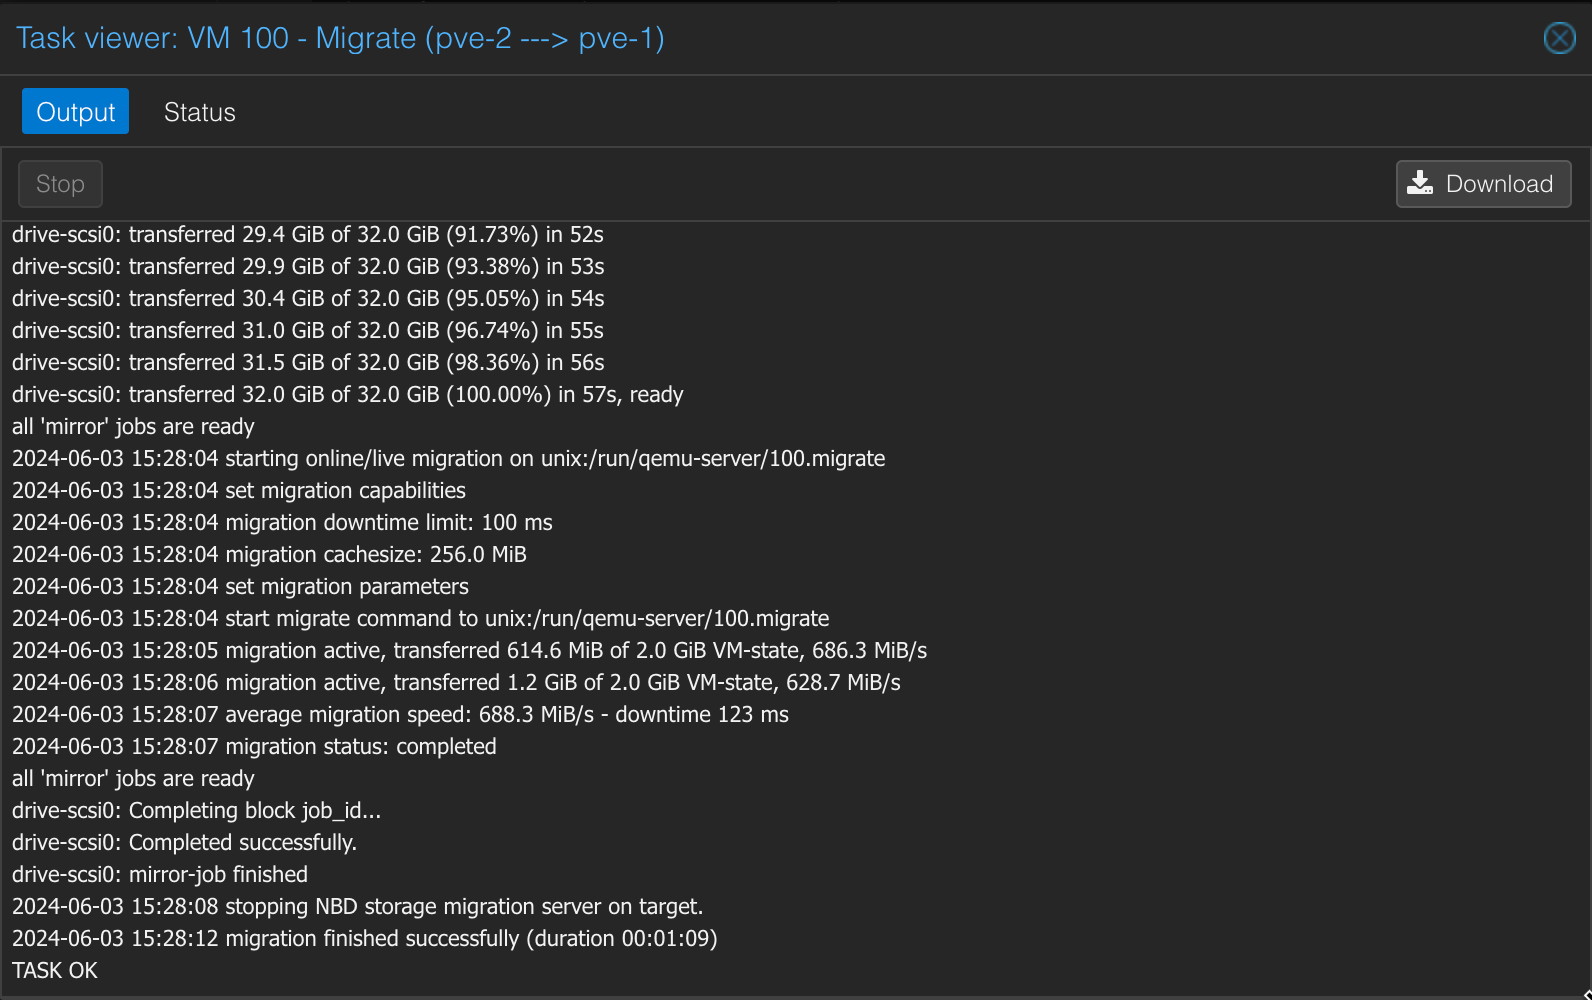
When the migration starts we can follow the progress
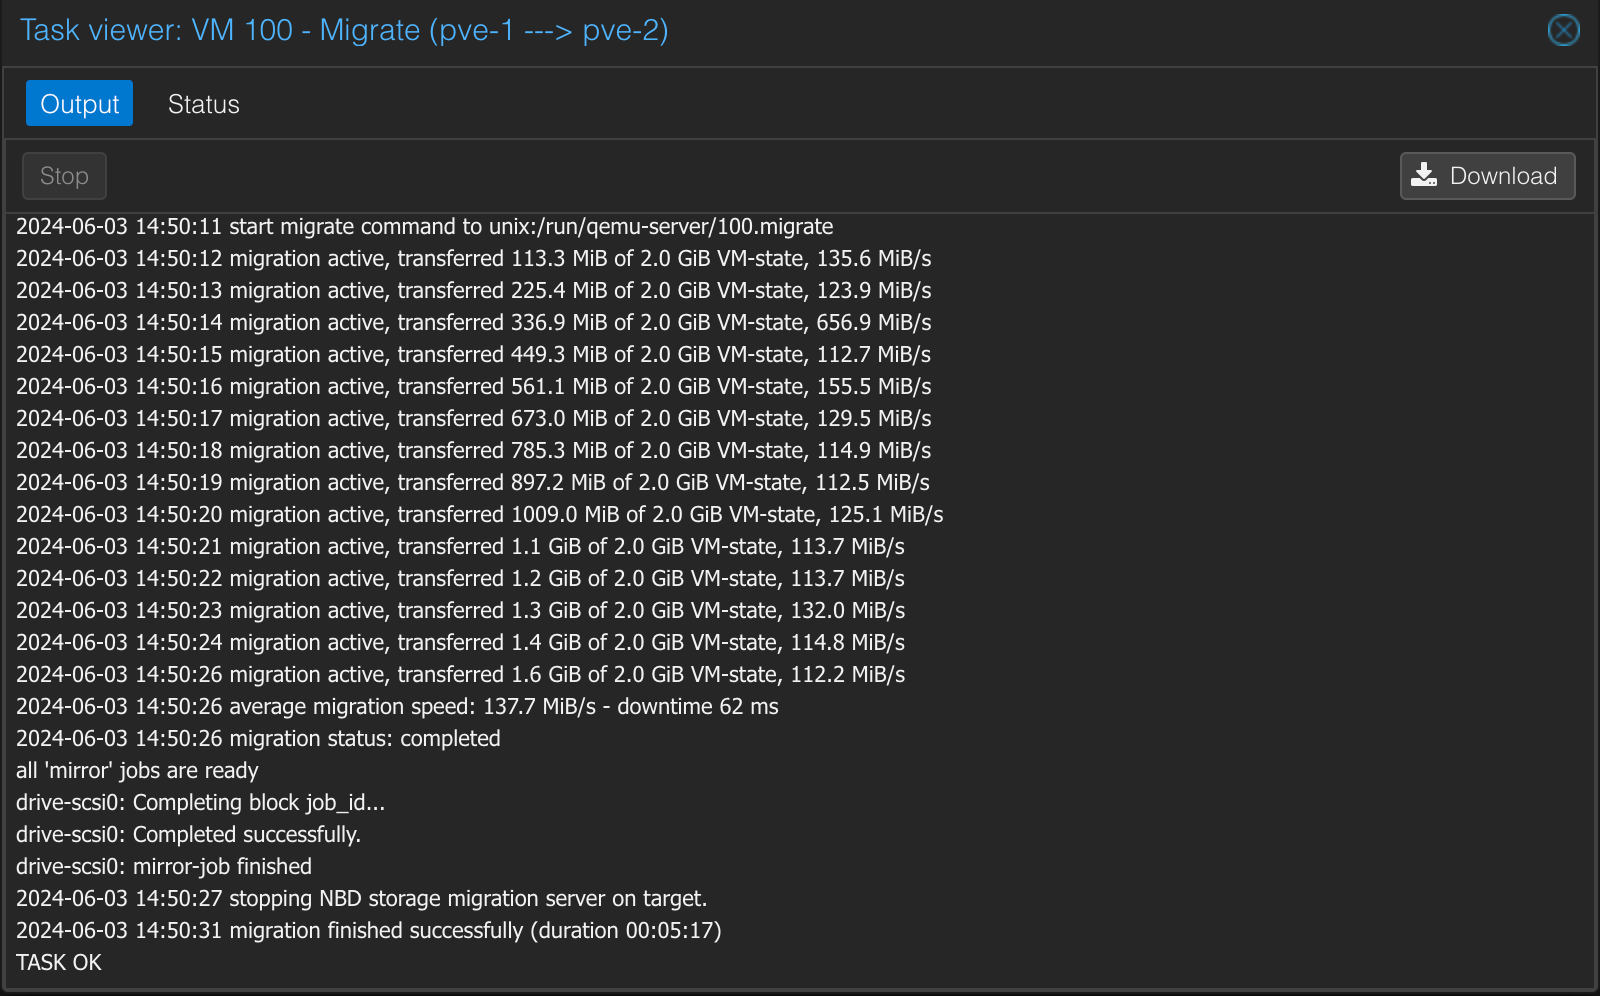
As we can see this migration took over 5 minutes to complete for a 32 GiB VM.
At this point we haven't done anything to set the migration network, nor have we configured replication so the migration was done over the management network which runs on 1 GbE.
We'll wait with the replication part as I would like to test the difference by switching the migration network.
Configuring the migration network
As we discussed the migration is now happening on the same network as the Cluster traffic which is using our management network. As the cluster traffic is latency sensitive, and since we want to utilize our faster 25 GbE network interface, we will configure PVE to use a different interface for our Migration network.
The migration network is configured as a network with a CIDR notation in the /etc/pve/datacenter.cfg file
To configure the Migration network we'll need to perform two tasks.
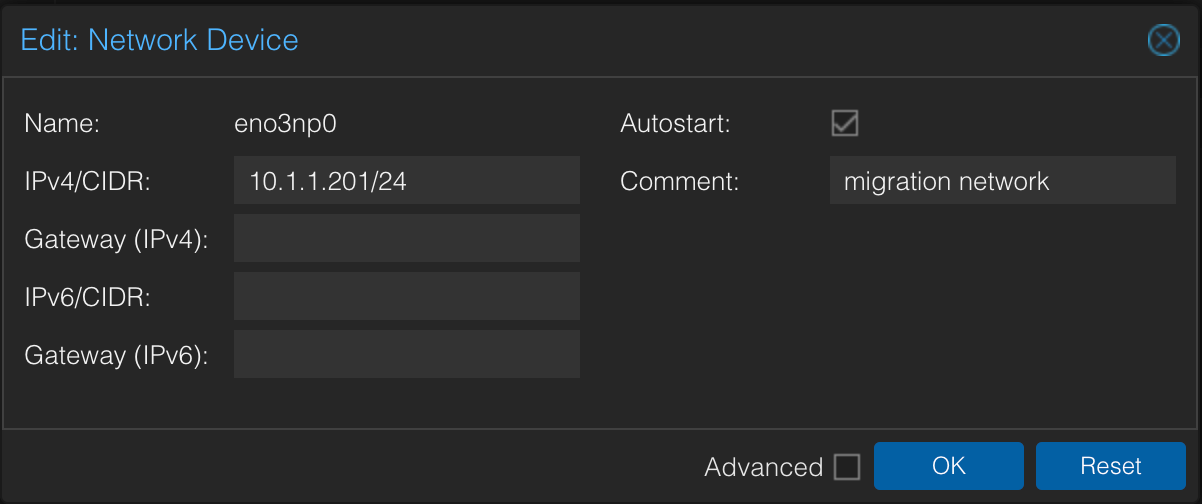
First we'll have to configure the interface on each node. We'll use the UI for this, but it could also be done by editing the /etc/network/interfaces file
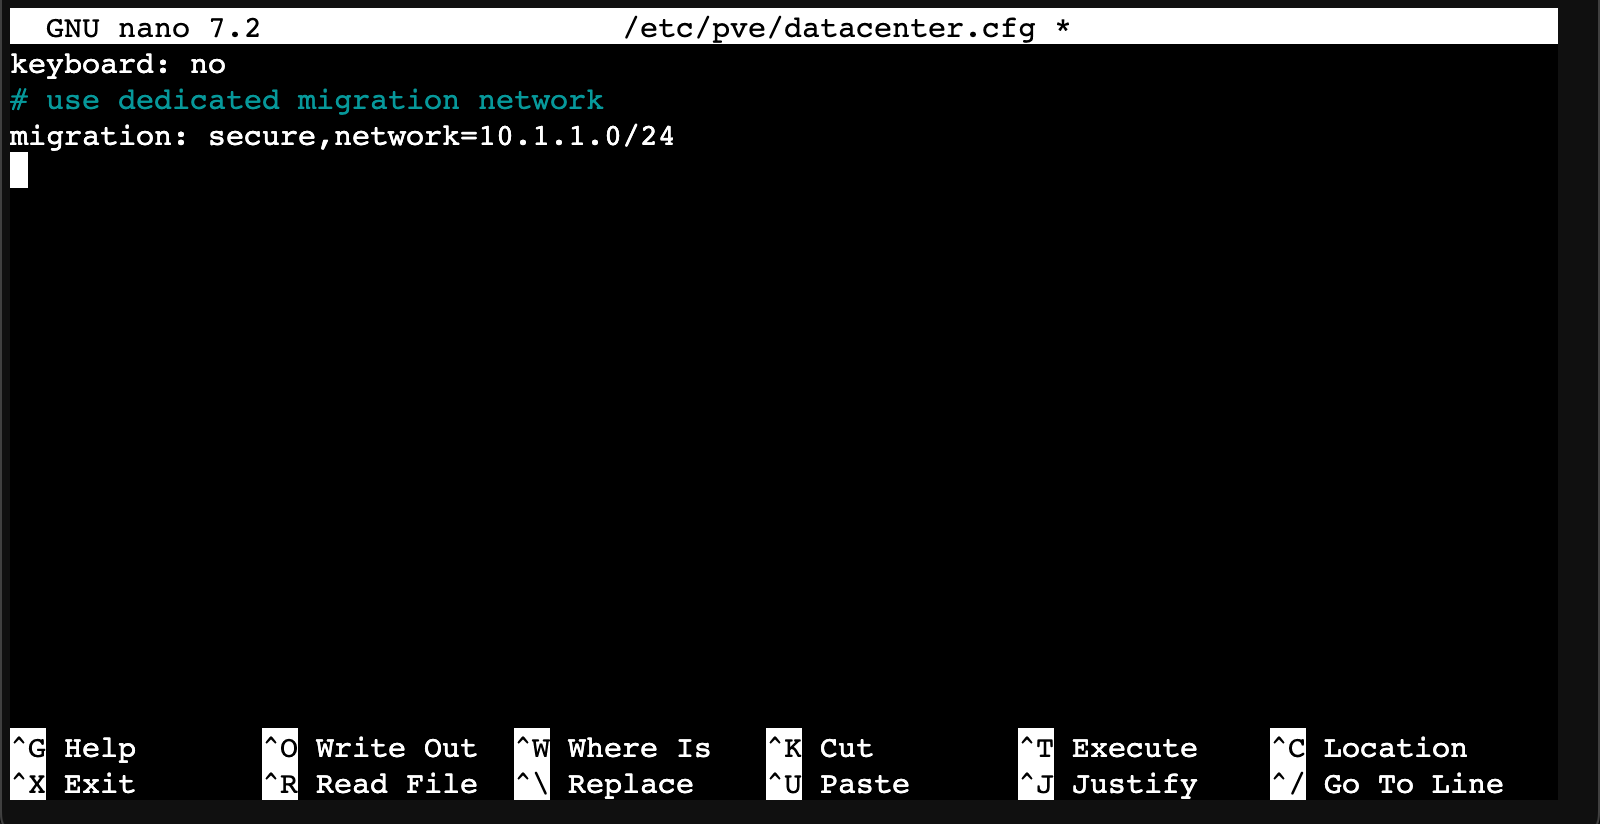
Second is to edit the migration settings in the /etc/pve/datacenter.cfg file. What we want to add is the migration line
1# use dedicated migration network
2migration: secure,network=10.1.1.0/24
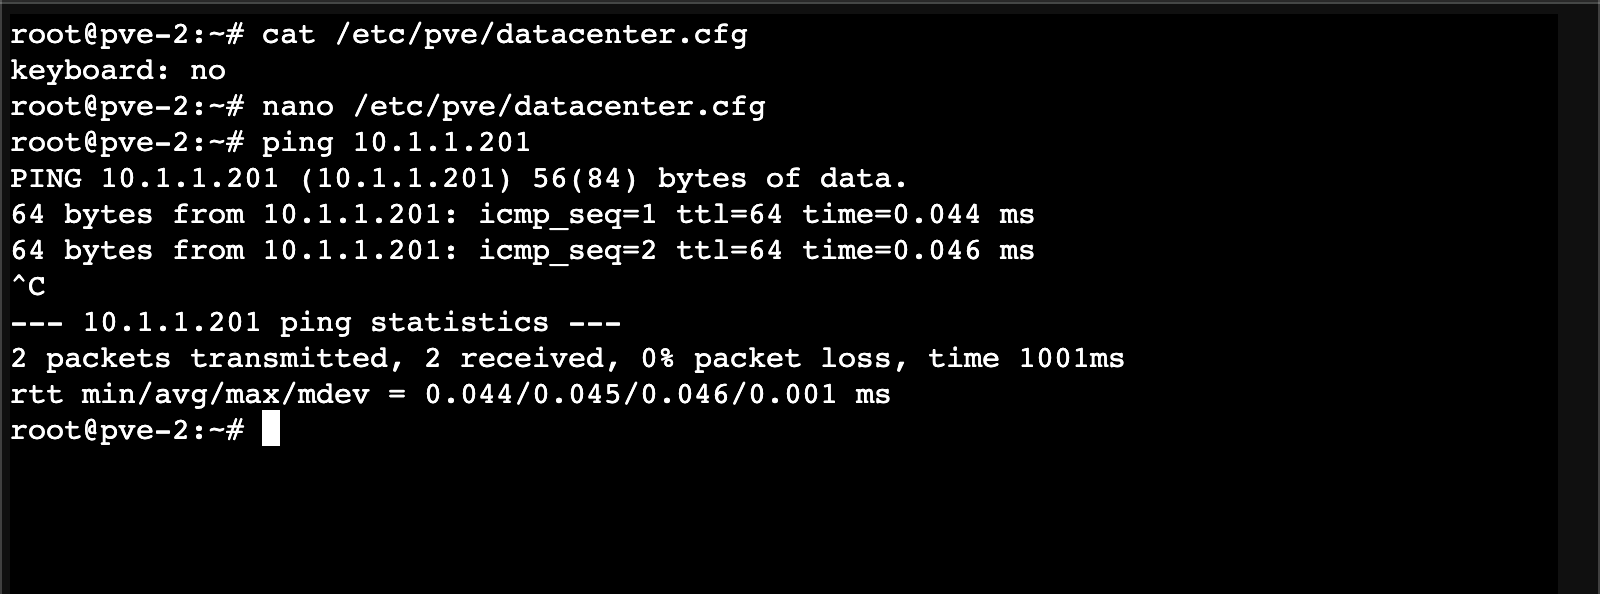
Now, after editing this let's also verify that the nodes can reach eachother on this network
Test new migration
So with that in place let's migrate the VM back to the first host to see if there's any differences
As we can see the migration finished in around 1 minute with a much higher average migration speed than before, but still not near the theoretical limit. Obviously there's more to it than just the network interfaces. There's the cable between, but more importantly we have the physical disks that's in place which also will affect the throughput. We won't dig any further in this at this point, but we have at least verified that we're now running migrations on the faster network.
Configure the replication
Now, let's take a look at how to configure ZFS replication for our VM, which will indeed help our migrations going forward.
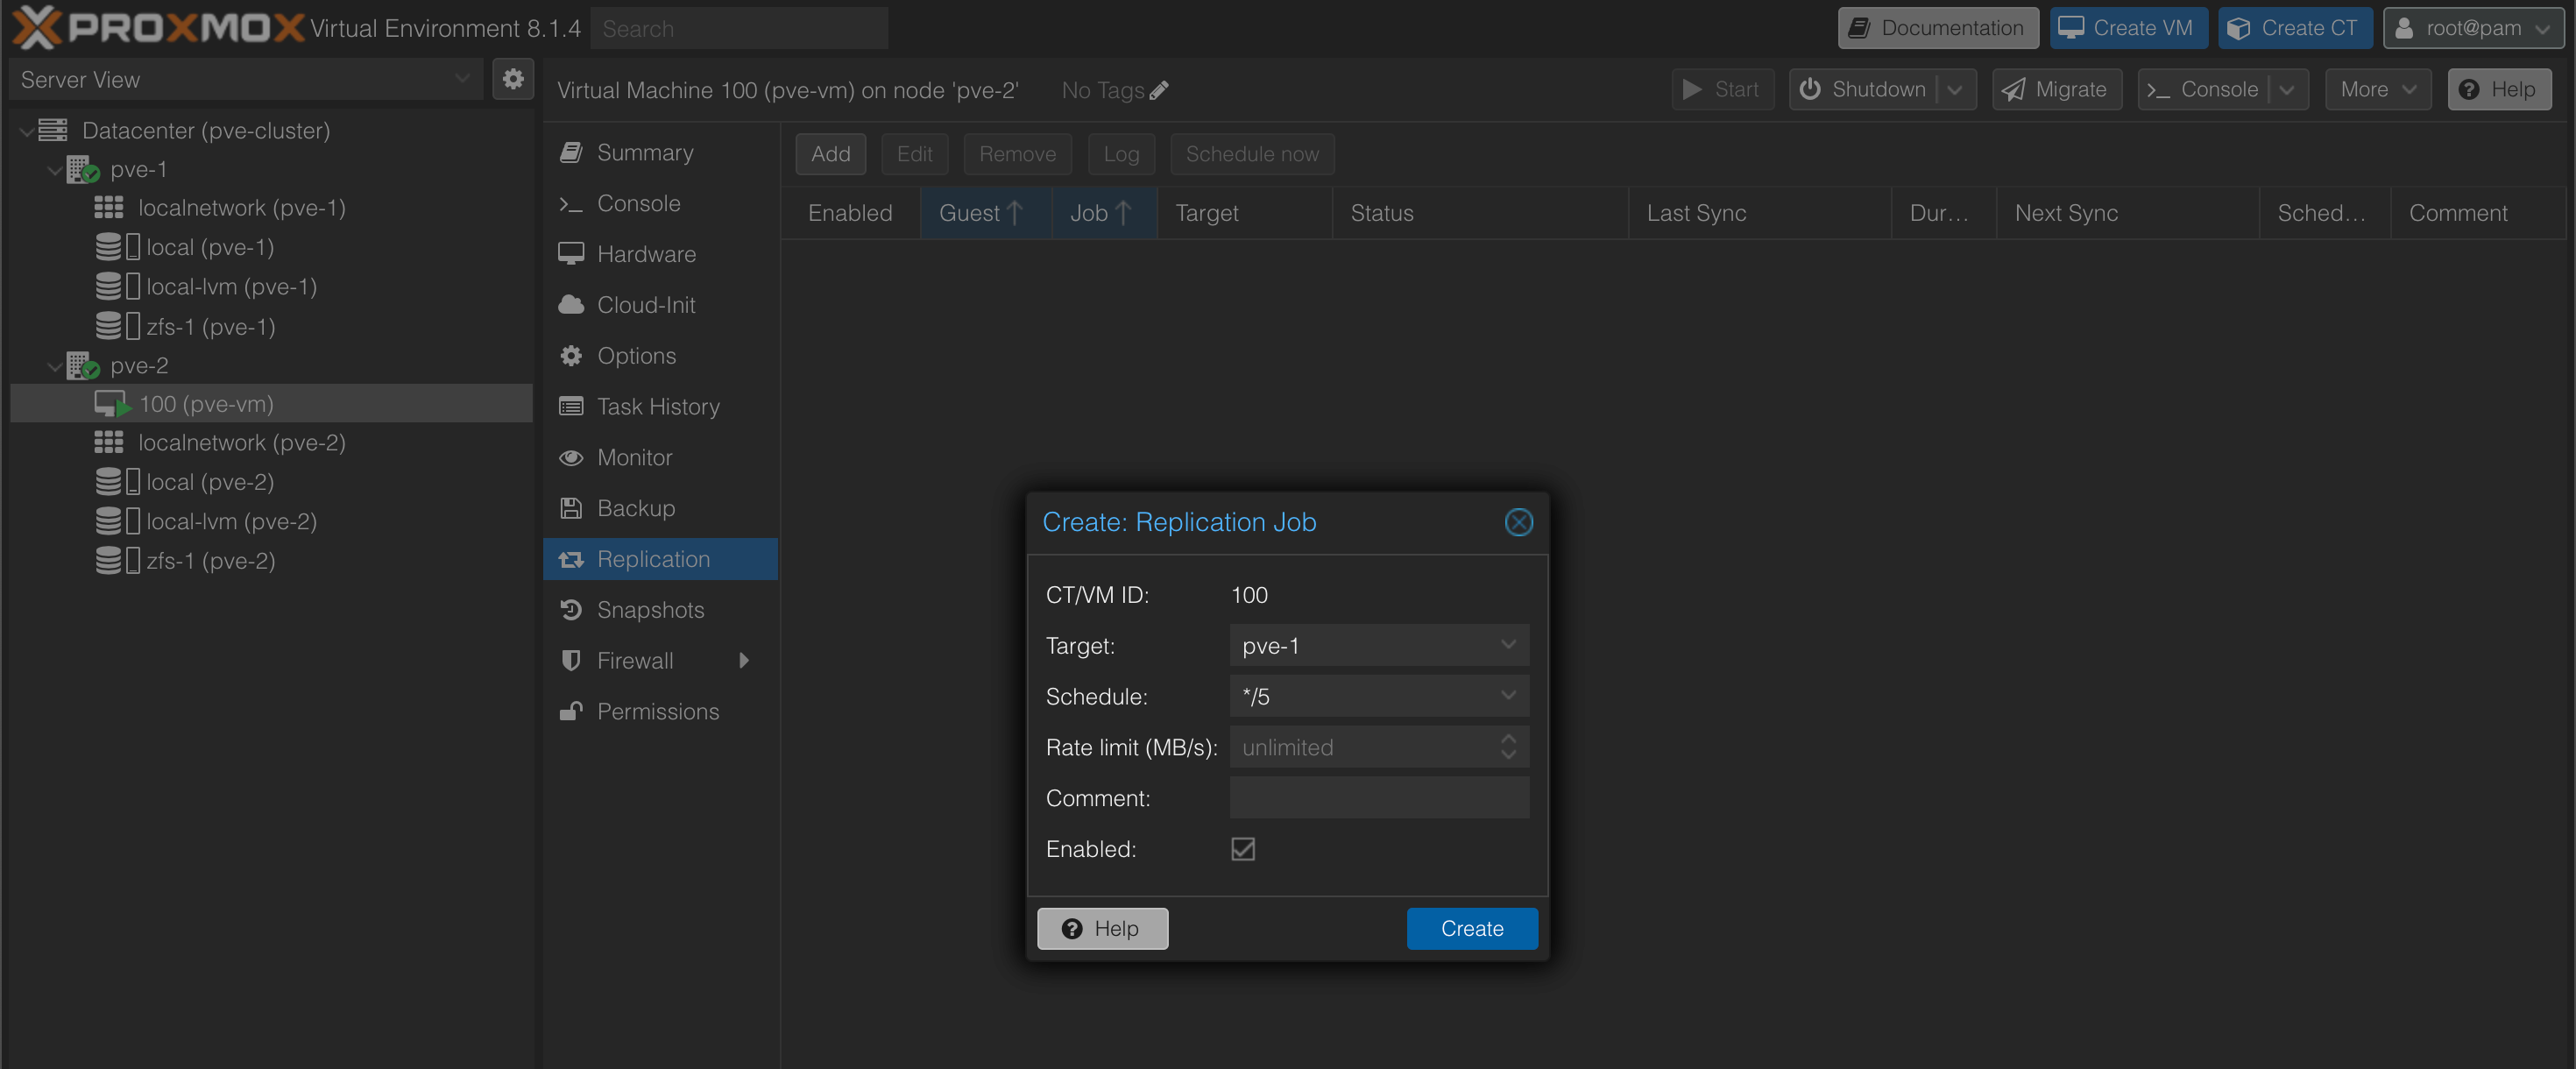
Replication is set per VM and is done in the Replication menu. By hitting the Add button we'll get to set the replication target and schedule as well as a rate limit. A prereq for our zfs replication is that a ZFS pool with the same name exists on the target
After the replication has been created we can see the status of it in the Replication view
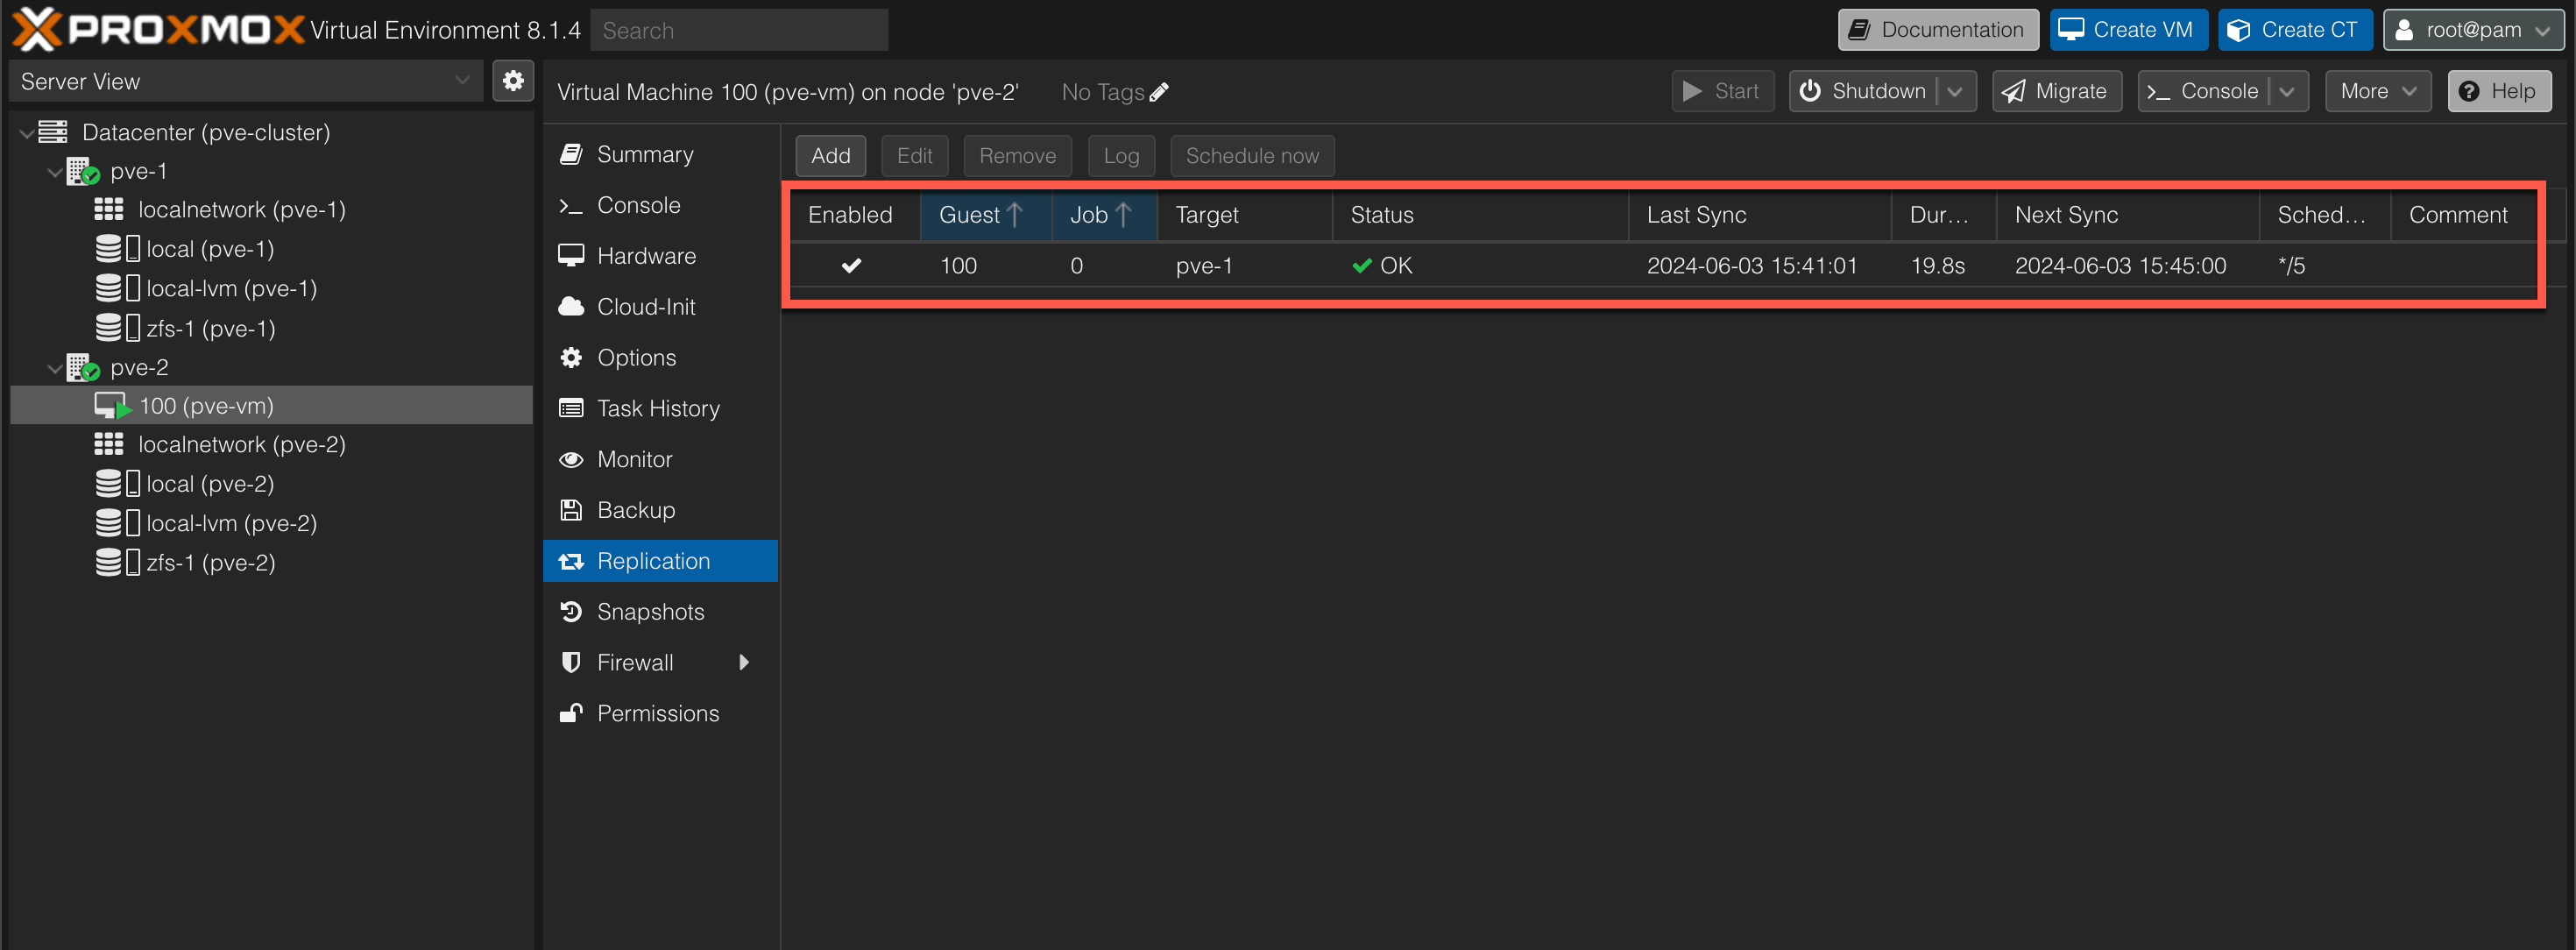
In this example we have set the replication to occur every 5 minutes. The status of the last sync was successful, and the duration was just shy of 20 seconds.
After waiting for 5 minutes we can check the status of the next replication
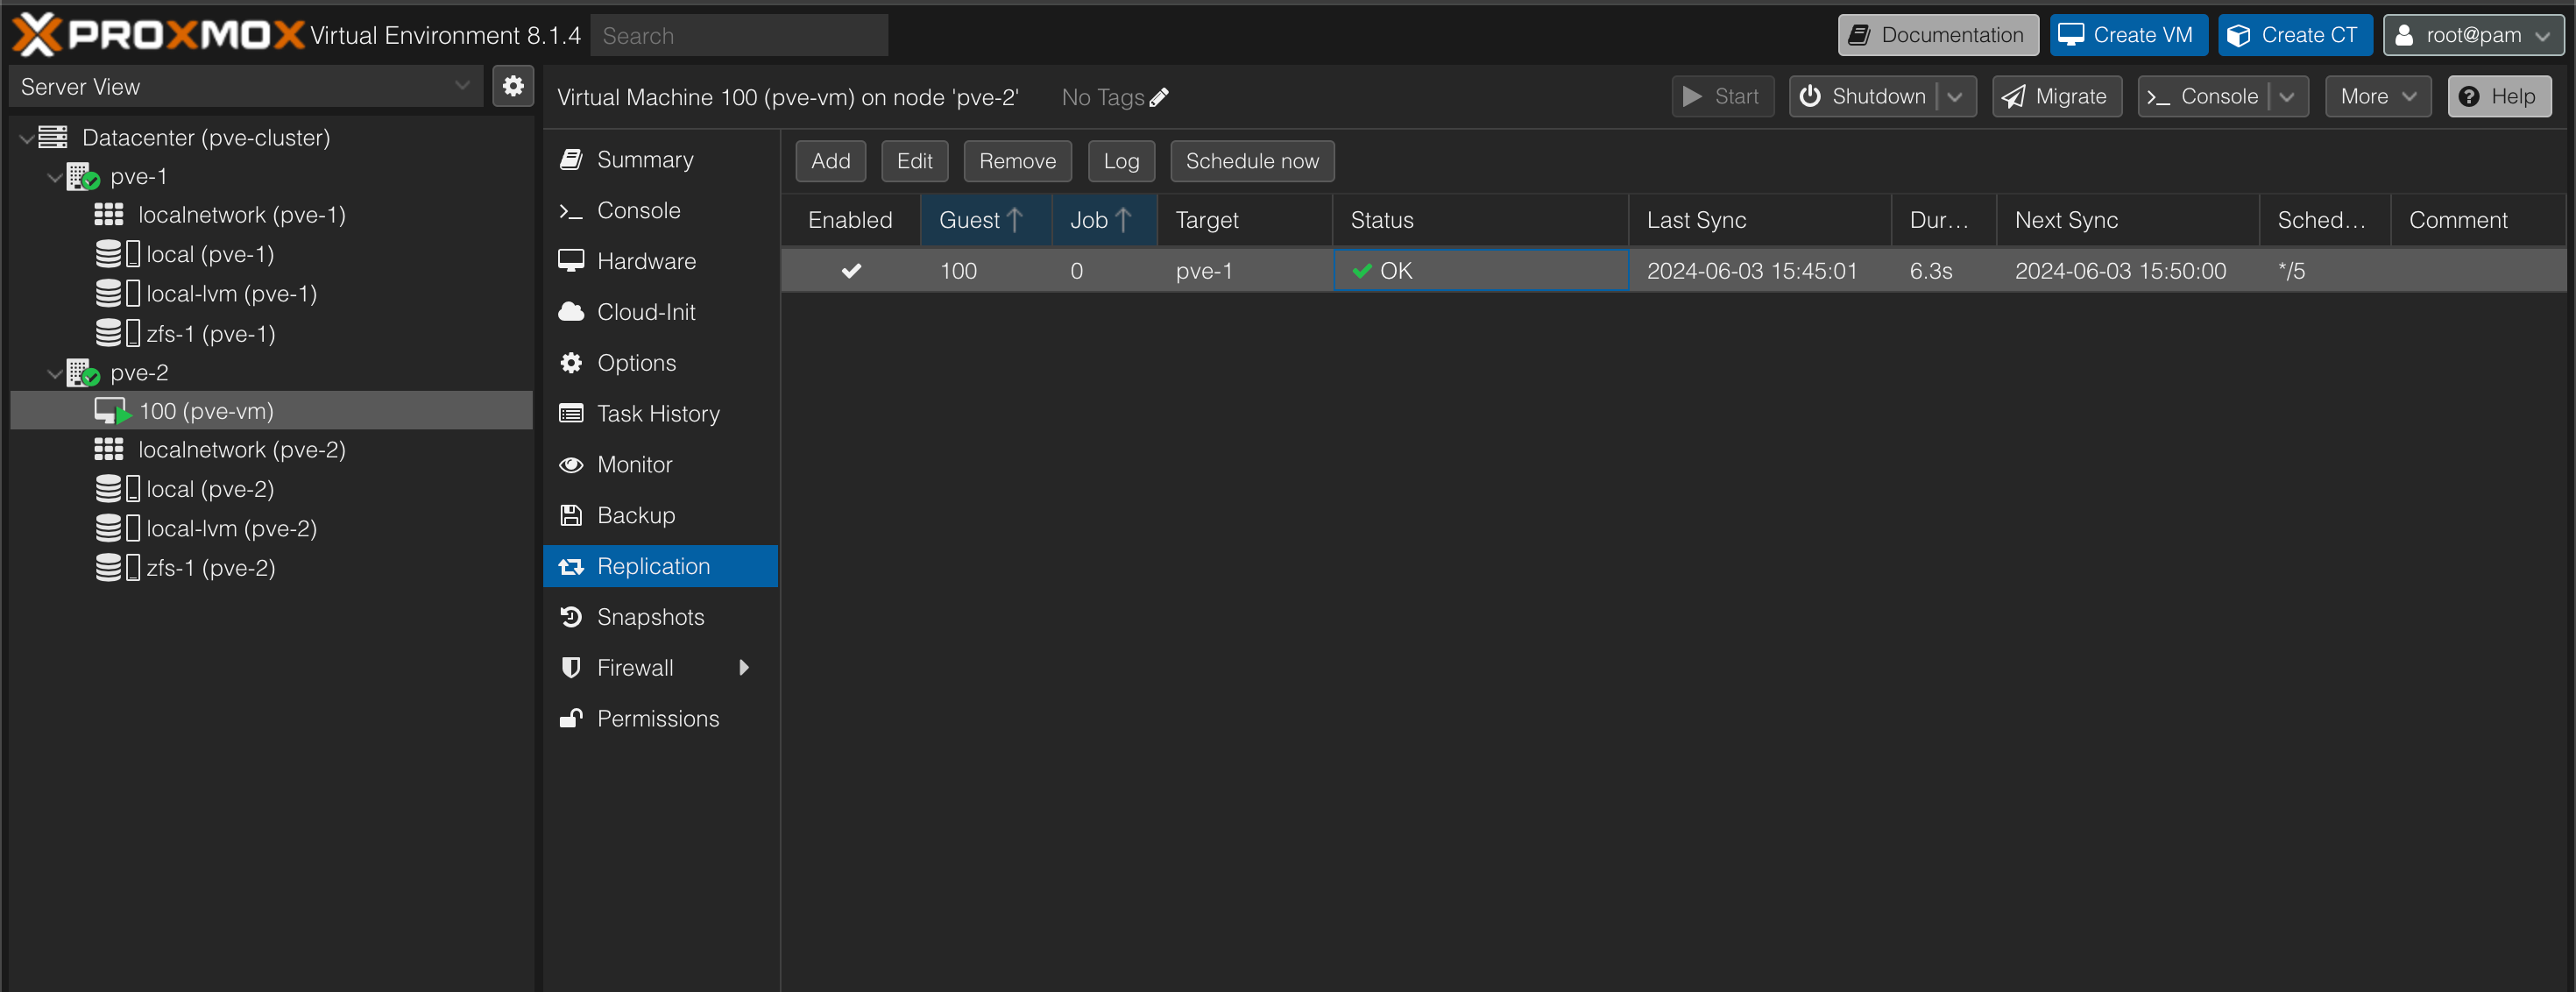
The duration is now down to just above 6 seconds.
Test migration
Now let's see if setting up replication had any affect on the migration of VMs
We'll replicate the VM from the pve-2 host to pve-1
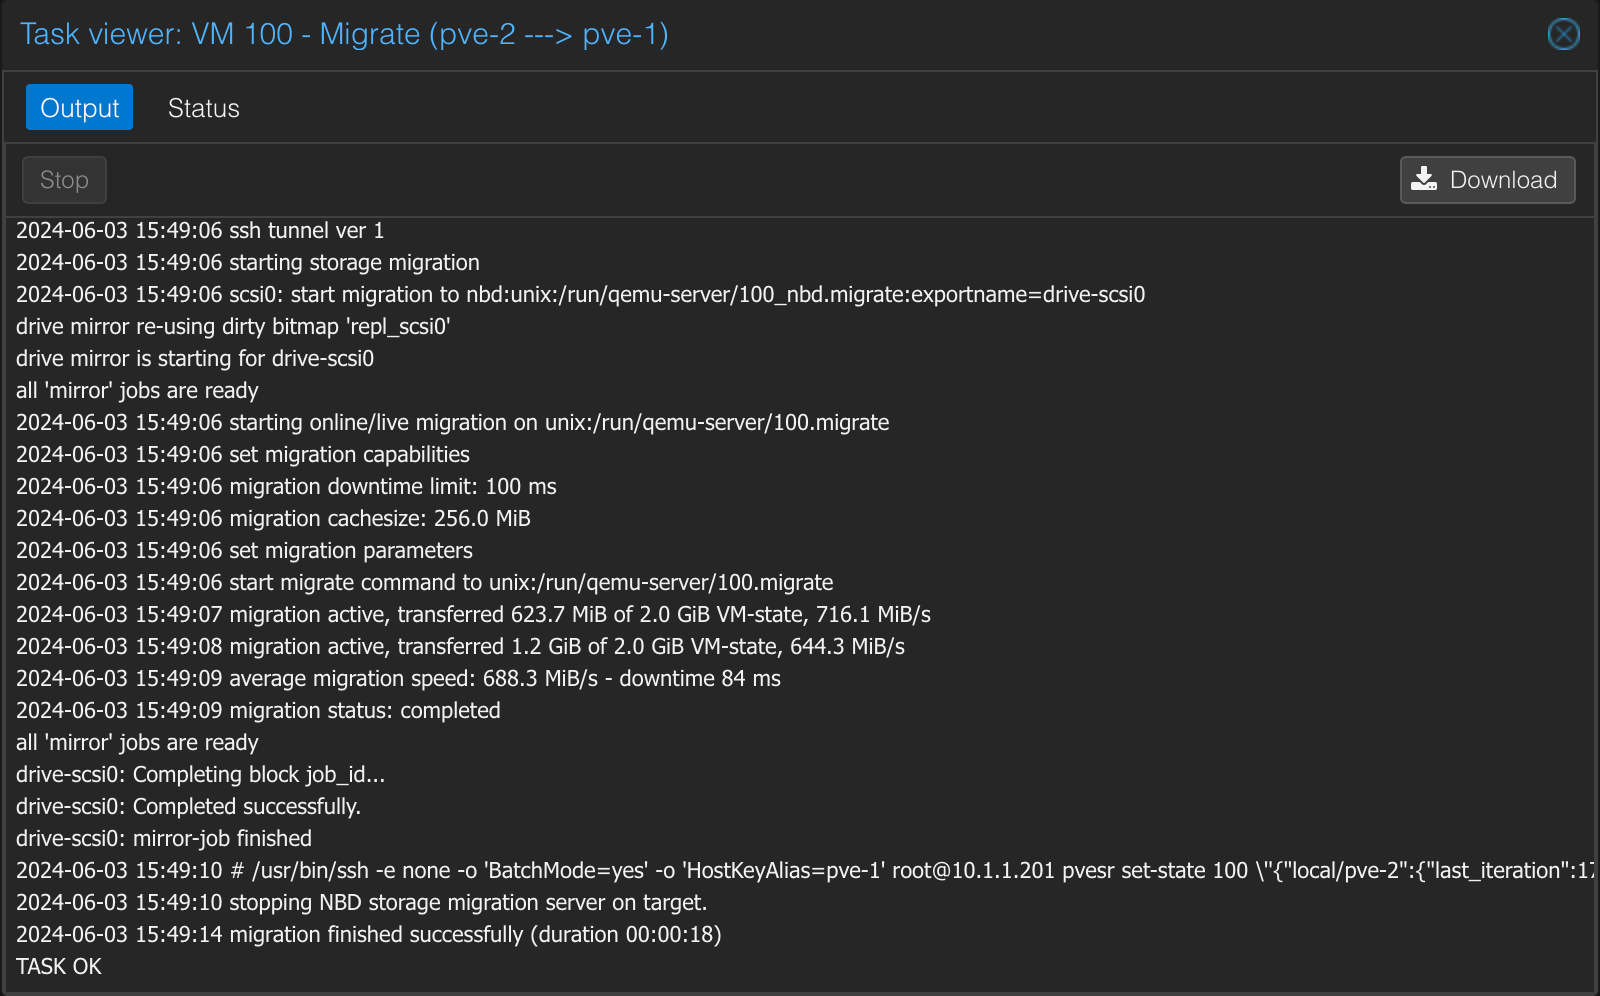
As we can see the migration is much faster now since there's a lot less data to migrate. We're down to 18 seconds
What's even nicer is that the replication has now been switched so that it's replicating back to the original host.
Summary
In this post we've seen how to extend our single PVE host installation with a second node to create a cluster. We've tested migrating a VM between host both on the normal cluster network, and then after configuring it, on a migration network. Finally we saw how to add ZFS replication of a VM on a schedule.
In our next post we'll see how to add a witness component to the mix which will let us configure High Availability to failover VMs in case of failures.
Thanks for reading.