vSphere with Tanzu - NSX Advanced Load Balancer 22.1
I have previously written about how to deploy the NSX Advanced Load Balancer (aka Avi Vantage) and configured it for use with vSphere with Tanzu.
As things move quickly in tech I wanted to do a refresh of this, as there has been a change in the Avi UI and in the vSphere workload management setup.
This post will focus on the deployment and initial configuration of the Avi load balancer, in an upcoming post we will take a look at the vSphere with Tanzu setup.
I will use the latest version available of Avi (22.1.1) in this post, please make sure you verify the compatibility between the Load balancer and the solution you'll use it for.
From the latest vSphere with Tanzu release notes the NSX Advanced Load Balancer version mentioned is 20.1.7. If you want official confirmation on the compatibility you should consider contacting VMware support
The official documentation describes the compatibility for integrating with different Ecosystems
Lab environment
In this post we'll work with a vSphere environment, based on vCenter and ESXi on the 7.0 Update 3f version.
The networks in play here, and where we'll see stuff being deployed are as follows:
| Subnet | VLAN | GW | Comment |
|---|---|---|---|
| 192.168.160.0/24 | 160 | 192.168.160.1 | Management network (vCenter, ESXi, Avi controller) |
| 192.168.161.0/24 | 161 | 192.168.161.1 | Frontend/load balancer network (Avi VIPs) |
| 192.168.162.0/24 | 162 | 192.168.162.1 | Workload network (Load balanced workloads/web servers) |
There's routing between these networks and also to the outside world. No firewall rules exists between these.
A simple drawing of the network would be something like the following
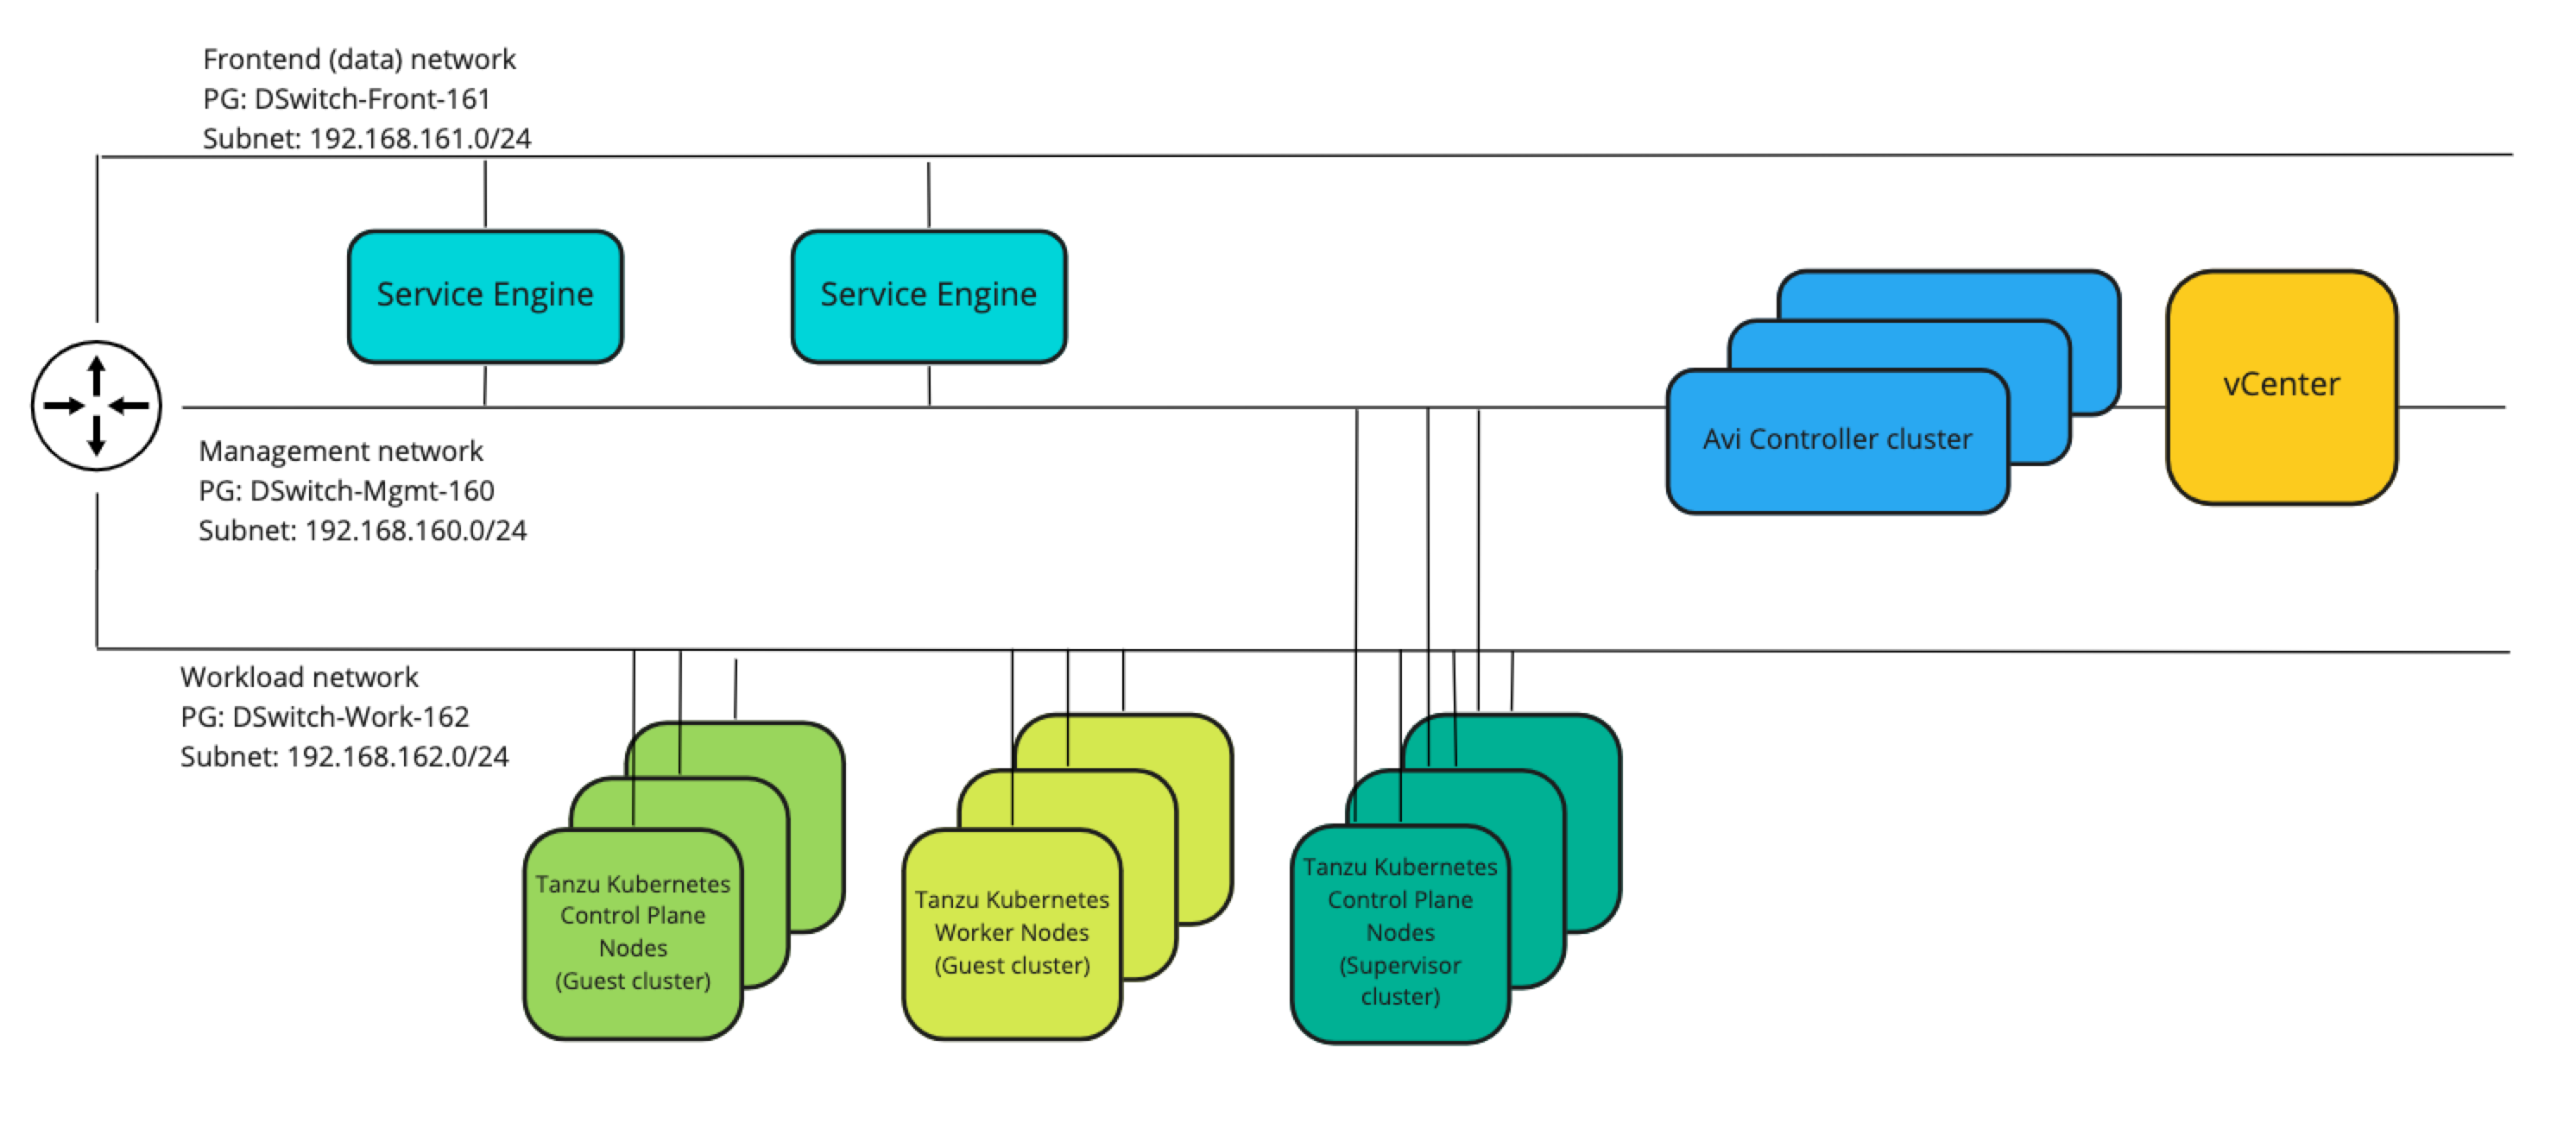
There's also DHCP services available in all of the networks with a scope in each network with the IP range 192.168.16x.100-192.168.16x.199
There's one exception with regards to the networks in use, and that concerns my DNS server which is served from a different network. The three networks mentioned above have access to the DNS services on this server
Deployment
The deployment of the NSX Advanced Load Balancer is done with the Avi controller and the software is downloaded from the Avi Pulse portal or from MyVMware. Note that you'll need to have entitlements in place for getting access to the download.
In this post we'll deploy the controller to a vSphere environment so we'll download the OVA and deploy that in vCenter.
We'll not go through the process of deploying an OVA/OVF template to vCenter as this is pretty straight forward. The only configuration done is to provide the details of the management network for the controller.
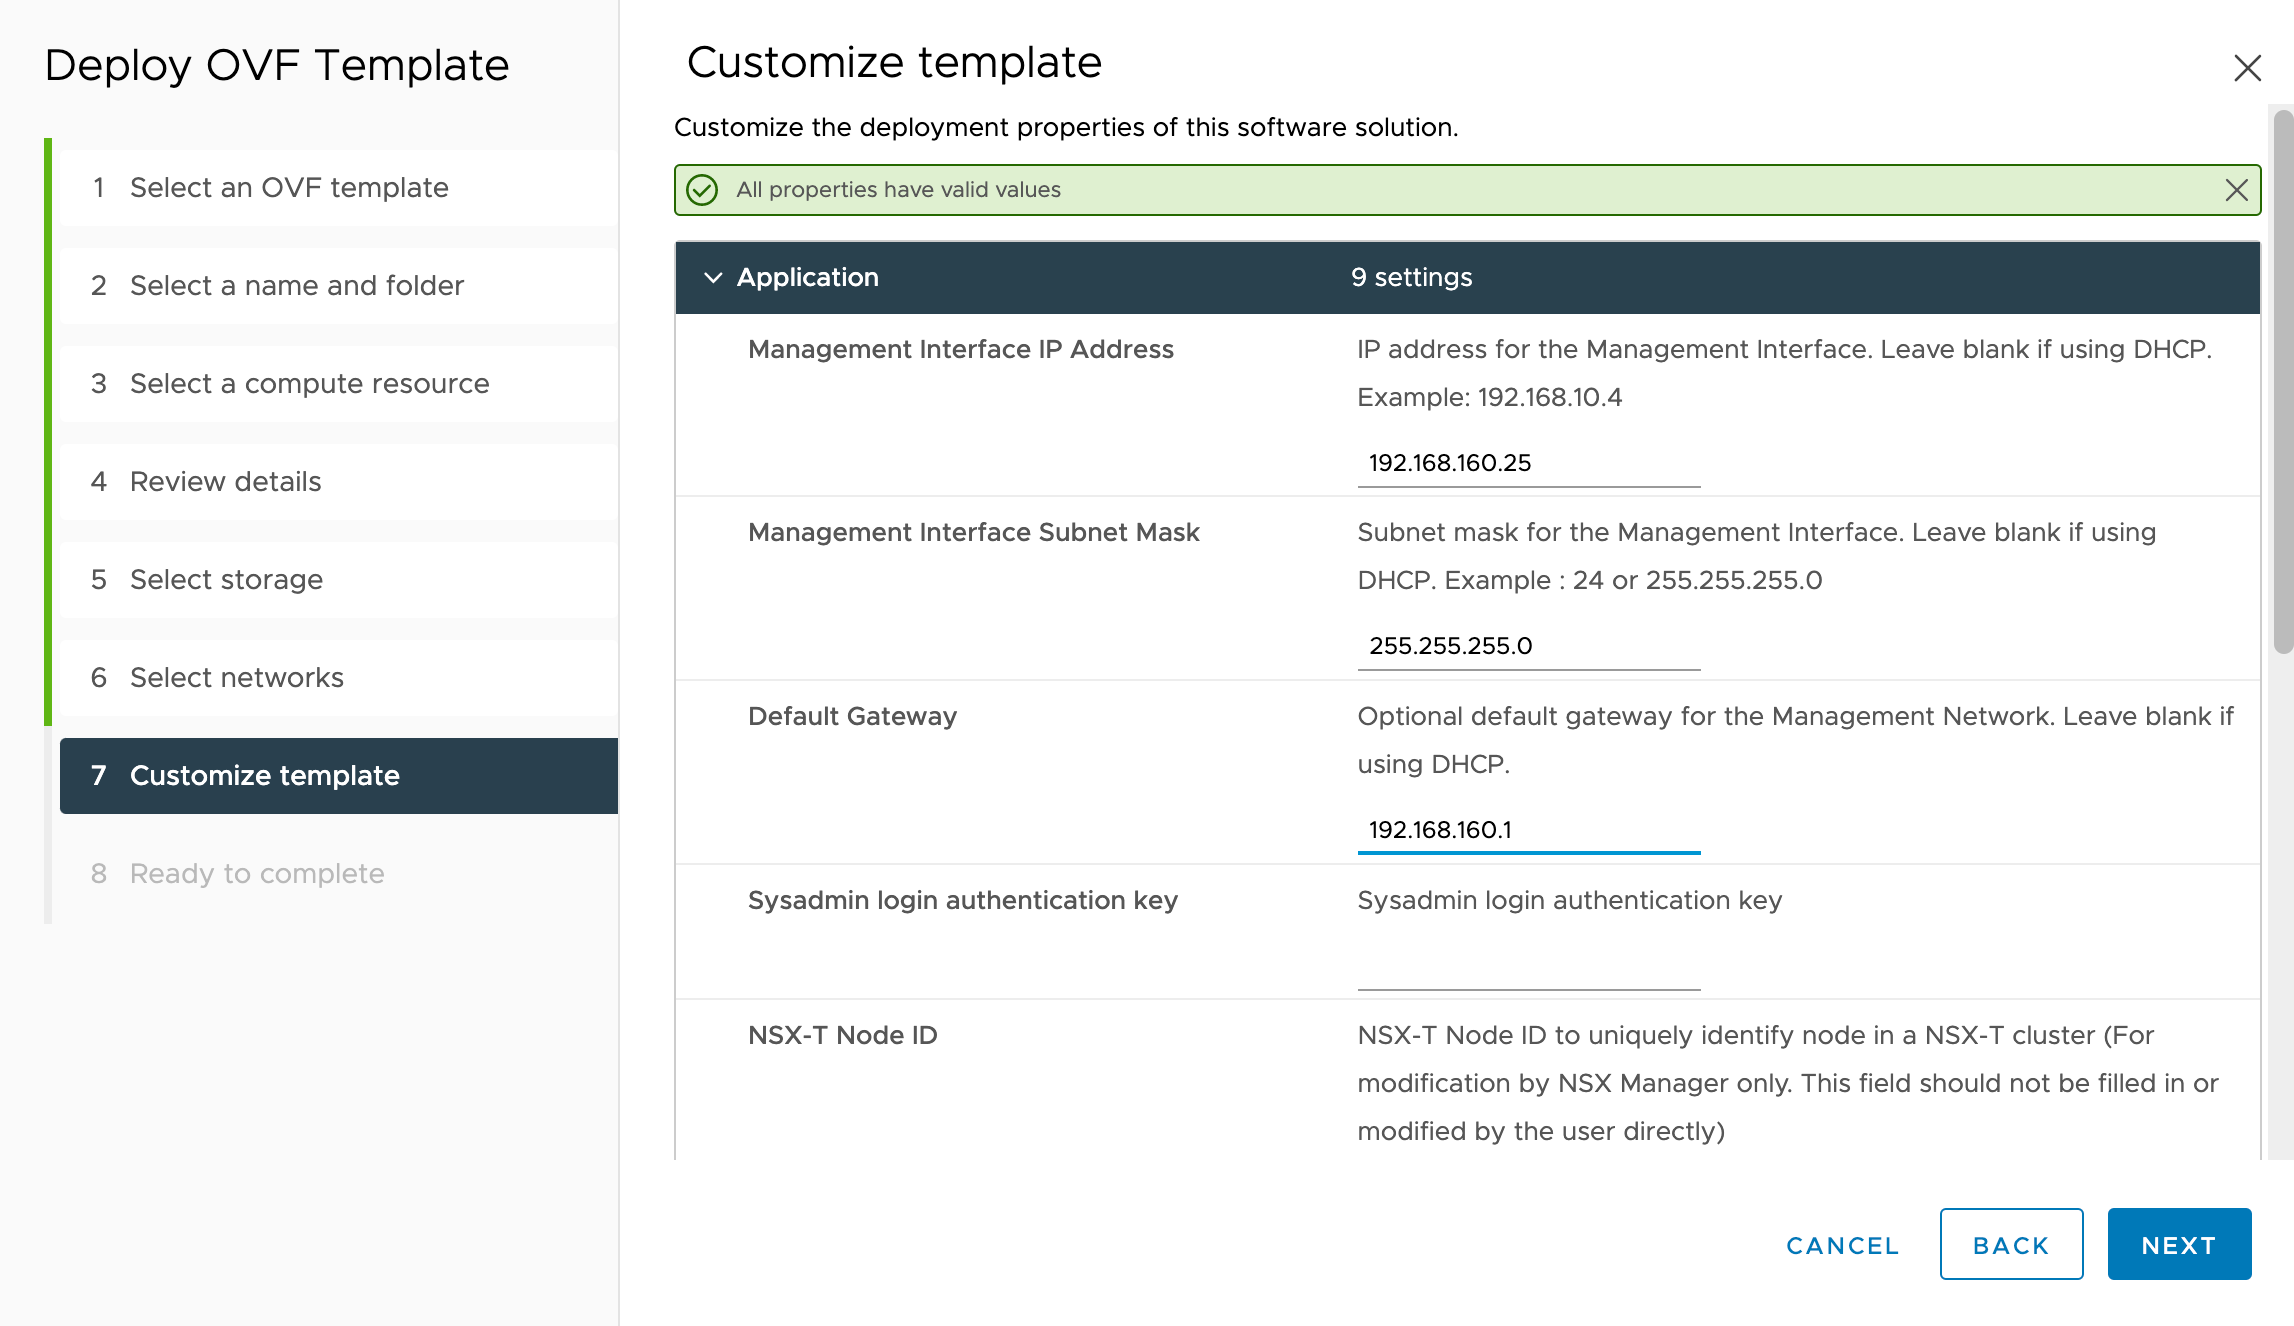
After importing the OVA we can power it and wait for the initial boot. Note that it might take a few minutes before the controller is ready to be configured
Intial configuration
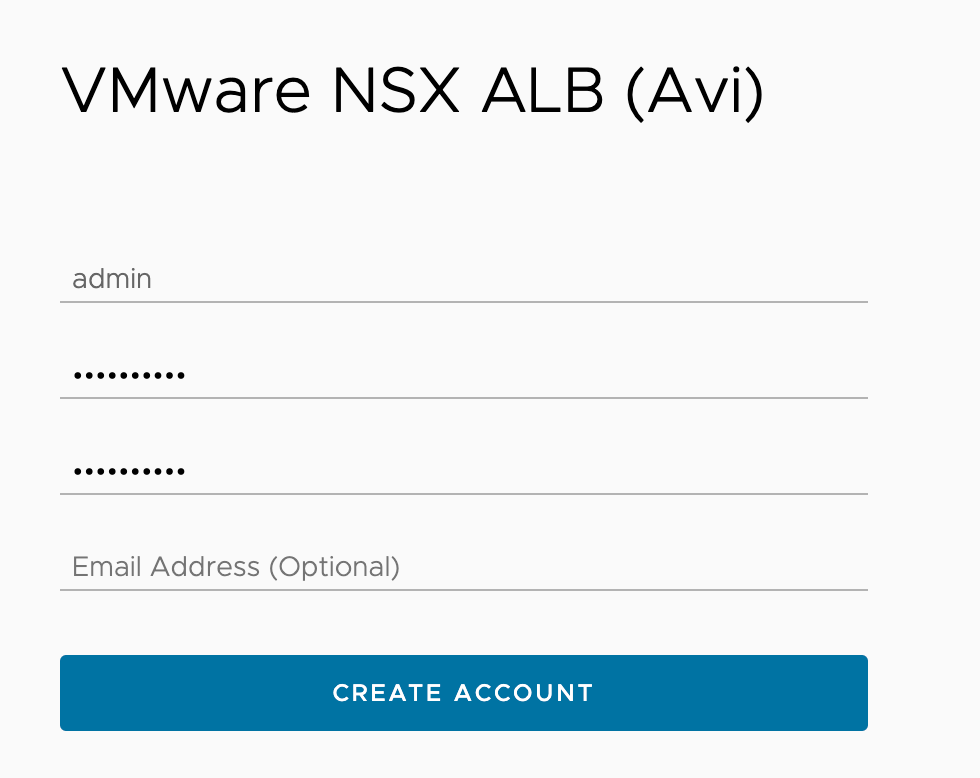
When we visit the controller IP address for the first time (again note that it will take a few minutes before it's ready) we'll have to provide details for the admin account, more specifically which password we want to set
After this we'll provide a passphrase, which are used for exports and backups, and the DNS settings

The next part concerns the SMTP capabilities, which in our case we'll skip
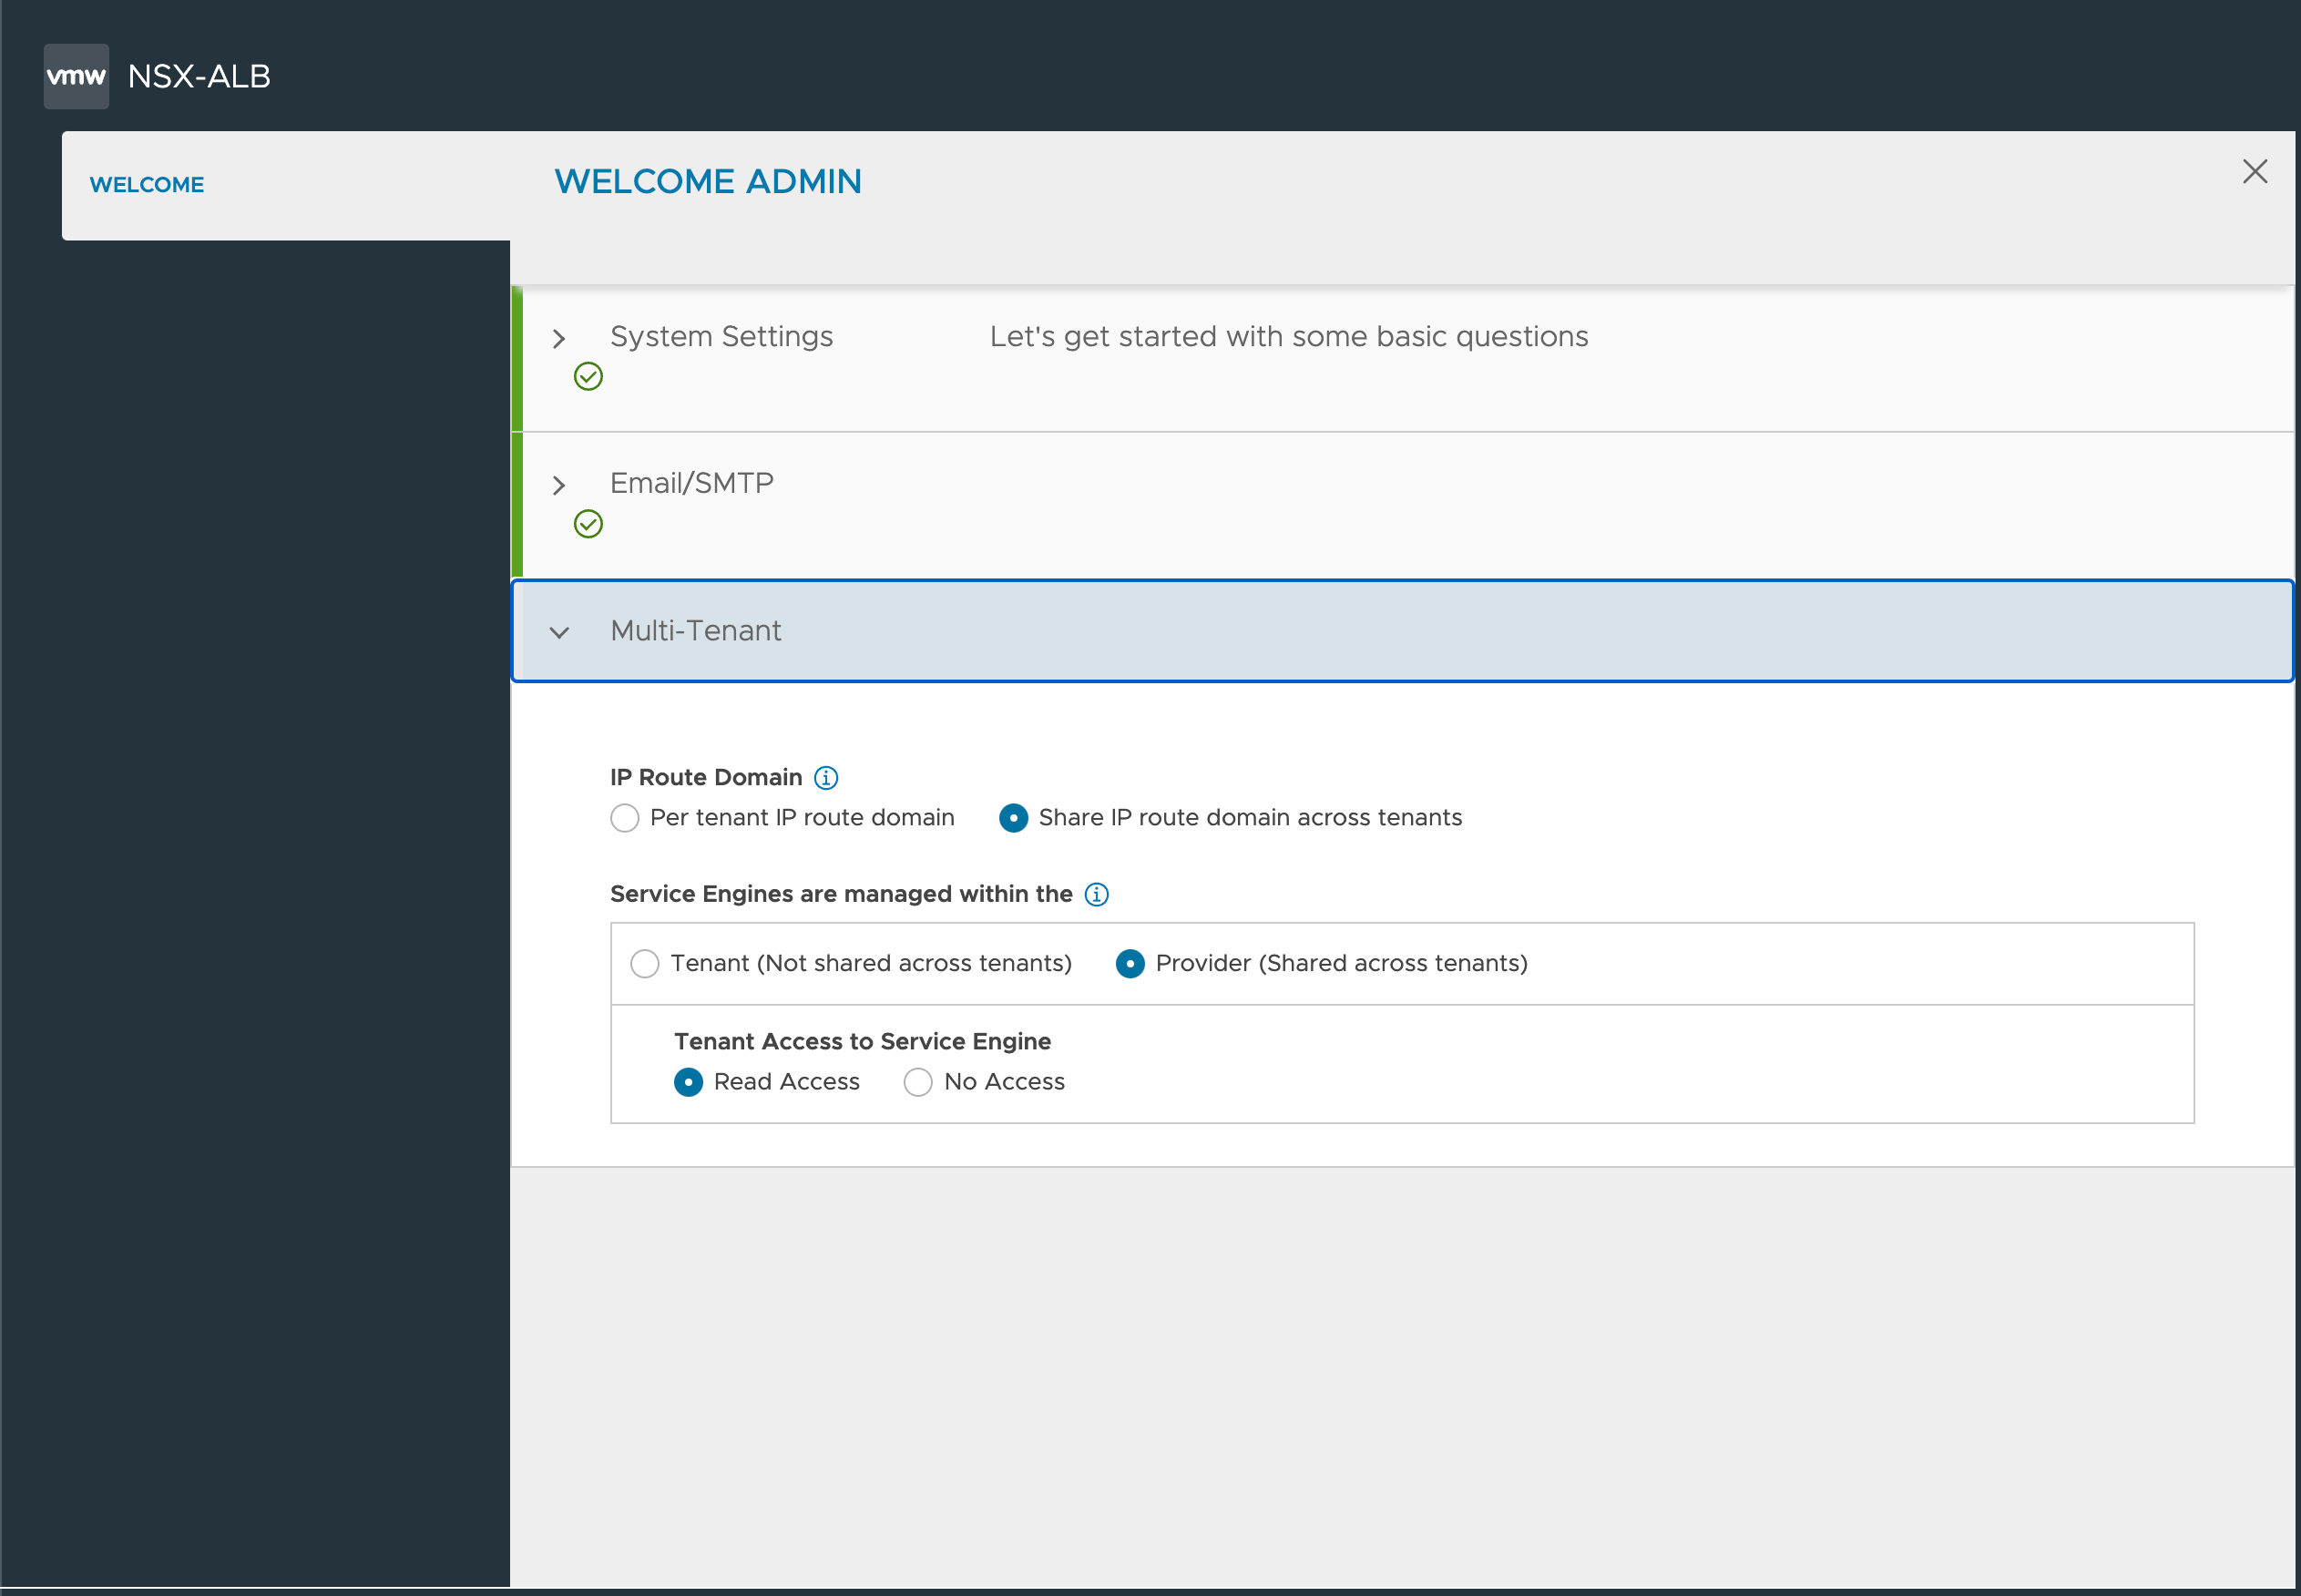
And we have some multi-tenancy capabilities which we'll leave with the defaults
Note that the initial config wizard has an option for configuring the Default cloud after completing the initial wizard. In our case we'll not select this

Avi configuration
After completing the wizard we're ready to proceed with a couple of additional configuration steps
Licensing
The first thing we'll do is to set up the correct license. By experience I really recommend that you change this first thing (if you're not planning on purchasing the Enterprise with Cloud services license) as it could be a real pain to do it later on when Avi is in use. I've previously blogged about that here.
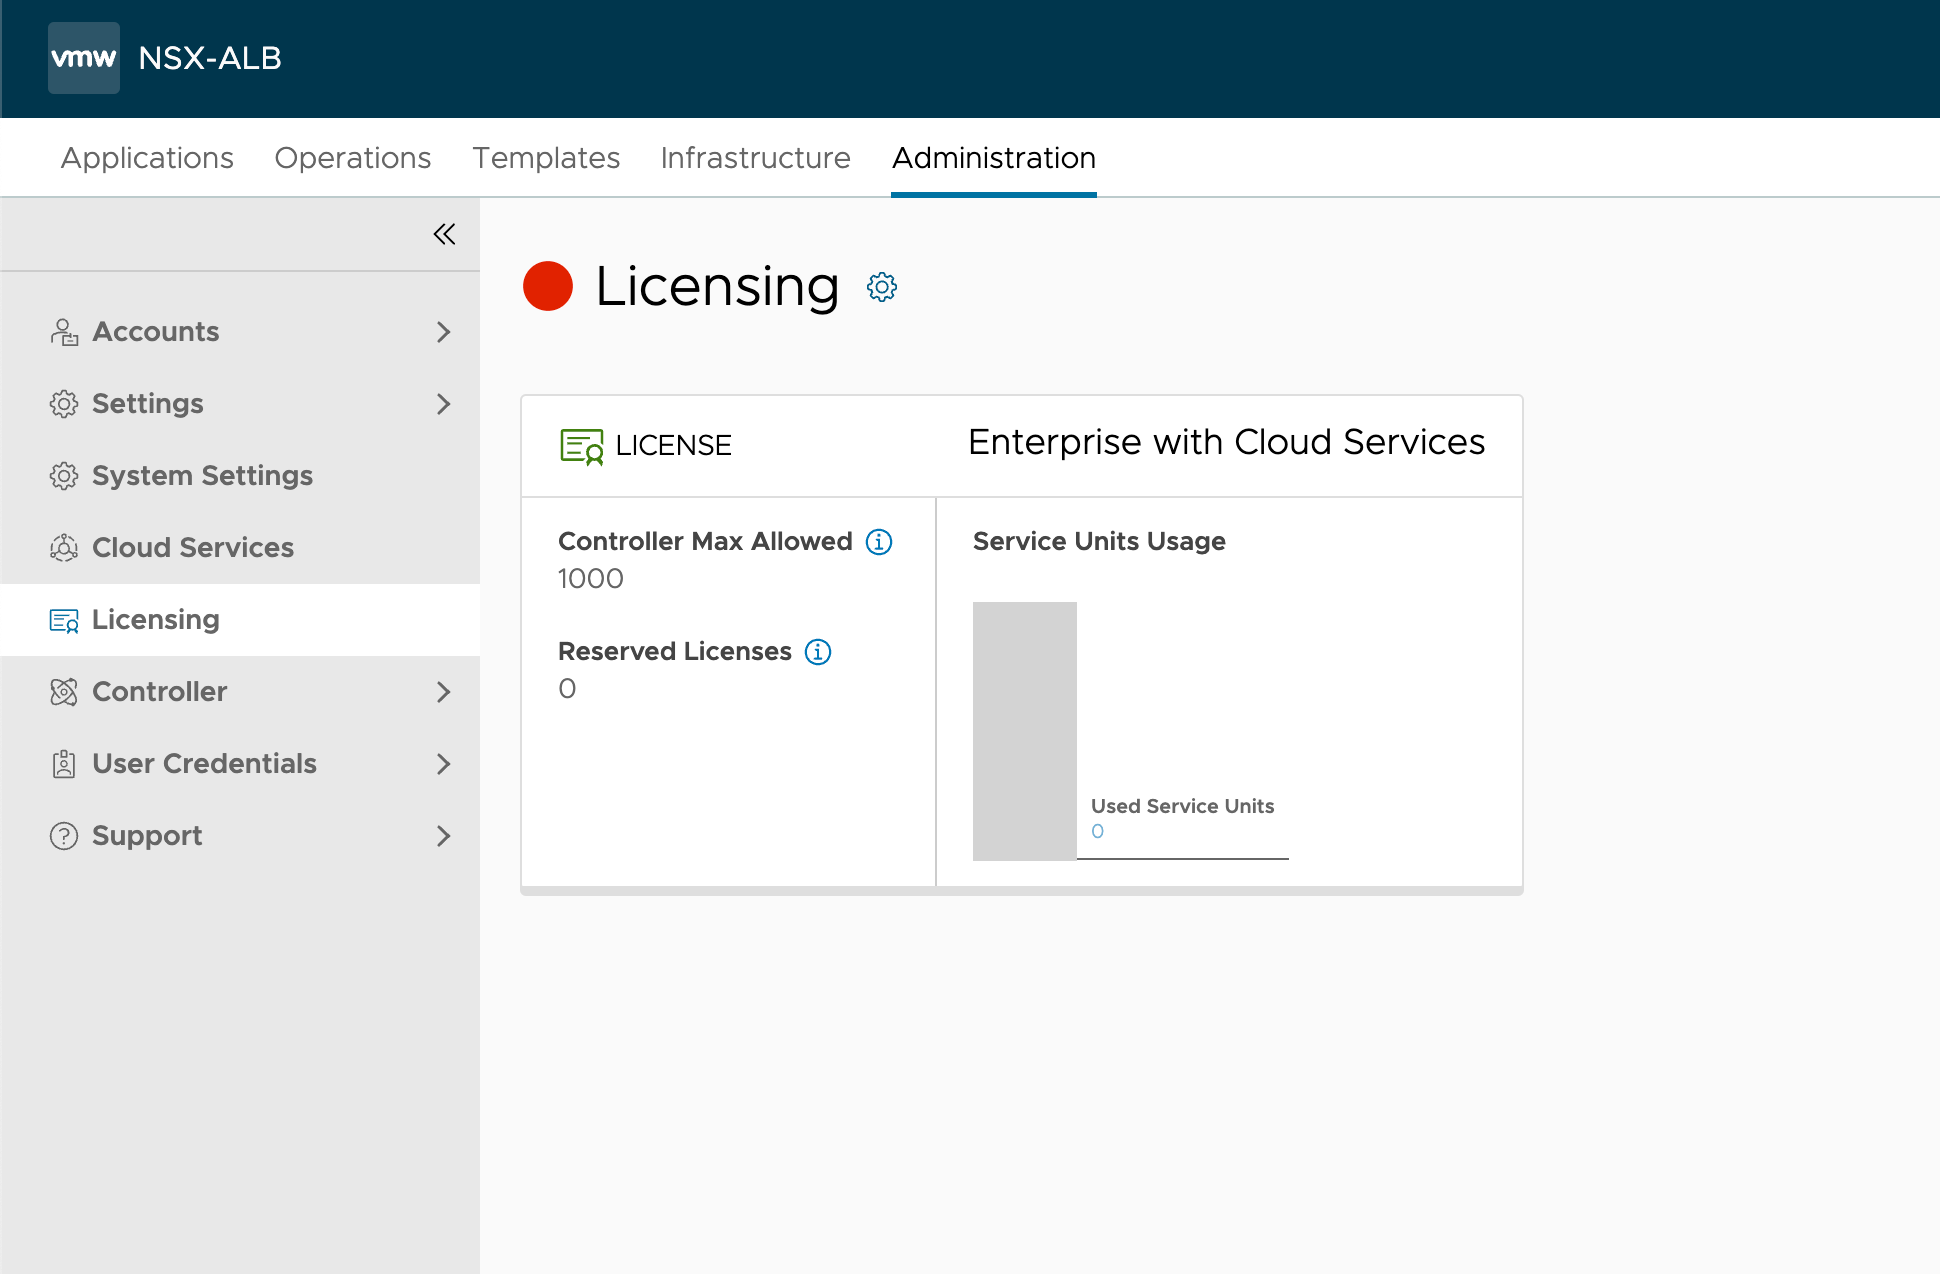
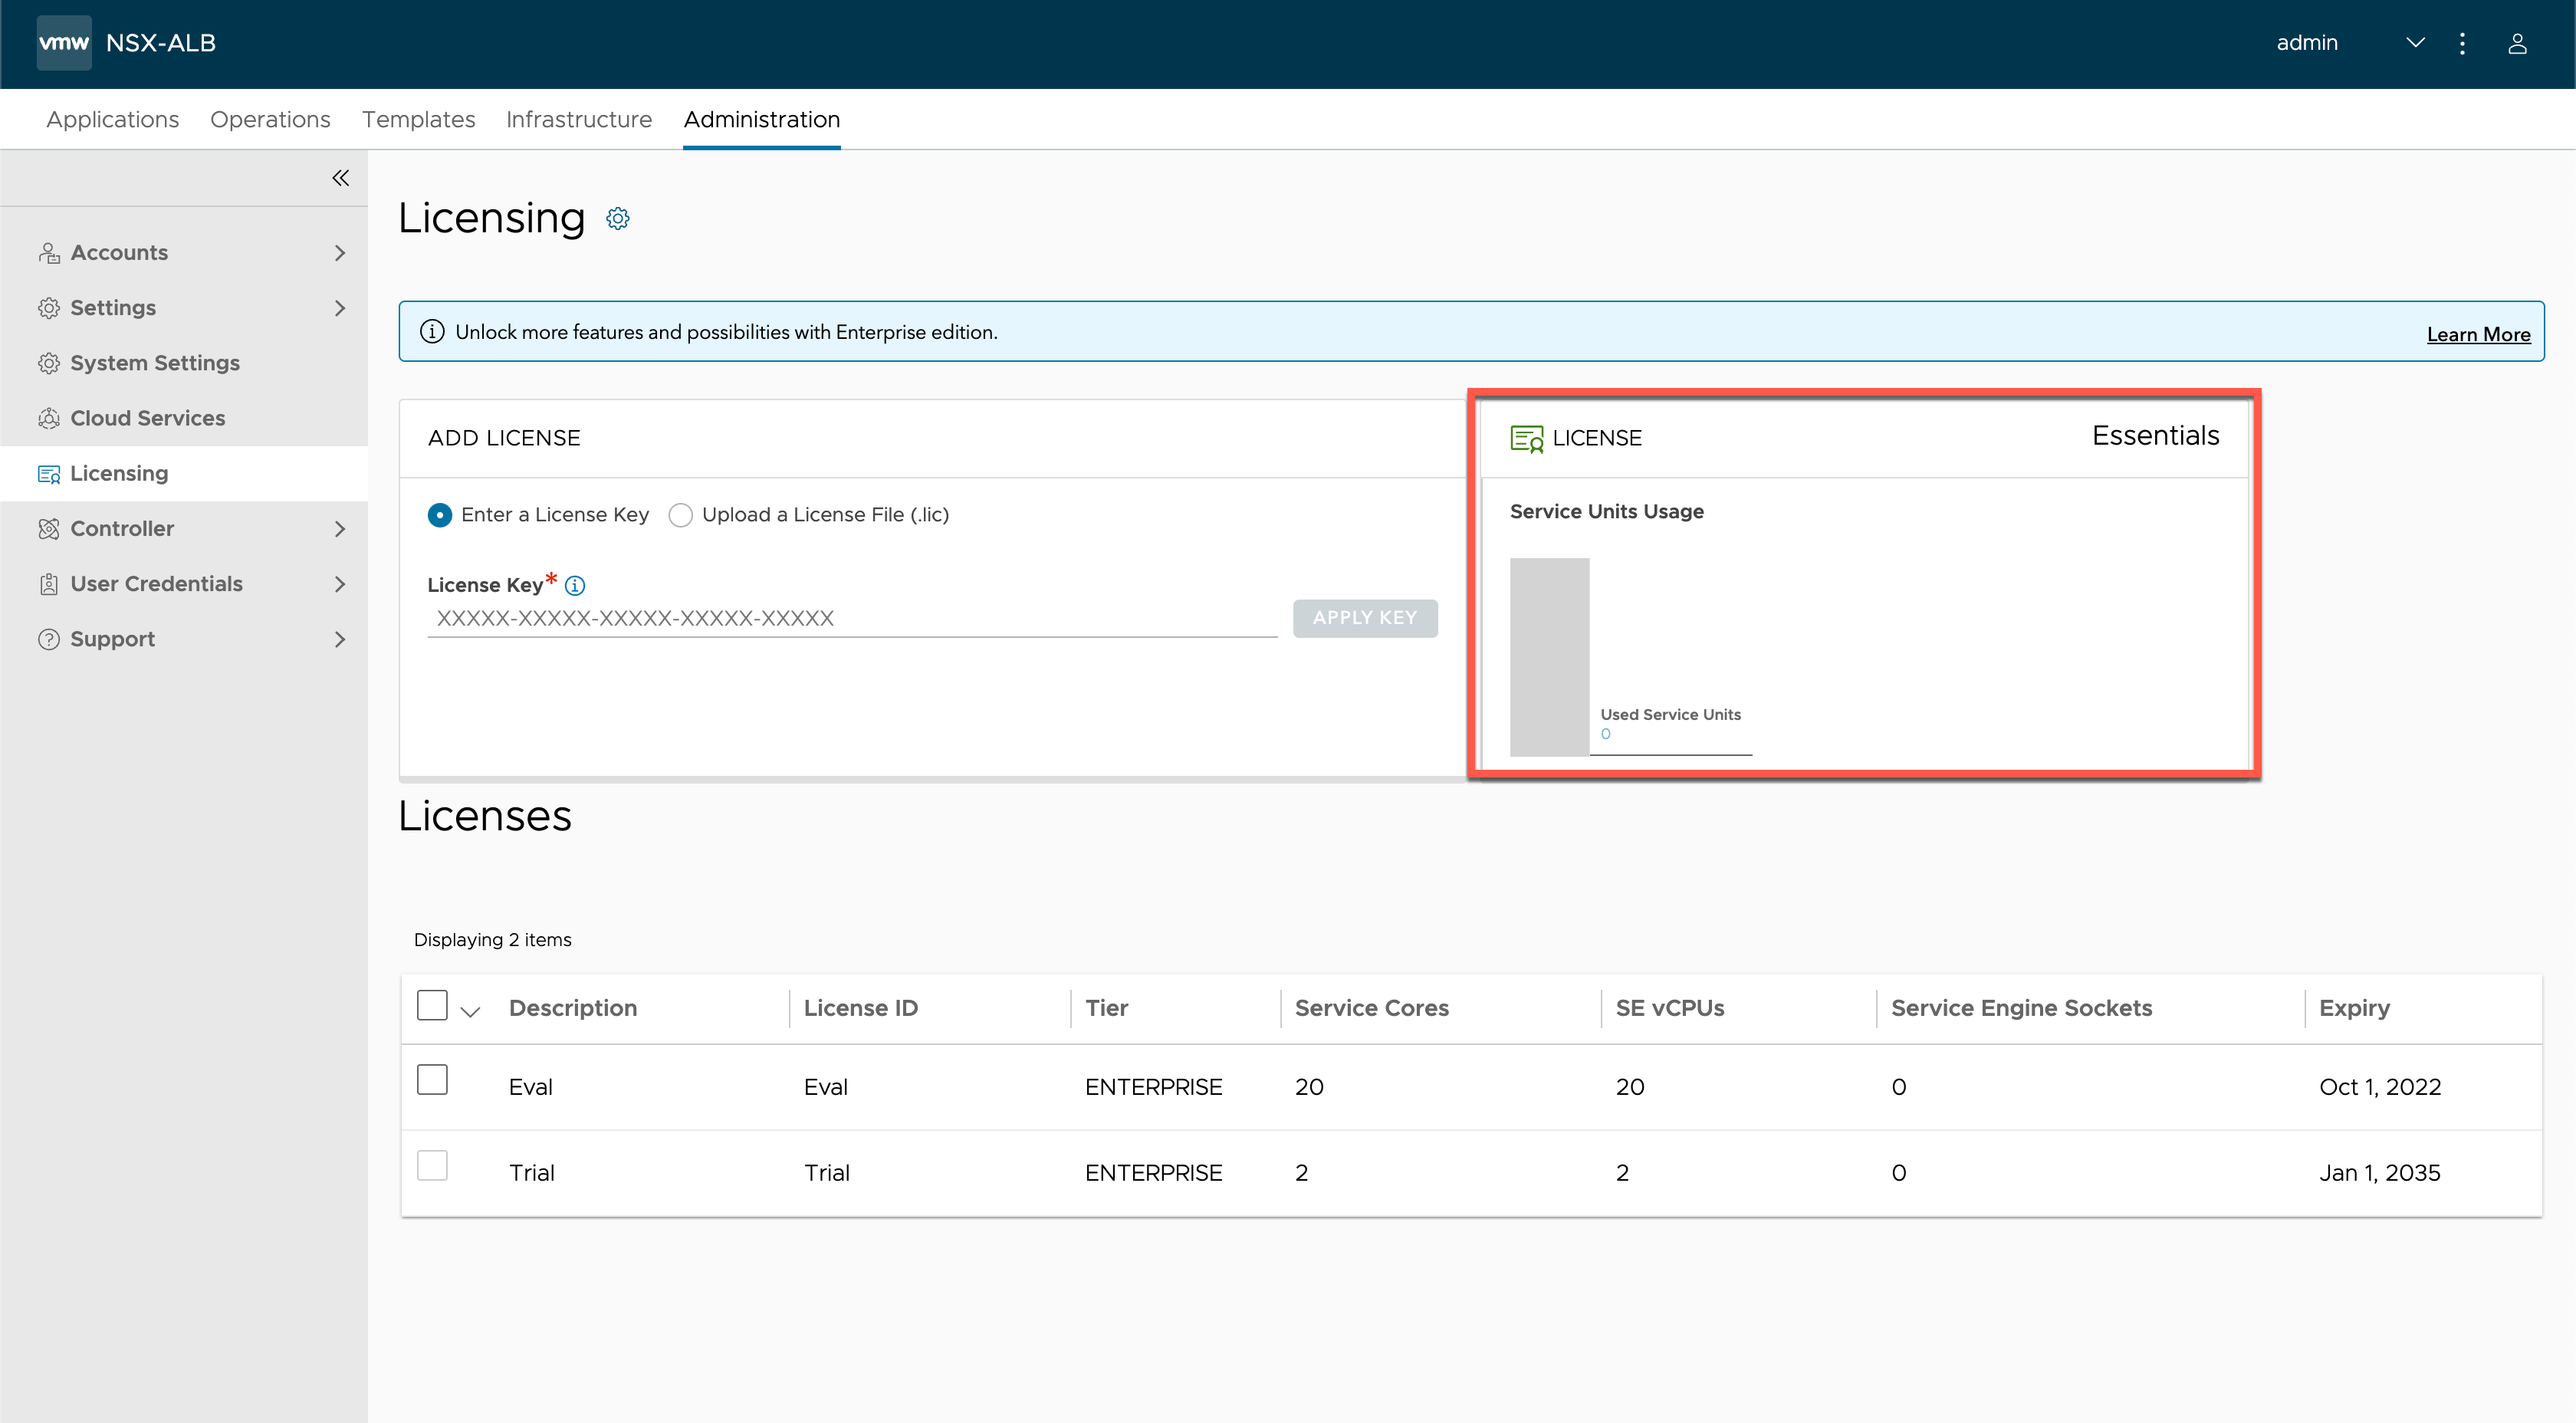
We'll use this Avi instance for vSphere with Tanzu, so we'll select the Essentials tier to change from the default Enterprise tier (the controller comes with an 30-day eval of the Enterprise tier)
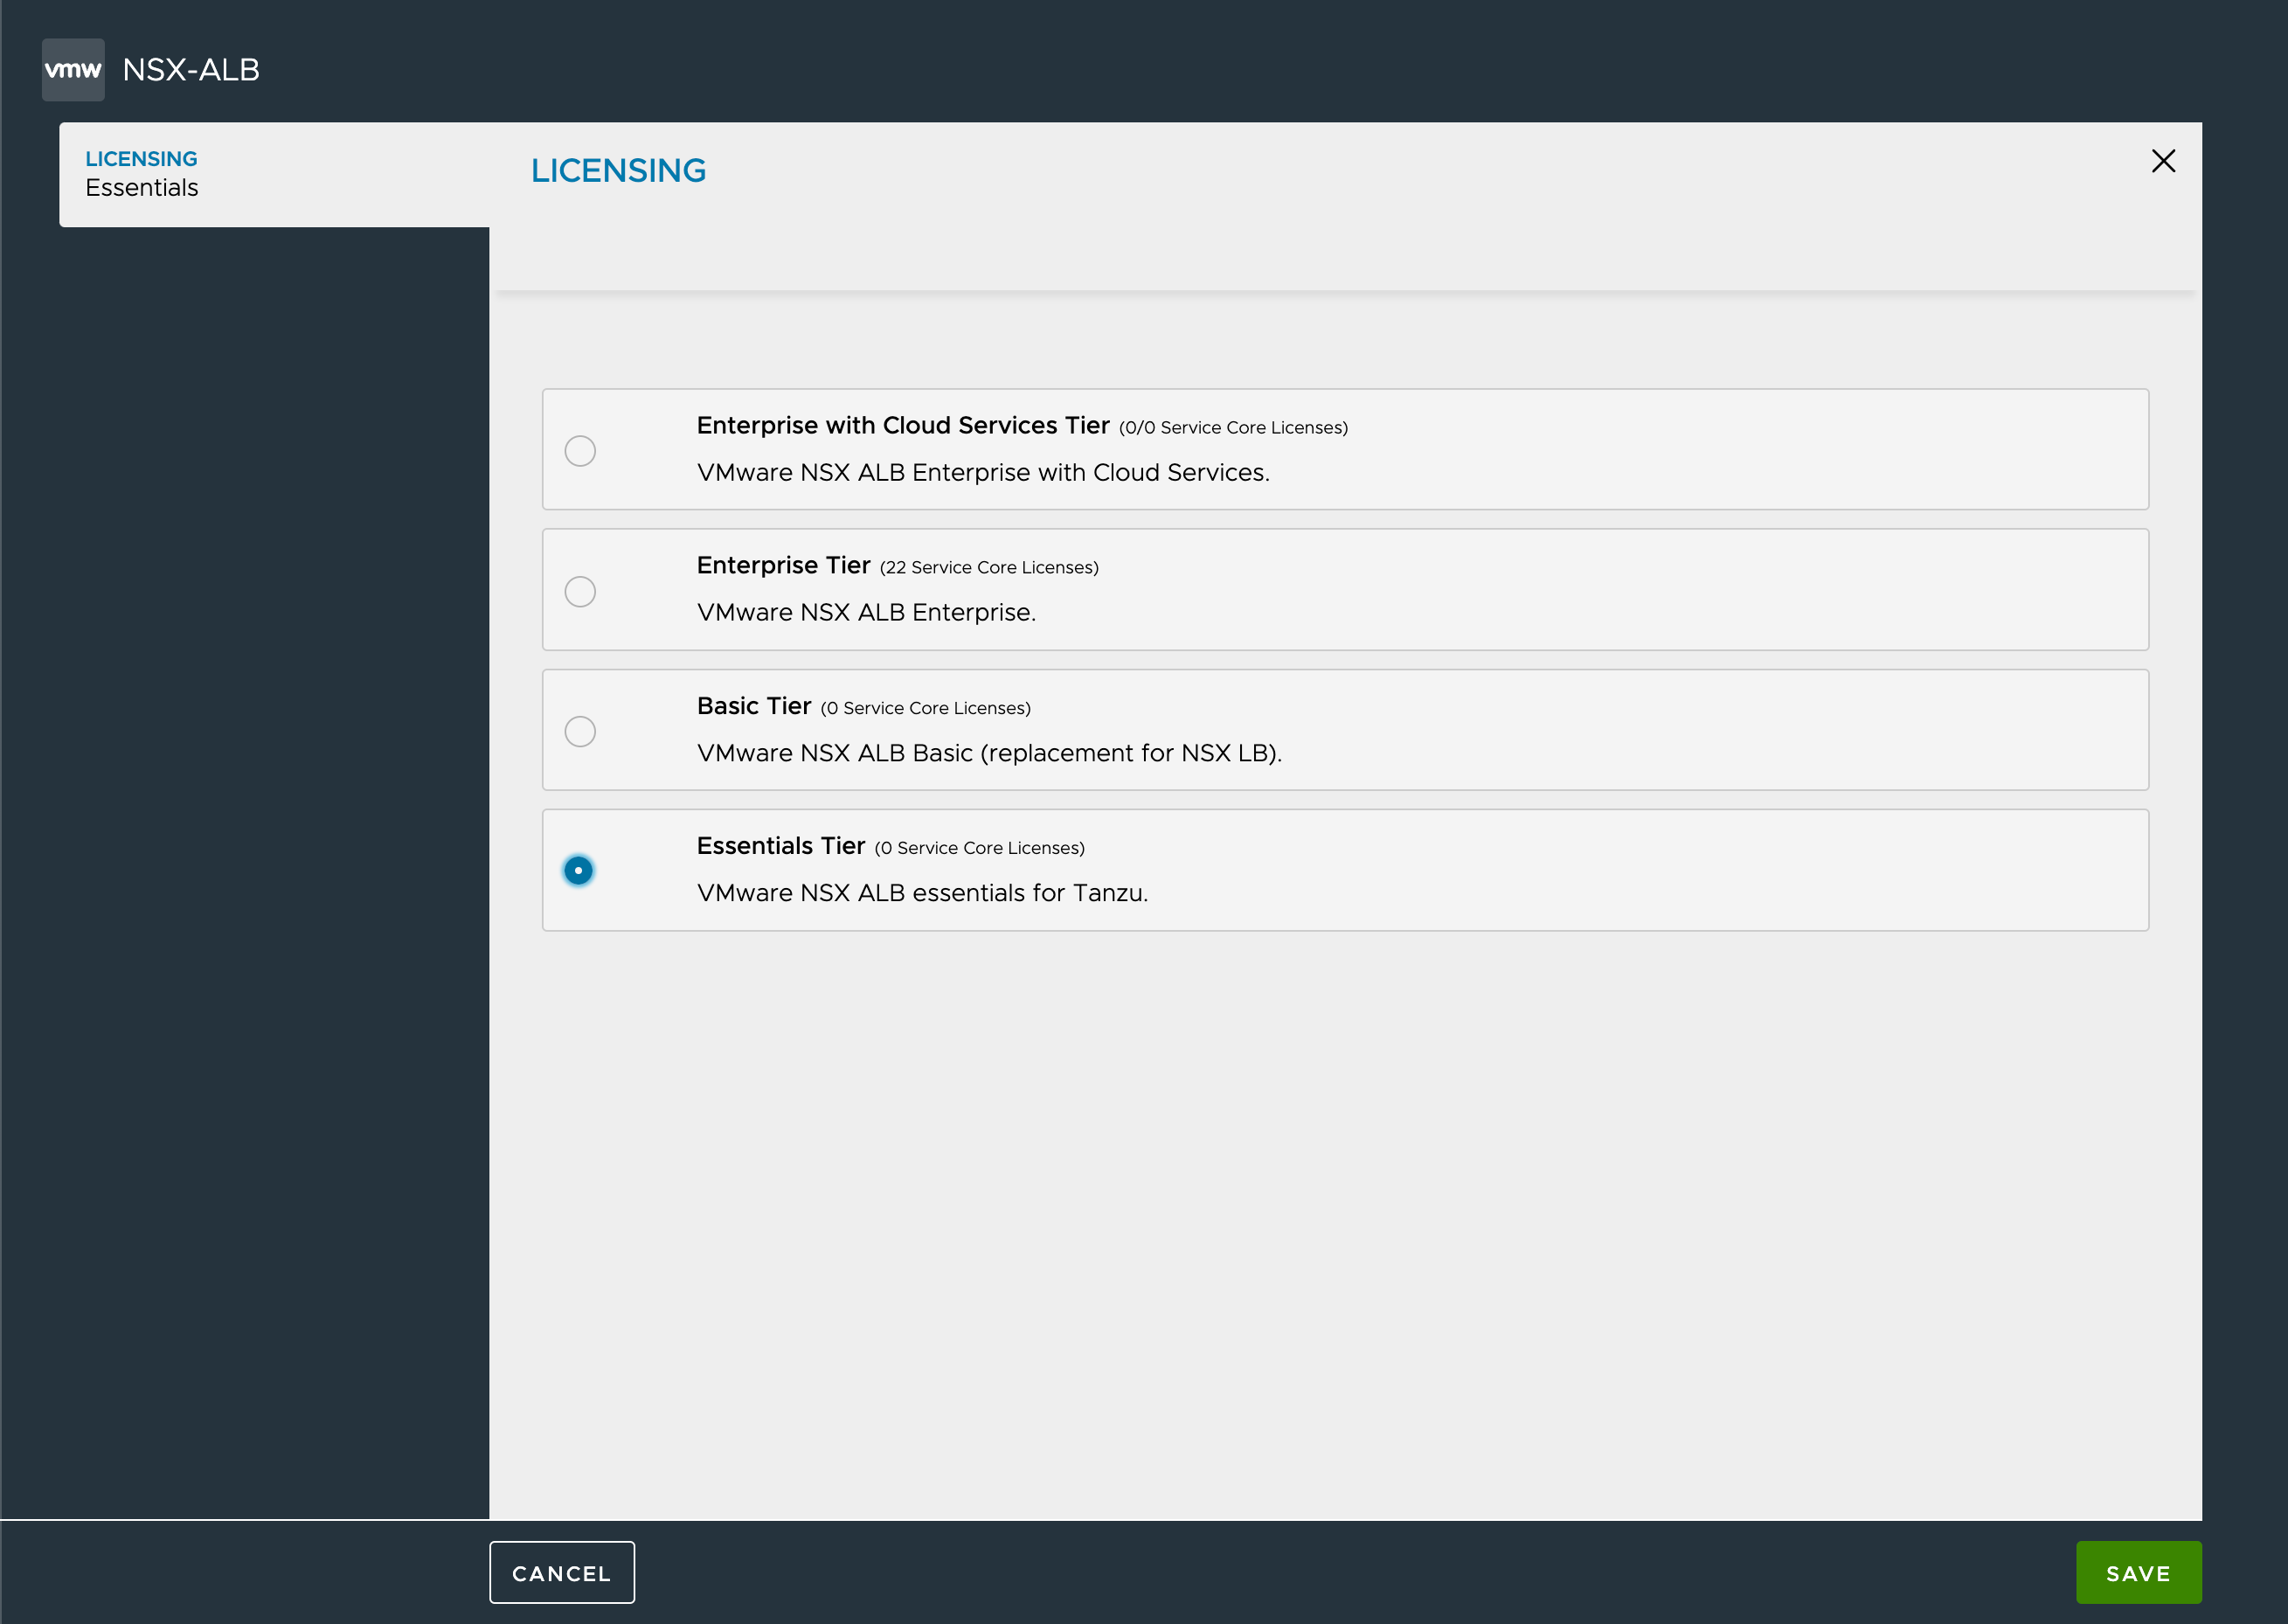
Verify that the license tier has changed
Certificate
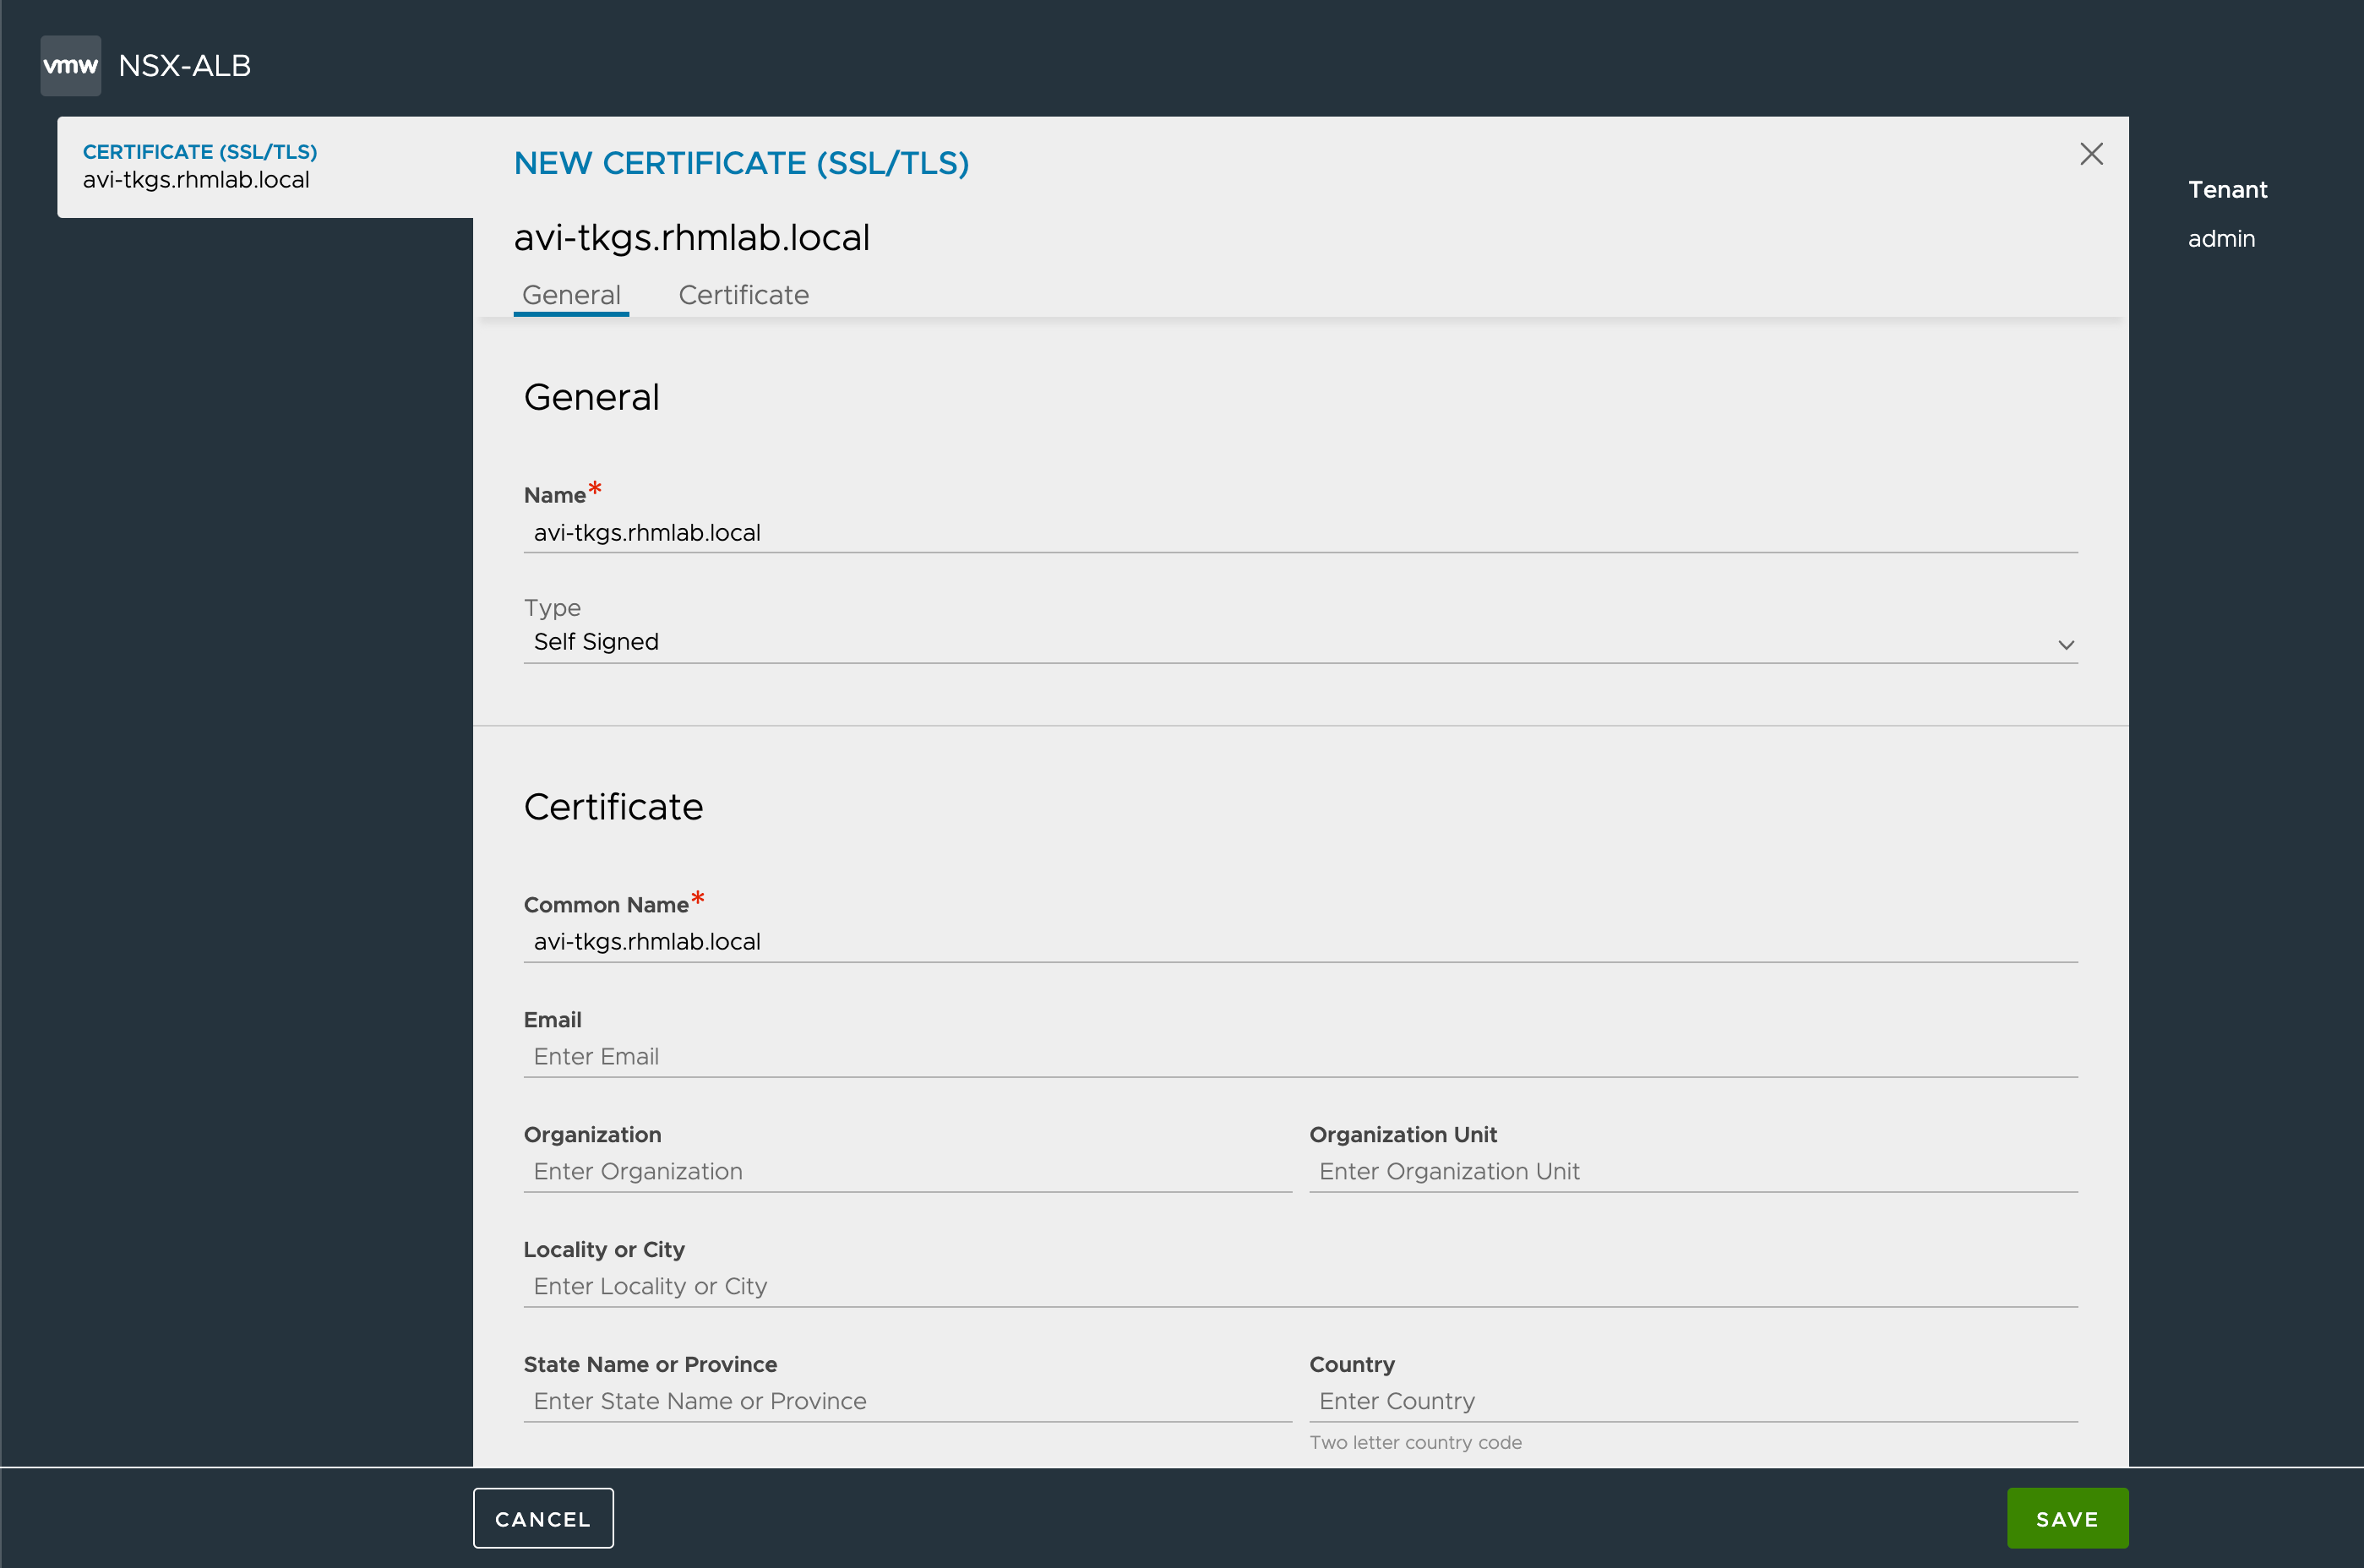
The next step will be to change the Avi controller web server certificate. We'll do this because we need this later on when we'll configure vSphere with Tanzu in an upcoming post
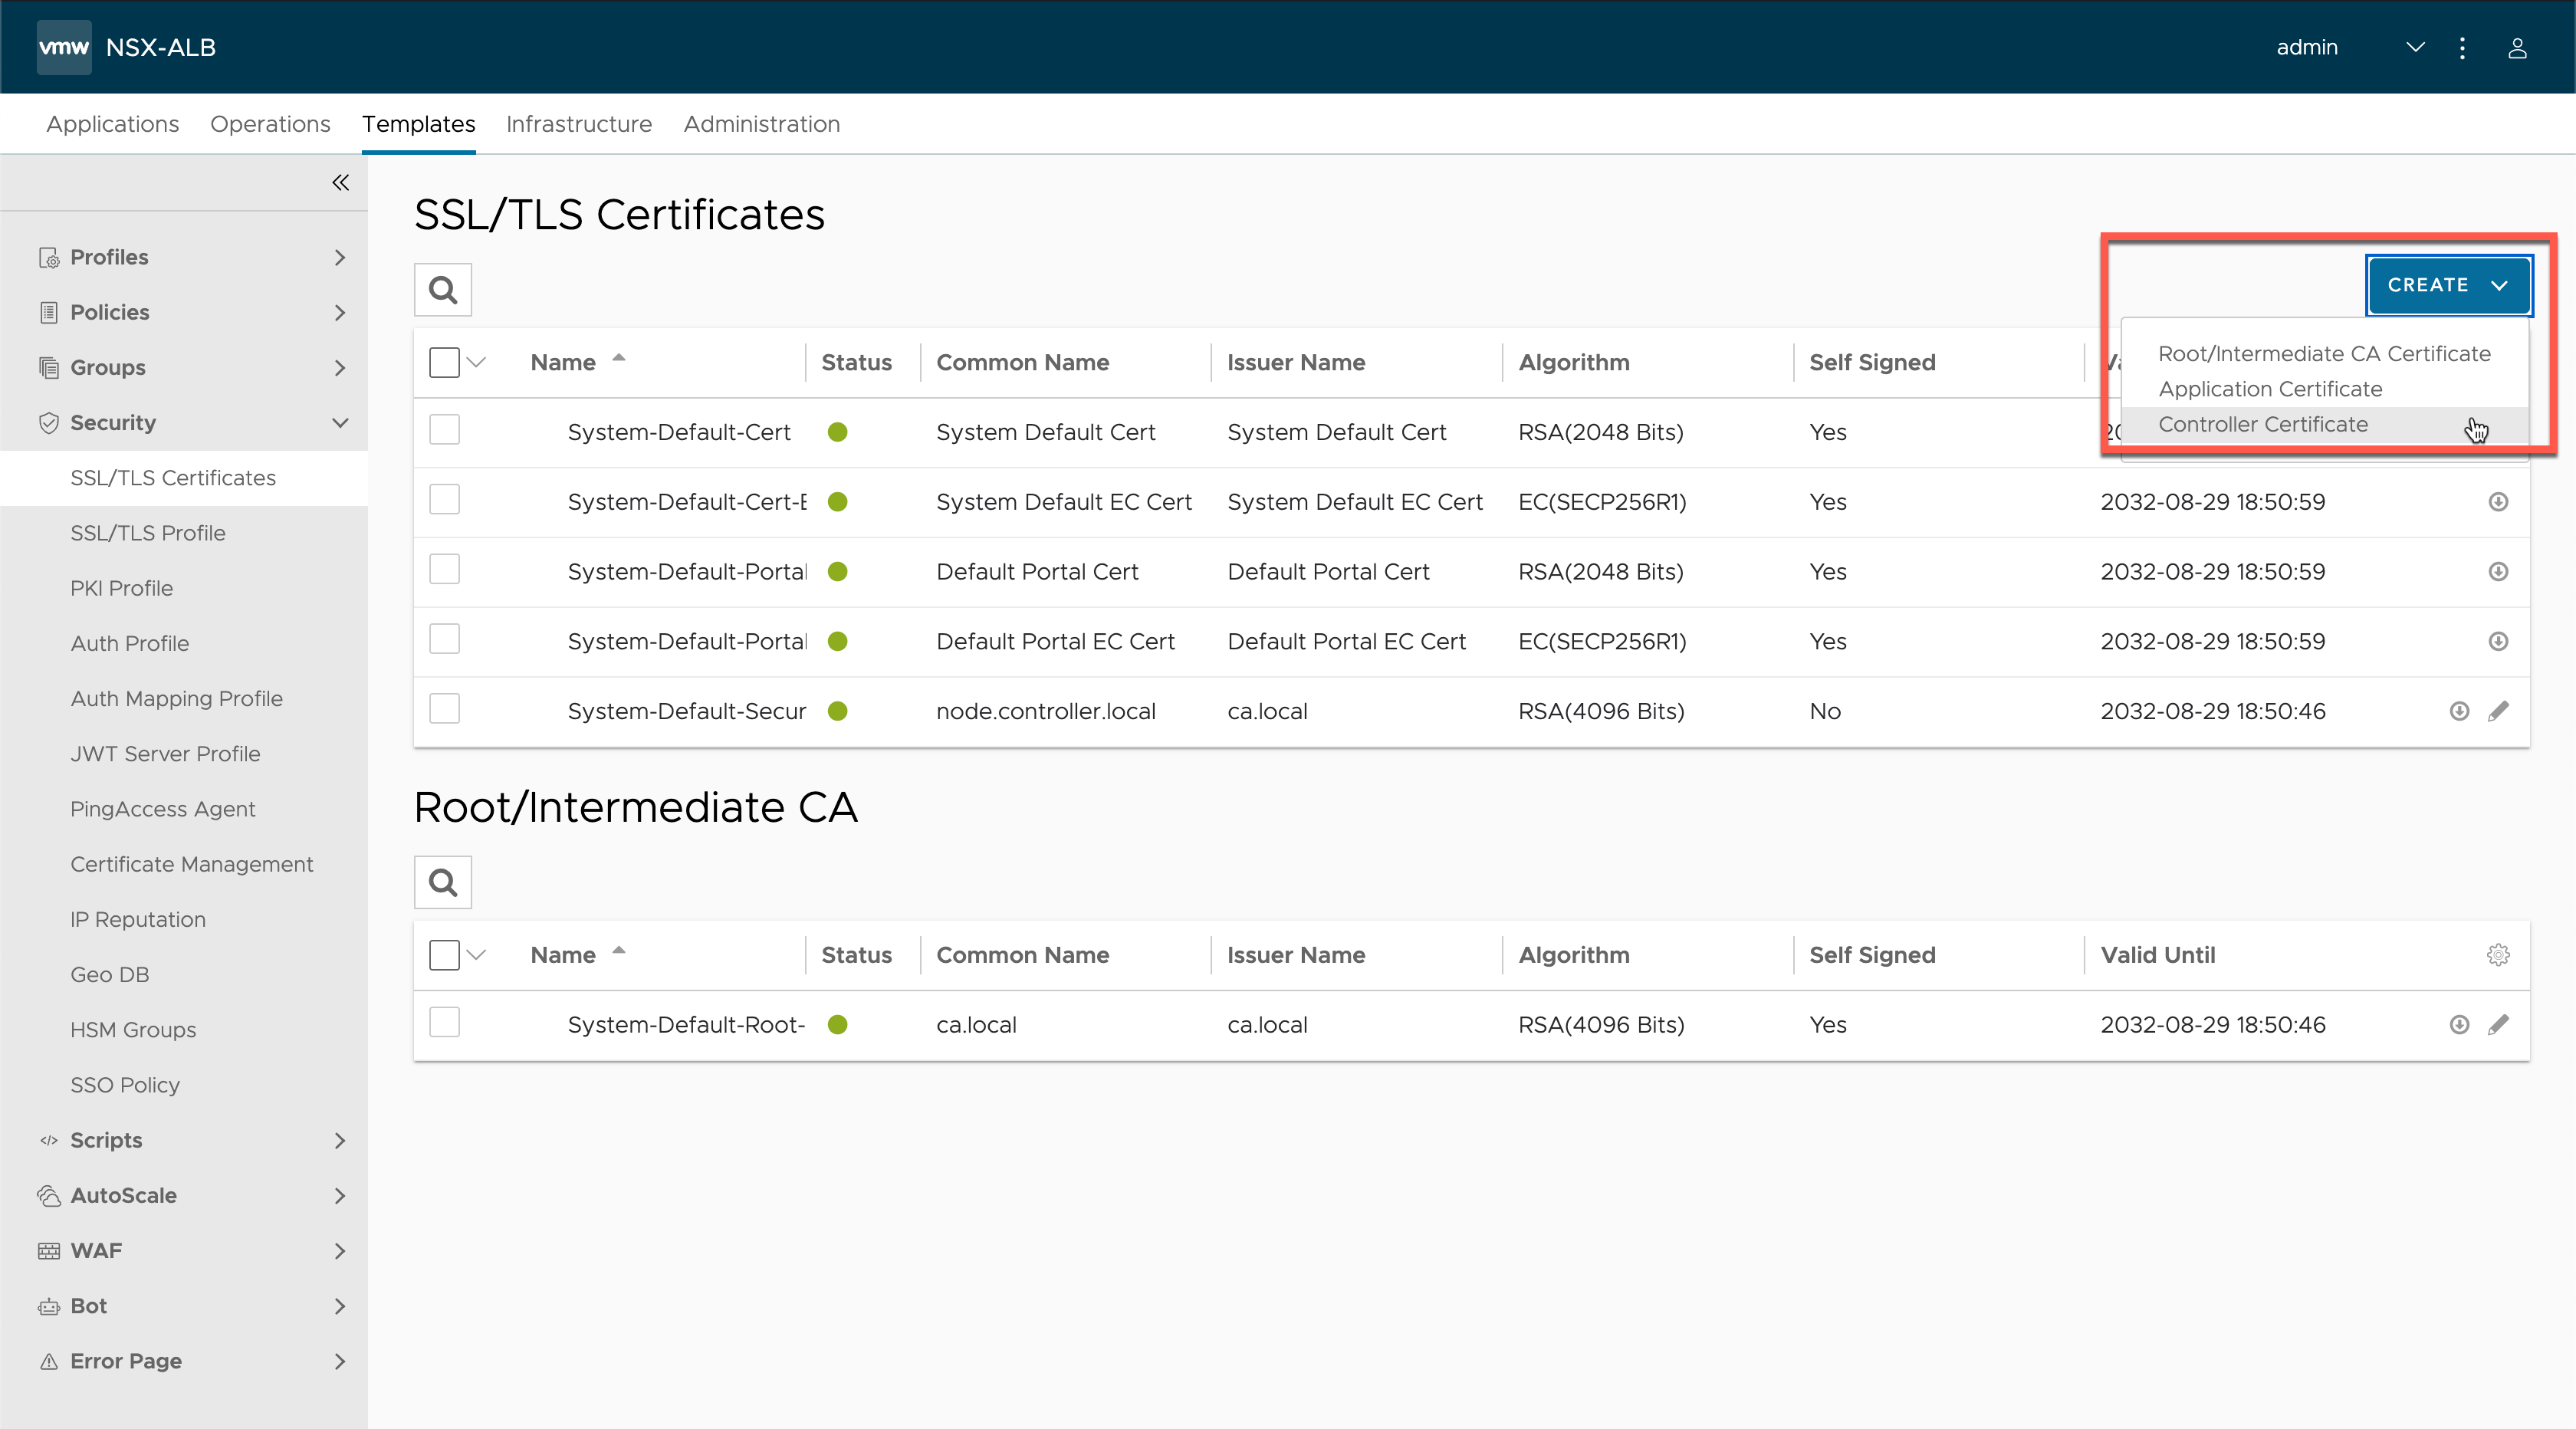
In this post we'll create a self-signed certificate, but in a production environment we should use a Enterprise CA signed certificate. We'll fill the certificate wizard with a common name
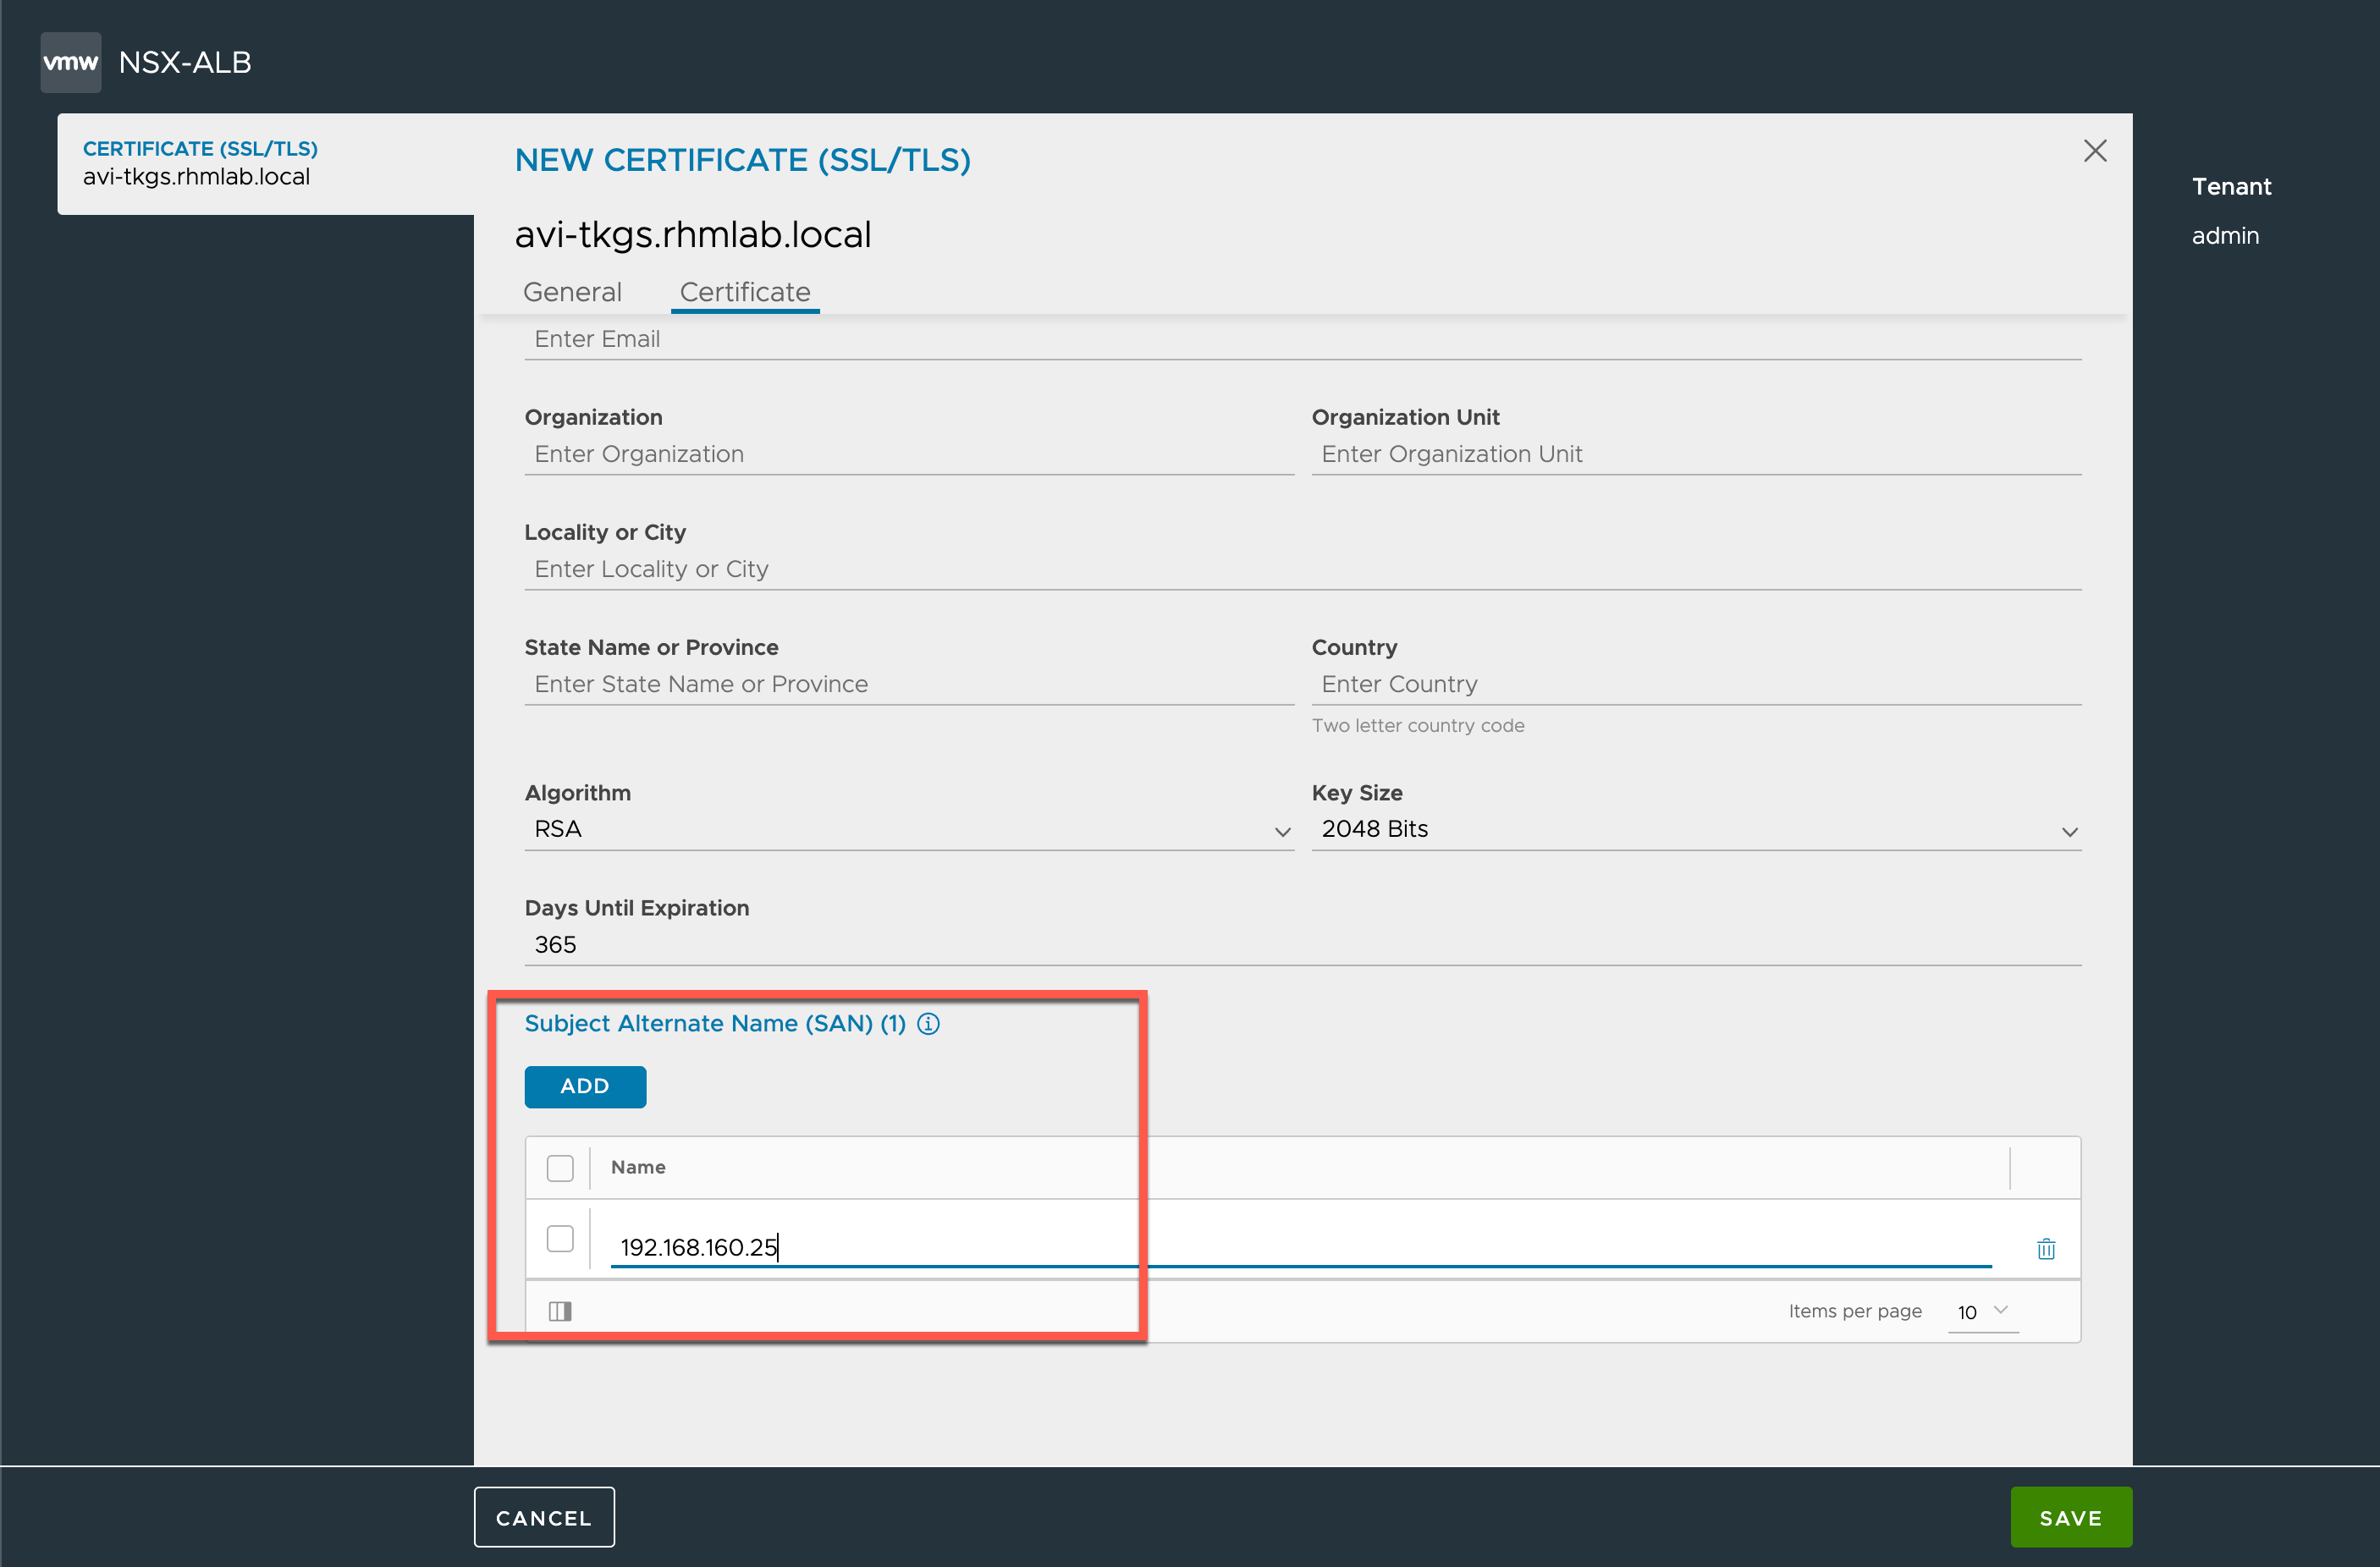
And we'll make sure that we have the IP of the controller as a Subjecte Alternate Name (SAN)
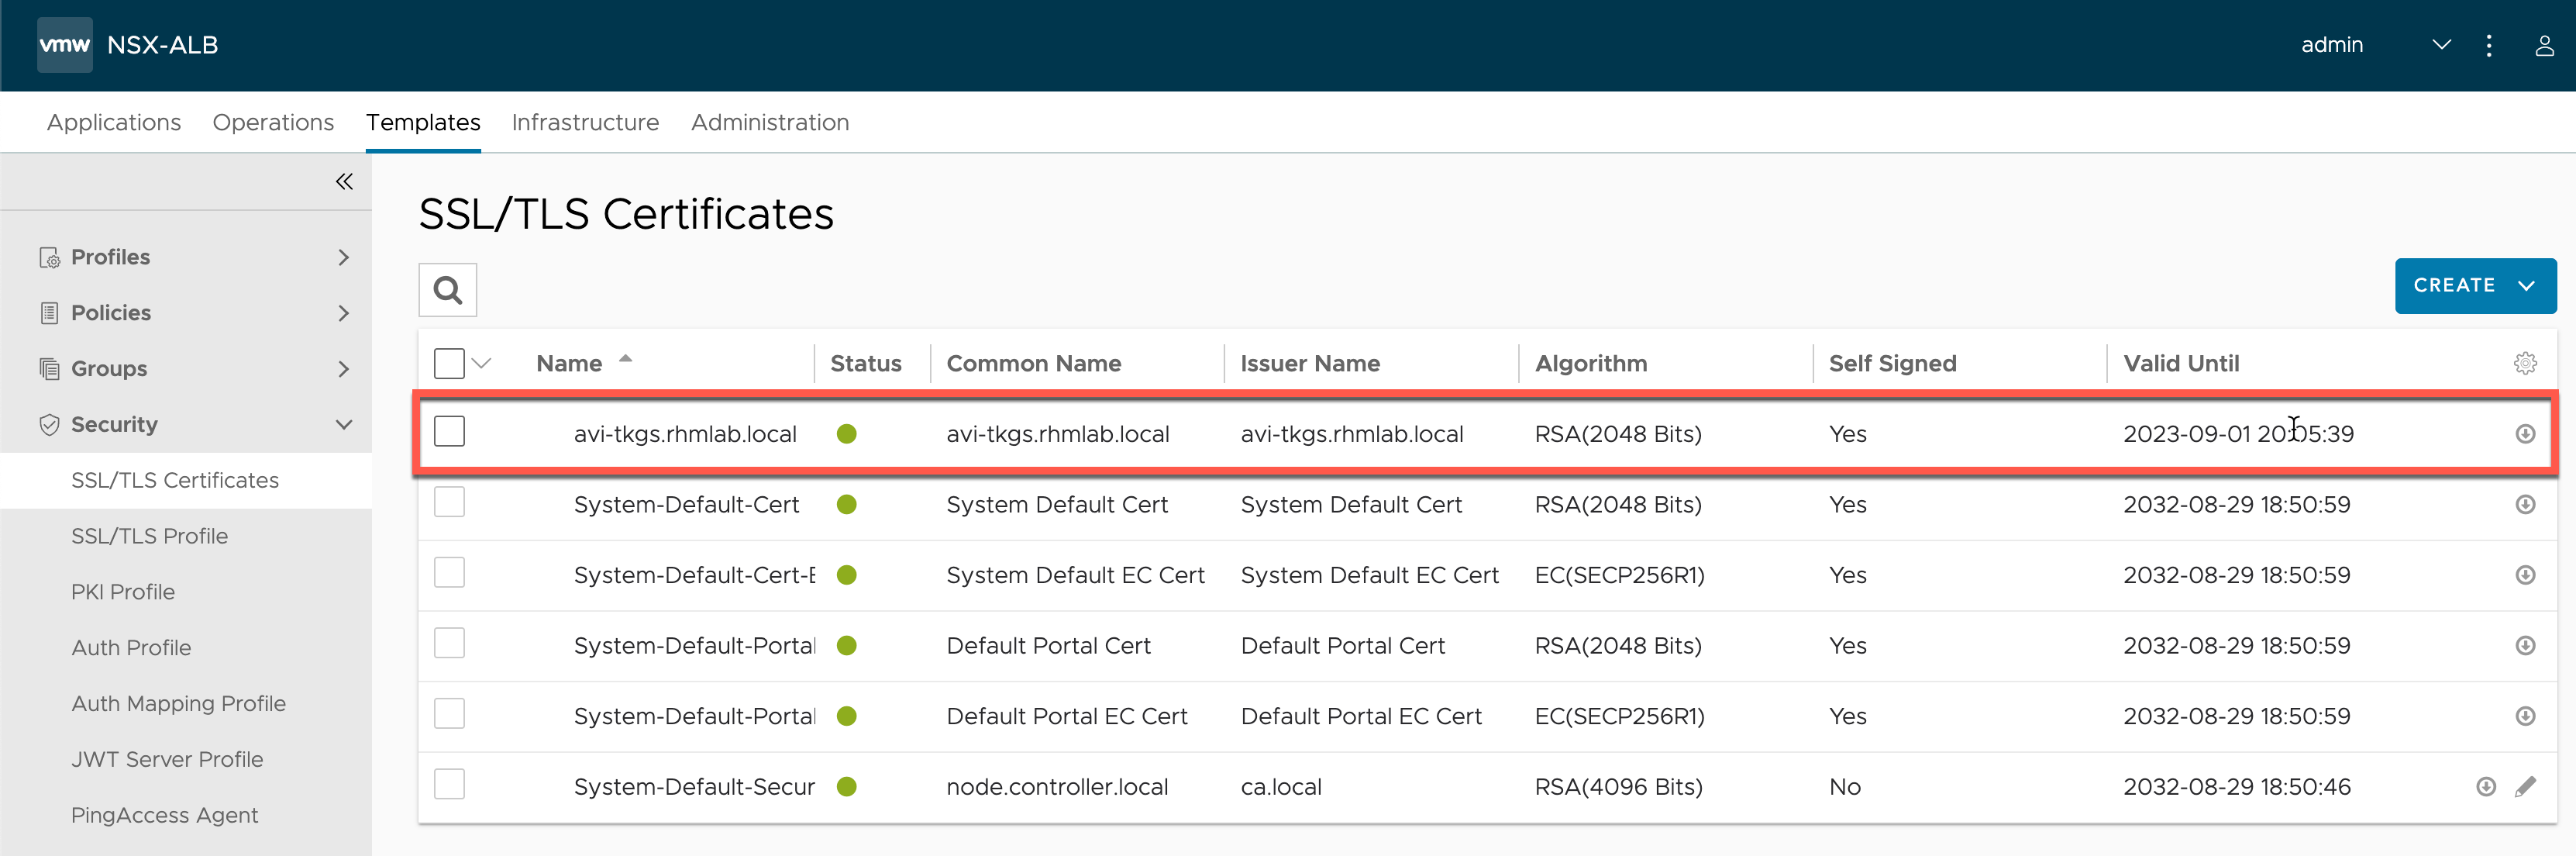
After completing the wizard, verify that the certificate has been created
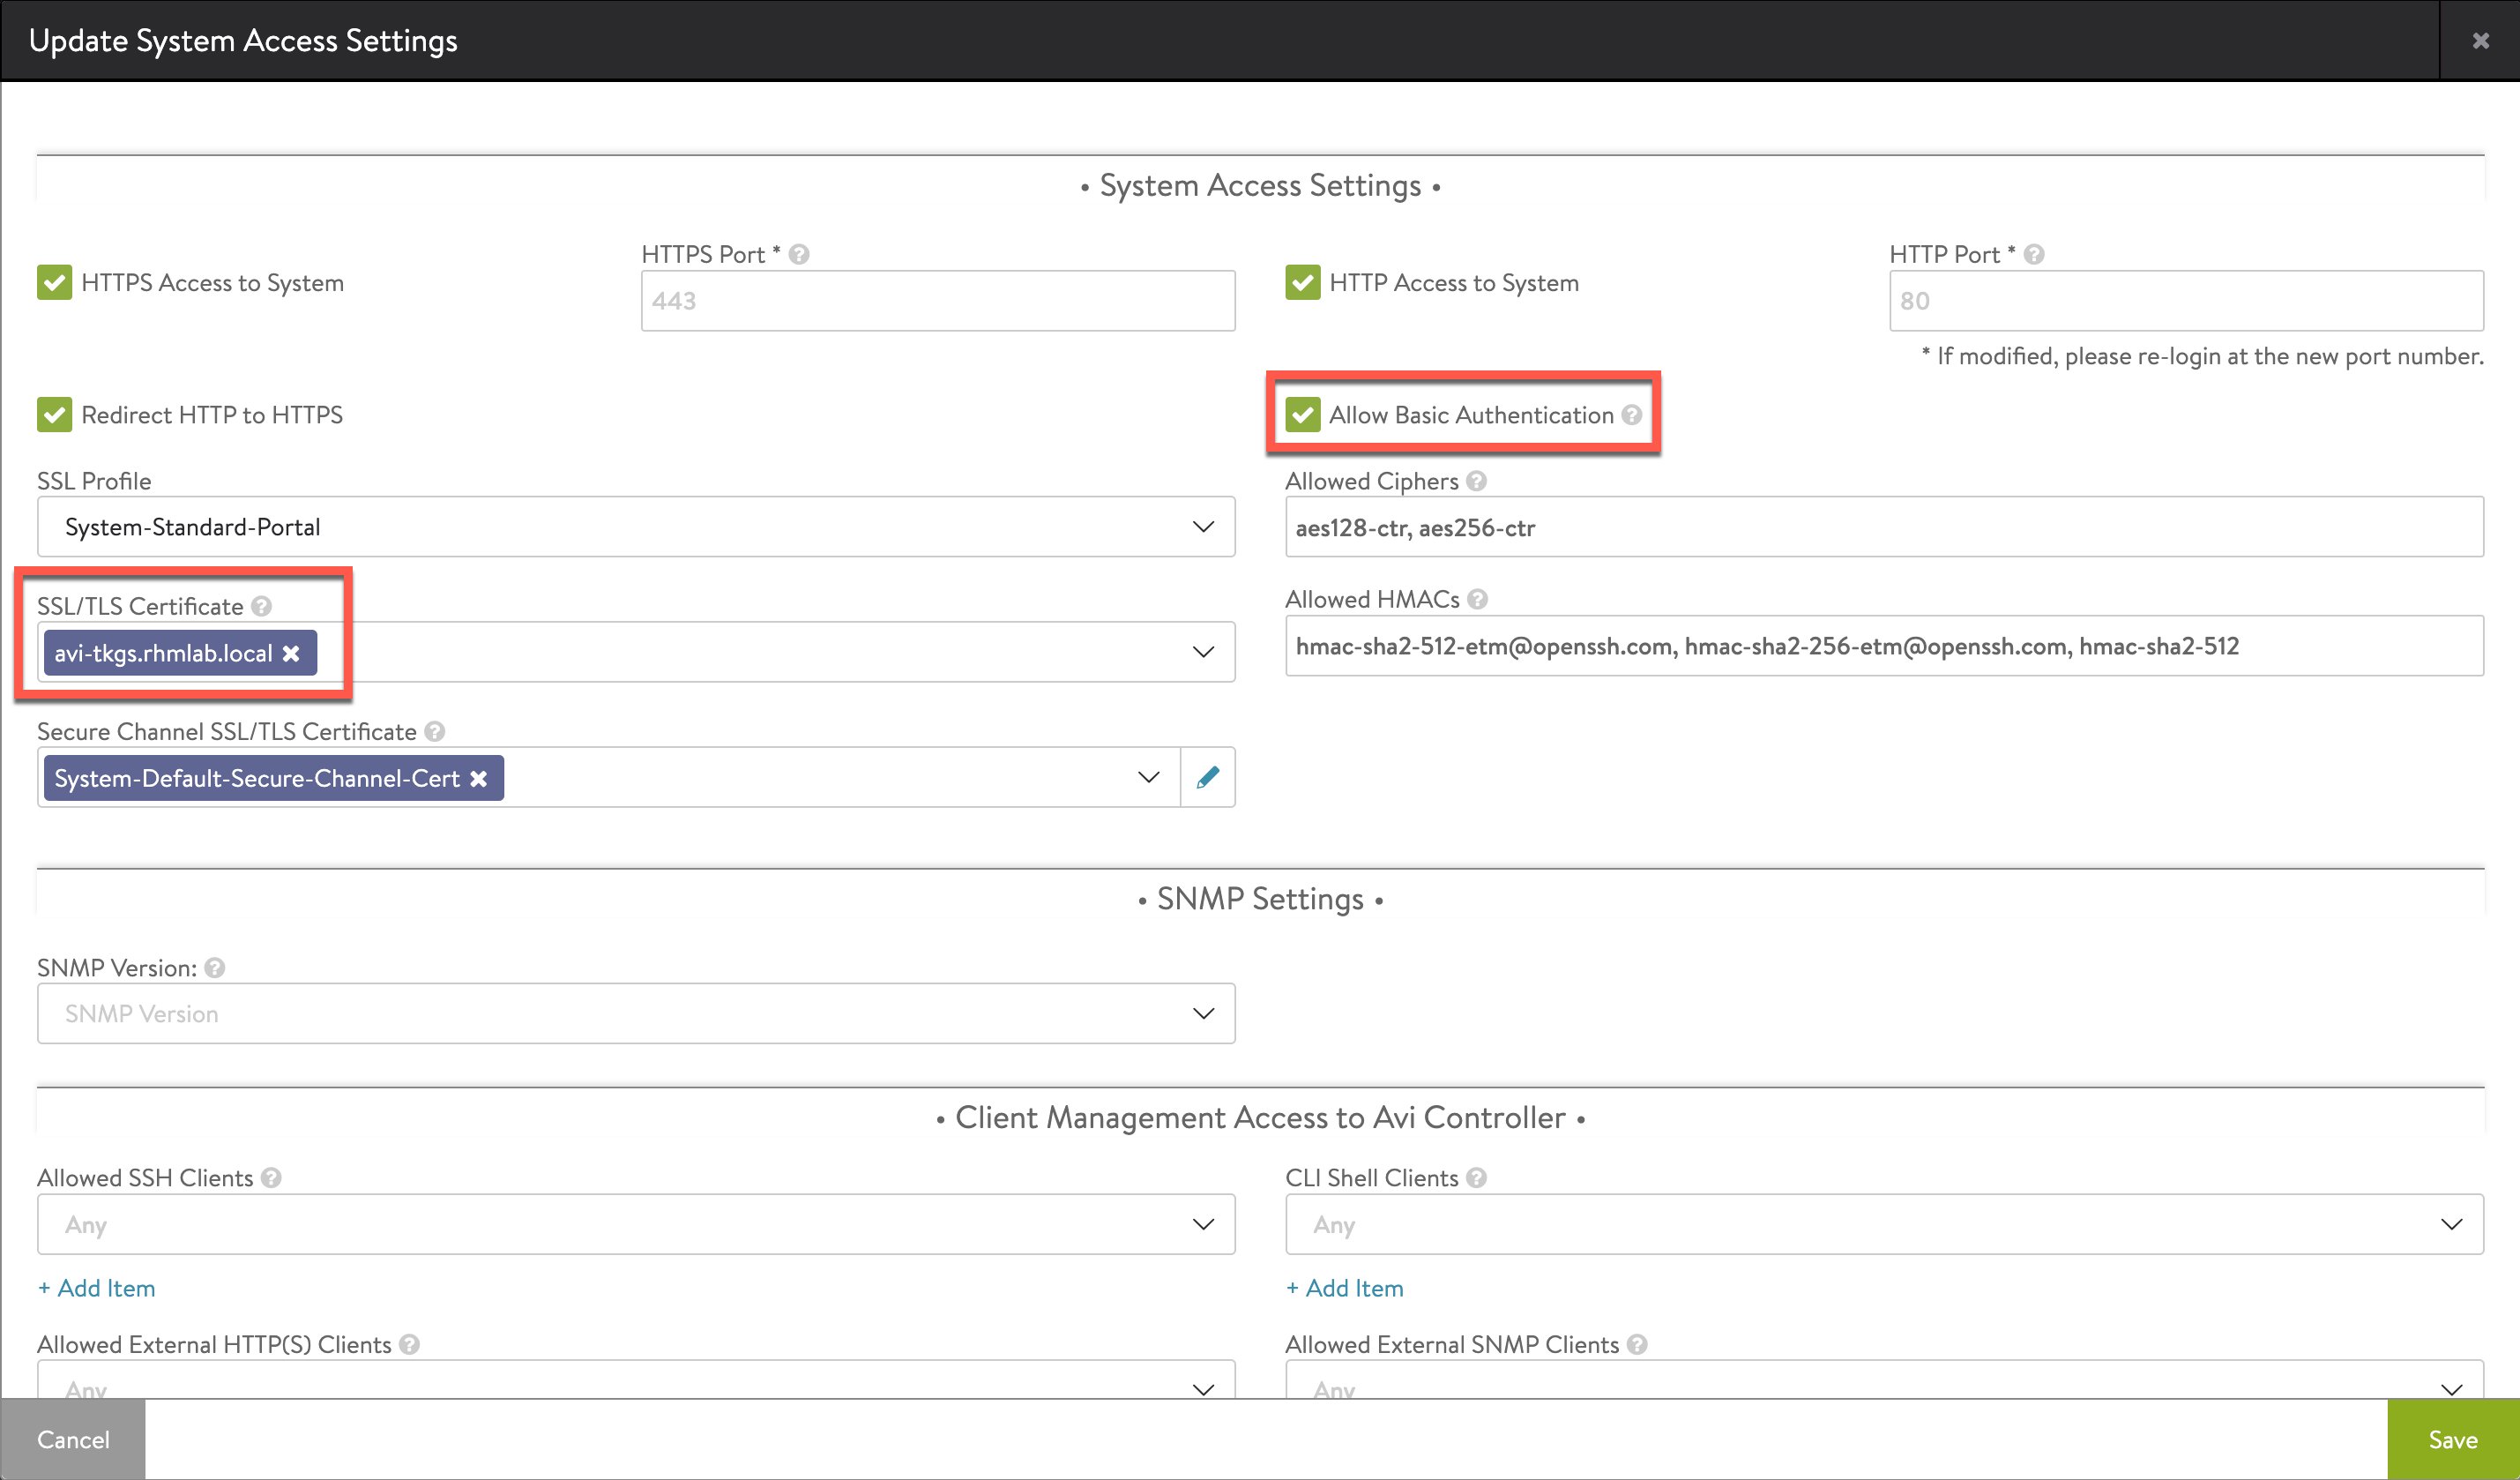
To change the controller certificate we'll go to the Administration tab and the Access settings and select the Pencil icon to edit
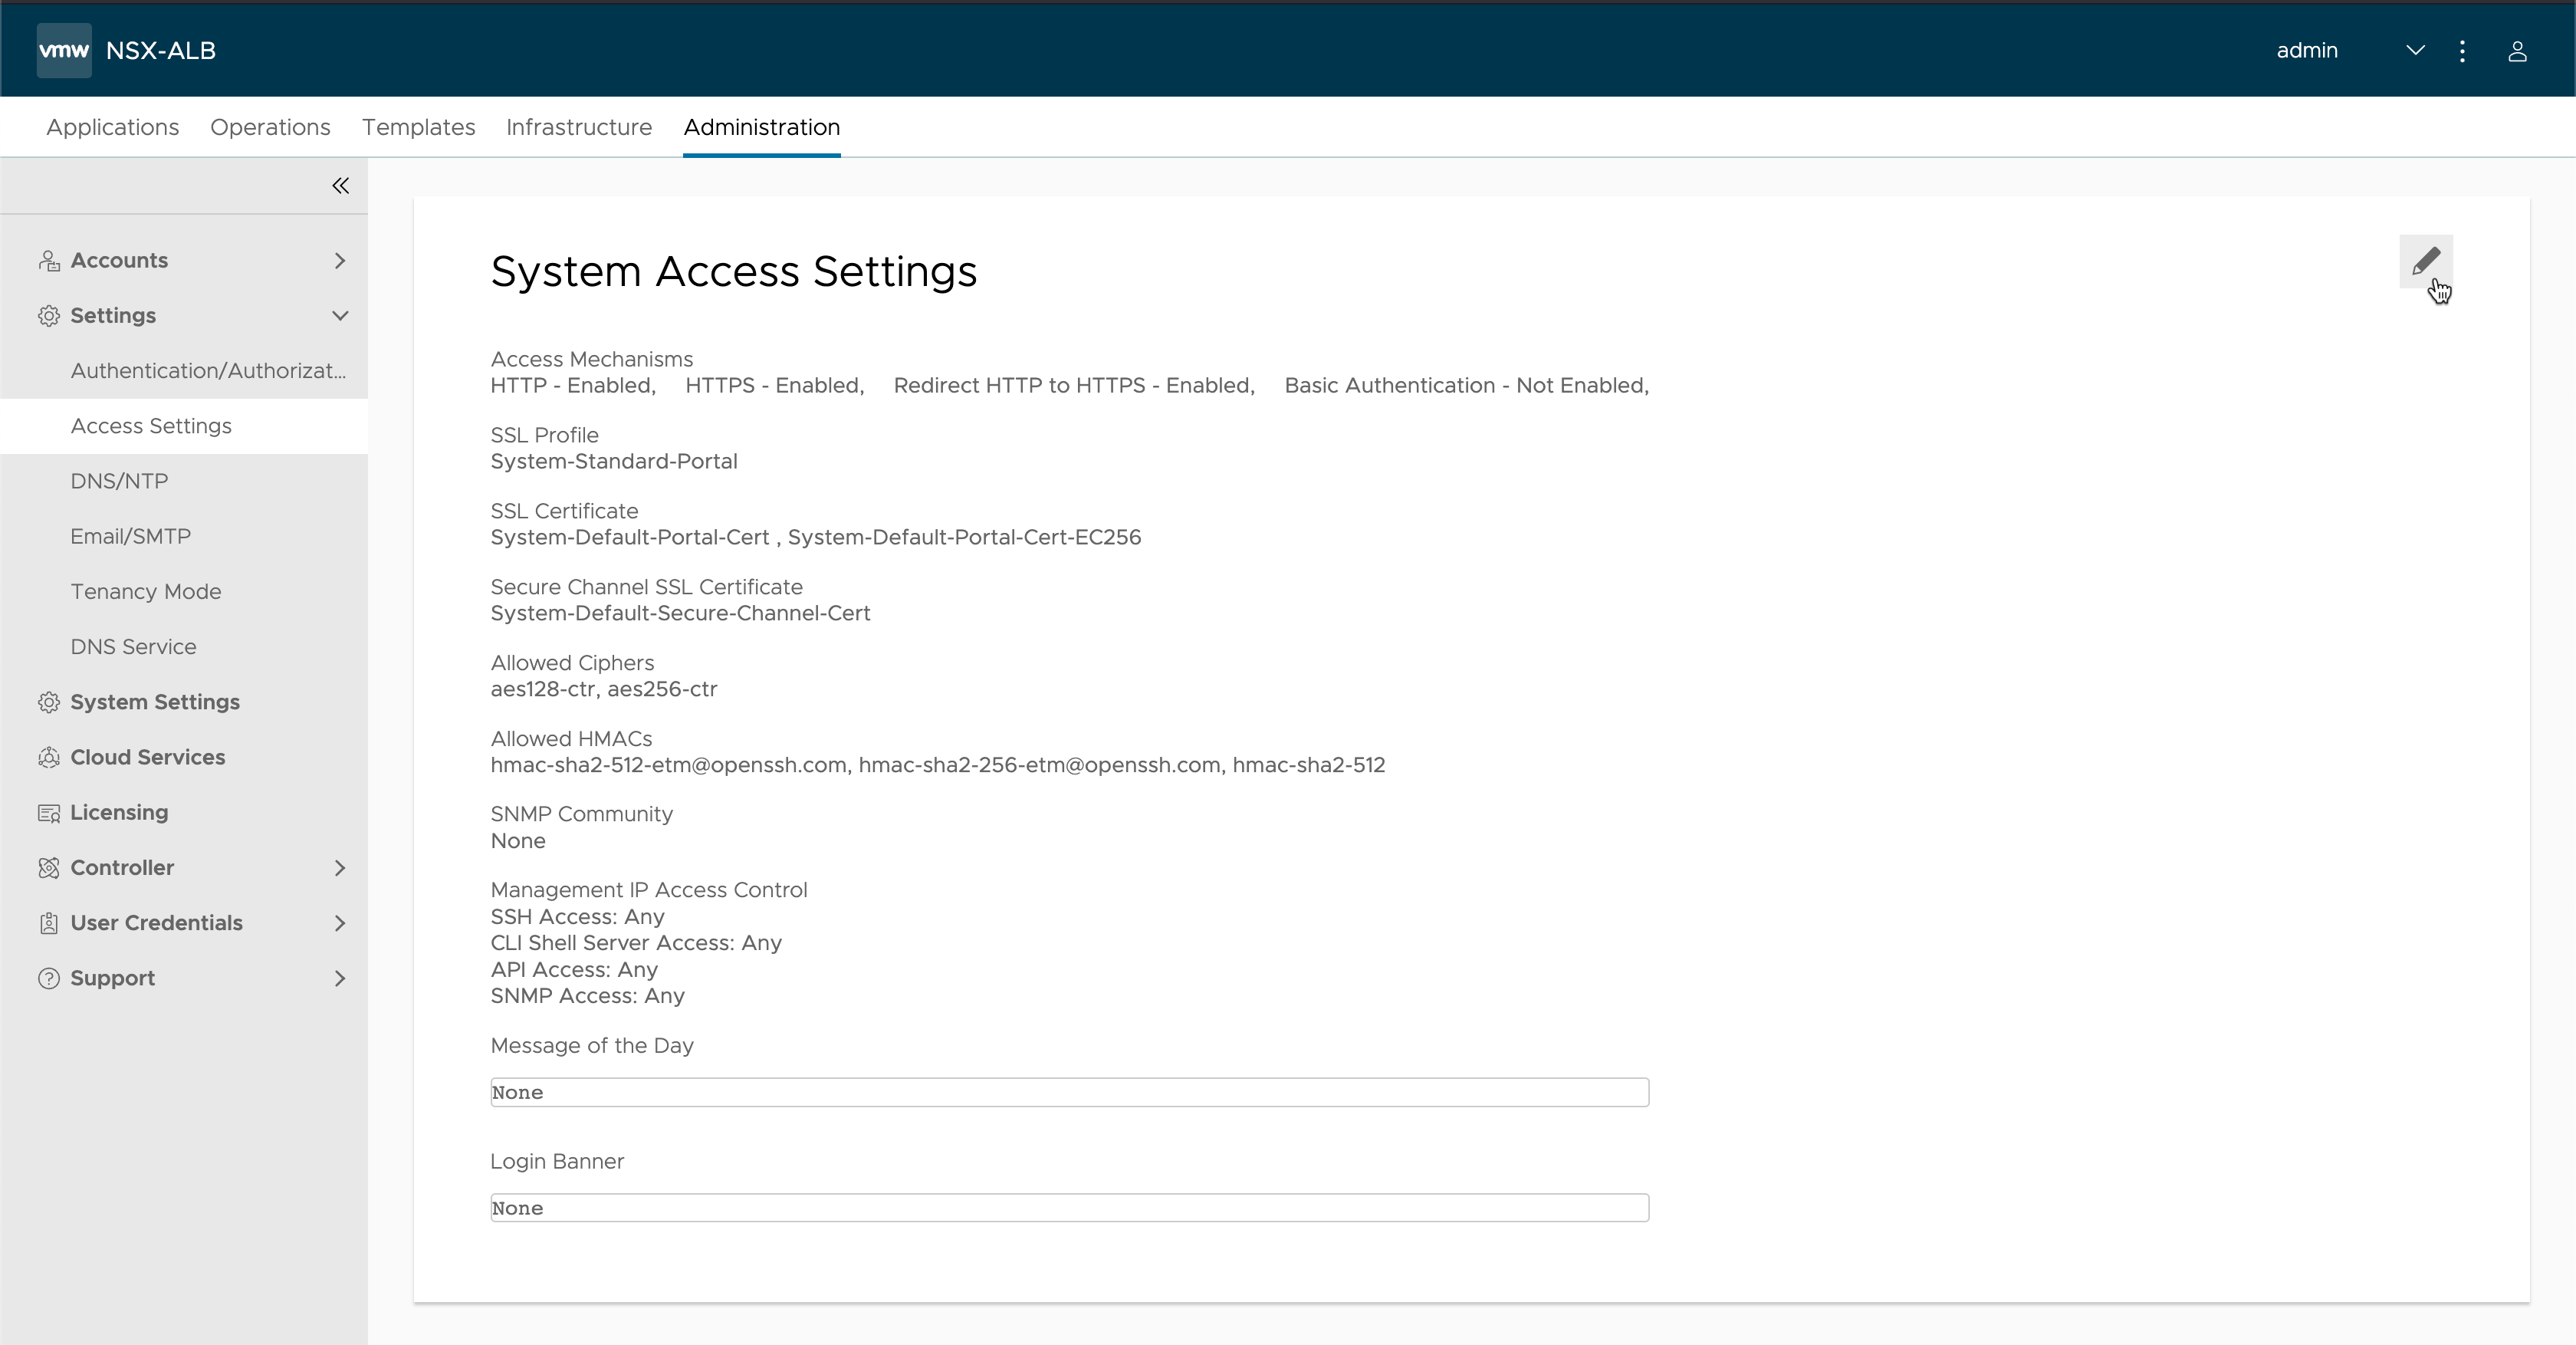
We'll remove the default certificates and add in our newly created, and we'll also enable Basic Authentication. I have had a few issues with vSphere with Tanzu when Basic Auth was disabled. Note that Basic Authentication might be a security concern.
After changing the certificate wait a minute and reload your browser to accept the new certificate
Default cloud setup
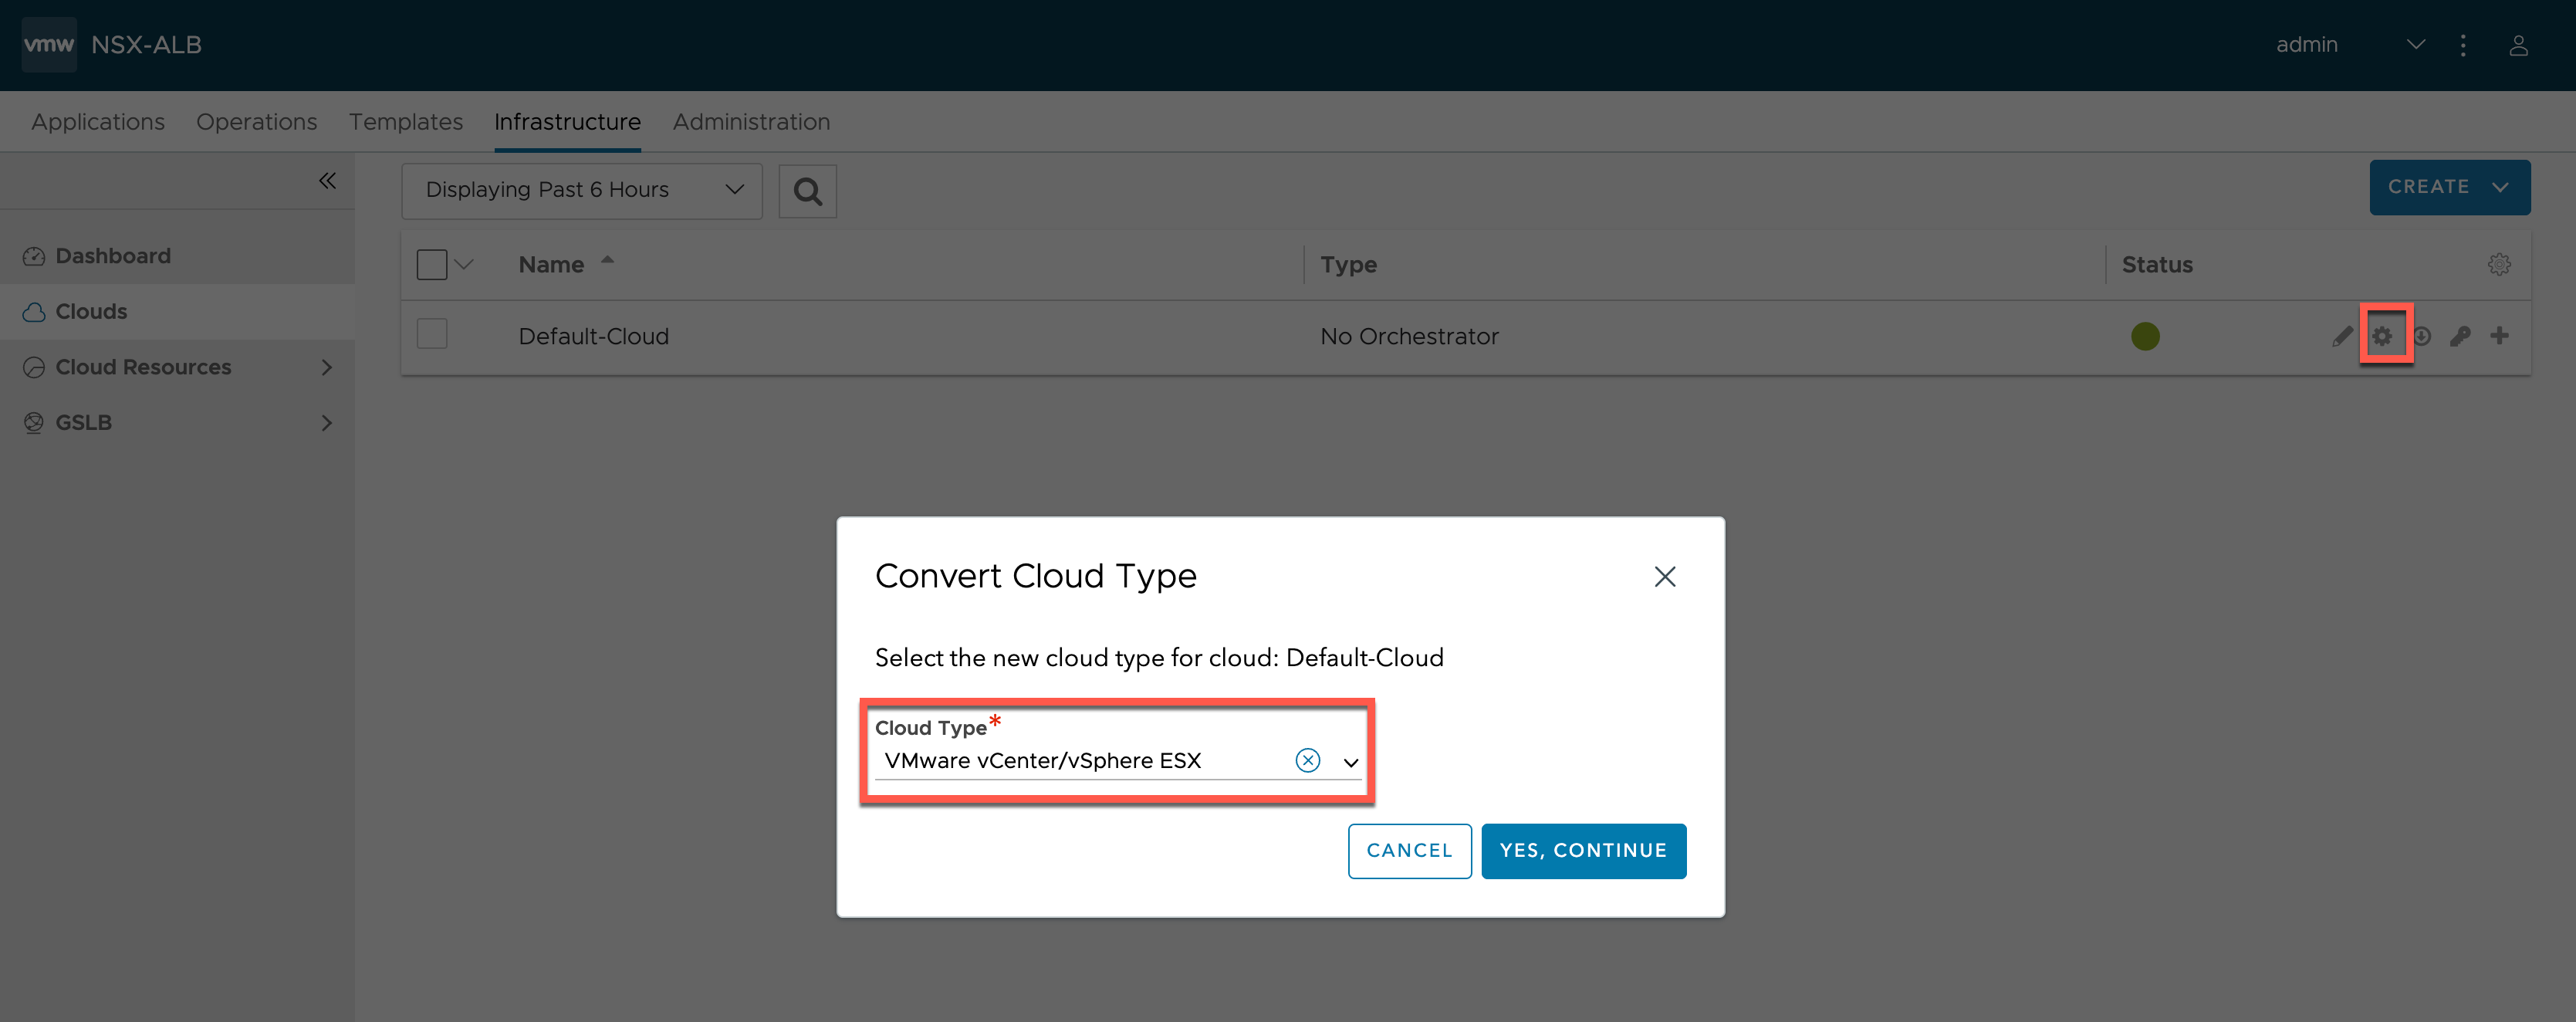
Now we'll head over to the Infrastructure tab to start configuring our Default-cloud. Note that if you'll use Avi for vSphere with Tanzu or with the Avi Kubernetes Operator (AKO) you have to keep the Default-cloud and configure that.
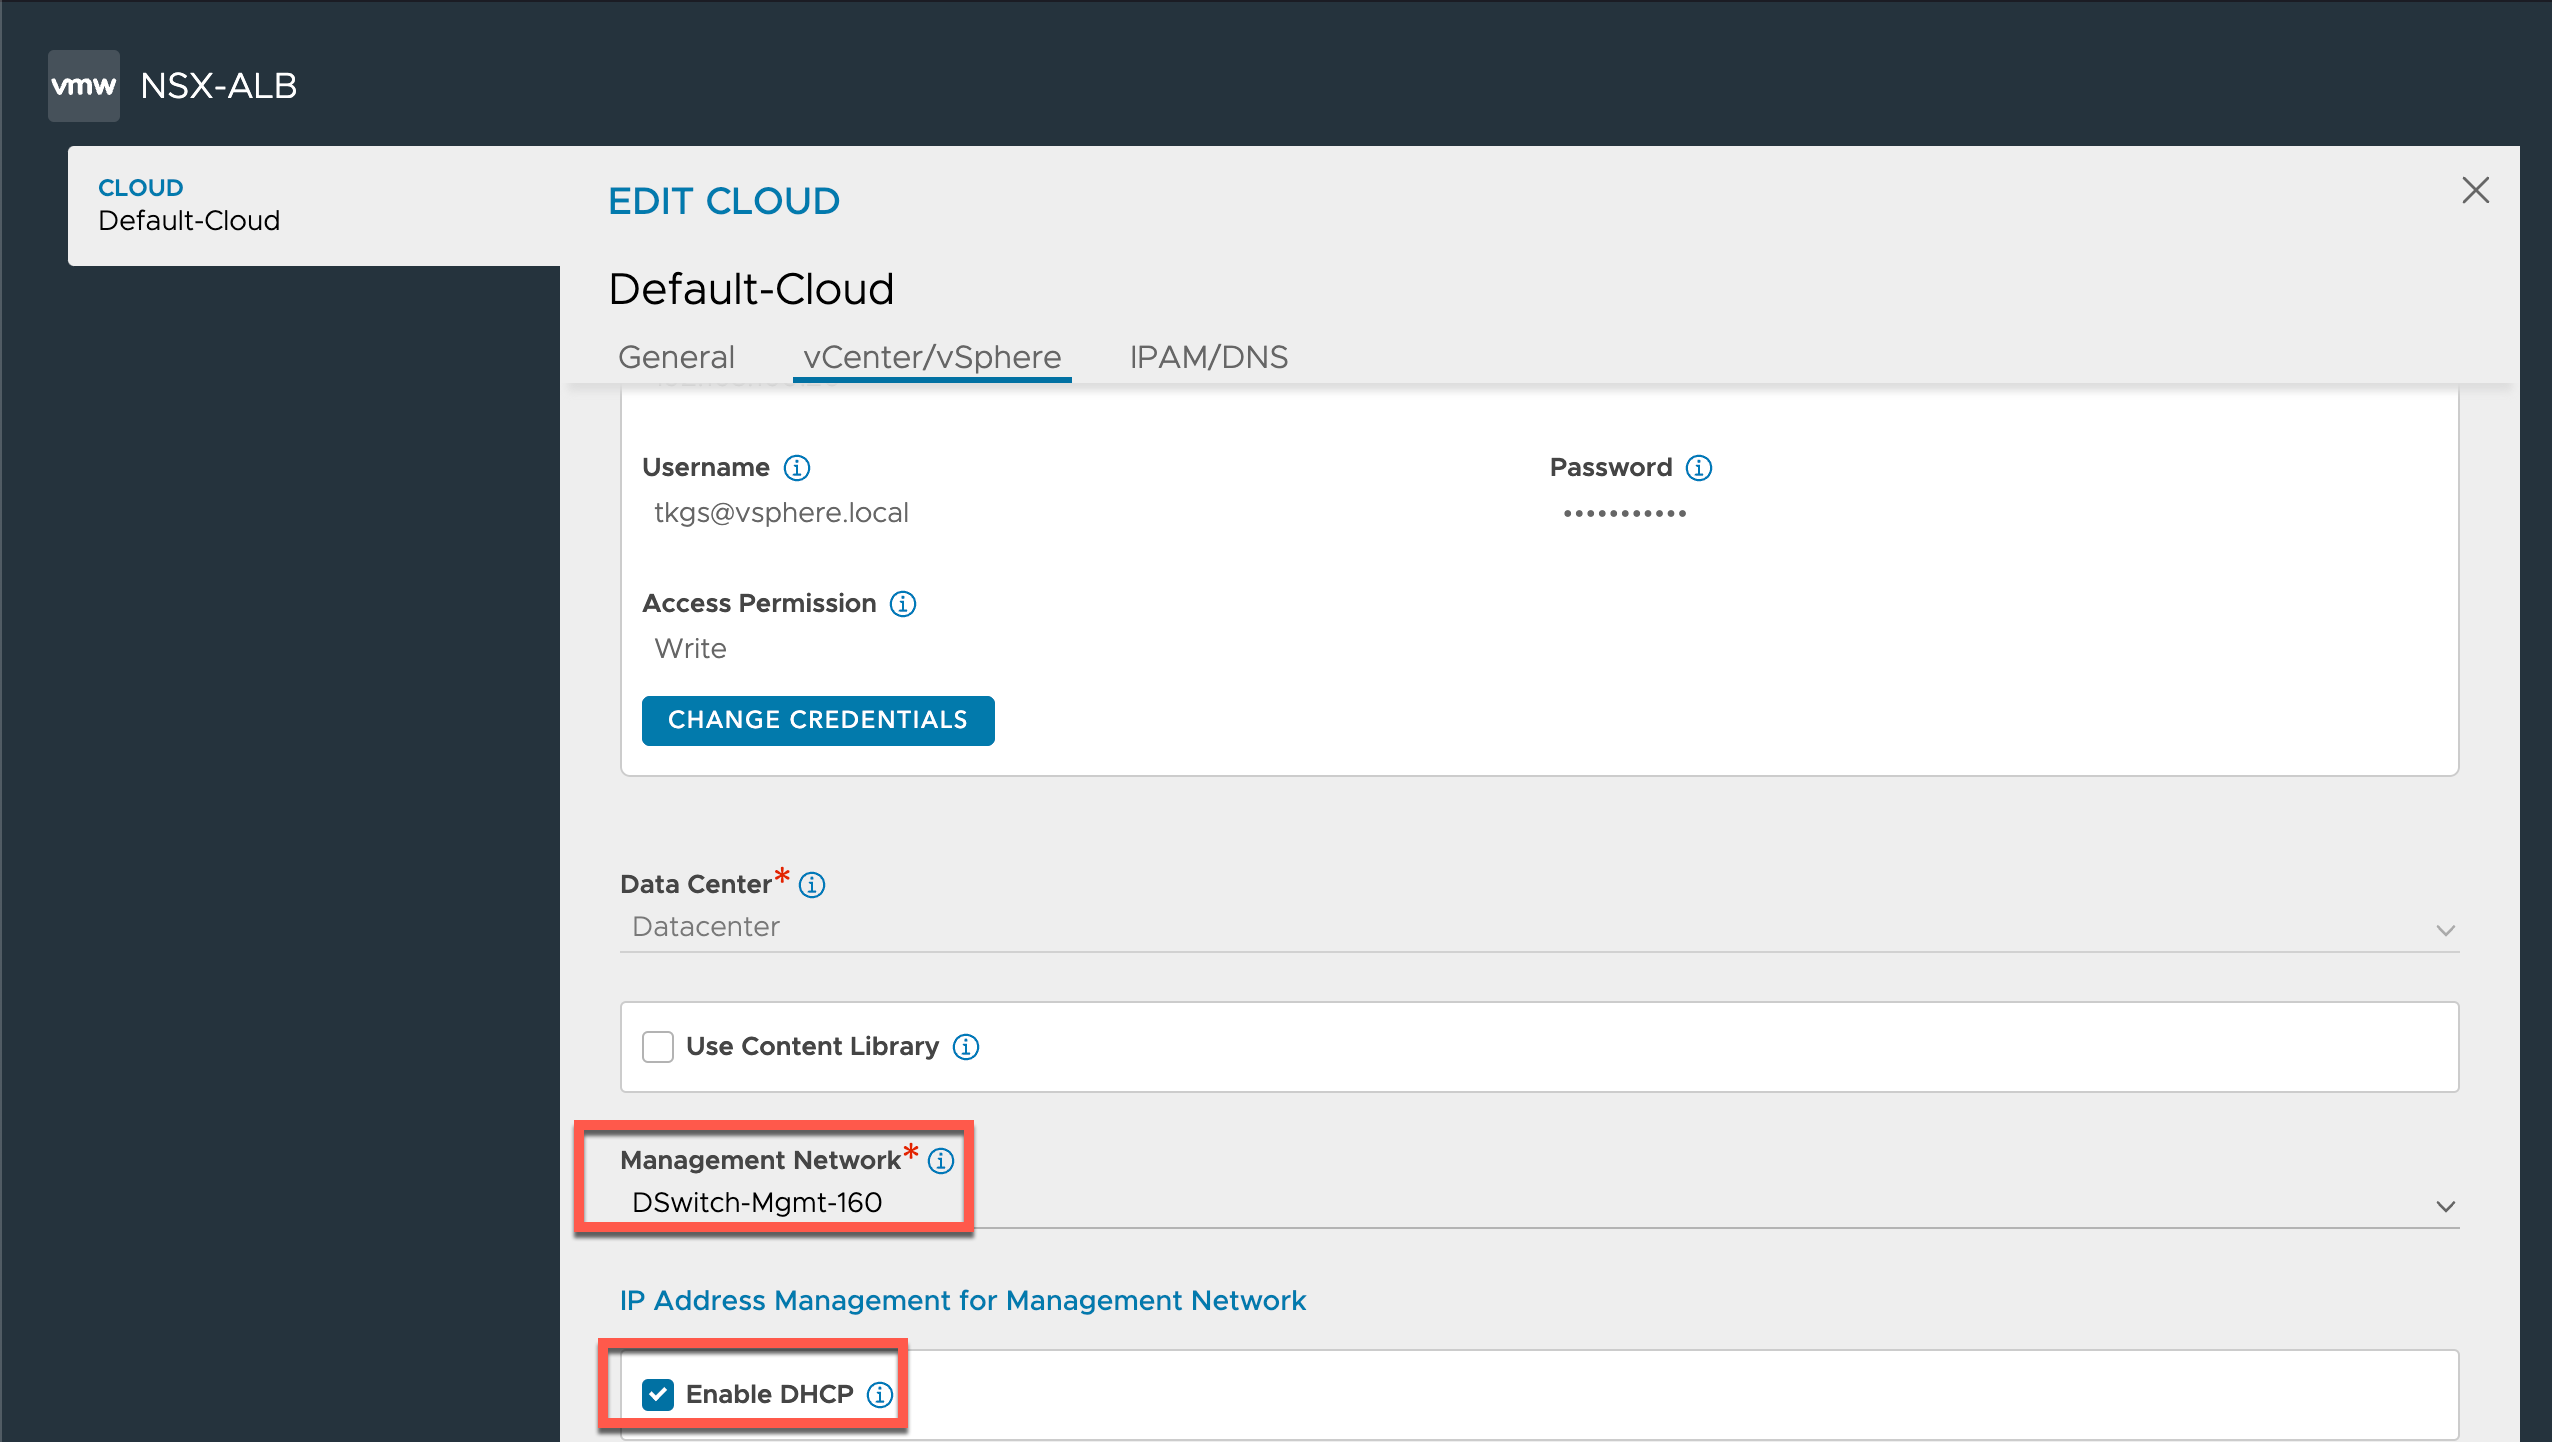
If you, like we've done in this post, didn't setup the cloud with the Initial config wizard we'll need to convert the Default-cloud cloud type from the "No Orchestrator" type to VMware vCenter/vSphere
After confirming the cloud type change we'll be presented with a wizard for configuring the cloud. In this setup we'll set the Service Engine group to the Default-group, we'll select DHCP as the default for our networks.
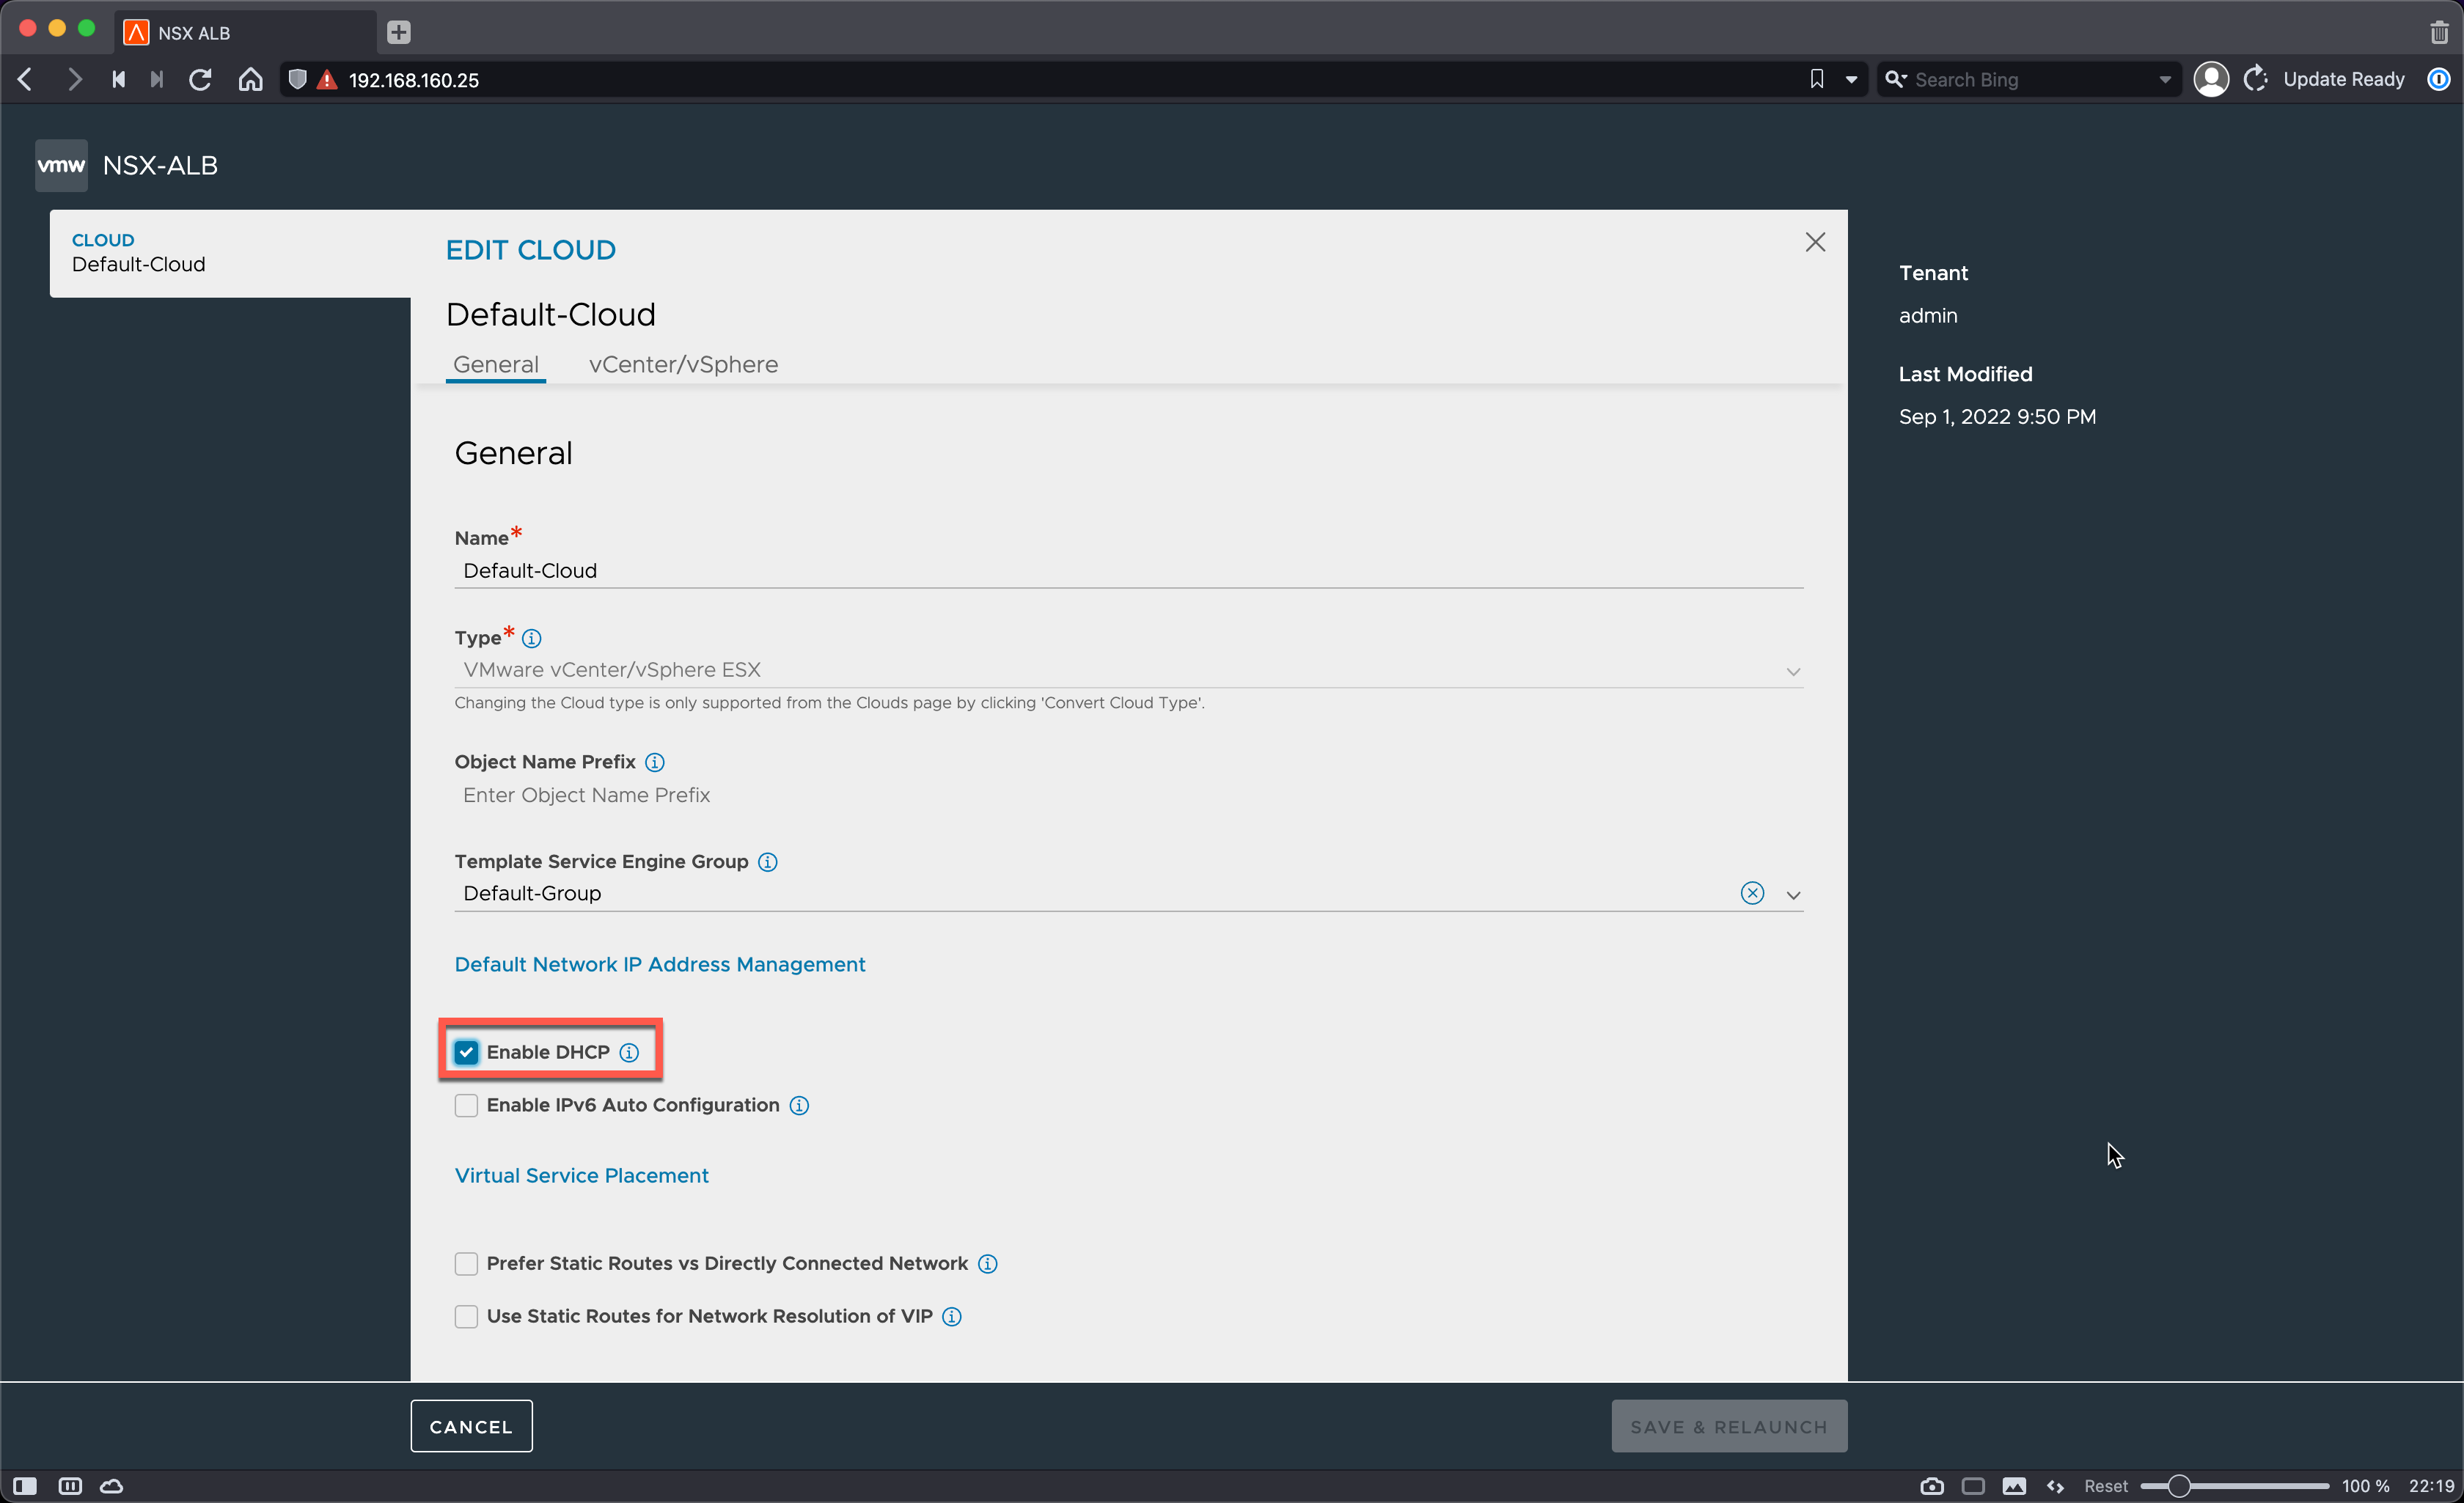
In the same wizard we'll also set our vCenter credentials. Note that I'm using a specific account for this setup. The permissions needed can be found here. A new feature in Avi 22 is the ability to use a Content Library for storing the Service Engine images, but this is an Enterprise feature so we'll not use this in our setup.
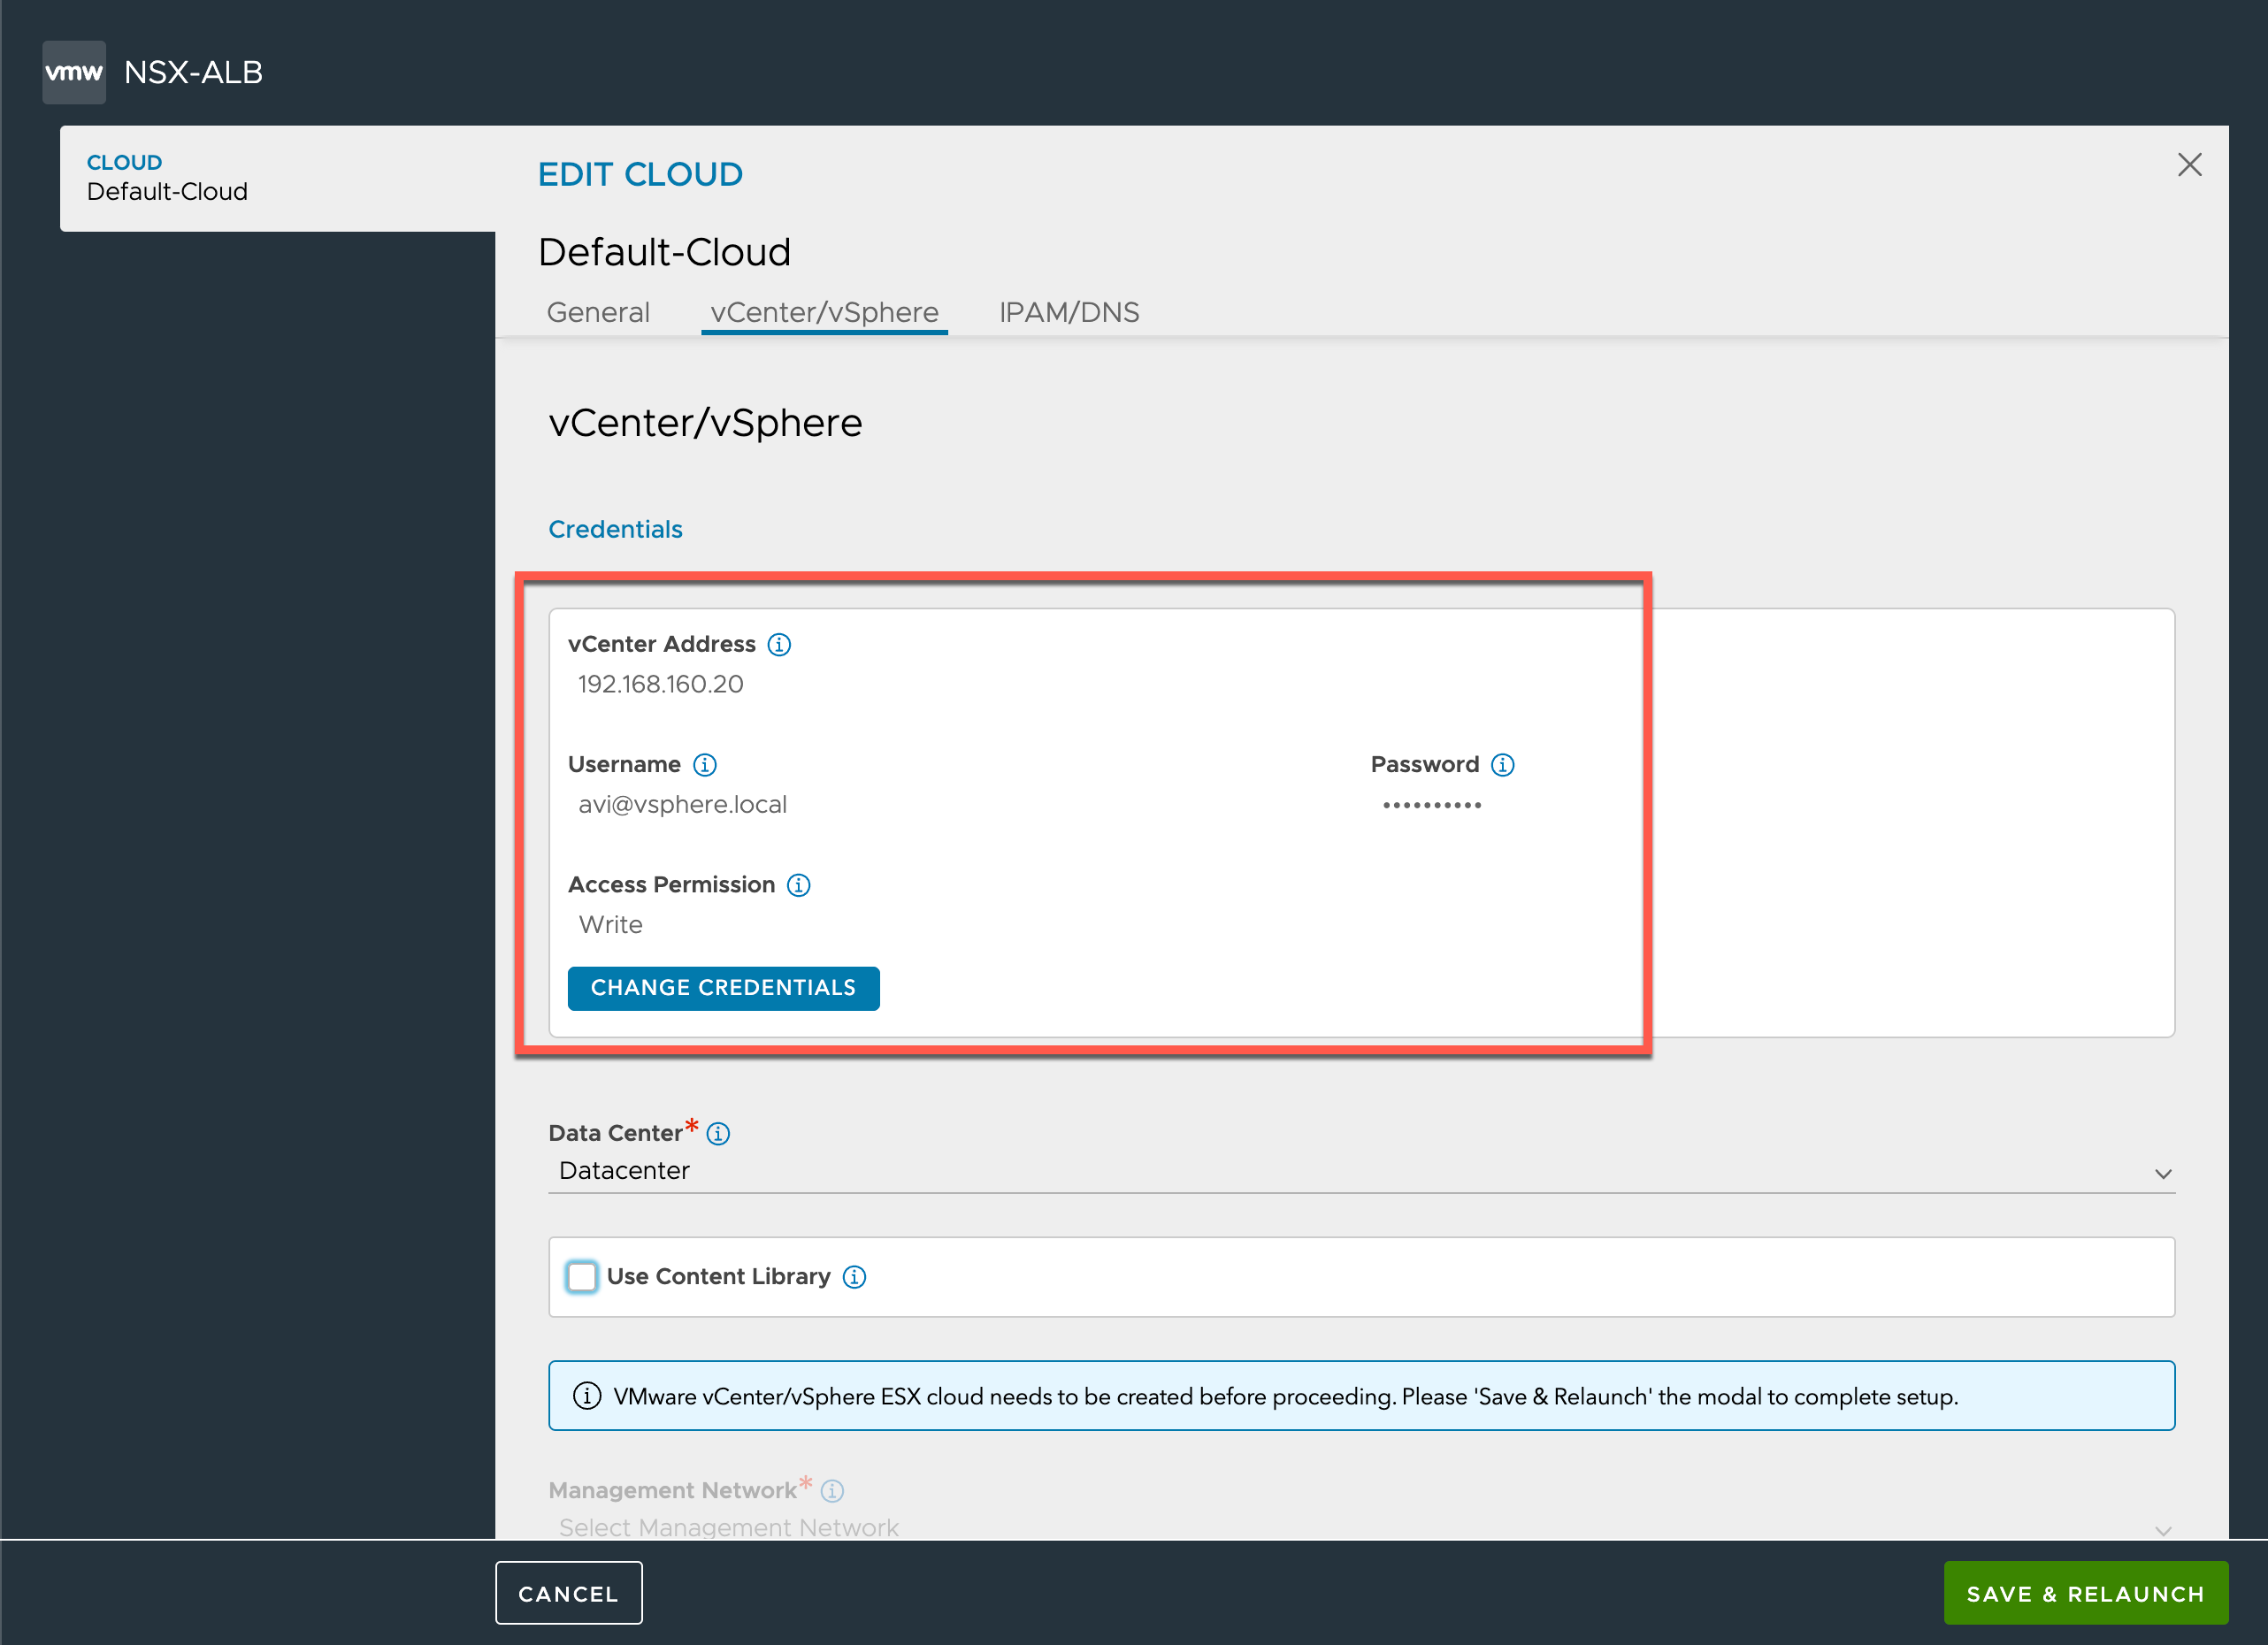
Before the last cloud configuration settings can be done we need to hit Save & Relaunch.
After the wizard relaunches, we'll select the correct Port group for the management network and we will also select DHCP as the default. Hit Save when finished.
Networking setup
After adding the credentials and connecting to vCenter the Avi controller will discover, amongst other things, the vSphere networks. We'll configure the ones that we'll be using later on in our vSphere with Tanzu setup
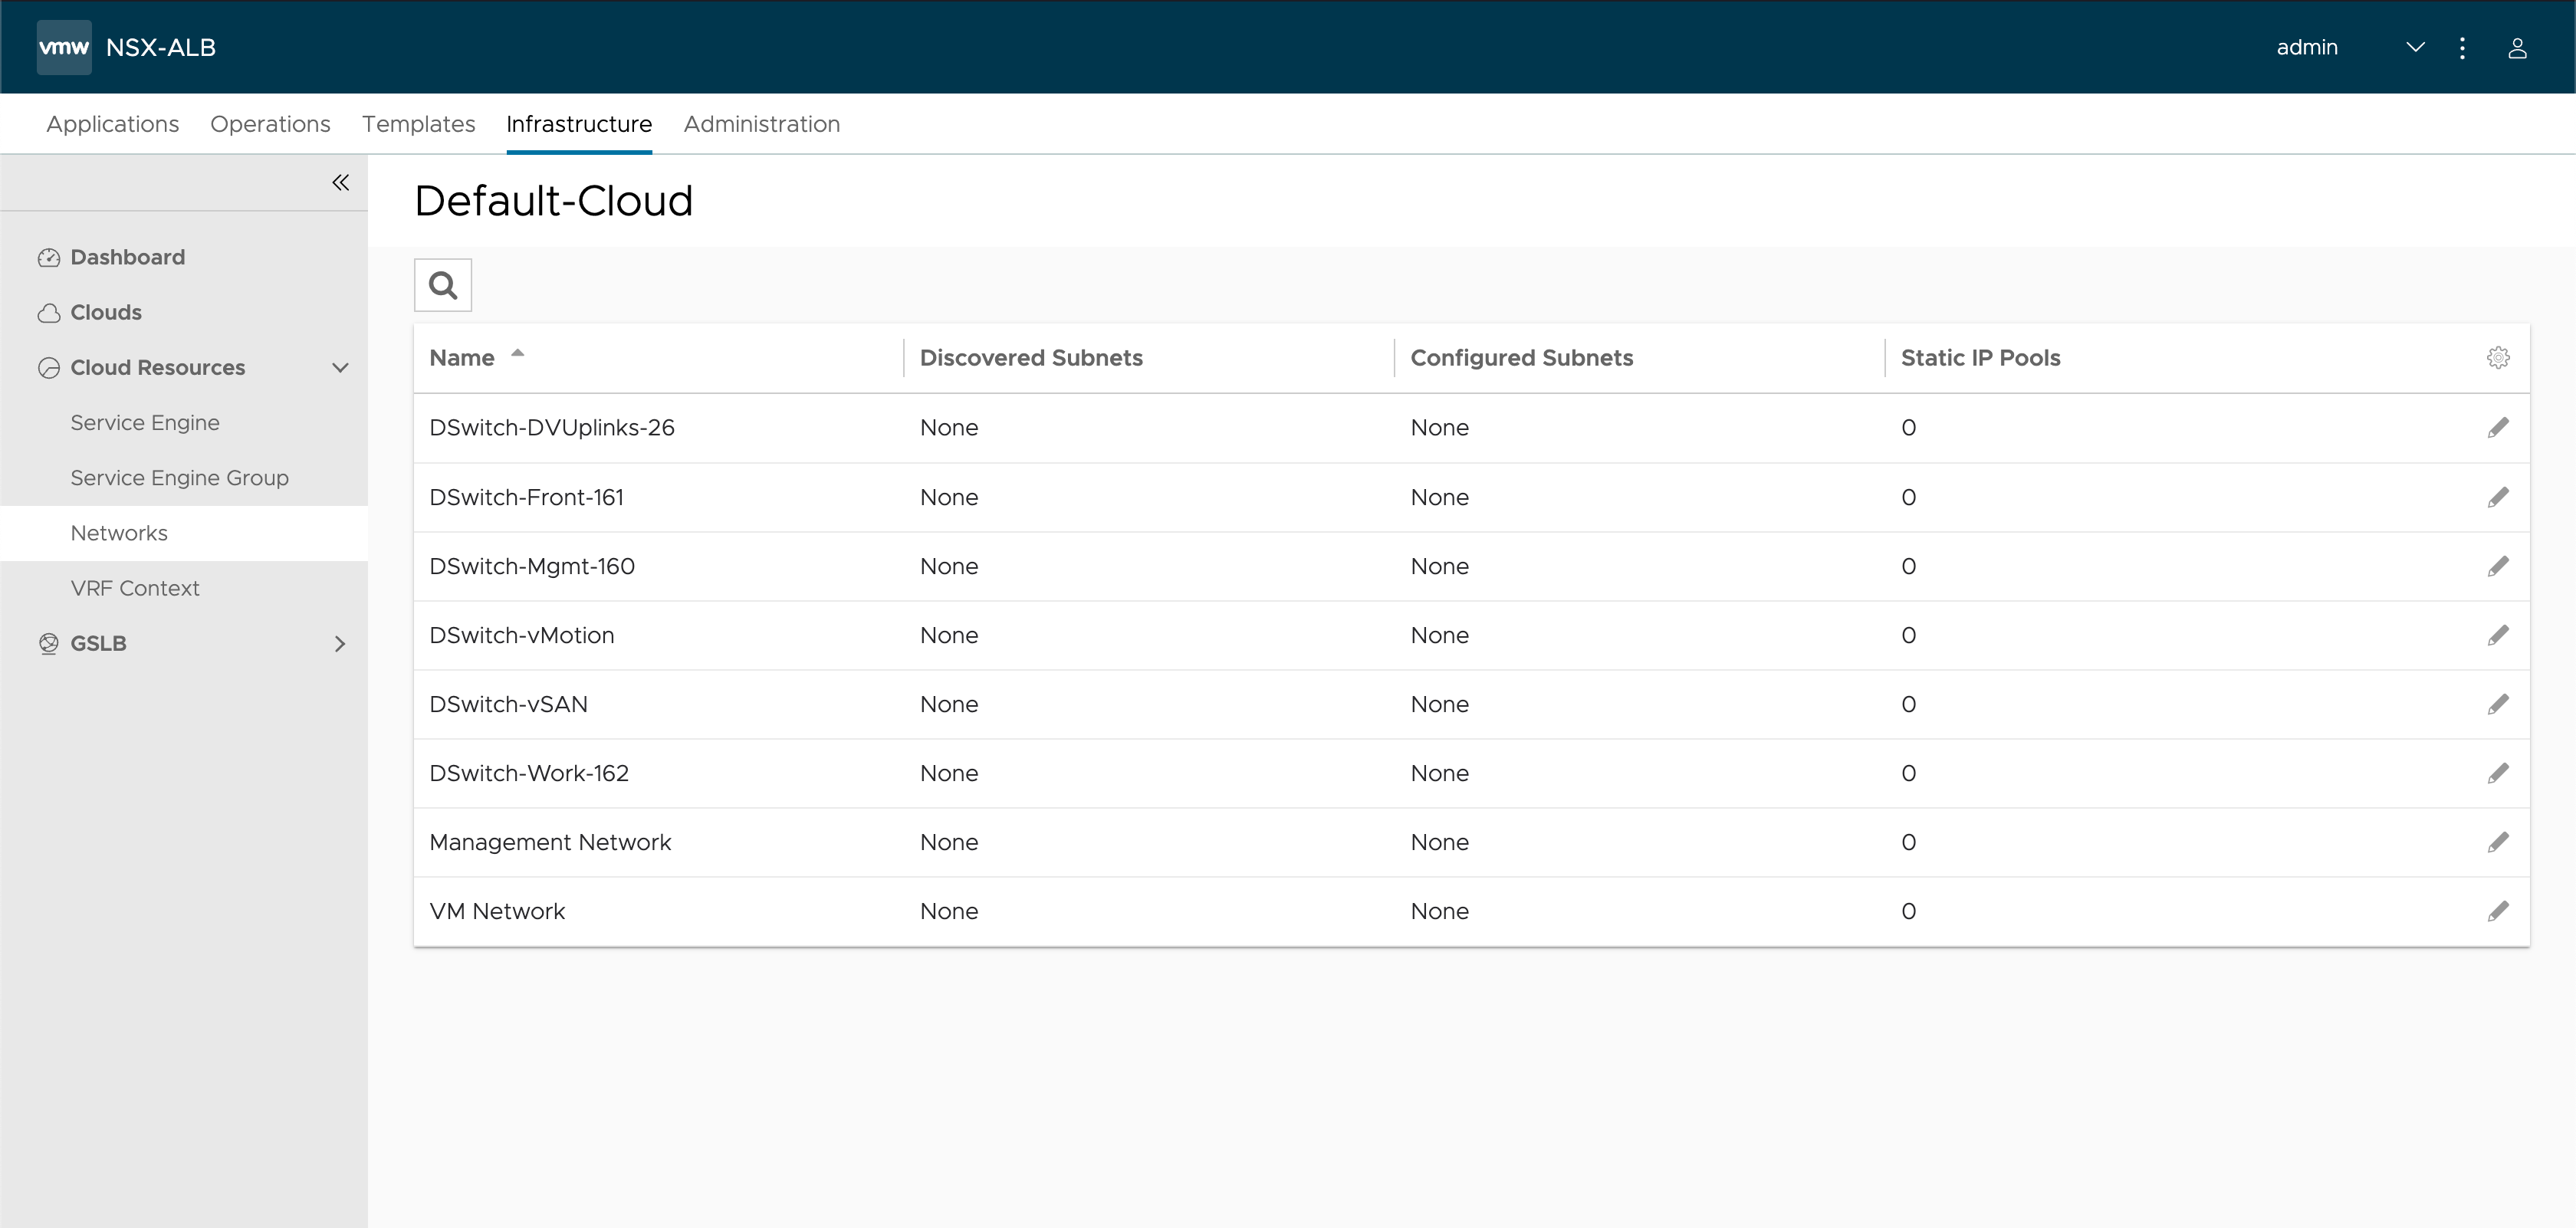
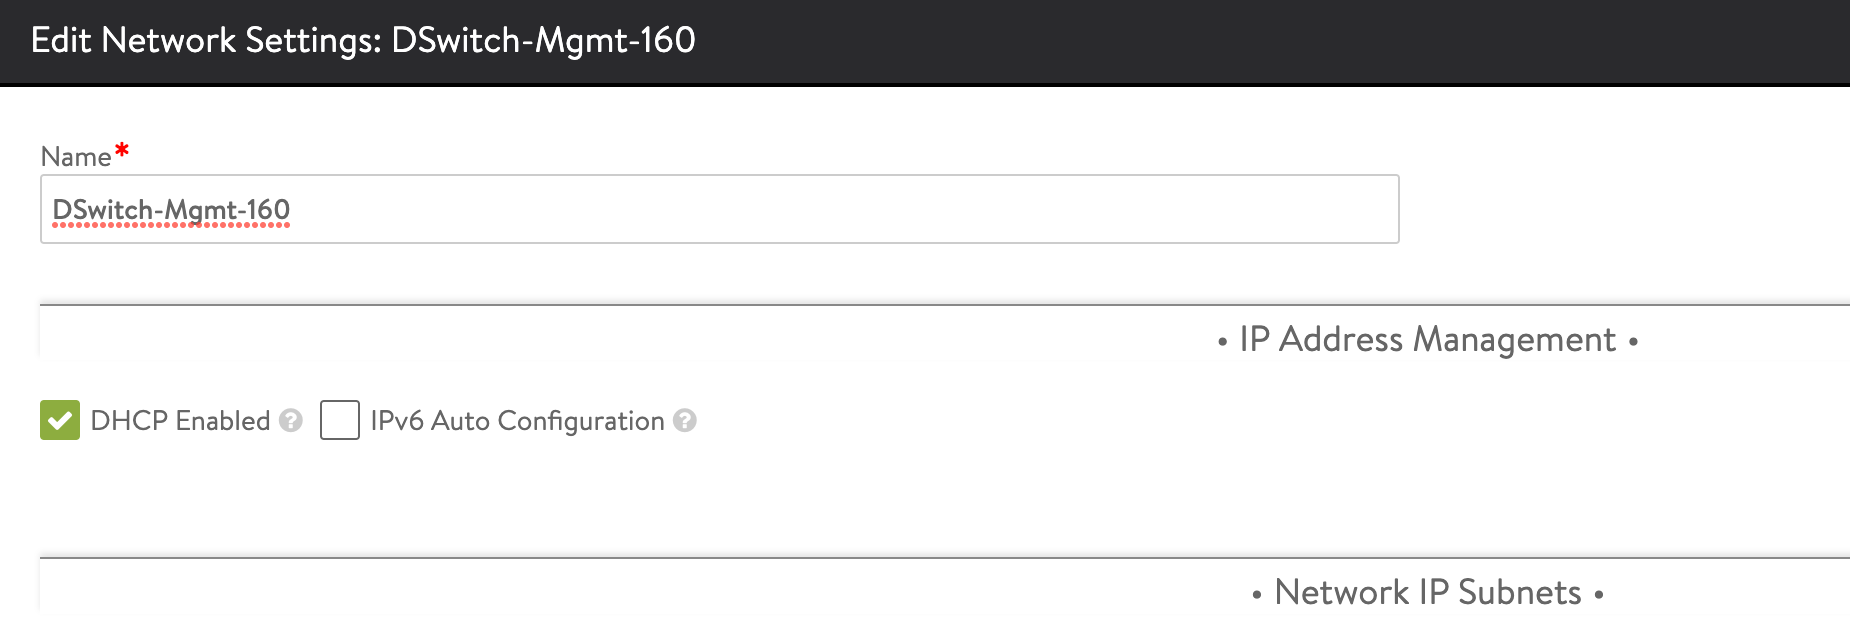
In our setup we'll mostly use DHCP so we'll verify that our networks has this selected
If you're not using DHCP this is where you would configure the Static IP pools. In our setup there's one set of resources that we need to provide an IP pool for and that is for the Virtual Services.
In this example we will have the Virtual services on the "Frontend" network, so we will find this in our Network list and configure it.
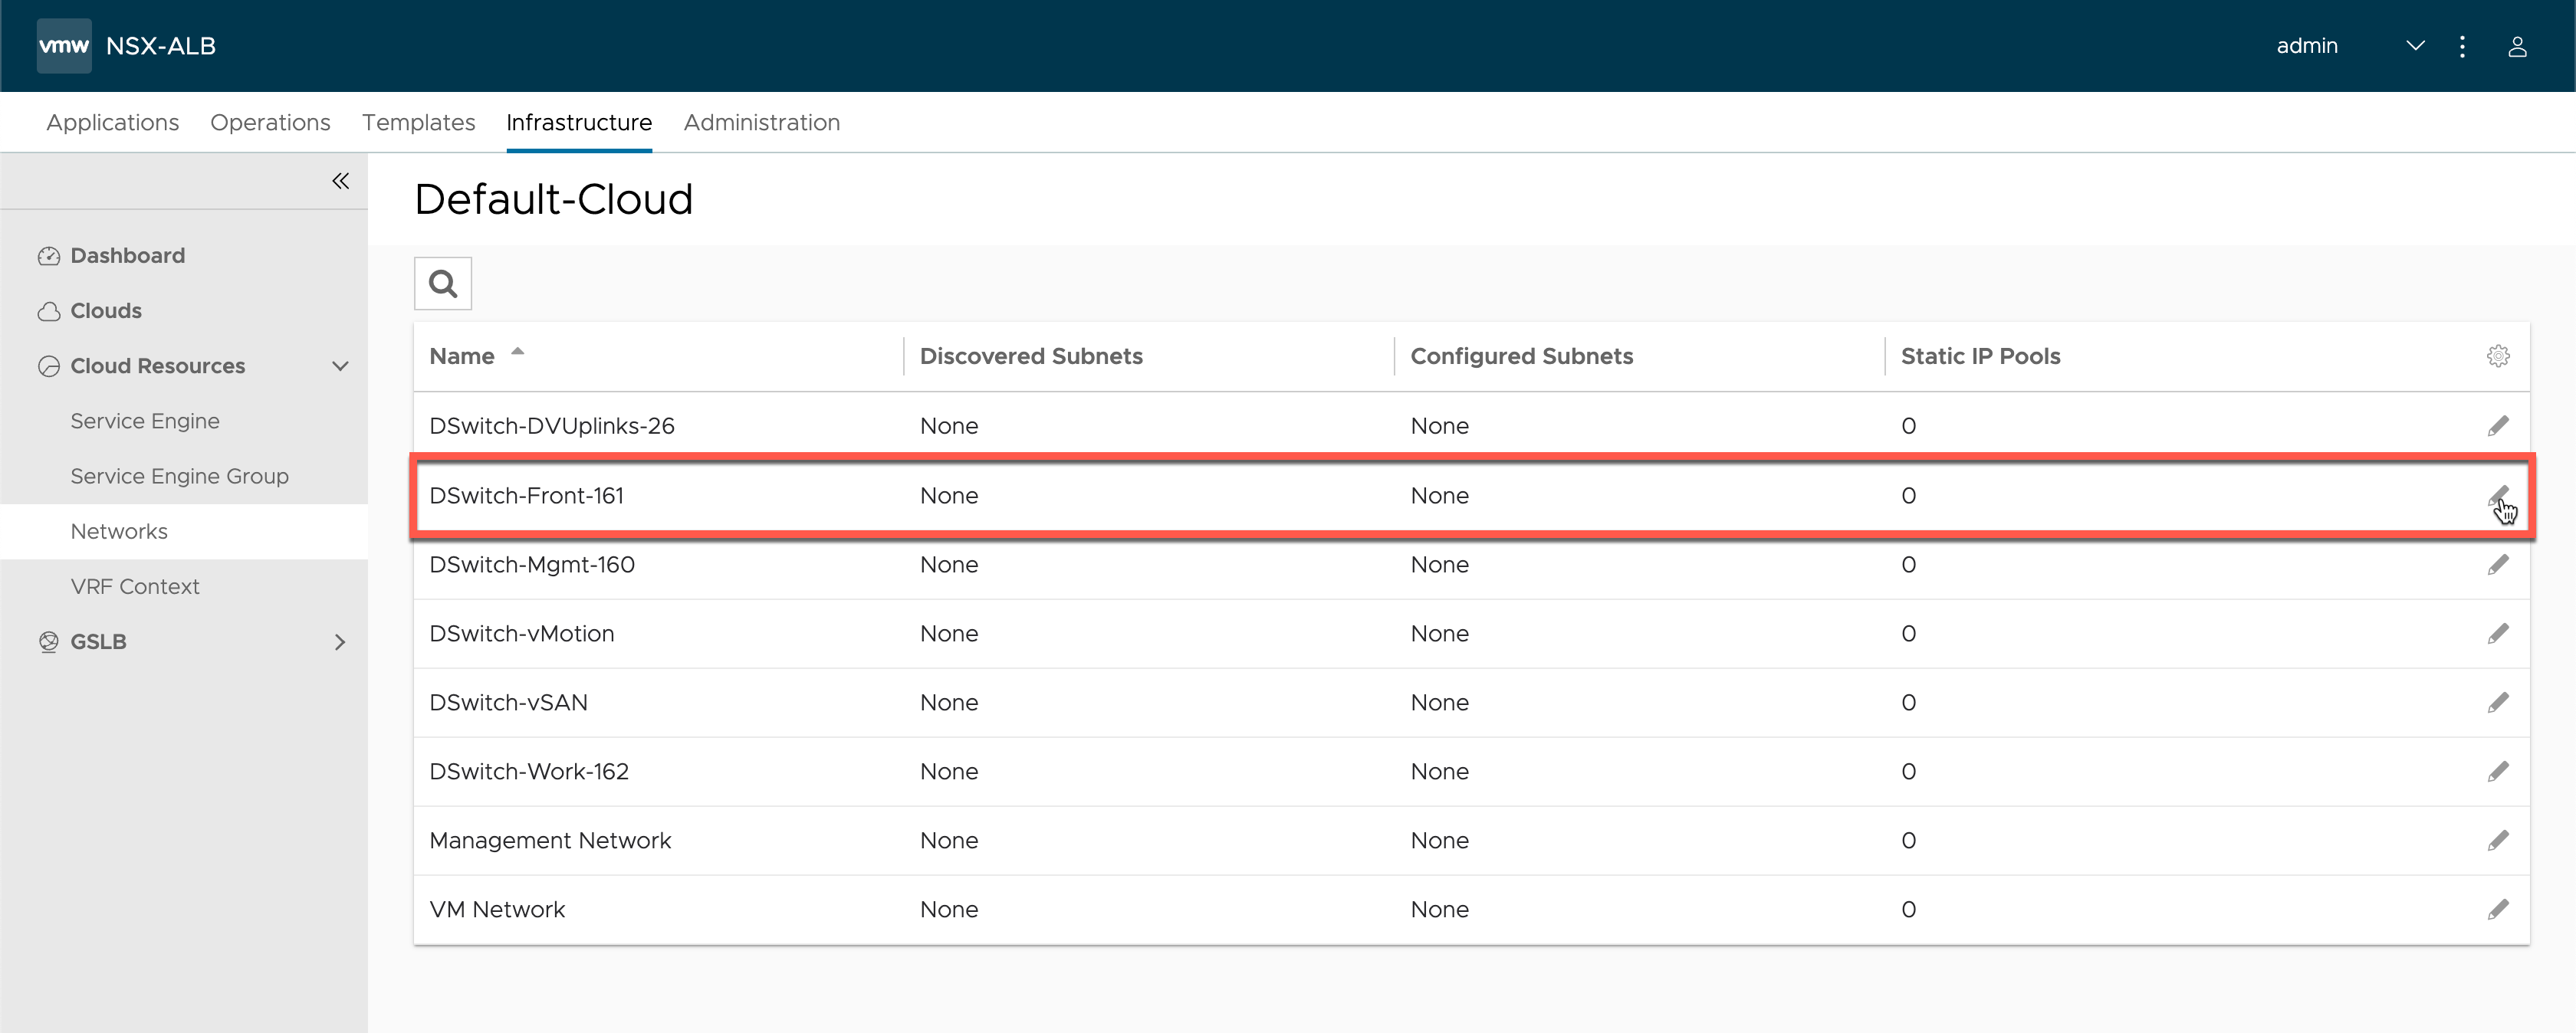
For the configuration we will hit Add subnet and this let's us enter the details of the subnet and the pool of addresses we want to use. We could use the same pool for both the Virtual services and the Service Engines, but in this case we will only use it for the VIPs
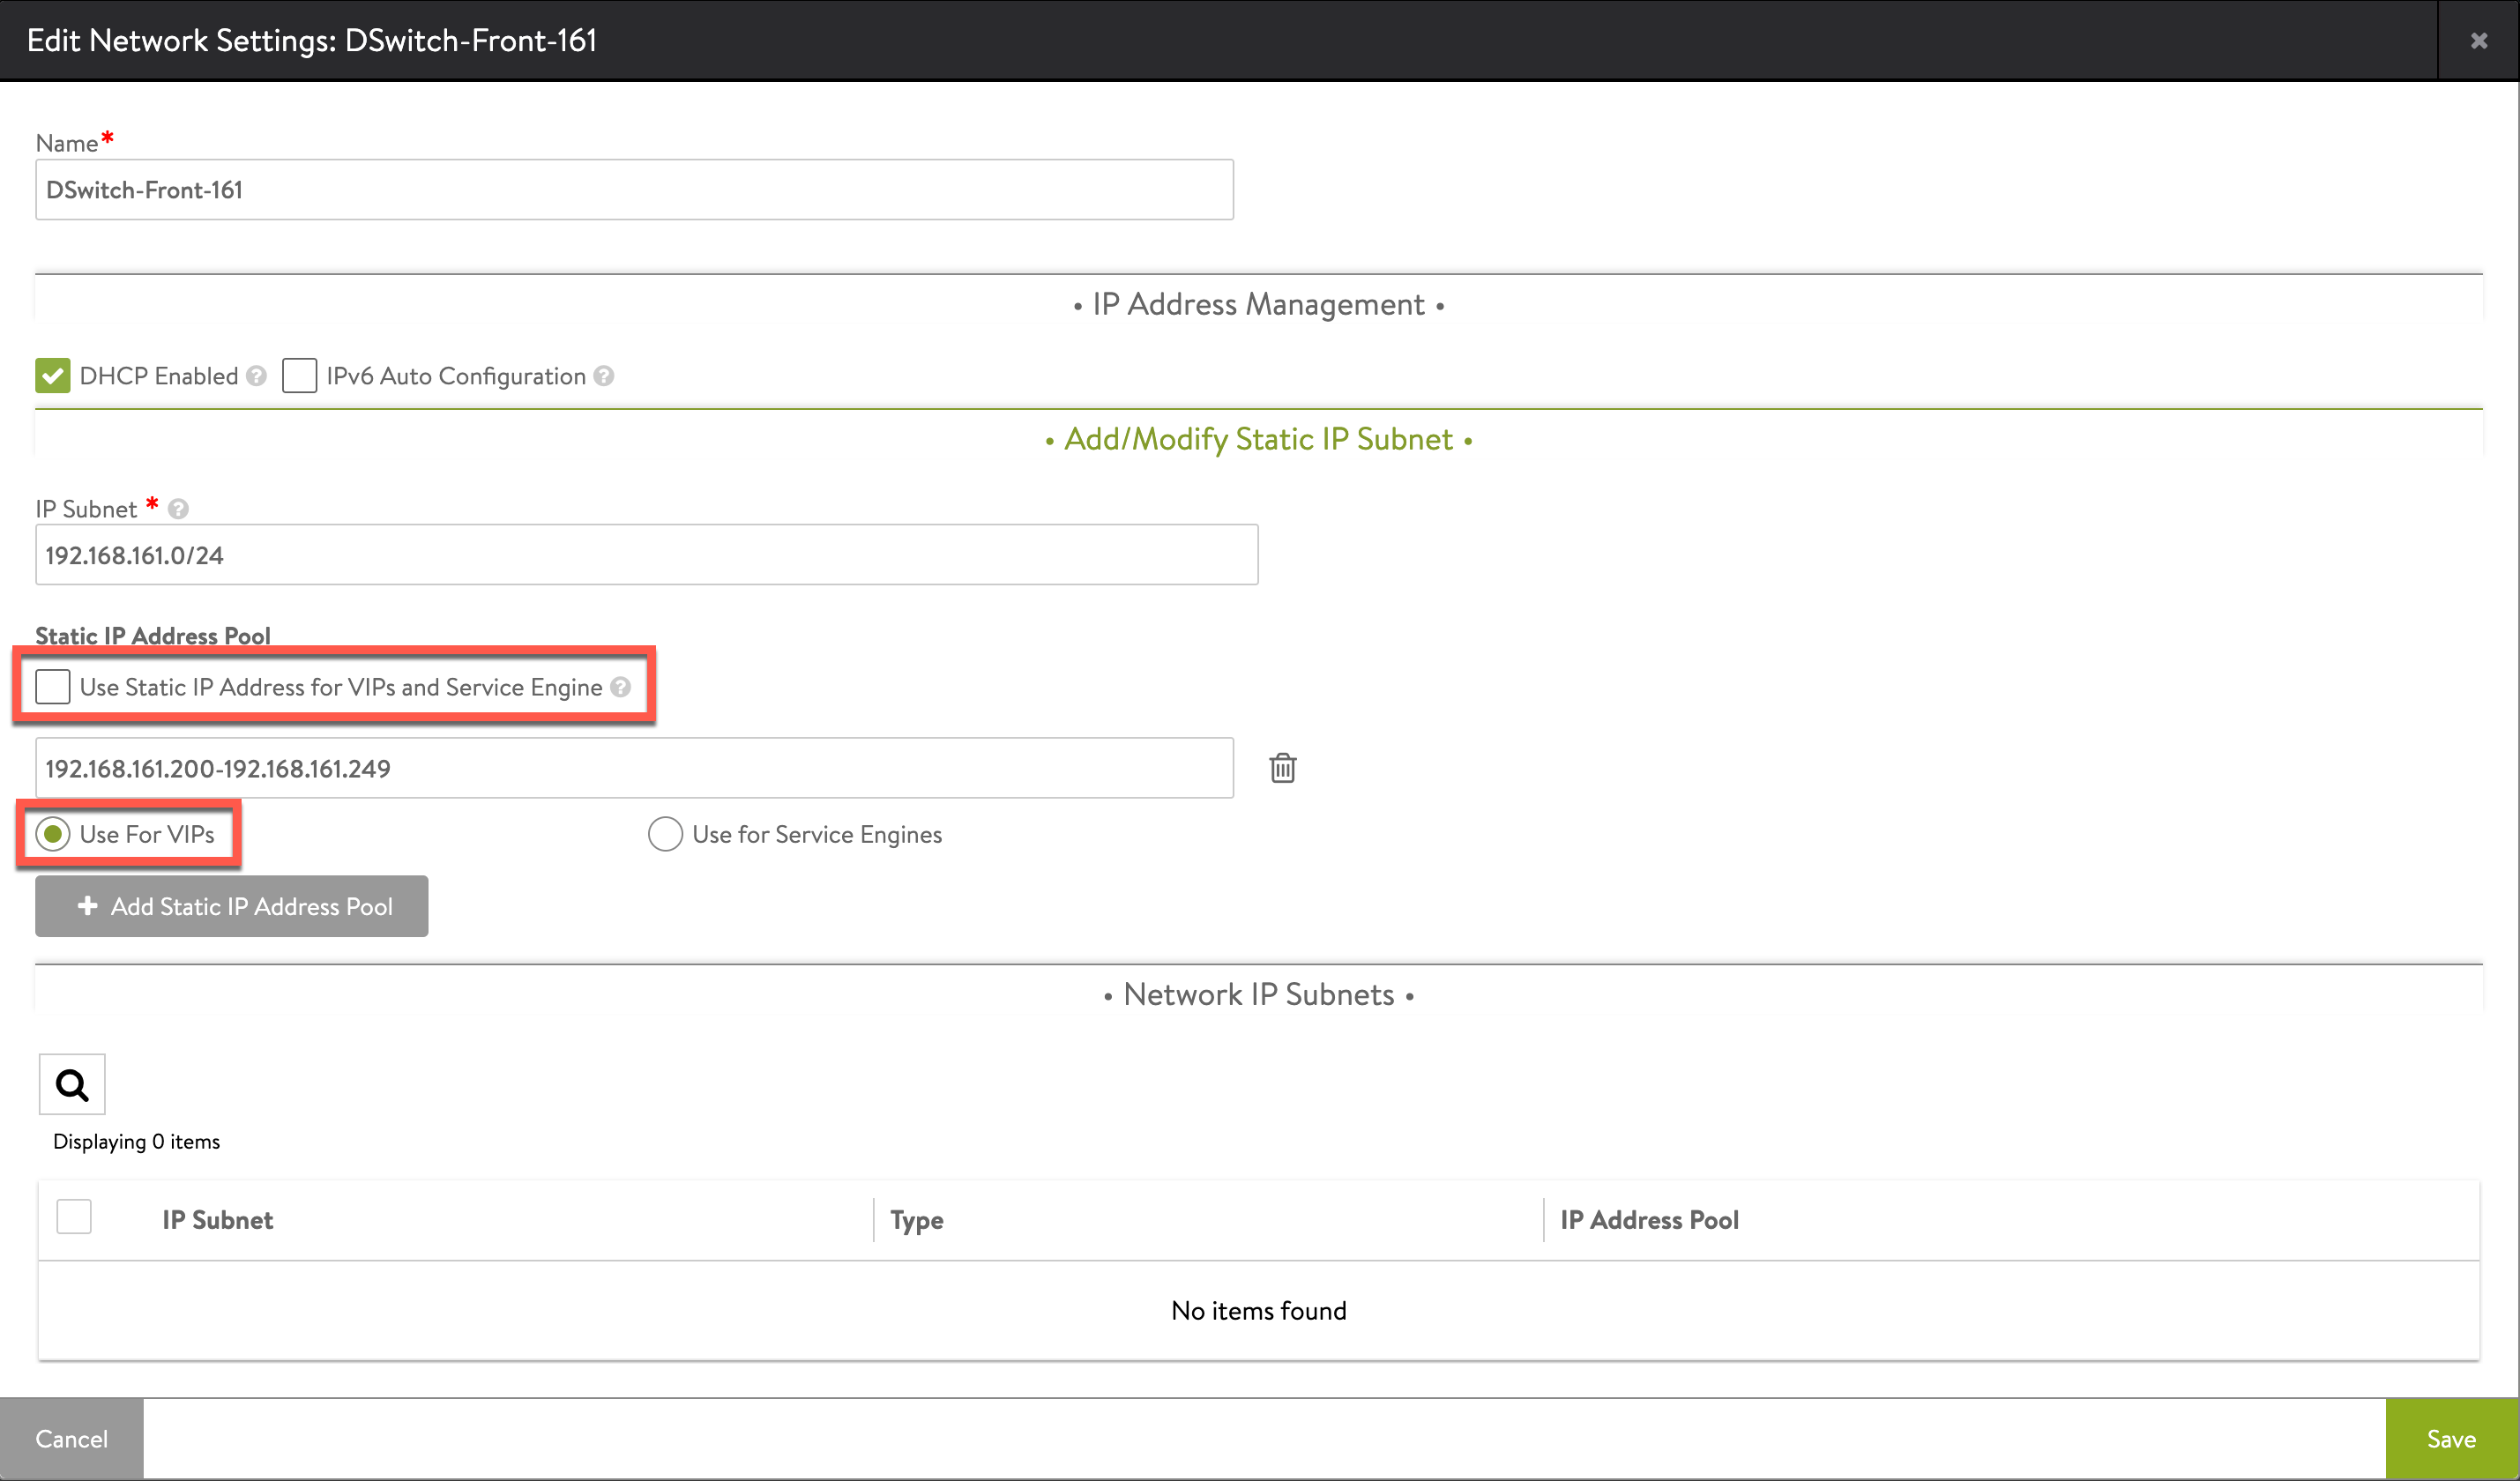
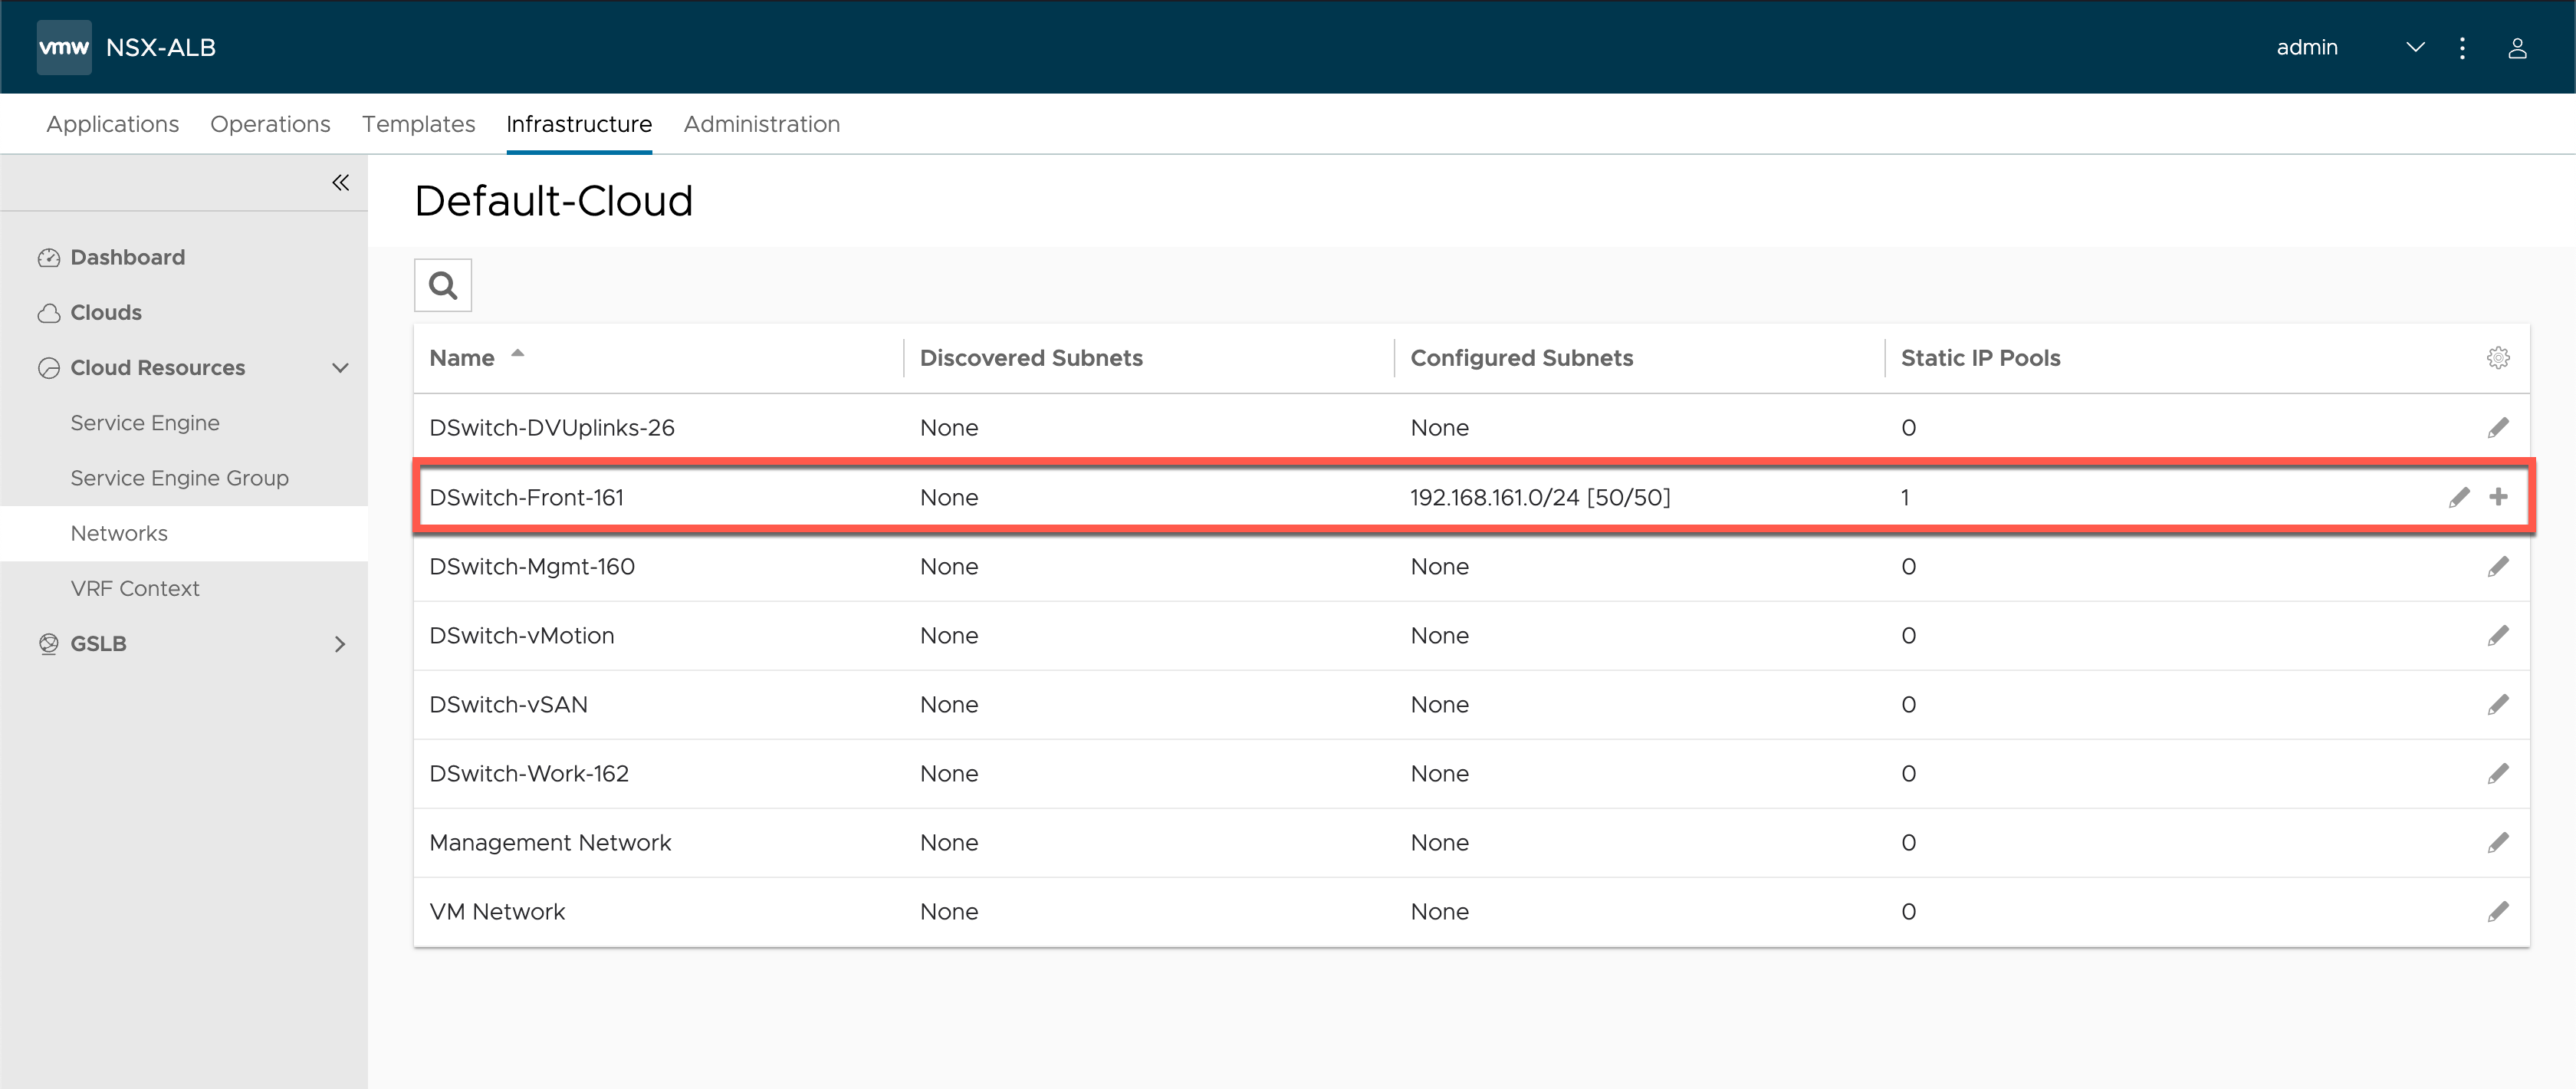
After we've added the Static IP pool and hit Save the configured subnet should be visible on the Network page
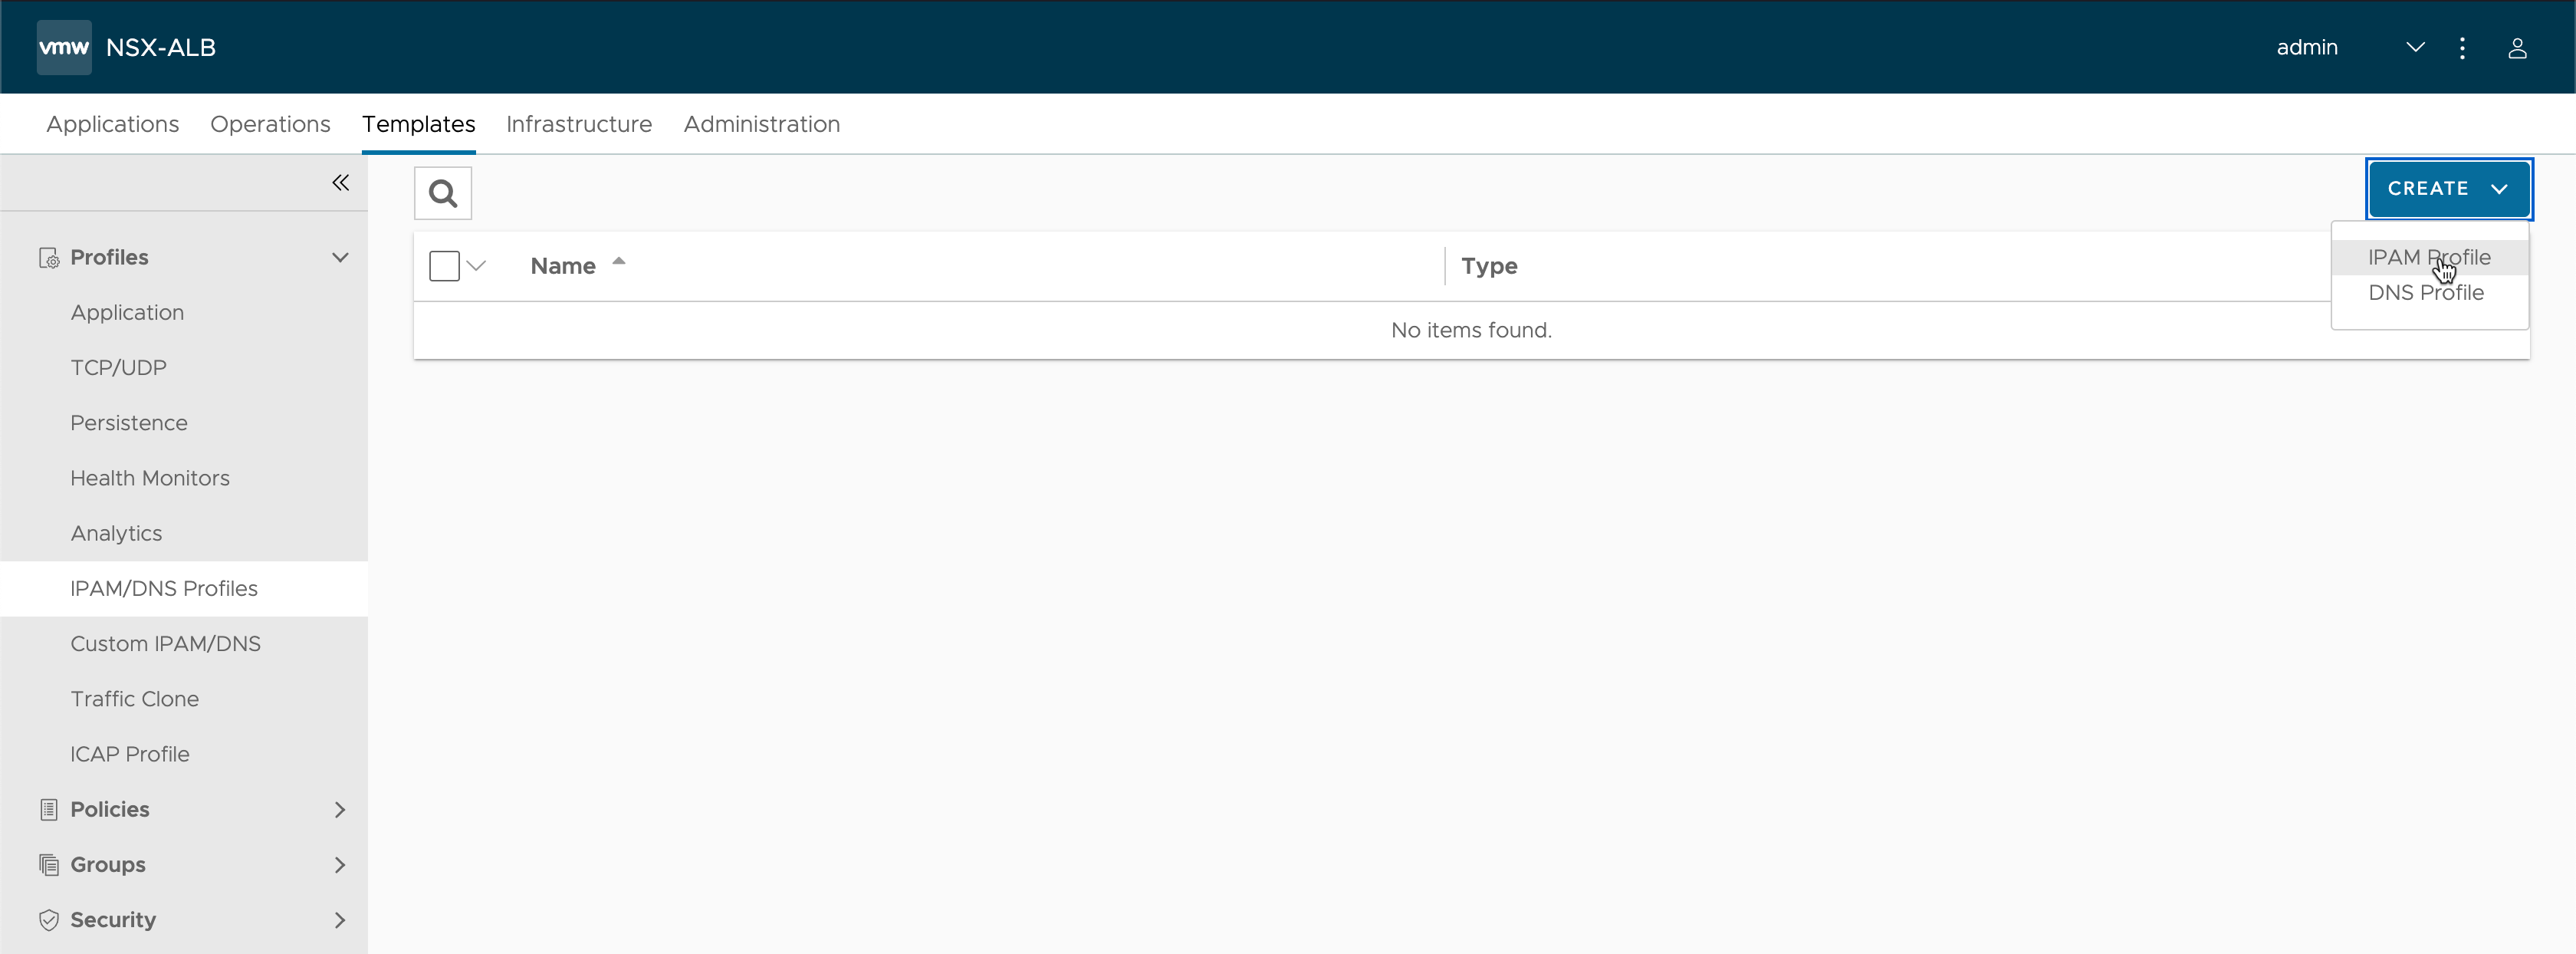
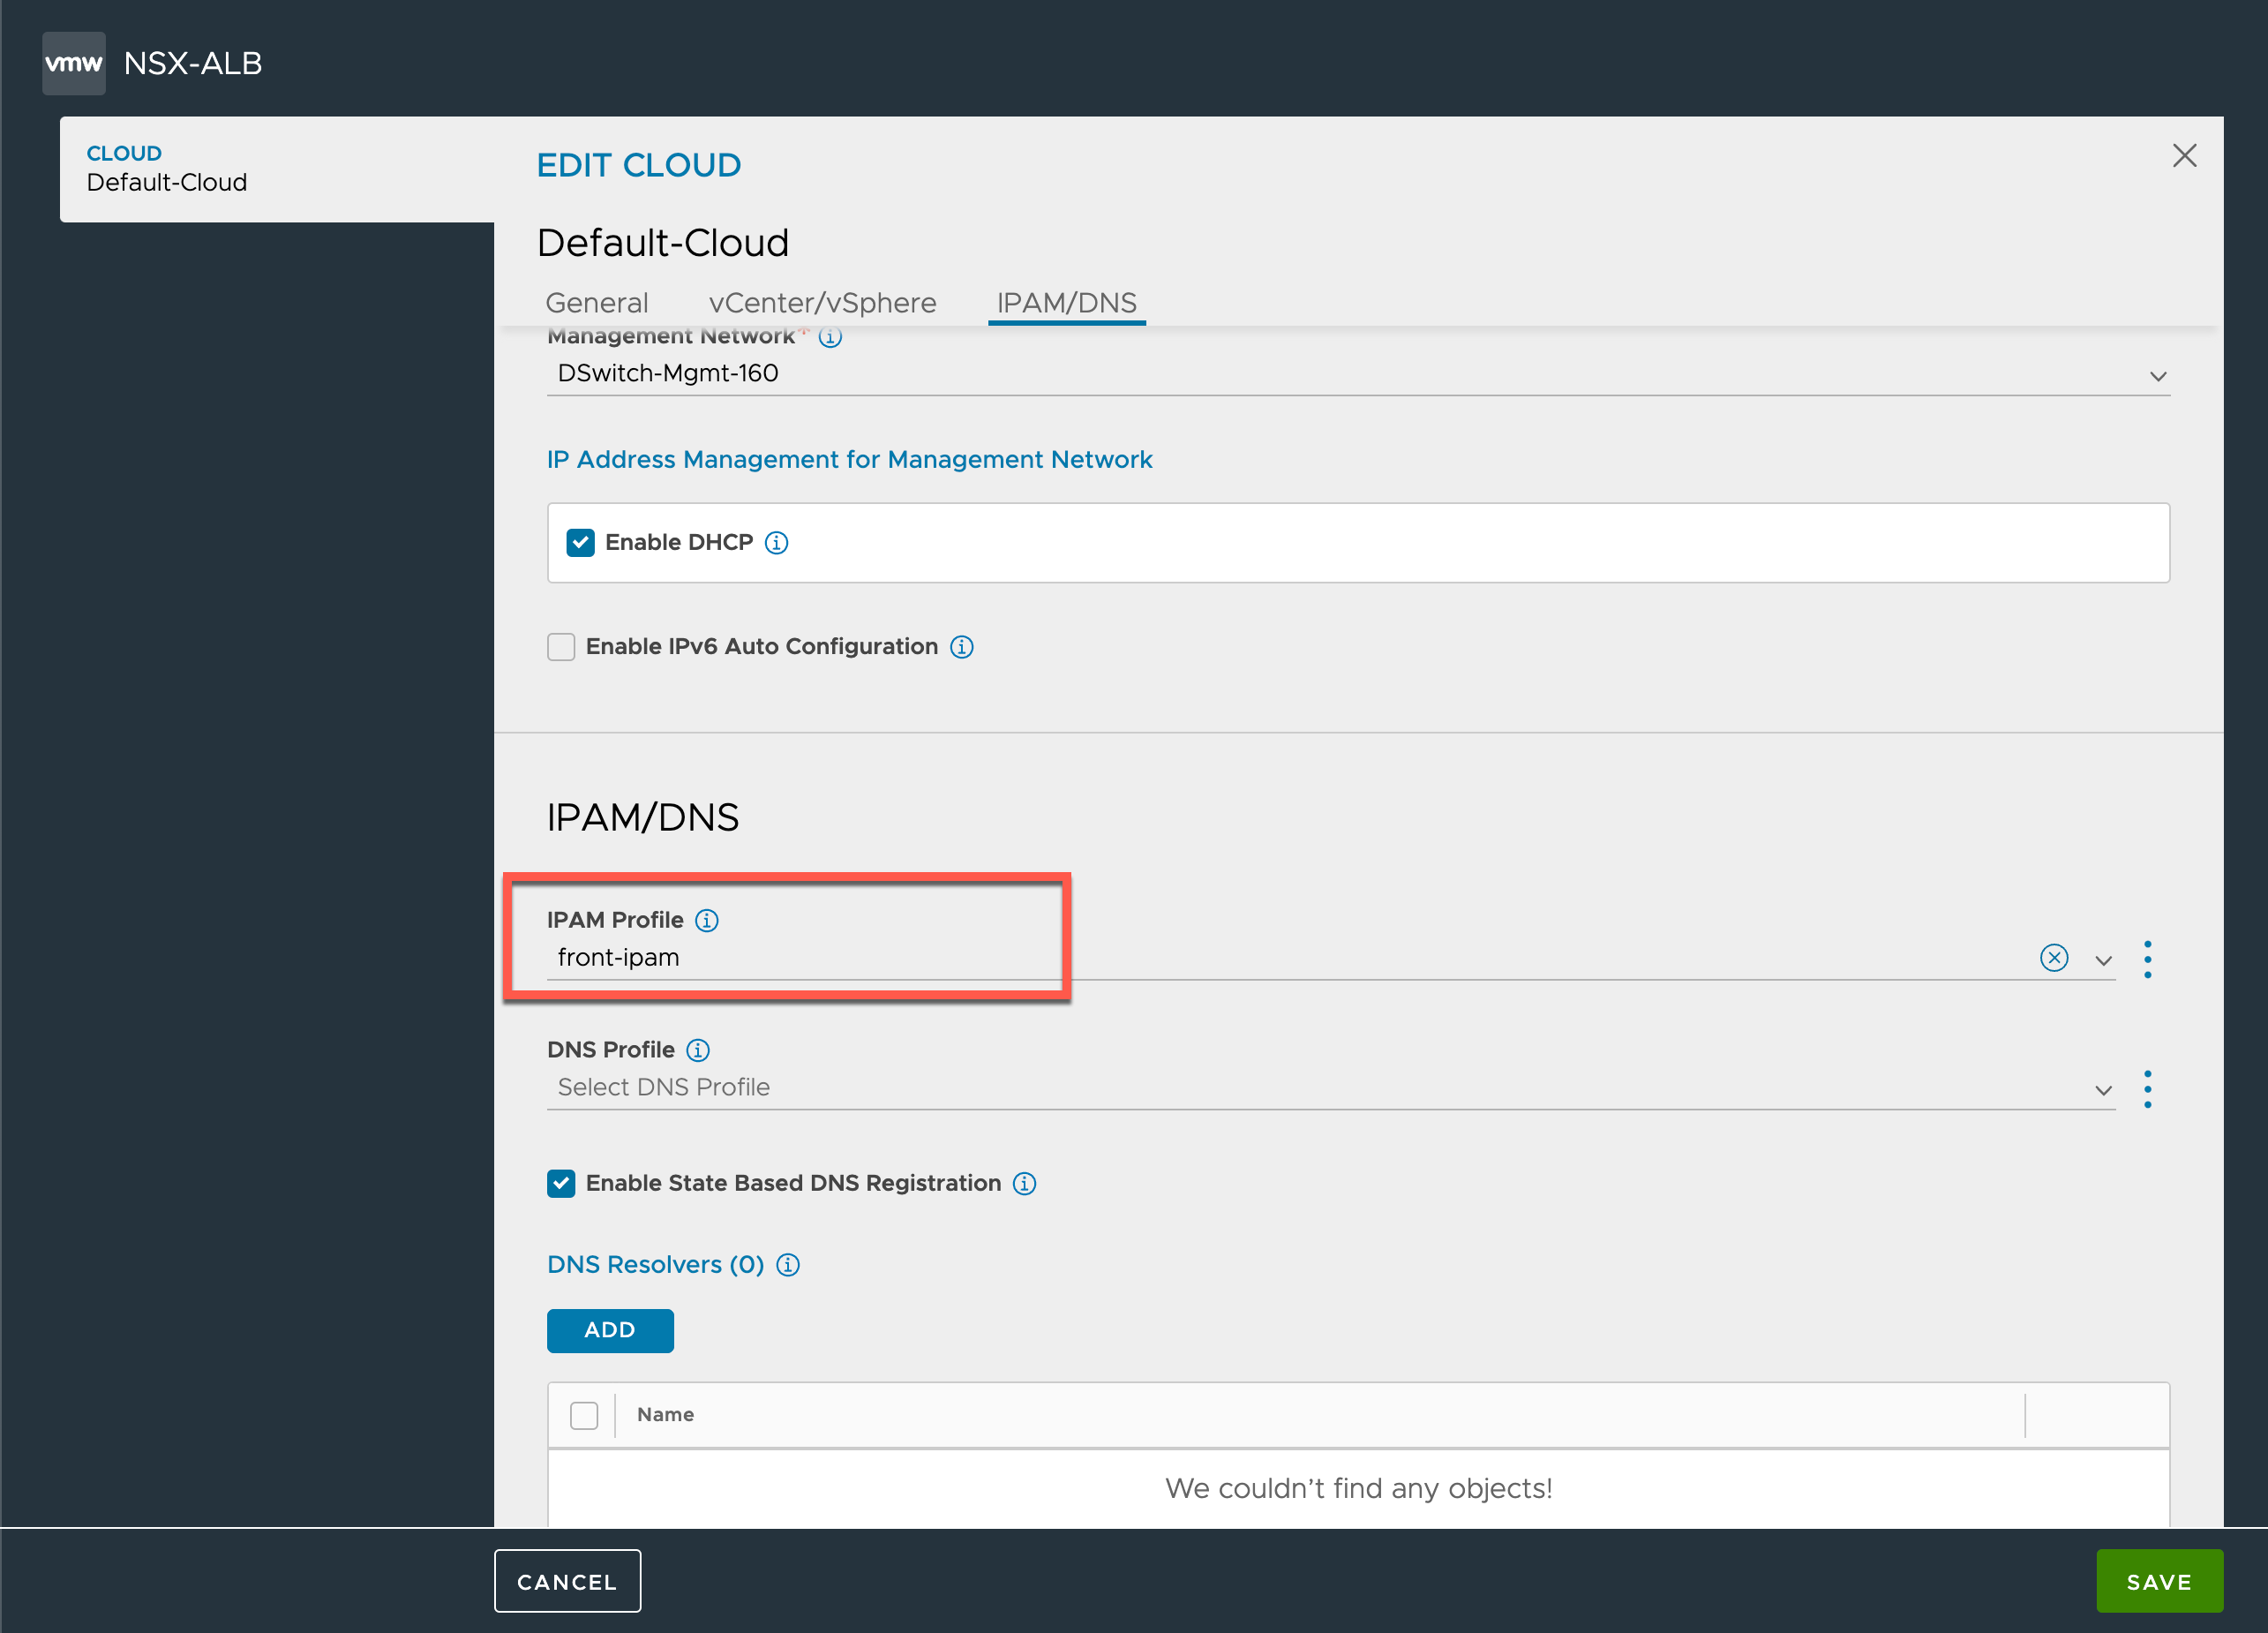
Now we will create an IPAM profile to tell the controller which network it should use for the VIPs. Profiles are created on the Templates tab
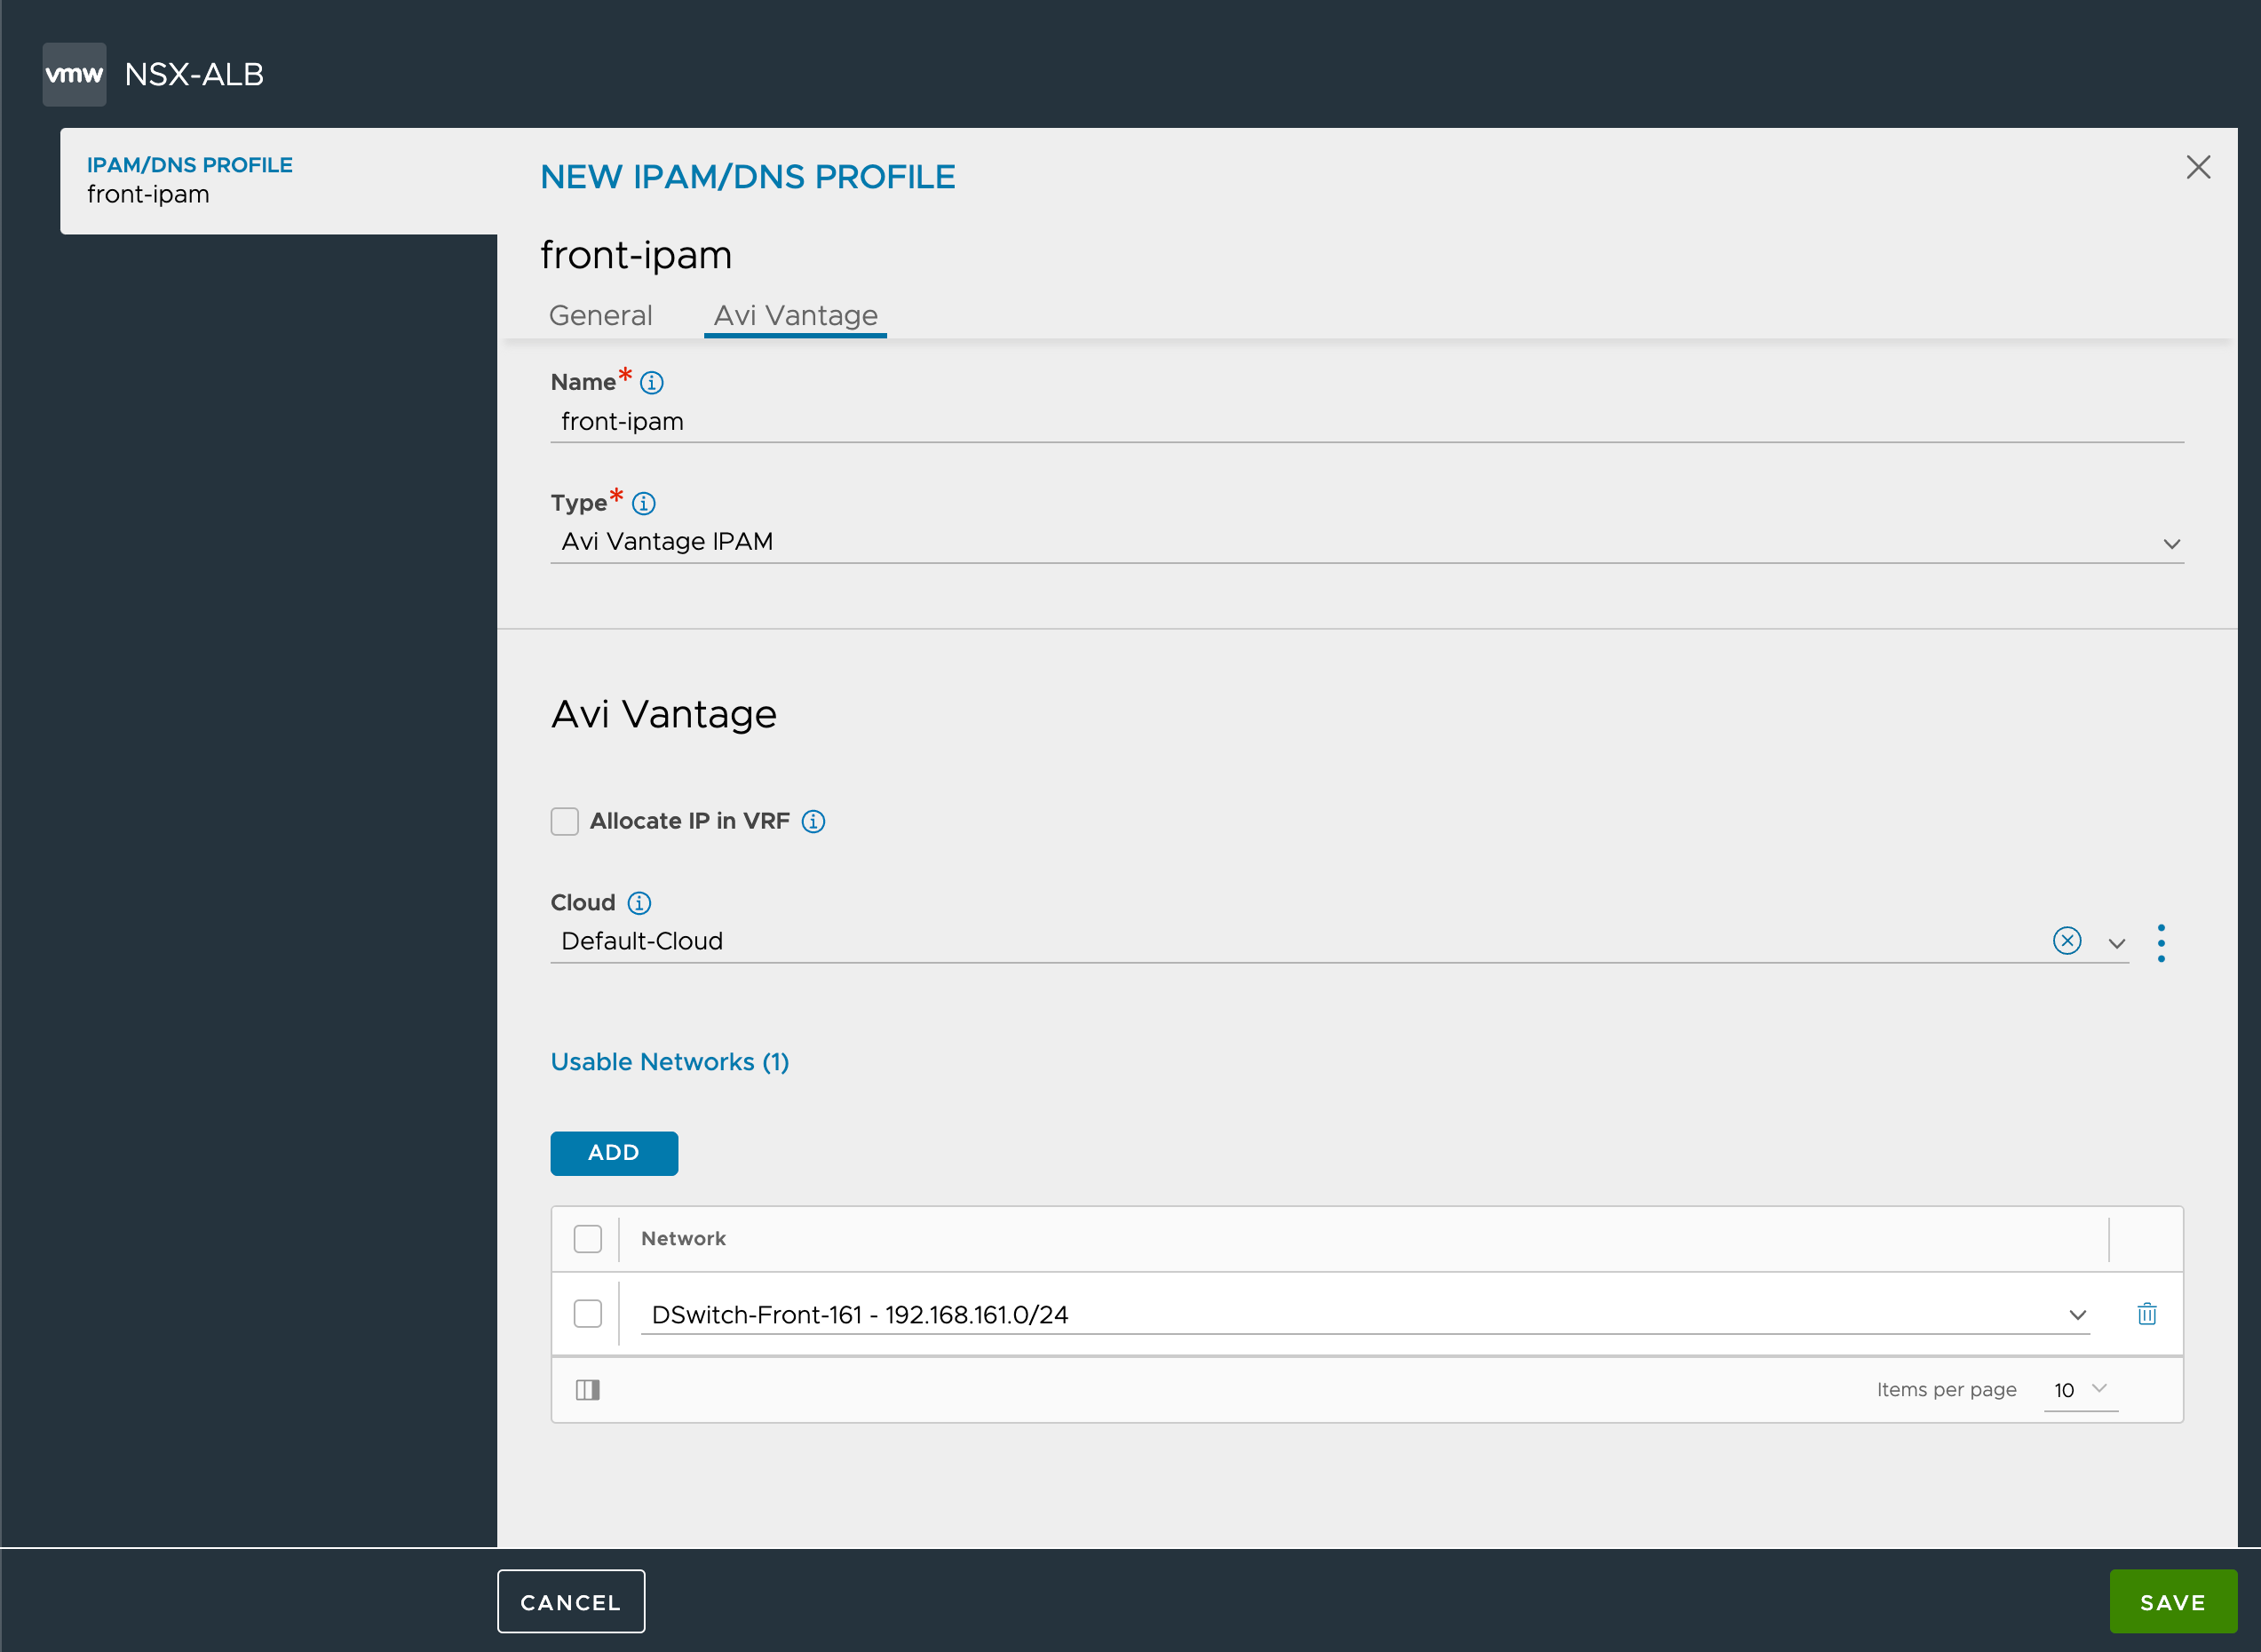
And finally we'll add the IPAM profile to the cloud configuration
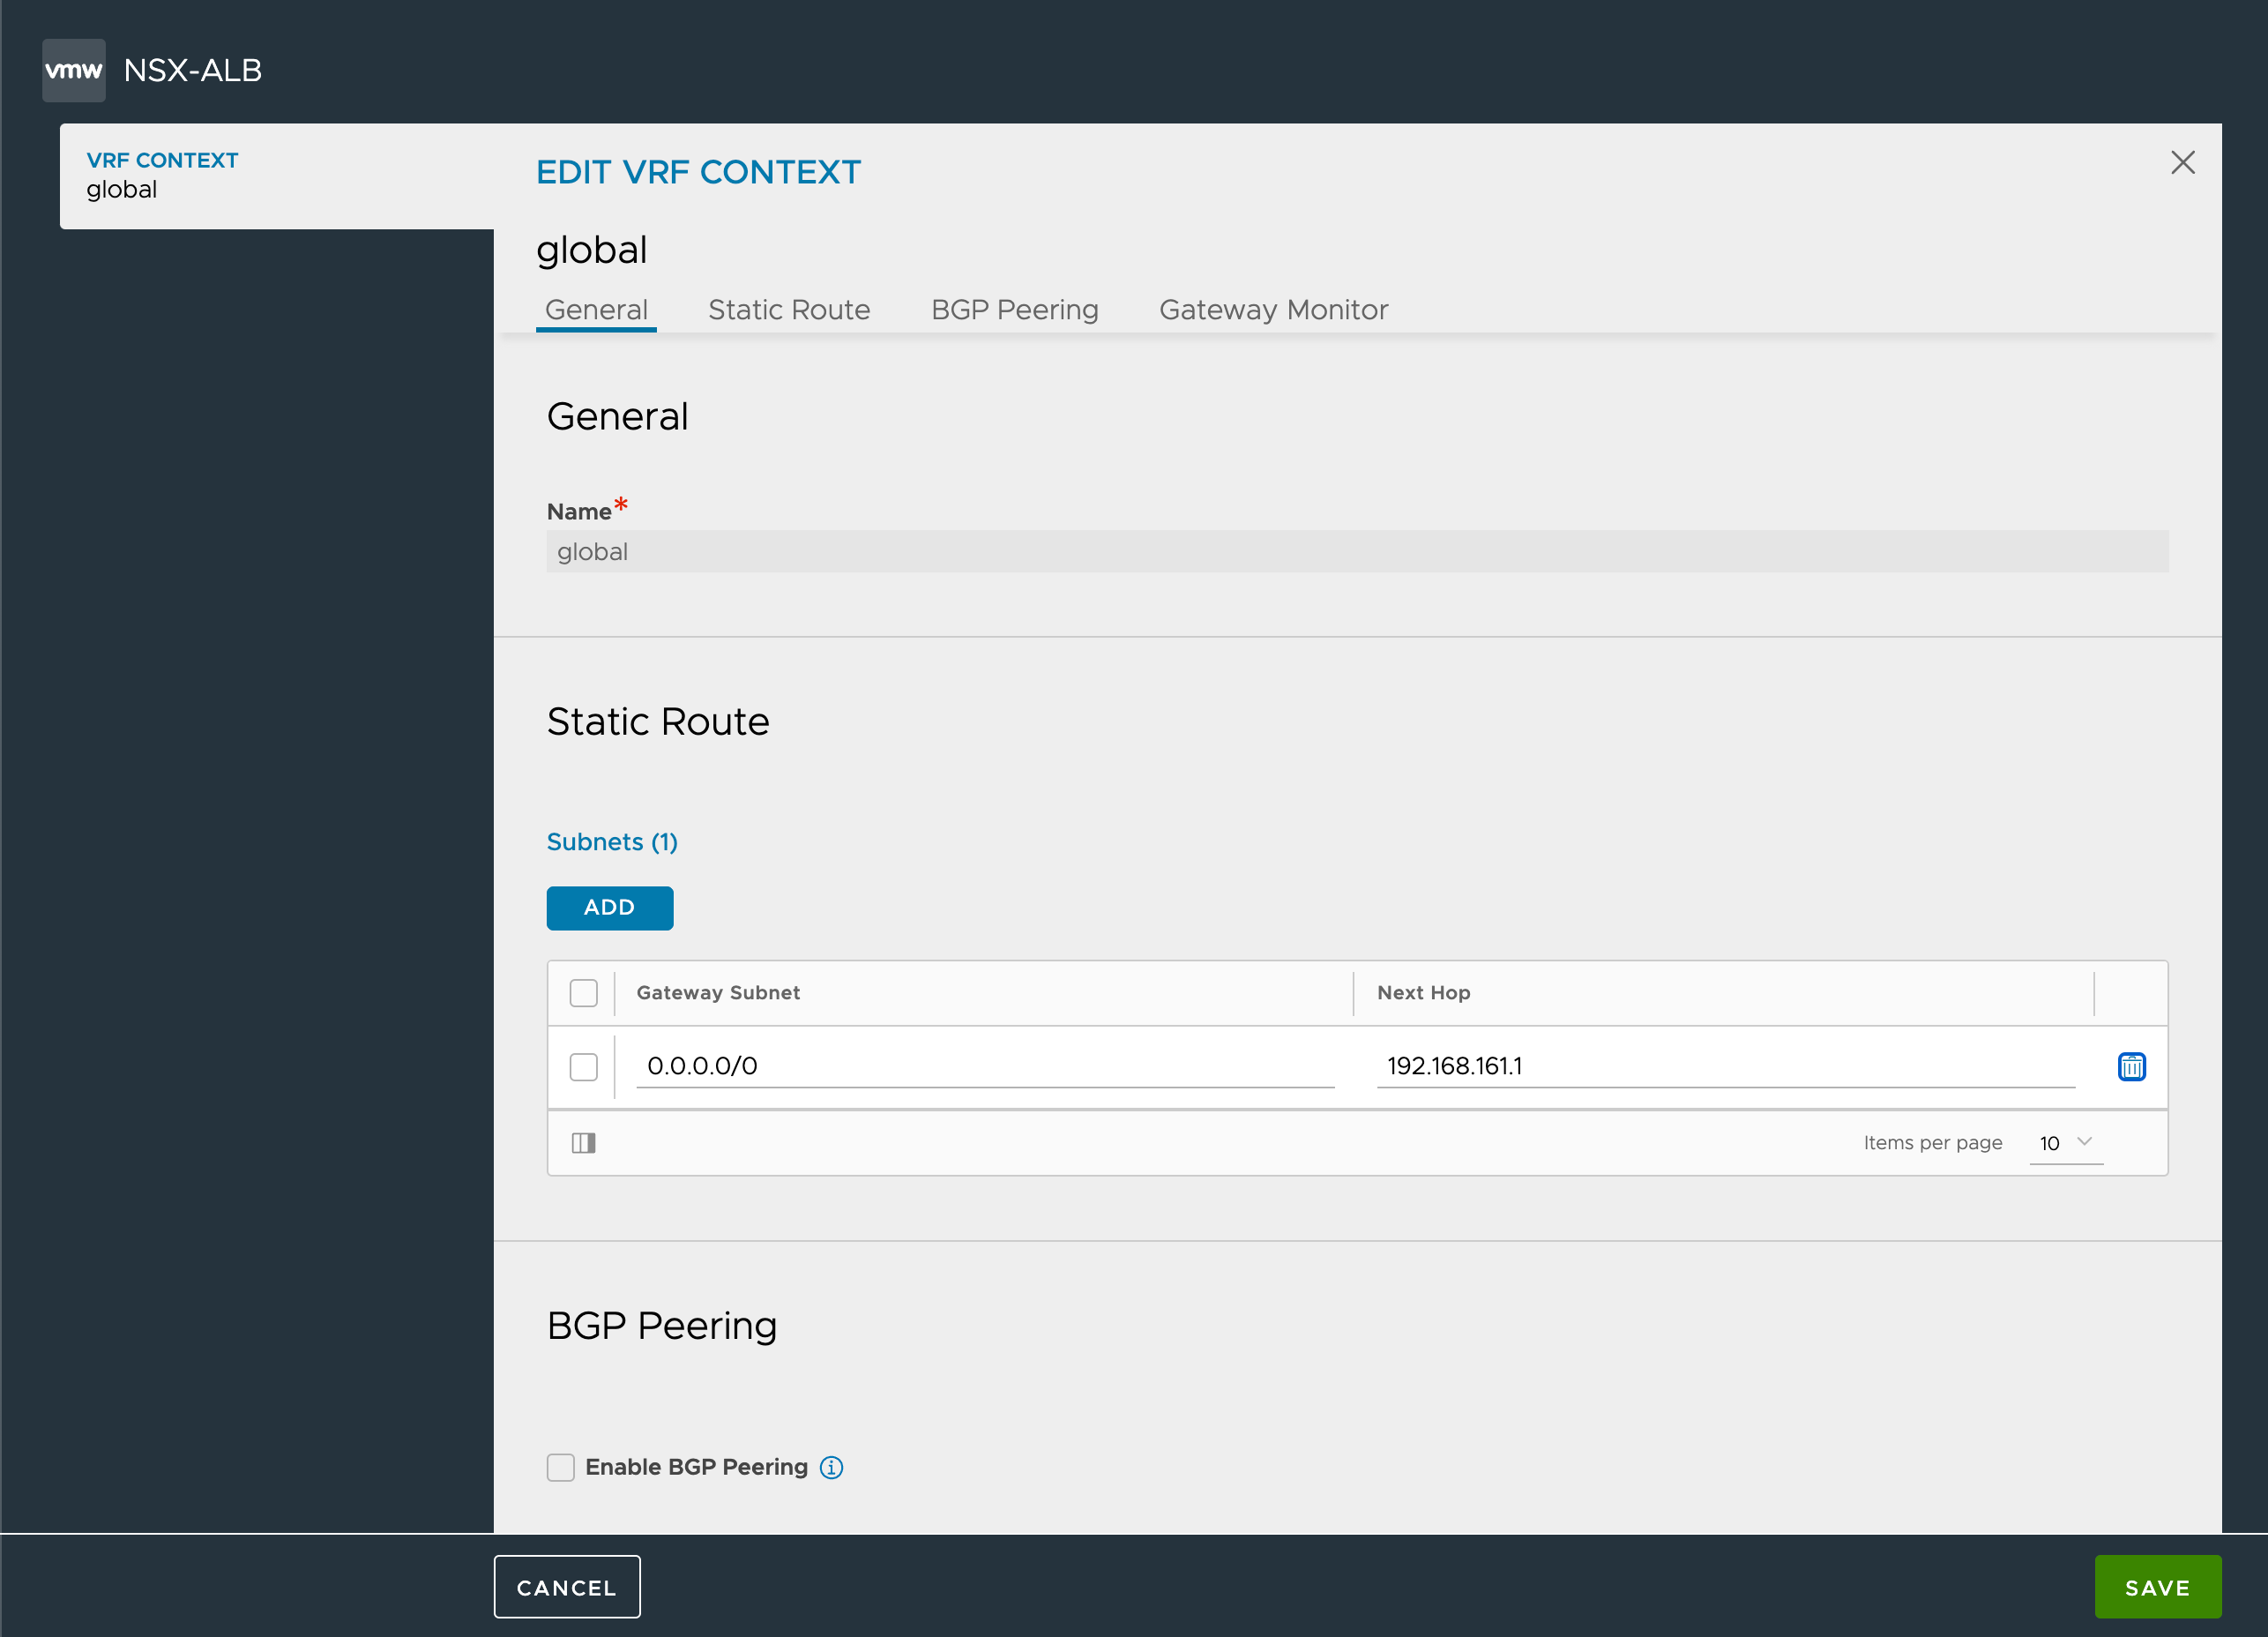
Lastly, we'll take a look at routing.
Because of how Avi works in our setup, with the Service Engines and the workloads on different networks, we need to provide a route between them. In my simple setup I'll just add in a default route by setting the 0.0.0.0/0 as the subnet, and I'll use the Frontend gateway as the Next hop
Summary
This concludes the configuration of the NSX Advanced Load Balancer. In the next post we will make use of this in our vSphere with Tanzu setup.