Installing Grafana Tempo
In this post we'll take a quick look at Grafana Tempo and how to install it's OSS version on a virtual machine. Tempo is Grafanaa Labs backend for traces from applications. It is a vital part of the Grafana LGTM stack and together with the other components of the stack it delivers a full observability platform for your apps and infrastructure.
The purpose of this mini-series is to explore and show how things fit together. It's not meant for setting up a production environment.
The other posts in this mini-series
Installing Tempo
Installing Tempo is quite straight forward. In this set up we're installing it on a virtual machine in what's referred to as monolitic mode where we run all the components in one instance of Tempo.
The other way is to install it in microservices mode where the components are deployed in distinct processes. This would probably be the preferred way for a production setup.
In this post and the mini-series we'll focus on the OSS versions of the components installed on Linux. Grafana also has a cloud offering that's really neat if you quickly want to get up and running. It's free version would fit a lot of smaller use-cases supporting 10k metrics, 50GB of logs and traces, 14 days retention and more. See more in the pricing plans
Object storage
The only real pre-req for Tempo is object storage for it's backend storage for traces. The object storage needs to be Amazon S3 compatible
Tempo could work with local storage as well, but it's not recommended.
In this setup we will connect Tempo to a MinIO object storage backend so we'll create a key for Tempo to use later on.
1access_key: <ACCESS_KEY>
2secret_key: <SECRET_KEY>
We'll also create a policy with full rights for a bucket for Tempo to use
 1{
 2   "Version" : "2012-10-17",
 3   "Statement" : [
 4      {
 5         "Effect" : "Allow",
 6         "Action" : [ "s3:GetBucketLocation", "s3:ListBucket" ],
 7         "Resource" : "arn:aws:s3:::<BUCKET>"
 8      },
 9      {
10        "Effect": "Allow",
11        "Action": [ "s3:GetObject", "s3:PutObject", "s3:DeleteObject" ],
12        "Resource": "arn:aws:s3:::<BUCKET>/*"
13      }
14   ]
15}
1mc admin policy create <MINIO_ALIAS> <POLICY_NAME> <JSON_FILE>
2mc admin policy info <MINIO_ALIAS> <POLICY_NAME>
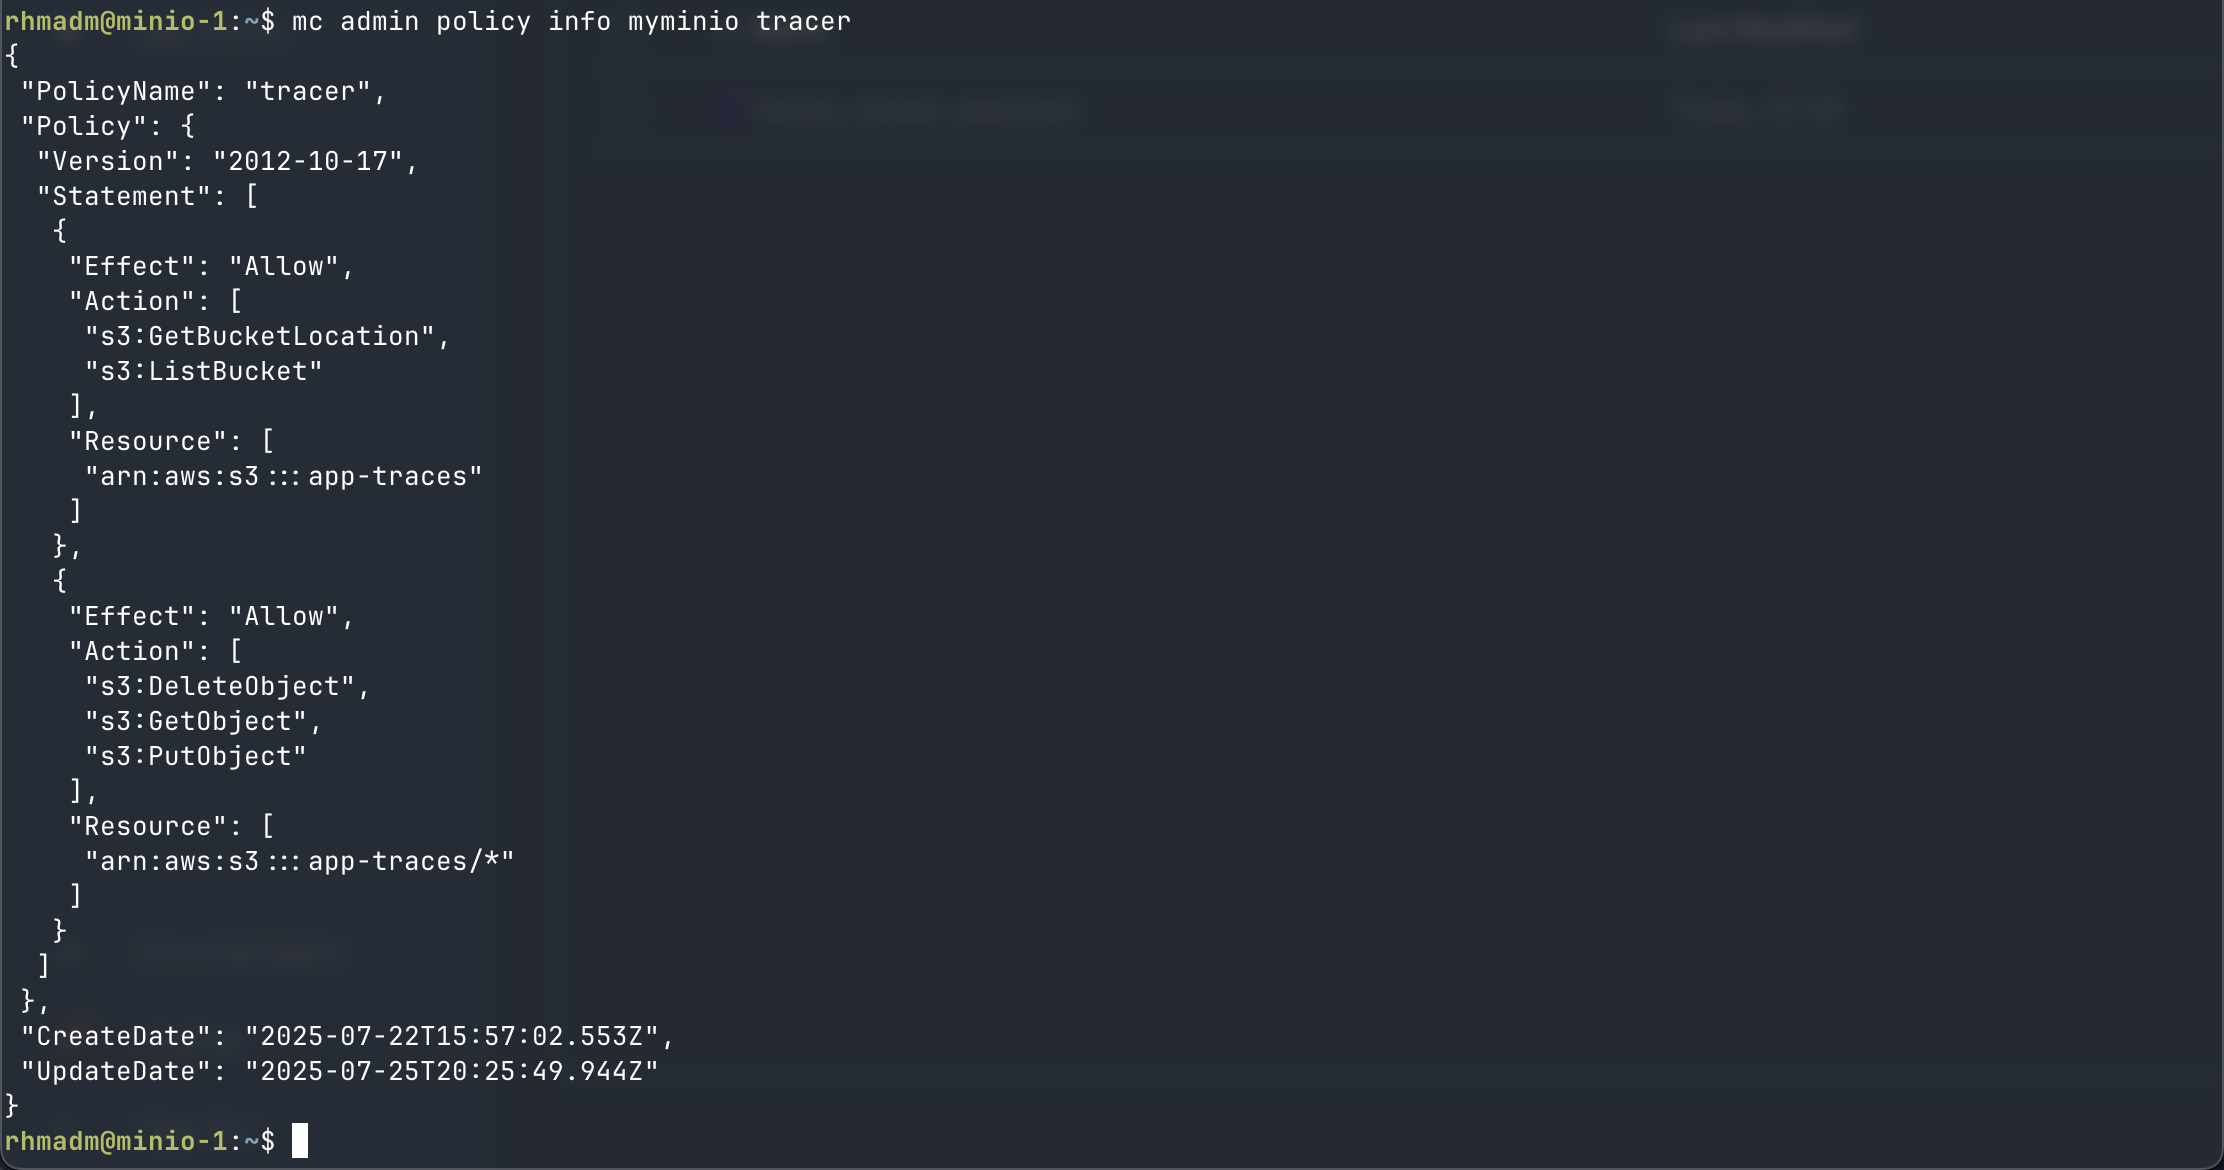
And let's attach the policy to the user
1mc admin policy attach <MINIO_ALIAS> <POLICY> --user <ACCESS_KEY>
We'll also verify the policy
1mc admin policy entities <MINIO_ALIAS>

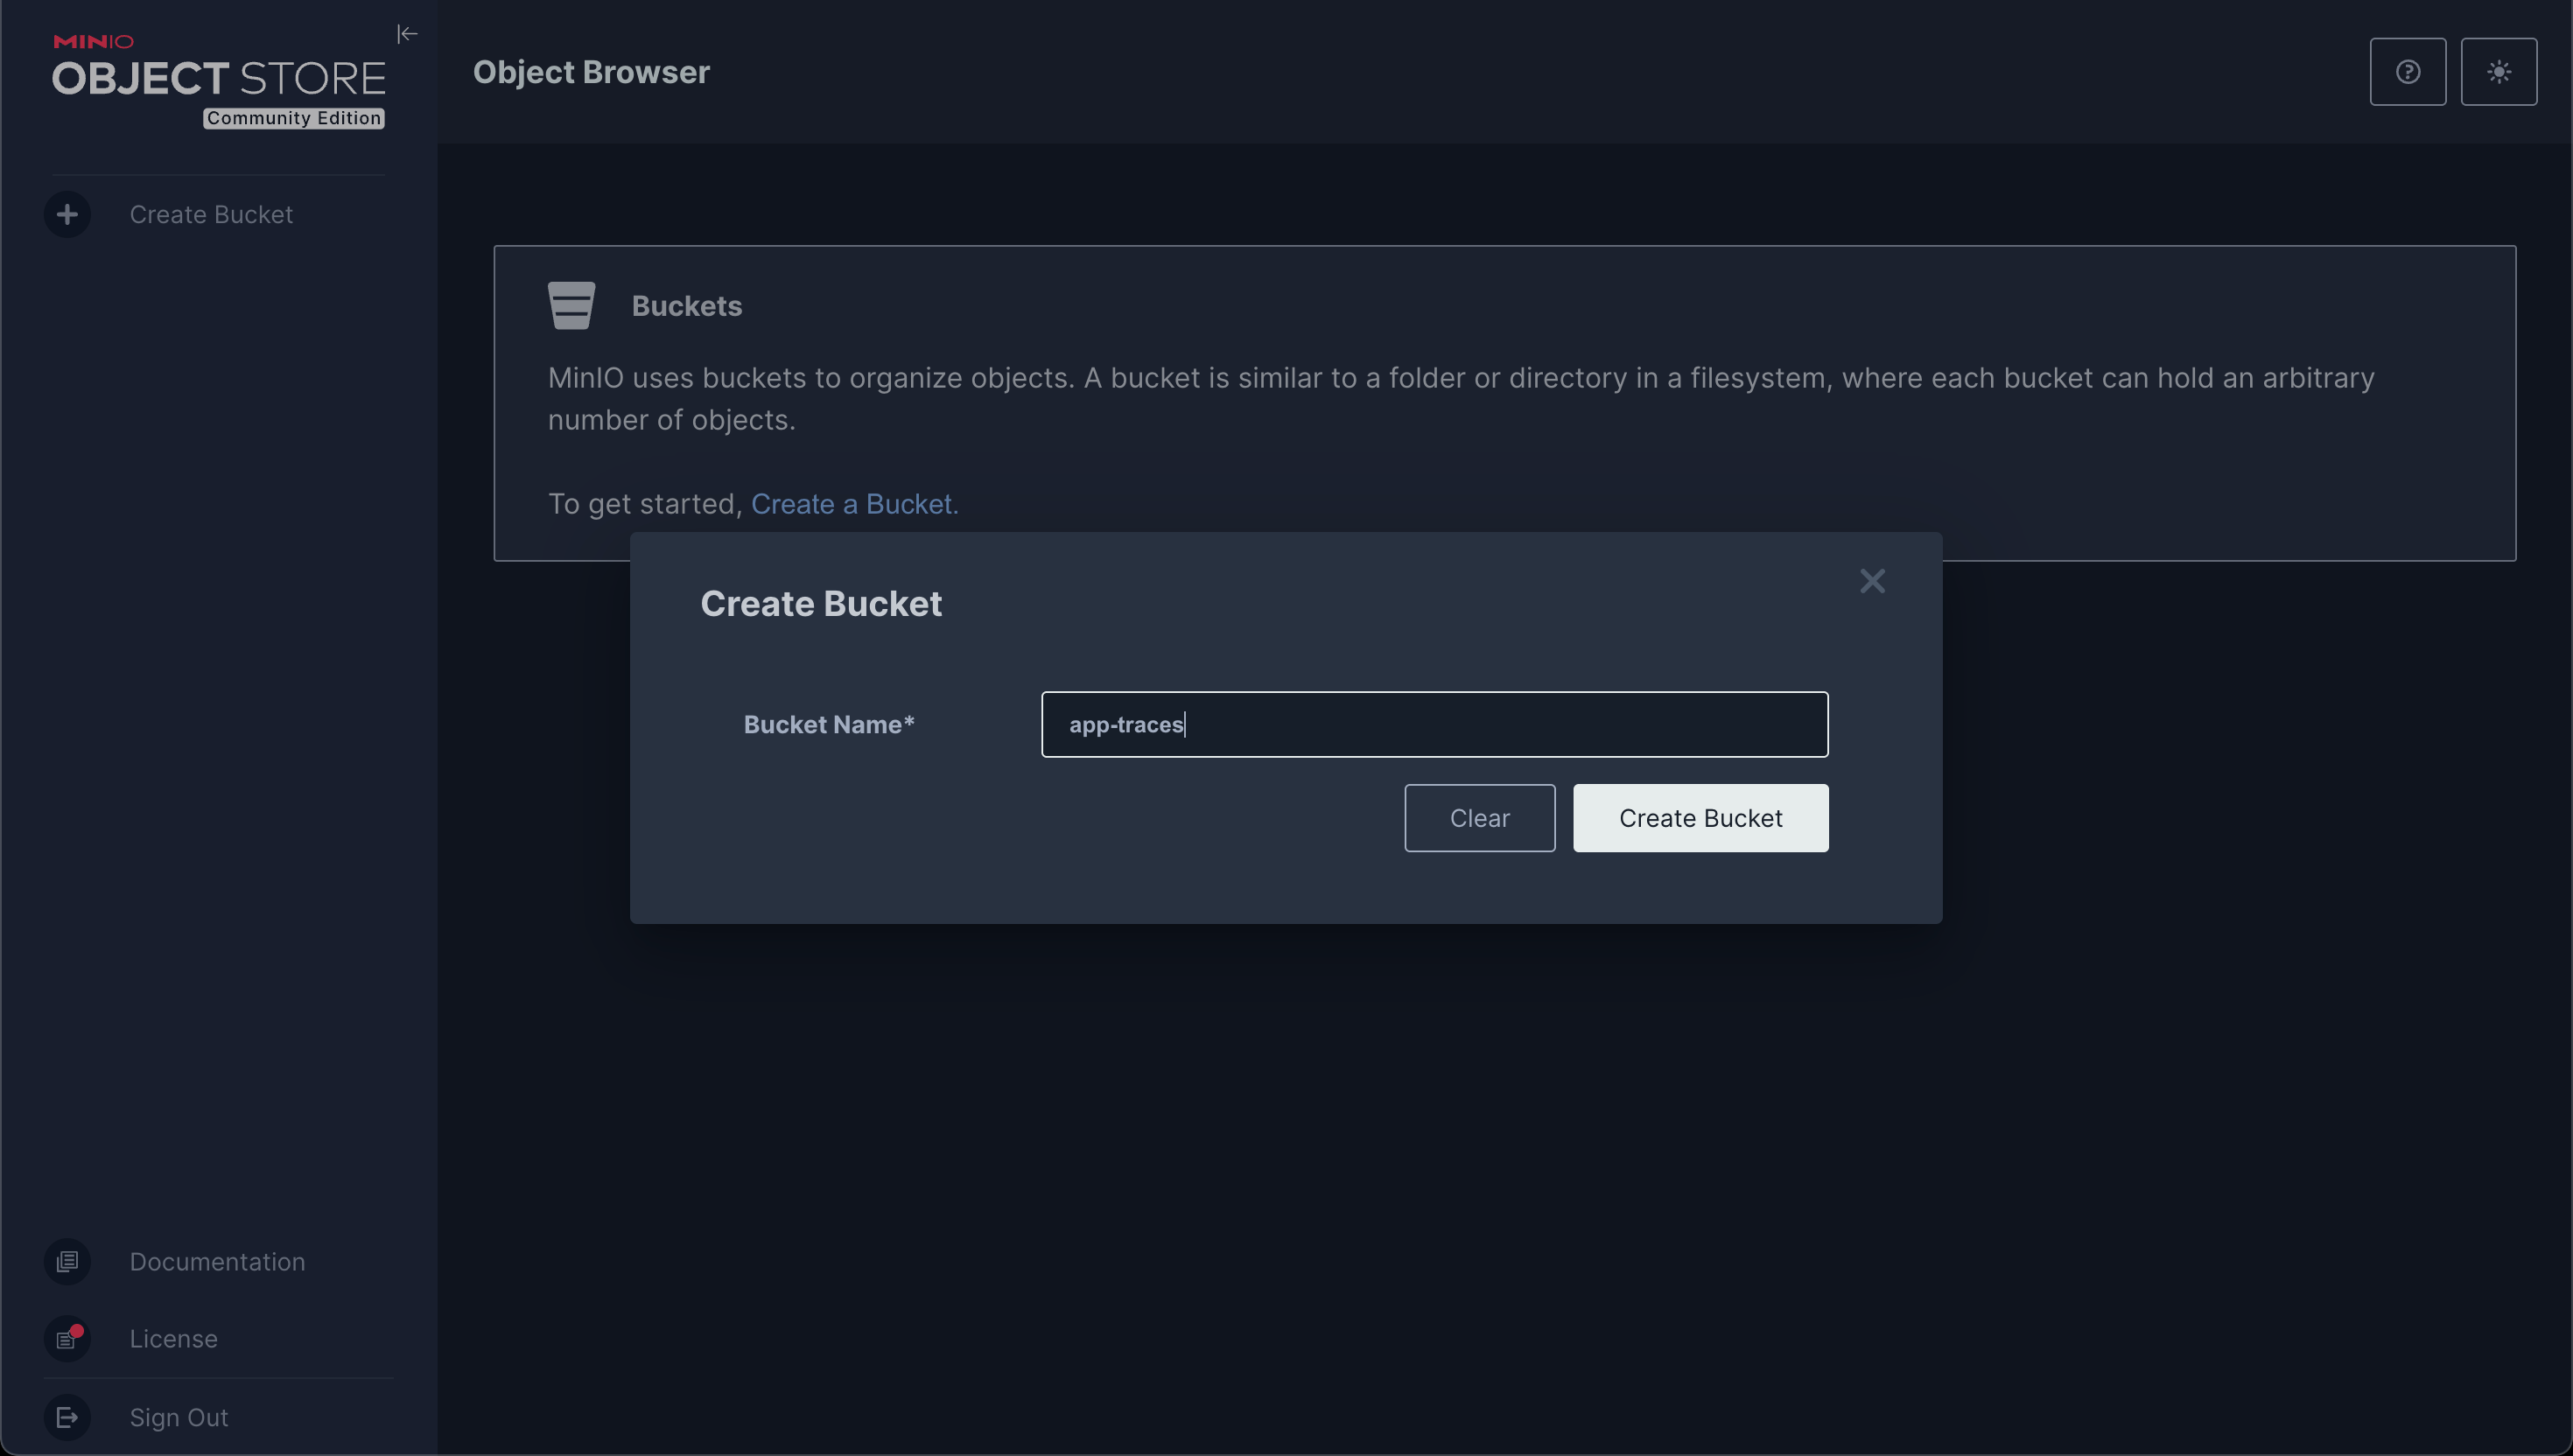
Finally we'll create a bucket for Tempo to use
Install Tempo
Now, we're ready for installing Tempo.
We'll start by downloading and installing the binary
1curl -Lo tempo_2.8.1_linux_amd64.deb https://github.com/grafana/tempo/releases/download/v2.8.1/tempo_2.8.1_linux_amd64.deb
2sudo dpkg -i tempo_2.8.1_linux_amd64.deb
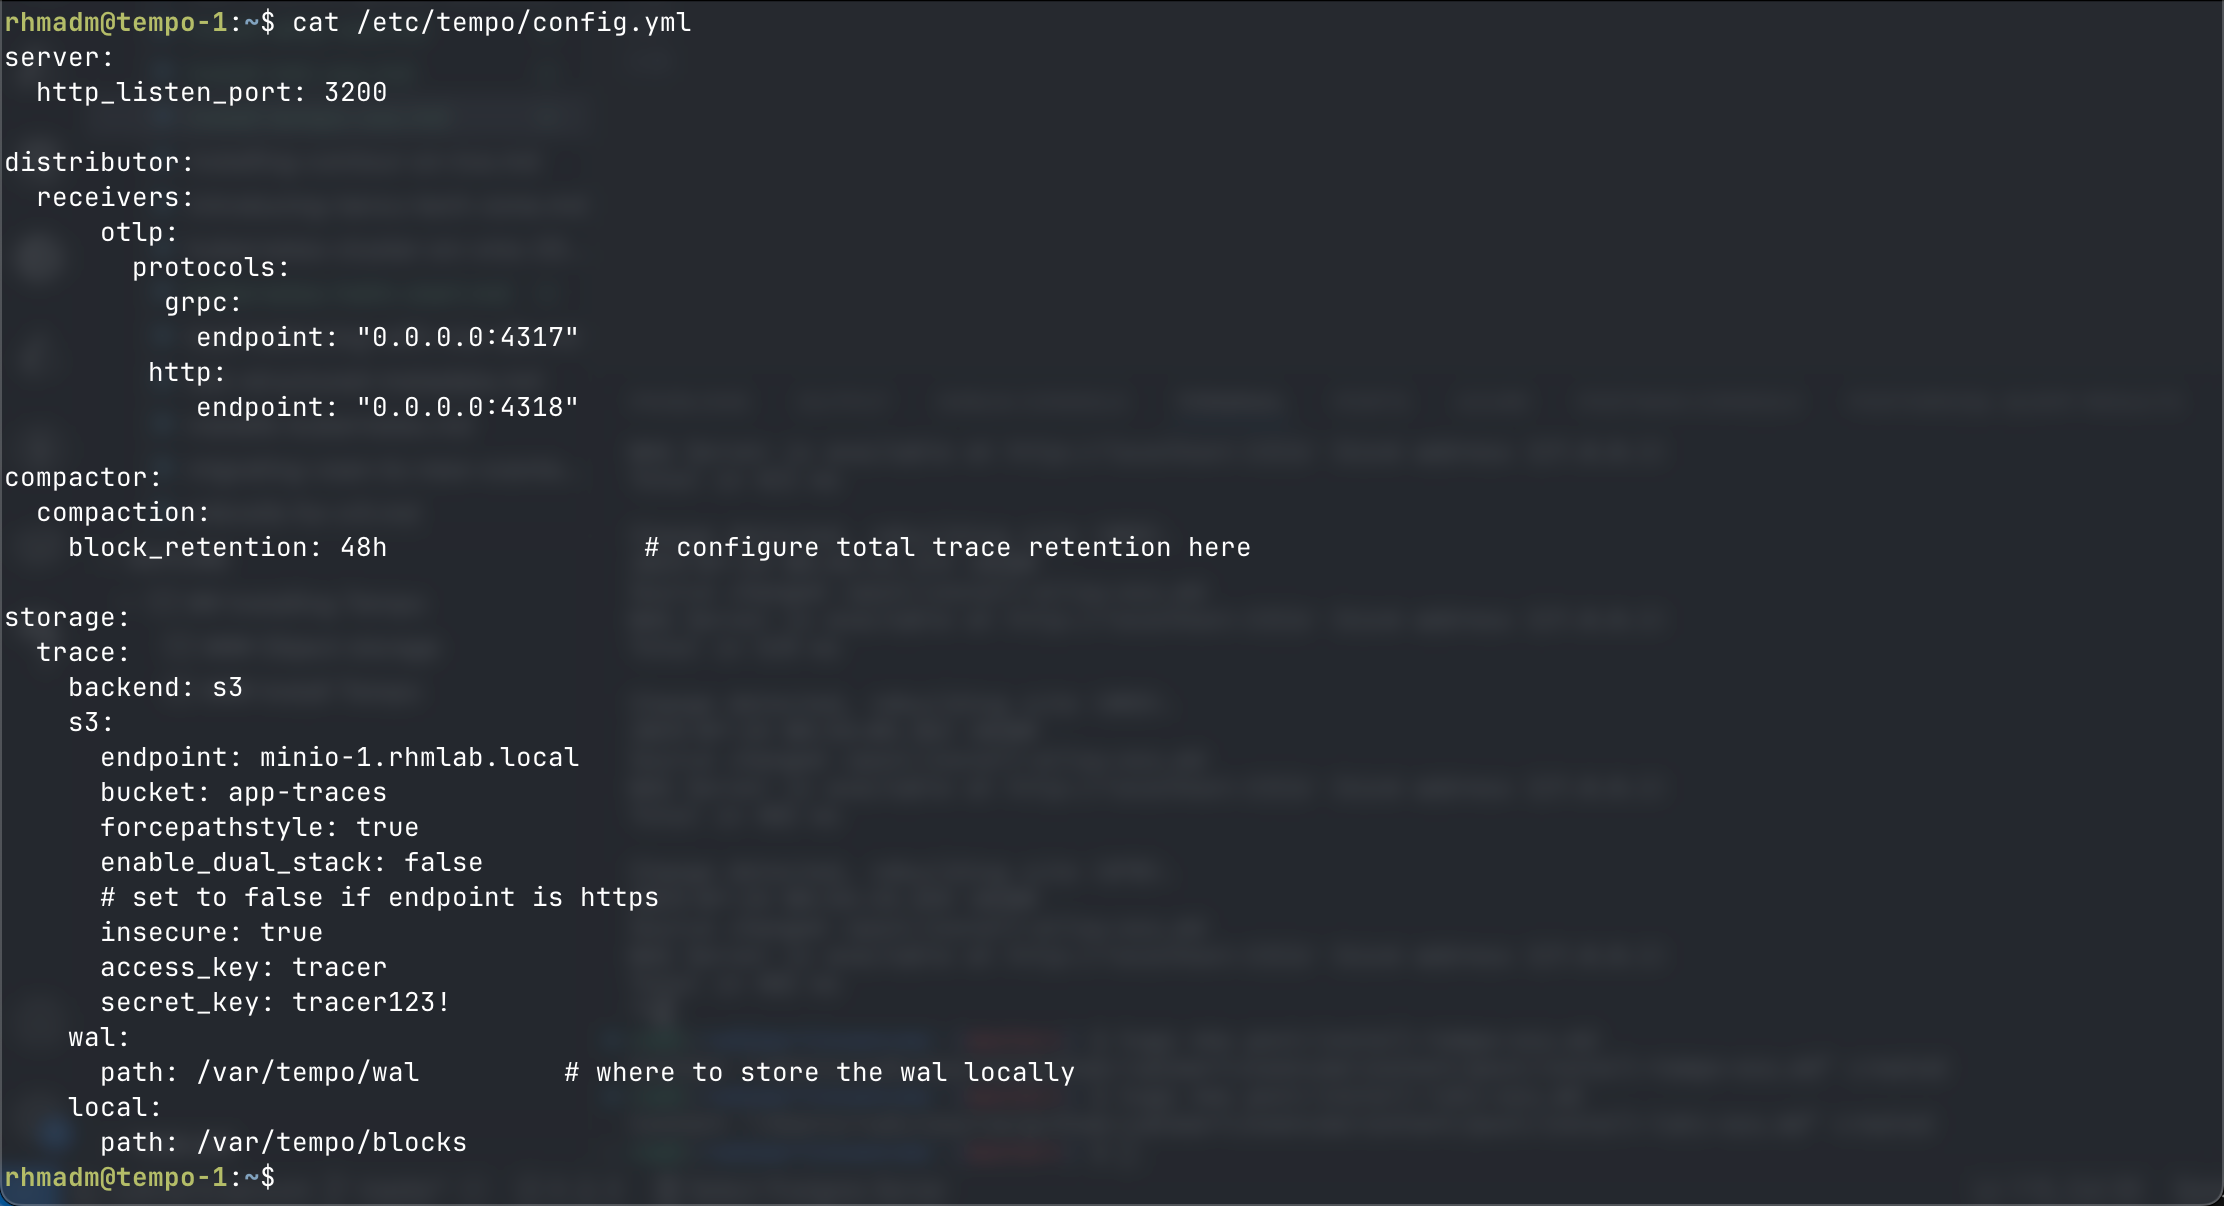
Now we'll configure Tempo to use our bucket for it's trace backend in the configuration file, /etc/tempo/config.yaml
 1server:
 2  http_listen_port: 3200
 3
 4distributor:
 5  receivers:
 6      otlp:
 7        protocols:
 8          grpc:
 9            endpoint: "0.0.0.0:4317"
10         http:
11            endpoint: "0.0.0.0:4318"
12
13compactor:
14  compaction:
15    block_retention: 48h                # configure total trace retention here
16
17storage:
18  trace:
19    backend: s3
20    s3:
21      endpoint: <S3_ENDPOINT>
22      bucket: <S3_BUCKET>
23      forcepathstyle: true
24      enable_dual_stack: false
25      # set to false if endpoint is https
26      insecure: true
27      access_key: <ACCESS_KEY>
28      secret_key: <SECRET_KEY>
29    wal:
30      path: /var/tempo/wal         # where to store the wal locally
31    local:
32      path: /var/tempo/blocks
We'll make sure that the /var/tempo folder exists and that the tempo user has access to it
1sudo mkdir /var/tempo
2sudo chown -R tempo /var/tempo
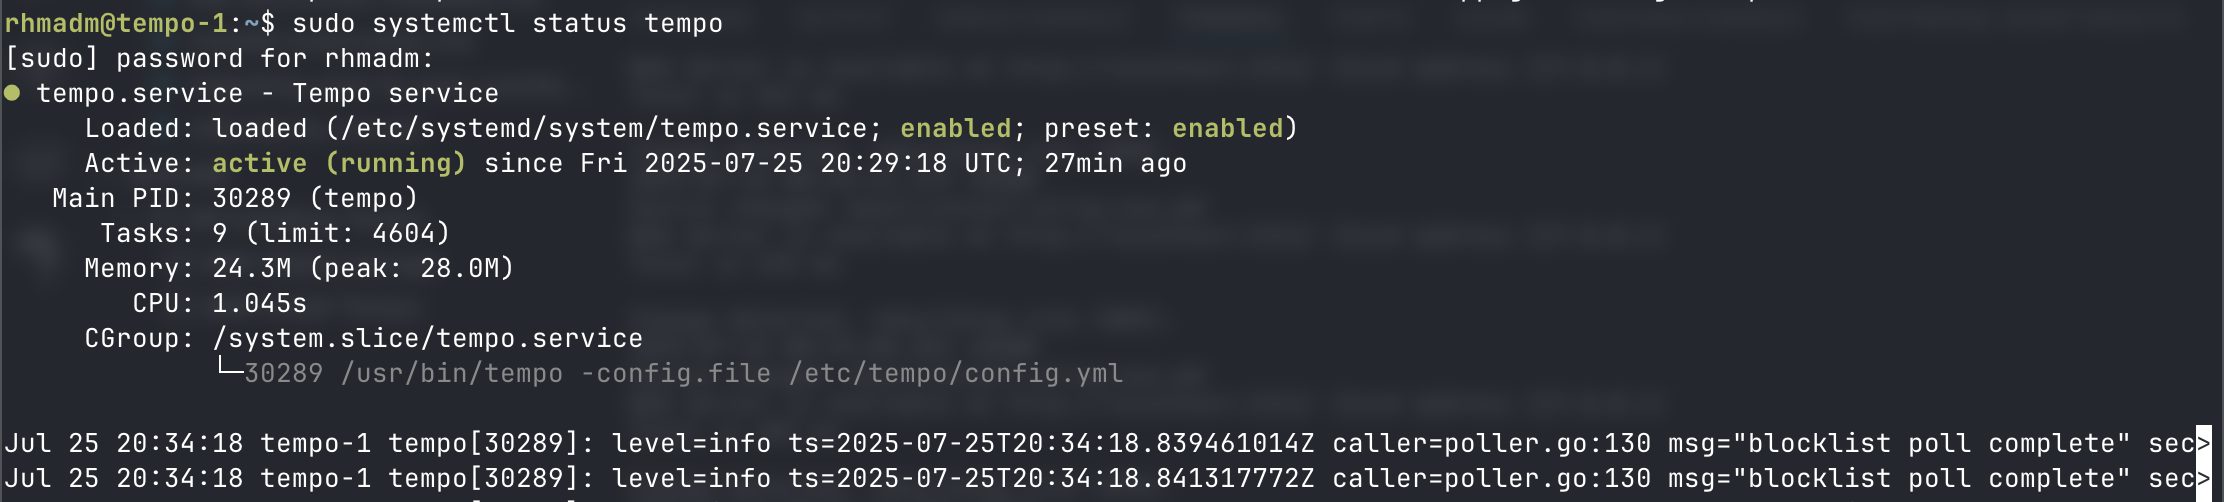
Now we can go ahead and start Tempo and make sure the service is enabled
1sudo systemctl start tempo
2sudo systemctl enable tempo
The Tempo service should be started
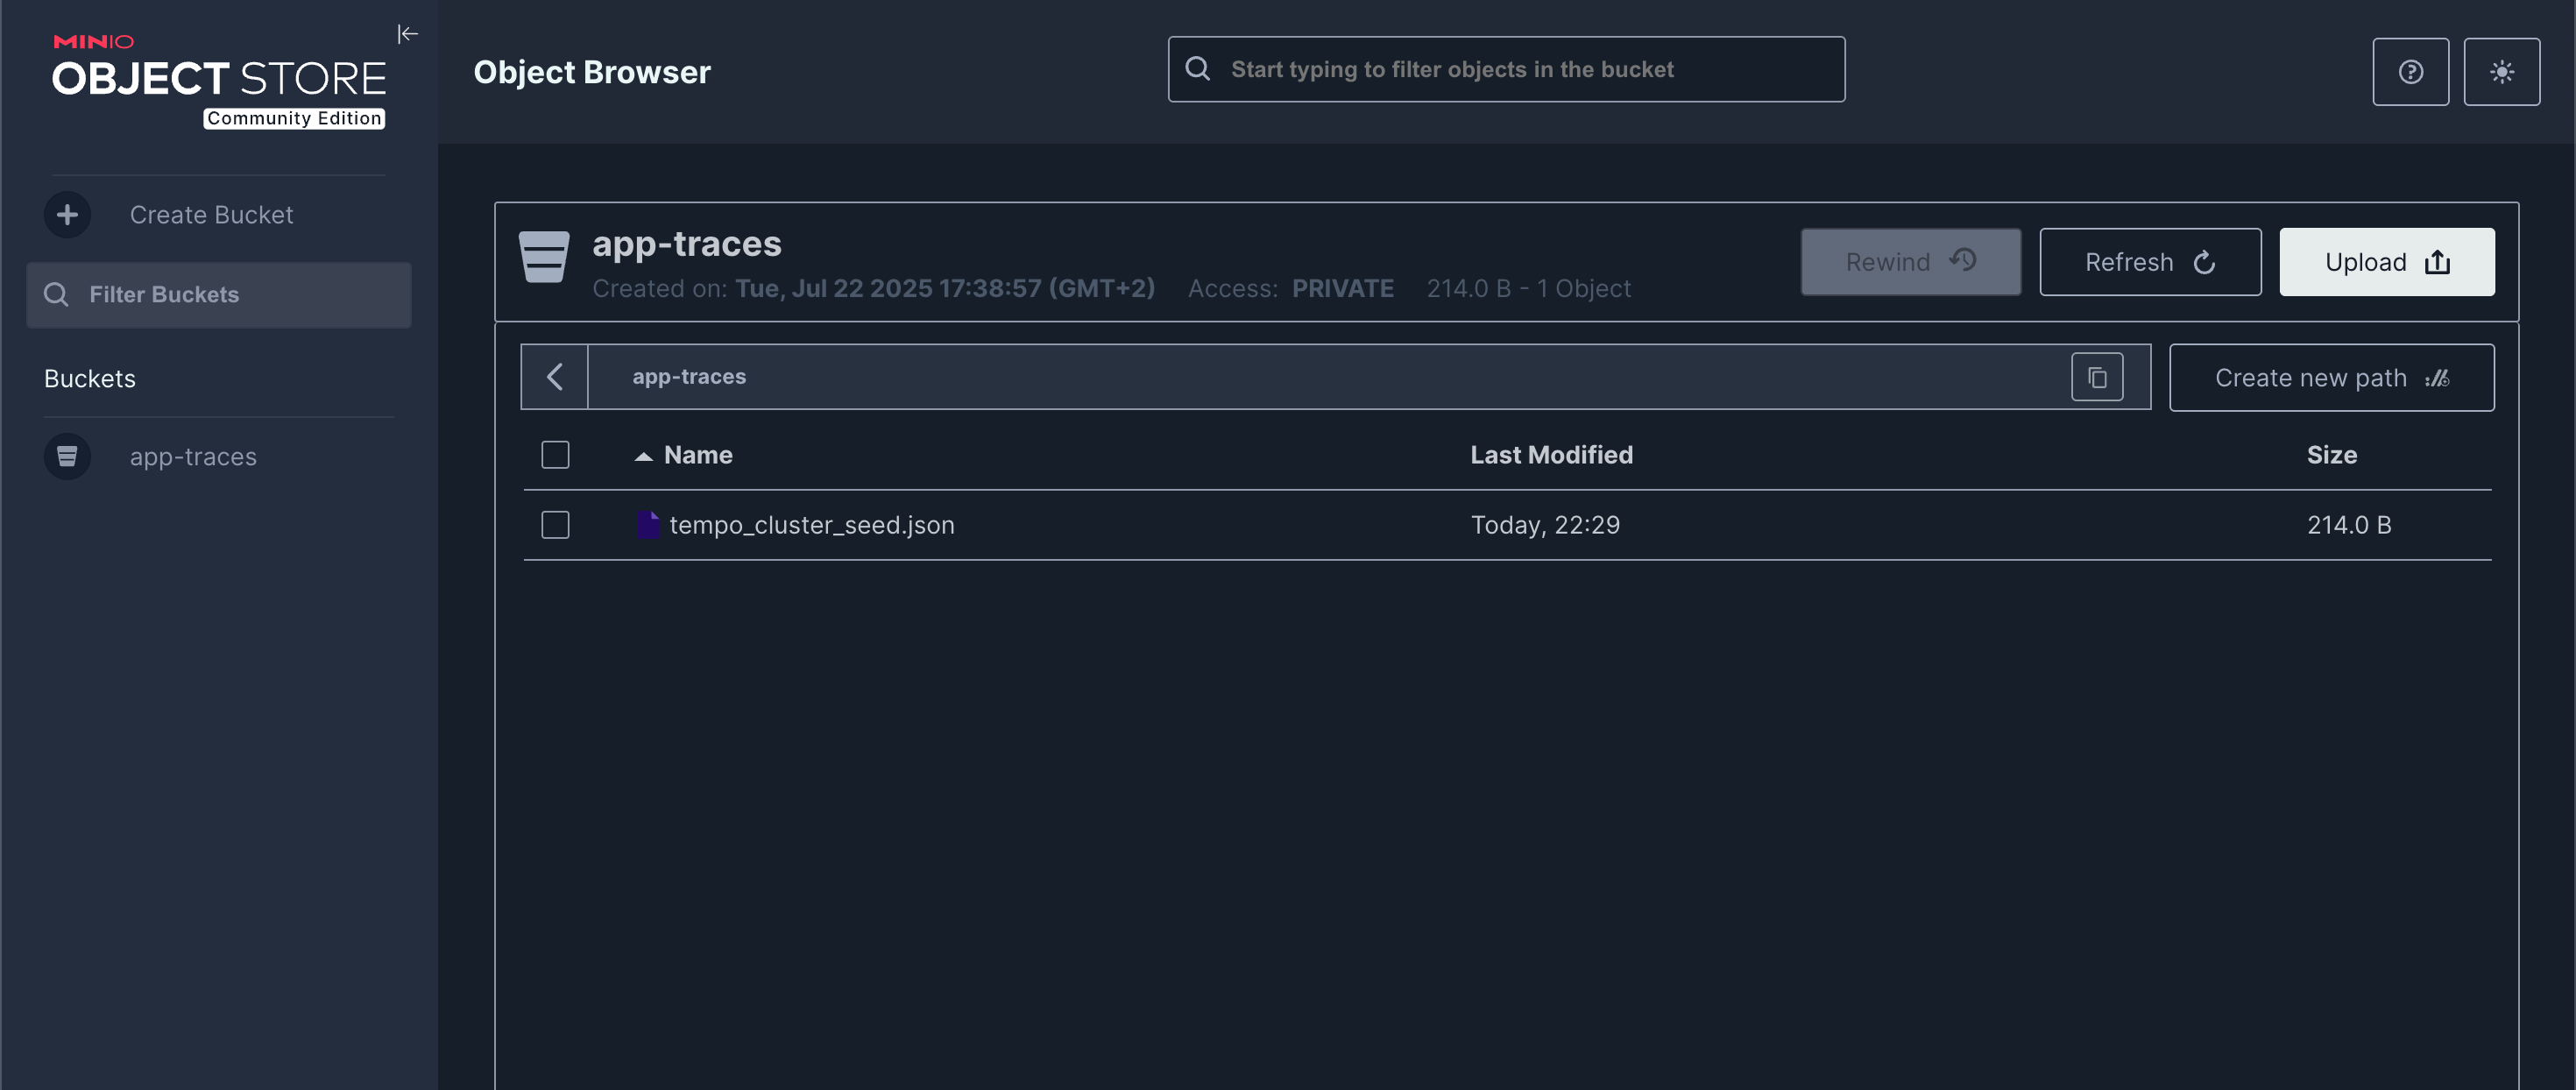
We can also see that in the S3 bucket a tempo_cluster_seed.json file has been created
Summary
With that Tempo should be ready to use for collecting traces from applications.
In an upcoming post we'll hook Alloy up to Tempo and eventually send application traces to Tempo via the Alloy collector and visualize them in Grafana