VMware Identity Manager instance IP address change
This post will go through the steps taken for changing IP address on a VMware Identity Manager (vIDM)/Workspace ONE Access instance in my lab environment. Note that this does only cover a single instance installation and not a Identity Manager cluster
Environment setup
The vIDM instance is running version 3.3.6. and is in use by both a vRealize Automation (vRA) cluster and a single vRealize Automation instance deployed through vRealize Suite Lifecycle Manager (vRSLCM).
In addition to this instance there's also a vRSLCM node and a vRA cluster running which also will need to have its IP address changed. For brevity I've split the process for those two out in different blog posts.
All nodes are connected to the same NSX Overlay network segment.
Step-by-step process for changing IP details
There is a couple of documentation articles from VMware here and here explaining the necessary steps for vIDM/Workspace ONE Access.
Note that this makes use of the /opt/vmware/share/vami/vami_config_net script which let's us in a text-based GUI change the IP details. Note however that since the instance also has vApp properties set in vCenter it's not enough just to change the IP details through the vami_config_net script since (at least in my case) the IP settings gets reverted after a reboot.
As mentioned, in this process I've also changed IP addresses for both vRSLCM and vRA as these were all running on the same network. Check the corresponding blog posts for details on those specifically.
For completion, the whole process:
- Verify status on all nodes and apps
- Power off and snapshot all nodes
- Power on and verify status again
- Perform IP change on vRA
- Perform IP change on vIDM
- Perform IP change on vRSLCM
- Change underlying network
- Verify connectivity
- Verify vRSLCM and vIDM
- Change IP on vRA Load Balancer
- Update DNS
- Update certificates (optional)
- Start vRA cluster and verify
- Finished
Note that there's quite some downtime for the individual apps and nodes here. I could have had some of them up and running immediately after the IP change if I had wanted by migrating stuff to different virtual networks with the correct IP subnet. However since I wanted to keep the existing NSX segment (because I didn't want the ID to change) I went with a longer downtime and keep all nodes on the existing network.
Snapshot
After verifying the status of the environment it's a good idea to take a snapshot of the nodes in question, preferably with the nodes powered off.
Change vApp properties
Before starting the vRSLCM instance we change the vApp options on the VM for the IP address and gateway

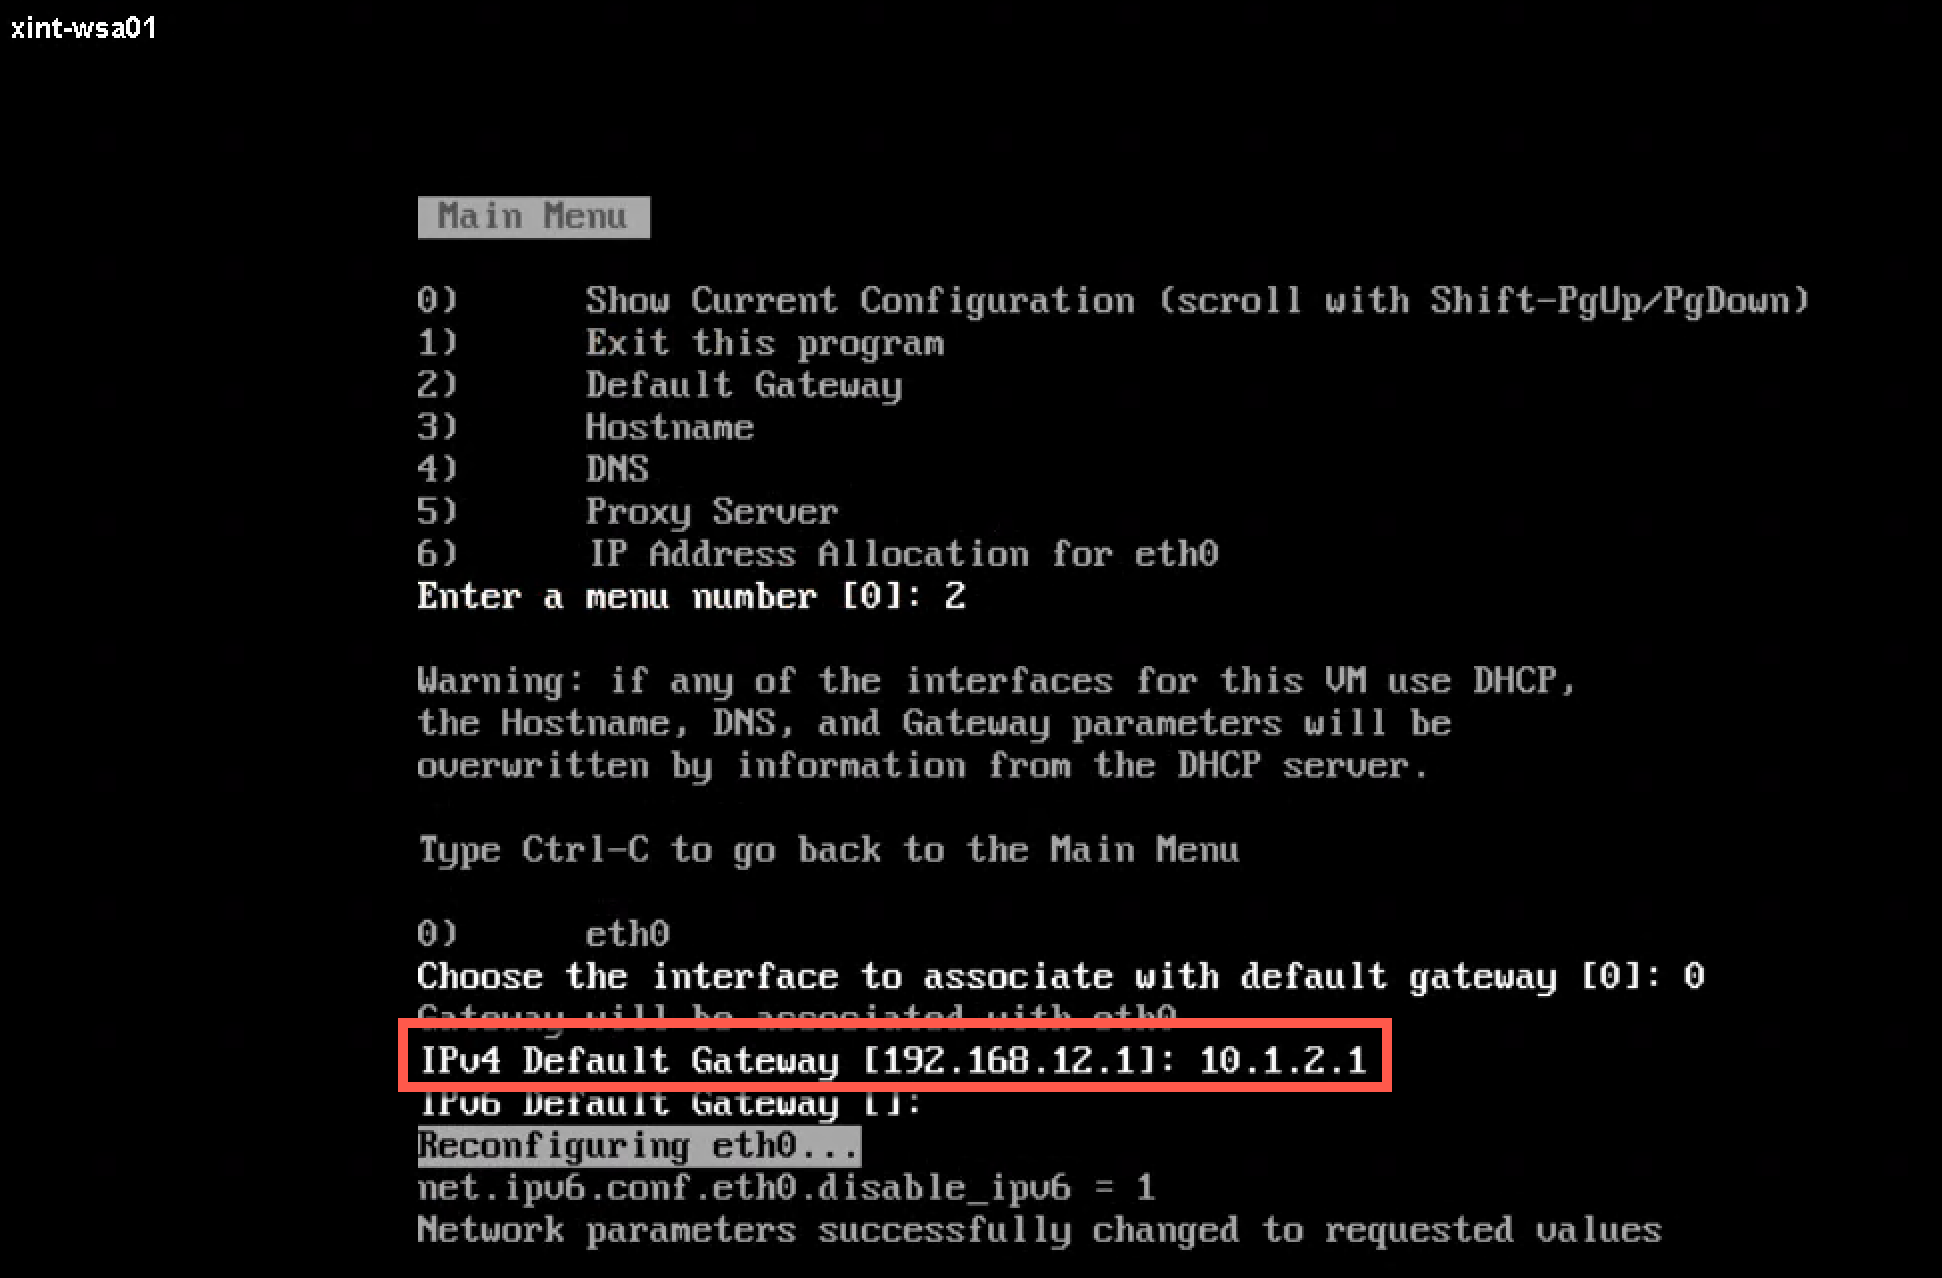
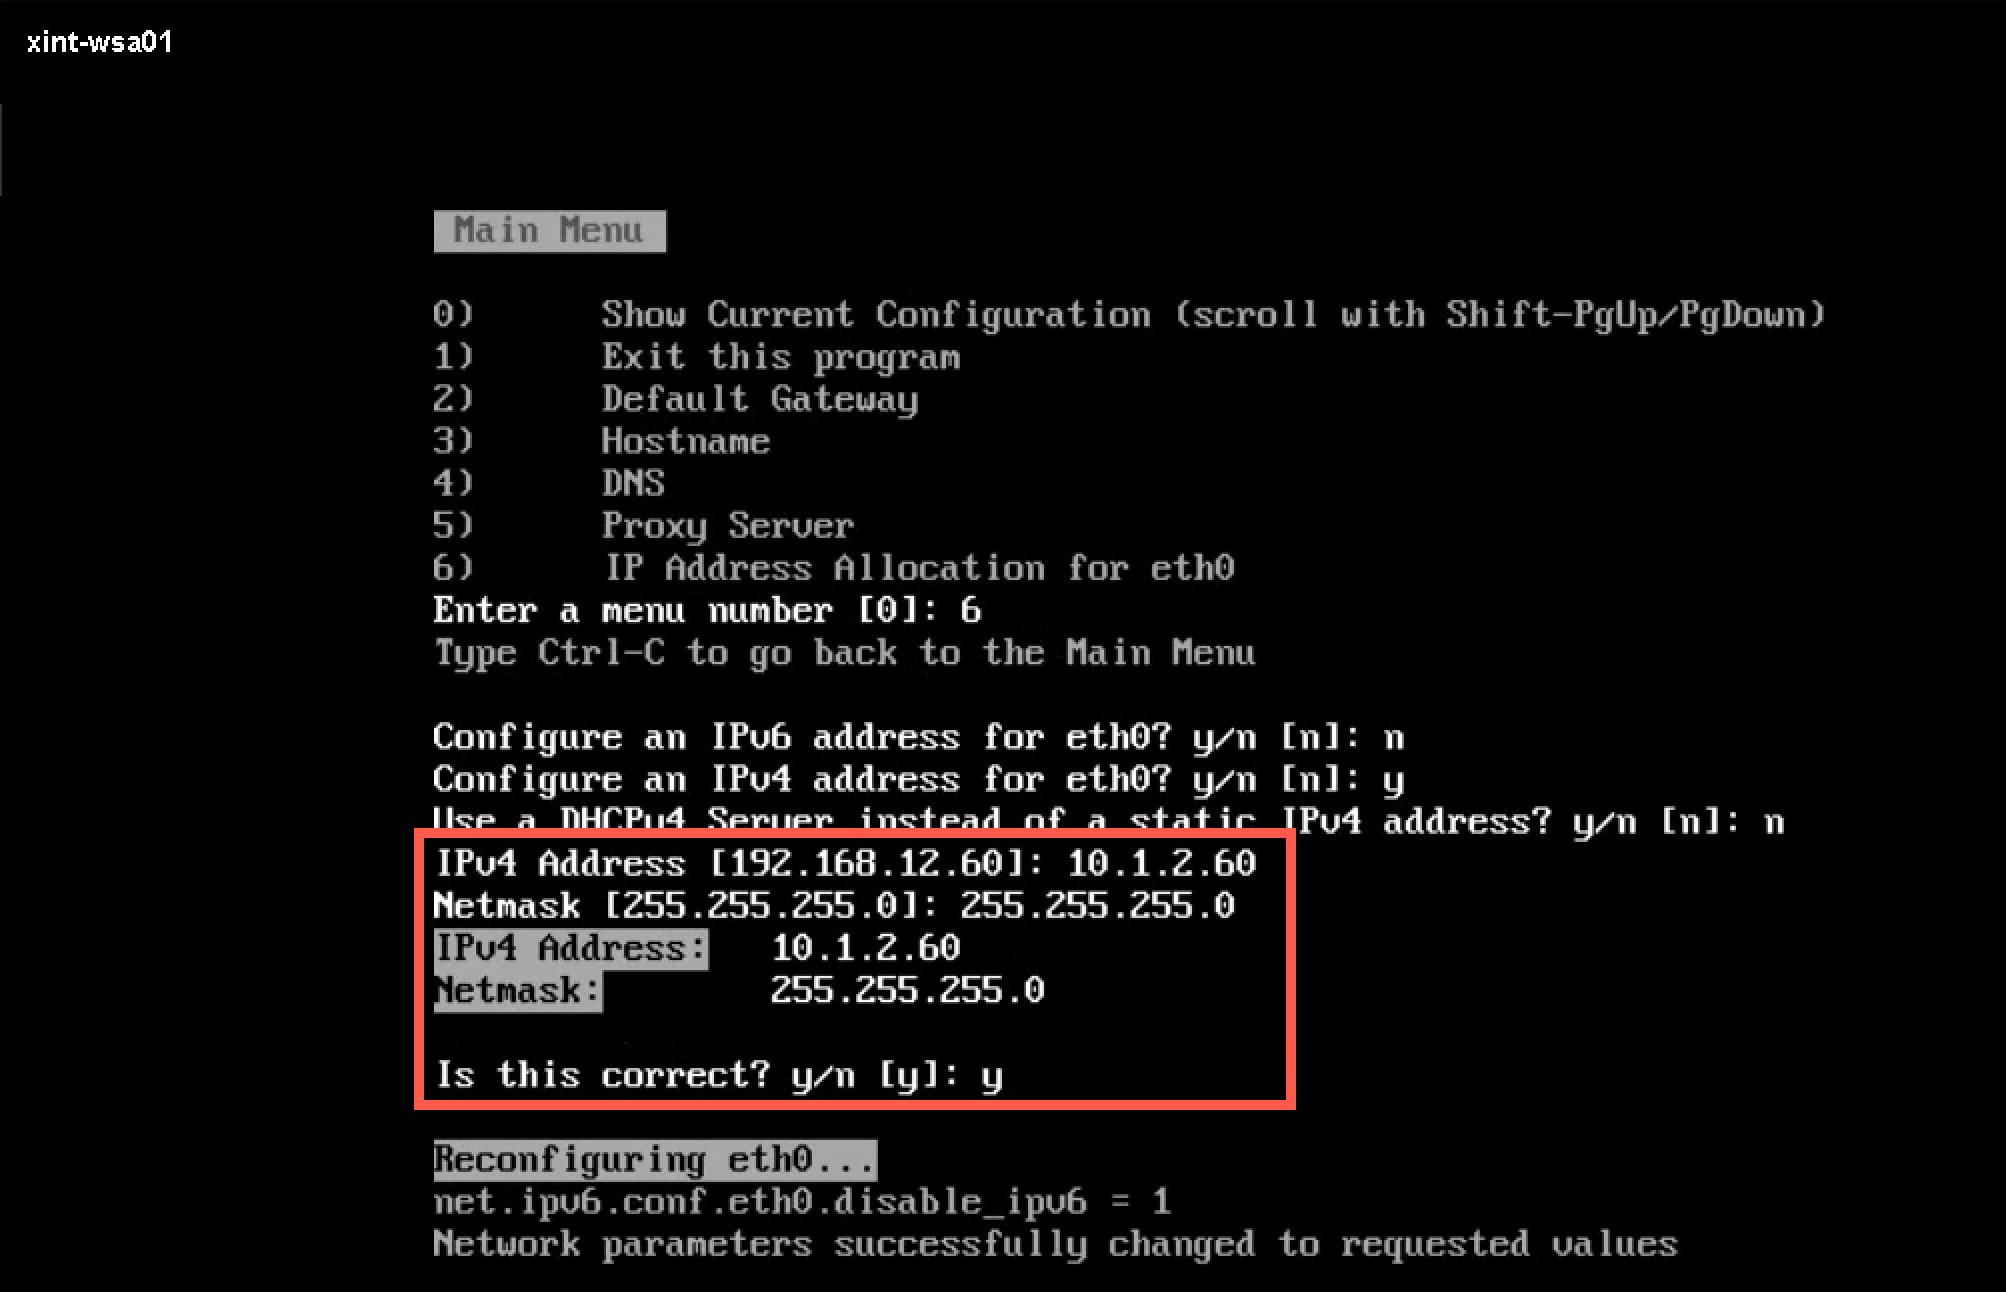
Change IP on node
When the VM is up and running we'll start up the /opt/vmware/share/vami/vami_config_net script which will present a text-based UI for us to work with in the terminal.
Note that it might be a good idea to do the IP change with a VM console and not over ssh since you'll lose connectivity to the VM when the IP changes
Change underlying network and reboot VM
Now we can change the underlying network, either the actual network or change the virtual portgroup the VM is connected to. And after changing the network and IP we reboot the VM to verify that the network details stick.
Note that in my case I waited to change the underlying network until all nodes in both vIDM and vRA also was changed
Verify connectivity
After the VM has rebooted and all has gone well it should be up and running on the new IP address.
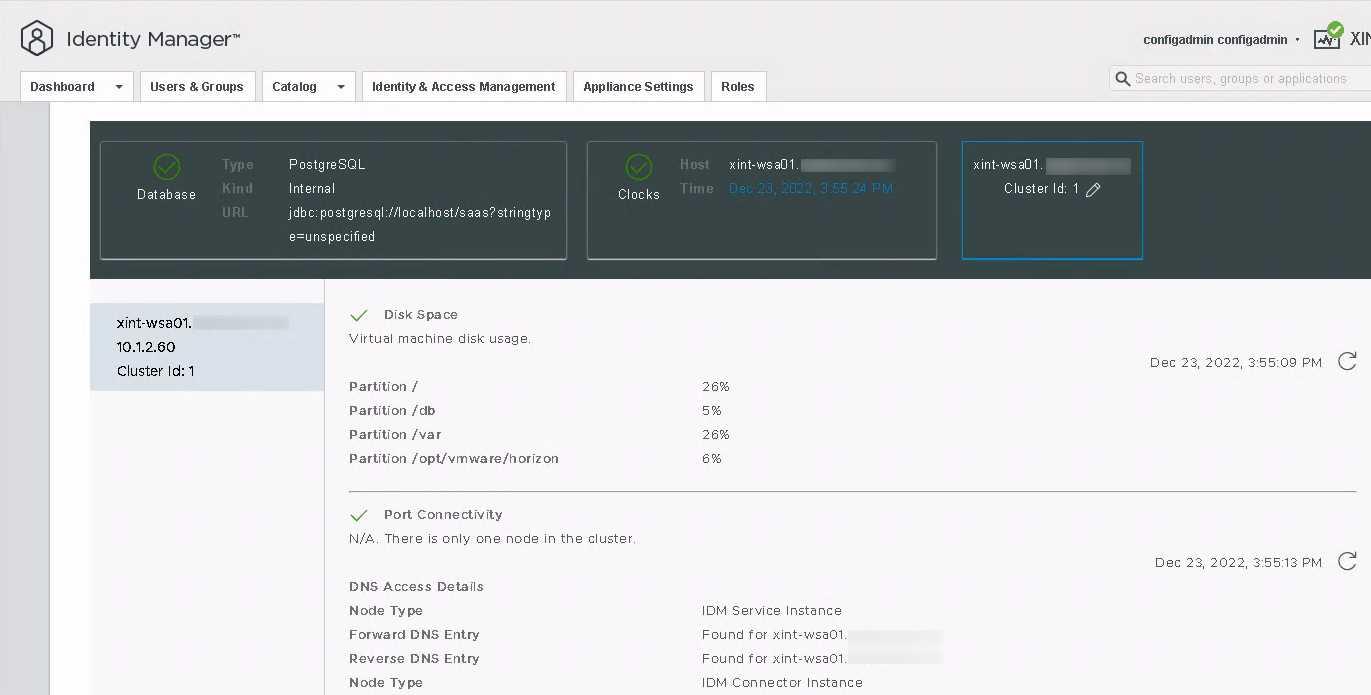
Verify vRSLCM
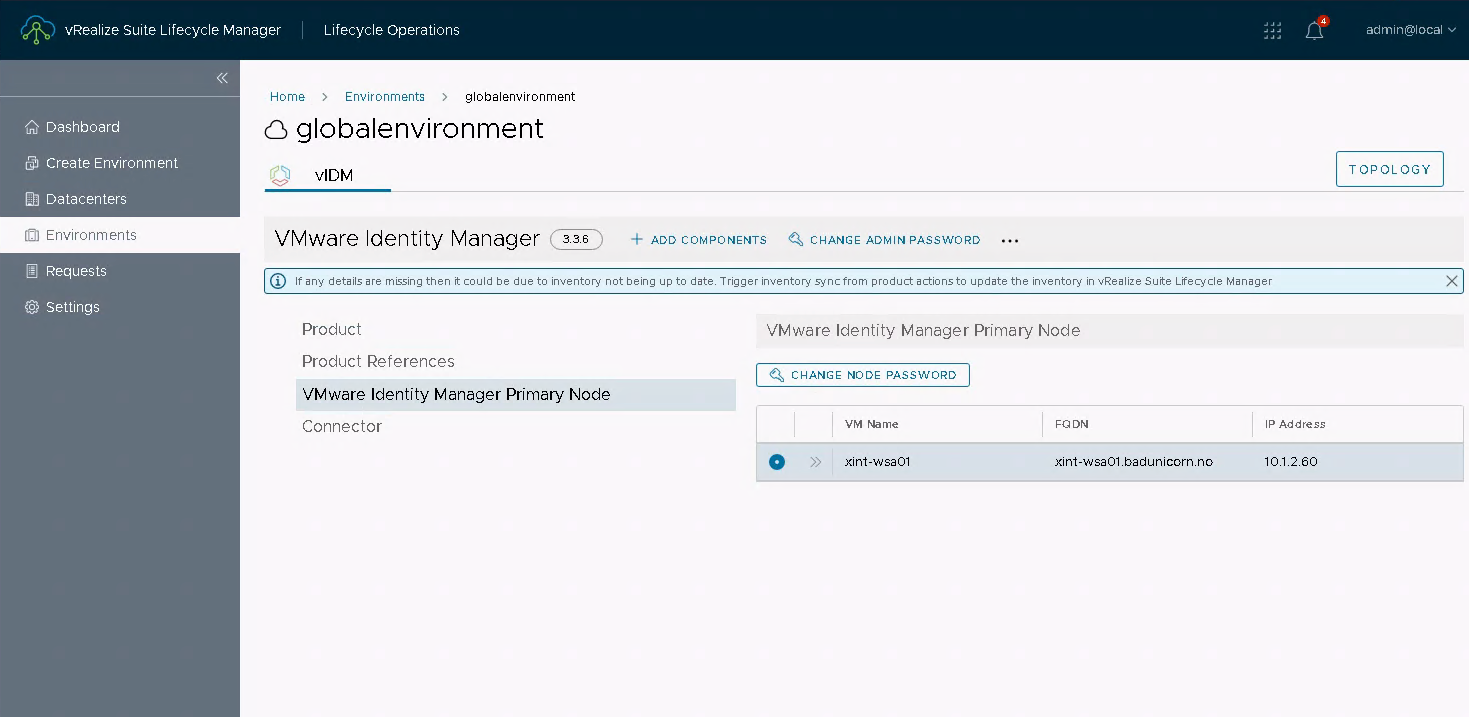
Since the vIDM instance is part of the "global environment" in vRSLCM we'll also trigger an Inventory sync, and verify that it can be sync'ed and that the IP details are updated
Update DNS and certs
Before finishing be sure to update the DNS record for the vIDM instance, and if the certificate in use has the IP address included make sure to regenerate a certificate with a new IP.
Summary
This short post was a write up of the steps taken to change the IP of a VMware Identity Manager instance.
Thanks for reading, and reach out if you have any comments or questions.