Tanzu Mission Control - Data Protection
Overview
Lately I've been playing around in Tanzu Mission Control, TMC for short. TMC is VMware's SaaS offering for managing Kubernetes clusters cross different clouds and providers.
So far we've seen how to attach existing clusters and how to create new clusters.
In this post we'll take a look at how to enable and use the Data Protection capabilities in TMC.
Note that when preparing for this post I came across this post from fellow vExpert Dean Lewis. He has also done a series of blog posts around TMC which is worth checking out
Project Velero
The Data protection capabilities in TMC is backed by the open-source tool Velero. This tool can be used to back up Kubernetes clusters both on-premises and in a public cloud with the ability to select a subset of the resources in the cluster. It differs from a few other solutions as it uses the Kubernetes API to capture (and restore) the state of the resources, where other solutions uses the etcd database directly.
To backup Persistent volumes Velero uses either the storage platform's native snapshot capabilities or the integrated file-level backup tool restic
Backup process
This won't be a detailed post on the Velero solution, but I thought it was interesting to see how the process works.
Velero defines a few new Kubernetes custom resources when installed in your cluster. It uses it's own controller with a watch loop to look for new or modified resources. This follows how Kubernetes manages other resources in the cluster with controller loops.
The backup workflow for a Velero backup explained high-level:
- Through the Velero client a new backup resource object is created and sent to the Kubernetes API server. The resource specifies what to back up
- The Backup controller validates the new object
- The Backup controller starts the backup. It queries the API server for the state of the resources it wants to back up
- The Backup controller uploads the backed up data to an object storage service, e.g. AWS S3
- The Backup controller creates a snapshot backup of Persistent volumes by default by using the storage provider's API. (This is enabled by default, but can be disabled in the backup job)

Data Protection in TMC
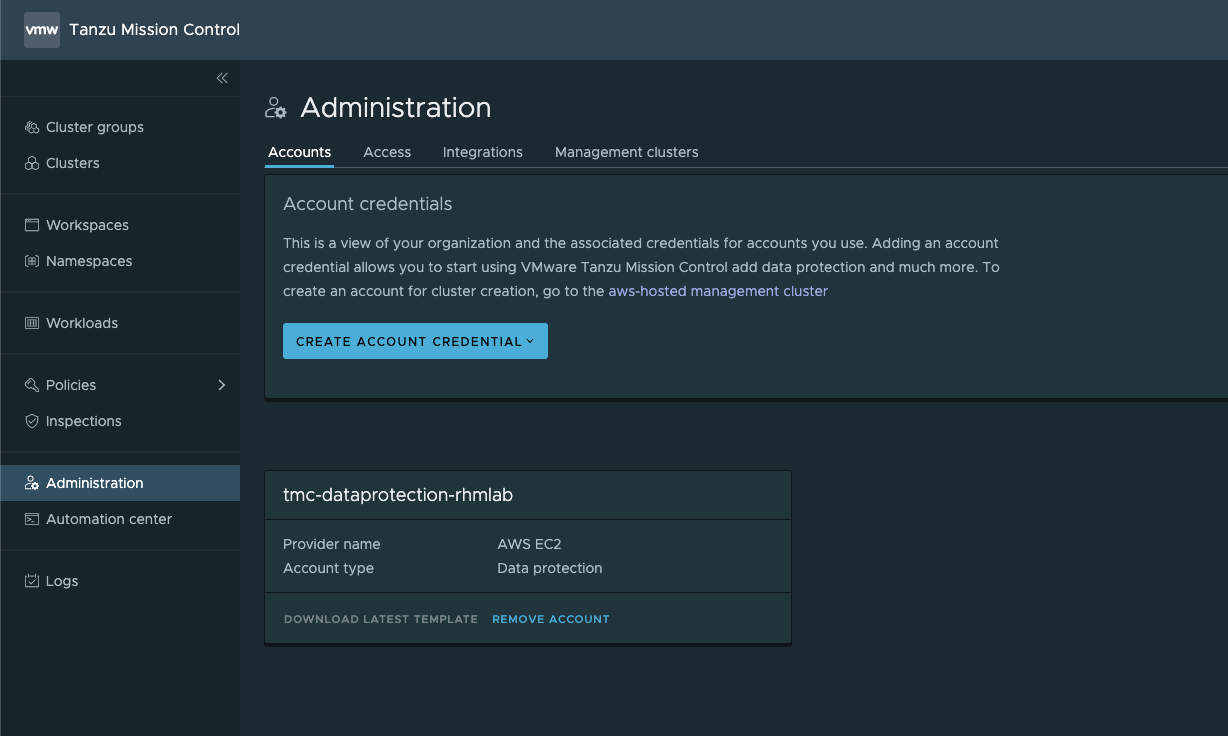
To enable Data Protection in TMC we need to set up an Account Credential for Data Protection. This credential will specify where the Velero extension should store the backed up data. Currently the only supported object storage provider for this is AWS S3.
Create Account credential
The creation of the Account credential follows the same procedure as we did for setting up a credential for our AWS provider to be able to deploy Tanzu Kubernetes clusters on AWS. Check out this blog post or the documentation for more info.
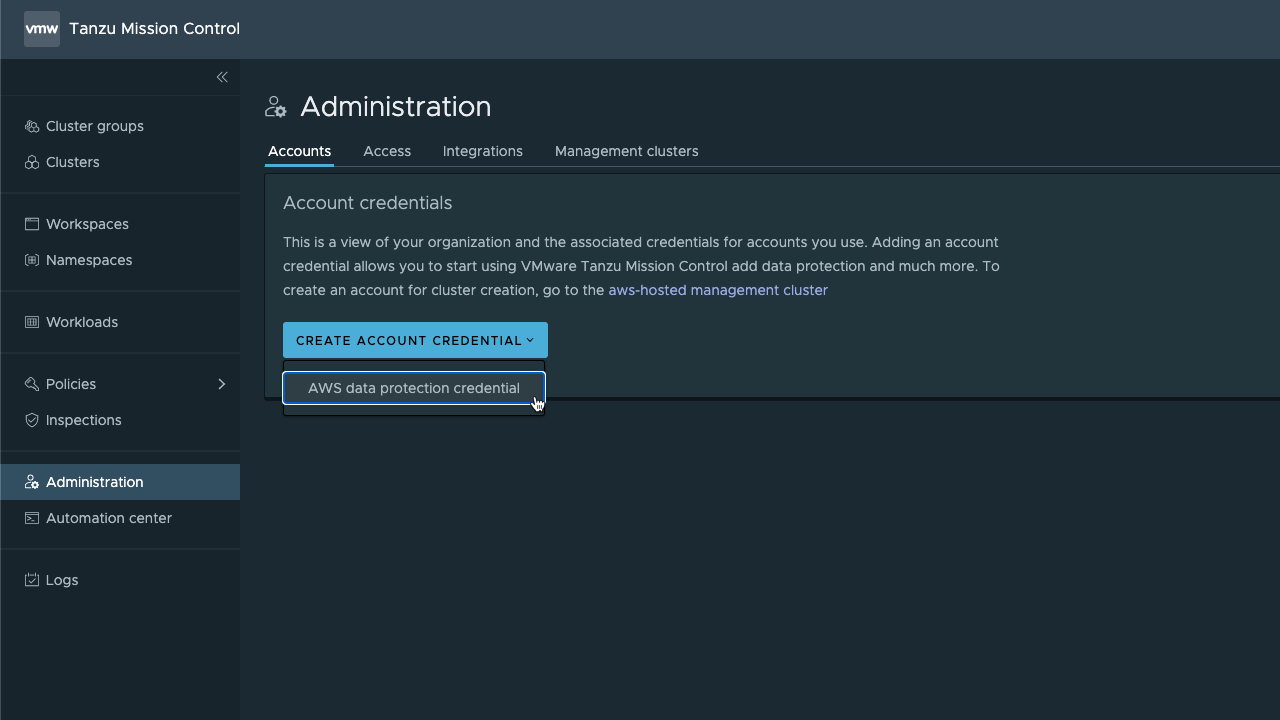
The difference here is that in stead of setting up through the Management clusters details view we use the Accounts tab in the Administration section and specify that we want to create an AWS data protection credential
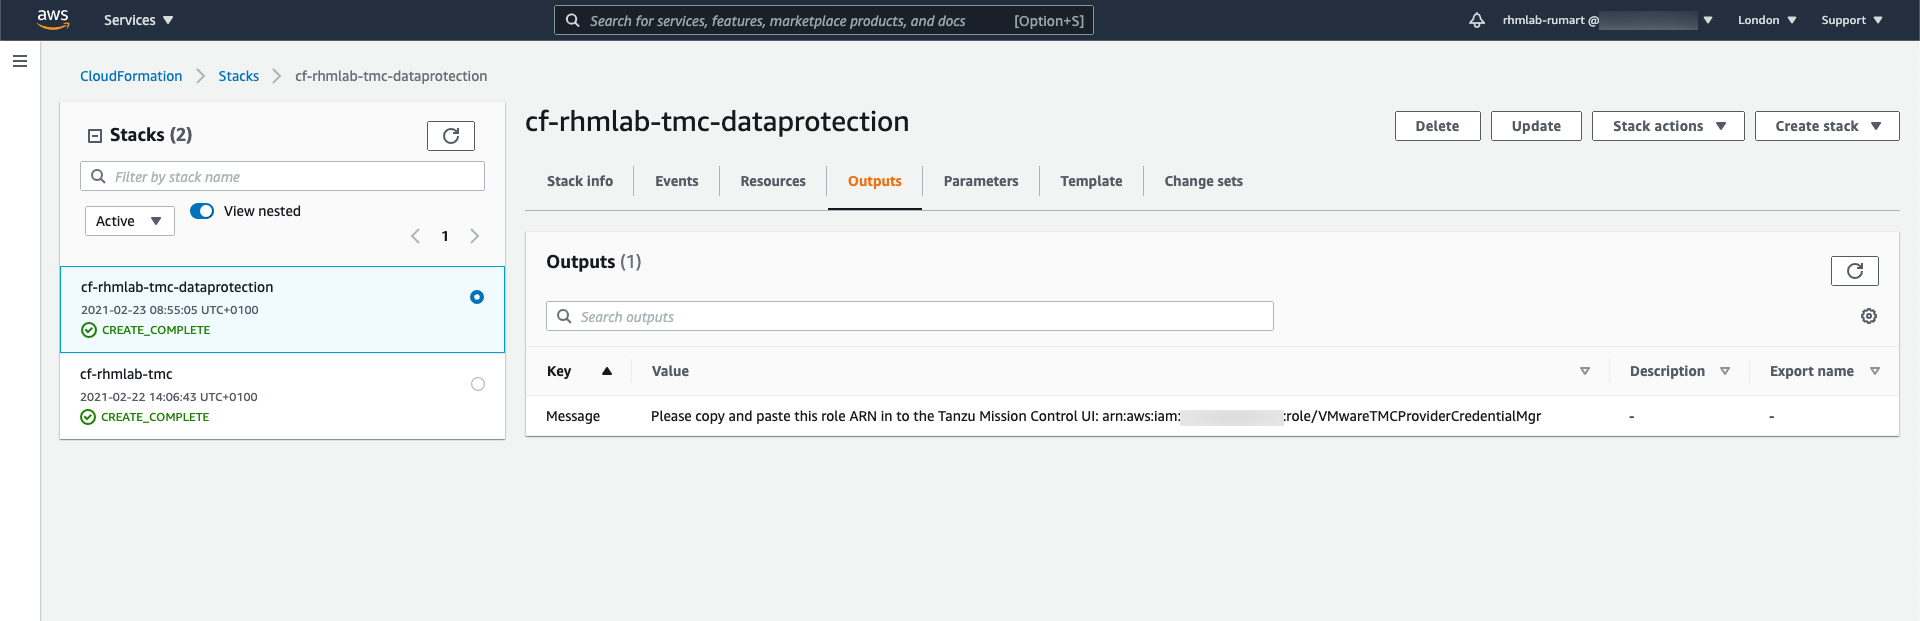
This fires of the credential wizard which instructs us to create a CloudFormation stack in AWS. Although it's the same process as we saw with the credential used for deploying clusters we should use a specific account for Data Protection with a new Template.
I won't cover the steps in AWS, again check out my previous post on this or the VMware documentation.
After the CloudFormation stack has been created we fetch the AWS ARN that TMC needs to create the credential for Data protection
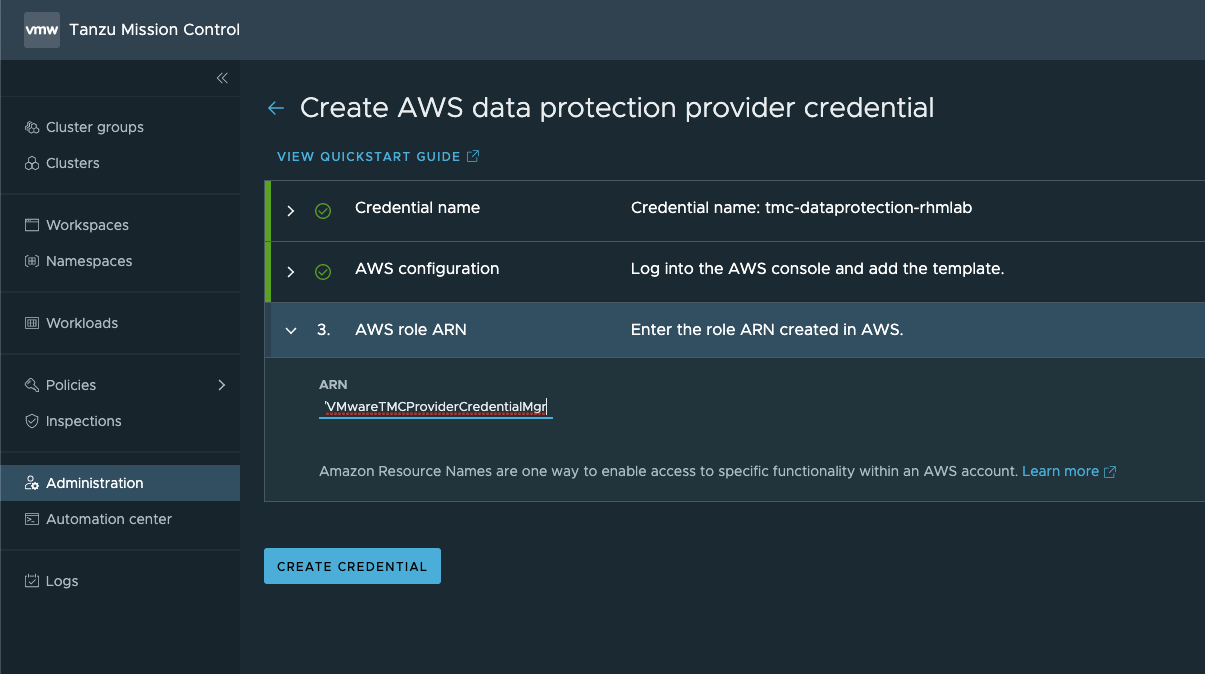
This ARN goes in to the credential wizard in TMC so we can create the credential
And with this in place we should see our newly created Data protection credential
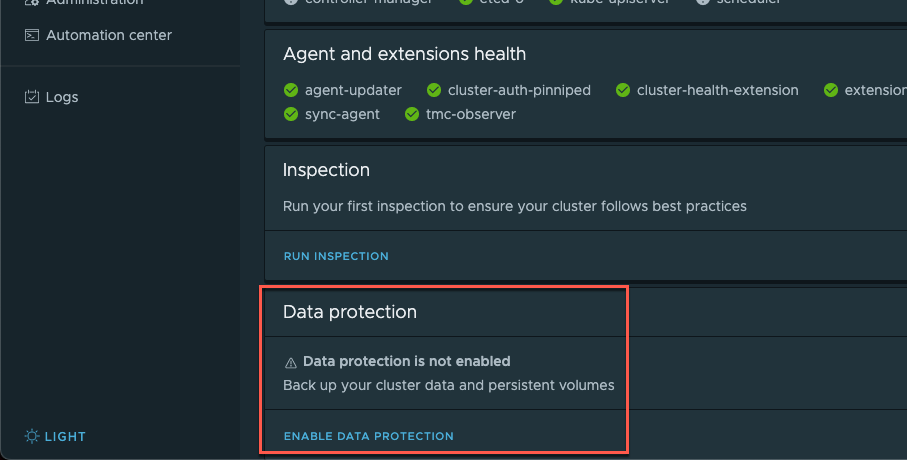
Enable Data protection for a cluster
Data protection is disabled by default so to use the capability we need to enable it for a cluster
When we hit Enable Data protection we get a dialog box where we select the Account credential. This allows us to use different credentials for different clusters.
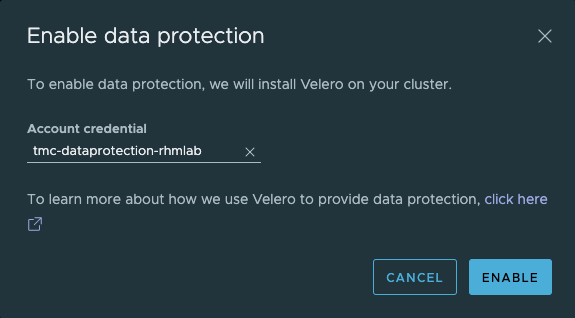
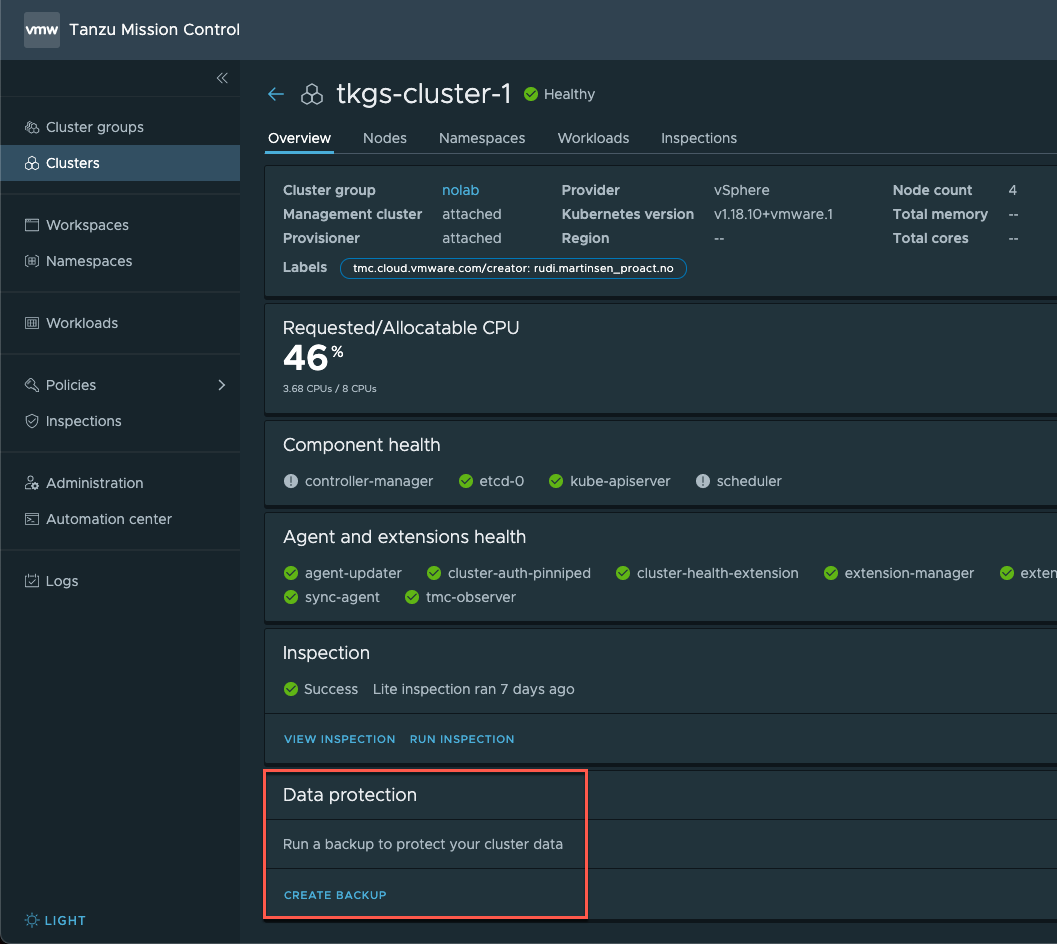
After selecting the credential we want to use, Data protection is enabled and we can create a backup
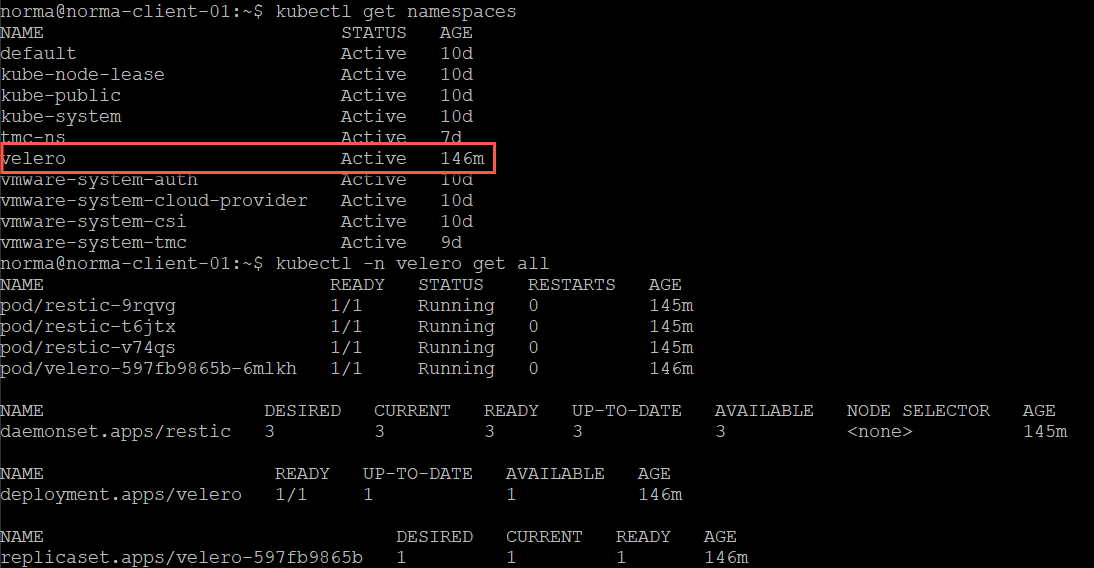
In our Kubernetes cluster we now have a Velero namespace with some resources created
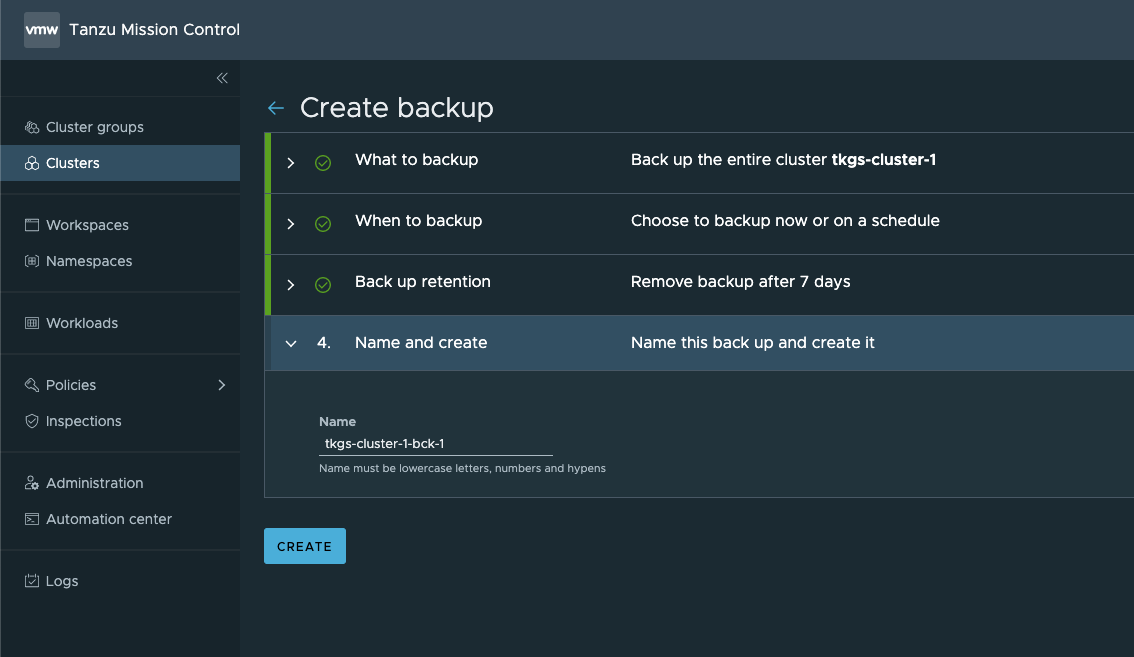
Create backup
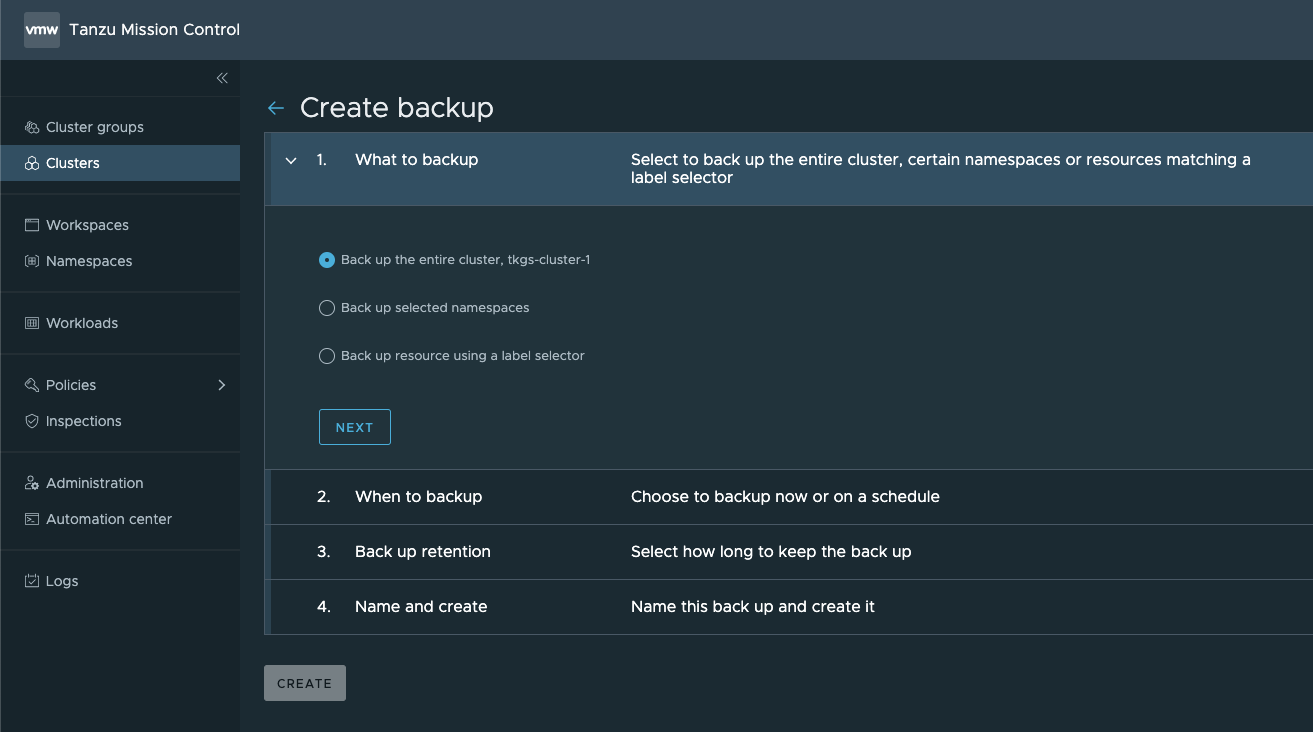
Let's create a backup of one our clusters by hitting of the Create backup wizard
The first step of the wizard is to select what we want to backup, either the entire cluster, selected namespaces, or by using a label selector
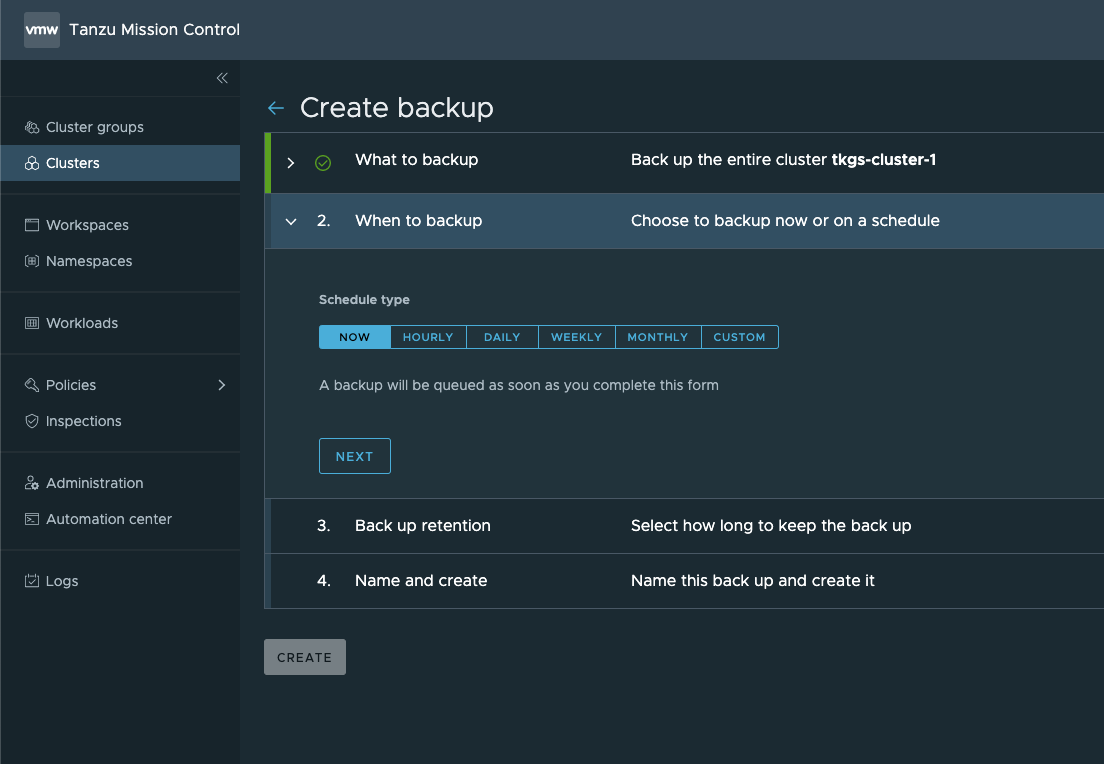
Next, we'll set the schedule. In my example I just want to do a one-time backup
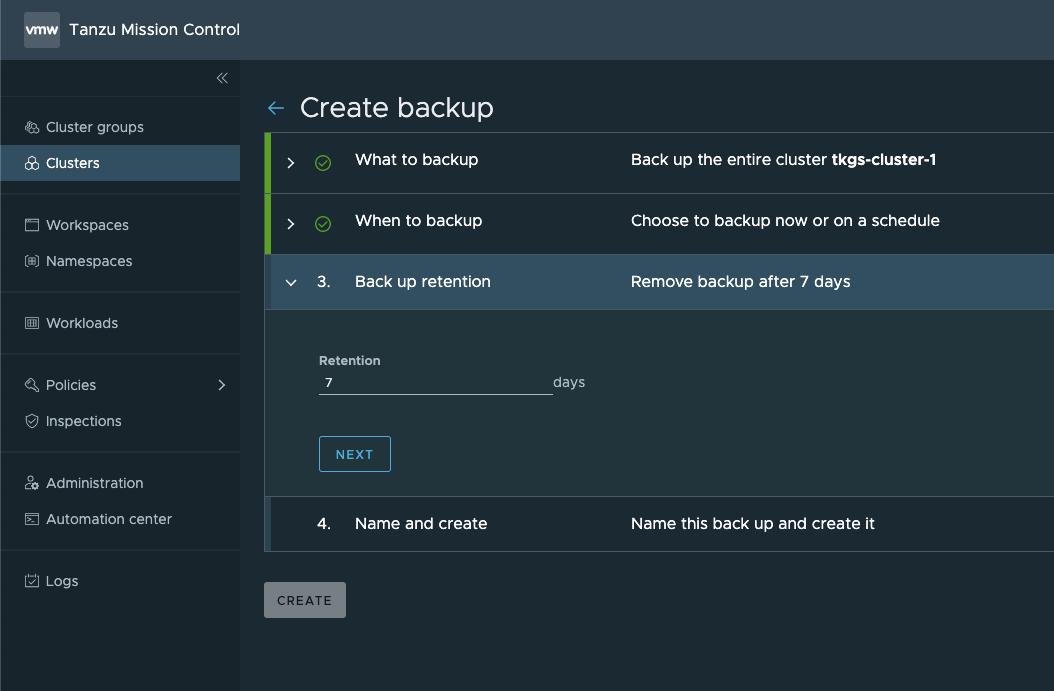
Next, we'll set the retention of the backup
The final step is to give the backup a name
Now TMC will invoke the velero backup process and velero will put our backup in a AWS S3 bucket
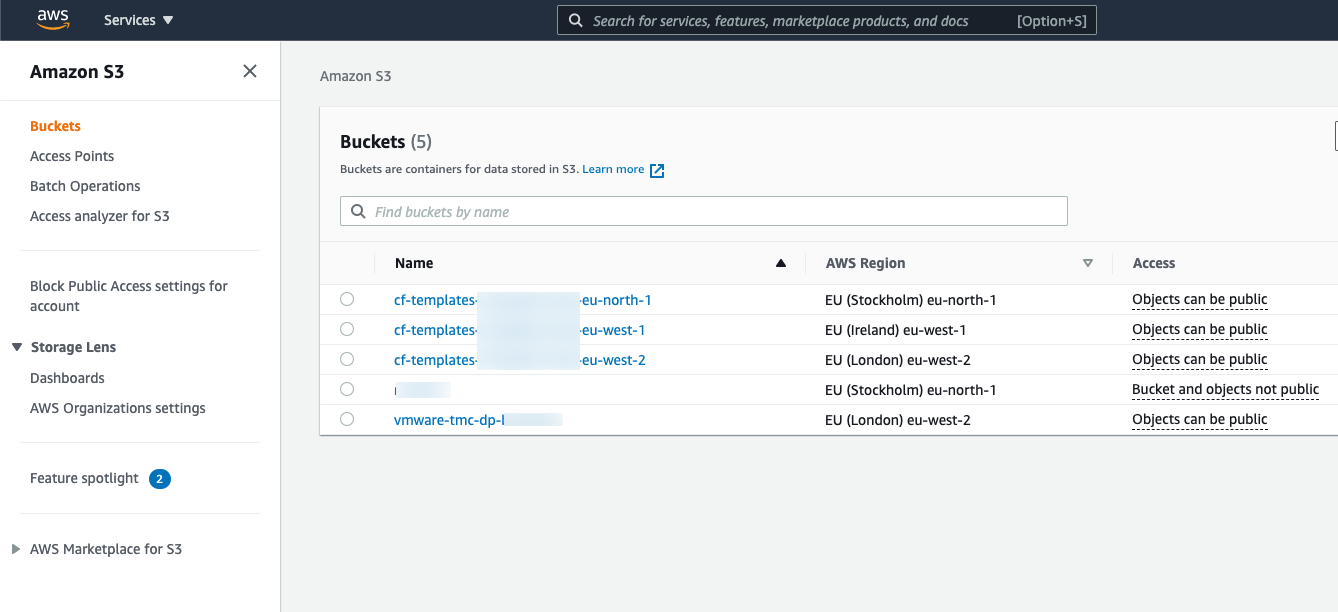
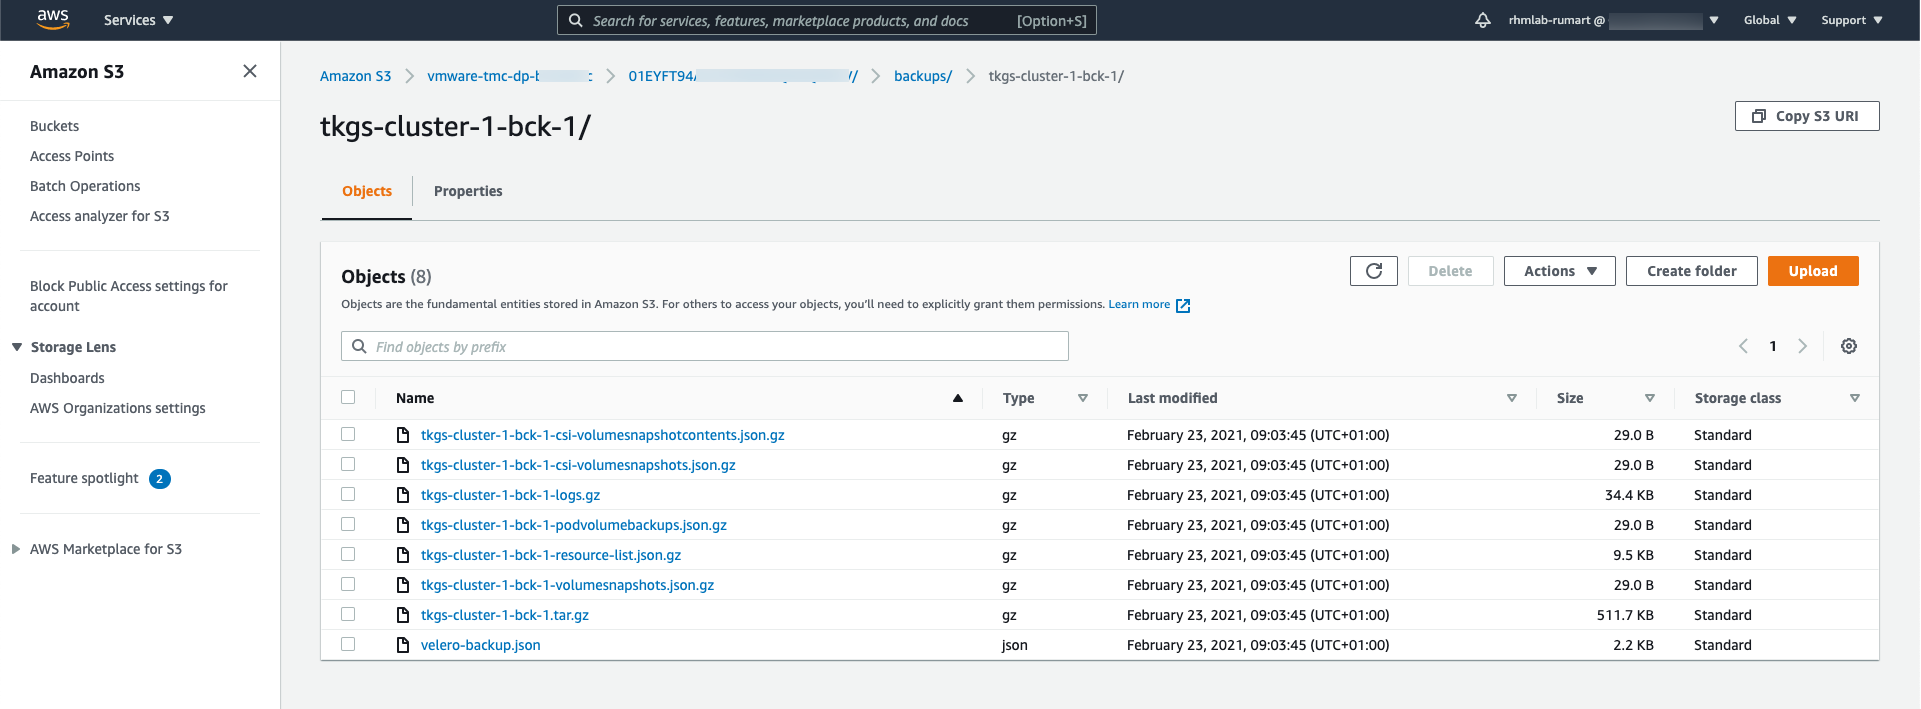
The vmware-tmc-dp-xyz bucket has been created automatically for us, and inside here we'll have folders for our clusters, and the backups created for them. The backup we just created consists of the following files
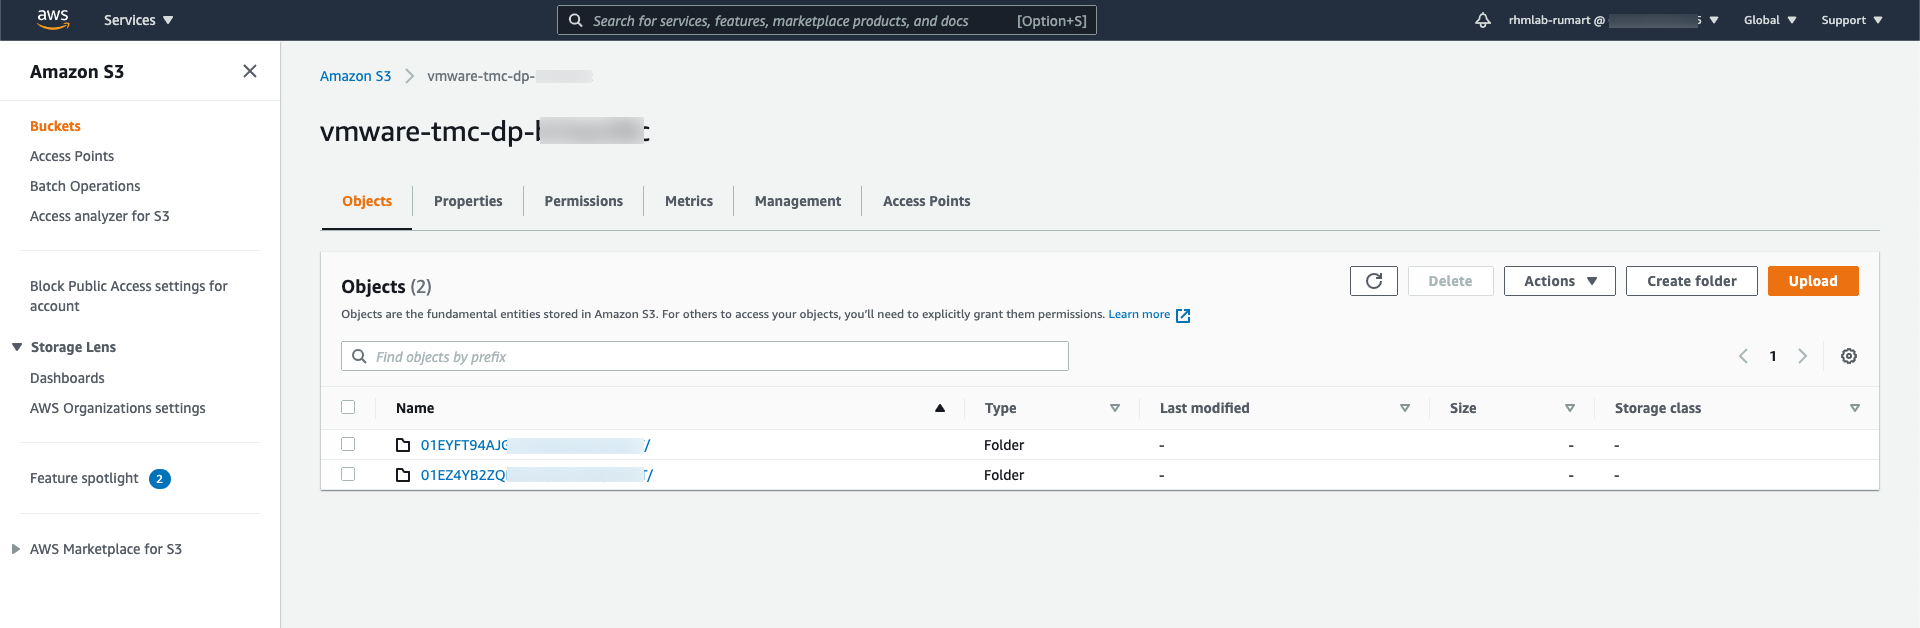
If we create a backup for a different cluster we'll get a folder for this as well under the same vmware-tmc-dp-xyz bucket
Back in our TMC console we can see the backups created and the status of them.
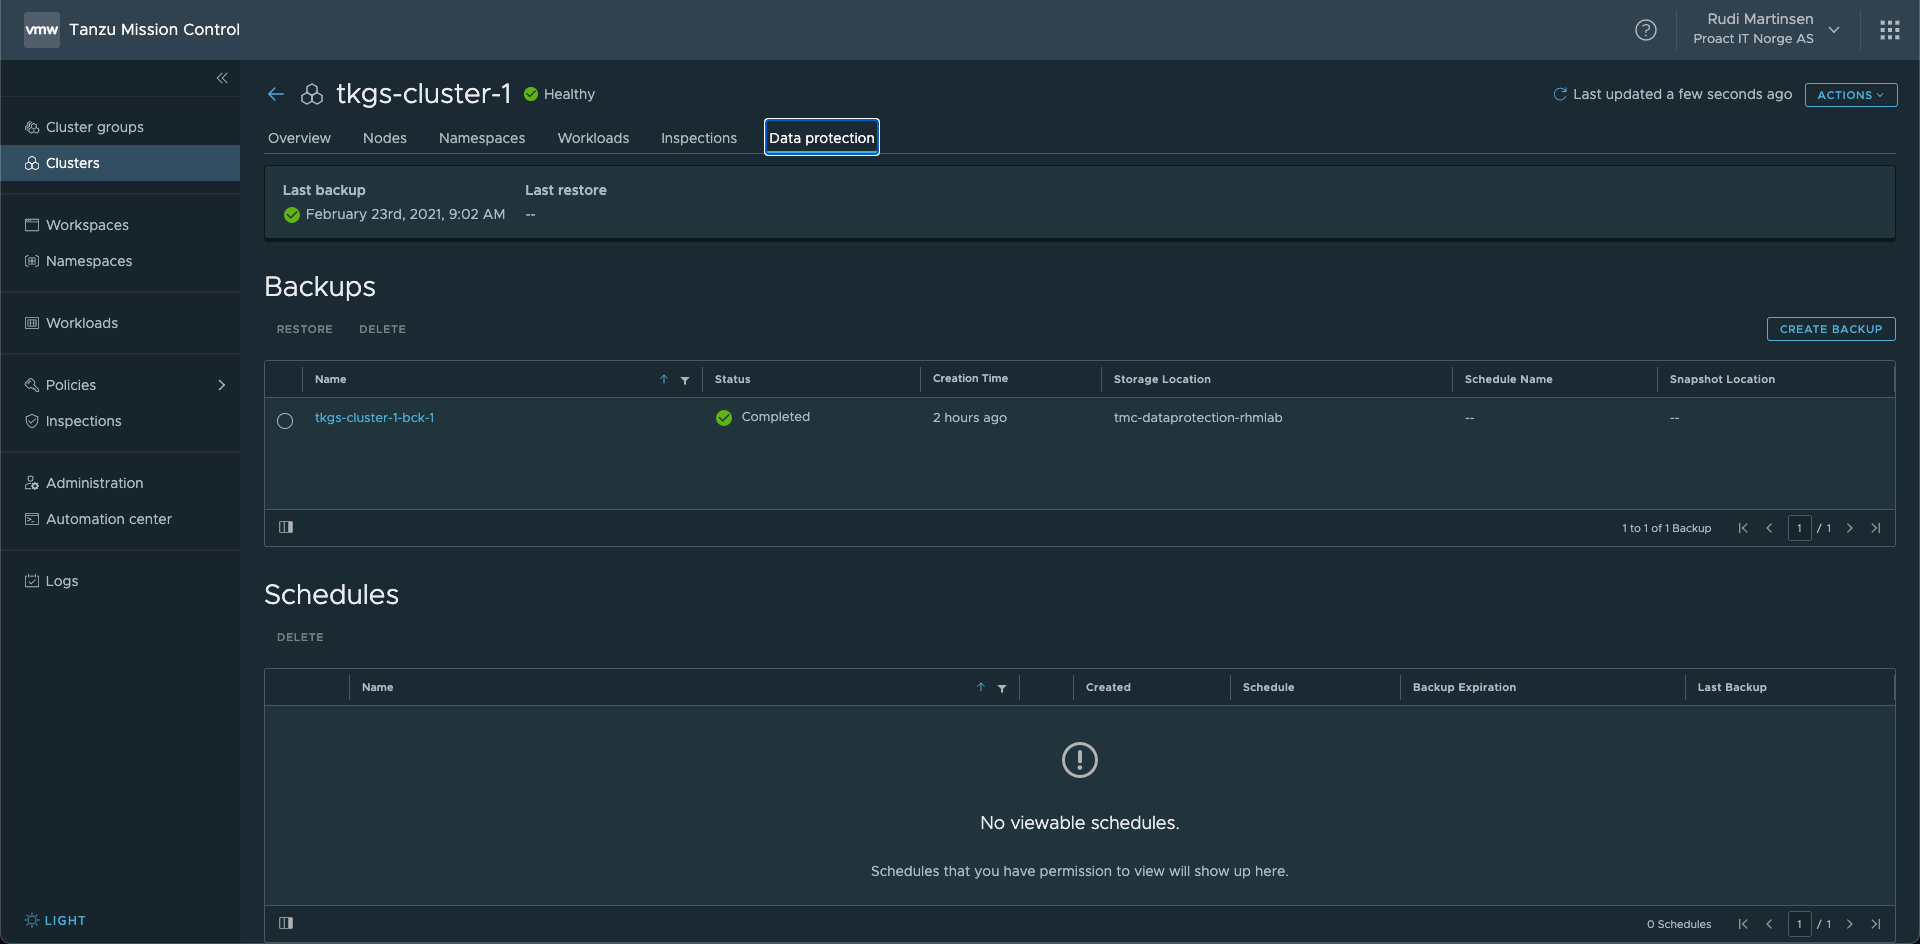
Since this is creating backups in our Kubernetes cluster we can find the same backups with kubectl. This is a nice feature where an Administrator can control this through the TMC console, while Developers can get the same details through their favorite tool kubectl

To create a backup or restore a backup we can use the tmc command-line utility, but I've also created a backup through kubectl with a yaml file. You should also be able to use the velero command-line utility
Note that I have no documentation resource for this so not sure if it's supported with TMC.
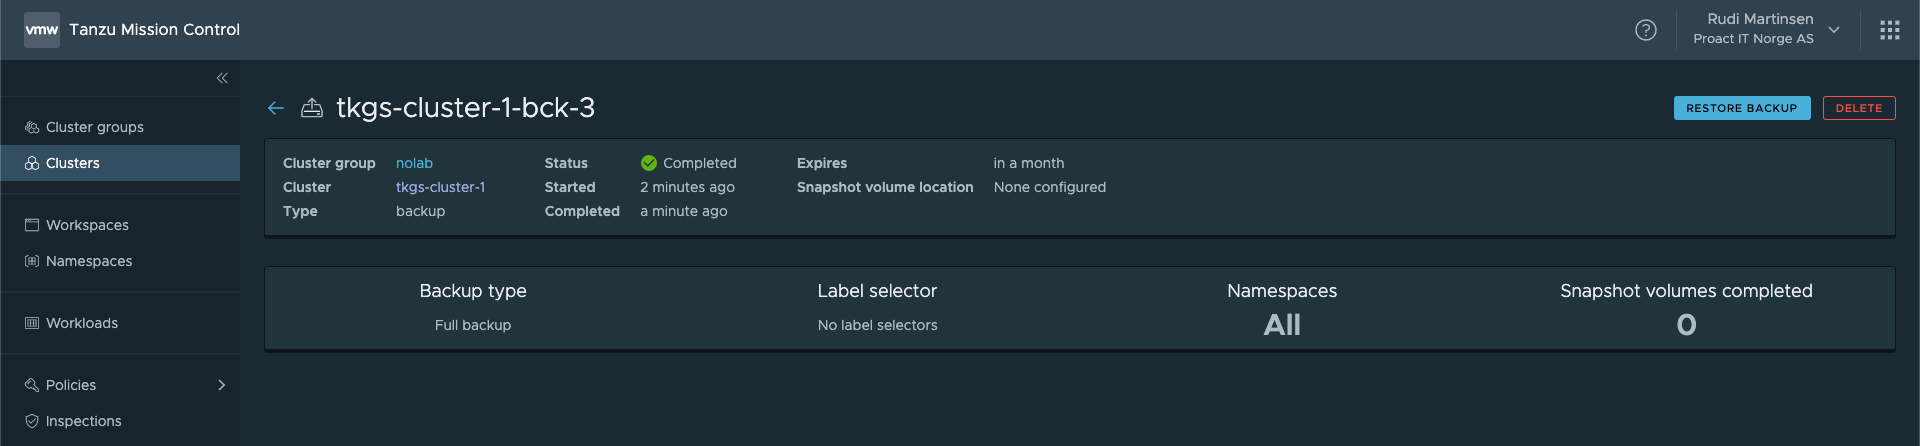
 1apiVersion: velero.io/v1
 2kind: Backup
 3metadata:
 4  labels:
 5    velero.io/storage-location: tmc-dataprotection-rhmlab
 6    manager: velero-server
 7    operation: Create
 8  name: tkgs-cluster-1-bck-3
 9  namespace: velero
10spec:
11  hooks: {}
12  storageLocation: tmc-dataprotection-rhmlab
13  ttl: 720h0m0s
1kubectl -n velero apply -f backup.yaml
Restore
Now, let's do a simple demo of a restore.
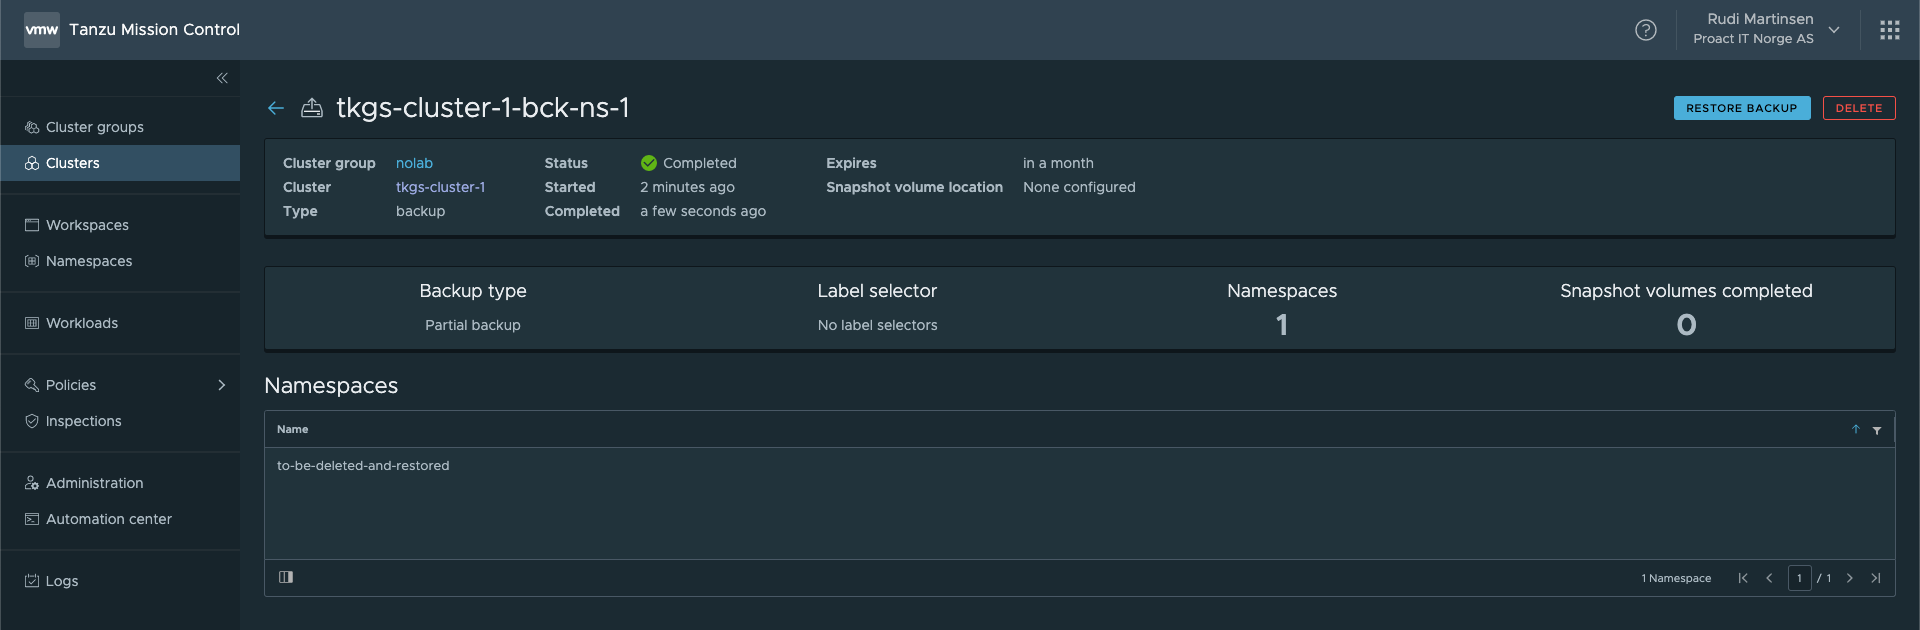
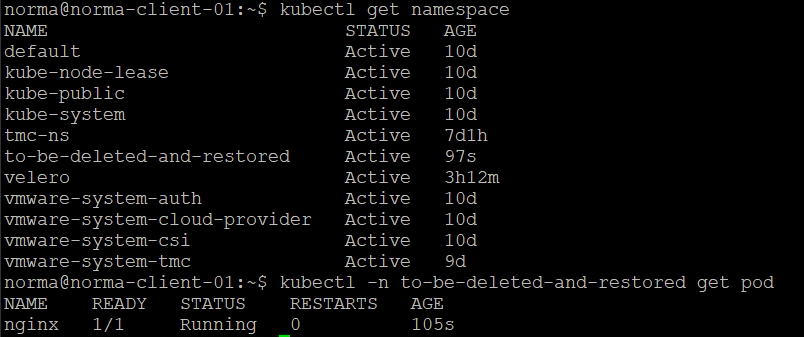
I've created a Namespace in my cluster, and have deployed a Pod running an nginx container

Now, let's create a backup of this namespace through the TMC console
And then, disaster happens. The namespace gets deleted and our Pod is lost

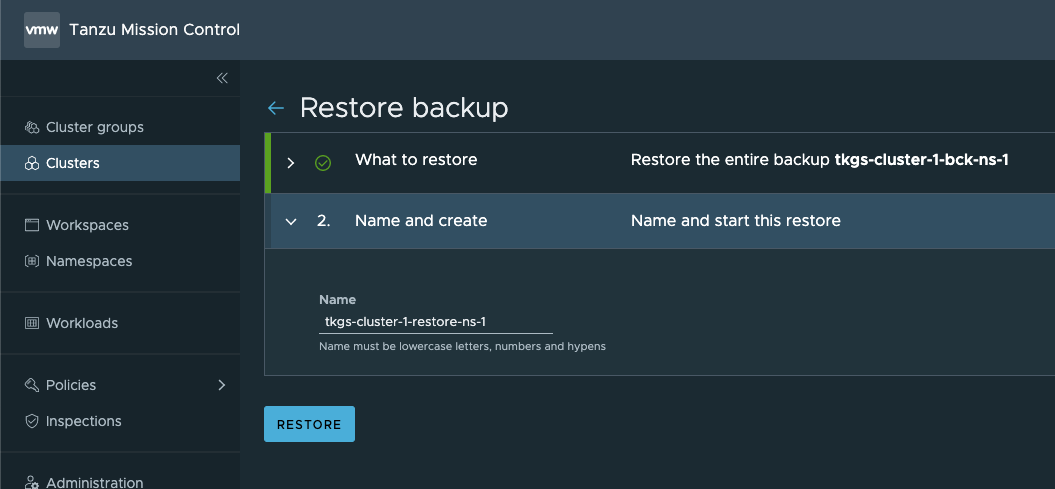
From TMC I can now hit the Restore backup button from the backup created to start the Restore wizard.
First we select what to restore from the backup. In this example I can go with the entire backup since it only contains the namespace deleted, but we could fetch the namespace from a Full cluster backup as well.
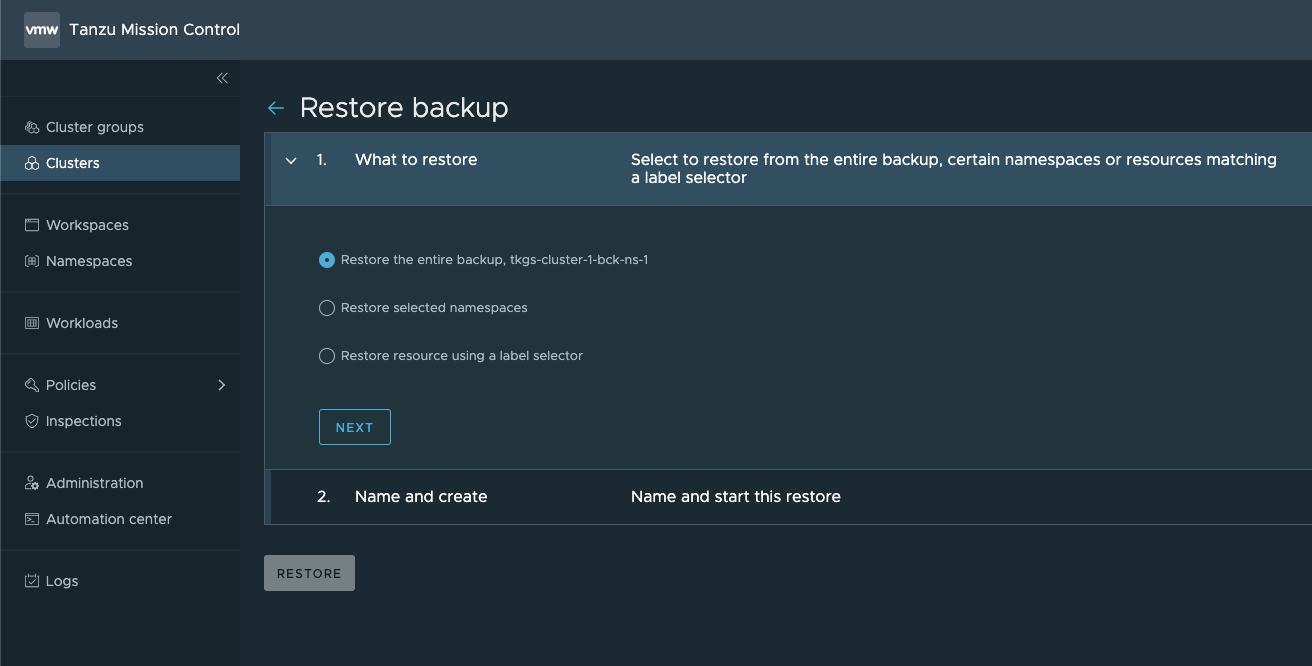
Give the restore a name and hit Restore
After a while our Restore operation has finished
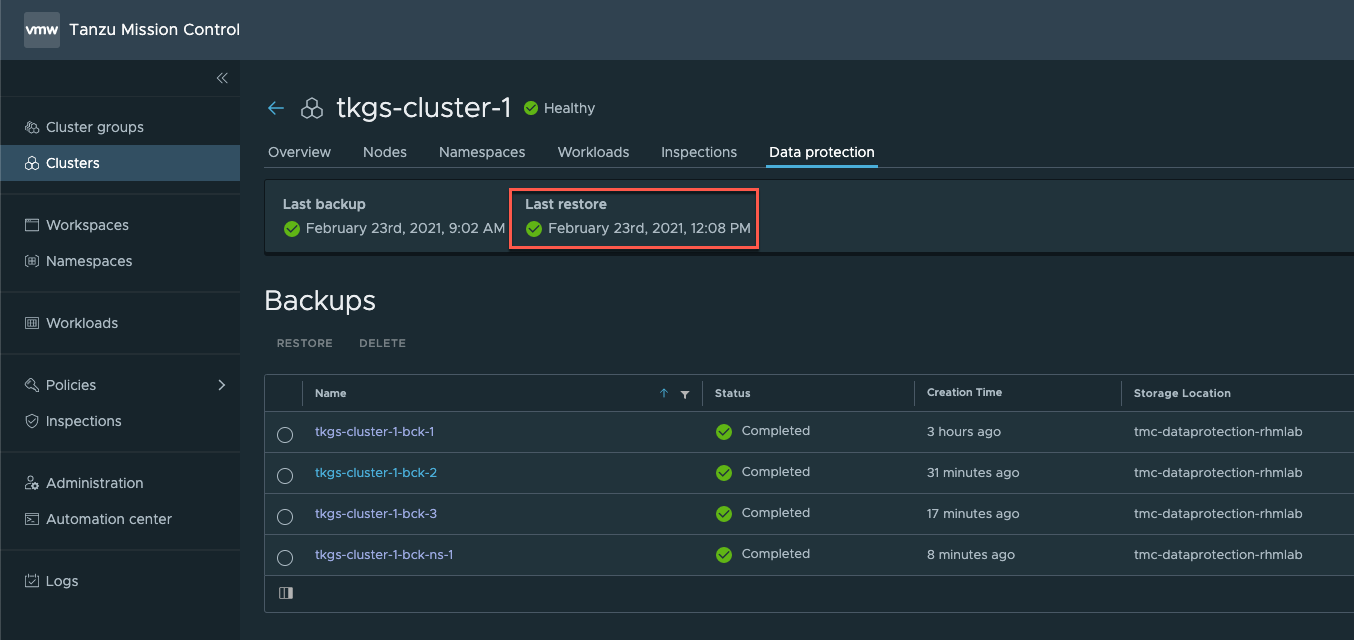
And we have our Namespace and Pod back in the cluster
Note, for an example of a restore with a volume as well, check out Dean Lewis' post mentioned at the start of this blog post.
Summary
Wow, another lengthy post, but hopefully this has been an intro to what we get from the integrated Data protection feature in Tanzu Mission Control.
I really like the visibility both from the TMC console, which is more of an Admin console, and the kubectl and velero command line utilities which can help Developers in their daily tasks.
Hopefully we will get the ability to set other object storage locations as targets going forward as not all want to or are even allowed to use AWS as a backup location.
Thanks for reading and feel free to reach out if you have any questions or comments.