Tanzu Mission Control - Creating Clusters

Overview
In a few previous blog posts I've covered how to add existing clusters to Tanzu Mission Control, VMware's cloud service for managing Kubernetes clusters across clouds and providers. Check out the intro post here and the post covering adding clusters from multiple clouds here.
In this post we'll take a look at creating new clusters, right from the TMC console. It'll be a long blog post, but there's lots of screen shots so bear with me.
Creating clusters
Until now we've added existing clusters to TMC. Now let's see how we can create cluster right from the TMC console!
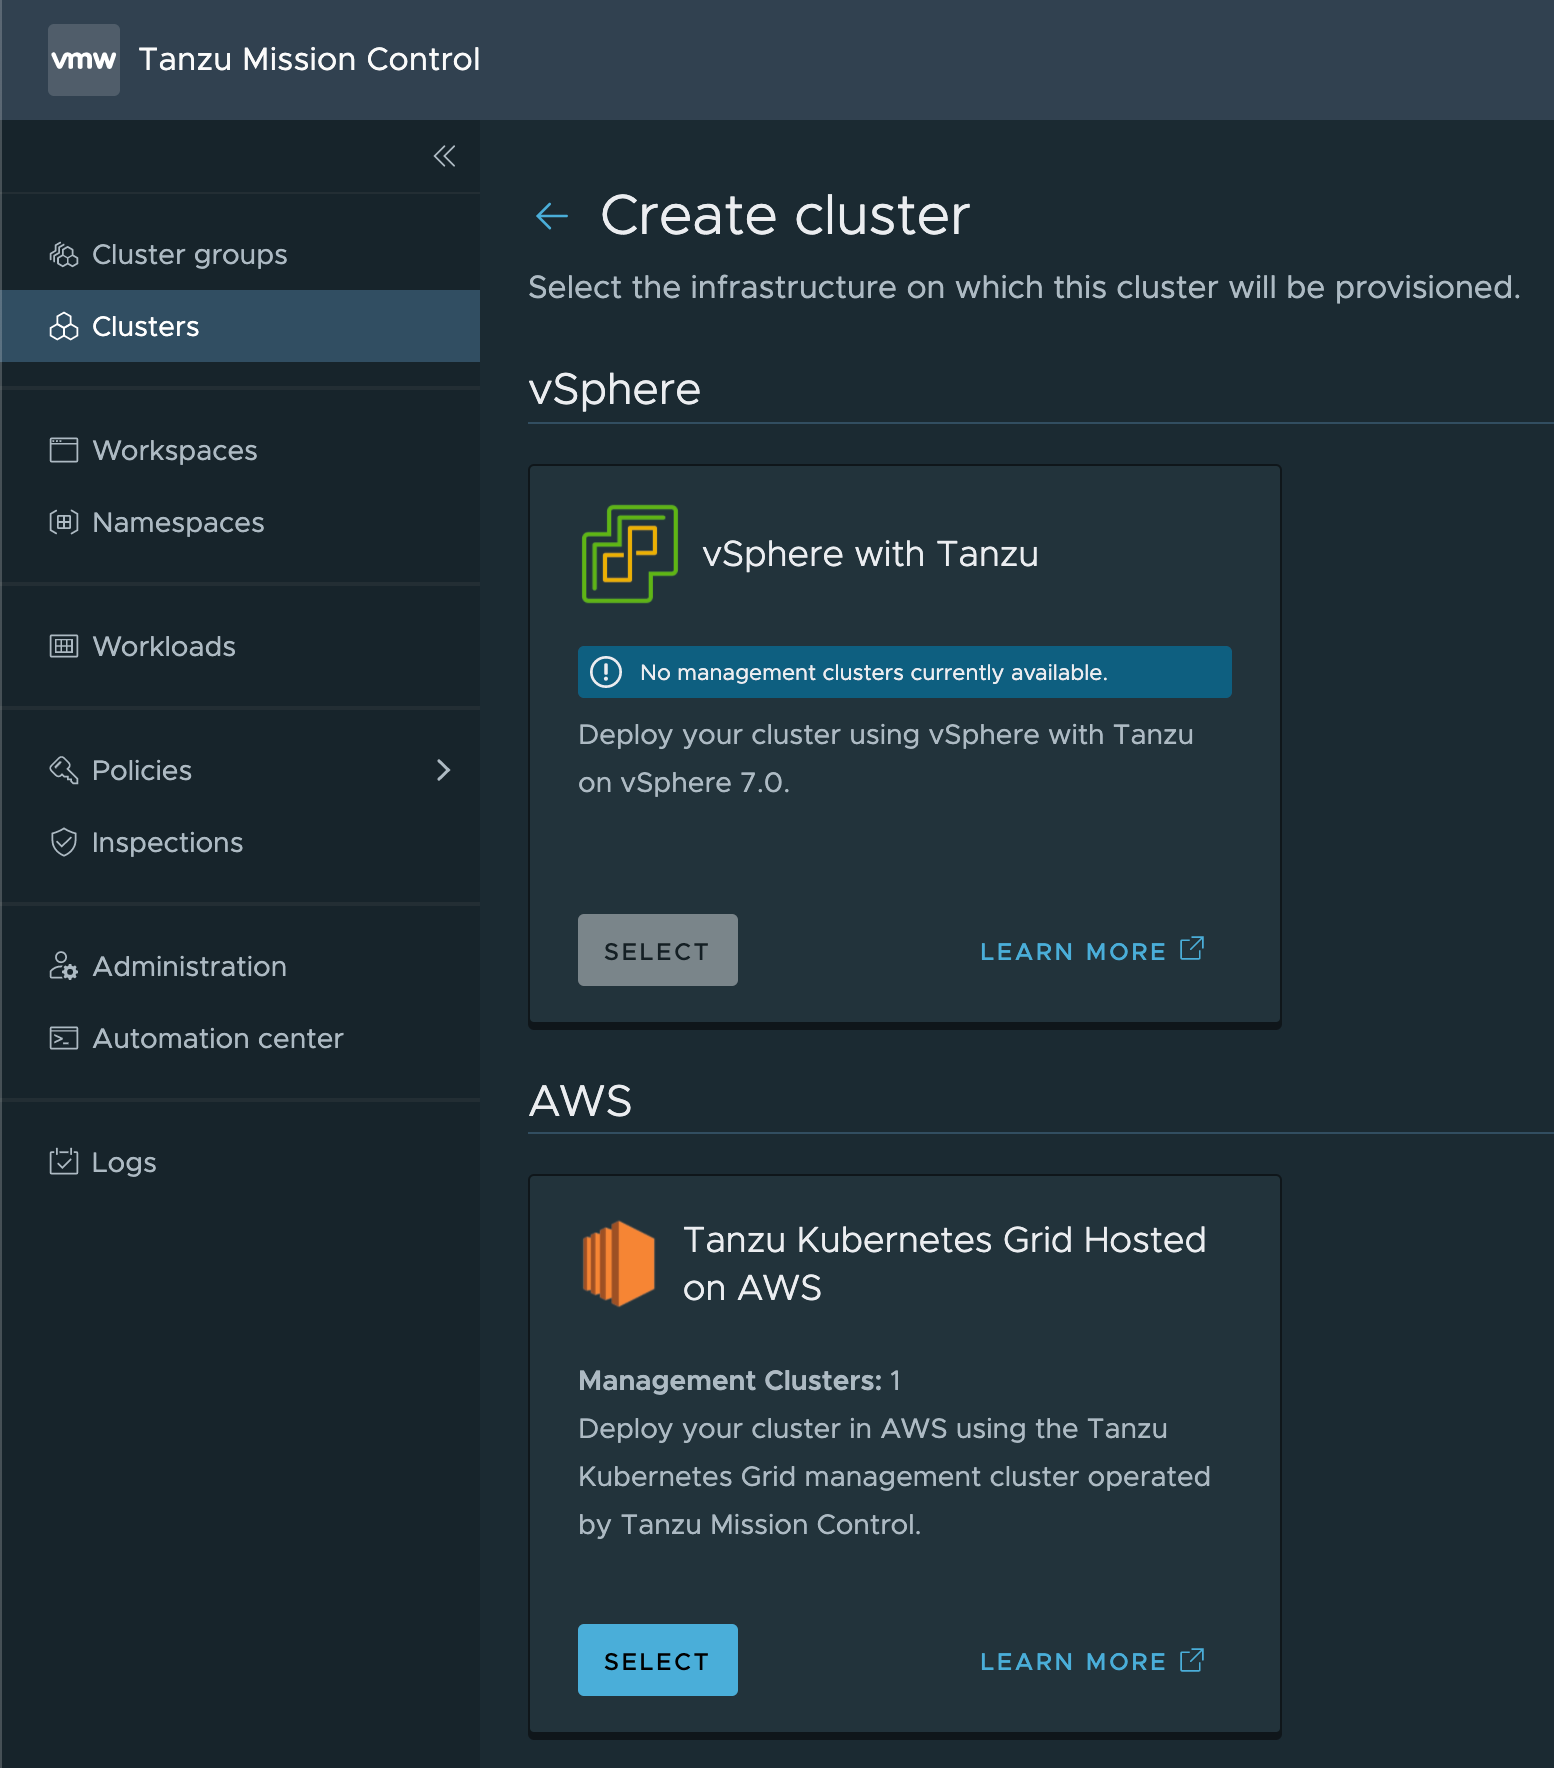
At the time of this writing the two supported providers for creating clusters are vSphere with Tanzu and TKG hosted on AWS. And the clusters we can create on these providers are Tanzu Kubernetes Clusters.
Management cluster and Providers
Before we can go ahead and deploy a cluster we need to set up a provider in the cloud we want to use. The setup of these differ a bit between Tanzu Kubernetes Grid hosted on vSphere with Tanzu (TKGS) and TKG hosted on AWS.
We'll take a look at setting up the provider and deploying clusters on each of them
vSphere with Tanzu
Configure Management cluster and provider
In this first example I'll use my existing Supervisor cluster running on our vSphere with Tanzu installation
We'll go to the Administration view and select the Management clusters tab.
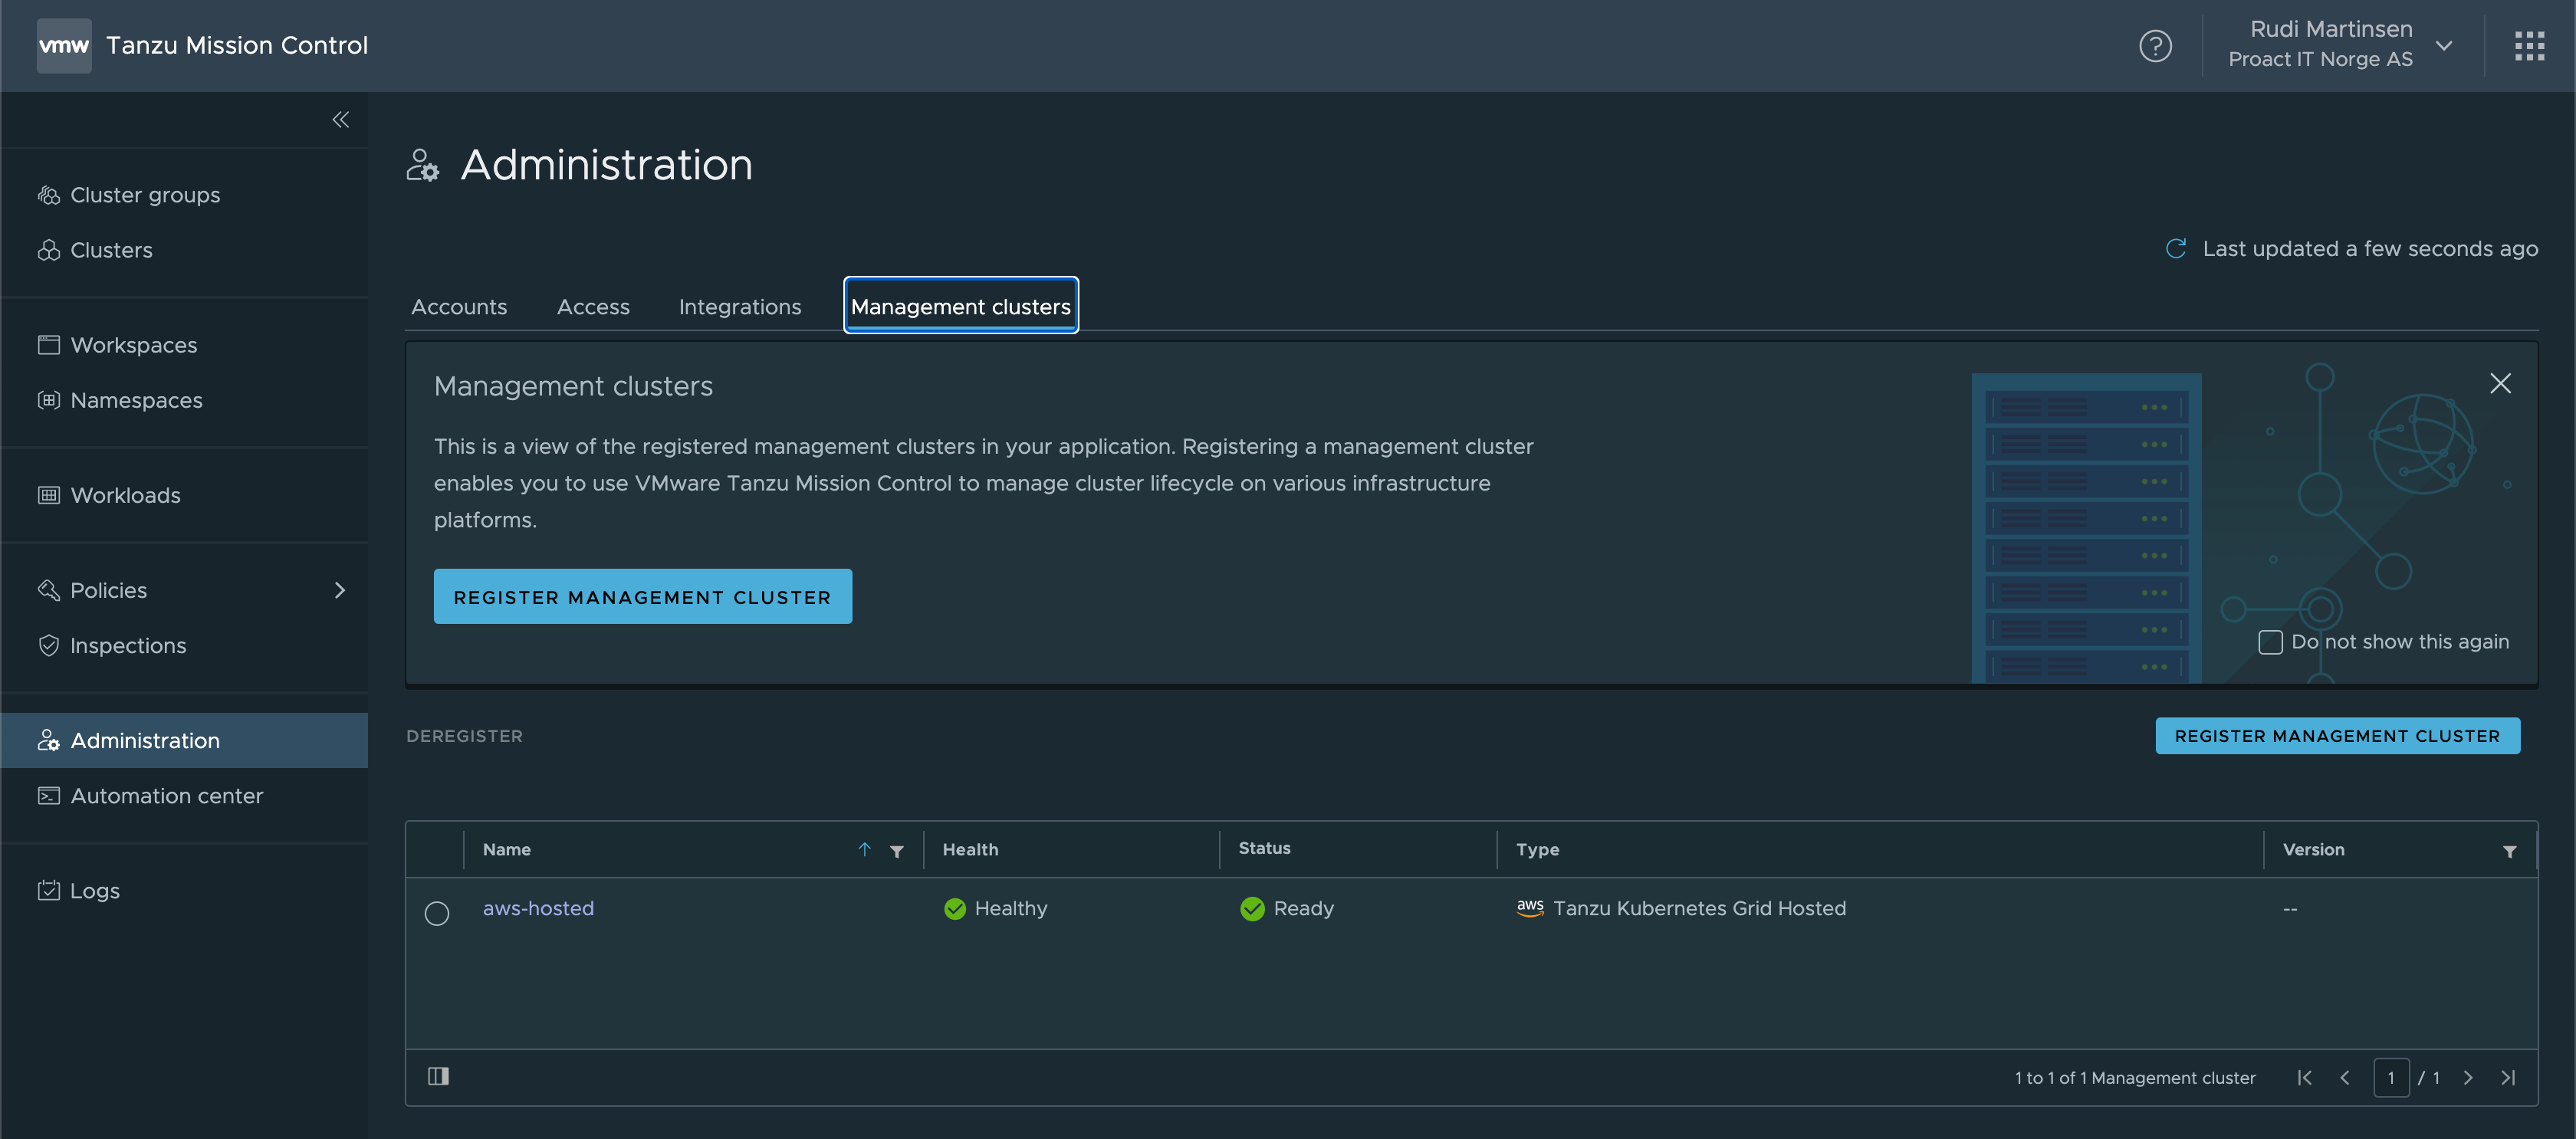
As we can see there's already a Management cluster available, an AWS hosted one. Note that to be able to use this we need to add in some credentials pointing to the correct AWS account etc.
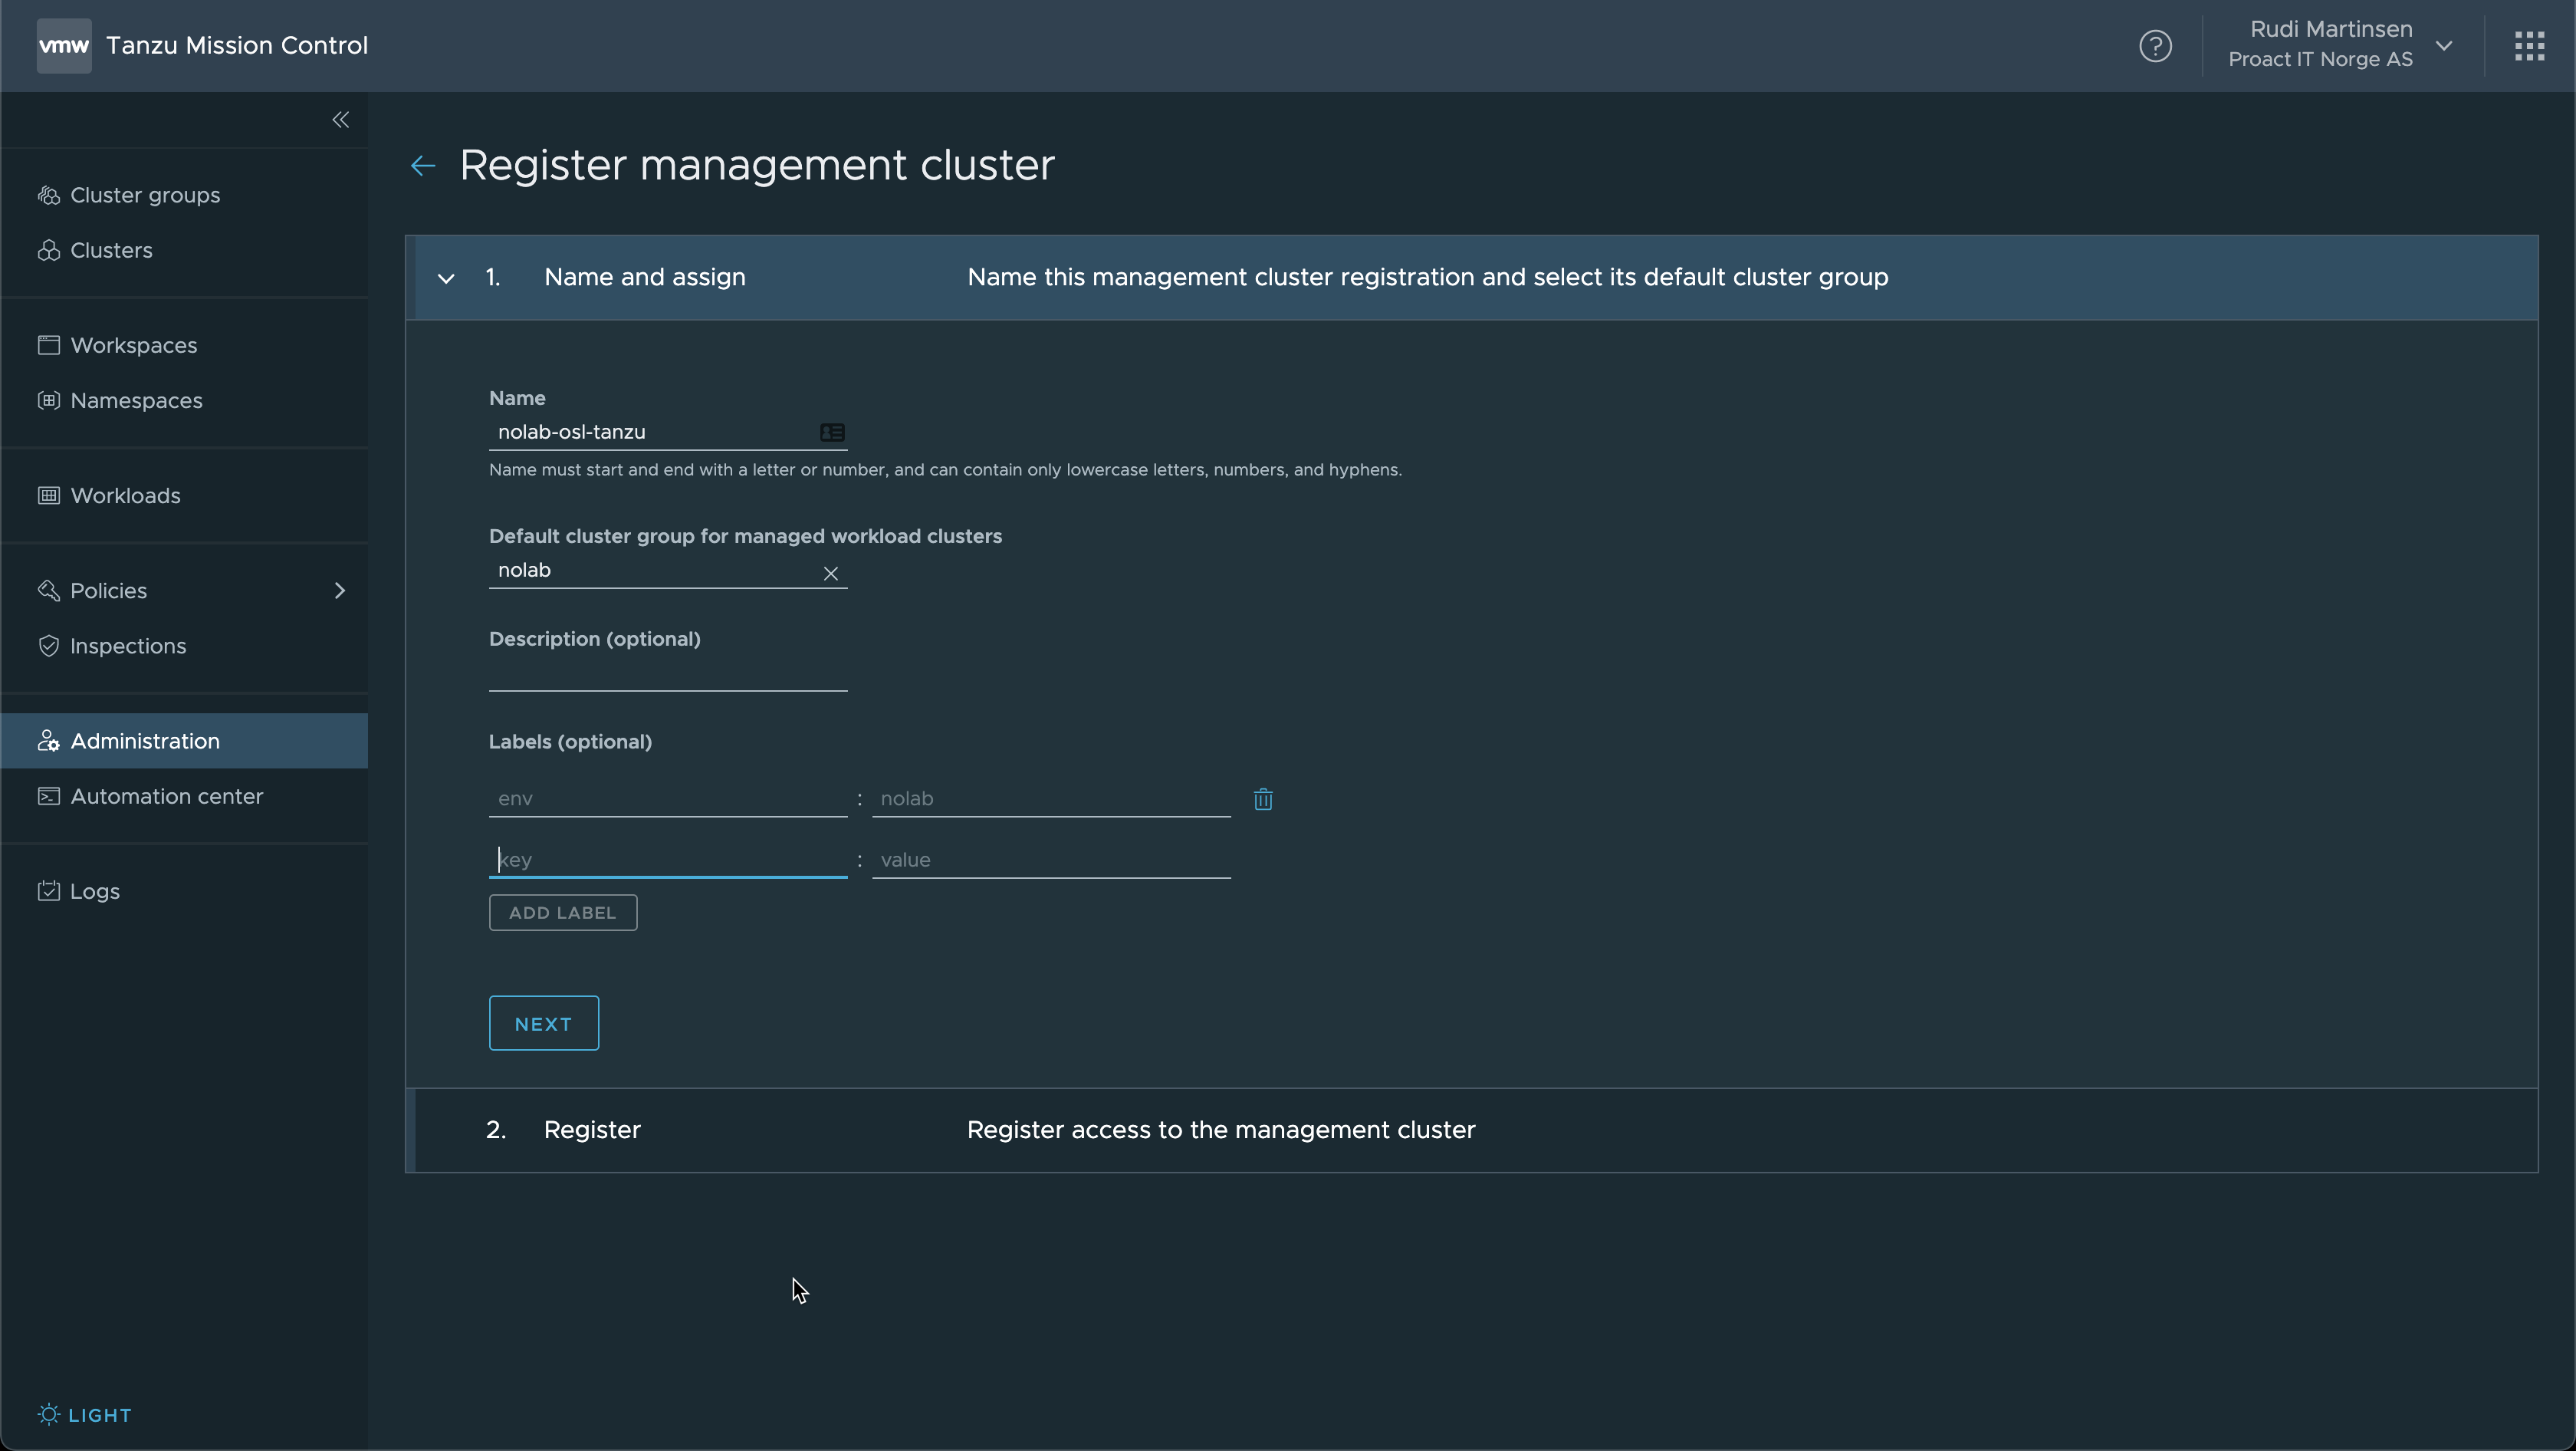
Now let's add in our Supervisor Cluster as a Management cluster in TMC. We start by entering the name, (default) cluster group and labels like we've done with the clusters in the previous examples.
When it comes to management clusters however we do not run a yaml file for adding the TMC extension. In Step 2 of the Register wizard we're directed to a KB article where the process is explained.
In our supervisor cluster there's already a TMC namespace that starts with svc-tmc, and ends with a portion of the vSphere cluster id
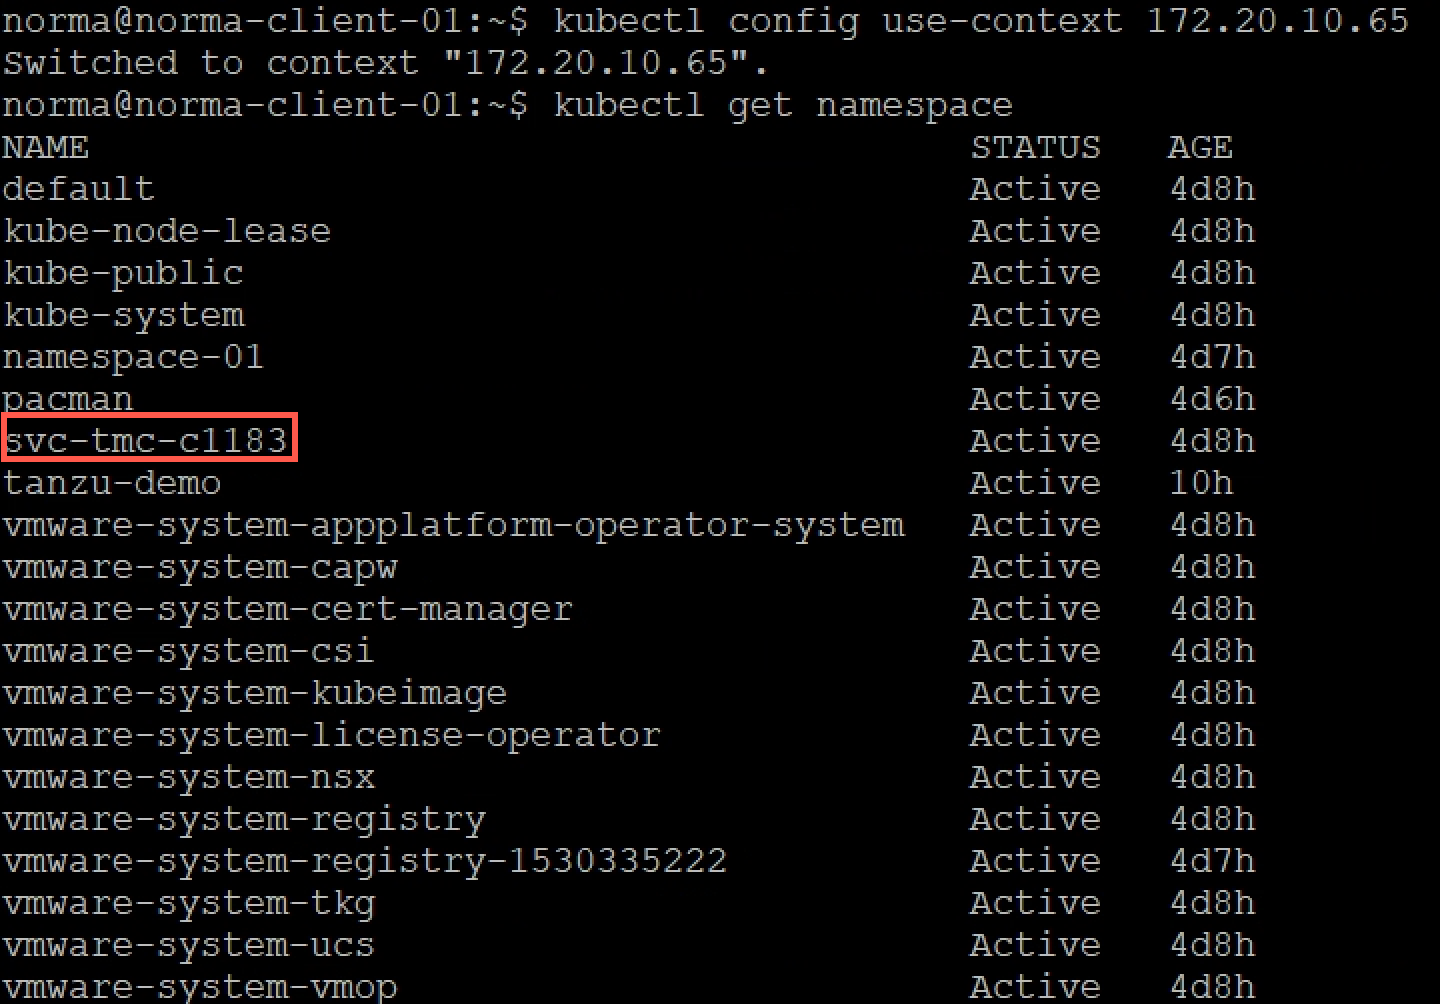
What we need to do is to add a yaml file with the name of this namespace and the registration link provided from the Register wizard
1apiVersion: installers.tmc.cloud.vmware.com/v1alpha1
2kind: AgentInstall
3metadata:
4  name: tmc-agent-installer-config
5  namespace: <svc-tmc namespace retrieved from the Supervisor cluster>
6spec:
7  operation: INSTALL
8  registrationLink: <registration link from the Register wizard>
After preparing this file we can apply it to the cluster and the extensions should be configured and after a while it communicates with your TMC instance.
Management cluster info
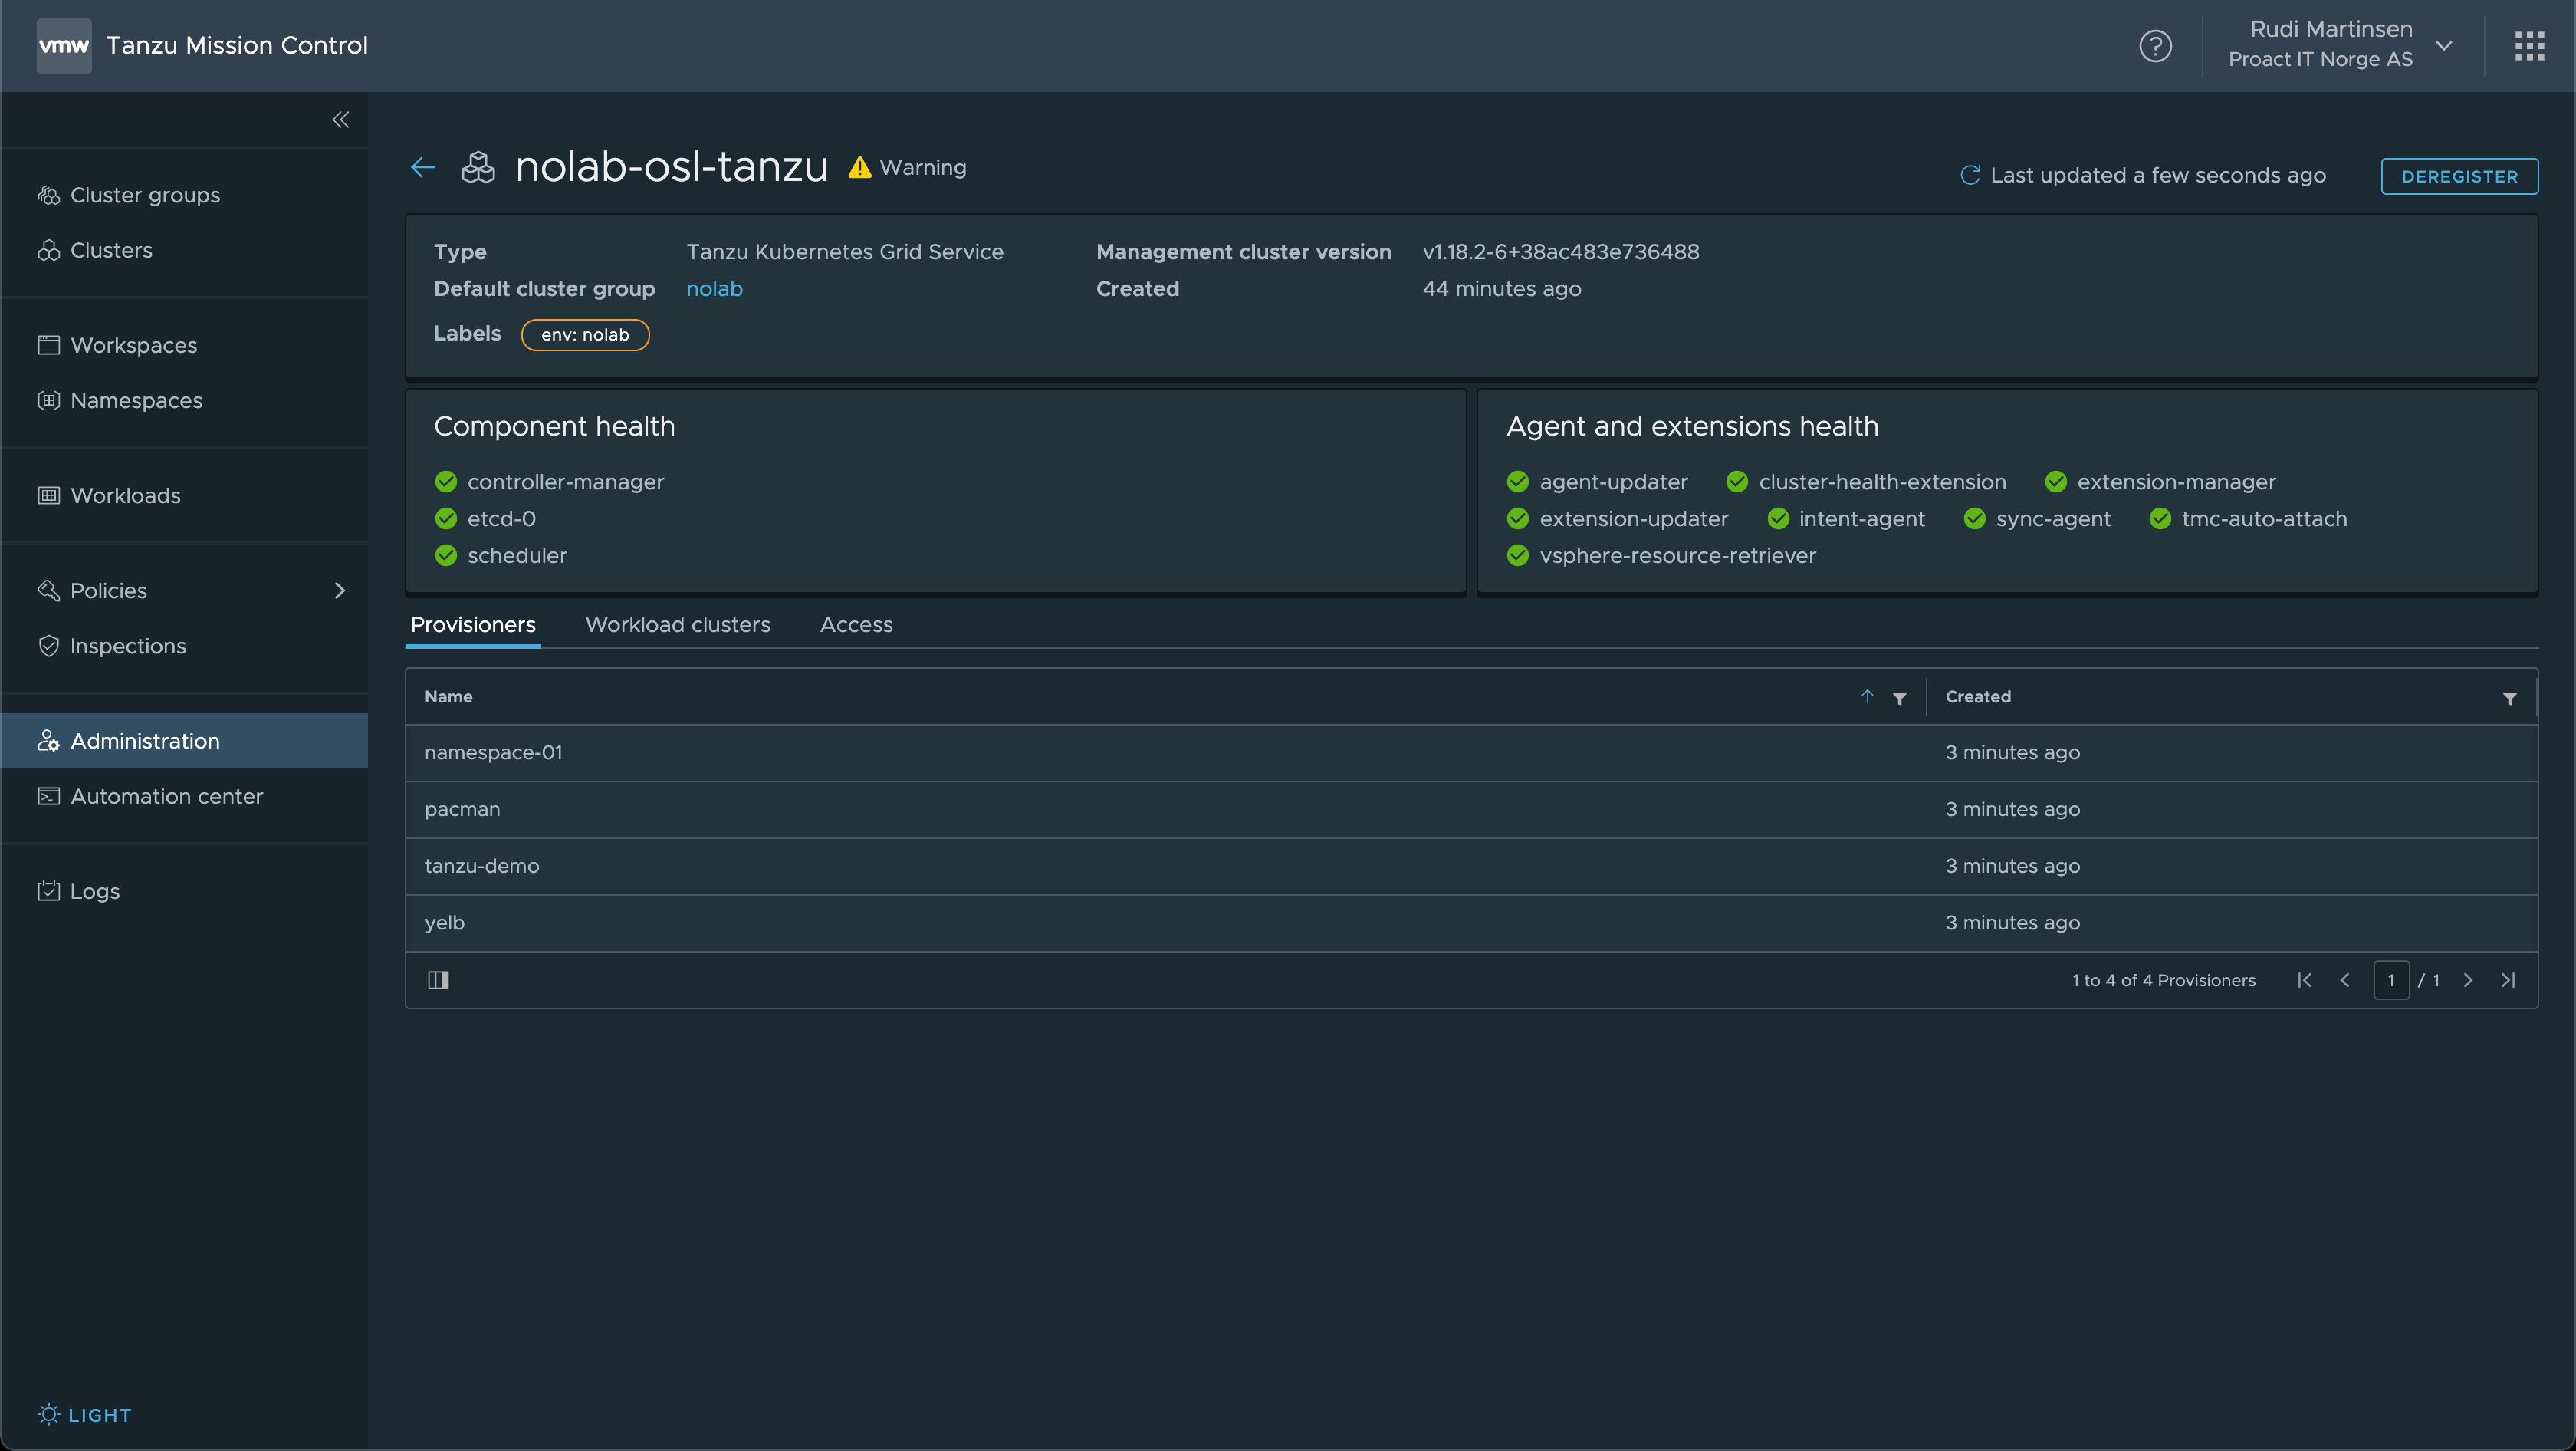
As we can see we have a Provisioners tab. This is the namespaces created on the Supervisor. Also notice the status of this cluster is Warning but there's no information about what is wrong..
There's also a Workload clusters tab which contains the TKG cluster deployed
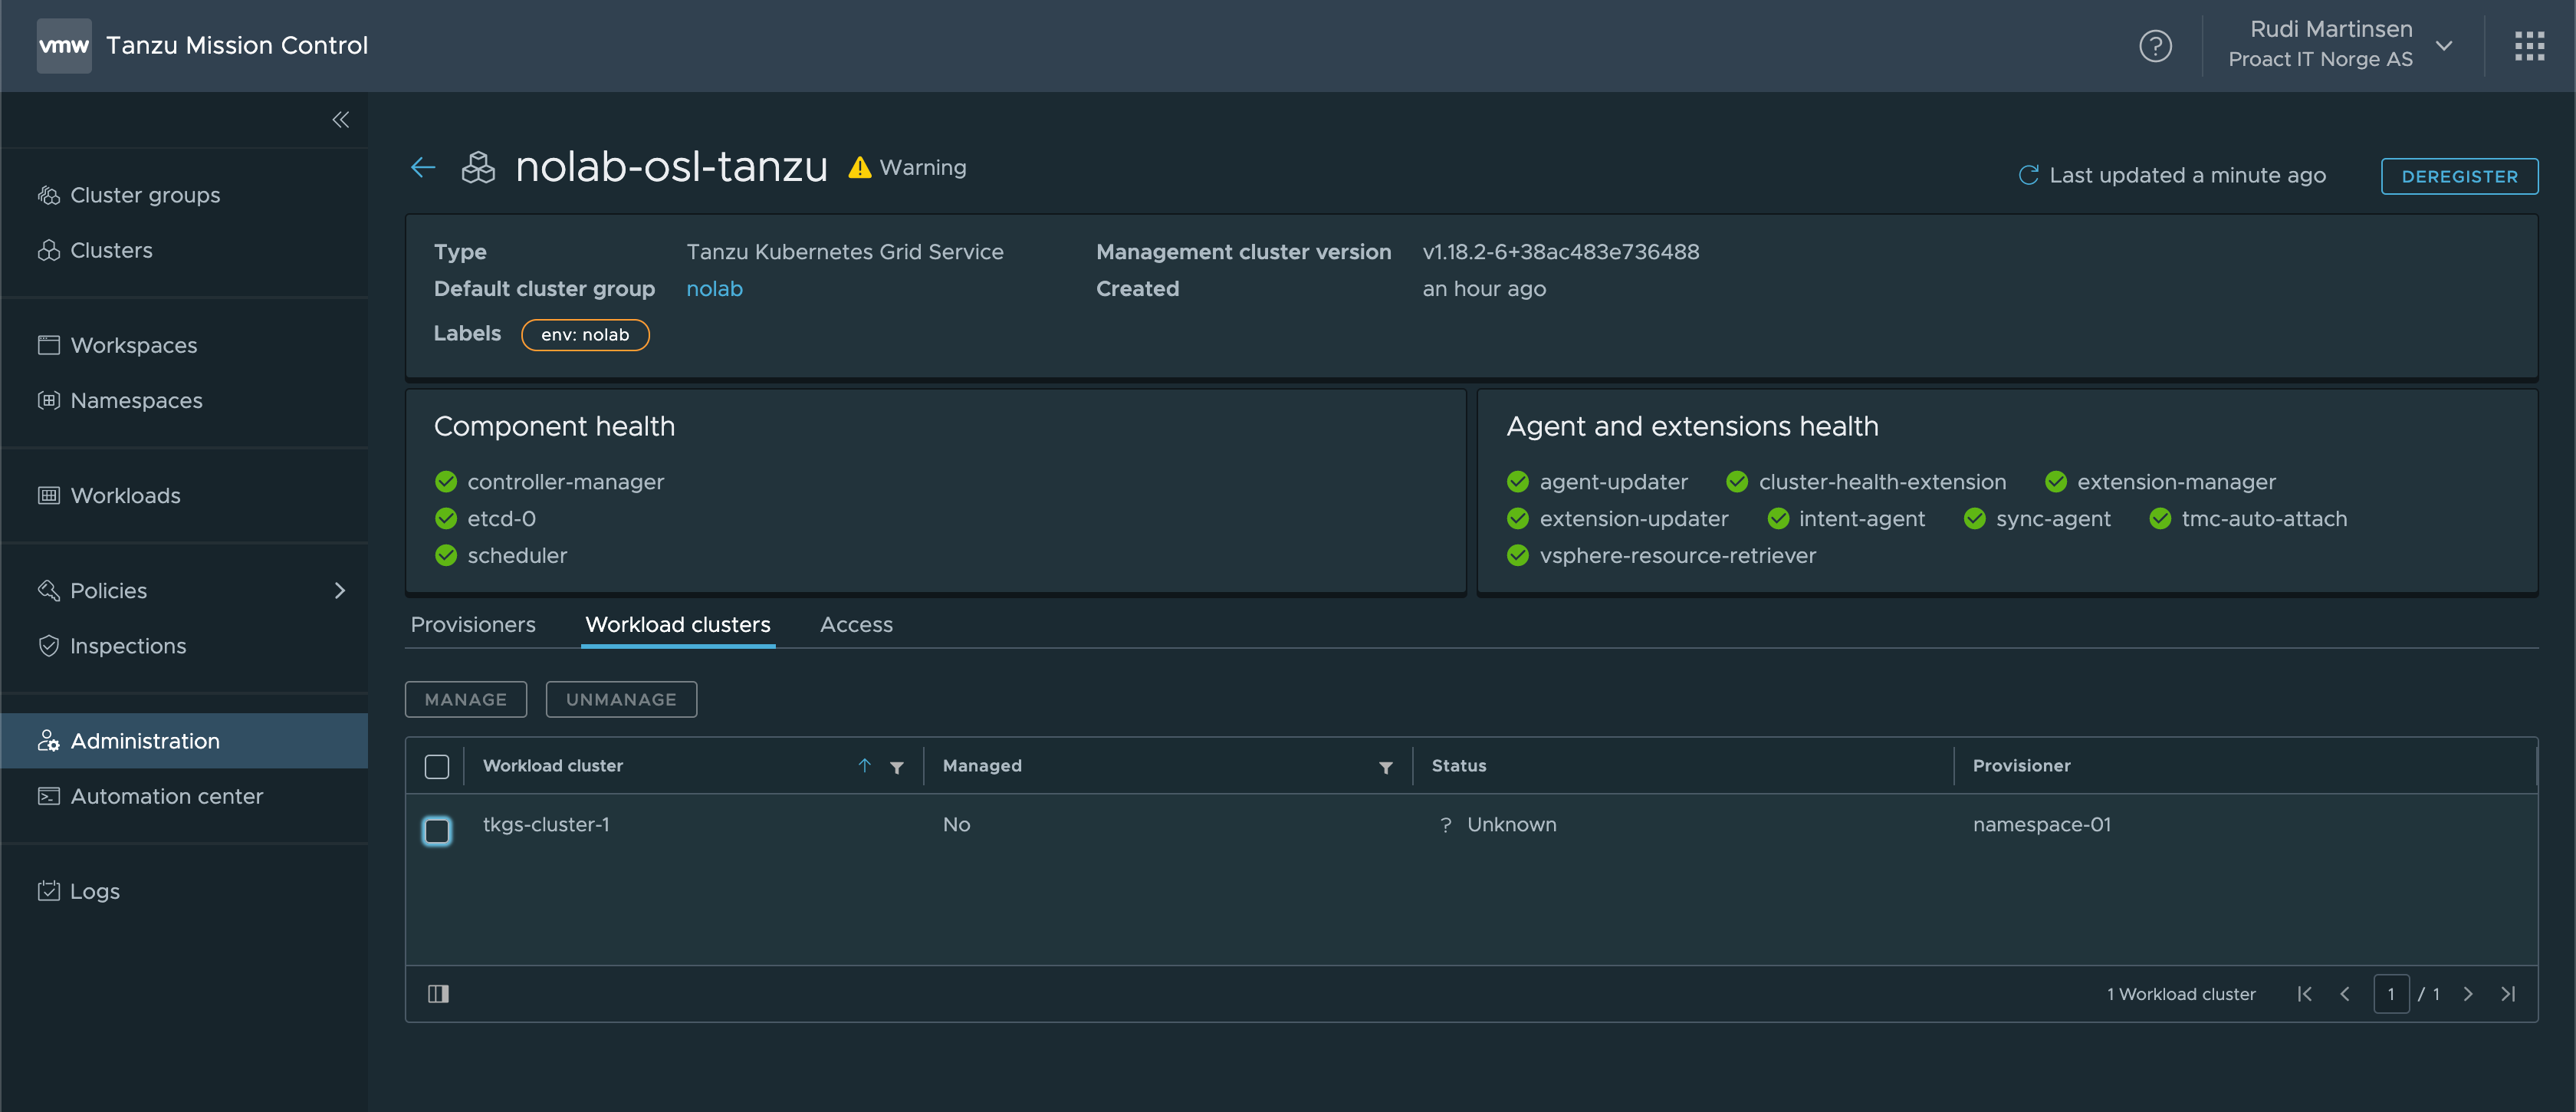
Note that a TKG cluster can be set to Managed by TMC
Finally we have the Access tab where we can check the current inherited policies, and also create a policy for a specific namespace

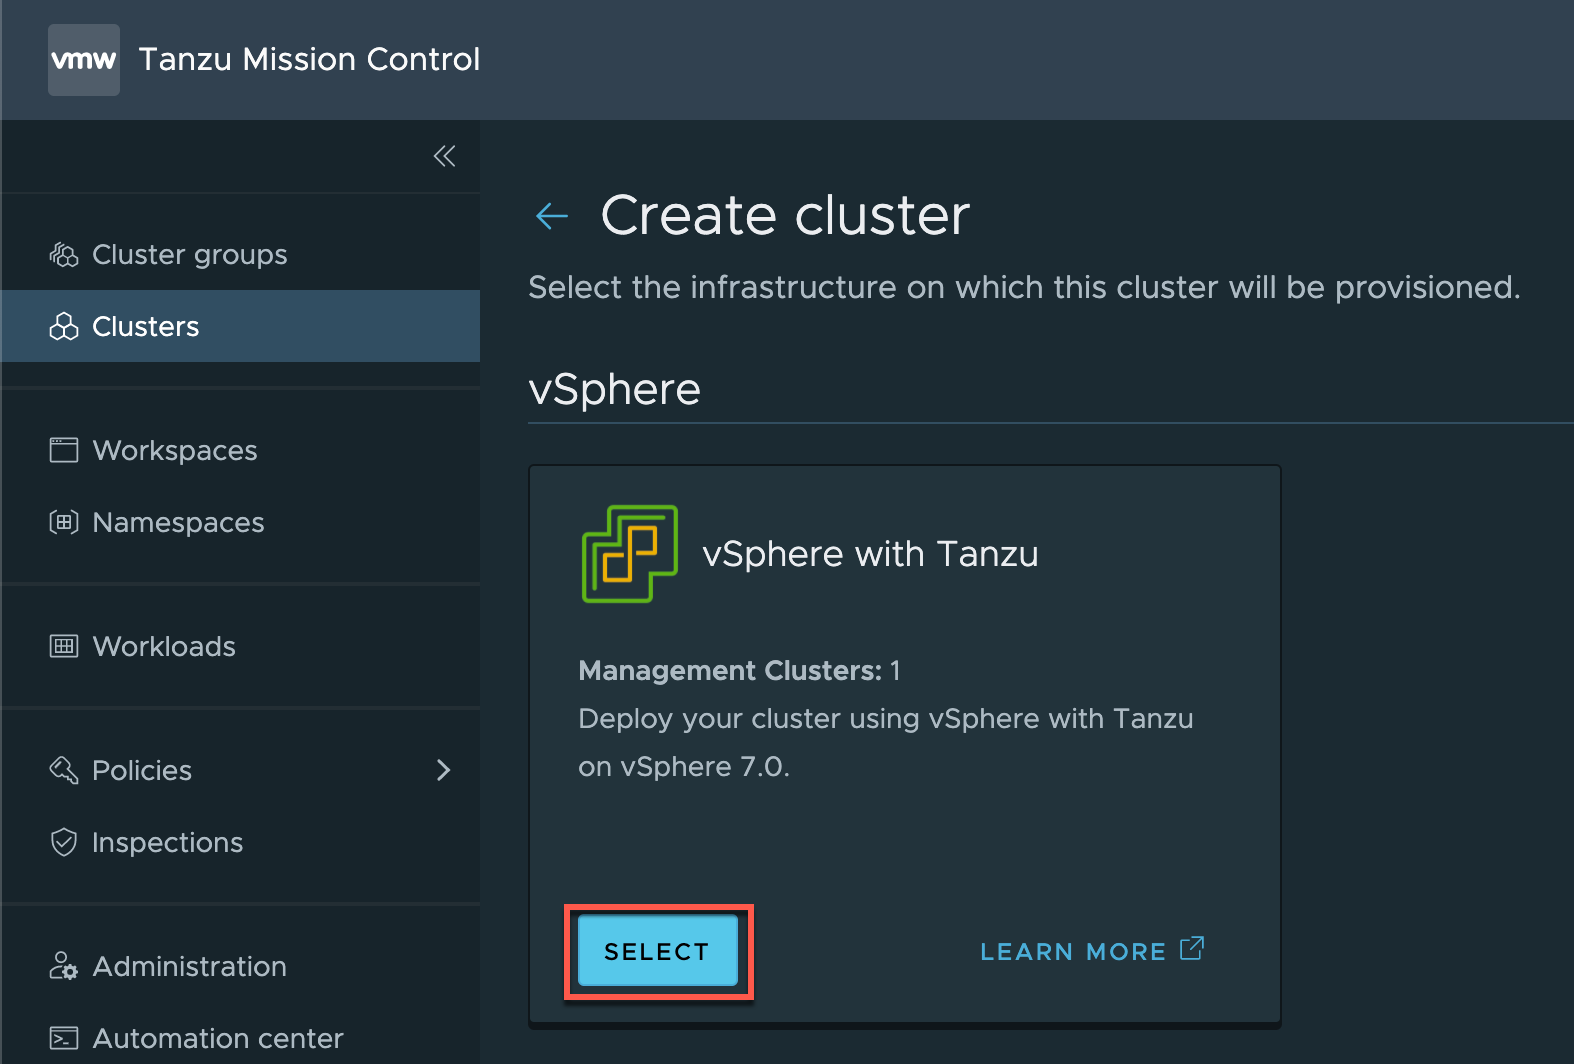
Deploying TKG clusters on vSphere
Now let's deploy a cluster to our vSphere environment right here from TMC. To do this we'll hit of the Create cluster wizard
First we'll select the Management cluster and then the Provisioner. The Provisioner is a namespace created in the Supervisor cluster
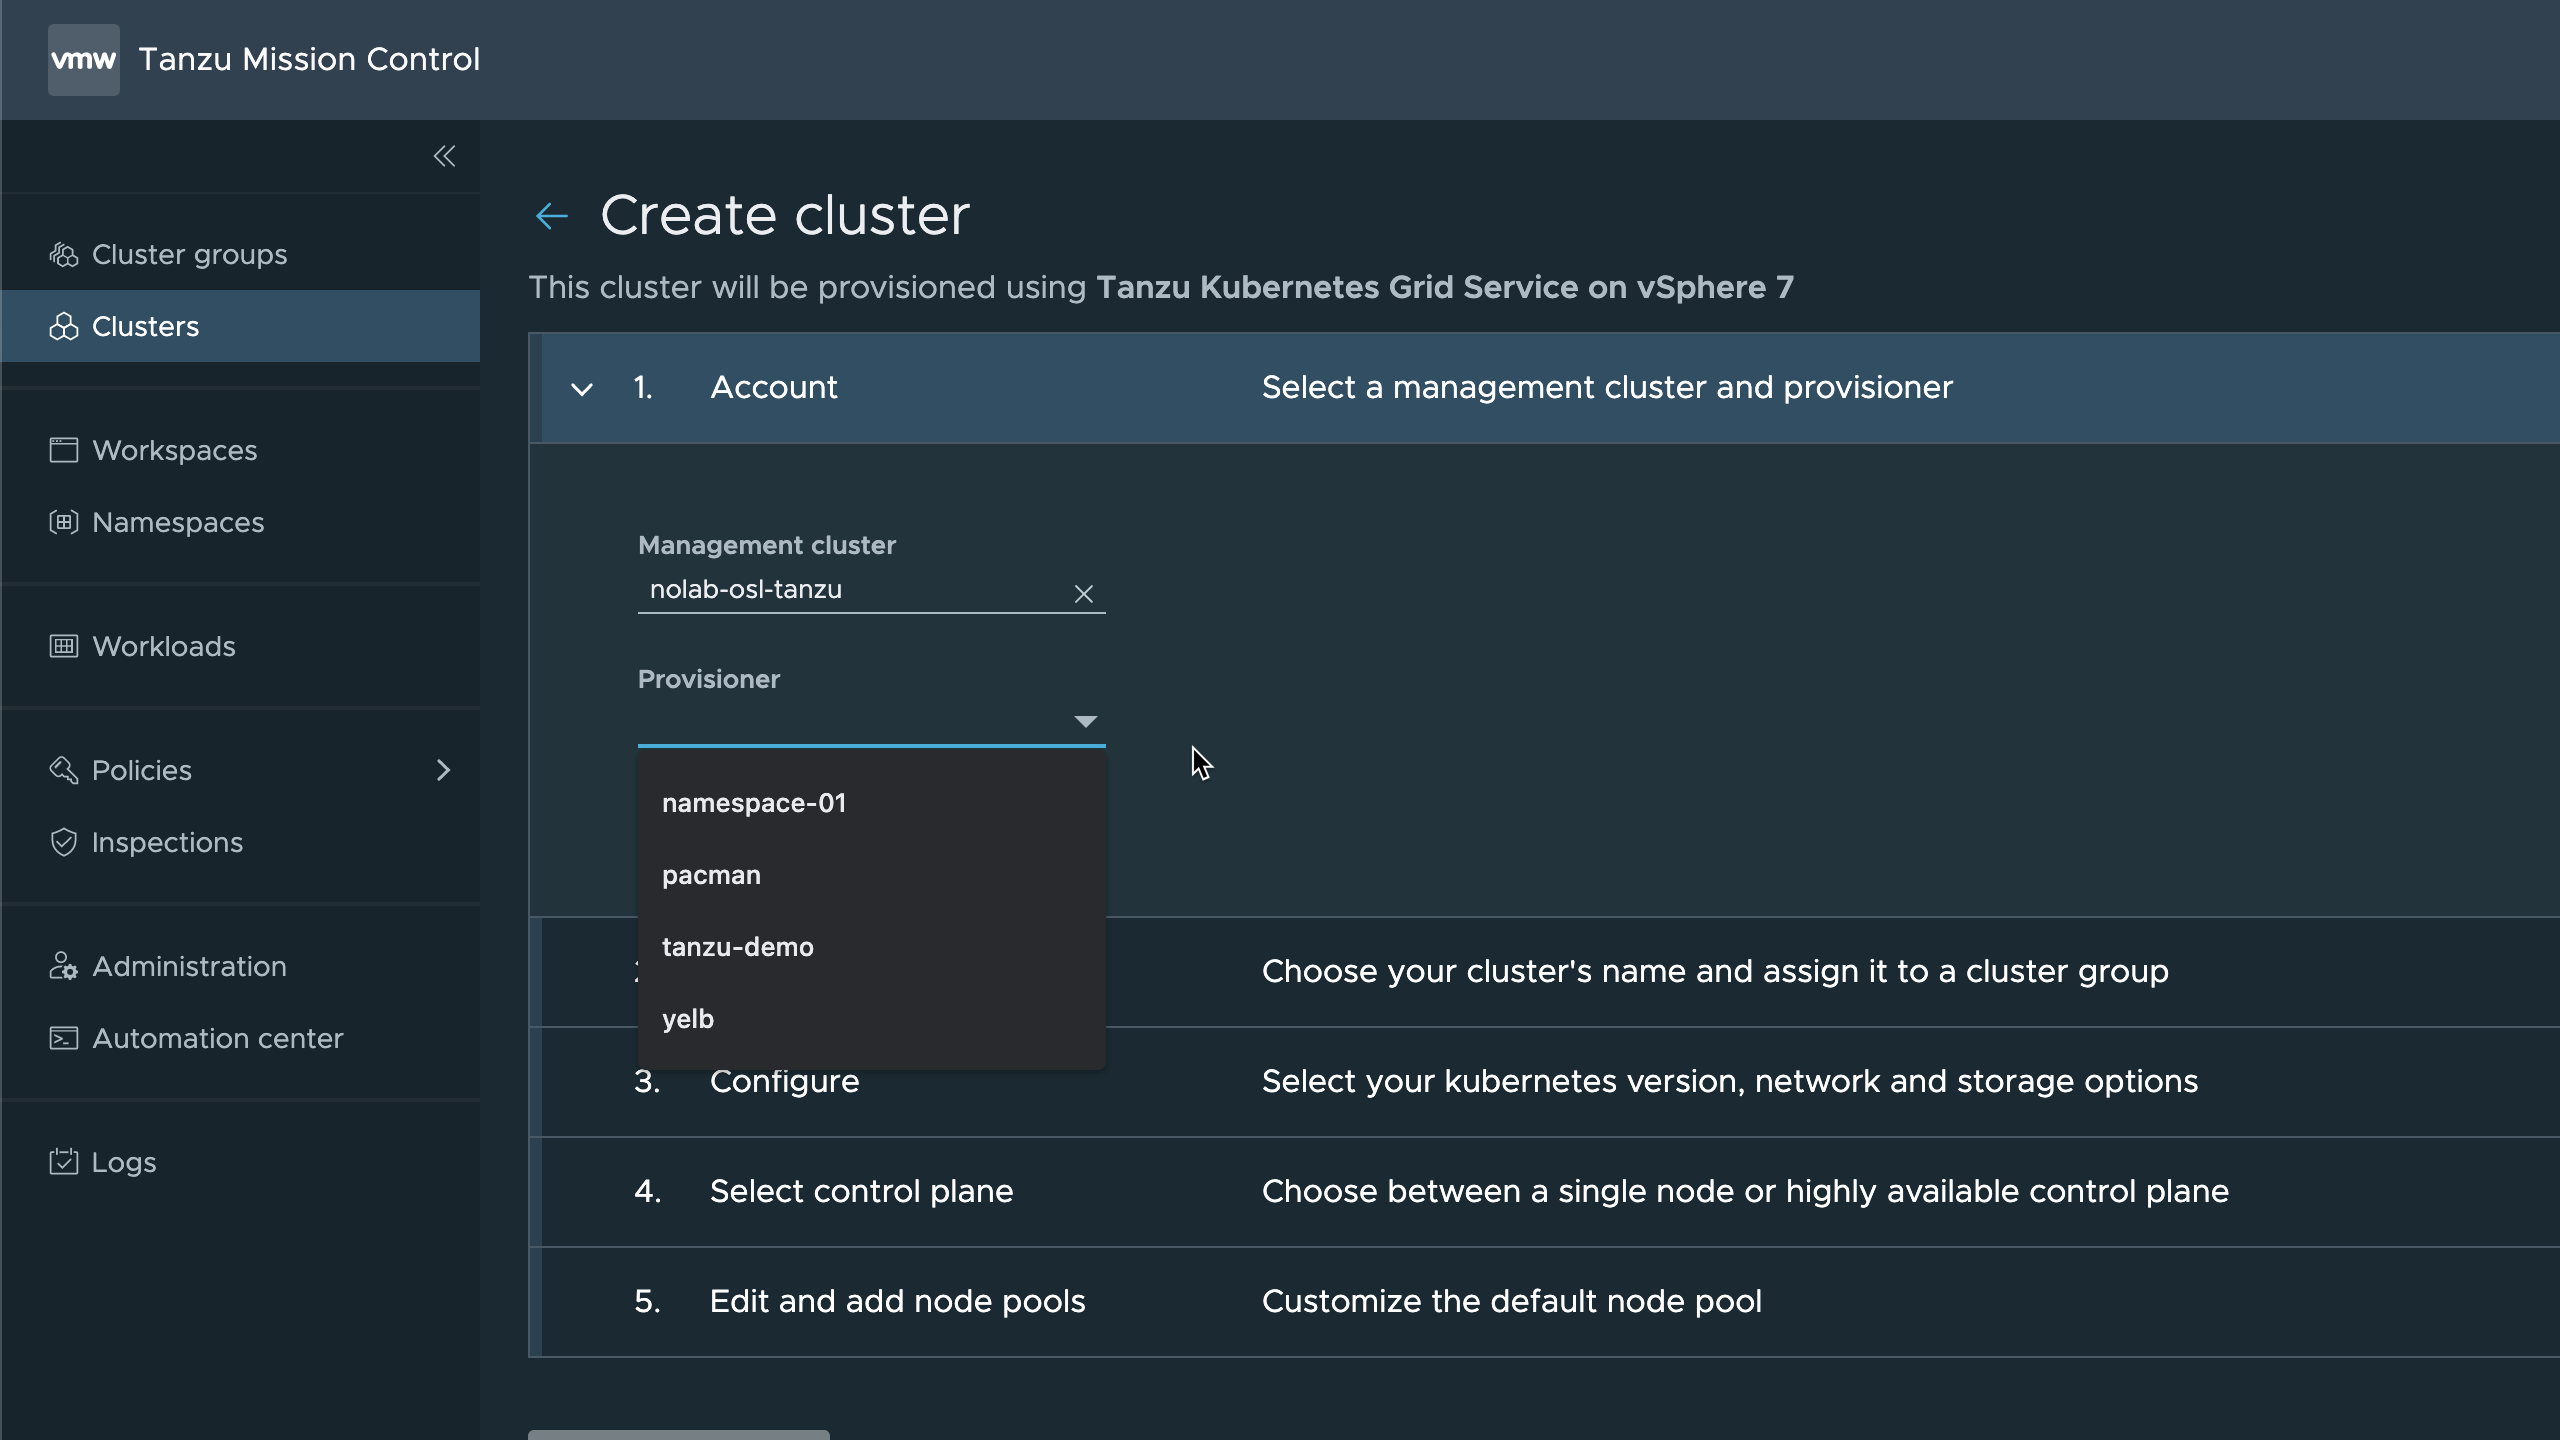
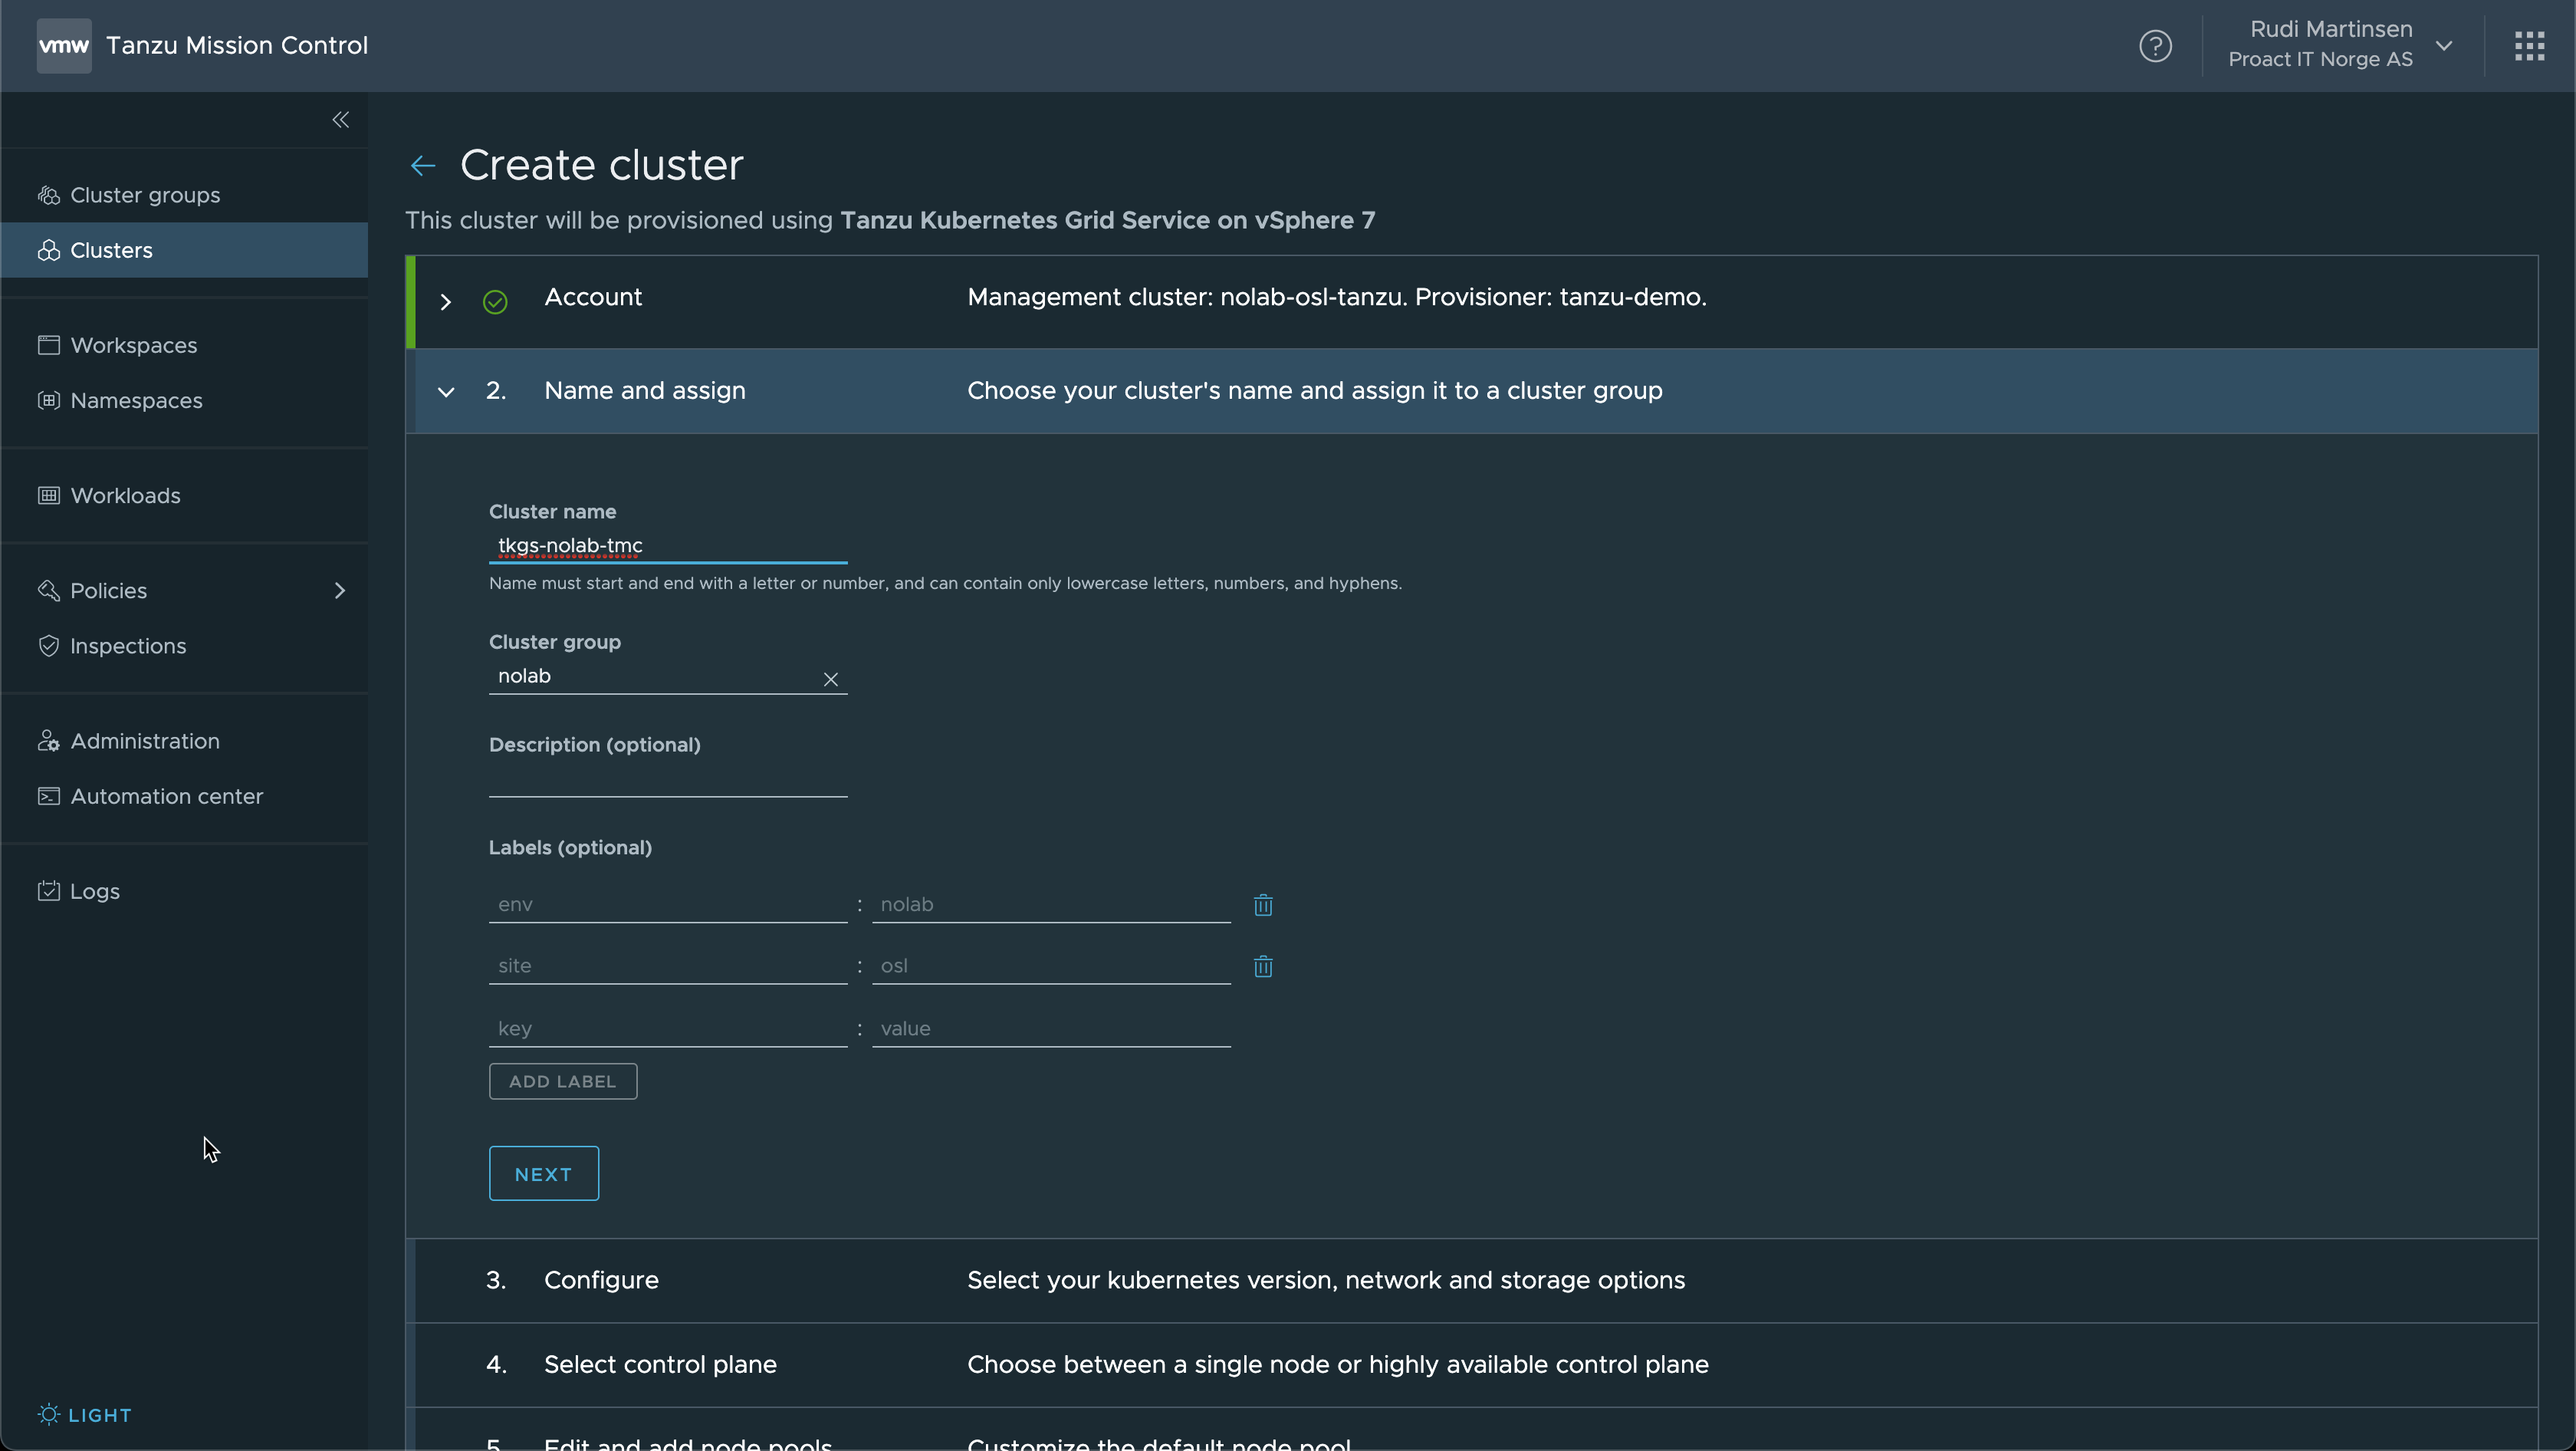
Now we'll add in the cluster name, the cluster group and labels
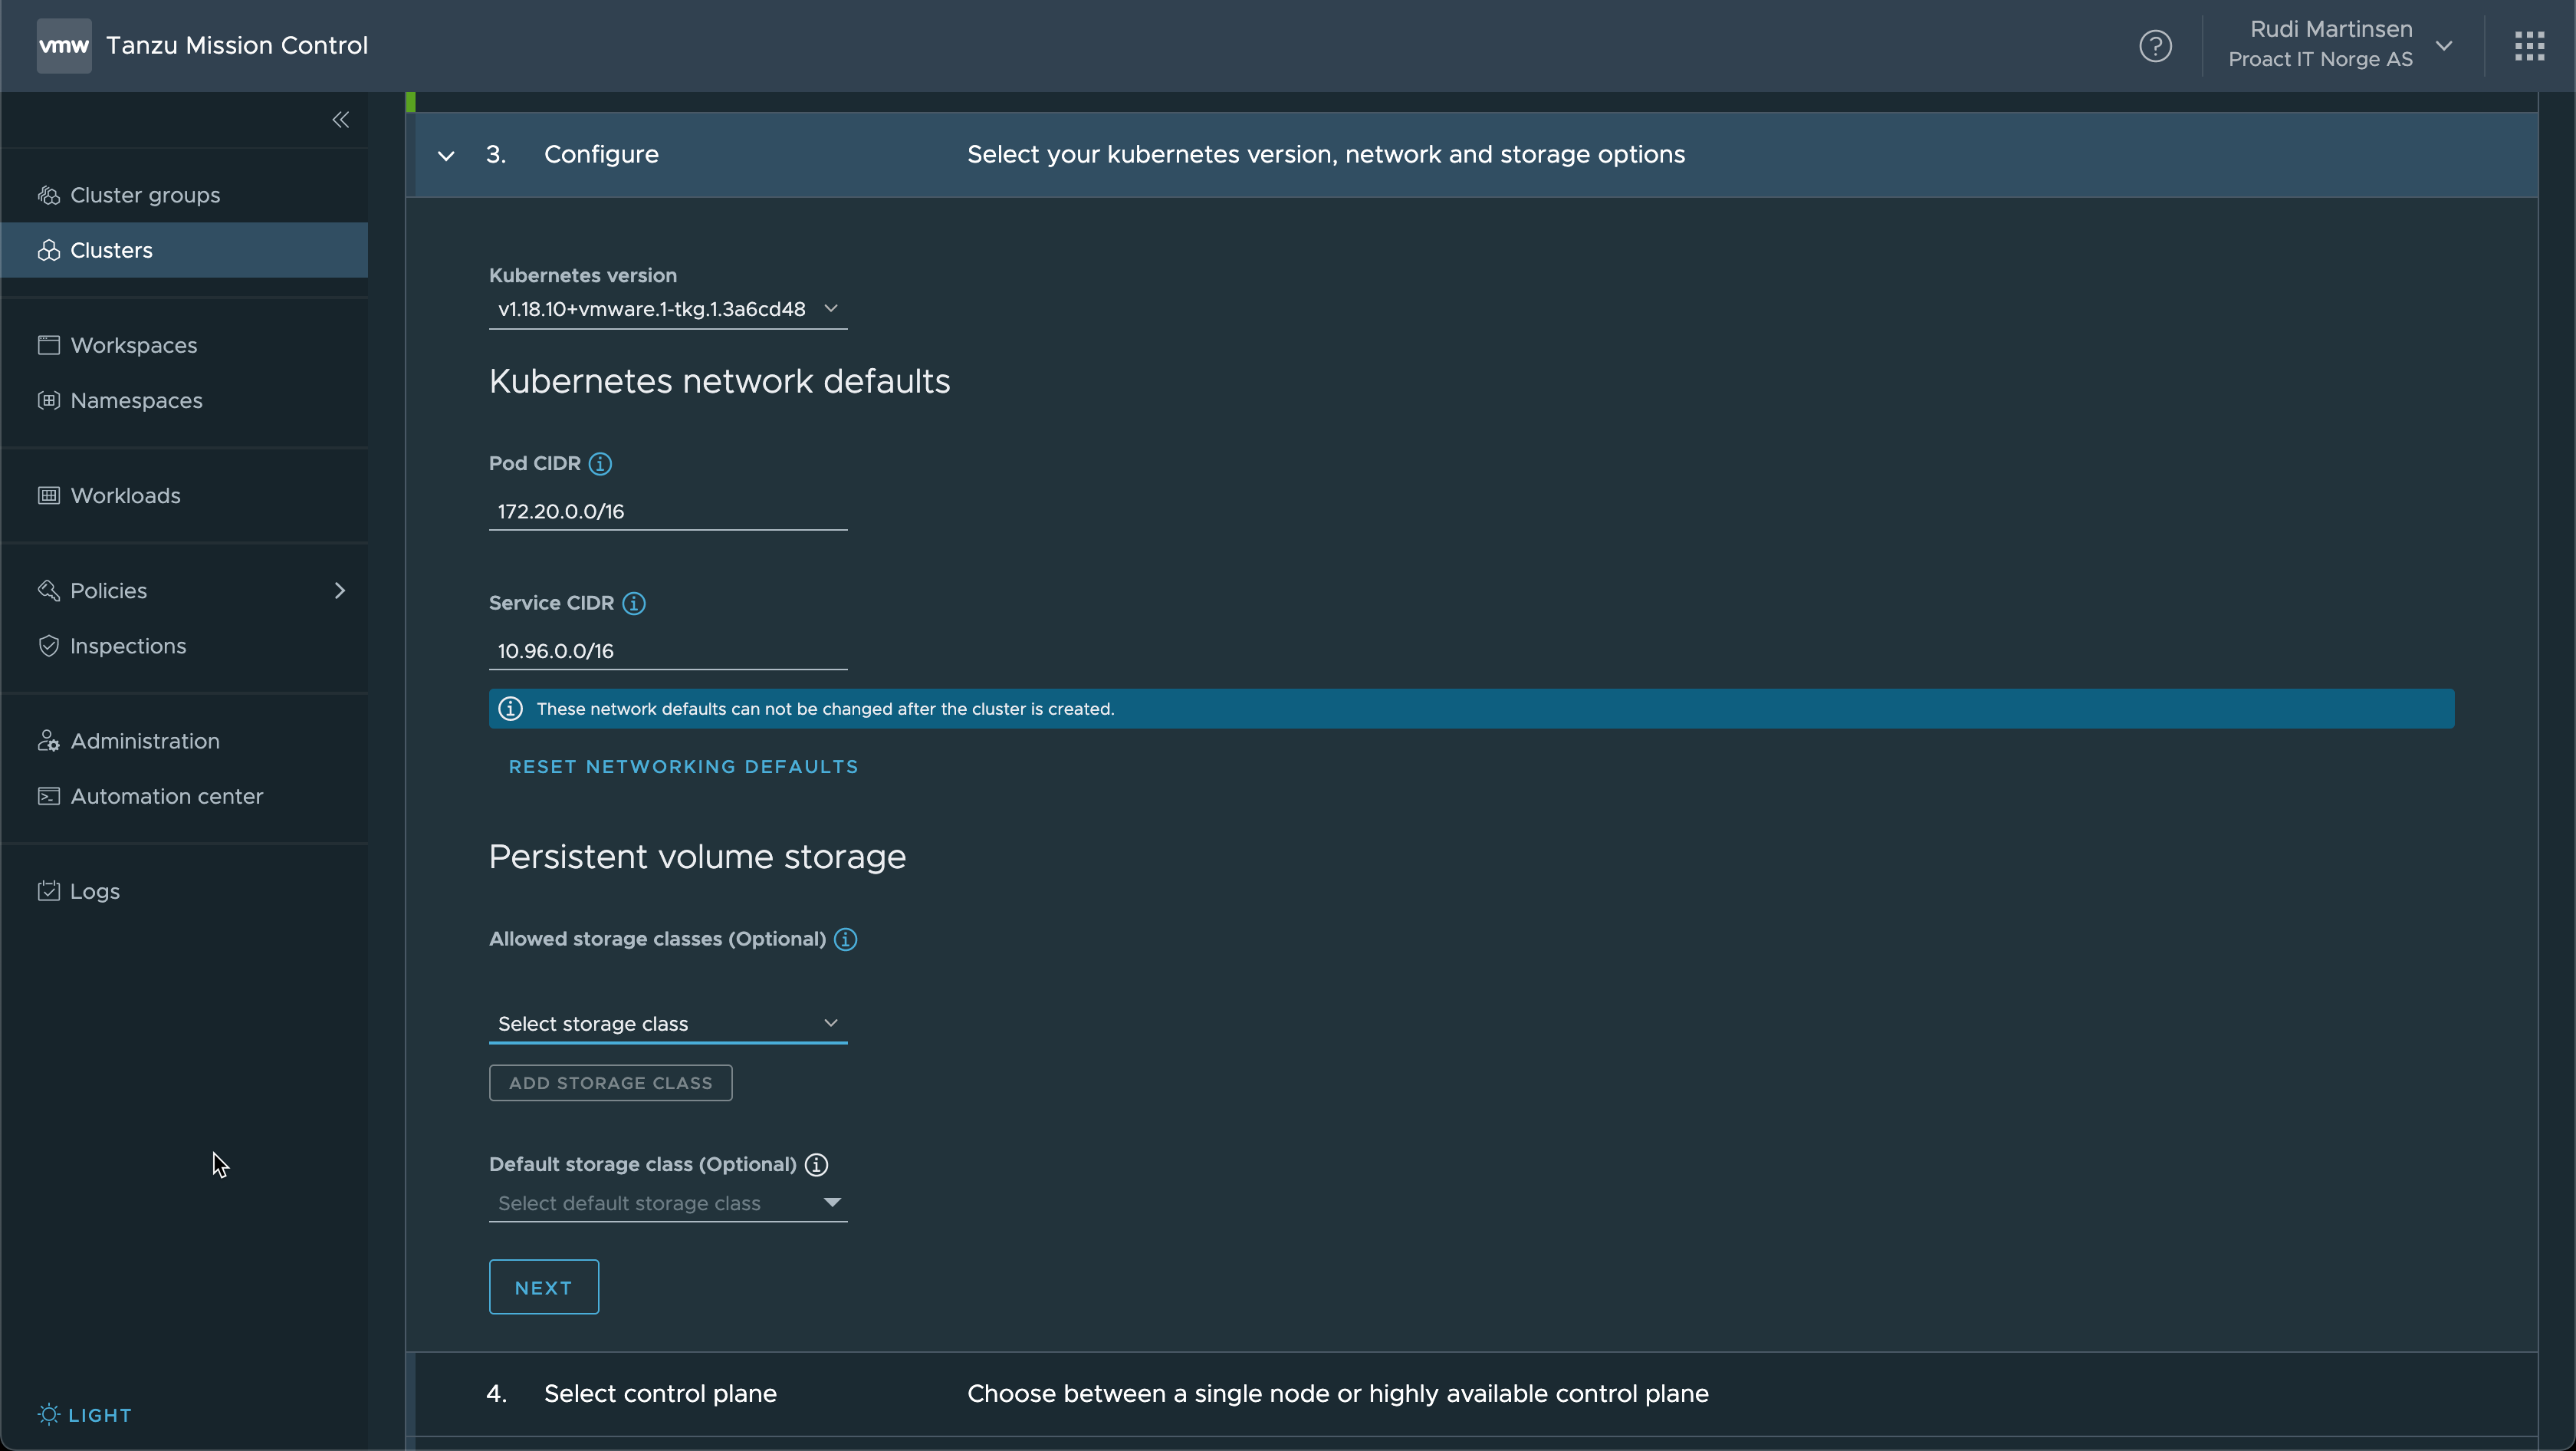
In the next section we select the Kubernetes version (fetched from the Supervisor clusters content library), the Pod and Service CIDR, and the Storage class
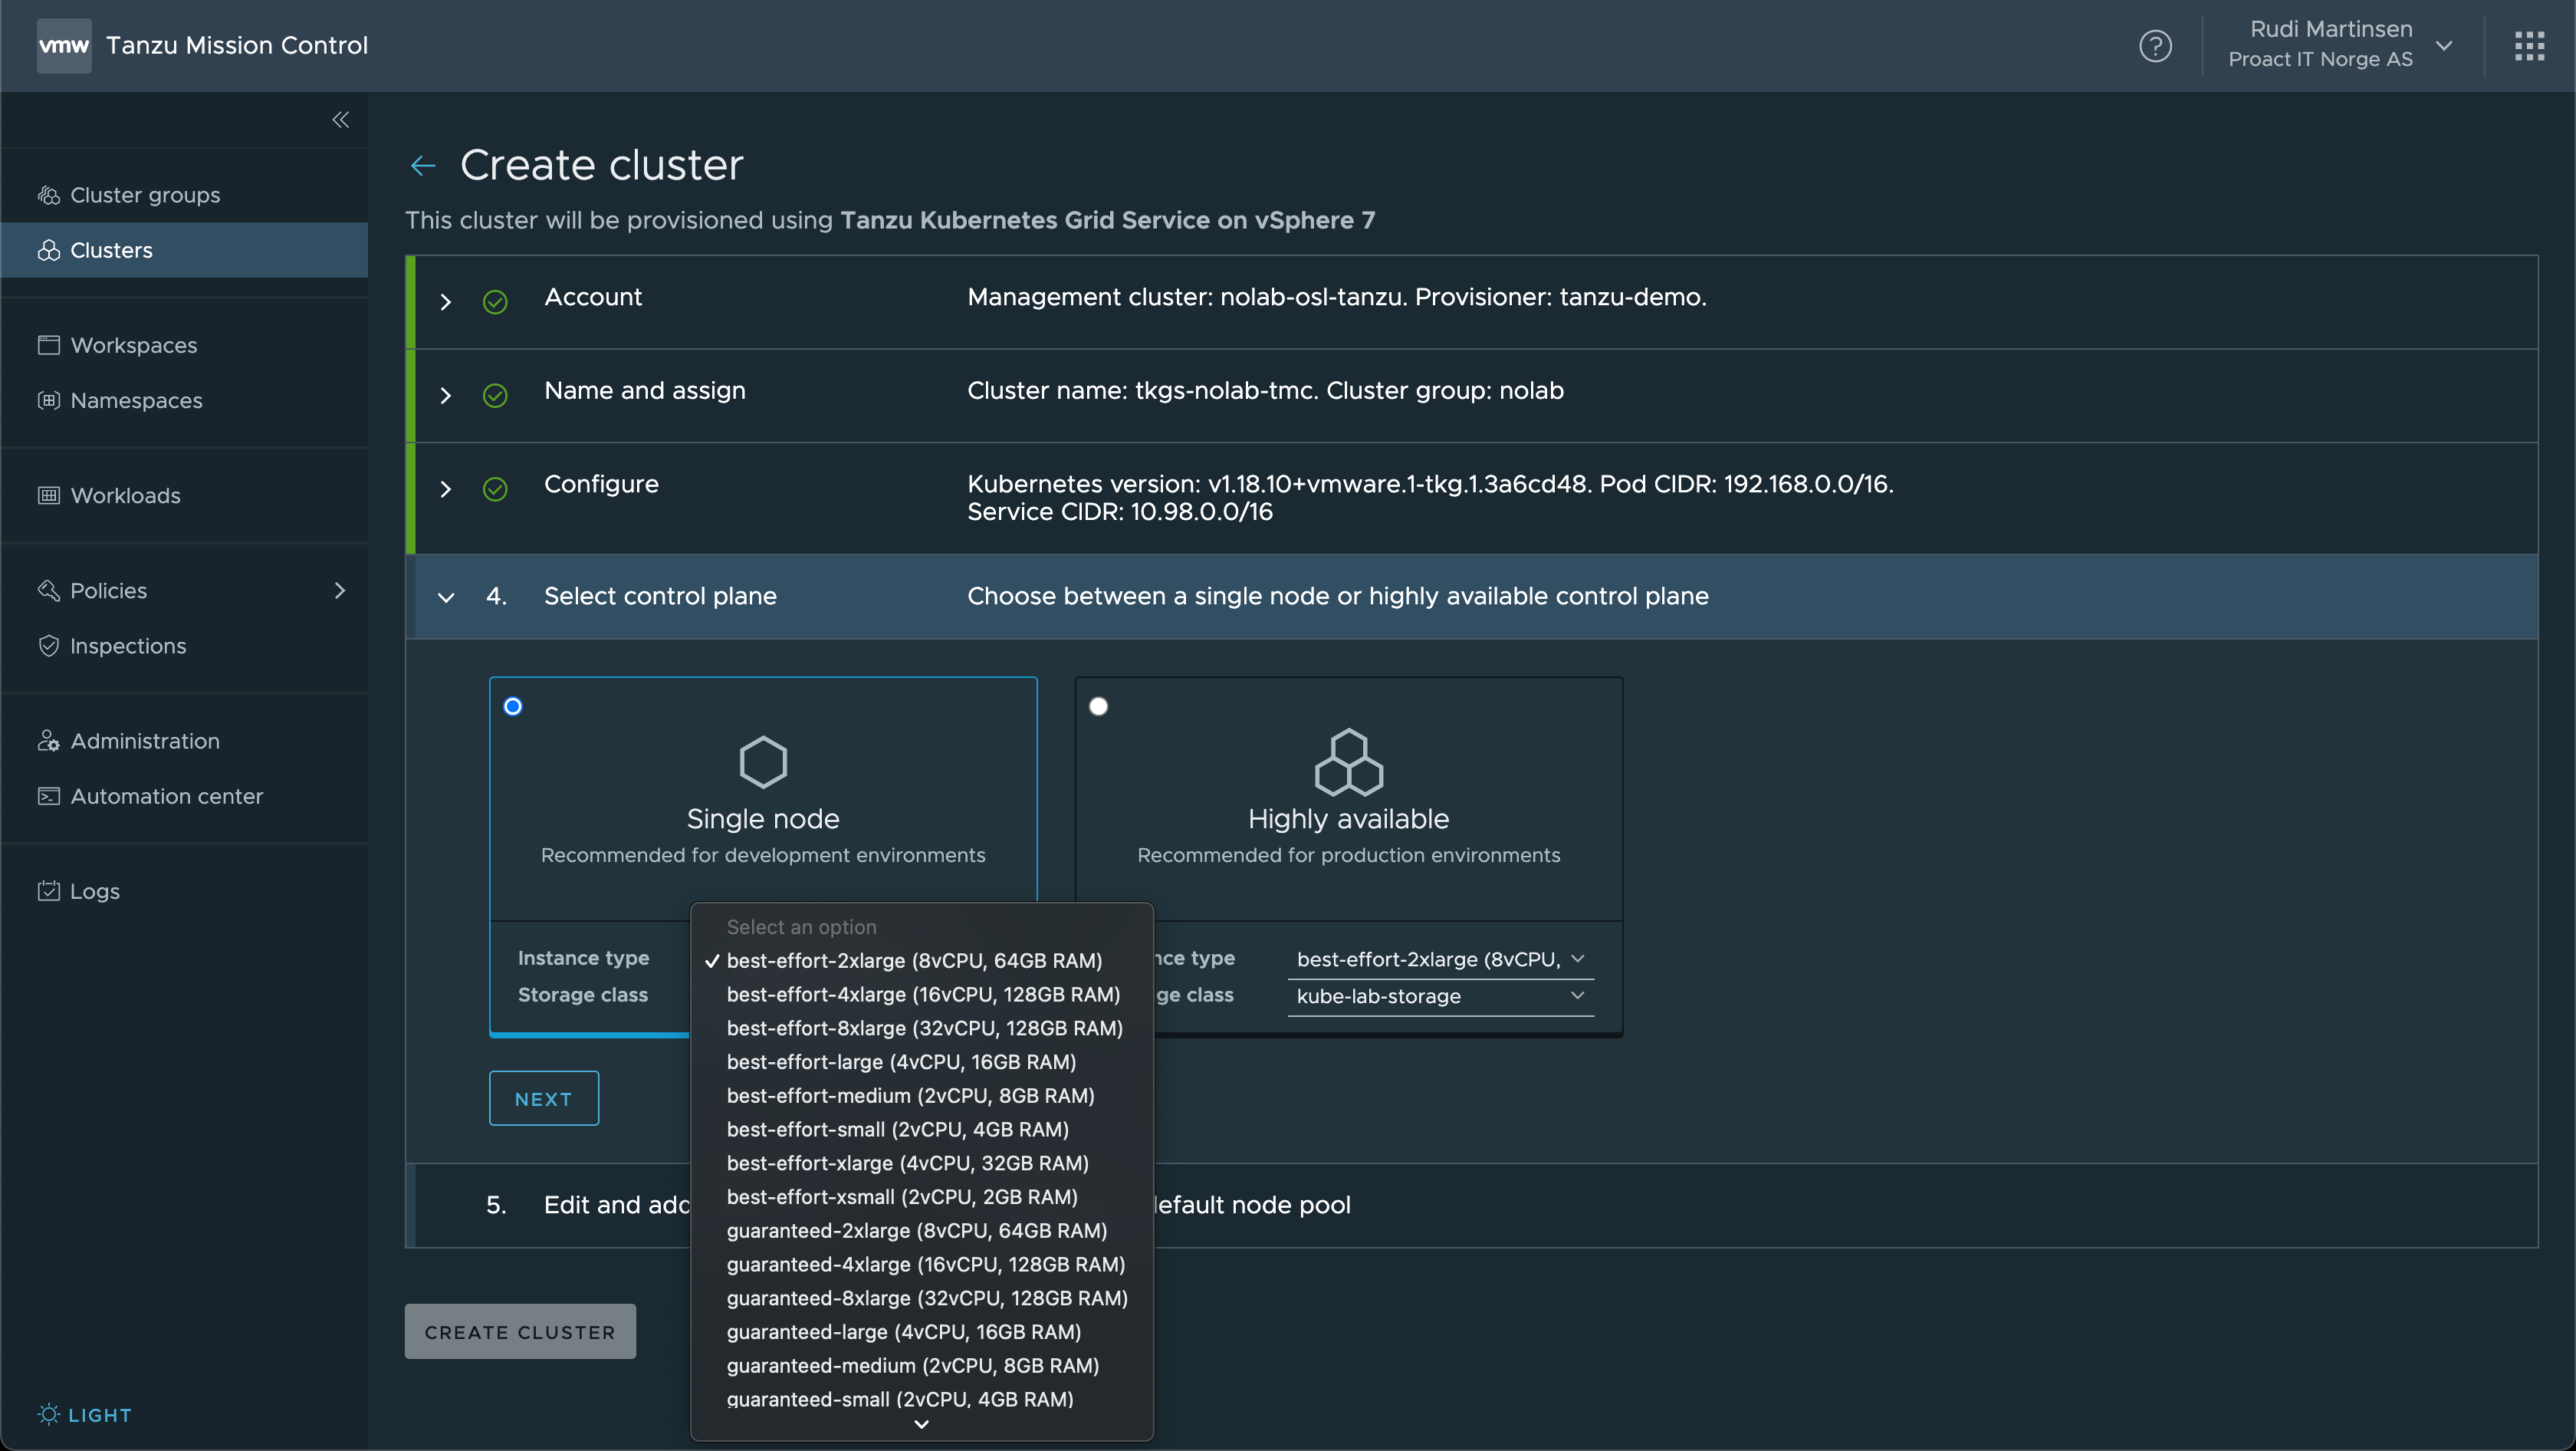
Next up we set the properties for the Control plane. First if we want a single node or HA (3 nodes), the size of the instances, and the Storage class to use
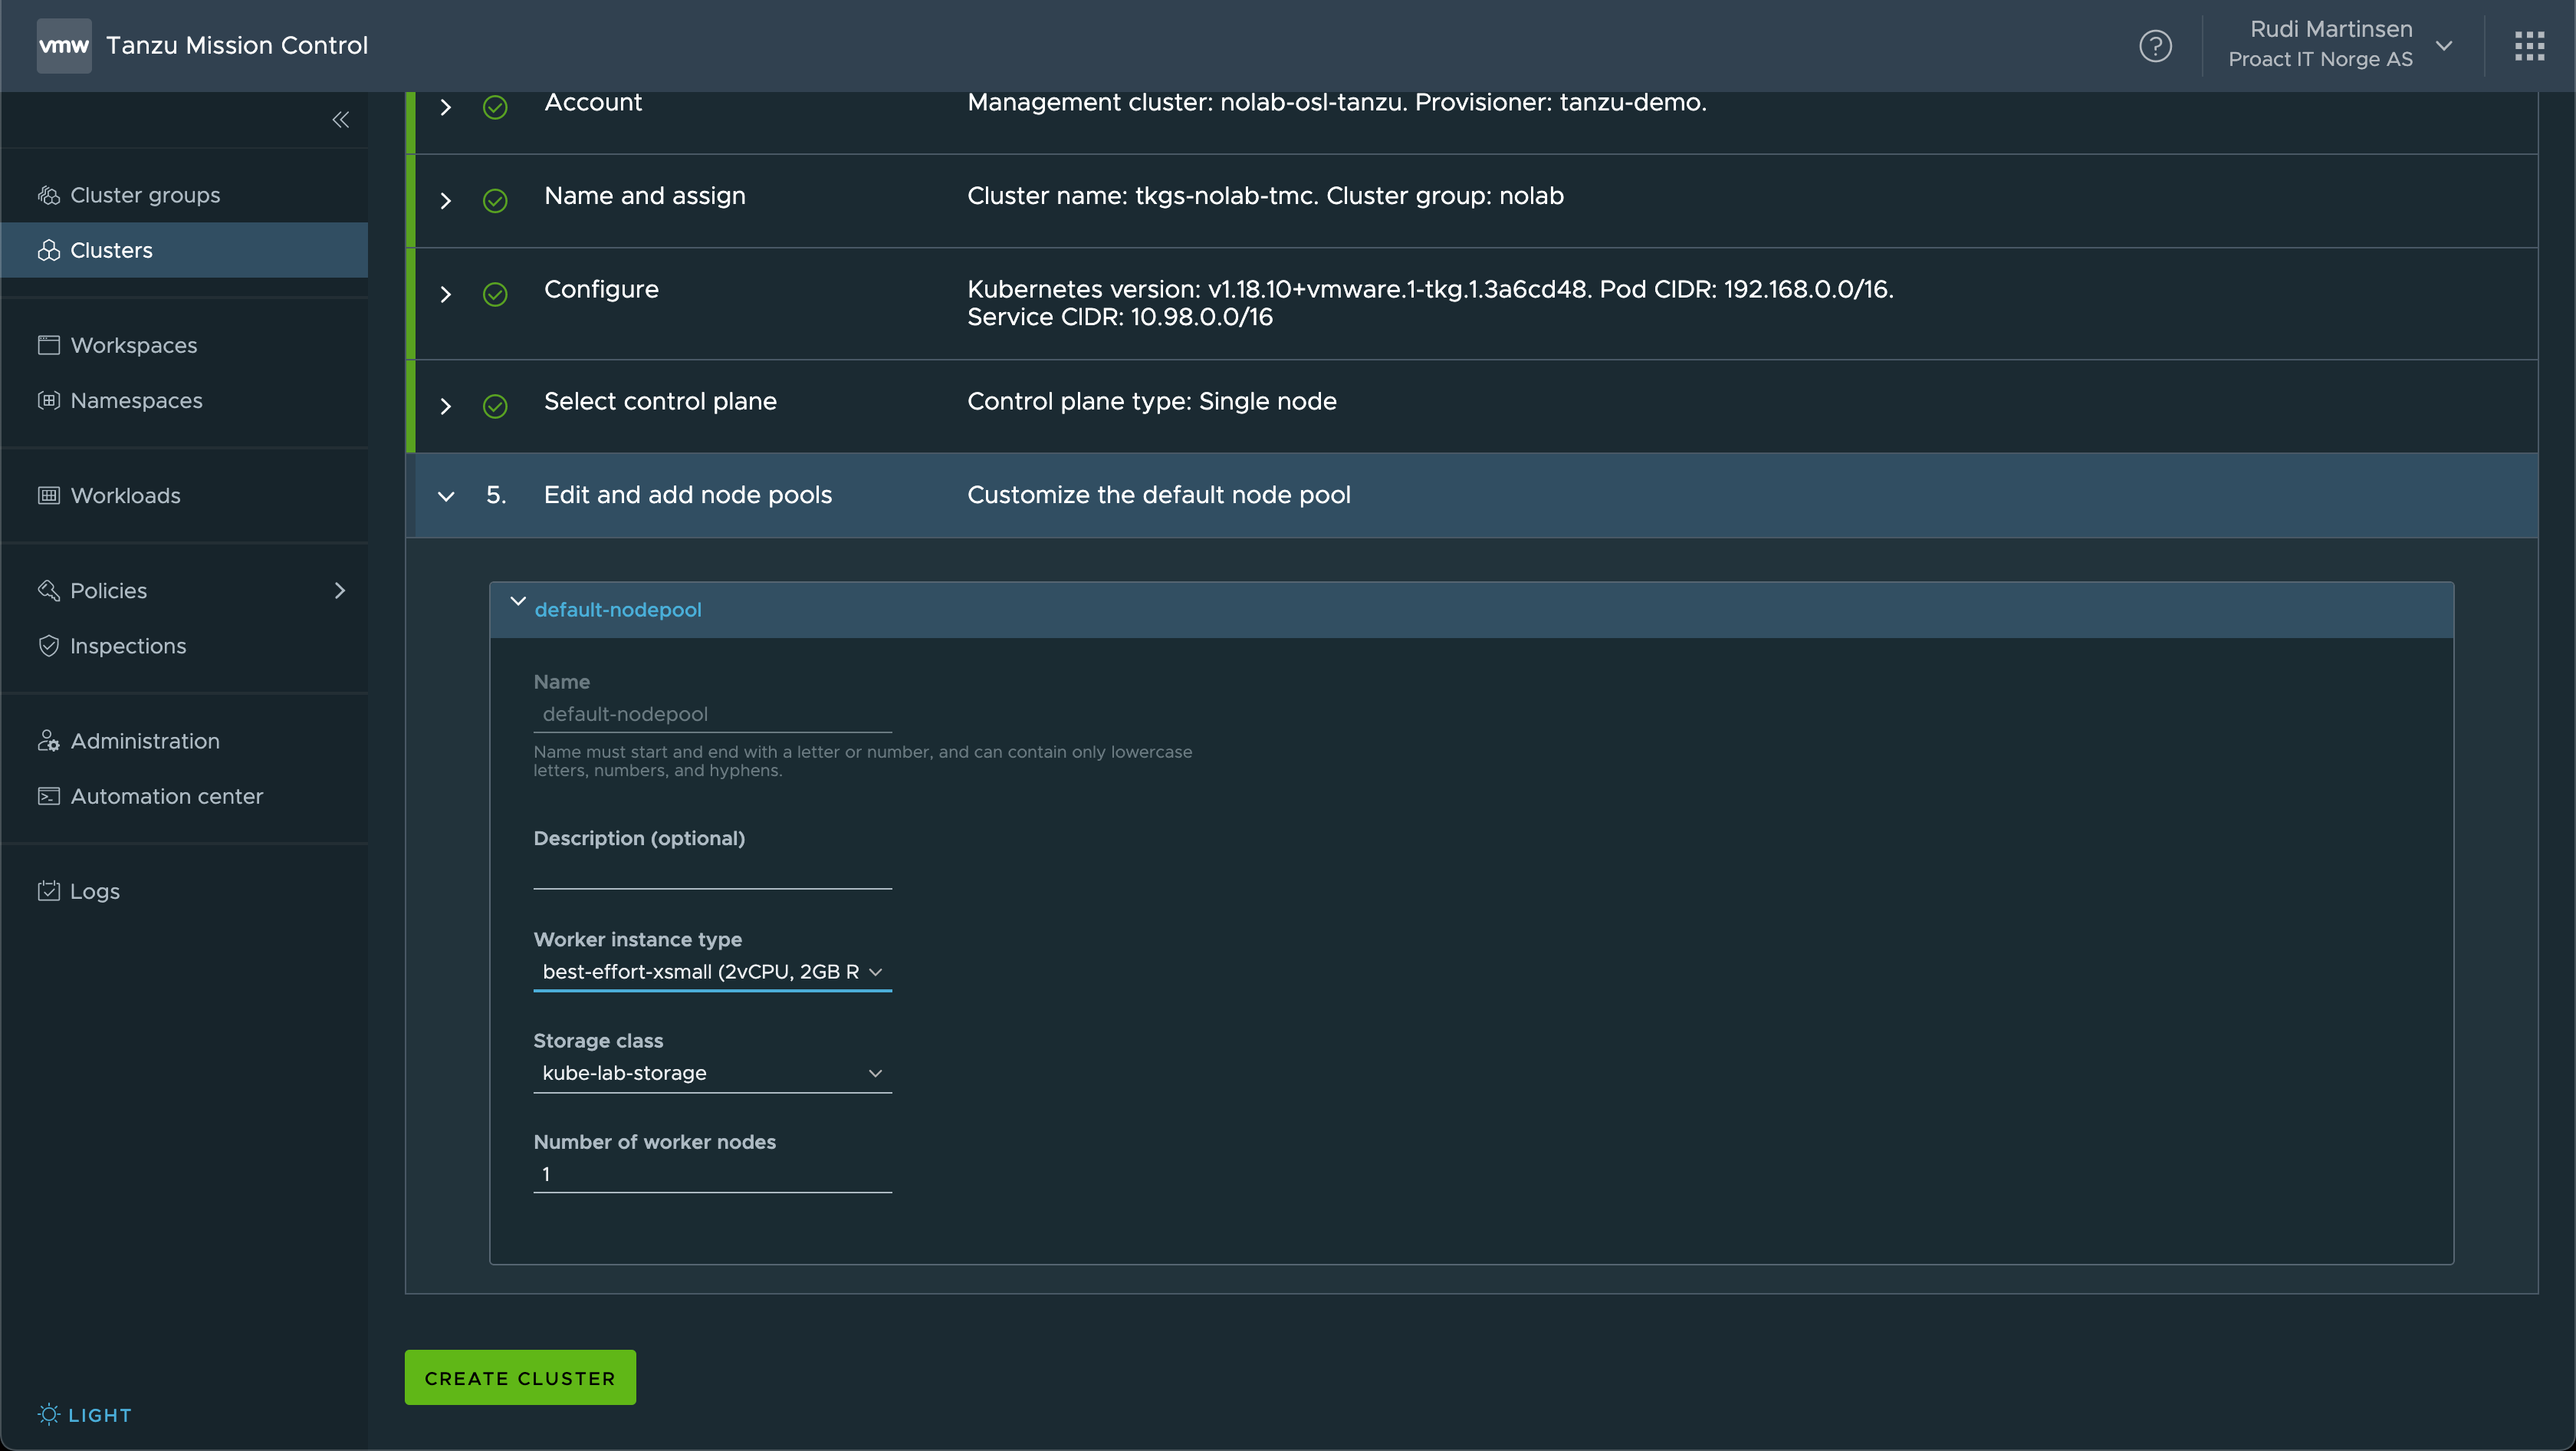
Finally we select the size and number of Worker nodes
Now our Supervisor cluster should start deploying our TKG cluster
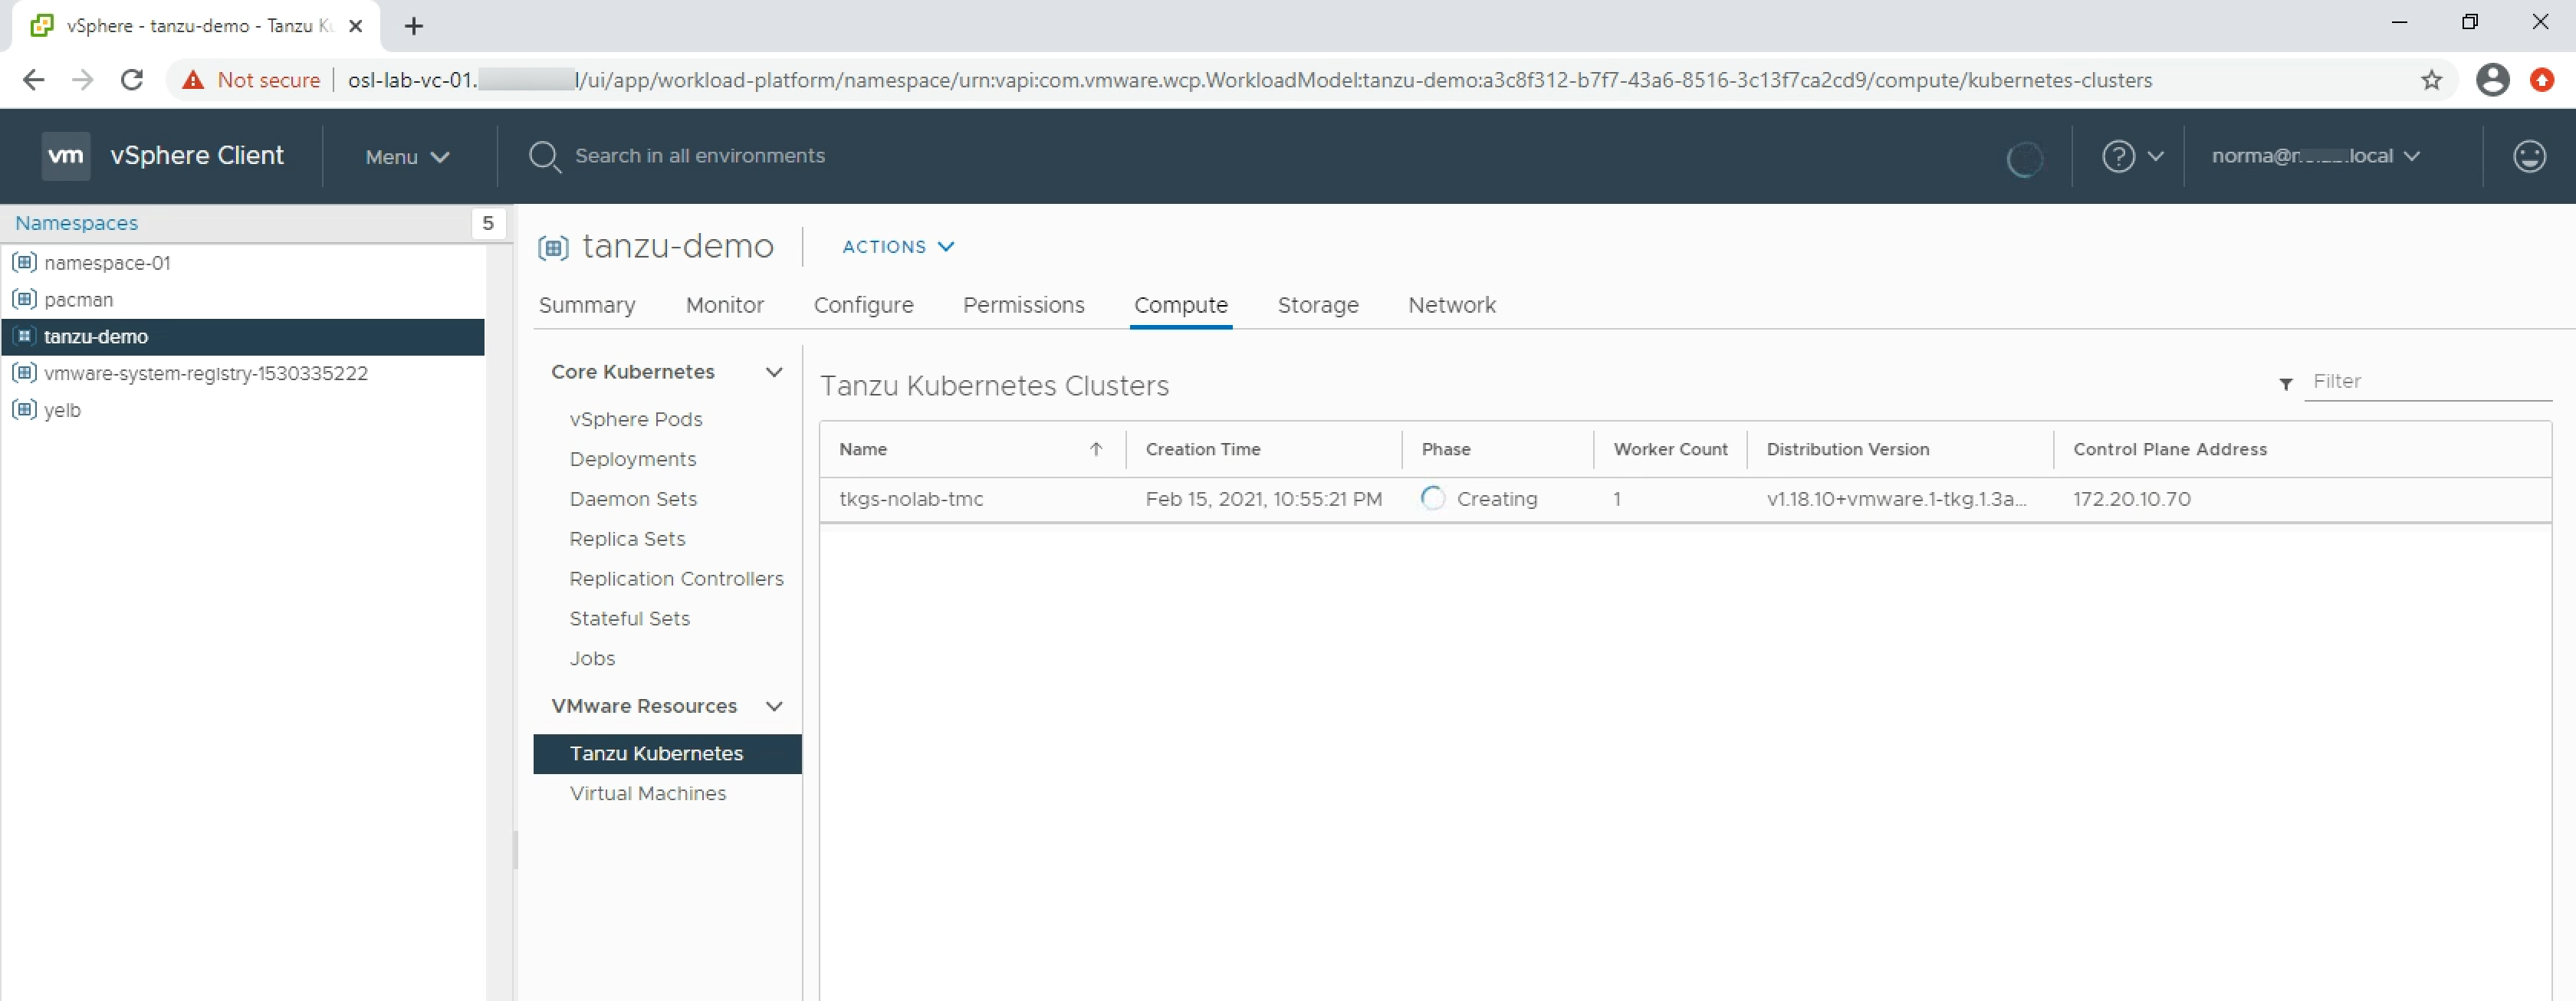
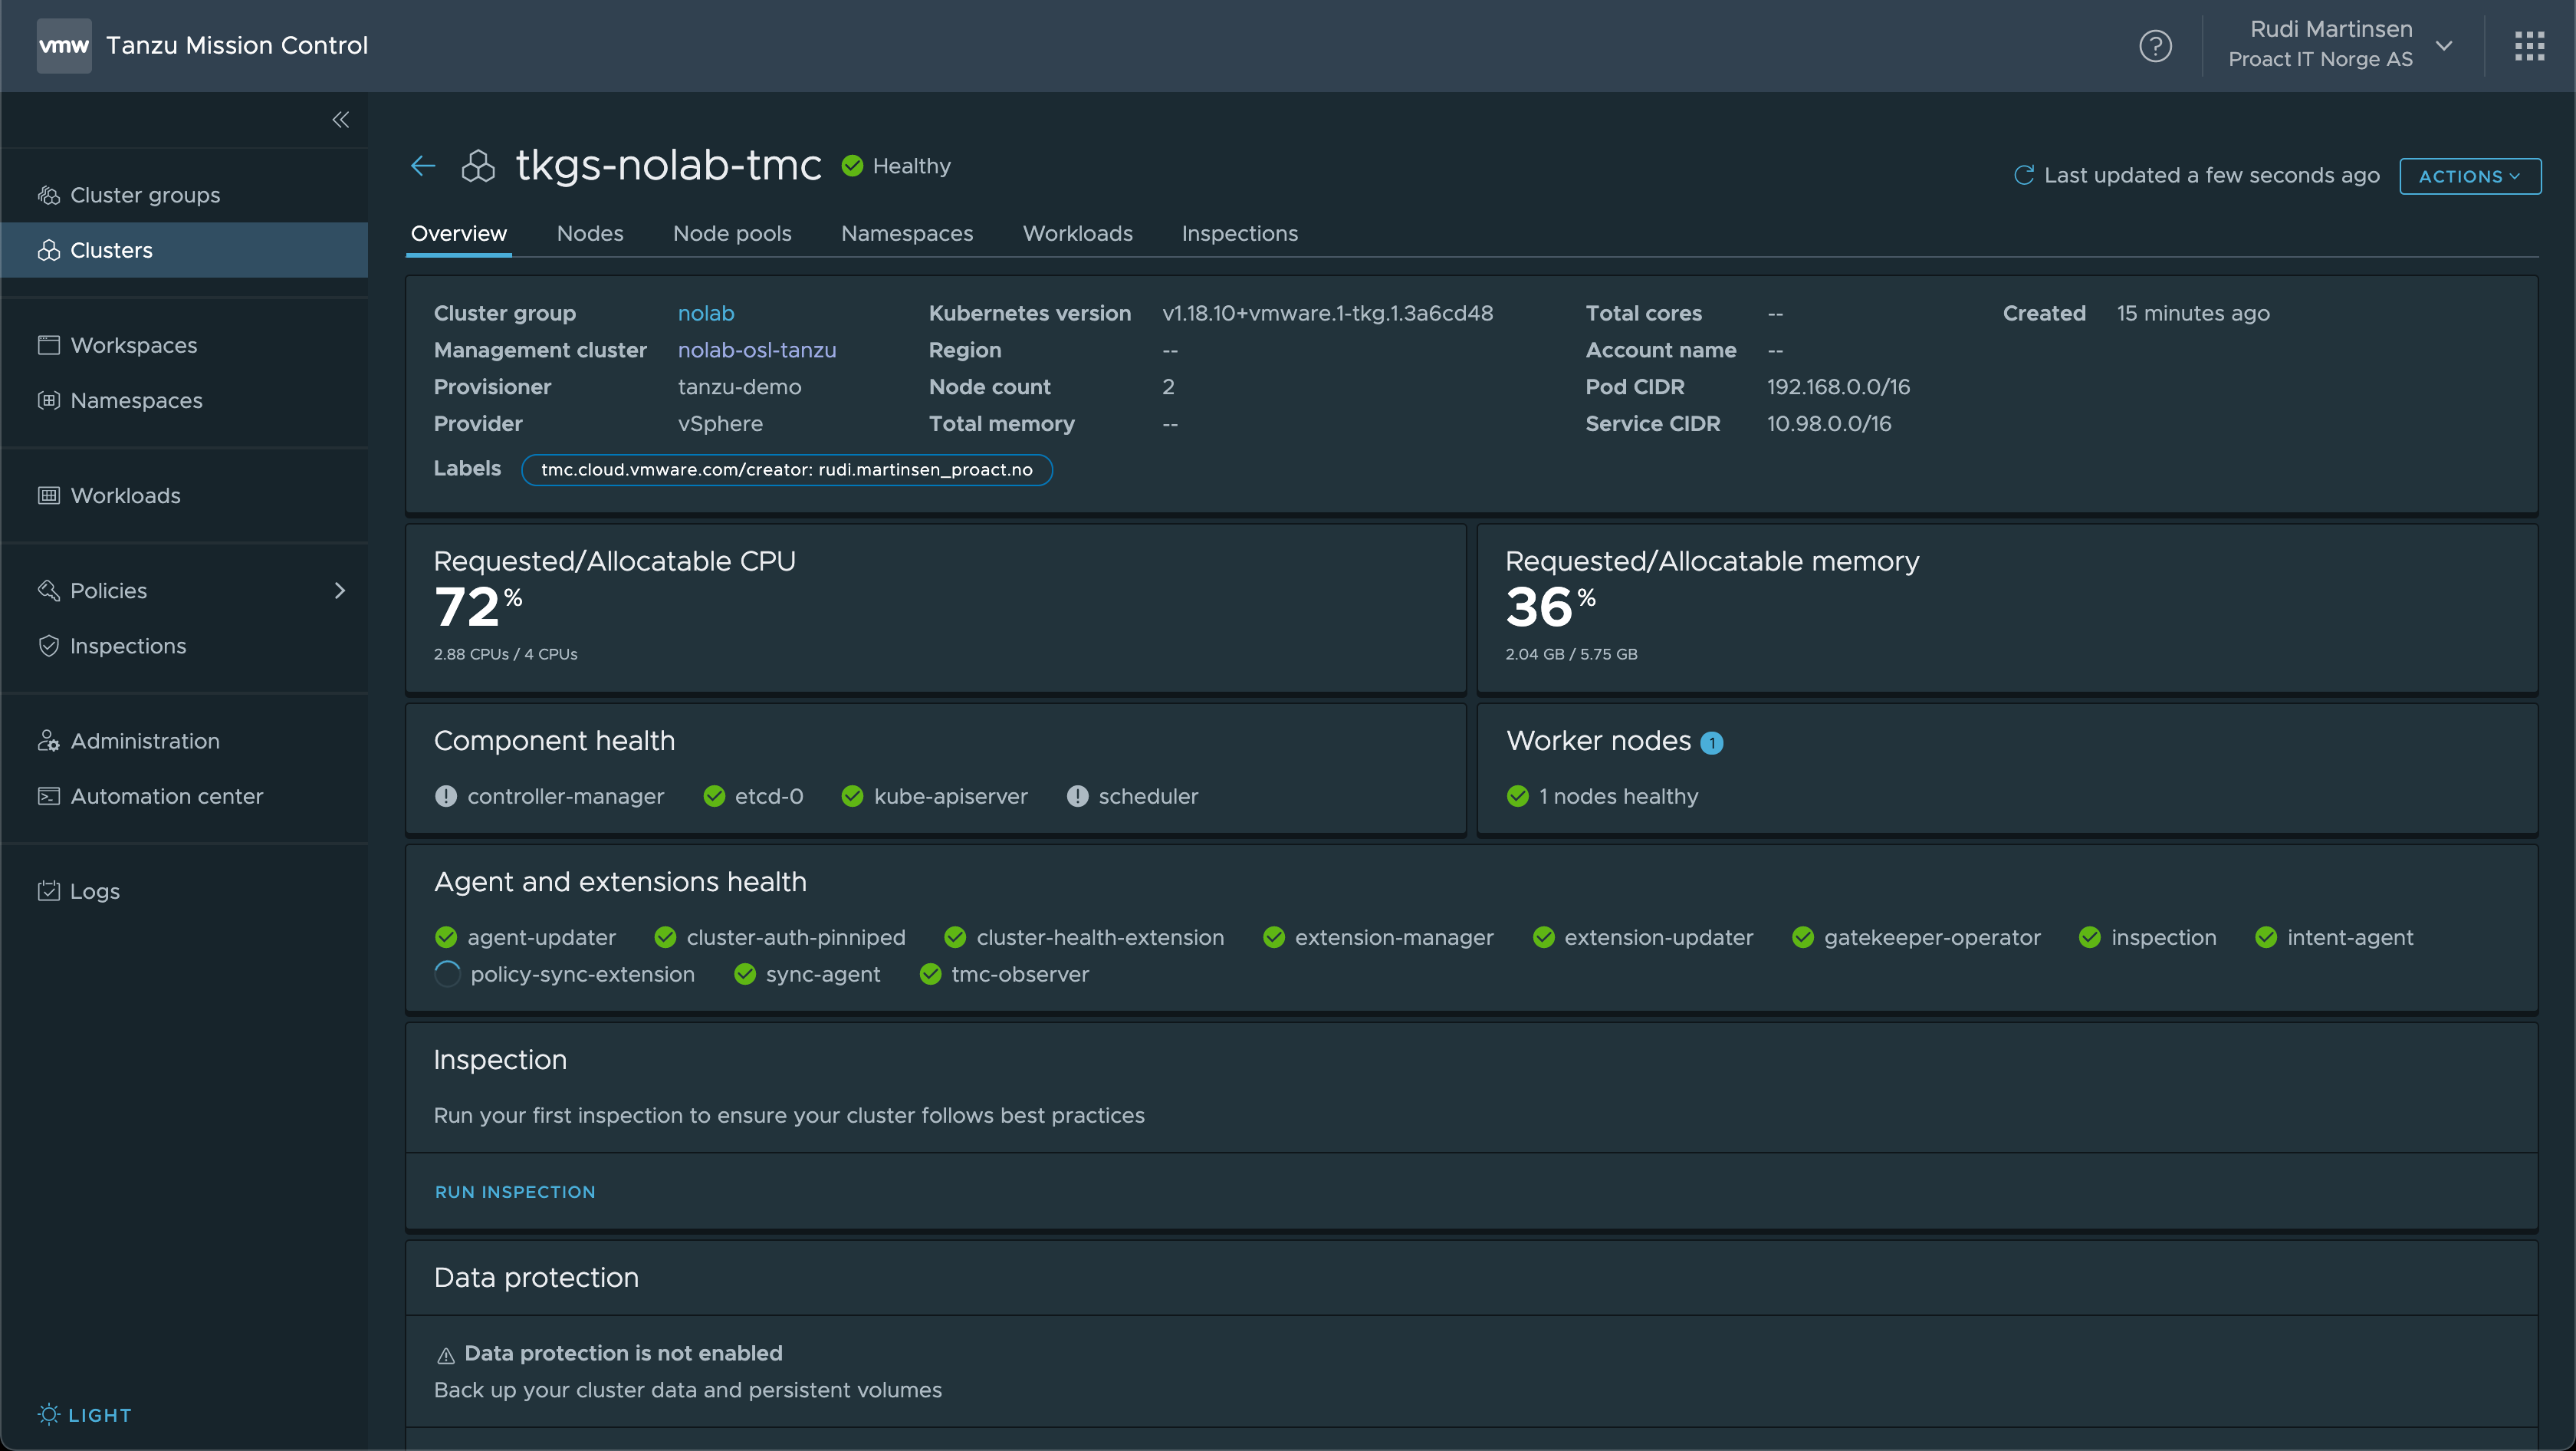
Again, after a while the cluster info starts updating and you should hopefully have a healthy cluster. Note that this obviously might take a while based on the size and count of nodes deploying
Tanzu Kubernetes Grid hosted on AWS
Now, let's take a look at how we can add a provider for deploying Tanzu Kubernetes Clusters on AWS. The process is documented on this VMware documentation page, but we'll go through the steps below.
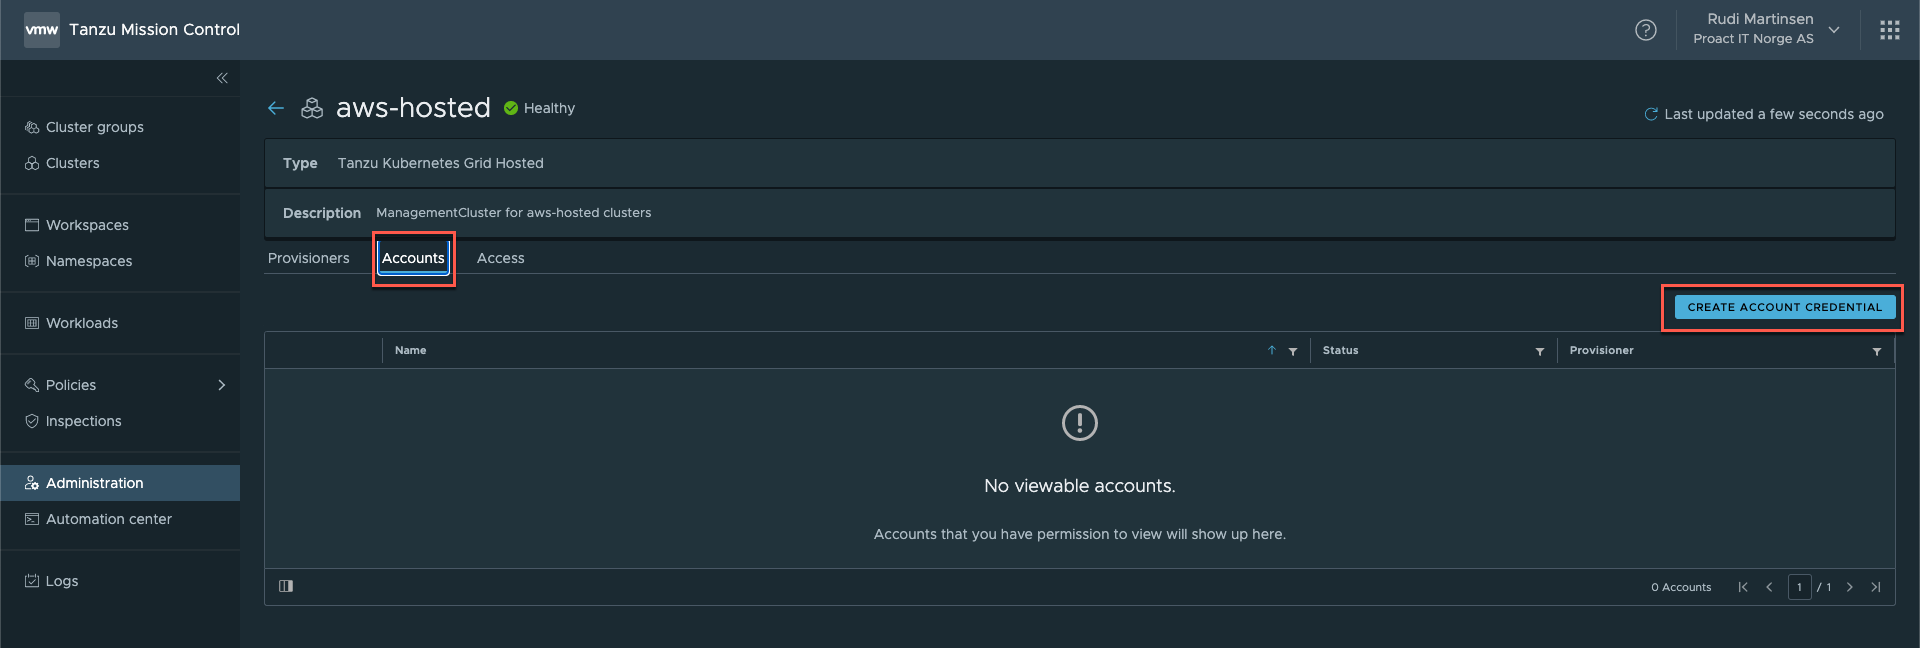
Our Management clusters tab already comes with a aws-hosted cluster. We'll connect this to an AWS account with the correct credentials so that TMC is allowed to provision clusters.
Set up provider and credentials
We'll click in to the aws-hosted cluster, select the Accounts tab and hit the Create Account Credential button
Now, select the provisioner (aws-provisioner) and give the credential a name, hit the Generate Template button
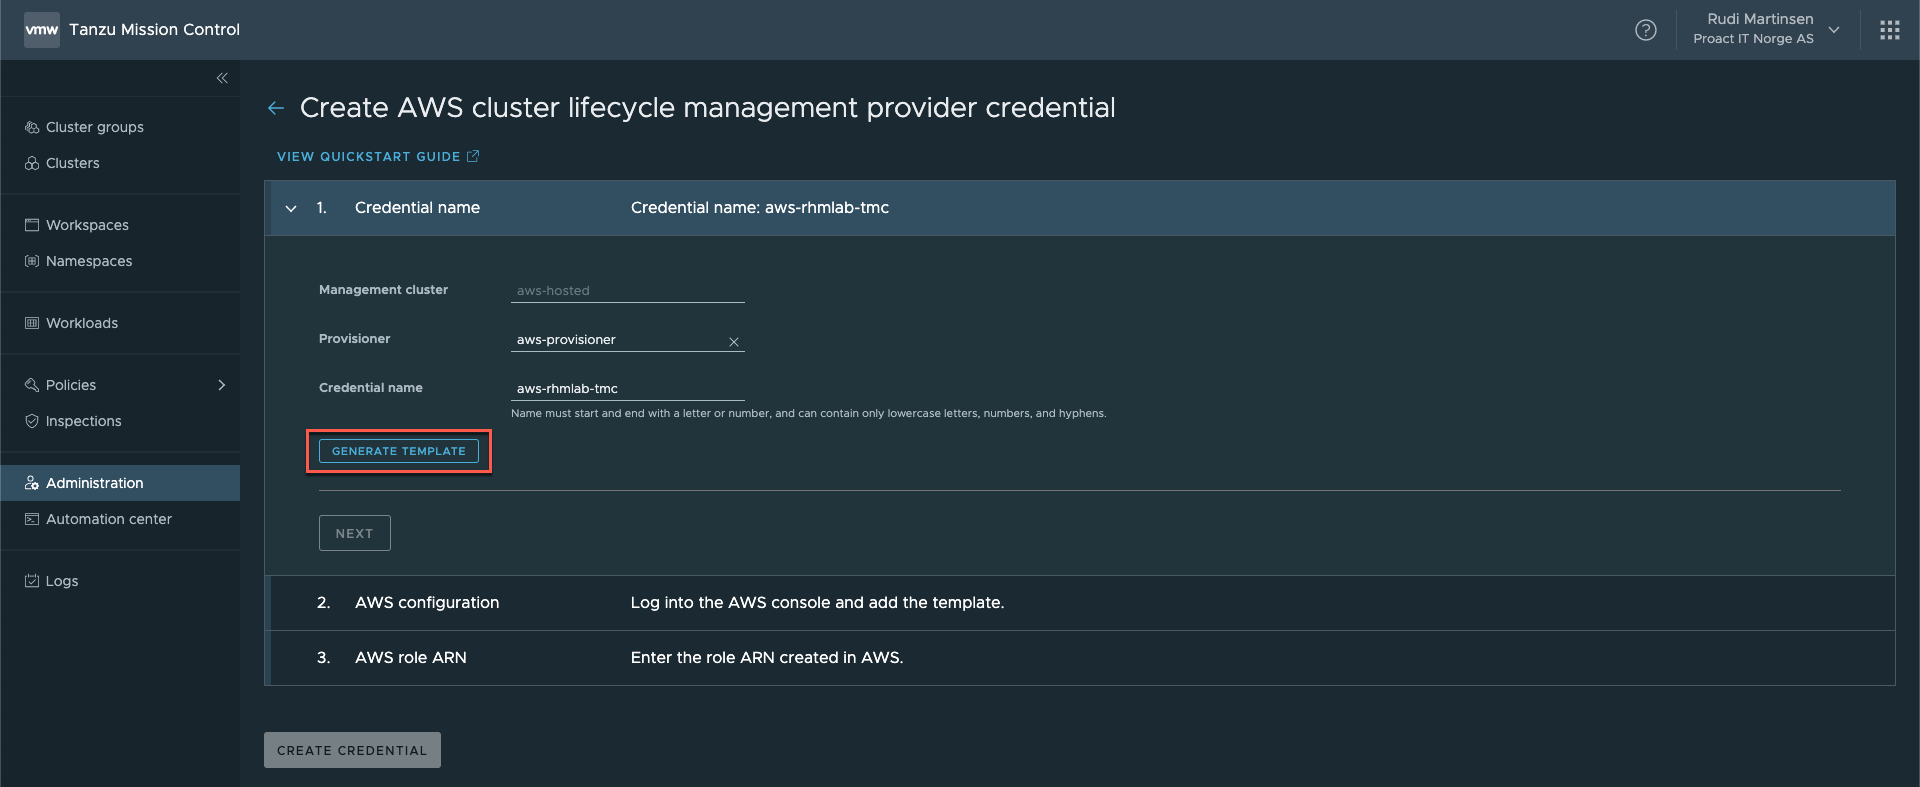
This downloads a template file to your computer which we'll have to use in the AWS console later on. The next step of the wizard asks us to follow the instructions on this side before clicking Next
Create CloudFormation stack
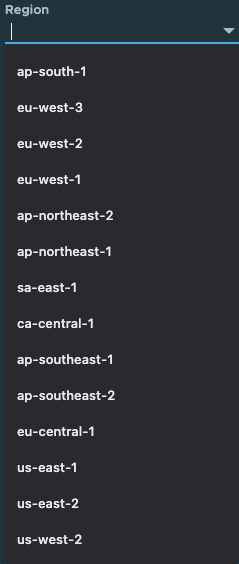
In AWS we will create a CloudFormation stack from the generated template. The detailed instructions can be found here. Note the prerequisites that you need to have an SSH key-pair for the region you plan to use with TMC.
To create a CloudFormation stack, first make sure you're in the correct region and head over to the CloudFormation service in the AWS console. As per time of writing the following regions are supported for TKG on AWS
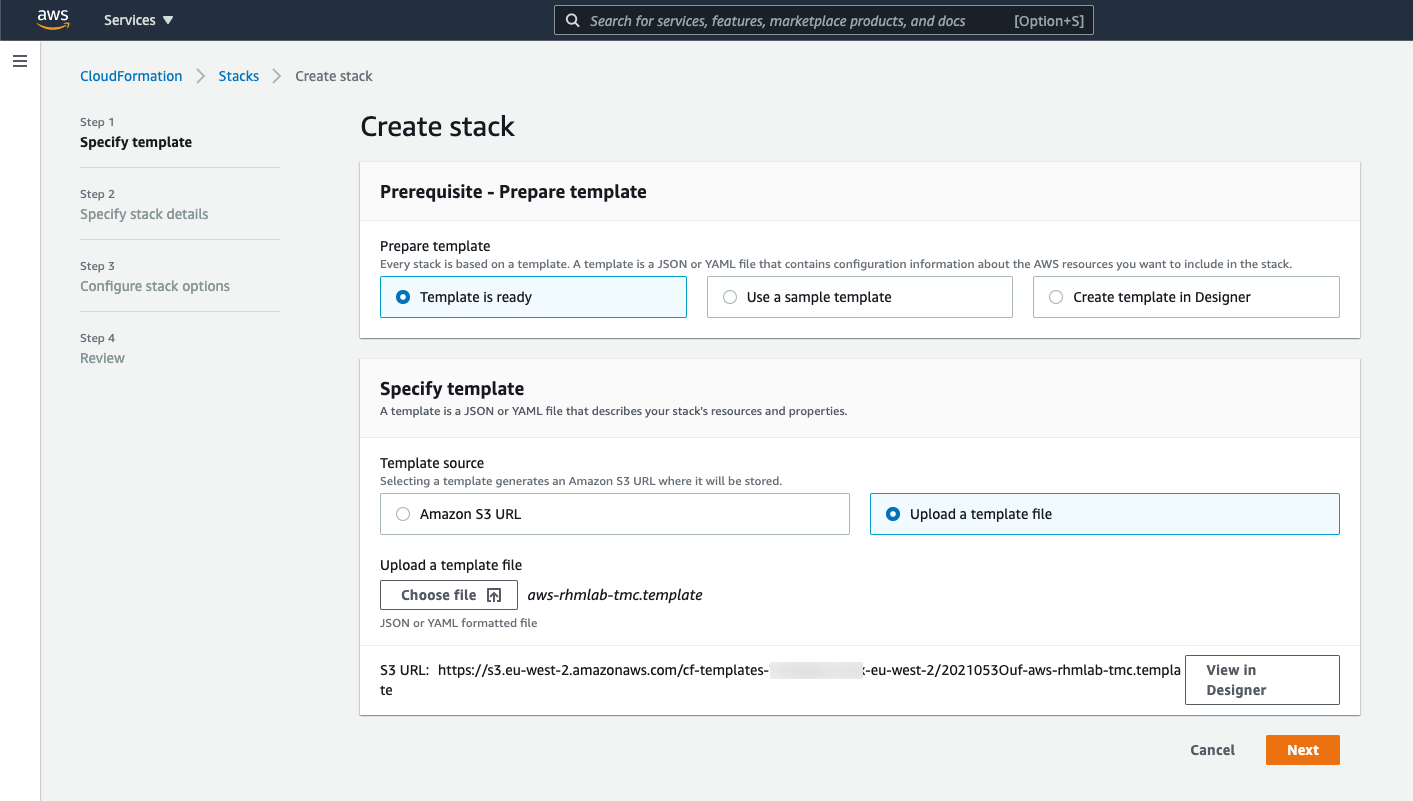
We'll hit the Create Stack option and select to Upload a template file
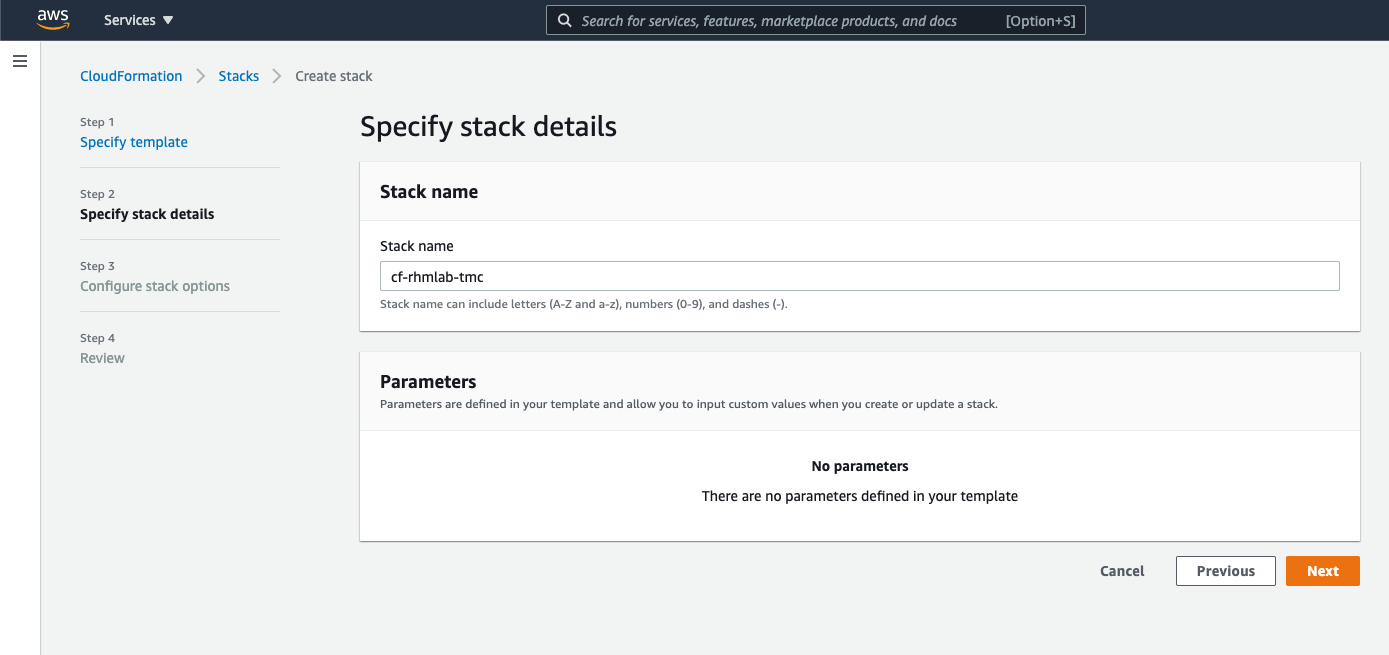
Now we'll give the stack a name and hit Next
On the next page we can set some labels and other options, e.g. permissions. I'll stick with the defaults and hit Next. The next page will summarize the details for the CloudFormation stack to be created. Hit Next
After a while your stack should be created.
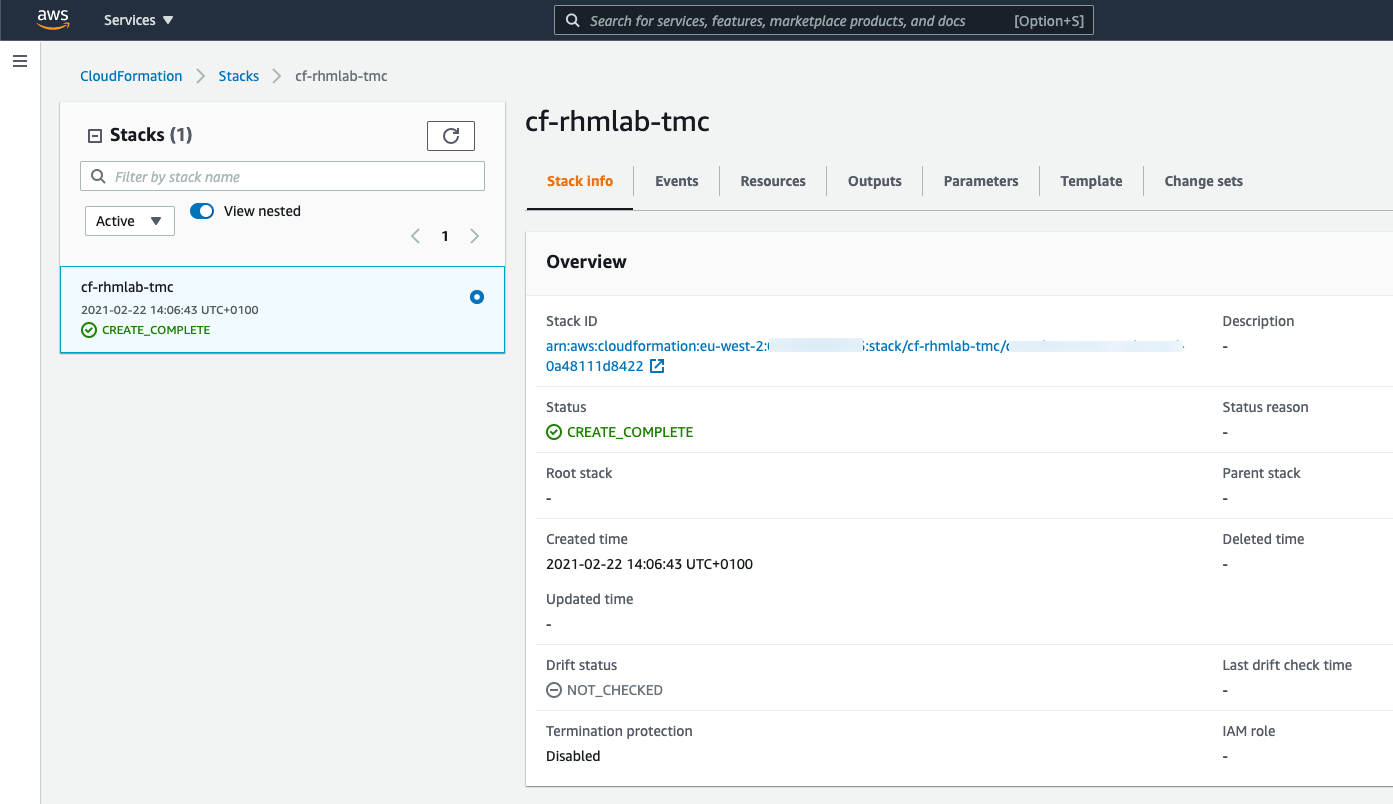
Now select the Outputs tab and retrieve the role specified in the Message output
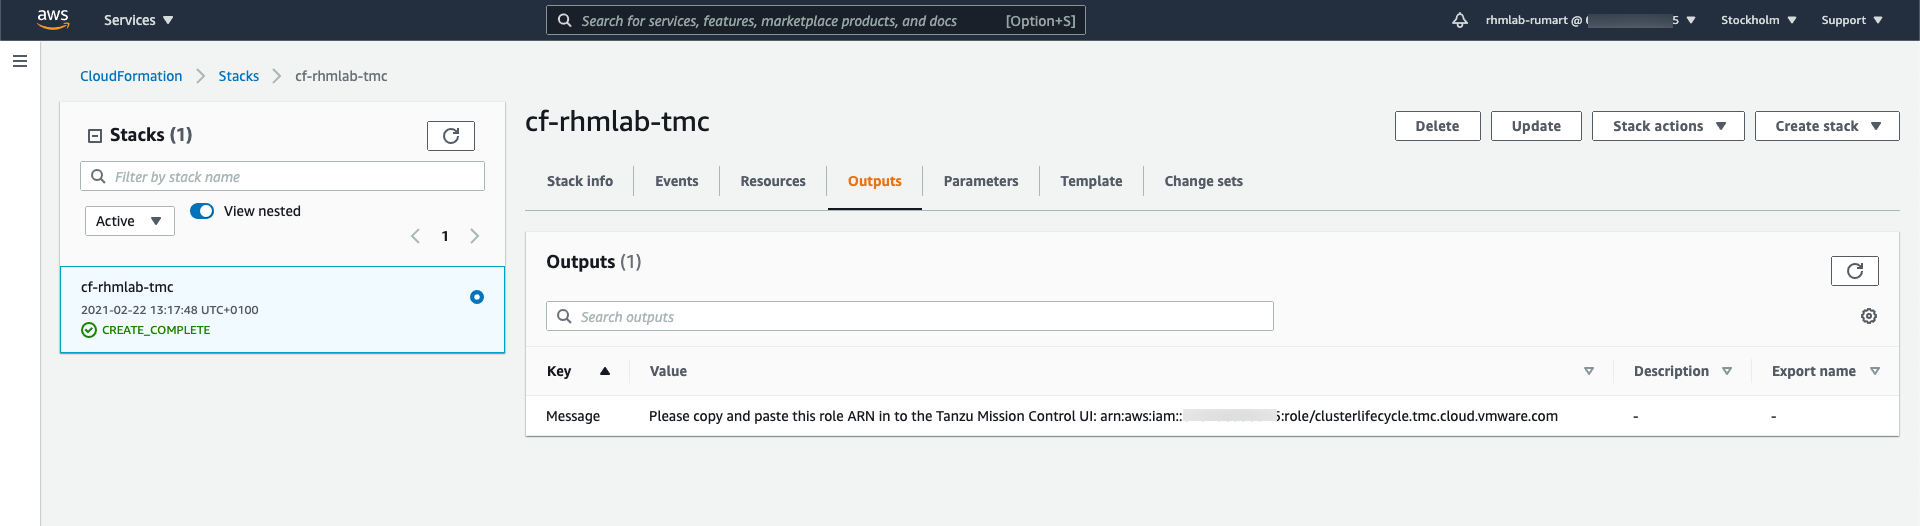
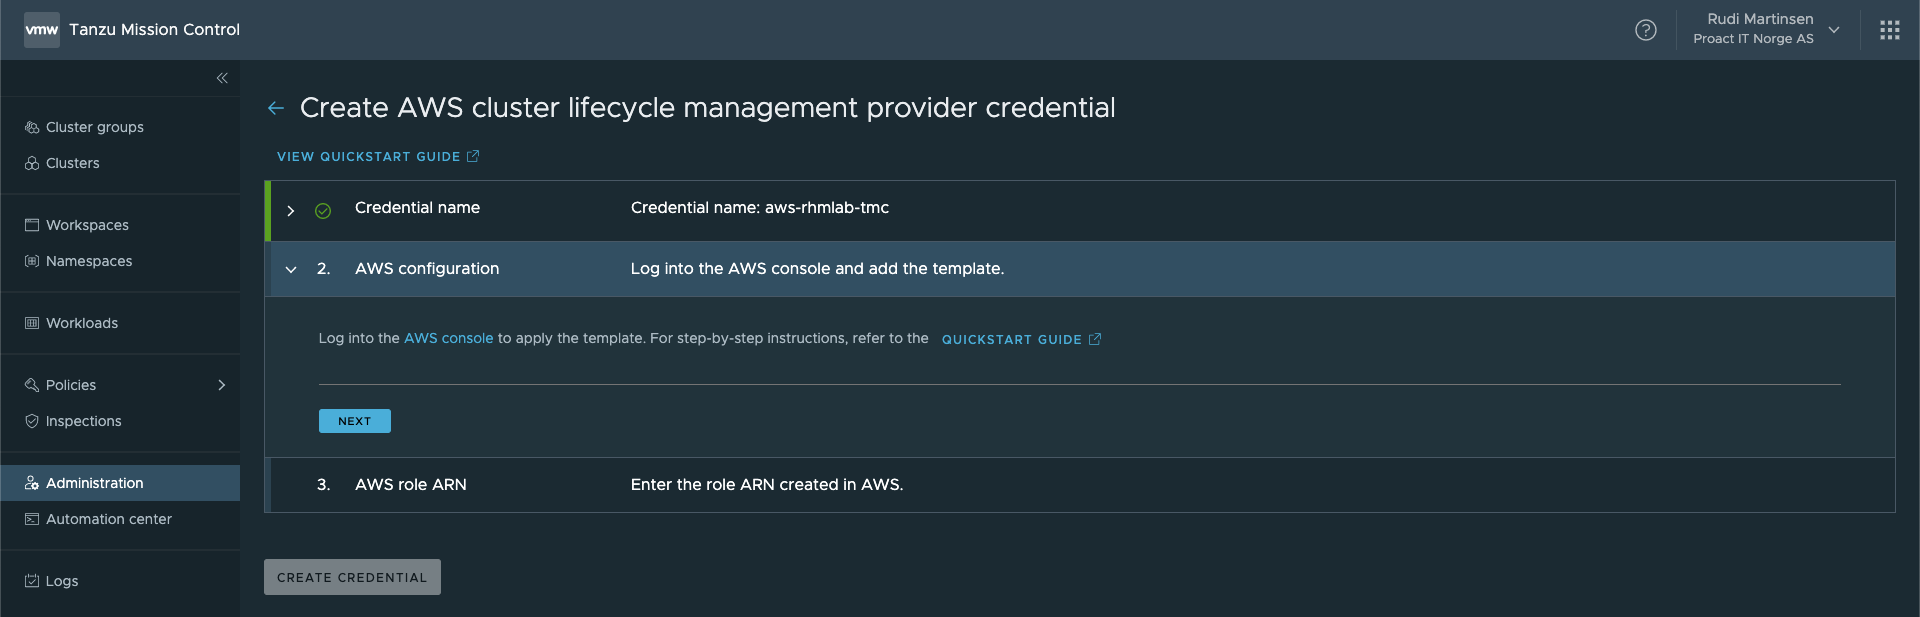
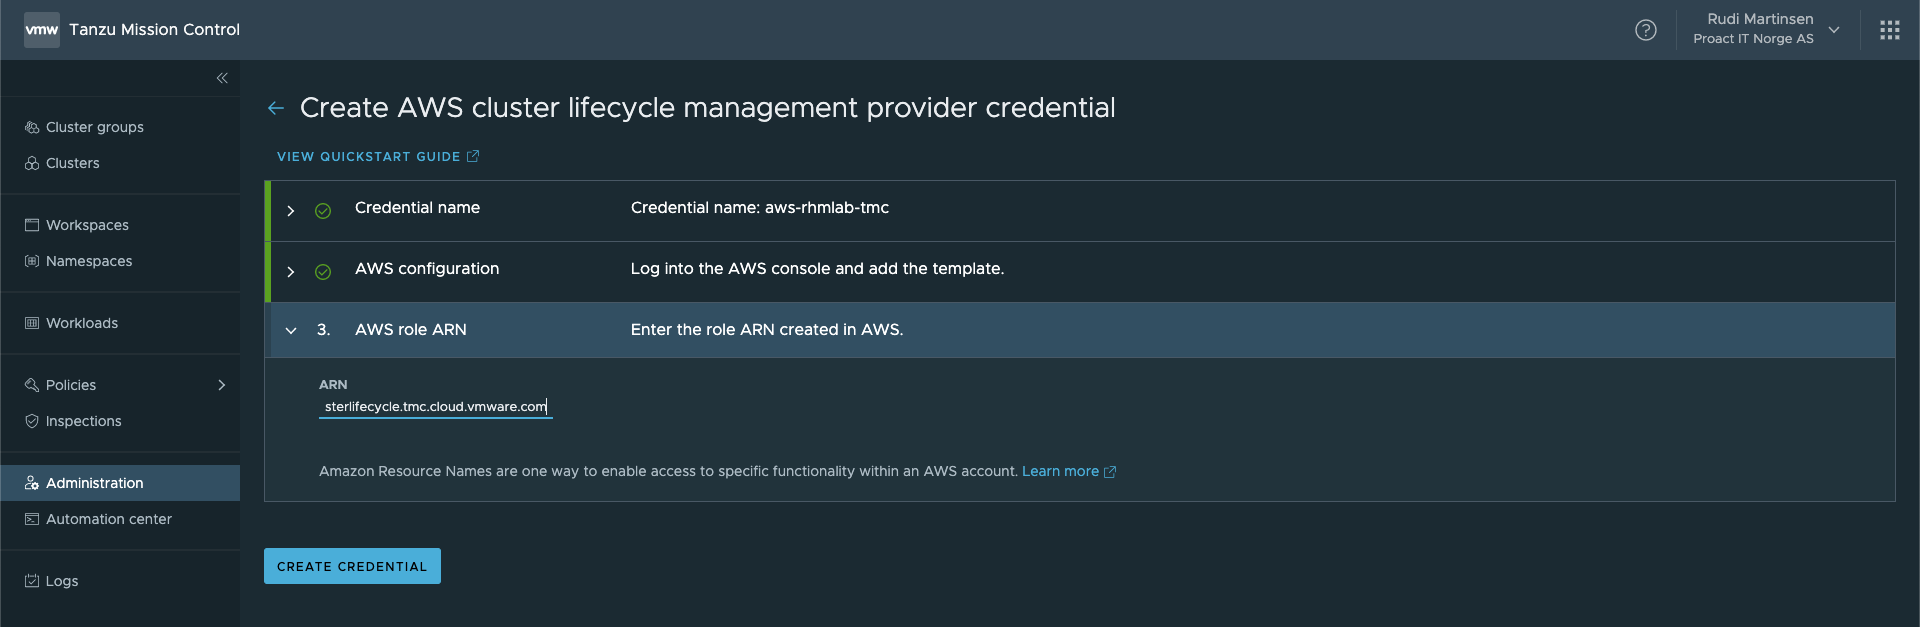
Create credential
Back in the TMC console hit Next in the AWS configuration step (step 2) and paste in the role ARN in step 3
And, after a little while TMC should report your credentials as valid
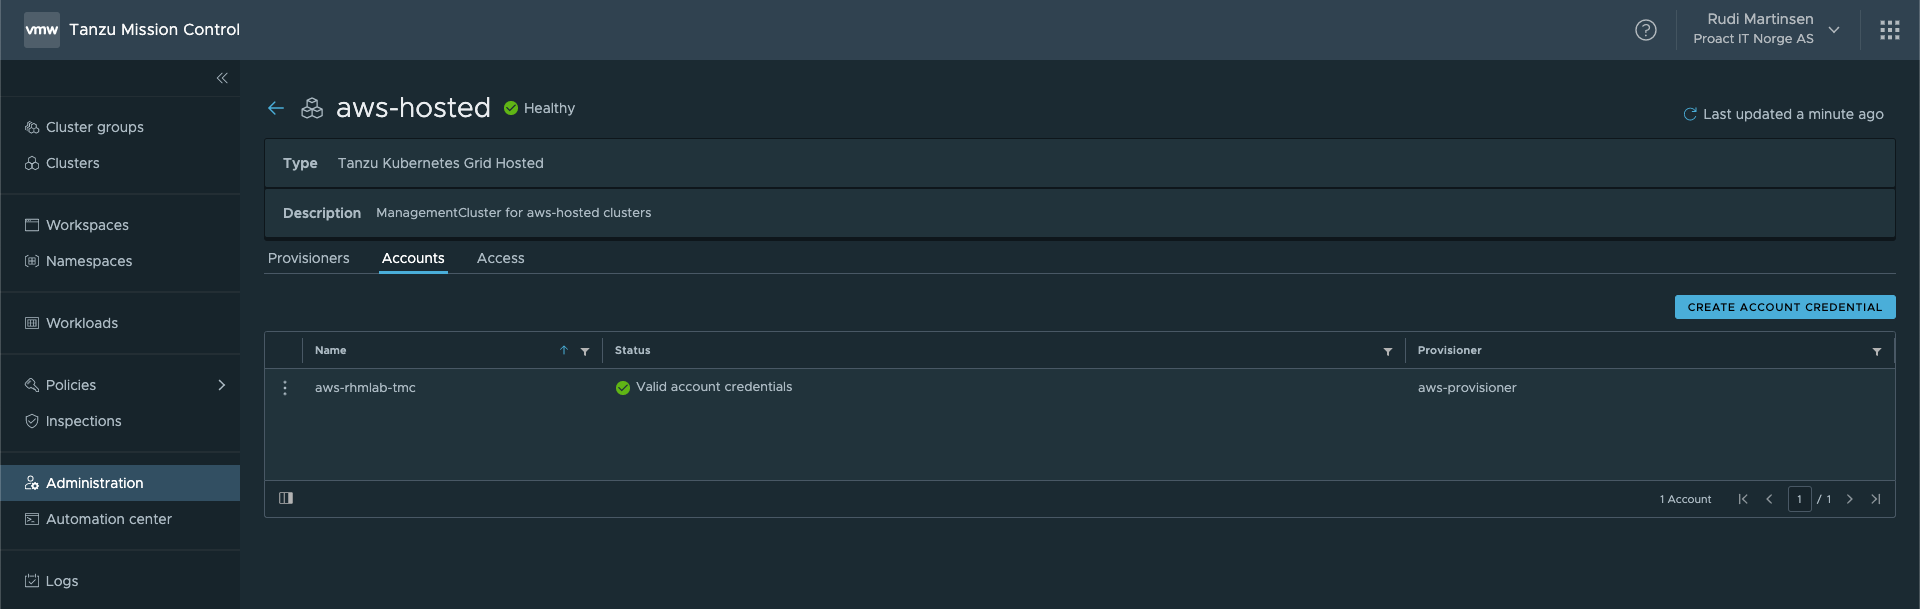
With this set up we should be able to provision clusters on AWS
Deploy Tanzu Kubernetes Cluster
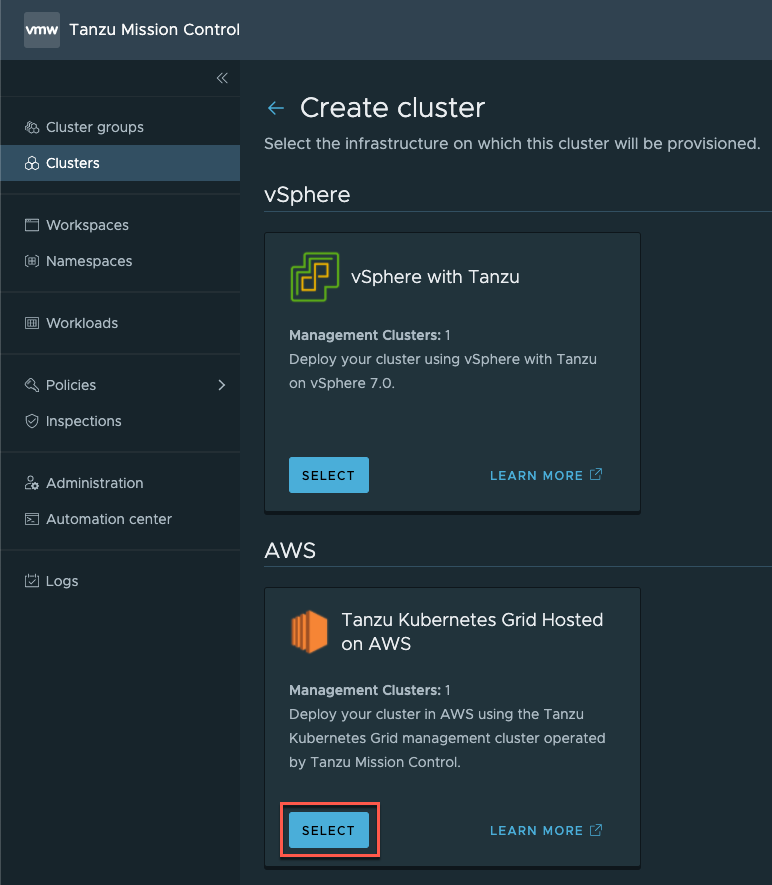
Back in our Clusters page we can now hit the Create cluster wizard and select the AWS option
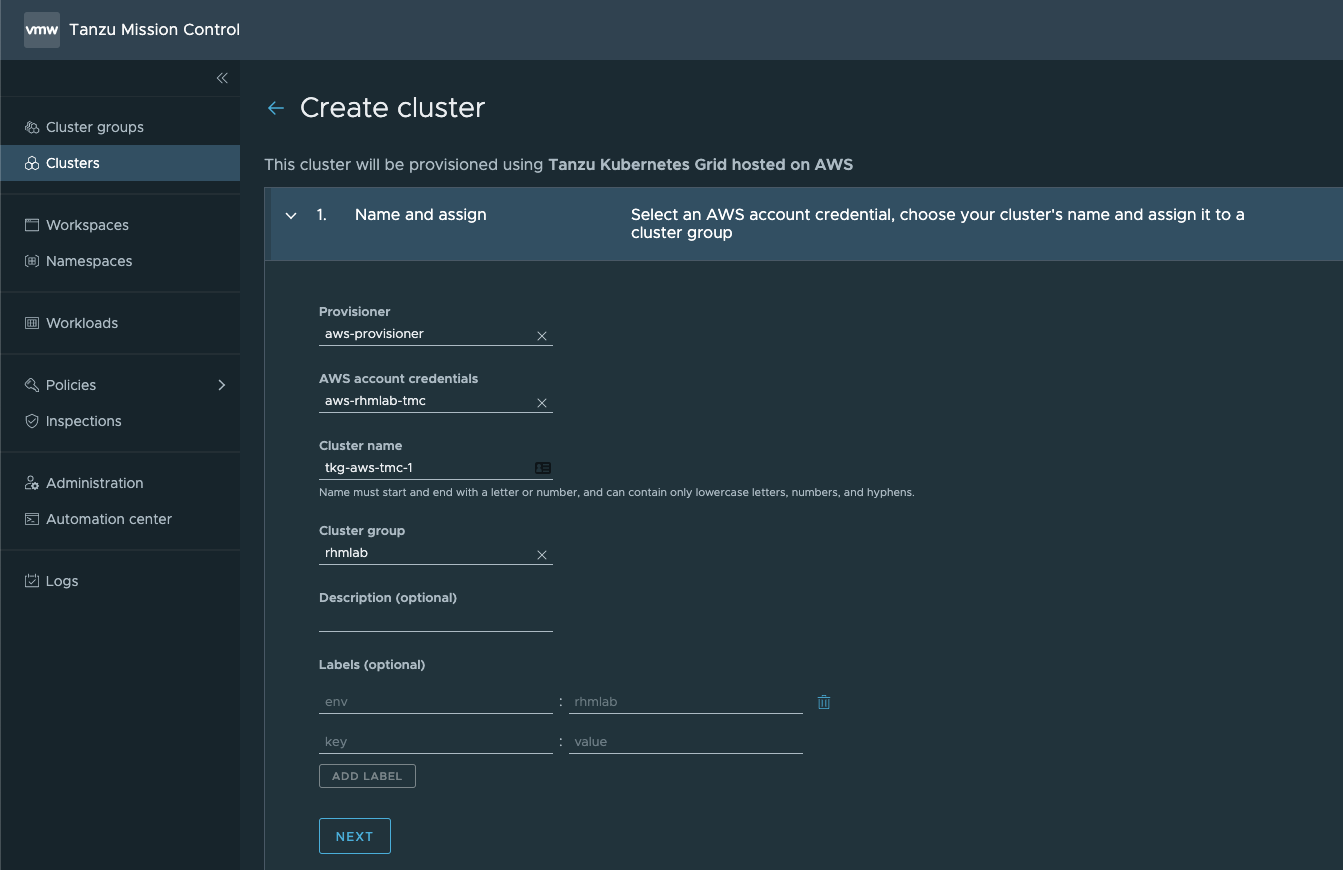
We'll select our AWS Provisioner, and then the credentials we just created. Then give the cluster a name, select the cluster group and add any description and labels
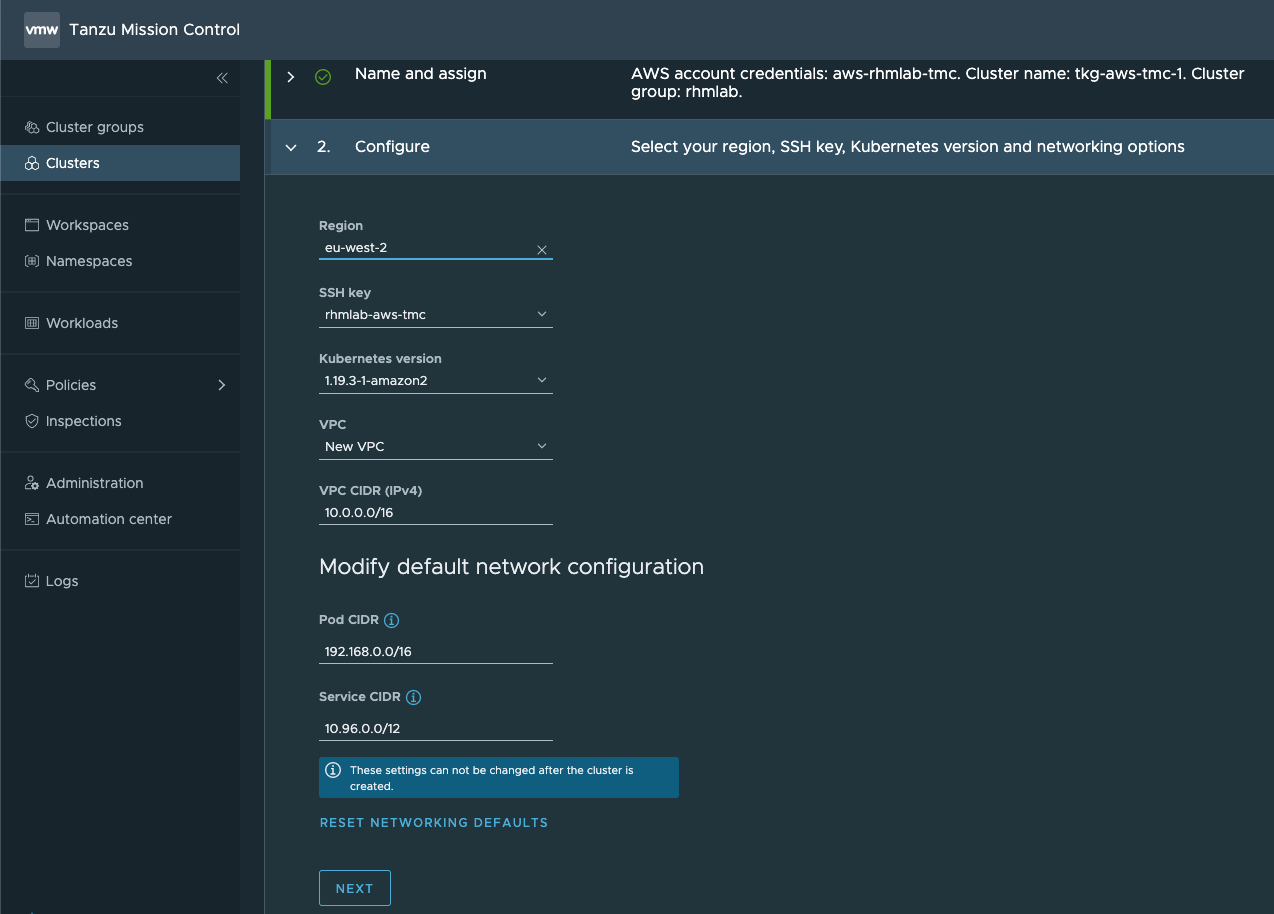
Now, in the Configure step we'll select the Region (note that this needs to correspond to the region we've created our CloudFormation Stack in), and the SSH key, as well as specify the network settings.
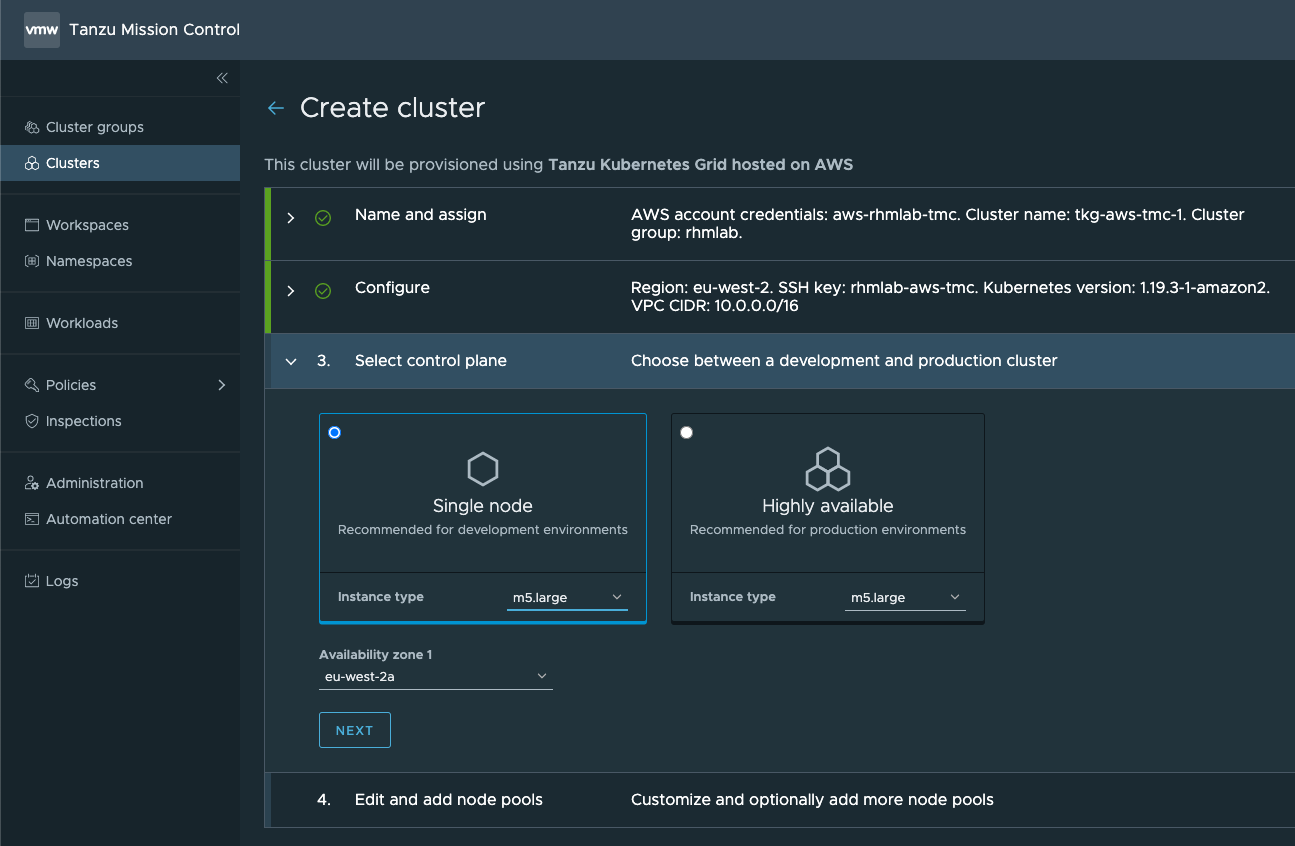
The next step sets the size and configuration (single vs ha) of the Control plane nodes. In my example I'll select a single node of size m5.large
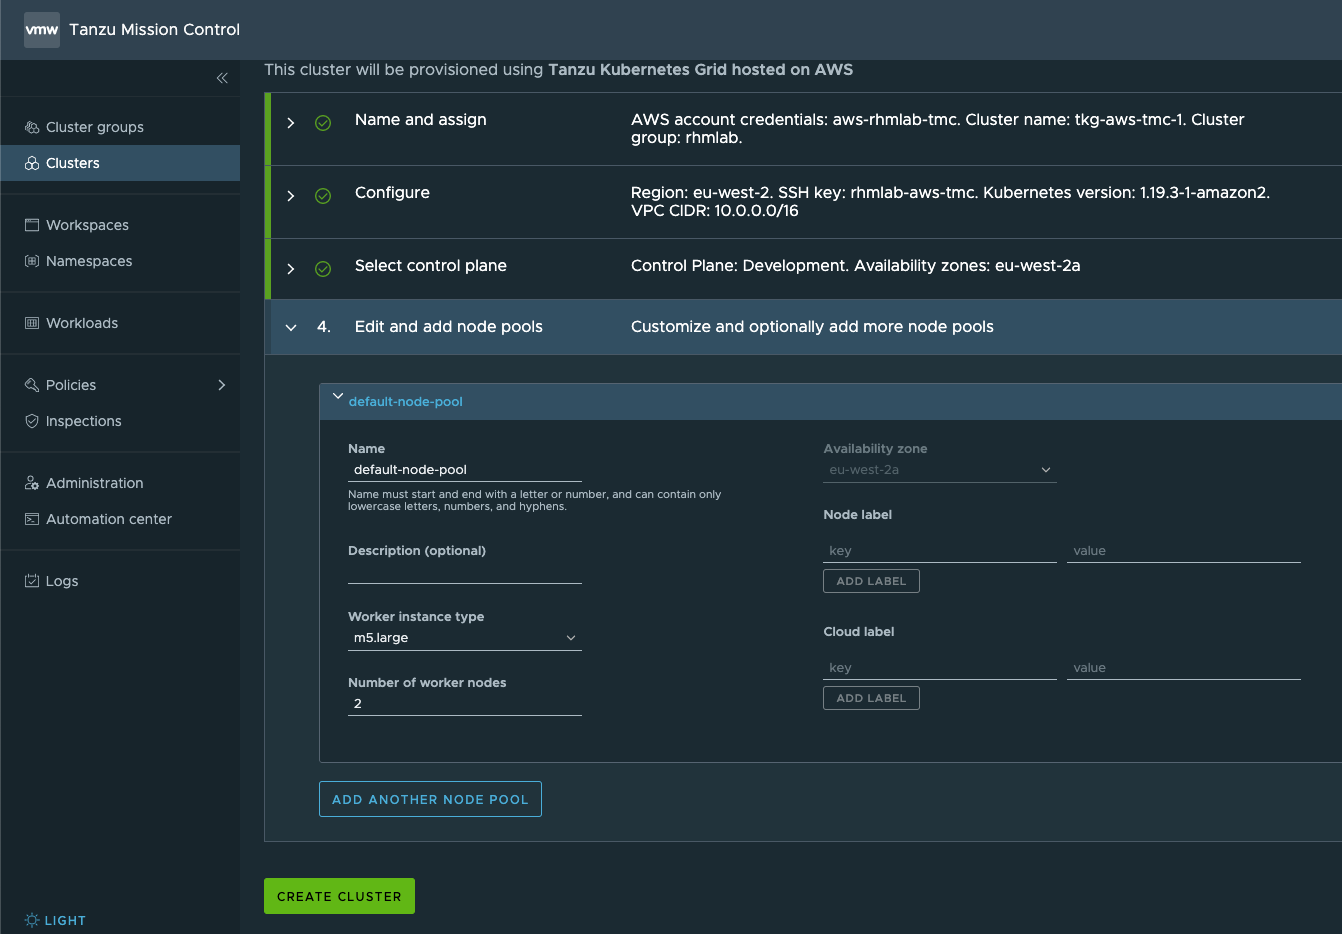
The next and final step will be for the Worker nodes. Again we select the size (instance type) and the number of nodes. We can optionally set some labels as well before hitting Create cluster to start deploying stuff on AWS
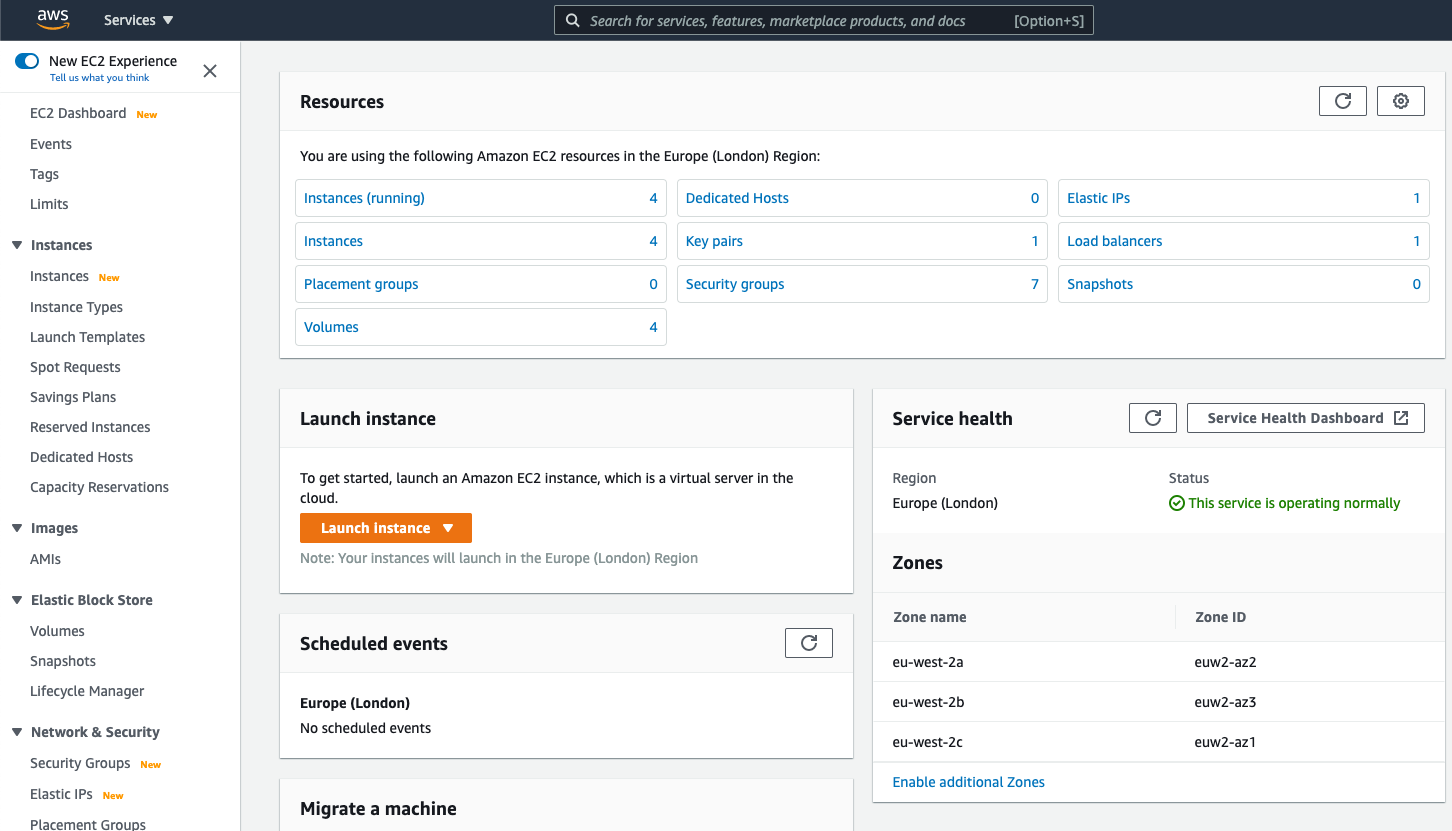
Over in AWS we should start seeing resources being created. We'll have both EC2 instances, security groups, a load balancer, and more created for us
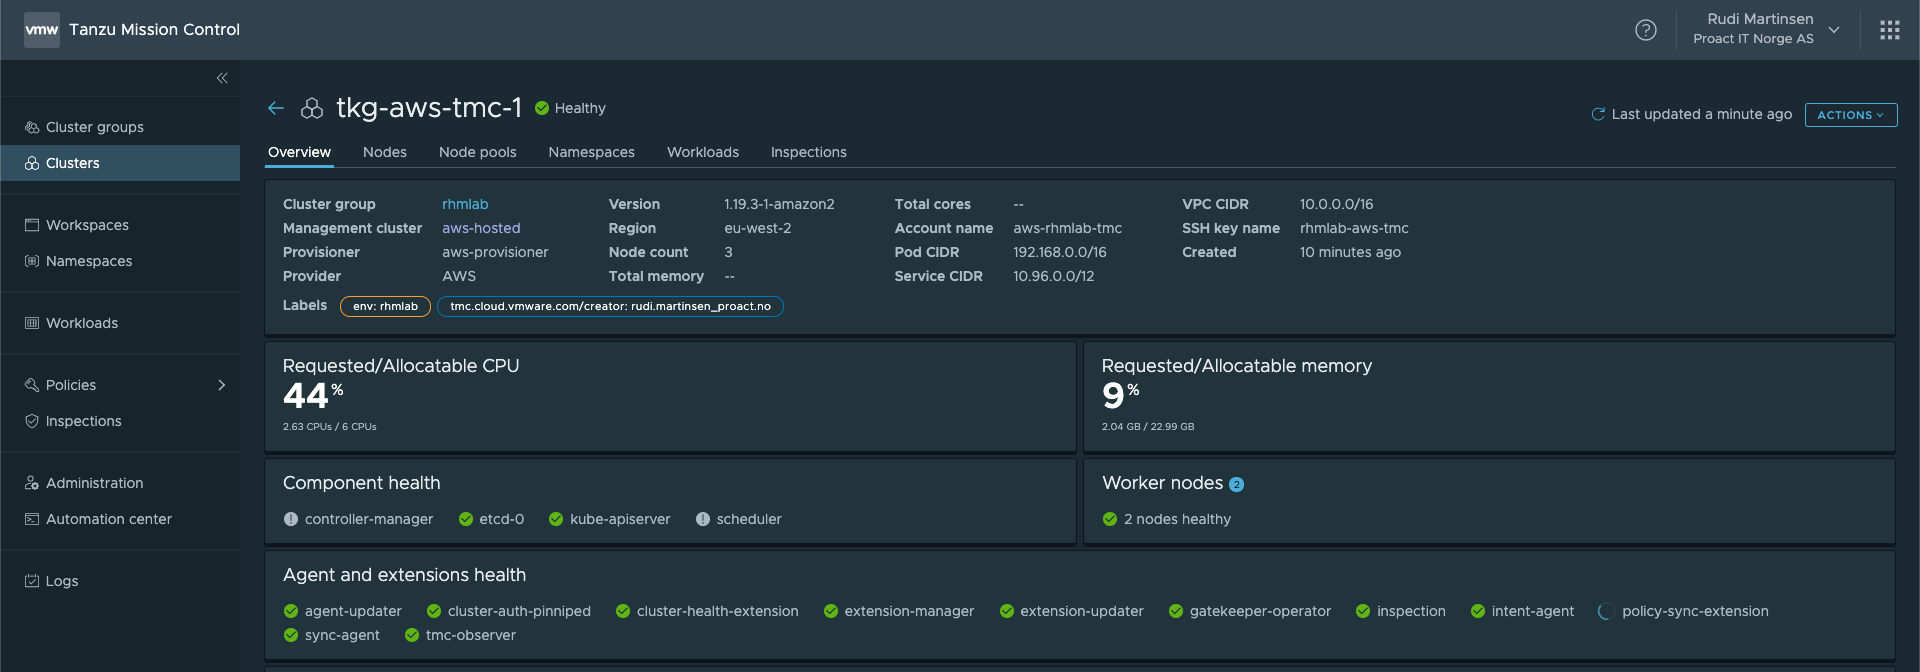
And after a while our cluster should be visible and healthy in our TMC console
Access our clusters
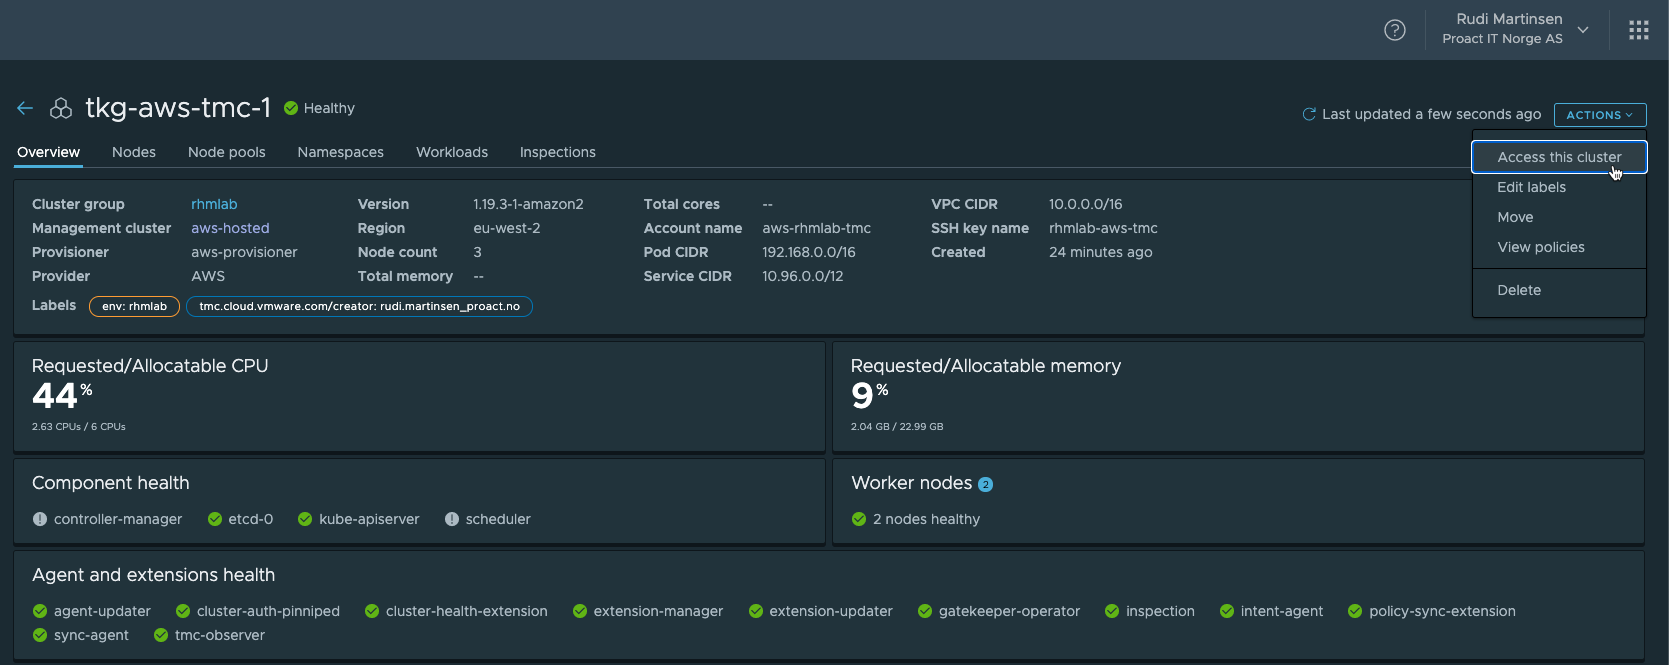
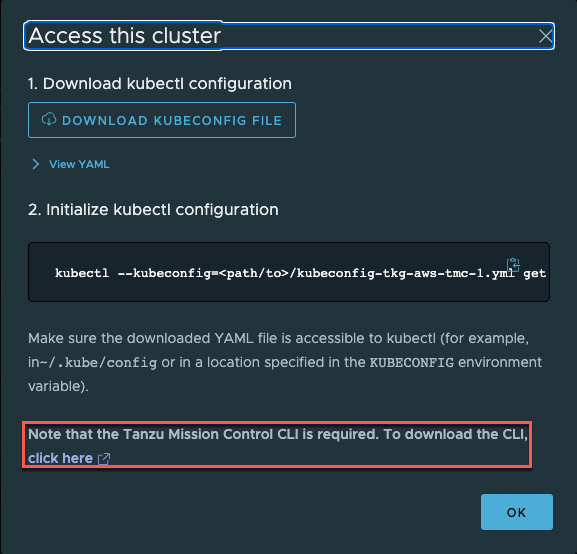
What's nice about having our clusters in TMC, besides being able to manage cross clouds and providers, is that I can get a pre-defined kube-config file for each of them. Right from TMC.
Note that you need to have the Tanzu Mission Control CLI available for using this
Let's run that command and see if we can get some information from our AWS cluster
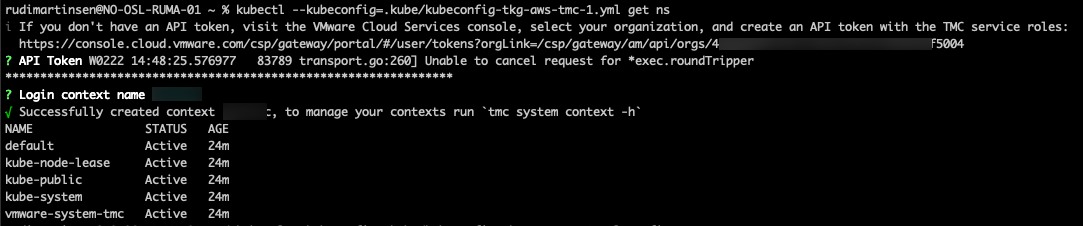
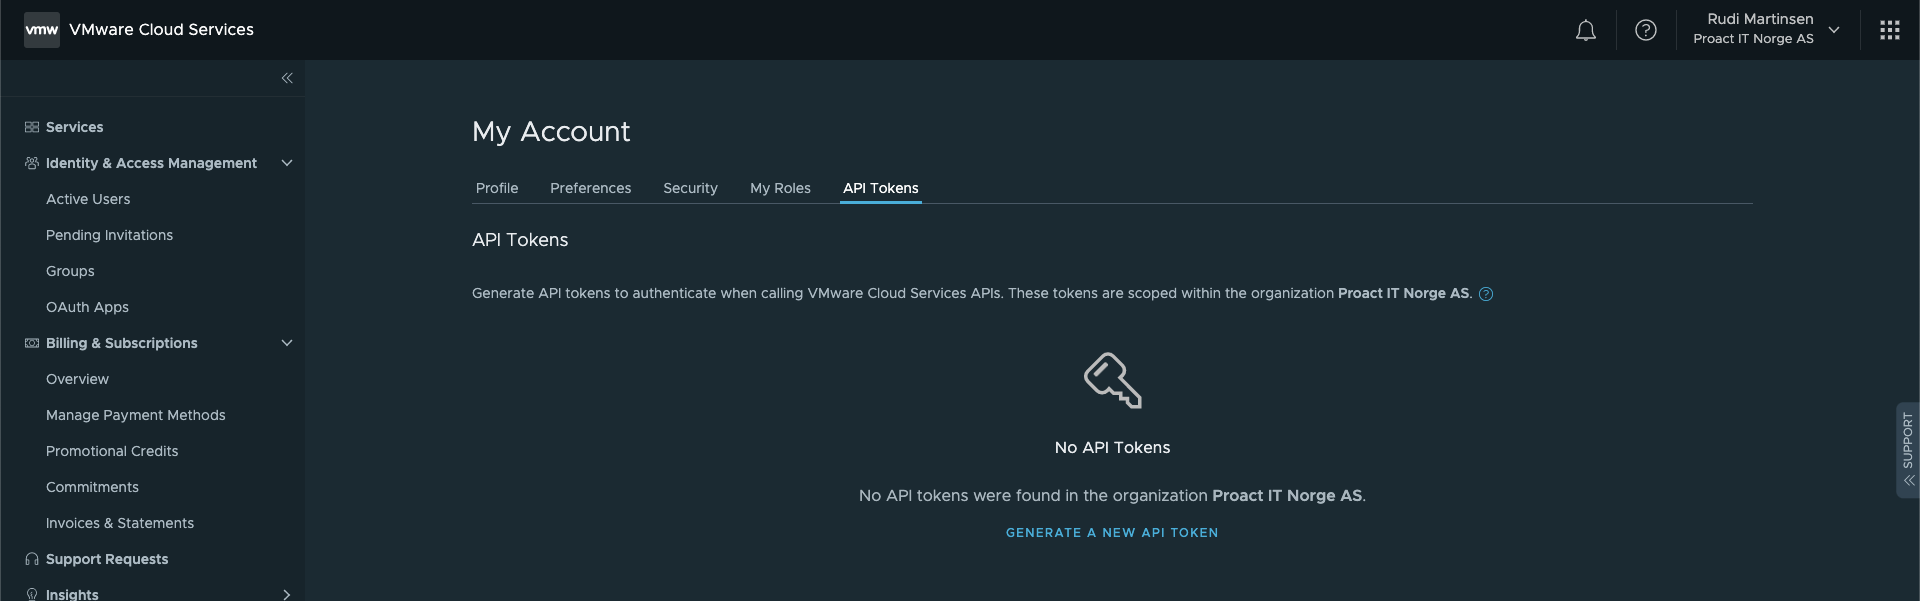
Note that if you haven't setup your tmc CLI you'll be asked for an API token which you need to create over in the VMware Cloud services console.
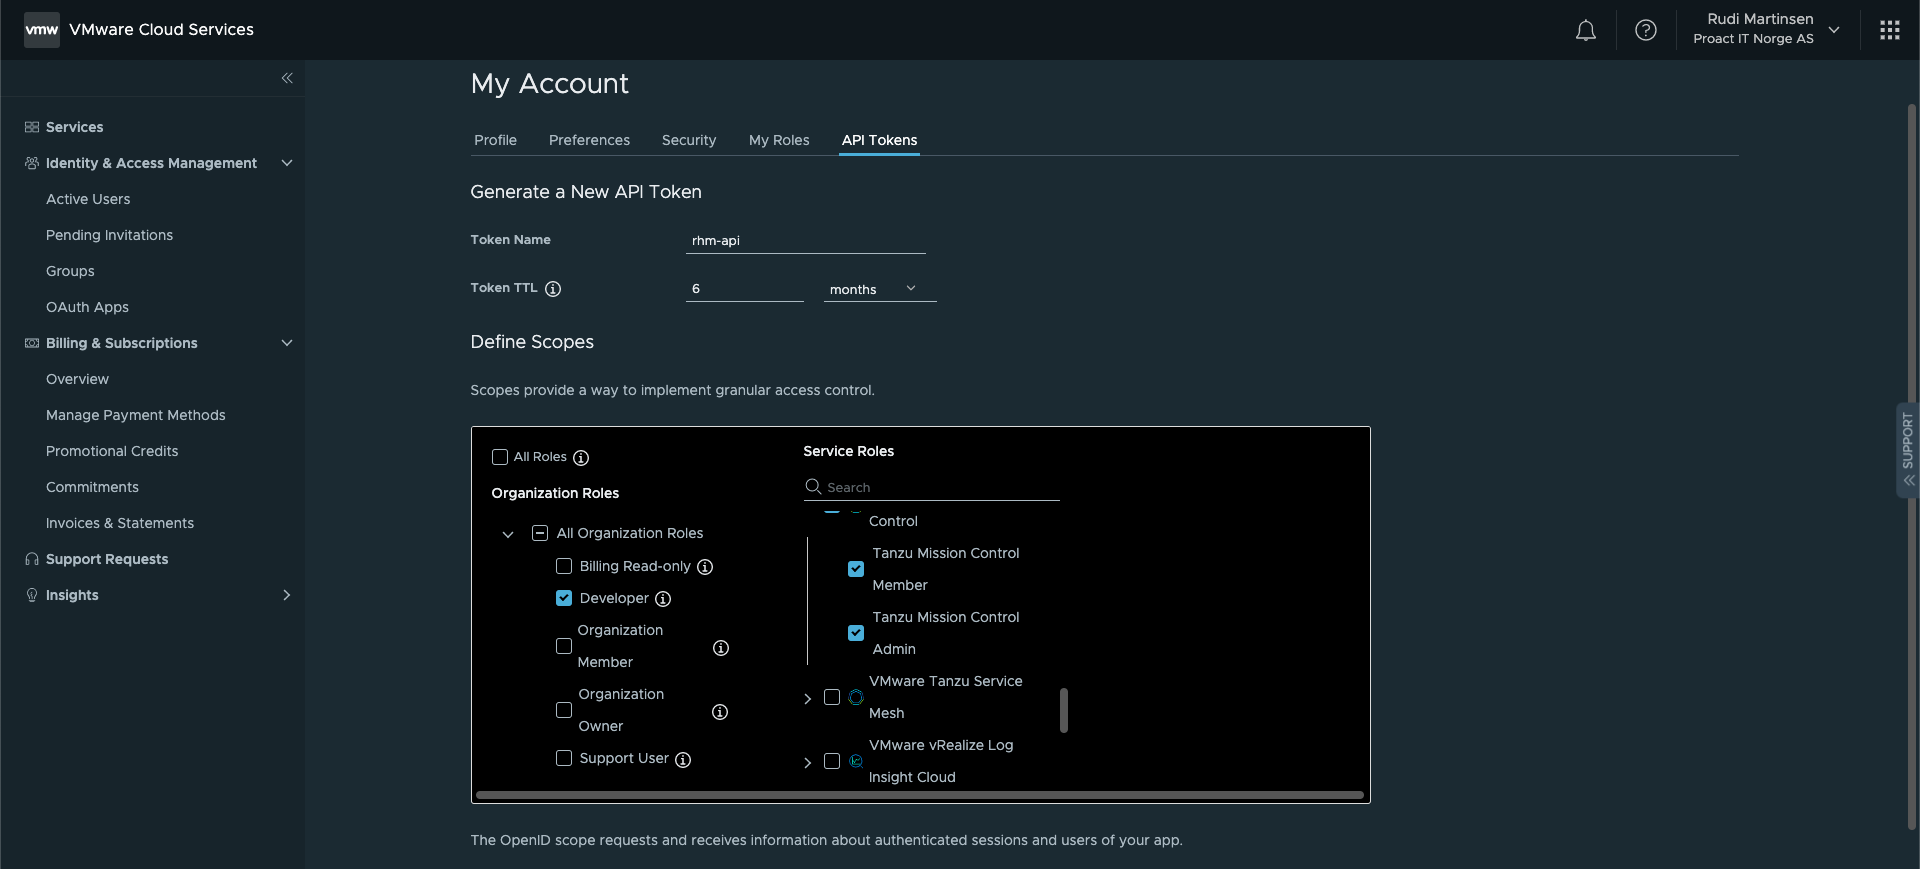
Select the TMC roles and hit Generate
You'll get your API token which you'll need to keep in a safe place as this will be used to access and retrieve information from TMC. Note that you'll not be able to see the code again once you close/leave the tab
There's obviously more to the tmc CLI than this, but we'll leave it with this for now.
Summary
This lengthy post has been all about how we can create Tanzu Kubernetes Cluster directly from our Tanzu Mission Control console. As of now we've seen that we can deploy clusters on vSphere with Tanzu AND on AWS. I suspect this to be supported on more clouds going forward, still by deploying TKC clusters, but who knows, maybe the Cloud providers own Kubernetes versions will be supported in the future?
Thanks for reading!