Upgrading a Kubernetes Cluster
Overview
In this post I'll cover the basic steps of upgrading a Kubernetes cluster.
This post is part of my preparations for the CKA exam and the cluster upgraded is not running any production loads so please take that into account when reading this post.
This post was written back in 2020, things have changed since then. A new version of this post can be found here
I'm not taking any precautions on the stuff running in the cluster, and not even backing up the state of the cluster which is something you'd want to do in a "real" environment.
Earlier I've written about how the cluster has been set up on virtual machines and how it was scaled out with more nodes
Setup and current version
In my setup I have a Kubernetes cluster running on virtual machines in a vSphere environment. There's three master nodes and three worker nodes, all running on Ubuntu 20.04, and the Kubernetes version is 1.18.1.
We'll upgrade to a new minor version, 1.19, in this post and the steps and documentation references reflects that. Please make sure you consult the correct documentation for the versions in your environment.

Note that you can only upgrade from one MINOR version to the next MINOR version, or between PATCH versions of the same MINOR version (reference)
Preparations
Again note that this post is skipping several key preparation steps, i.e. backups etc, which you'd normally do. Please refer to the documentation for the full set of upgrade steps.
When setting up this cluster I marked the versions on kubeadm, kubectl and kubelet to be held at 1.18.1-00 so that it wouldn't be upgraded if someone was to run an apt-get upgrade in the OS of the nodes.
Now we need to unmark and download the new version. We'll start with kubeadm and kubelet
1sudo apt-mark unhold kubeadm

Upgrade control plane nodes
Kubernetes documentation reference
The upgrade will follow these high-level steps:
- Upgrade first control plane (master) node
- Upgrade additional control plane nodes
- Upgrade workers
Install new kubeadm on first control plane node
Now let's install the newer kubeadm version, 1.19.5
1sudo apt-get install -y kubeadm=1.19.5-00
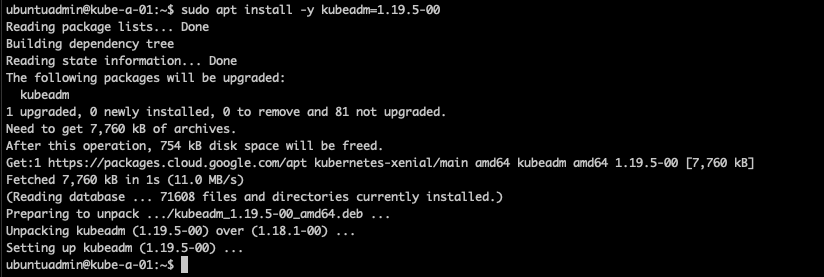
Let's verify the new version, and we'll also hold the kubeadm version so it won't upgrade by mistake
1sudo kubeadm version
2
3sudo apt-mark hold kubeadm

Drain first node and execute upgrade
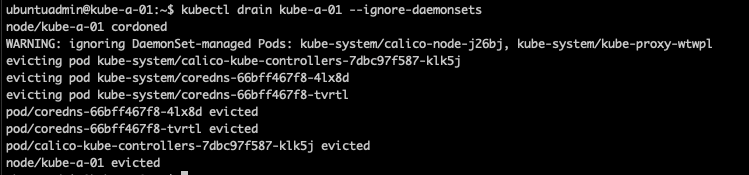
First we'll evict all pods from the node we want to upgrade with the kubectl drain command
1kubectl drain <first-control-plane-node> --ignore-daemonsets
Now we'll run the kubeadm upgrade plan command to run prechecks before the upgrade. This will let us know if there's anything we need to fix before or after the upgrade
1sudo kubeadm upgrade plan
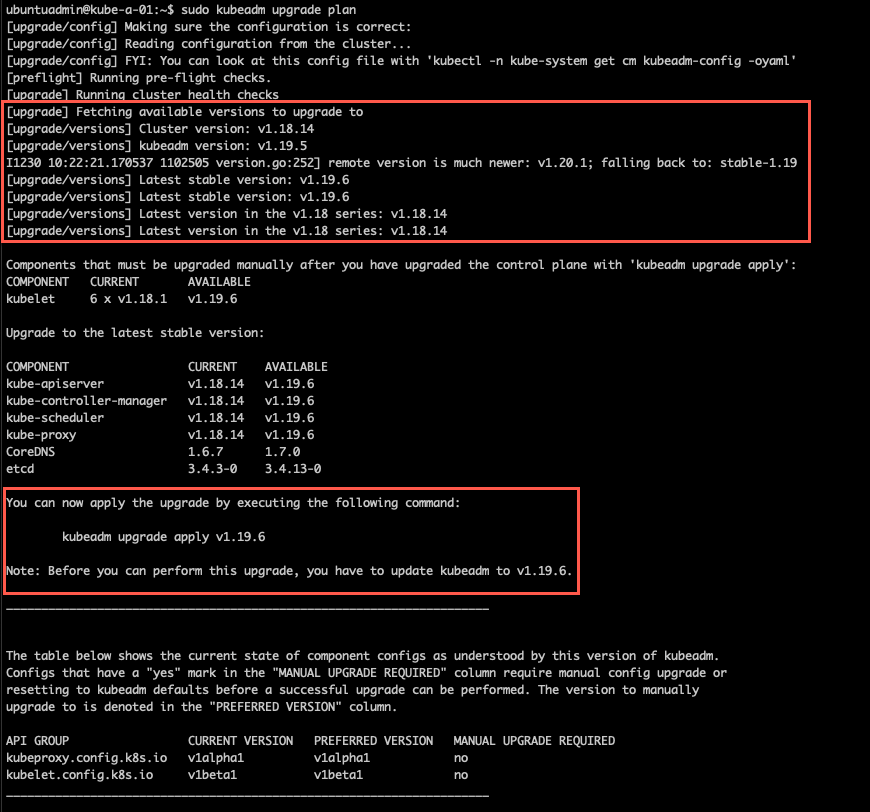
A couple of interesting things to note from the output is that it checks online to fetch the available versions. In my case it finds that there is a 1.20 version available, but it falls back to 1.19 since that is what I have installed. In the 1.19 version there is actually a newer patch version than what I installed.
The planner wants to do the 1.19.6 version where as I have installed kubeadm 1.19.5, hence I would need to upgrade kubeadm before running the actual upgrade.
I'm sticking with 1.19.5 and starting the upgrade with the kubeadm upgrade apply command
1sudo kubeadm upgrade apply v<MAJOR-VER>.<MINOR-VER>.<PATCH-VER>

After a short while the kubeadm upgrade is finished and outputs the status

Now, check if your CNI network provider plugin needs to be updated, I'm not documenting that in this post
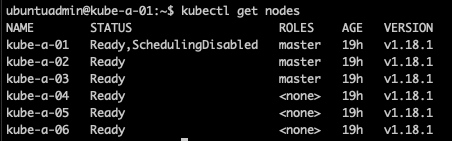
If we check the node status in the cluster we'll find that the version of the node is still at the old version (1.18.1 in my case), this is because we've only upgraded the kubeadm at this point.
Put first control plane node back to work
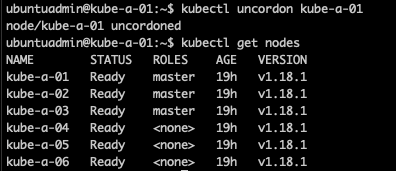
Now we can uncordon the node so it get's back into serving the cluster so we can continue with upgrading the other control plane nodes
1kubectl uncordon <node>
Upgrade kubeadm on other control plane nodes
Kubernetes documentation reference
Now we'll continue by upgrading kubeadm on the rest of the control plane nodes.
First unmark and install the new kubeadm version, then re-hold the package at the new version.
Before running the upgrade we'll drain the node
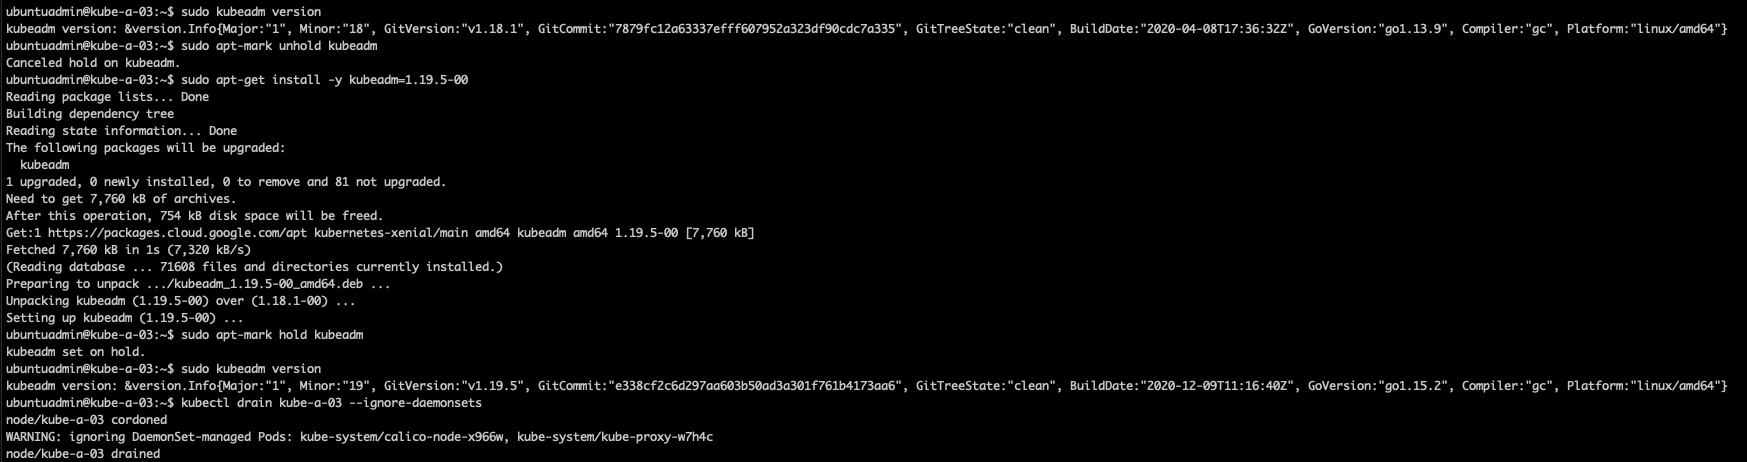
1sudo kubeadm version
2sudo apt-mark unhold kubeadm
3sudo apt-get install -y kubeadm=<VERSION>
4sudo apt-mark hold kubeadm
5sudo kubeadm version
6
7kubectl drain <NODE> --ignore-daemonsets
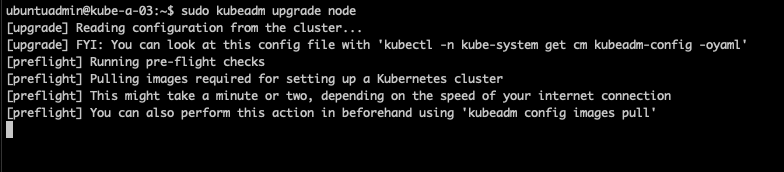
Now we can run the upgrade, we'll use the kubeadm upgrade command, but with the node parameter instead of apply <VERSION> as we used on the first control plane node (note that we do not have to run the kubeadm upgrade plan command on subsequent nodes).
1sudo kubeadm upgrade node
After a while the node is upgraded and we can continue with remaining control plane nodes.
Upgrade kubelet and kubectl
Kubernetes documentation reference
When all control plane nodes is upgraded we can upgrade the kubelet and kubectl.
The kubelet is a service running on the Operating system and not in Kubernetes it self so the install of the package is the actual upgrade.
To start using the new version we restart the daemon. Note that this will restart the containers on the nodes so run one node at a time and verify that the other nodes are running. So although not specified in the documentation I am evicting pods from the node I'm upgrading
The following needs to be done on all control plane nodes
Drain the node (not sure if this is really necessary, but guess it won't hurt...)
1kubectl drain <NODE> --ignore-daemonsets
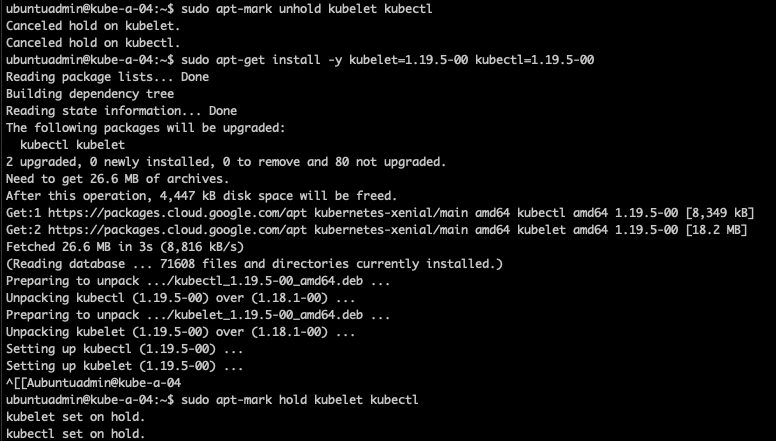
Unhold the package versions
1sudo apt-mark unhold kubelet kubectl
Install the new versions
1sudo apt-get install -y kubelet=1.19.5-00 kubectl=1.19.5-00
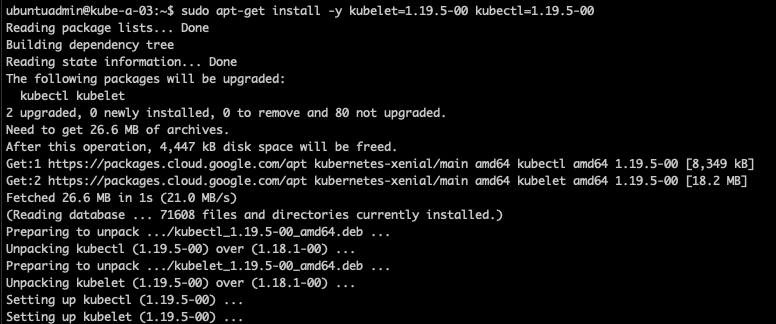
Re-hold the packages at current version
1sudo apt-mark hold kubelet kubectl
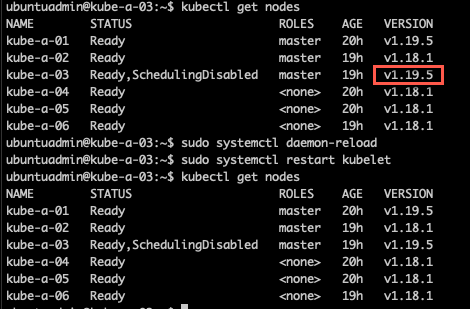
Now we'll reload the system services and restart the kubelet as per the Kubernetes documentation. Note that in my case the kubelet was already restarted as part of the upgrade, hence the version had already changed
1kubectl get nodes
2
3sudo systemctl daemon-reload
4sudo systemctl restart kubelet
5
6kubectl get nodes
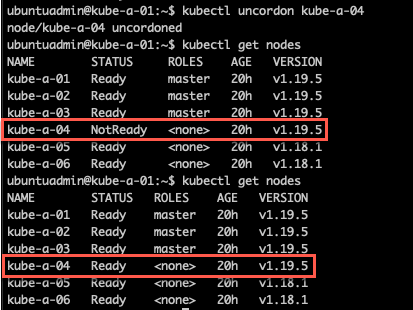
Remember to uncordon the node if you did this before the upgrade
1kubectl uncordon <NODE>
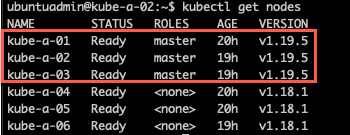
When all control plane nodes have been upgraded verify your cluster status before continuing with the worker nodes
Upgrade worker nodes
Kubernetes documentation reference
High-level steps for upgrading worker nodes (with kubeadm):
- Upgrade kubeadm package
- Drain node to evict running containers
- Run kubeadm upgrade
- Upgrade kubelet and kubectl
- Put node back to work
The steps is quite similar to the control plane nodes so I'll just note the commands and skip some of the screenshots.
Make sure you do one node at a time and that you verify that the other nodes are running. In a production environment you'd probably also monitor the load of the cluster as you upgrade, especially if you are upgrading multiple nodes at once. For a VI admin you can compare this to upgrading ESXi hosts in a compute cluster
Upgrade kubeadm binaries
1sudo kubeadm version #Verify current version
2
3sudo apt-mark unhold kubeadm
4sudo apt-get install -y kubeadm=<VERSION>
5sudo apt-mark hold kubeadm
6
7sudo kubeadm version #Verify new version
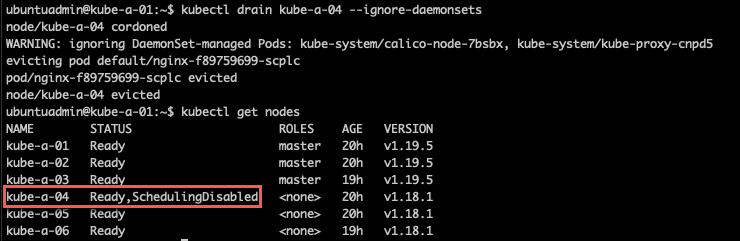
Drain node
Note that we're using kubectl here. If kubectl is not configured on your worker node you can run the commands from your admin machine or one of the control plane nodes
1kubectl get nodes #Verify cluster status
2kubectl drain <NODE> --ignore-daemonsets
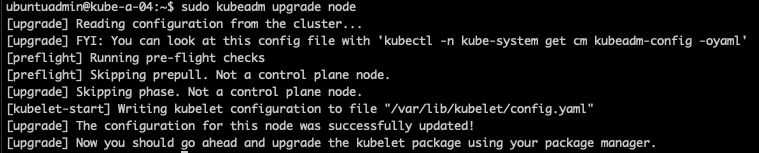
Upgrade kubeadm
Running the kubeadm upgrade node command on a worker is quite fast since it's only updating the kubelet configuration file
1sudo kubeadm ugprade node
Upgrade kubelet and kubectl
1sudo apt-mark unhold kubelet kubectl
2sudo apt-get install -y kubelet=<VERSION> kubectl=<VERSION>
3sudo apt-mark hold kubelet kubectl
4
5sudo systemctl daemon-reload
6sudo systemctl restart kubelet
Uncordon node and verify status
After upgrading put the node back in to scheduling and verify the cluster status. Note that it might take a short while before the node is ready
Verify cluster status
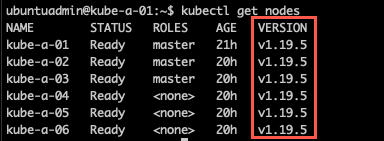
After running the upgrade on all worker nodes our cluster should be all up and running on the new version
1kubectl get nodes
Note that if you're running kubectl from a machine outside of the cluster it migh need to be updated as well
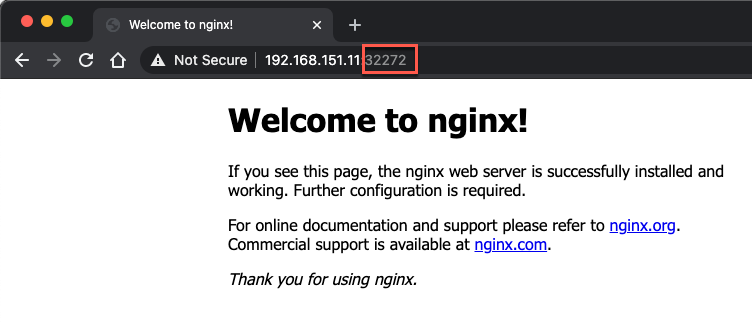
If you have any services running on the cluster go ahead and verify that they are still working. In my case I have a nginx pod running and exposed through a NodePort service which let's me access it from outside the cluster

Note that if you use the kubectl get componentstatuses command this will probably throw a warning and report that the scheduler and controller-manager are unhealthy

The componentstatuses has been deprecated in 1.19,see here and here, so this can be ignored.
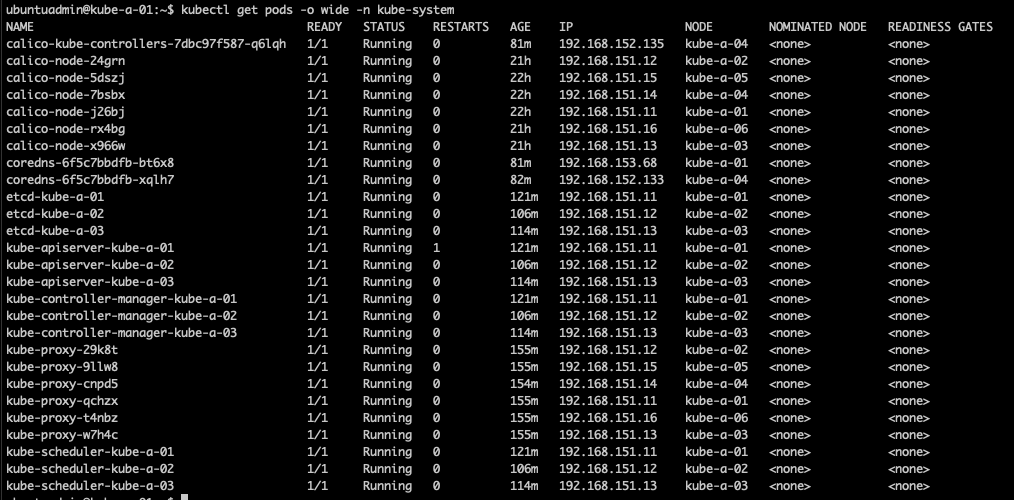
One extra check to do is to ensure that all pods in the kube-system namespace is running
1kubectl -n kube-system get pods -o wide
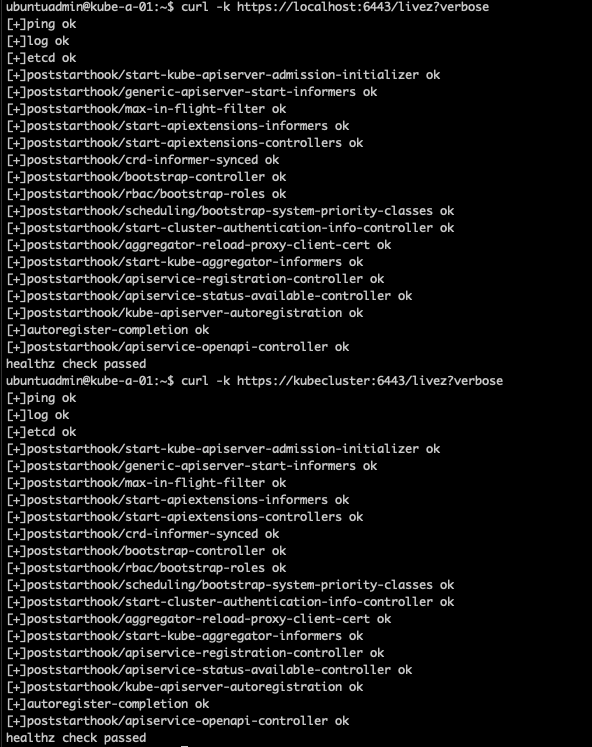
We can also check the API health endpoints on the nodes
1curl -k https://localhost:6443/livez?verbose
Summary
This post has shown how to run the upgrade of Kubernetes control plane and worker nodes with kubeadm. Again, please make sure you follow any additional steps needed for doing this in a production environment and refer to the Kubernetes documentation specific for your version
Thanks for reading.