Deploying a Proxmox Cluster backed by Ceph
In a few previous posts we've seen how to deploy Proxmox and how to configure a Proxmox Cluster. In the previous cluster post we worked with hosts backed by ZFS storage, i.e. no shared storage. In this post we'll take a look at how to use Ceph as the storage for the cluster.
Whereas the previous cluster posts also supported failover scenarios those all came with a cost of data loss depending on the replication of data between the hosts. With Ceph as the storage backend the workloads will run on shared storage between the hosts and in case of a failure the workload should still be up and running and no data should be lost.
Note that there's many different failure scenarios, many which might result in data loss even in my example architecture here in my lab environment. Please make sure that you design for failure scenarios relevant to your environment and architecture
Let's get started
Cluster architecture
The architecure used in this design looks something like the following

We have three hosts with internal storage (SSD disk) and each host has a few networks connected. In the design we have separated the management, cluster and storage networking on different interfaces and networks. In this setup the management is shared with the VM traffic, but in a real-world scenario these would also be separated, and we would also have multiple network interface cards for the different networks/use-cases.
The best practice is to separate the storage replication from the cluster network traffic as both are latency sensitive and critical for the performance of the cluster
Please refer to this section from the Proxmox Ceph deployment documentation: If unsure, we recommend using three (physical) separate networks for high-performance setups:
- one very high bandwidth (25+ Gbps) network for Ceph (internal) cluster traffic.
- one high bandwidth (10+ Gpbs) network for Ceph (public) traffic between the ceph server and ceph client storage traffic.
- one medium bandwidth (1 Gbps) exclusive for the latency sensitive corosync cluster communication.
The amount of nodes and disks in those nodes used in this environment does not neccessarily meet best practices. Please make sure that you design your architecture based on the the use-cases your cluster is supposed to solve.
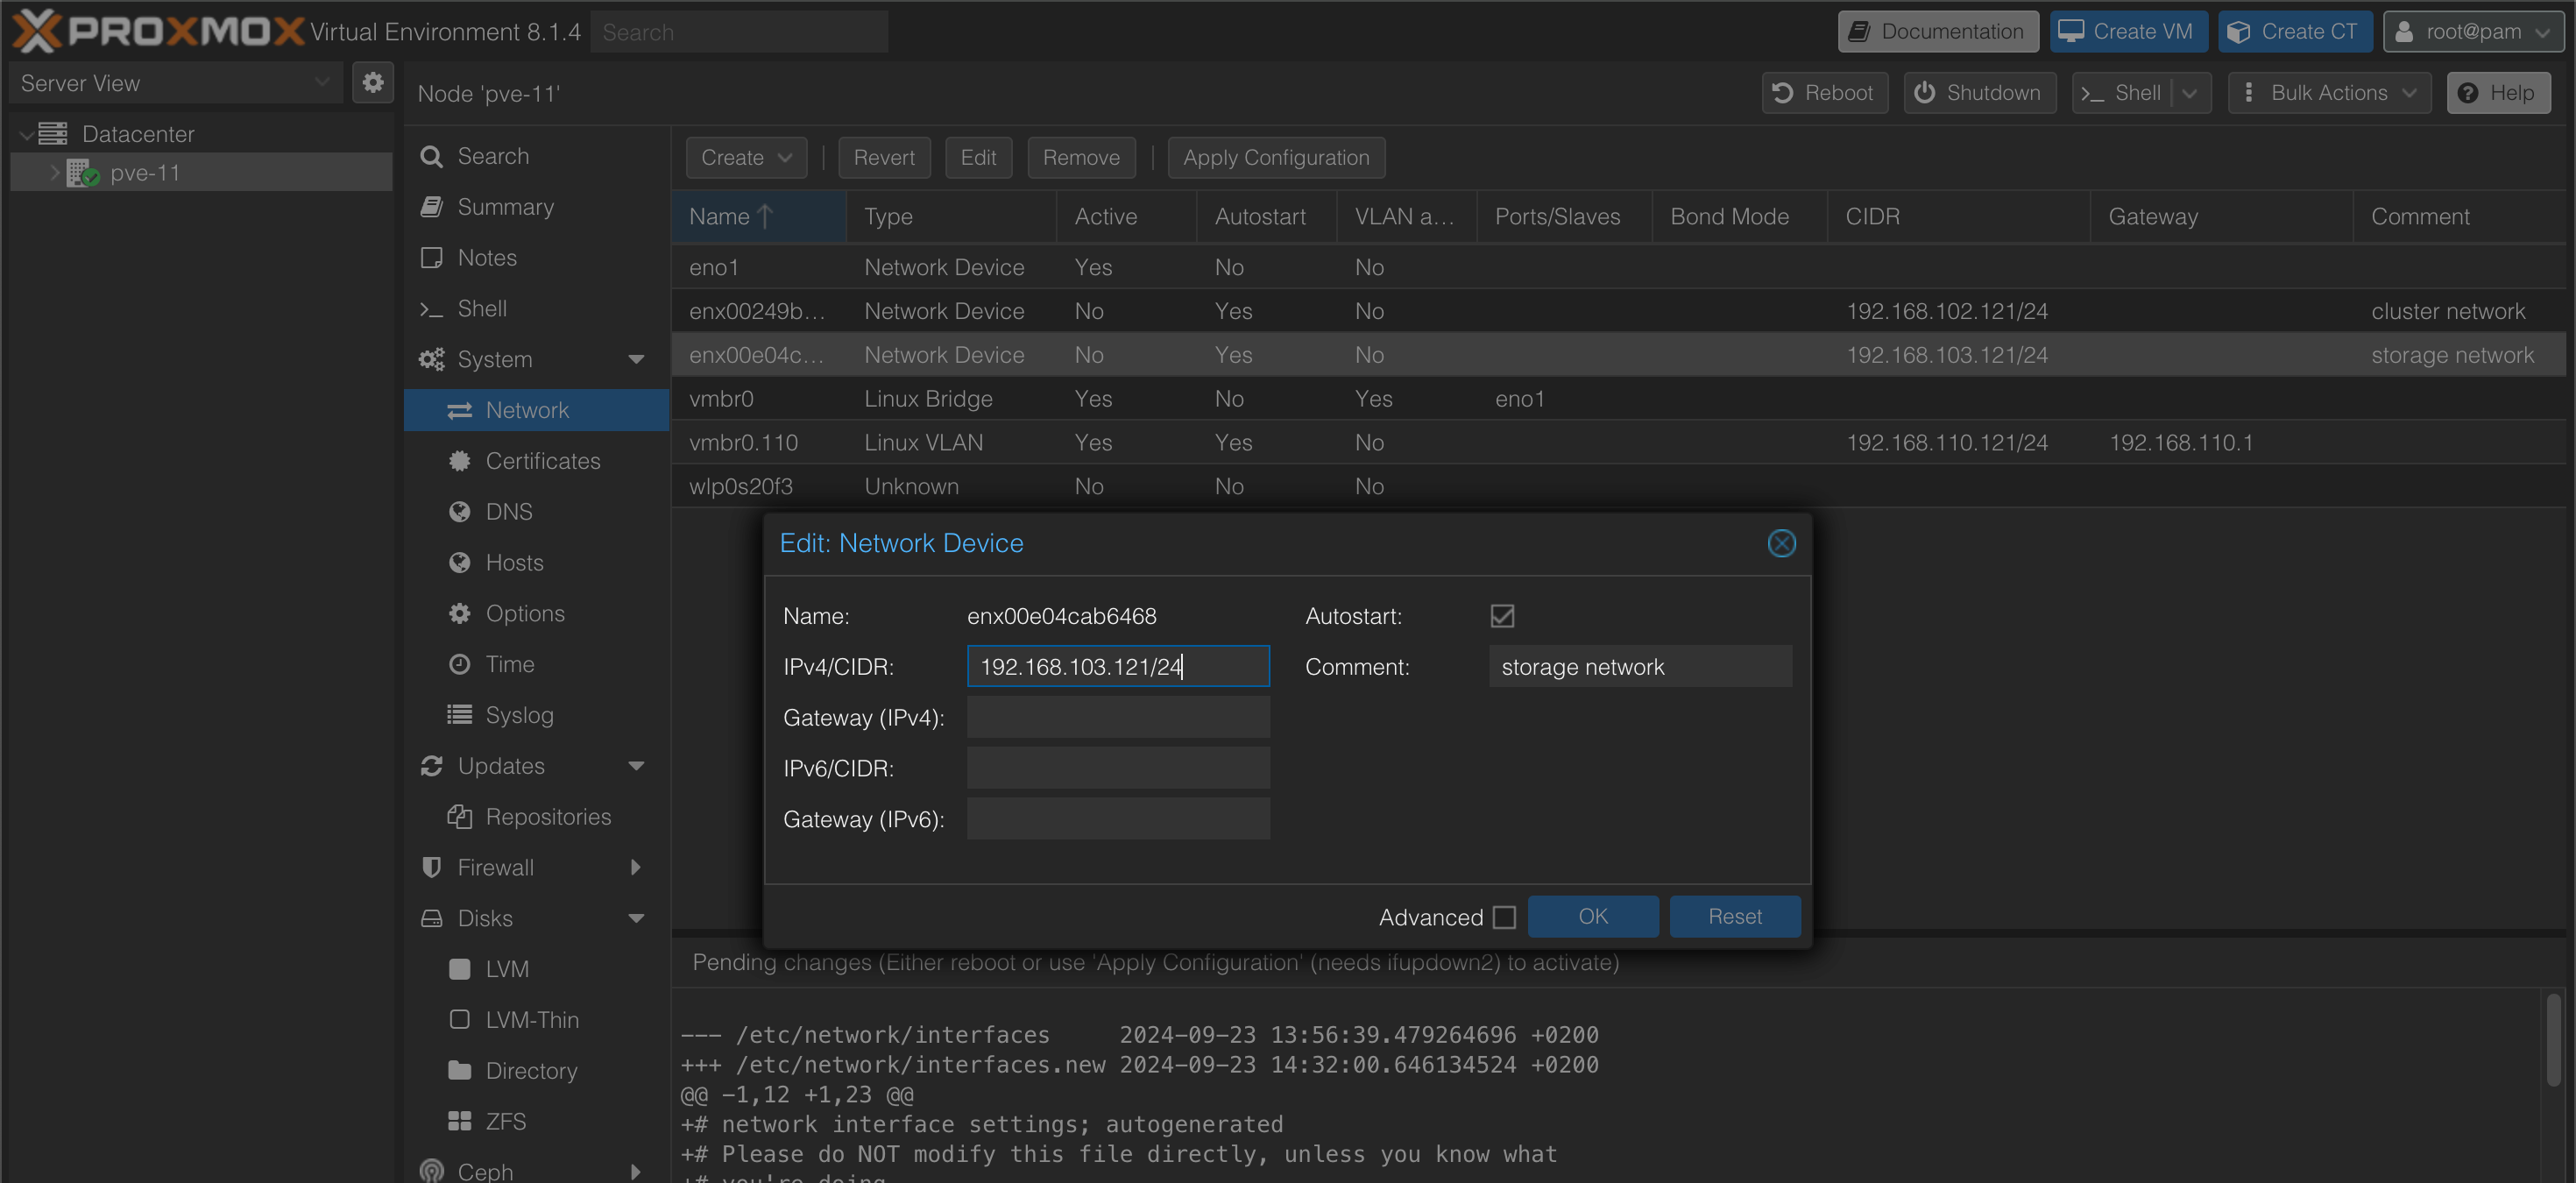
Host networking
Before creating our cluster we'll set up the networking on the hosts. We'll configure the nic's for cluster traffic and storage traffic.
Create cluster
Now, let's go ahead and create the cluster.
In the cluster creation wizard we'll give the cluster a name, and we'll specify the network to use for cluster traffic. In this example we'll specify both the cluster traffic nic and the storage nic as this could give us some failover capabilities should the cluster nic experience any issues.

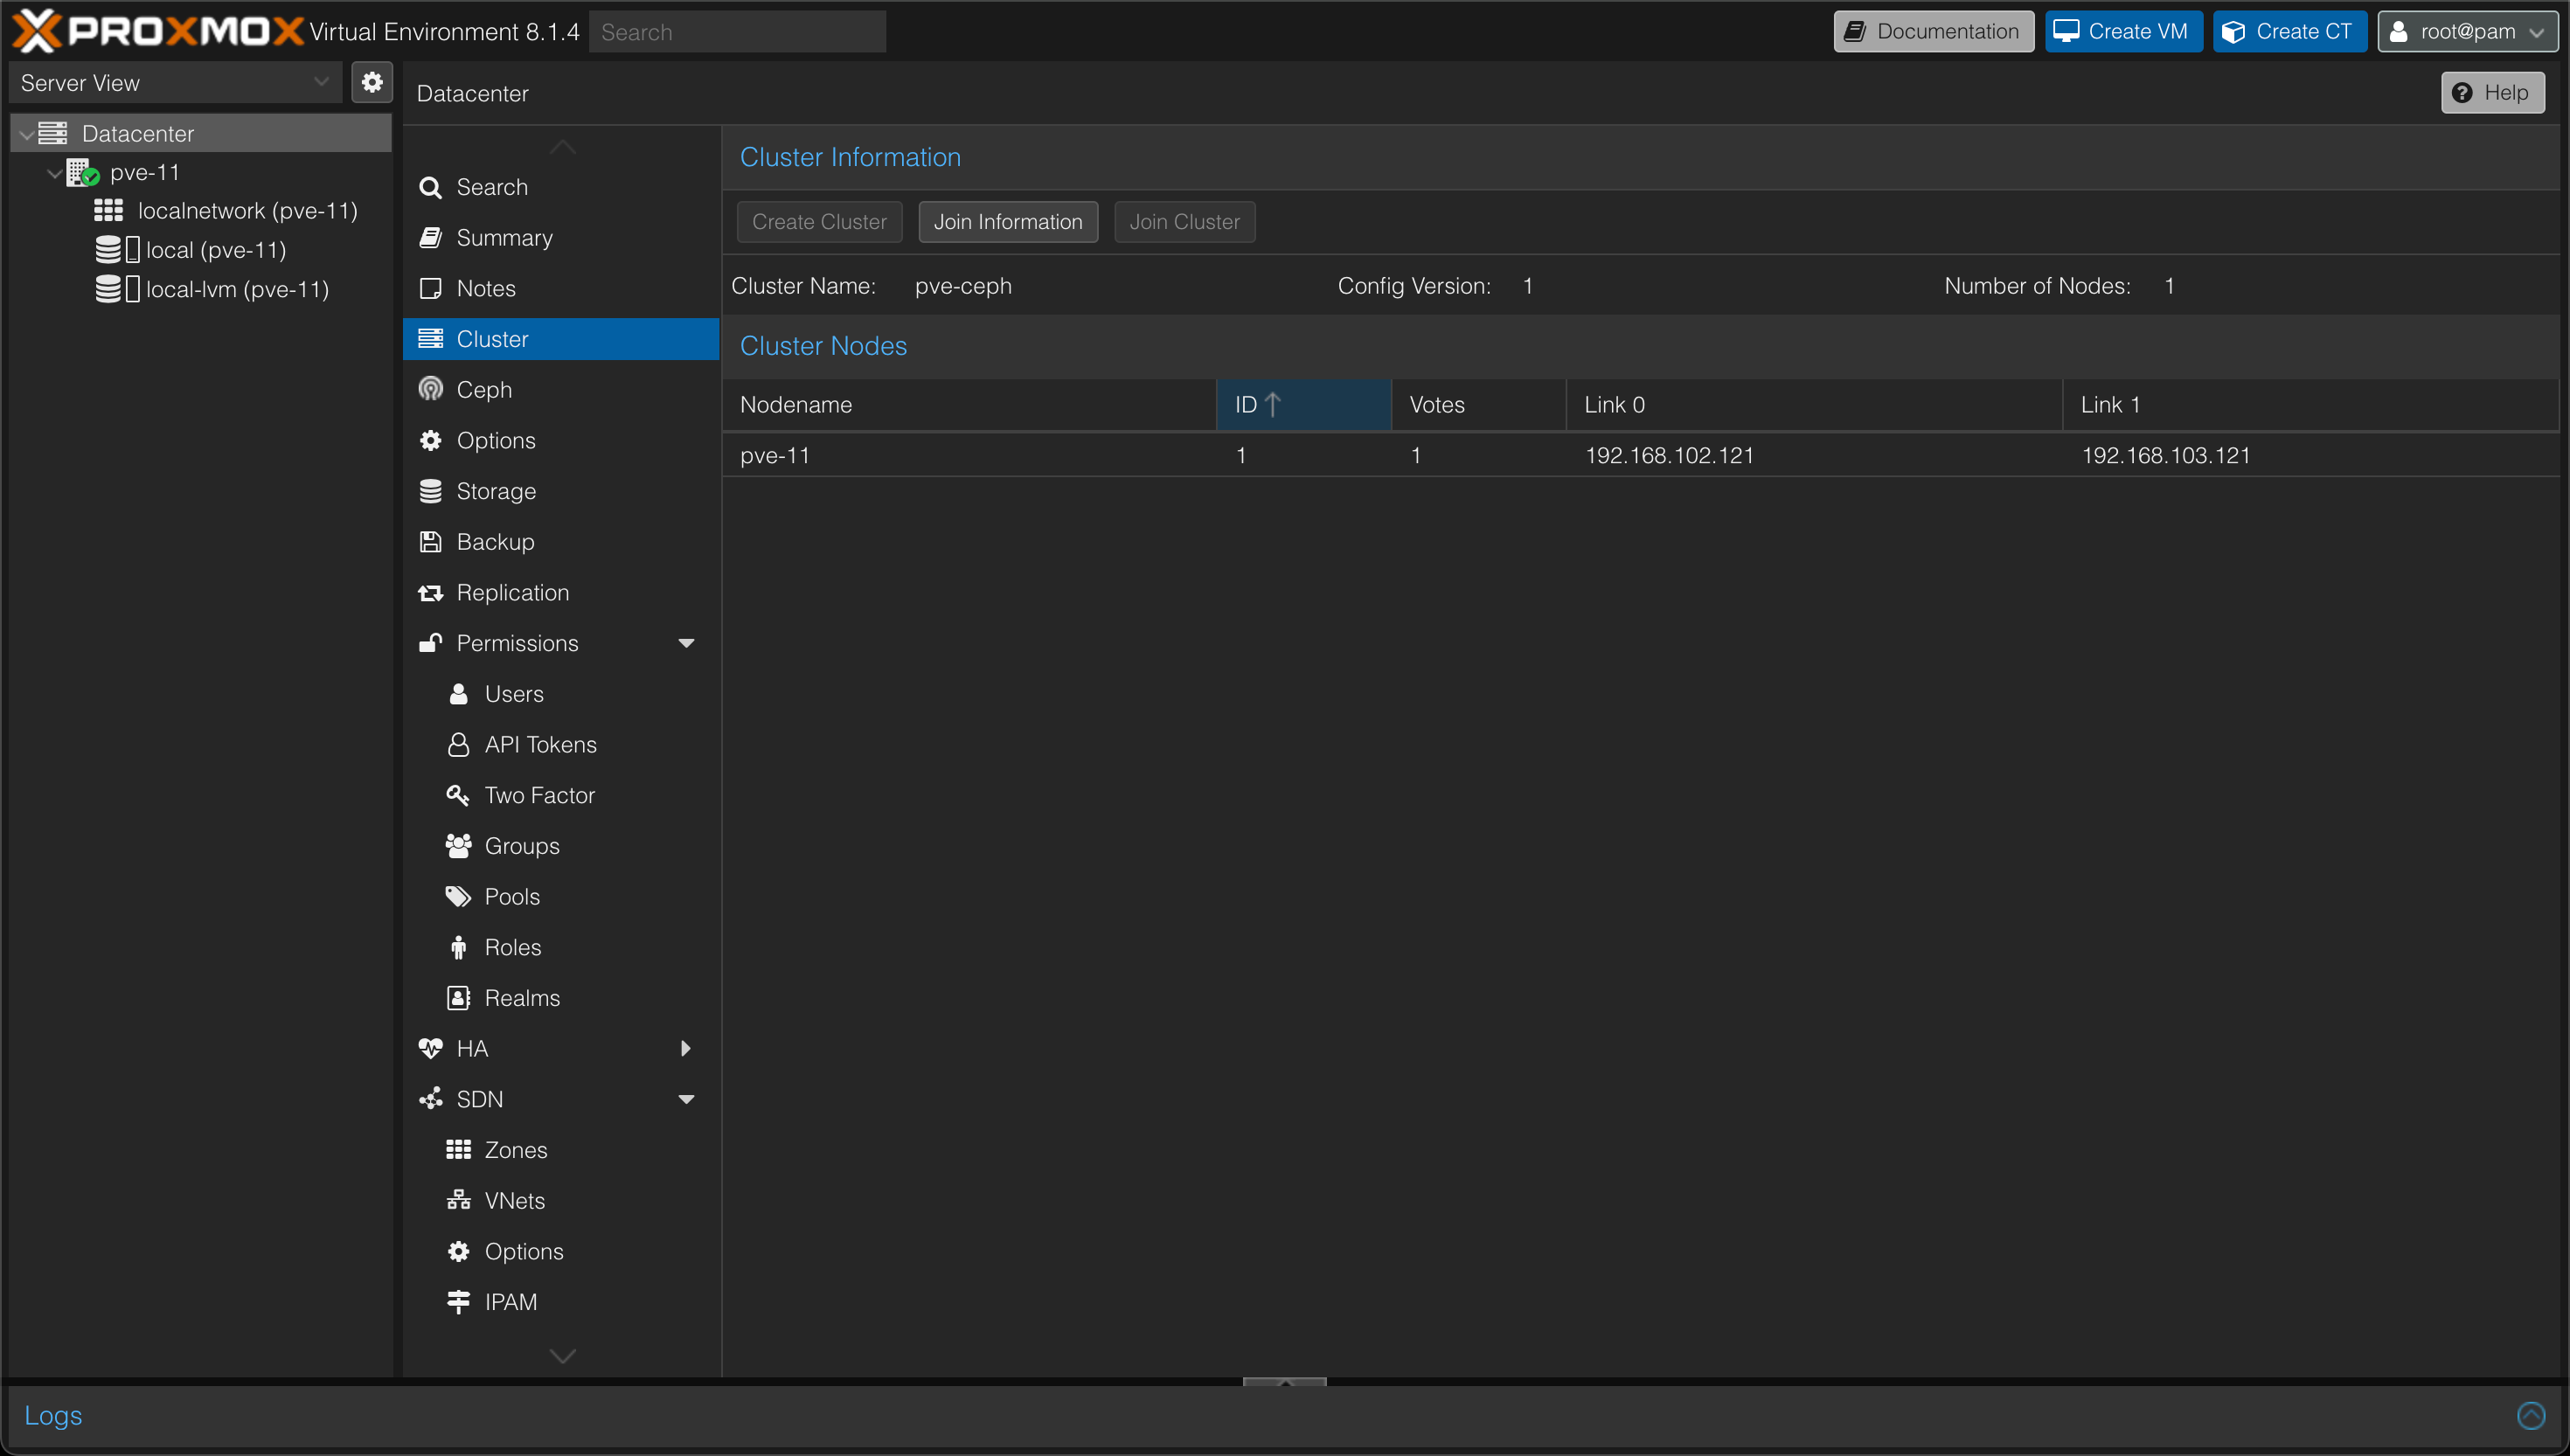
After successful creation of the cluster our Cluster page (on the Datacenter object) should look like something like the following
Add nodes to cluster
Now, we can go ahead and add the remaining two servers as cluster nodes.
From the cluster view we'll hit the "Join information" button to get the token needed for joining additional nodes.

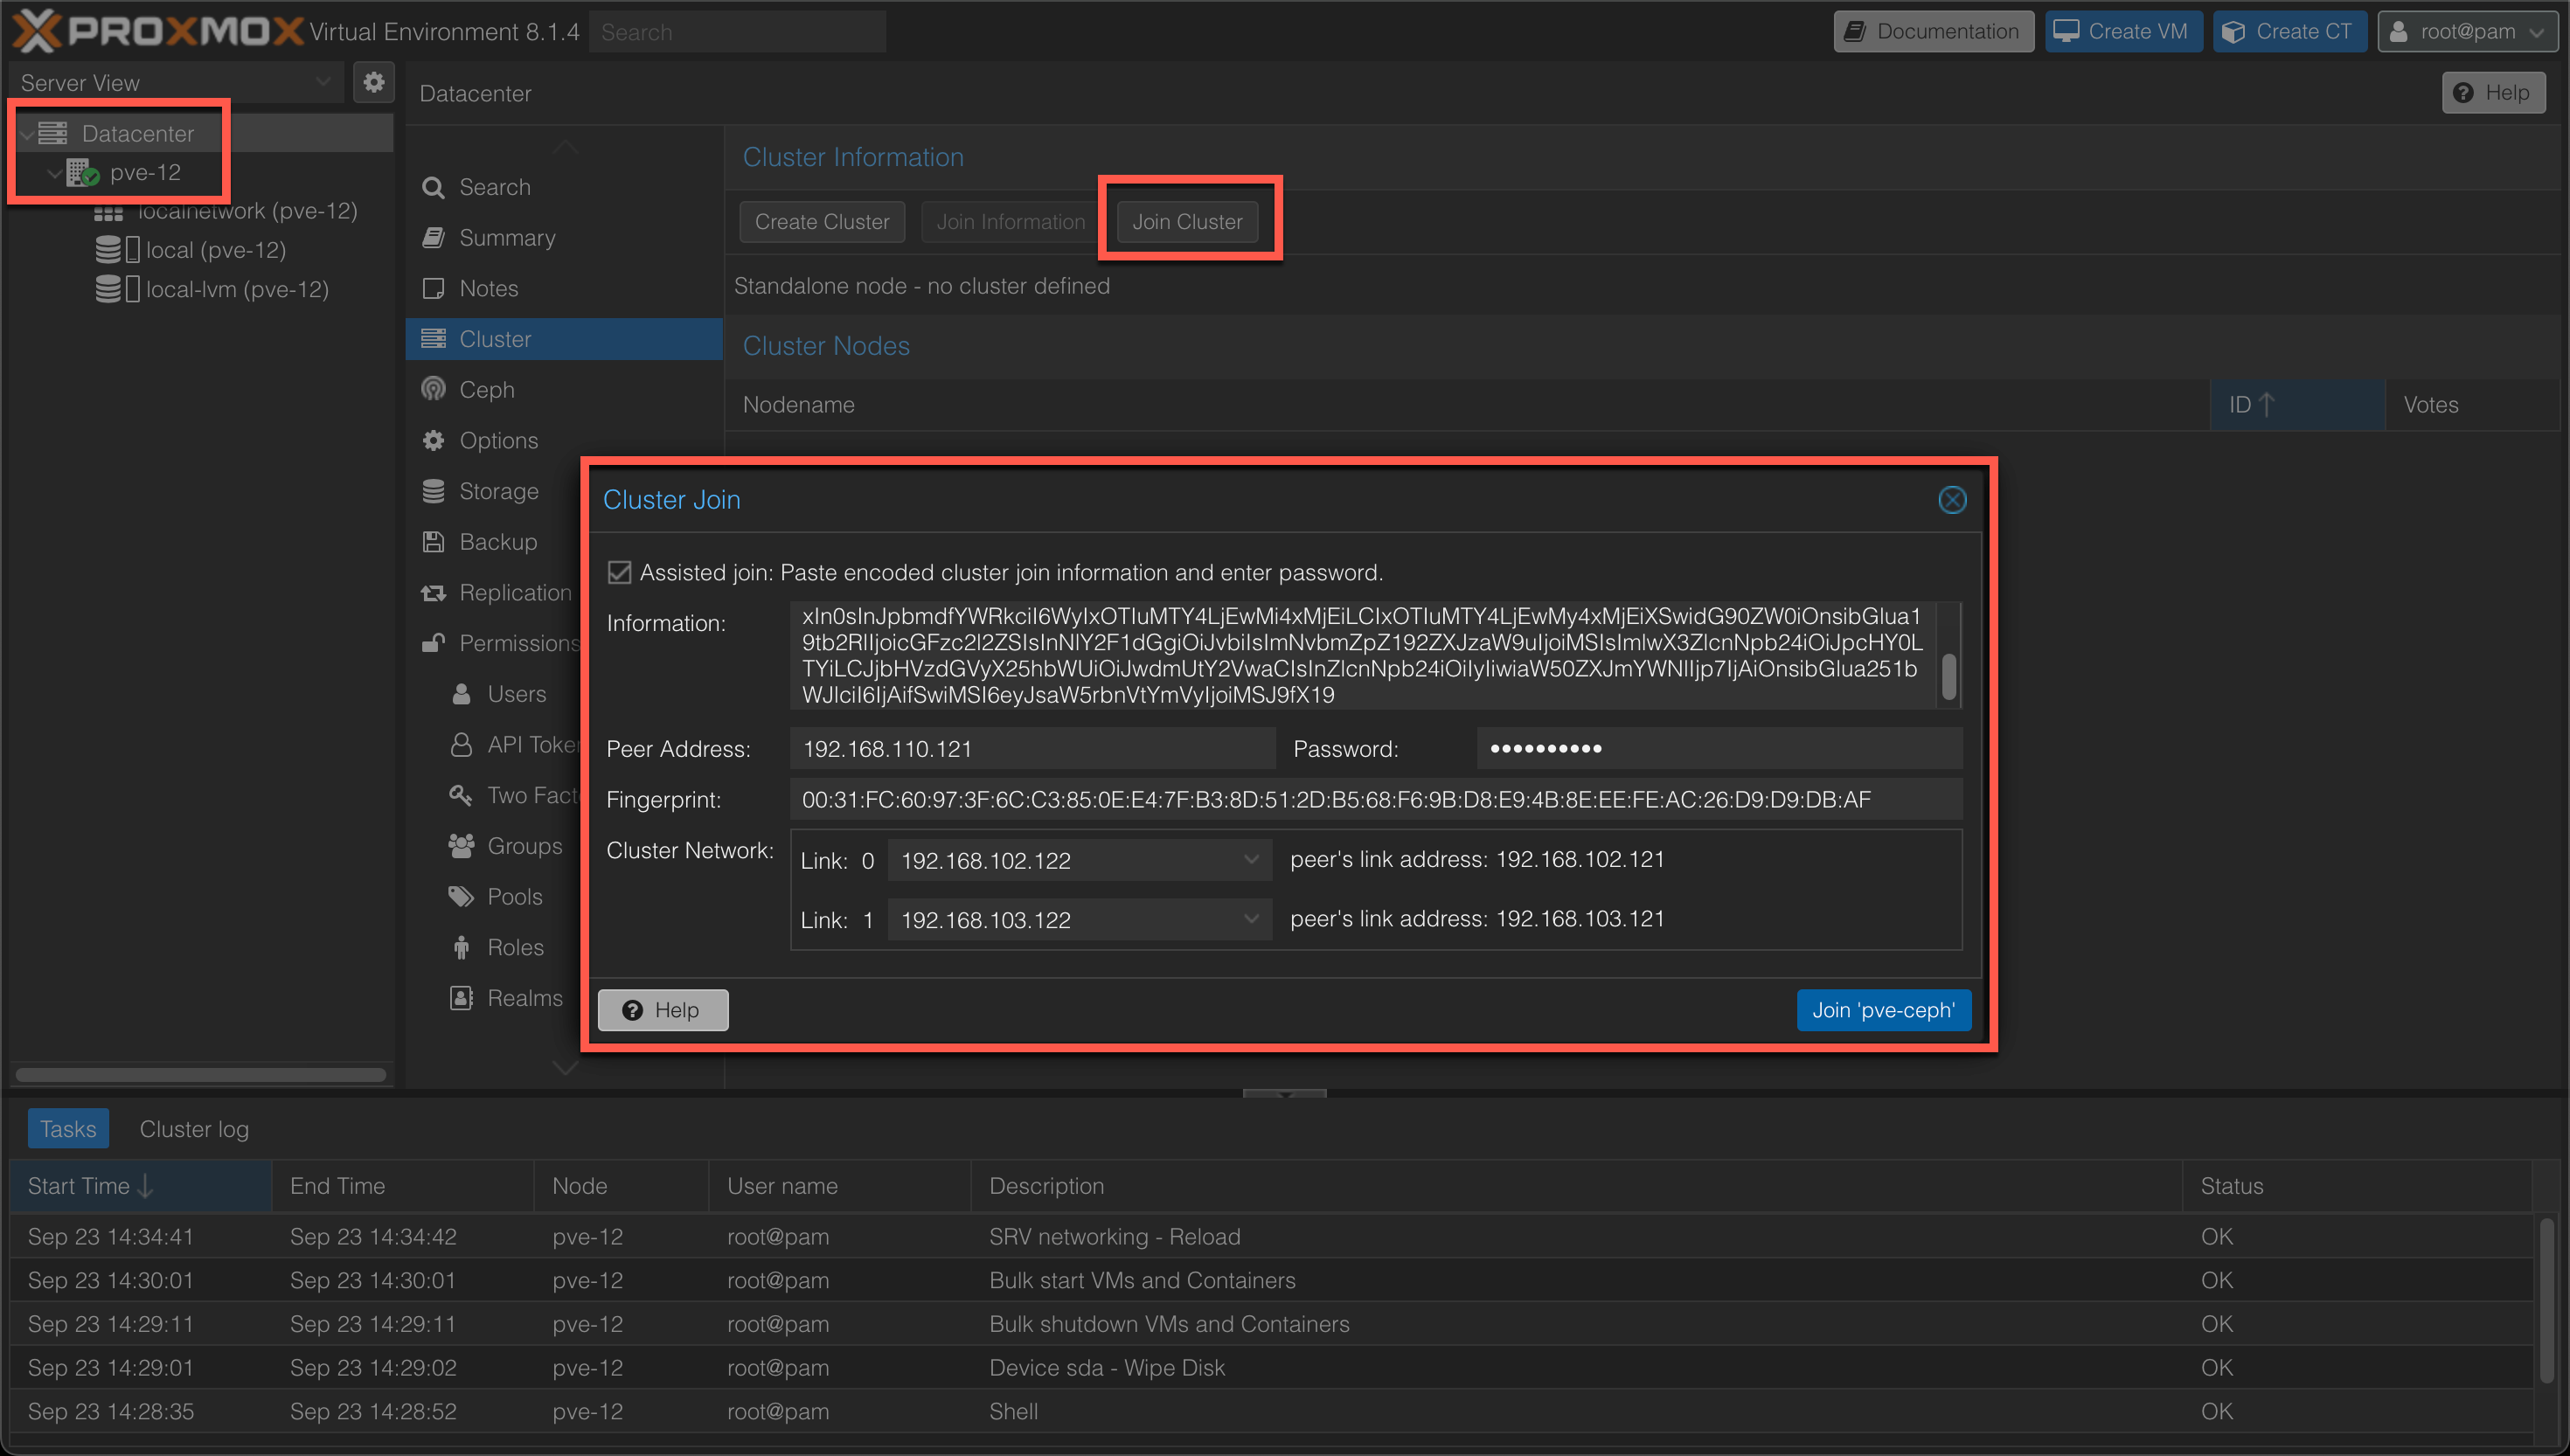
Now, on each of the two nodes we'll go to it's Datacenter object and hit cluster and then the "Join cluster" button and paste in the token. We'll also add the root password of the first node, and select the two links for the Cluster network
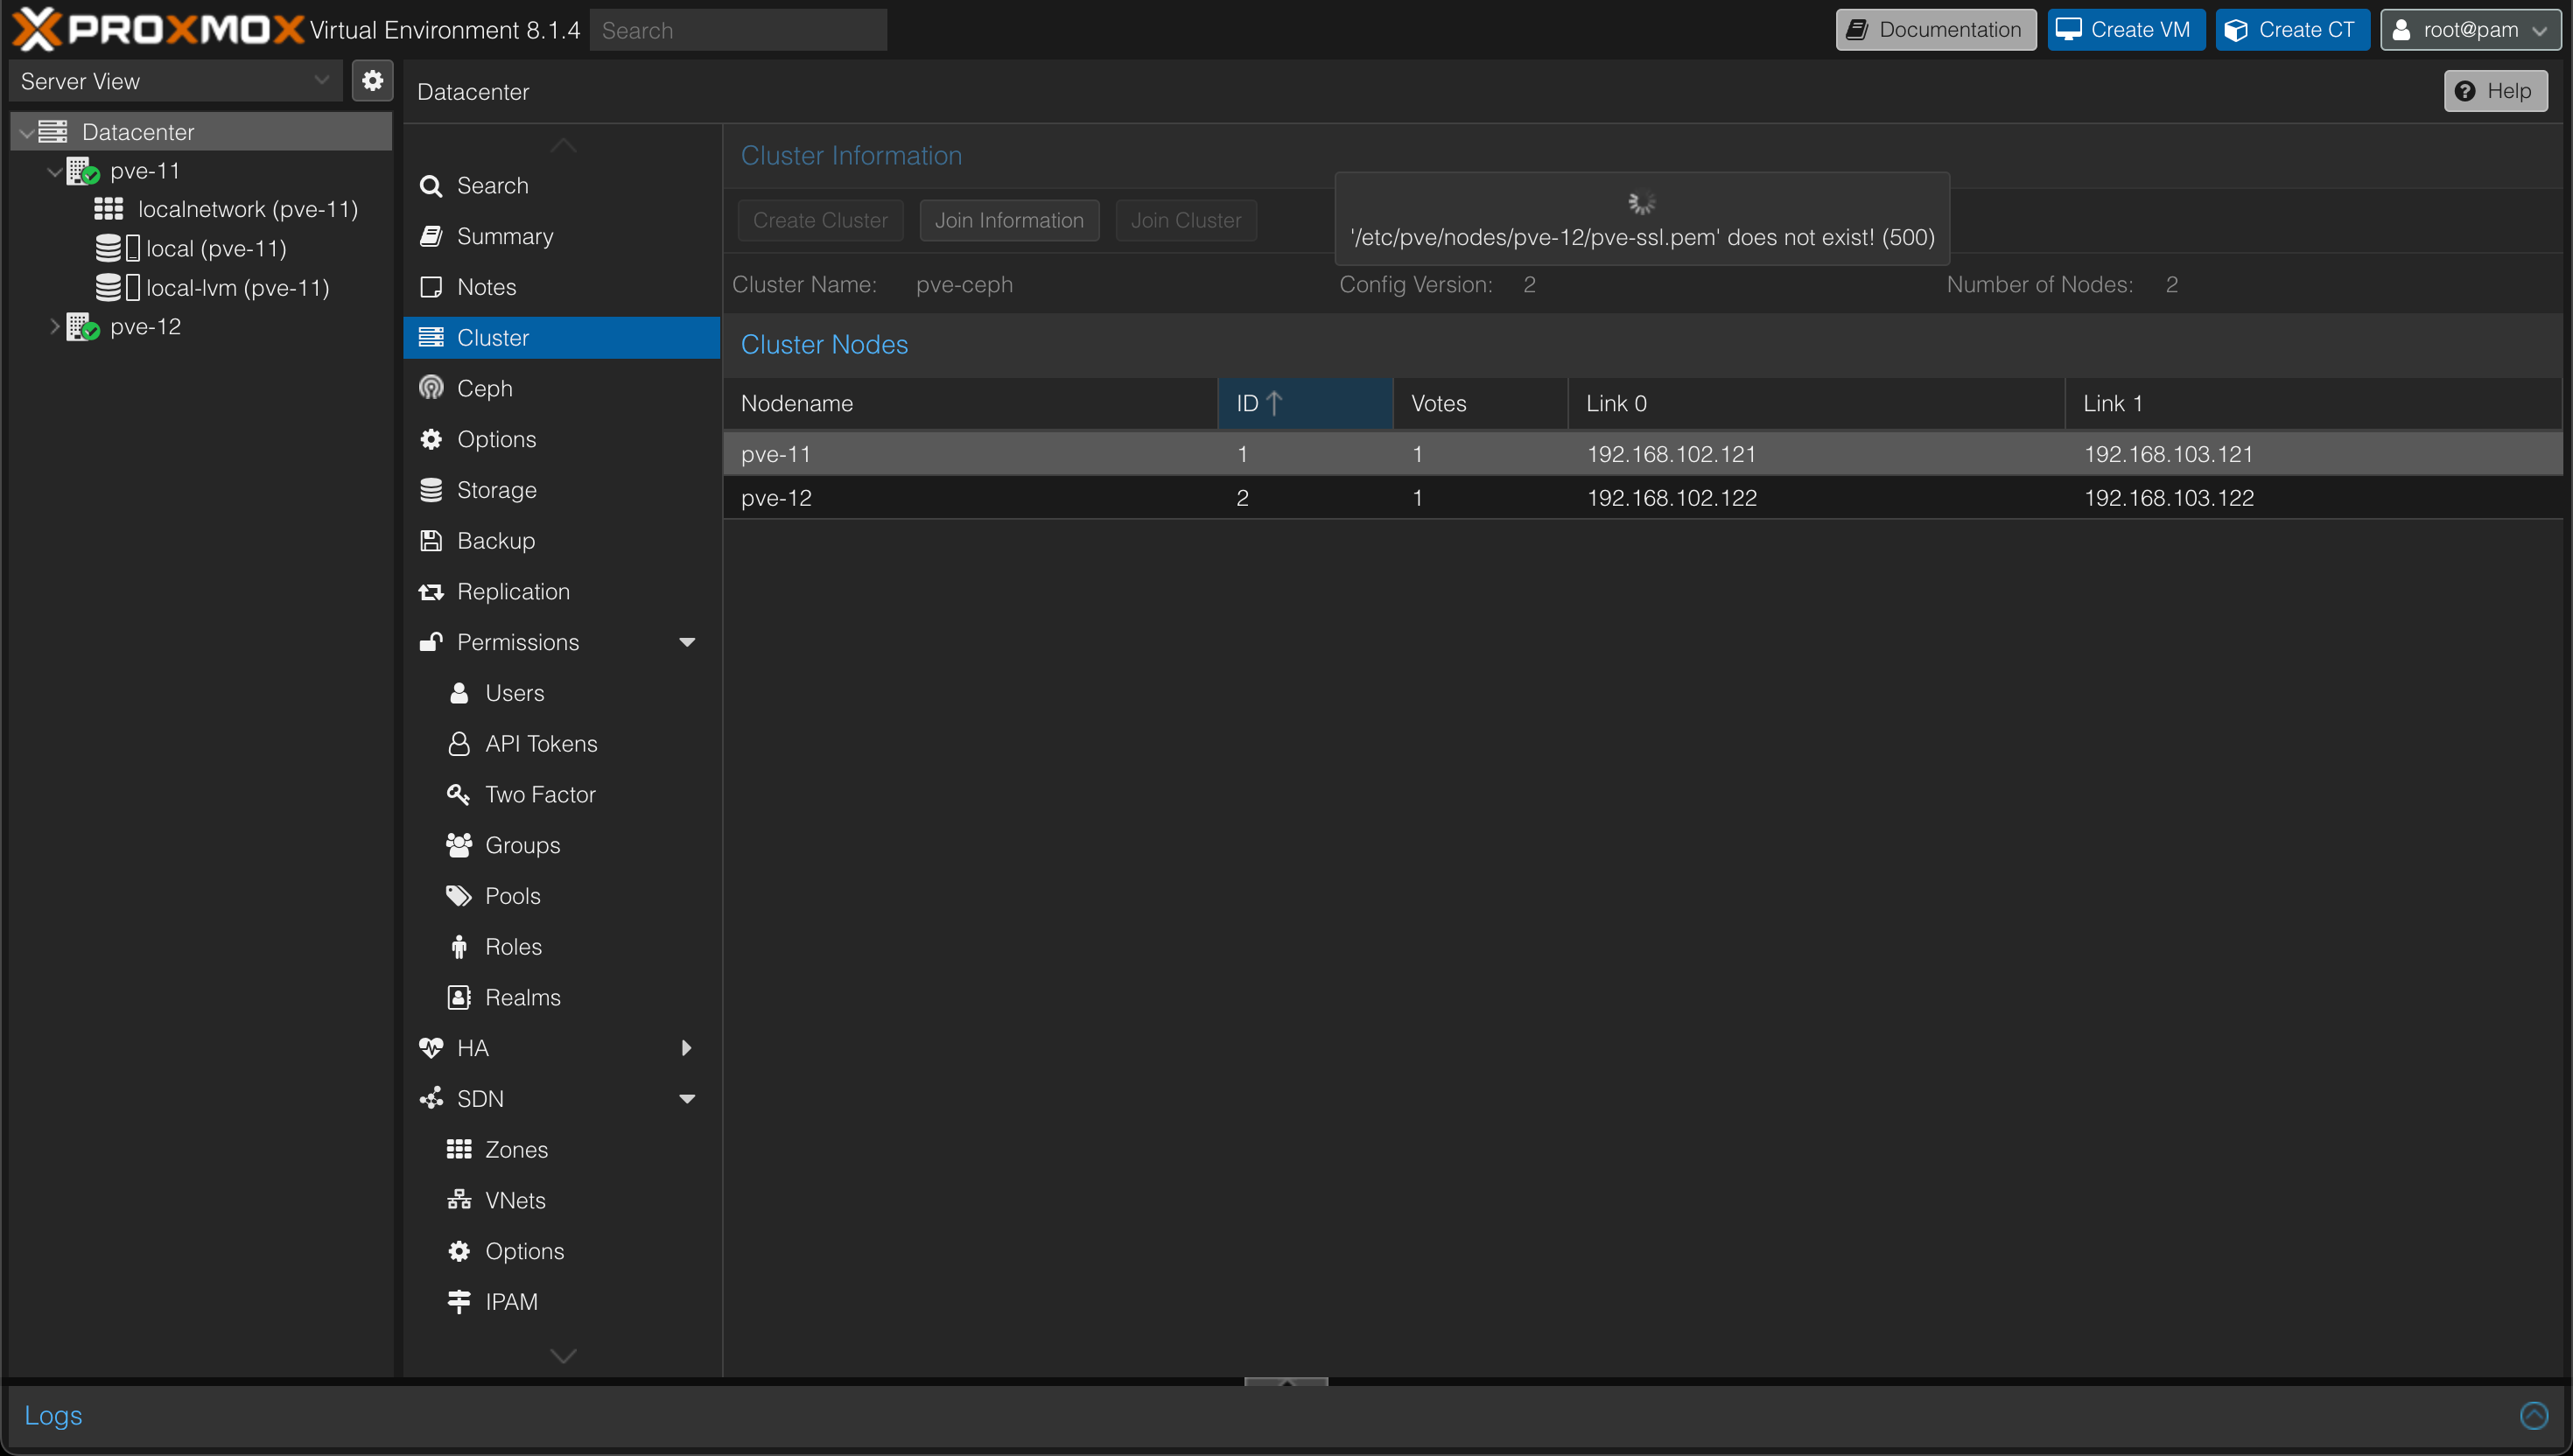
After hitting the join button the join cluster process will start. After a few seconds you might notice that there's a communication error displayed
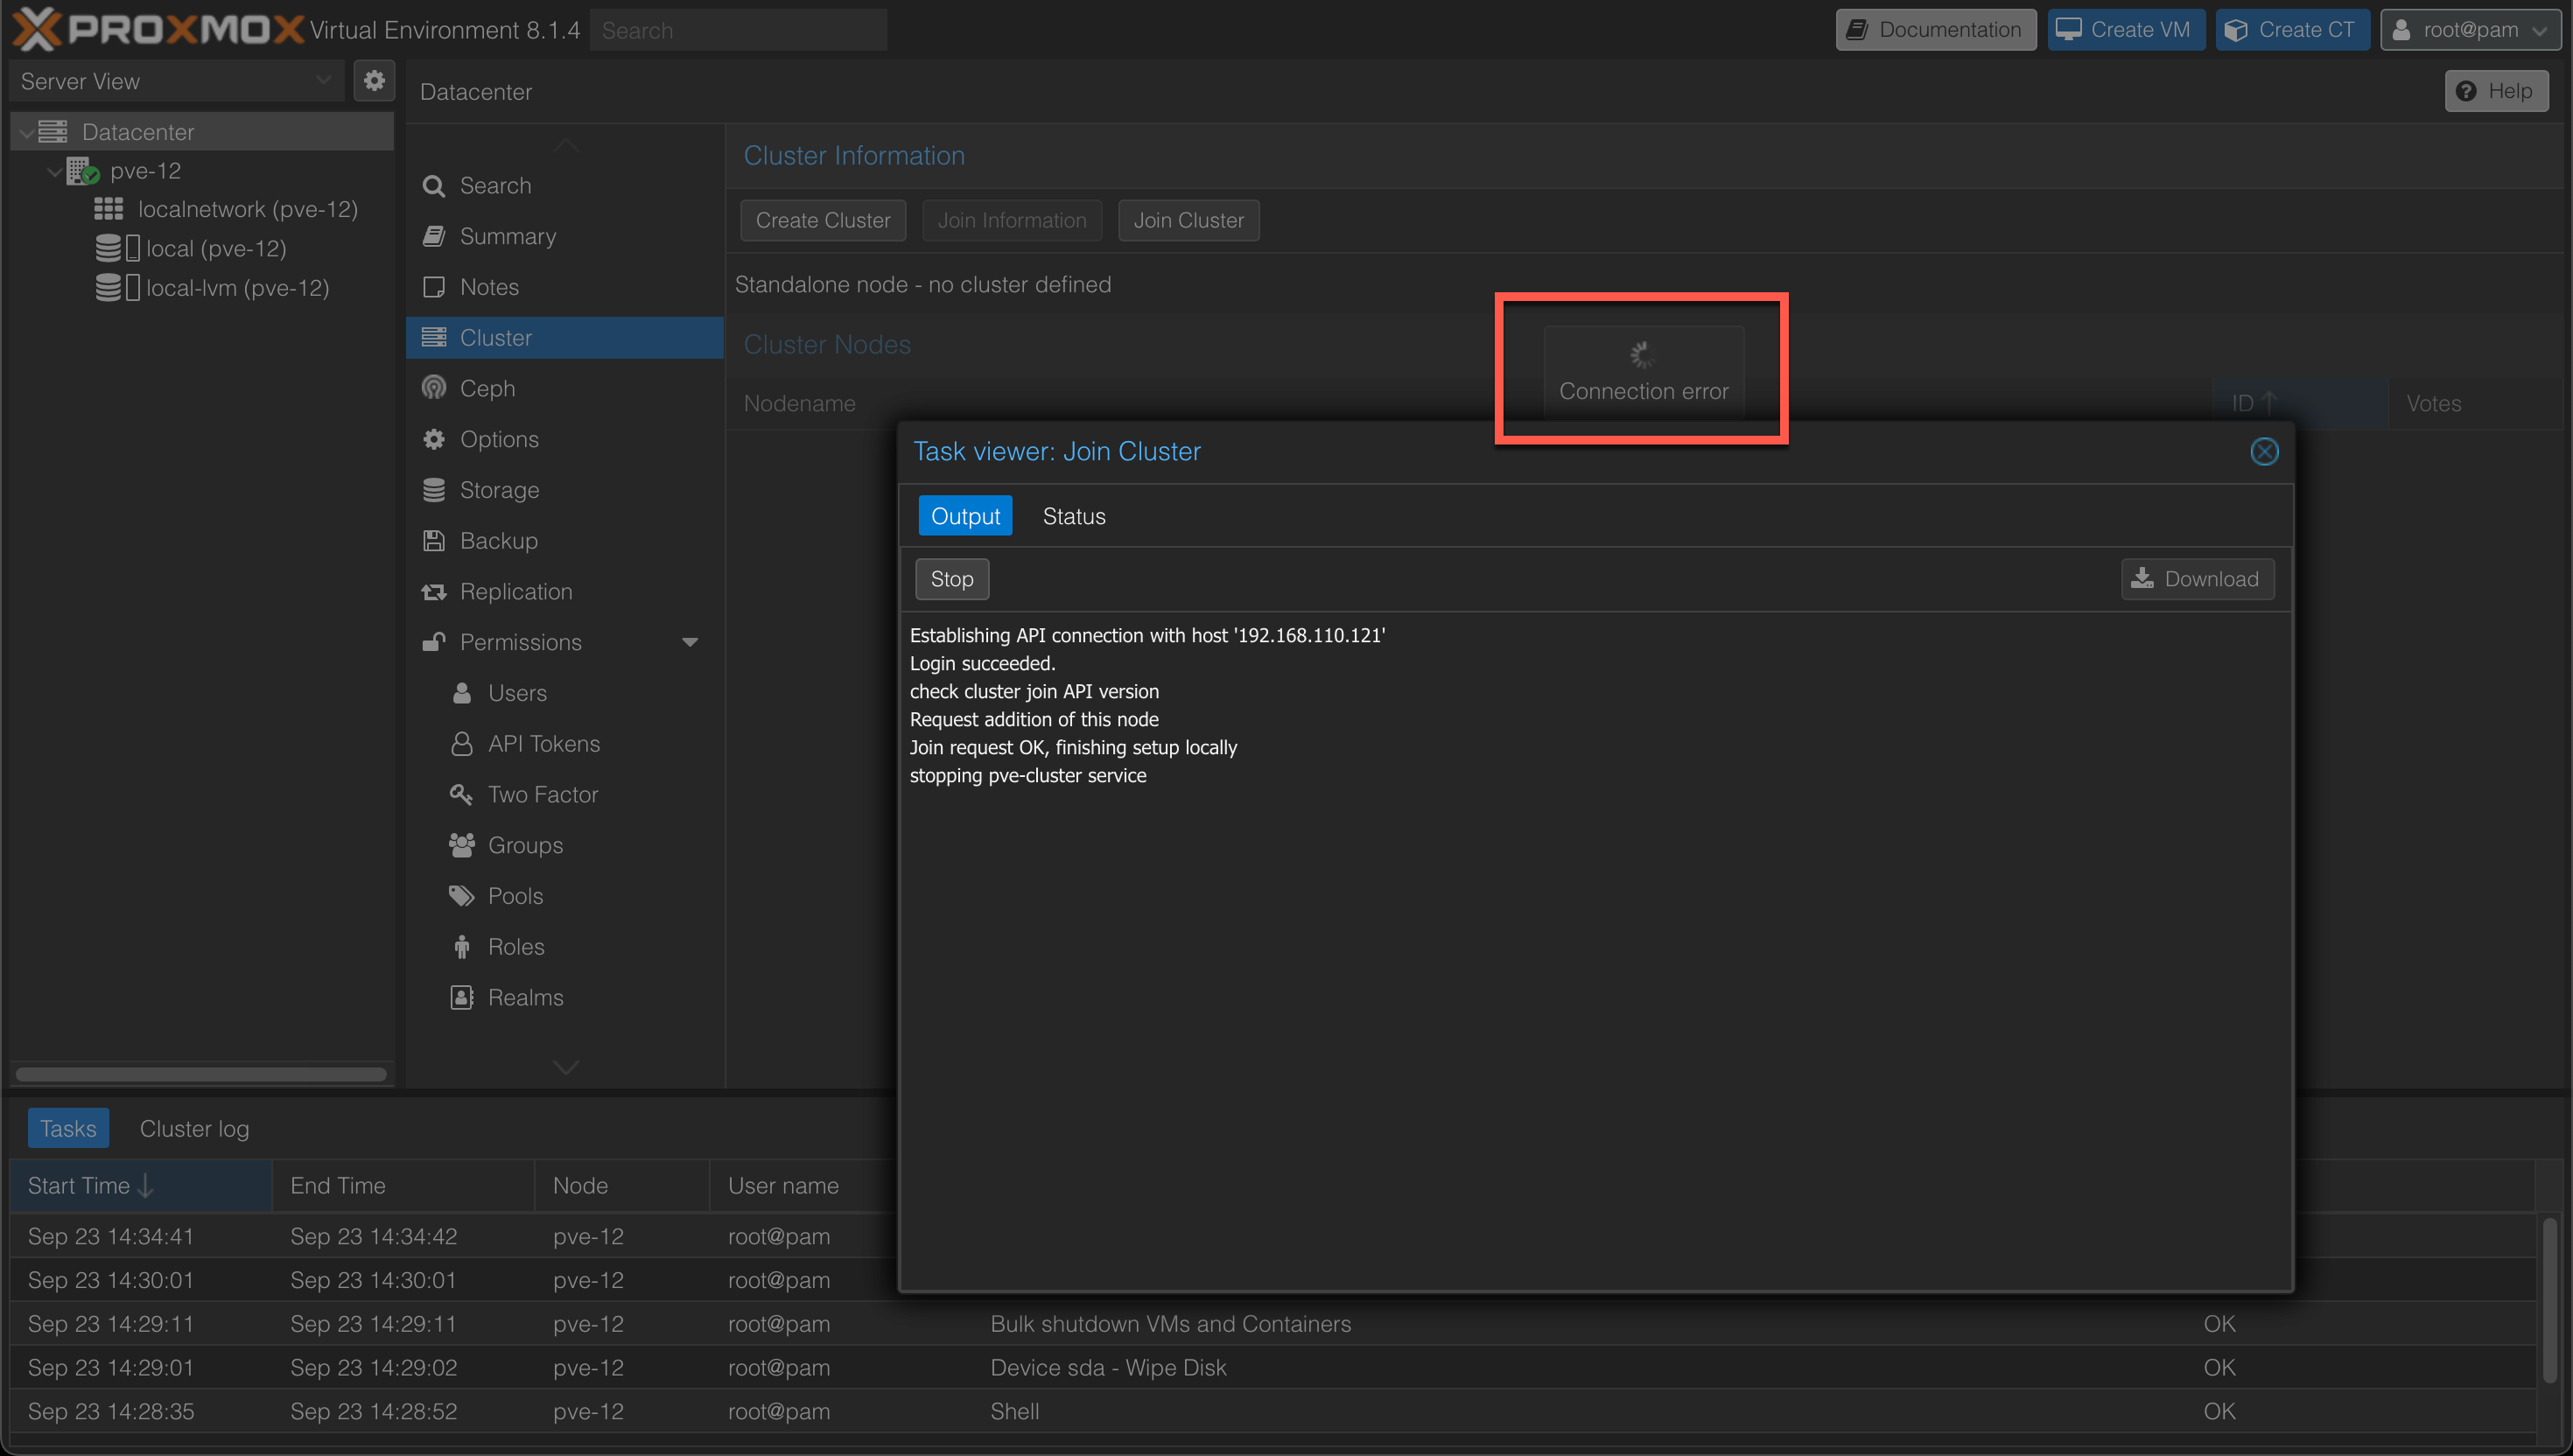
I suspect this comes from the fact that the Join cluster tasks restarts the pve-cluster service, but in my experience it won't finalize the task in the UI.
Looking at the Cluster view on our first node we might also get an error concerning a pve-ssl.pem file, but we can see that the node has joined.
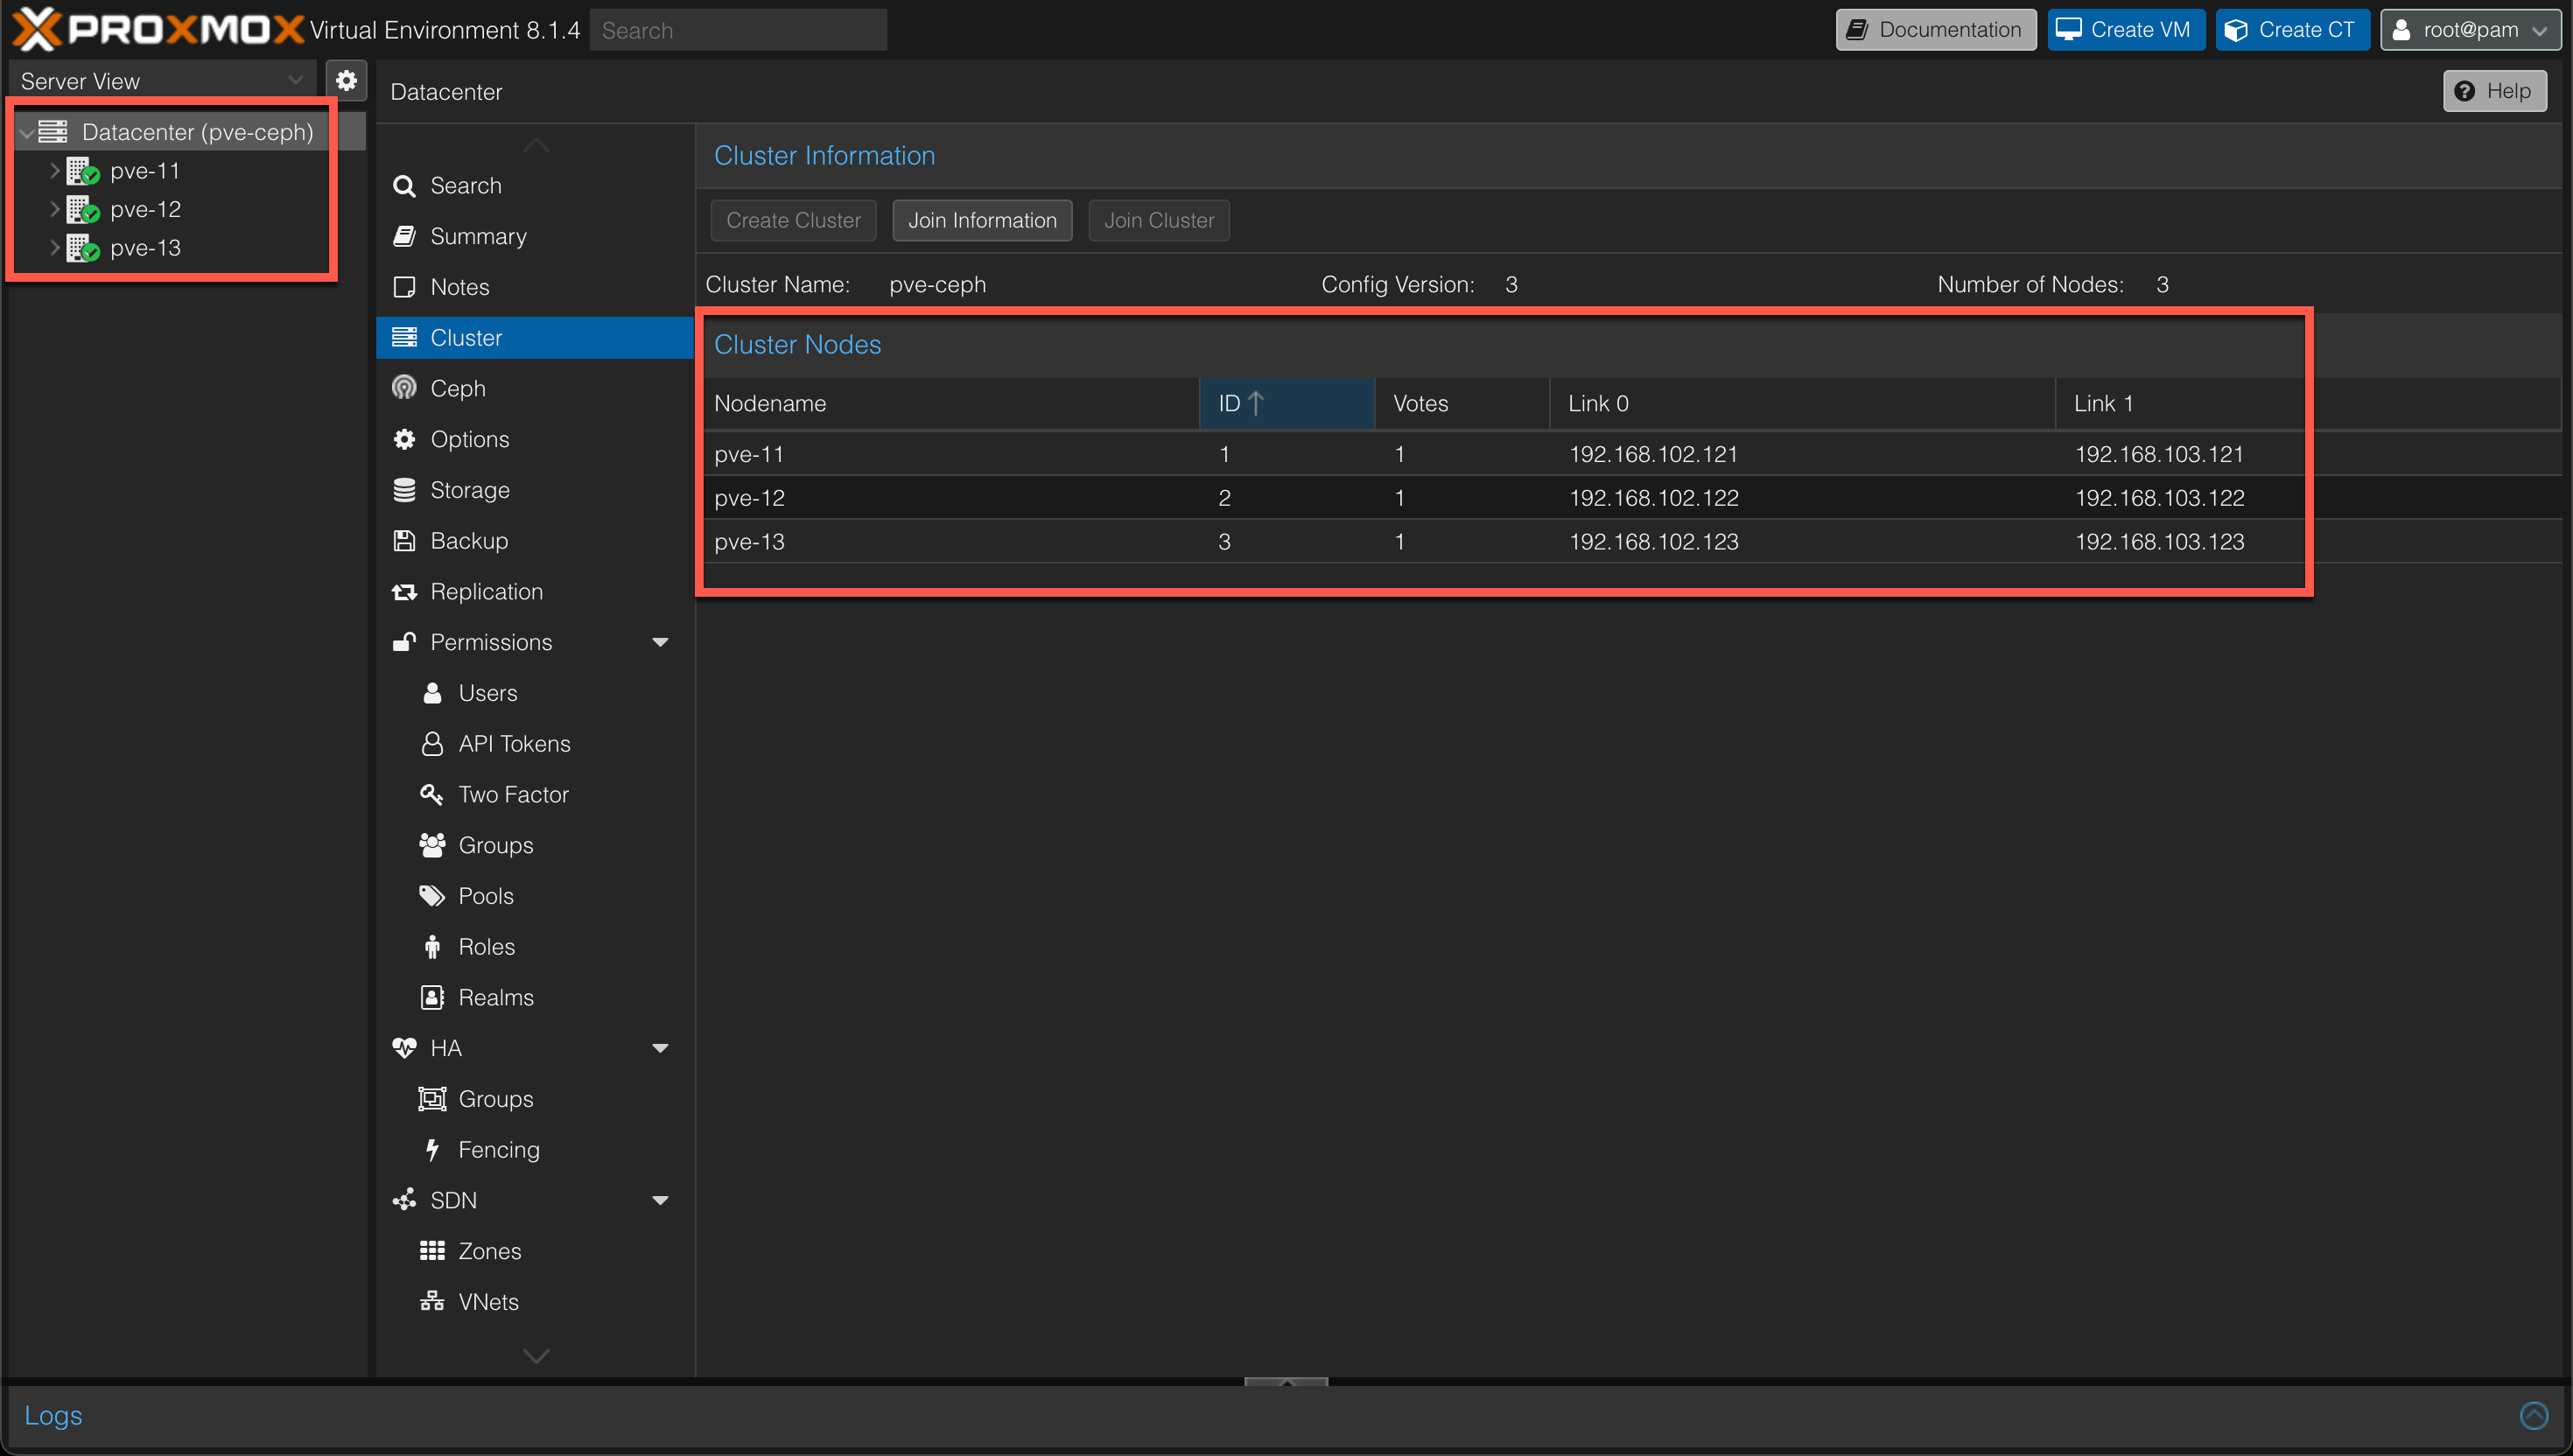
After refreshing the page(s) everything should be fine, and we can go ahead and add our third node and finally our cluster should consist of our three nodes and there should be a green checkmark on all three nodes
Install Ceph
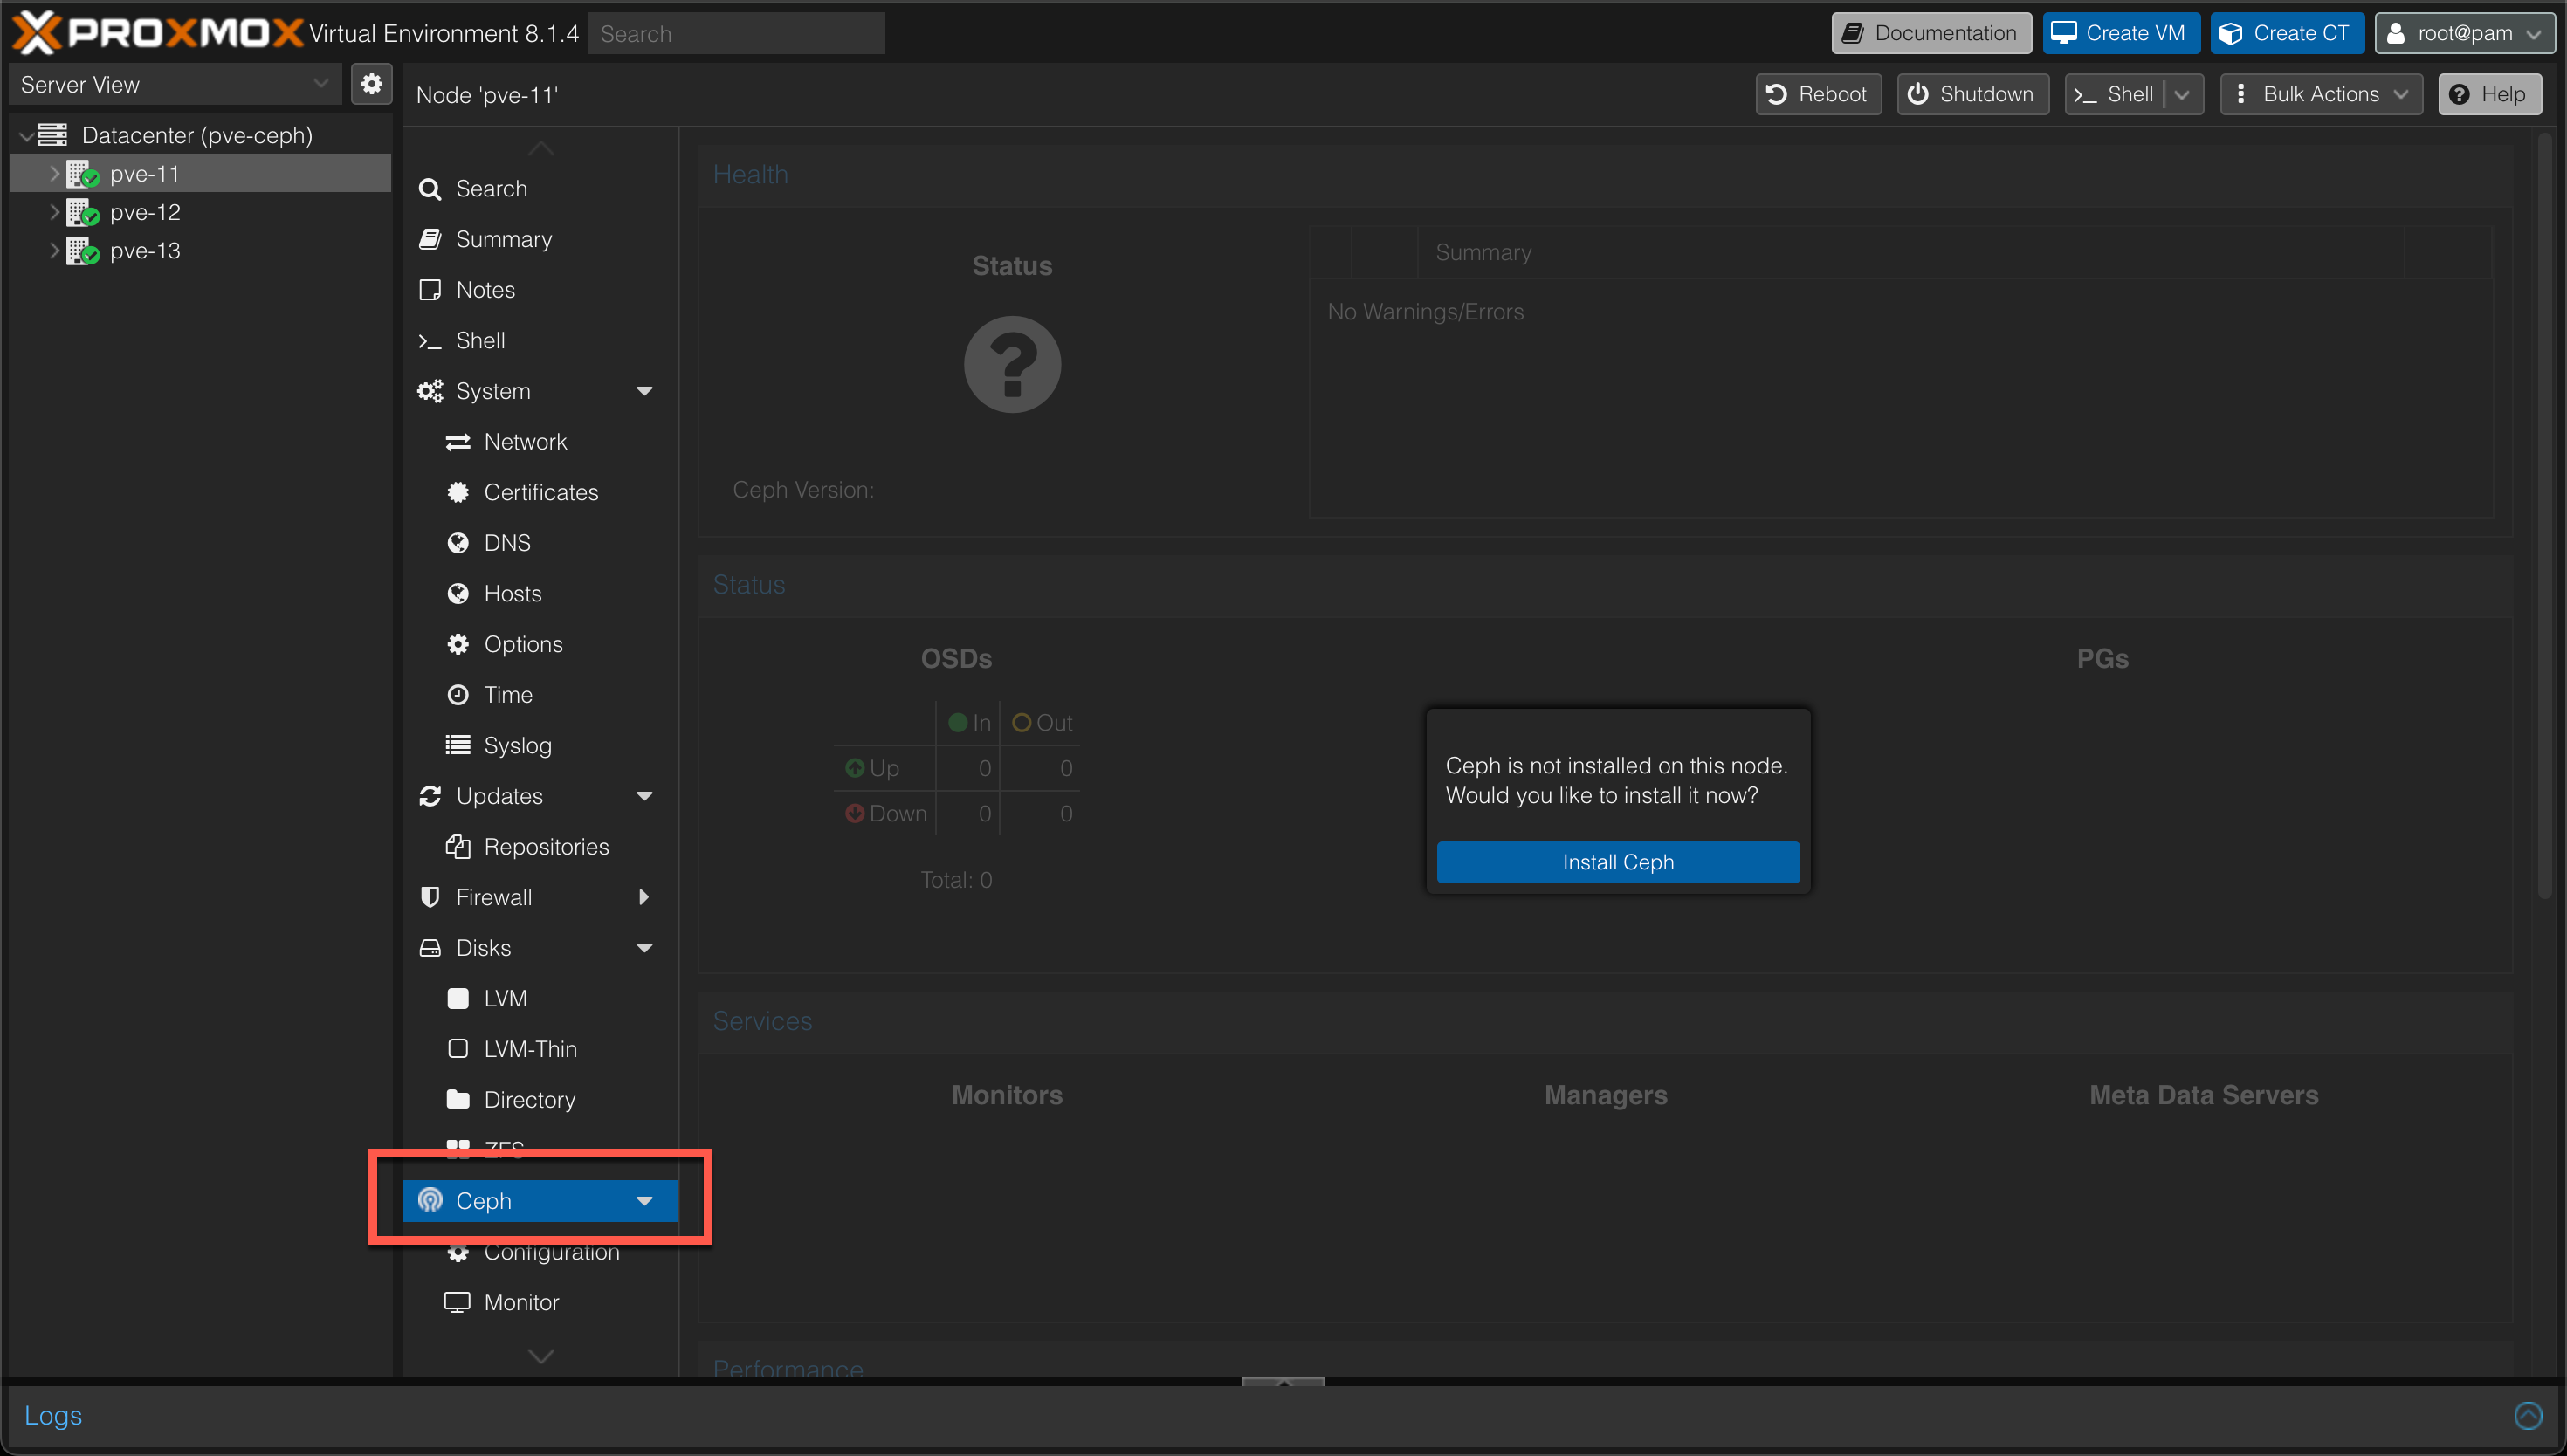
Moving on we'll now go ahead and install Ceph on the nodes.
To help us with this we can use the wizard and functionality added in the Proxmox VE UI
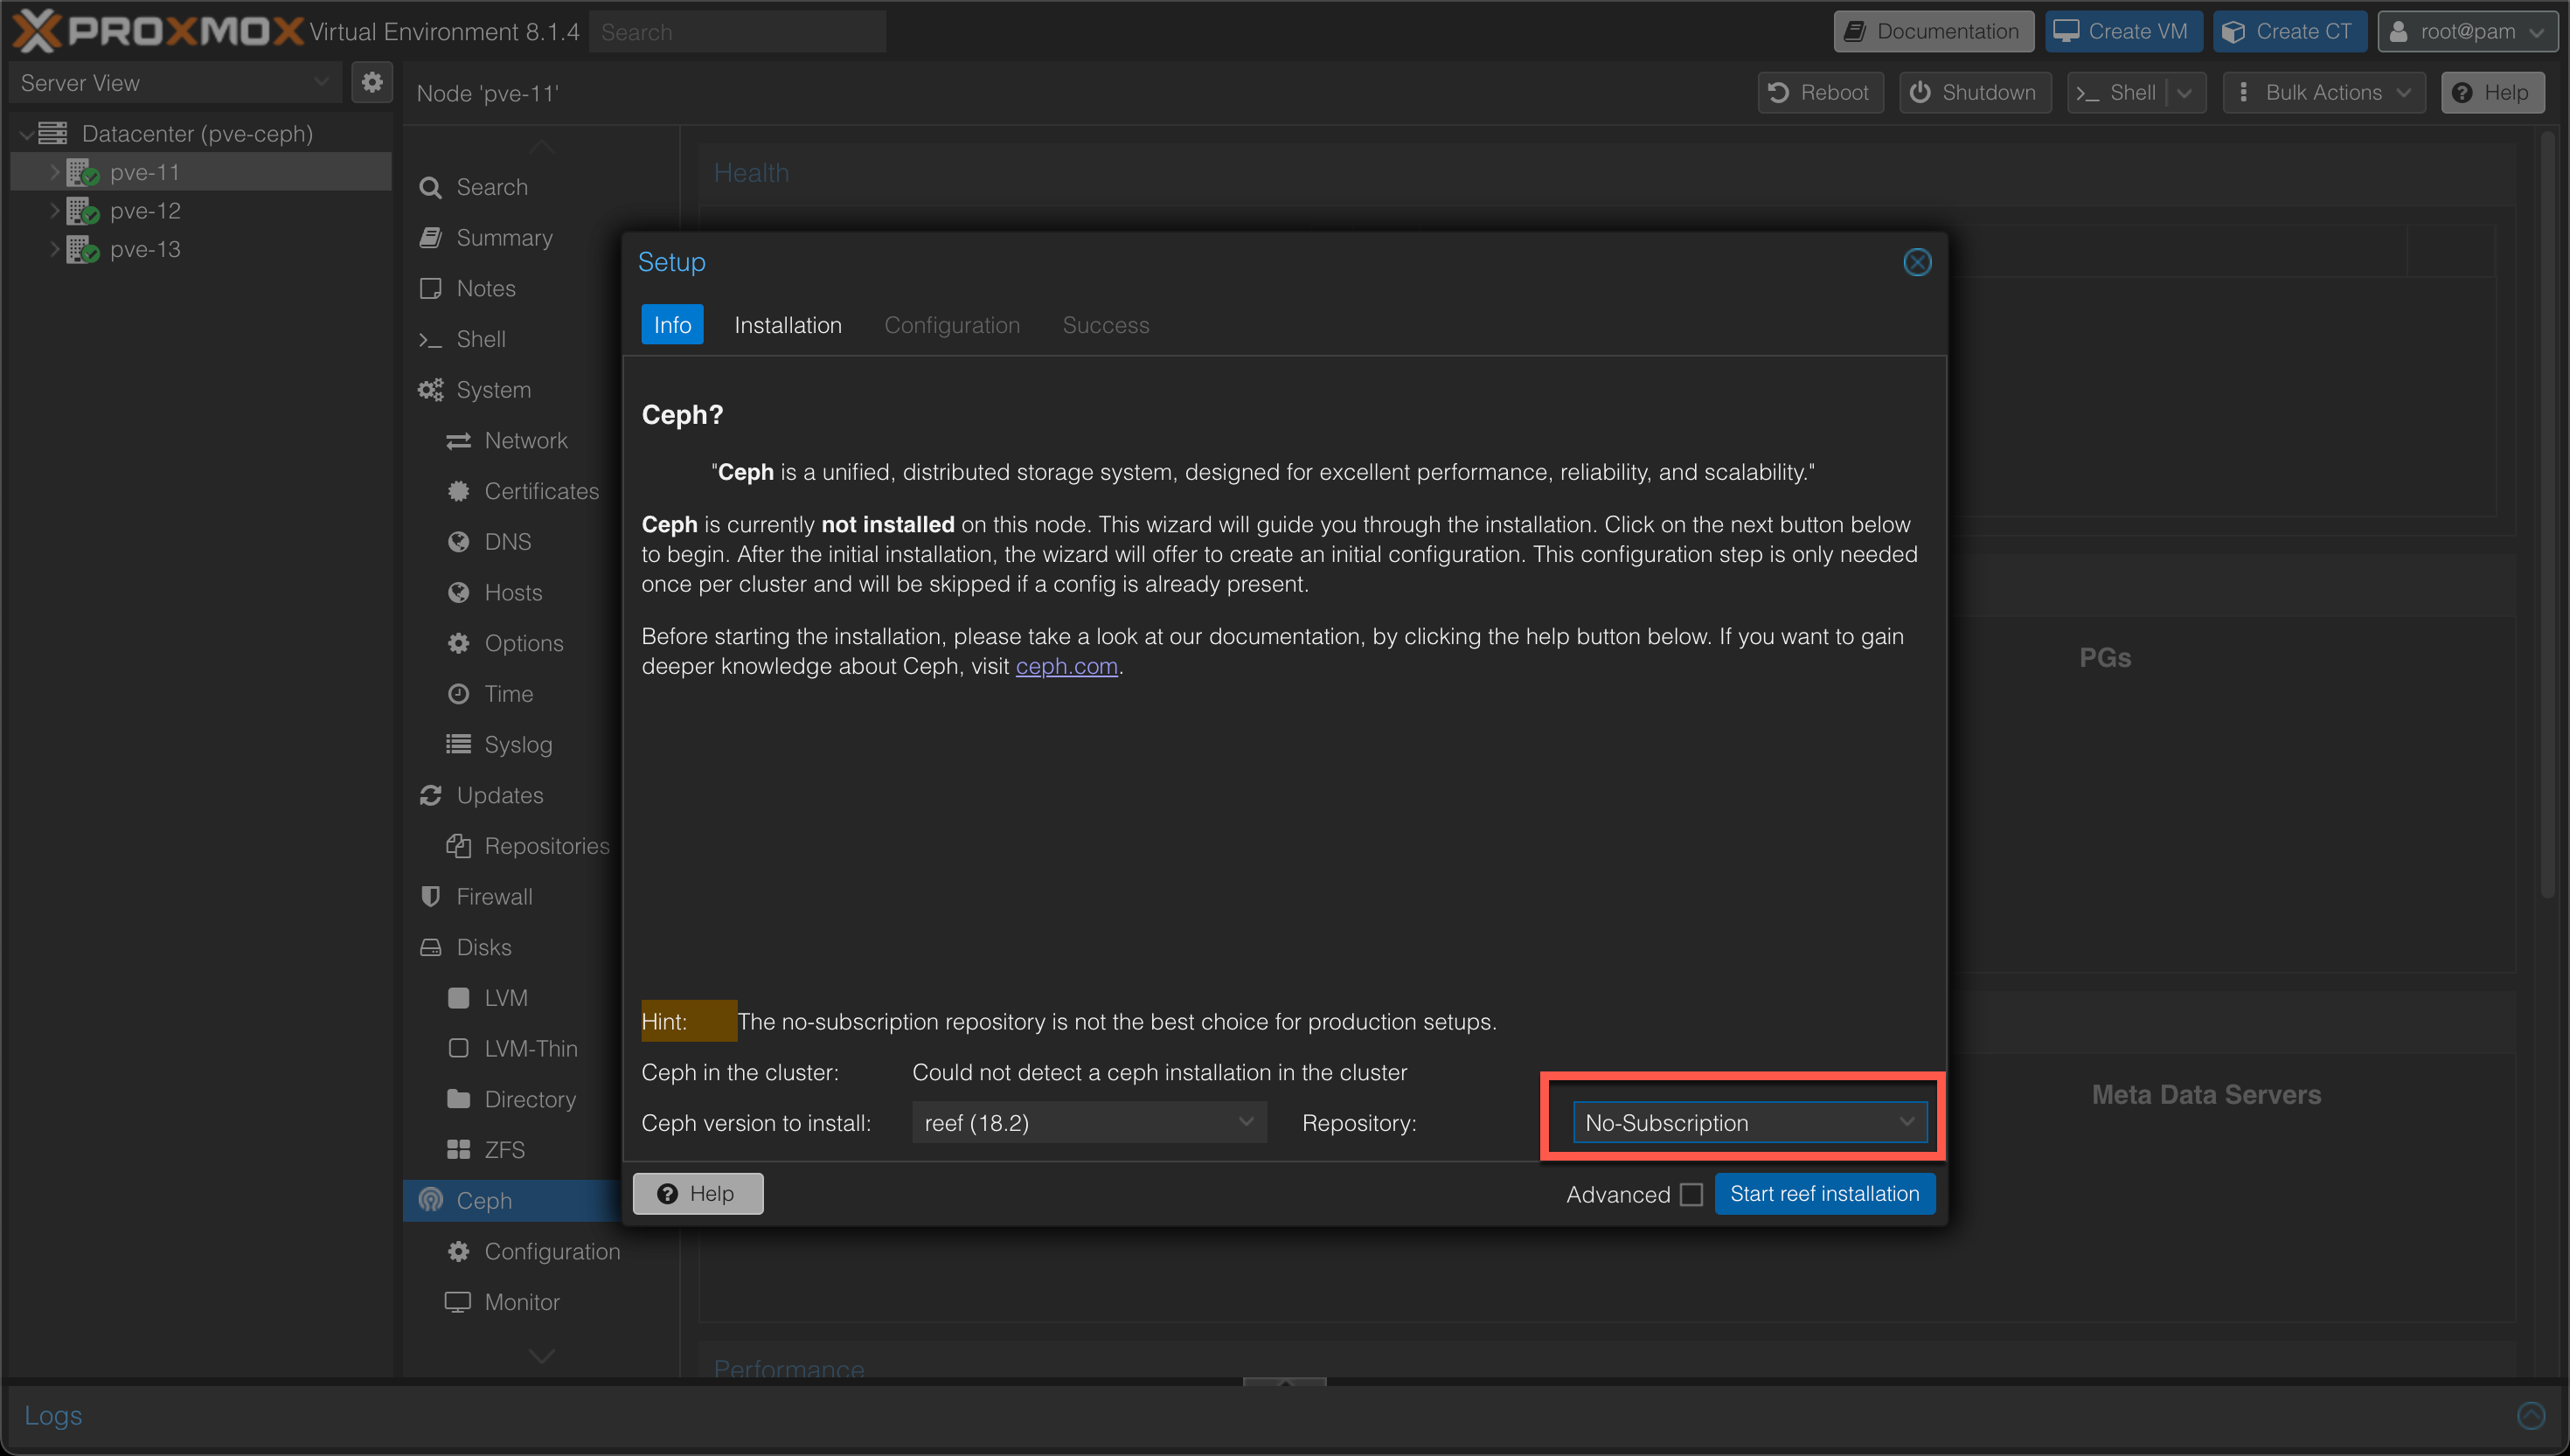
The first step in the installation is to choose the Ceph version and the repository to use. In our case we'll go with the Reef (18.2) version, and the "No-subscription" (community) repository
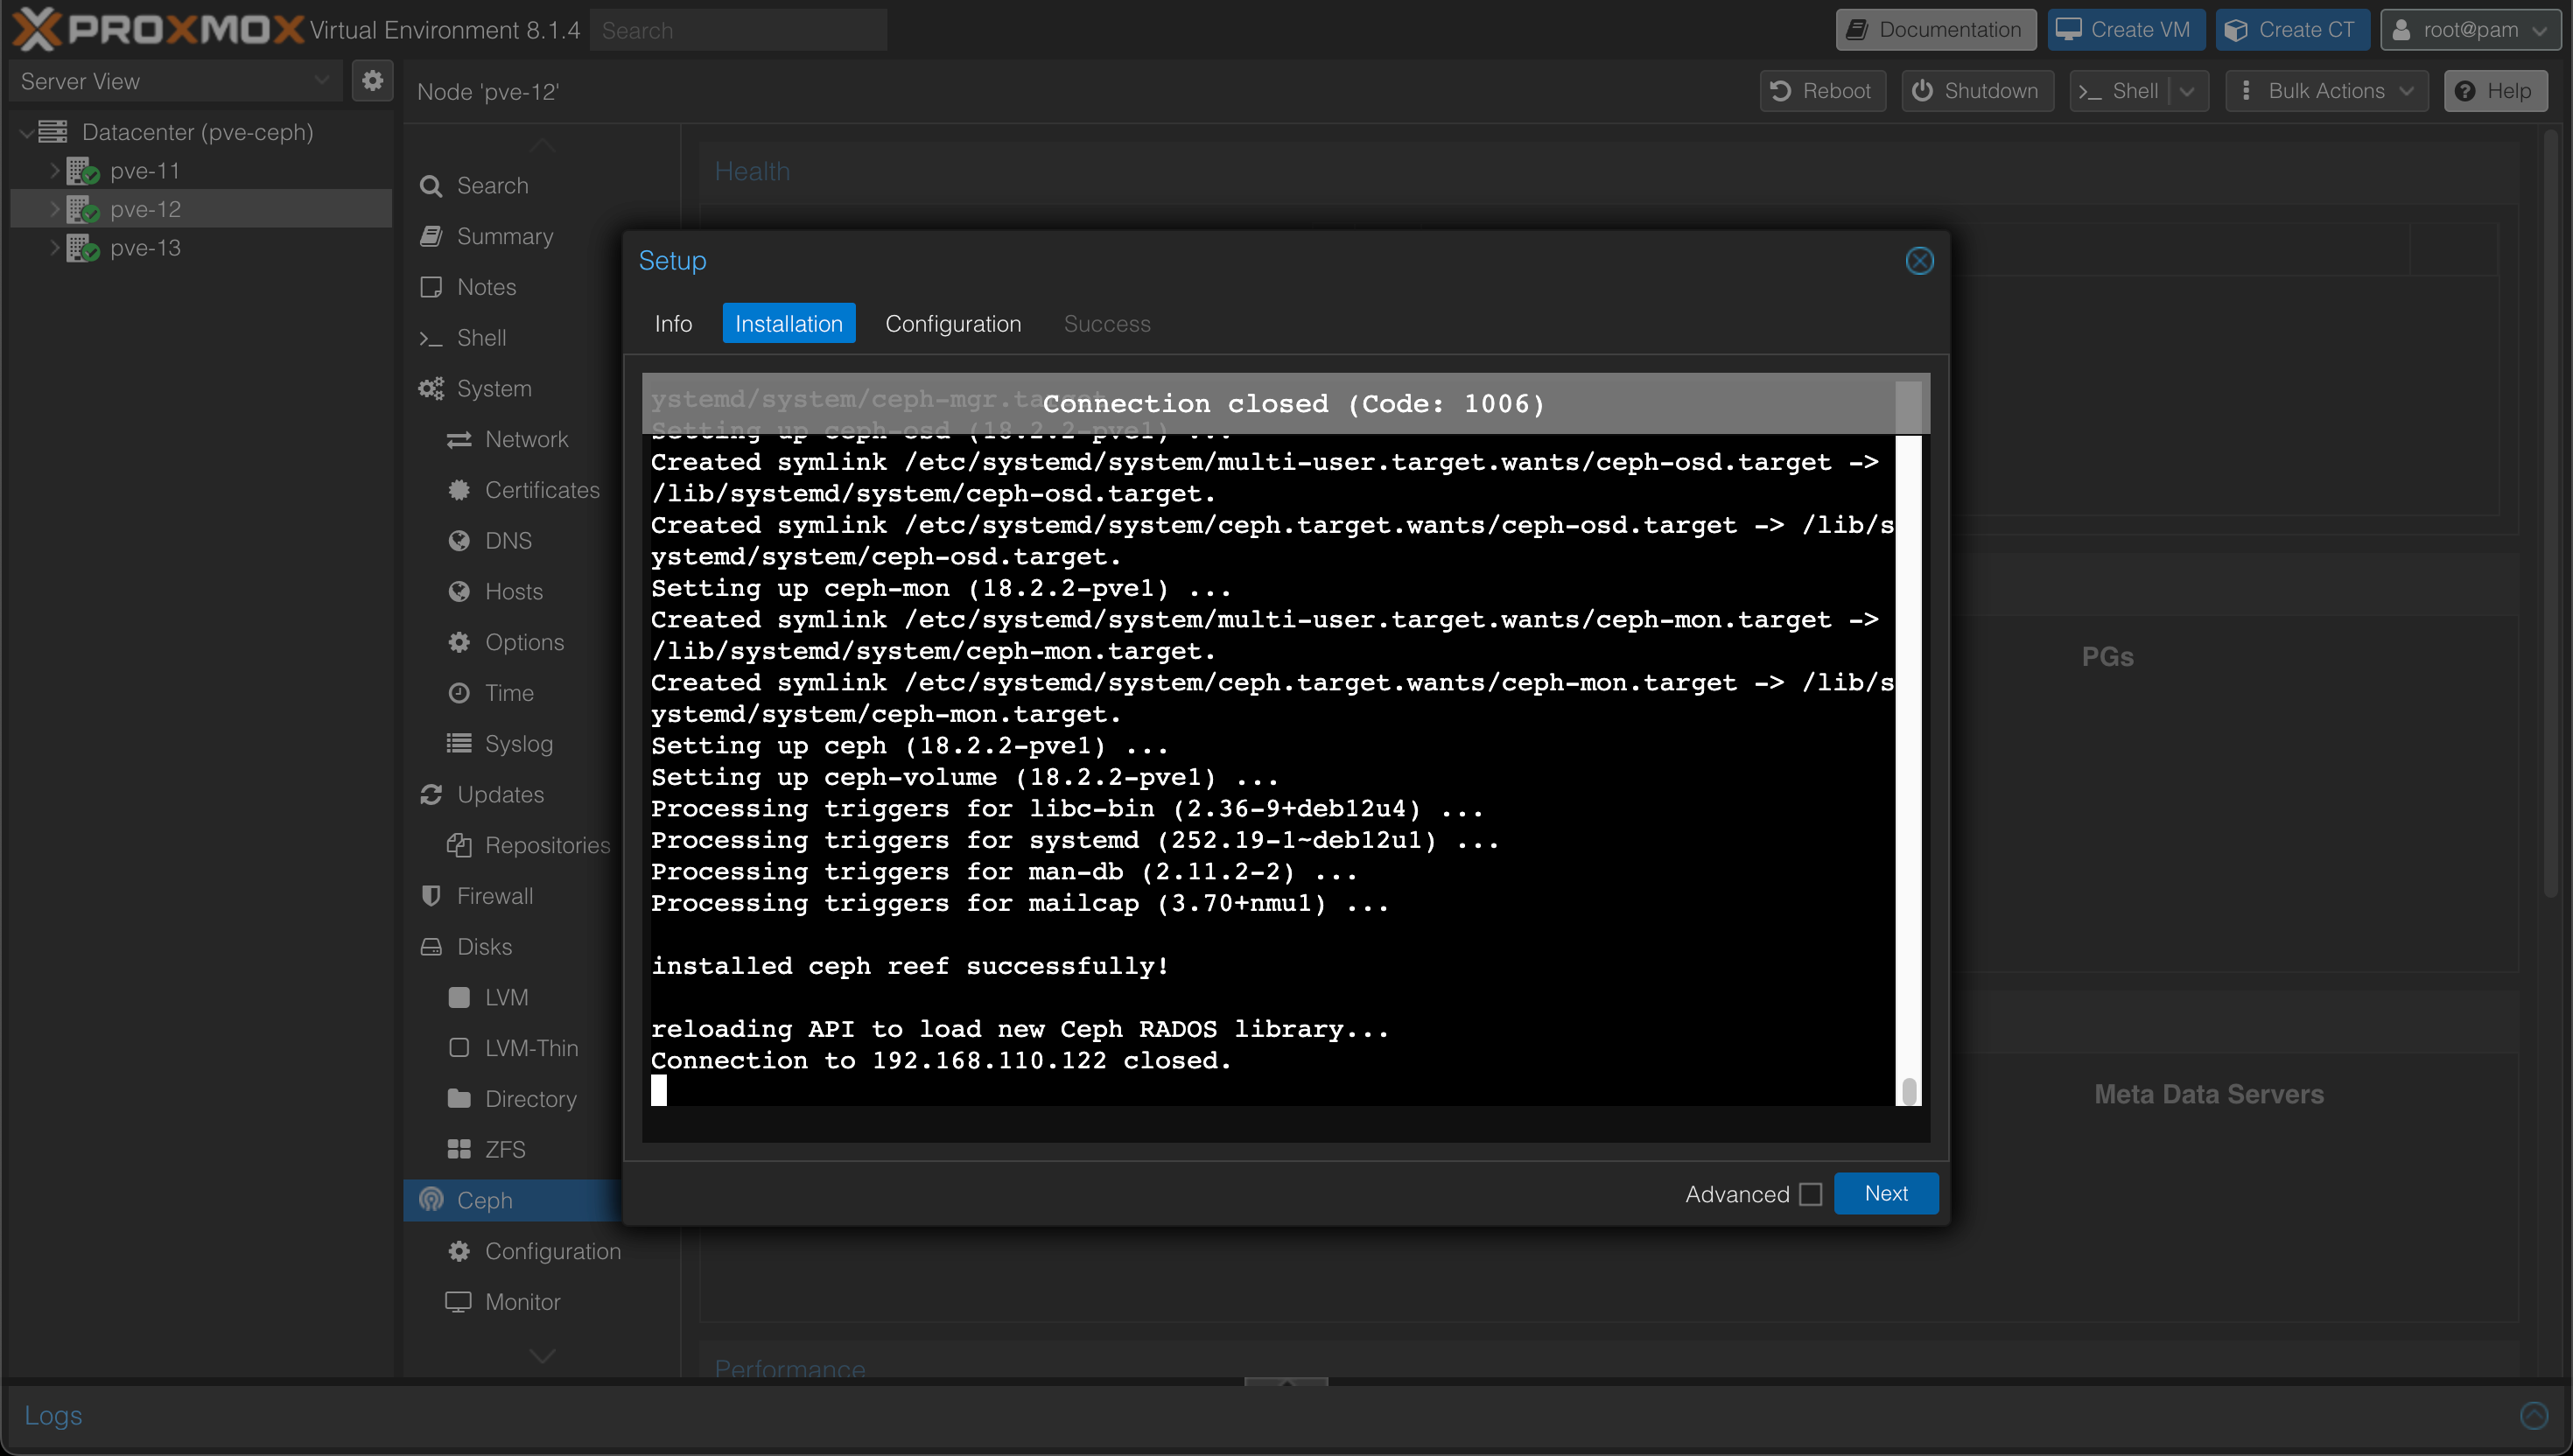
After selecting the version, the installer will start downloading and installing the packages needed
Next we'll select the network
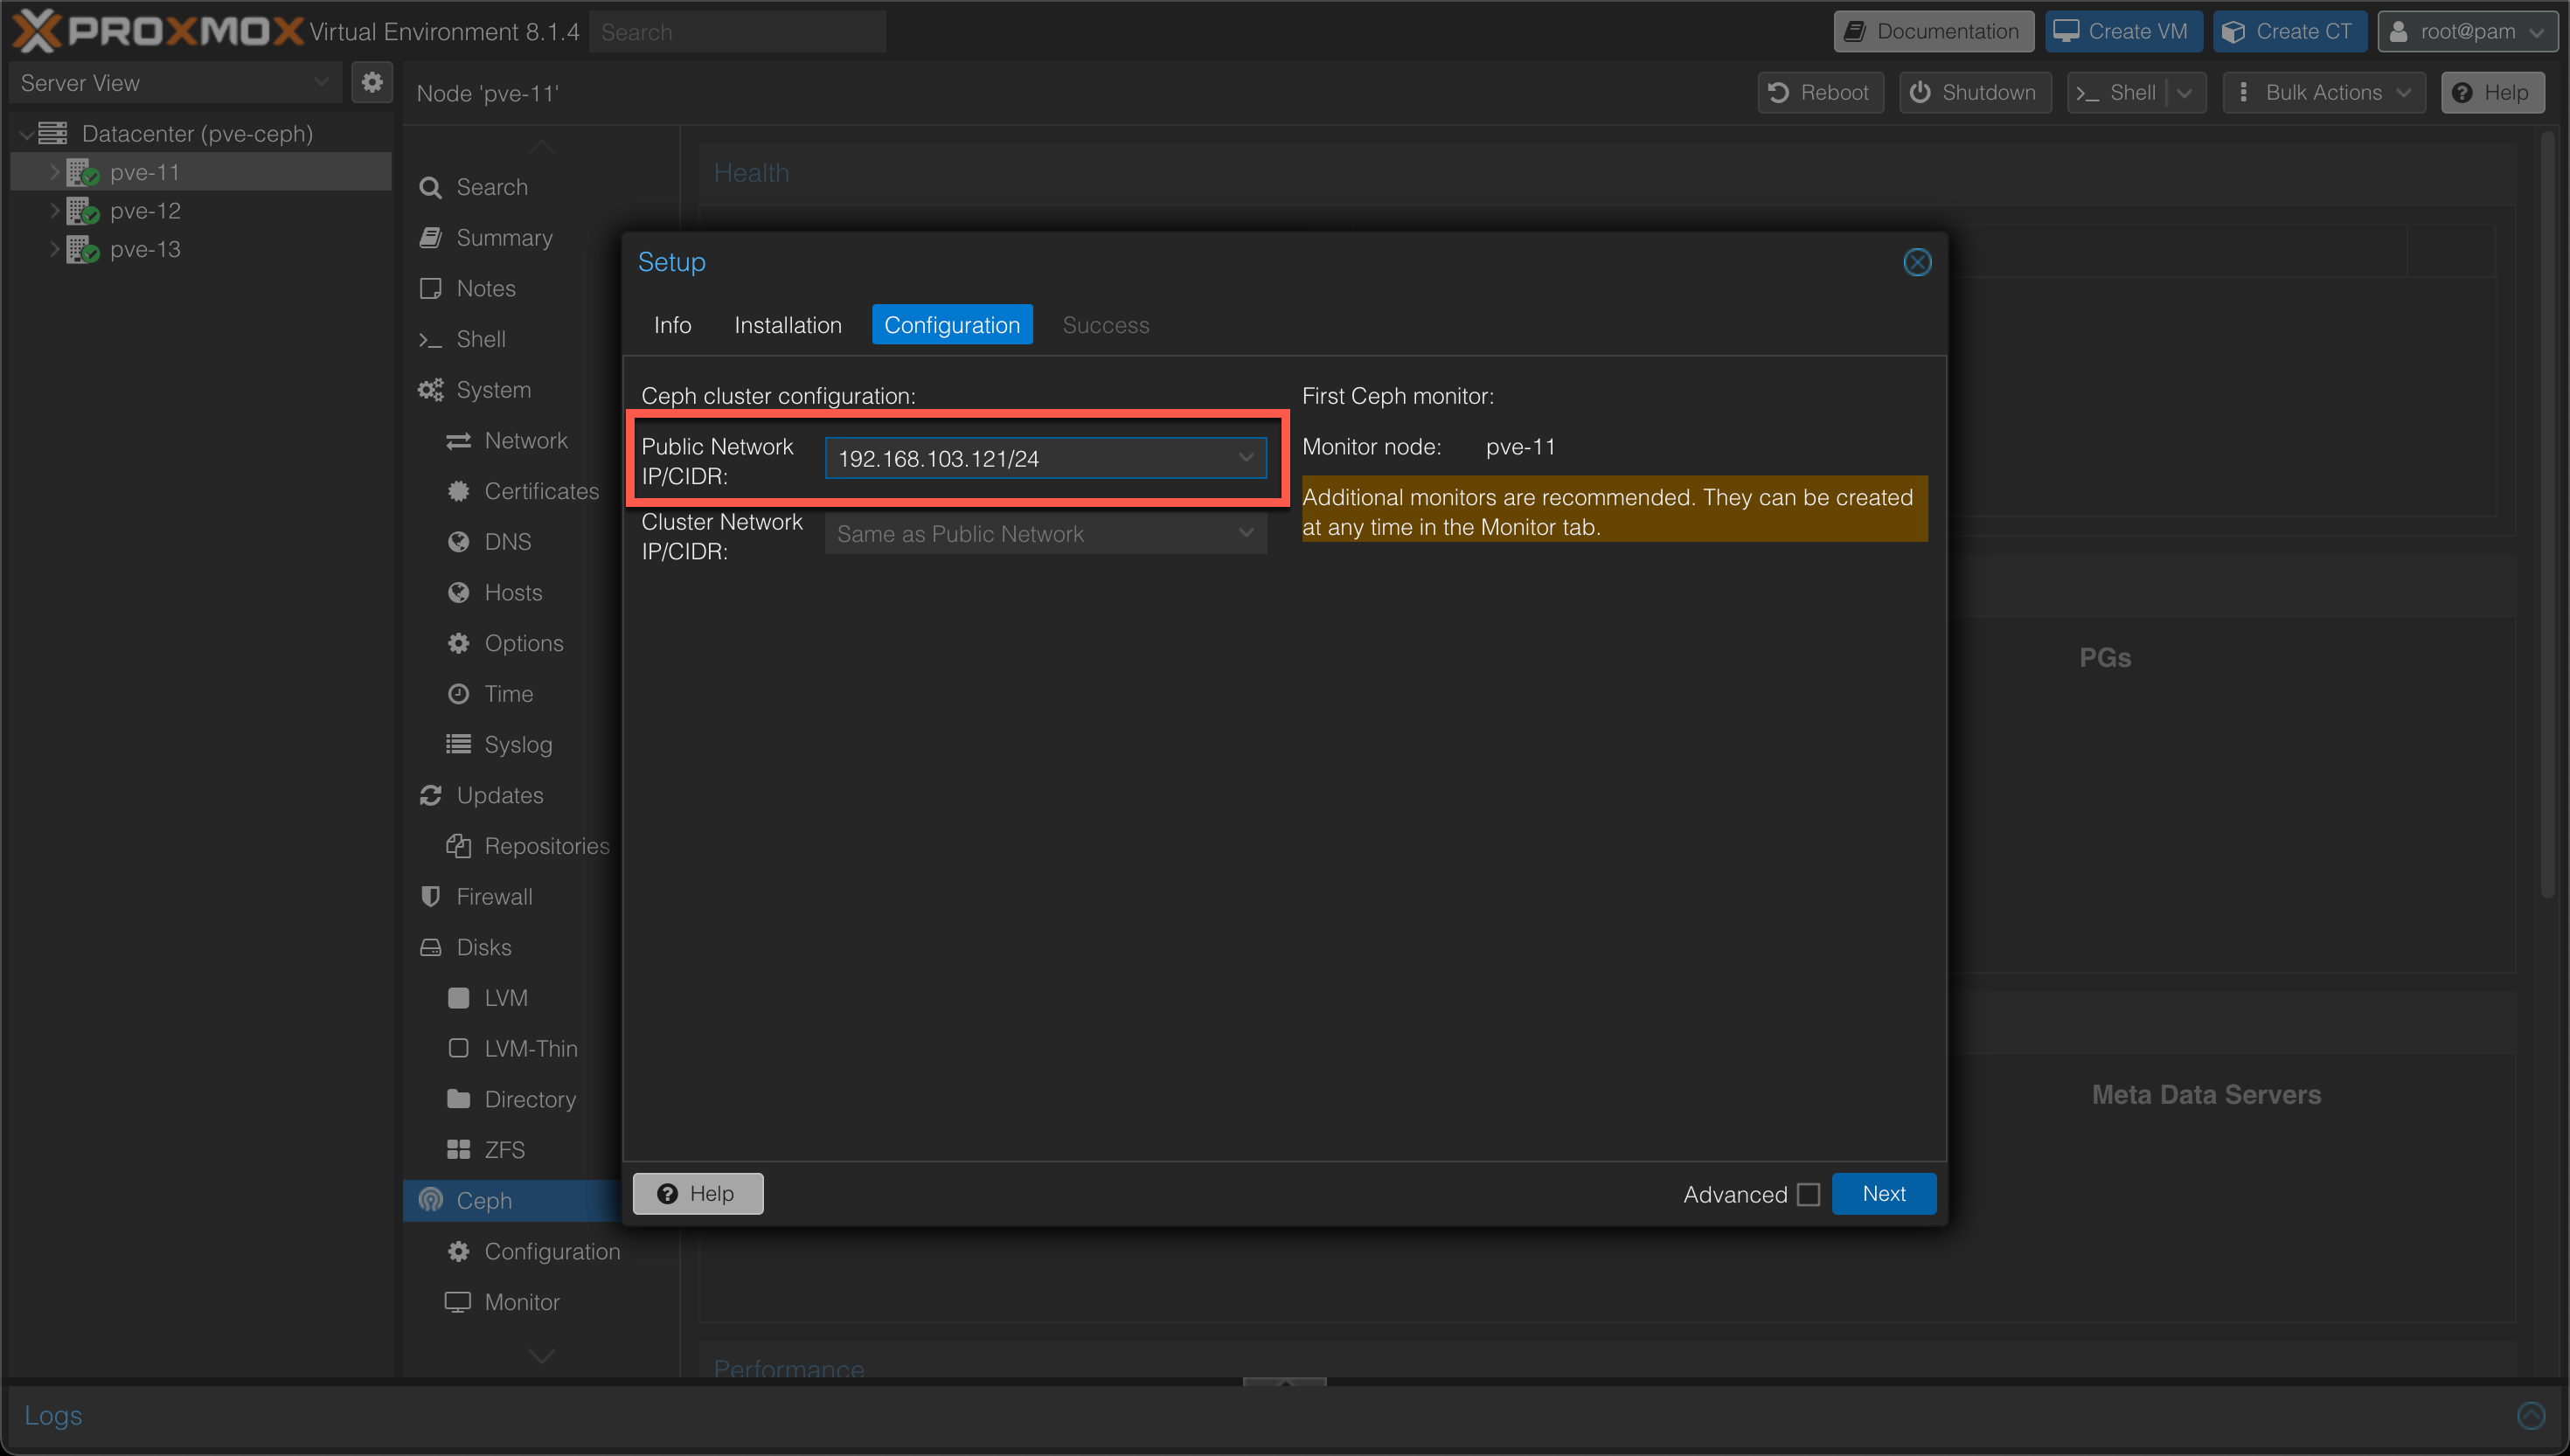
Again, please read up on the networking requirements when deploying this in your own environment
And finally we'll hit Finish to finalize the Ceph installer

Now, as the wizard suggests, it's time to install Ceph on the two remaining nodes
Add monitors
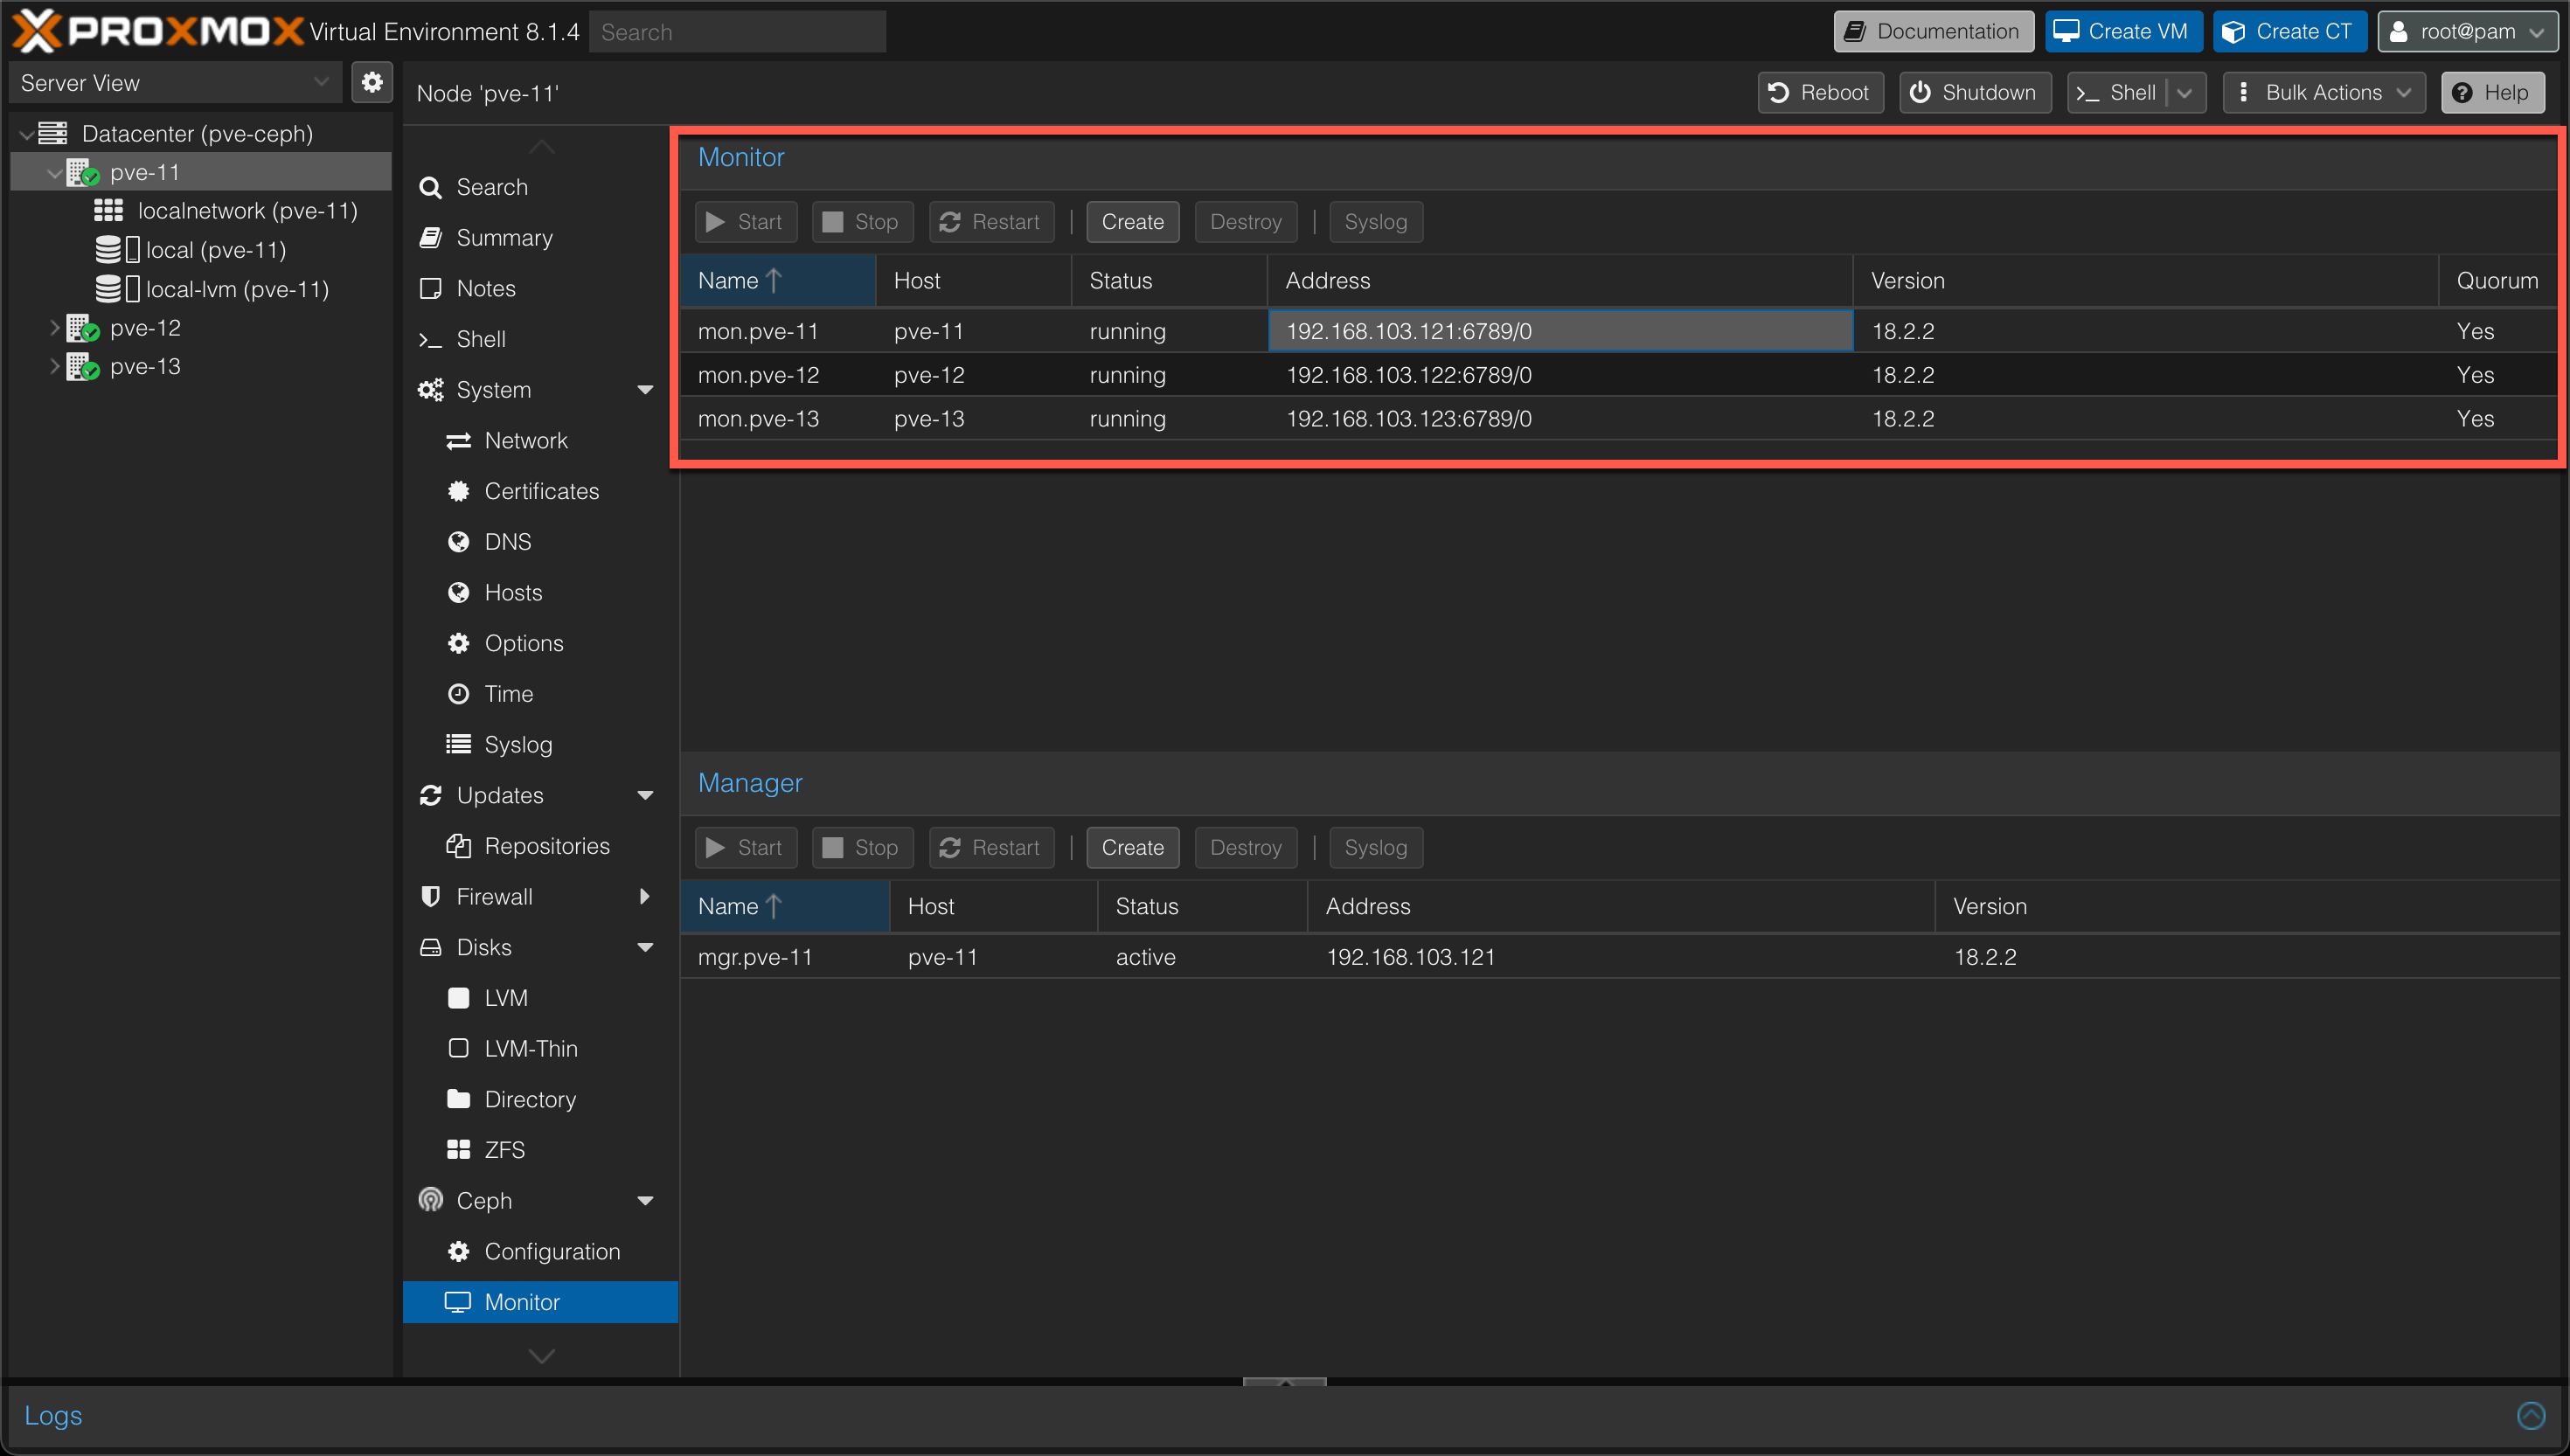
When all nodes have Ceph installed we'll also add the two last nodes as Ceph monitors
This is done to ensure that failure on any of the nodes will get picked up by the others. If we had omitted this step, a failure on the first node would result in the Ceph cluster being down.
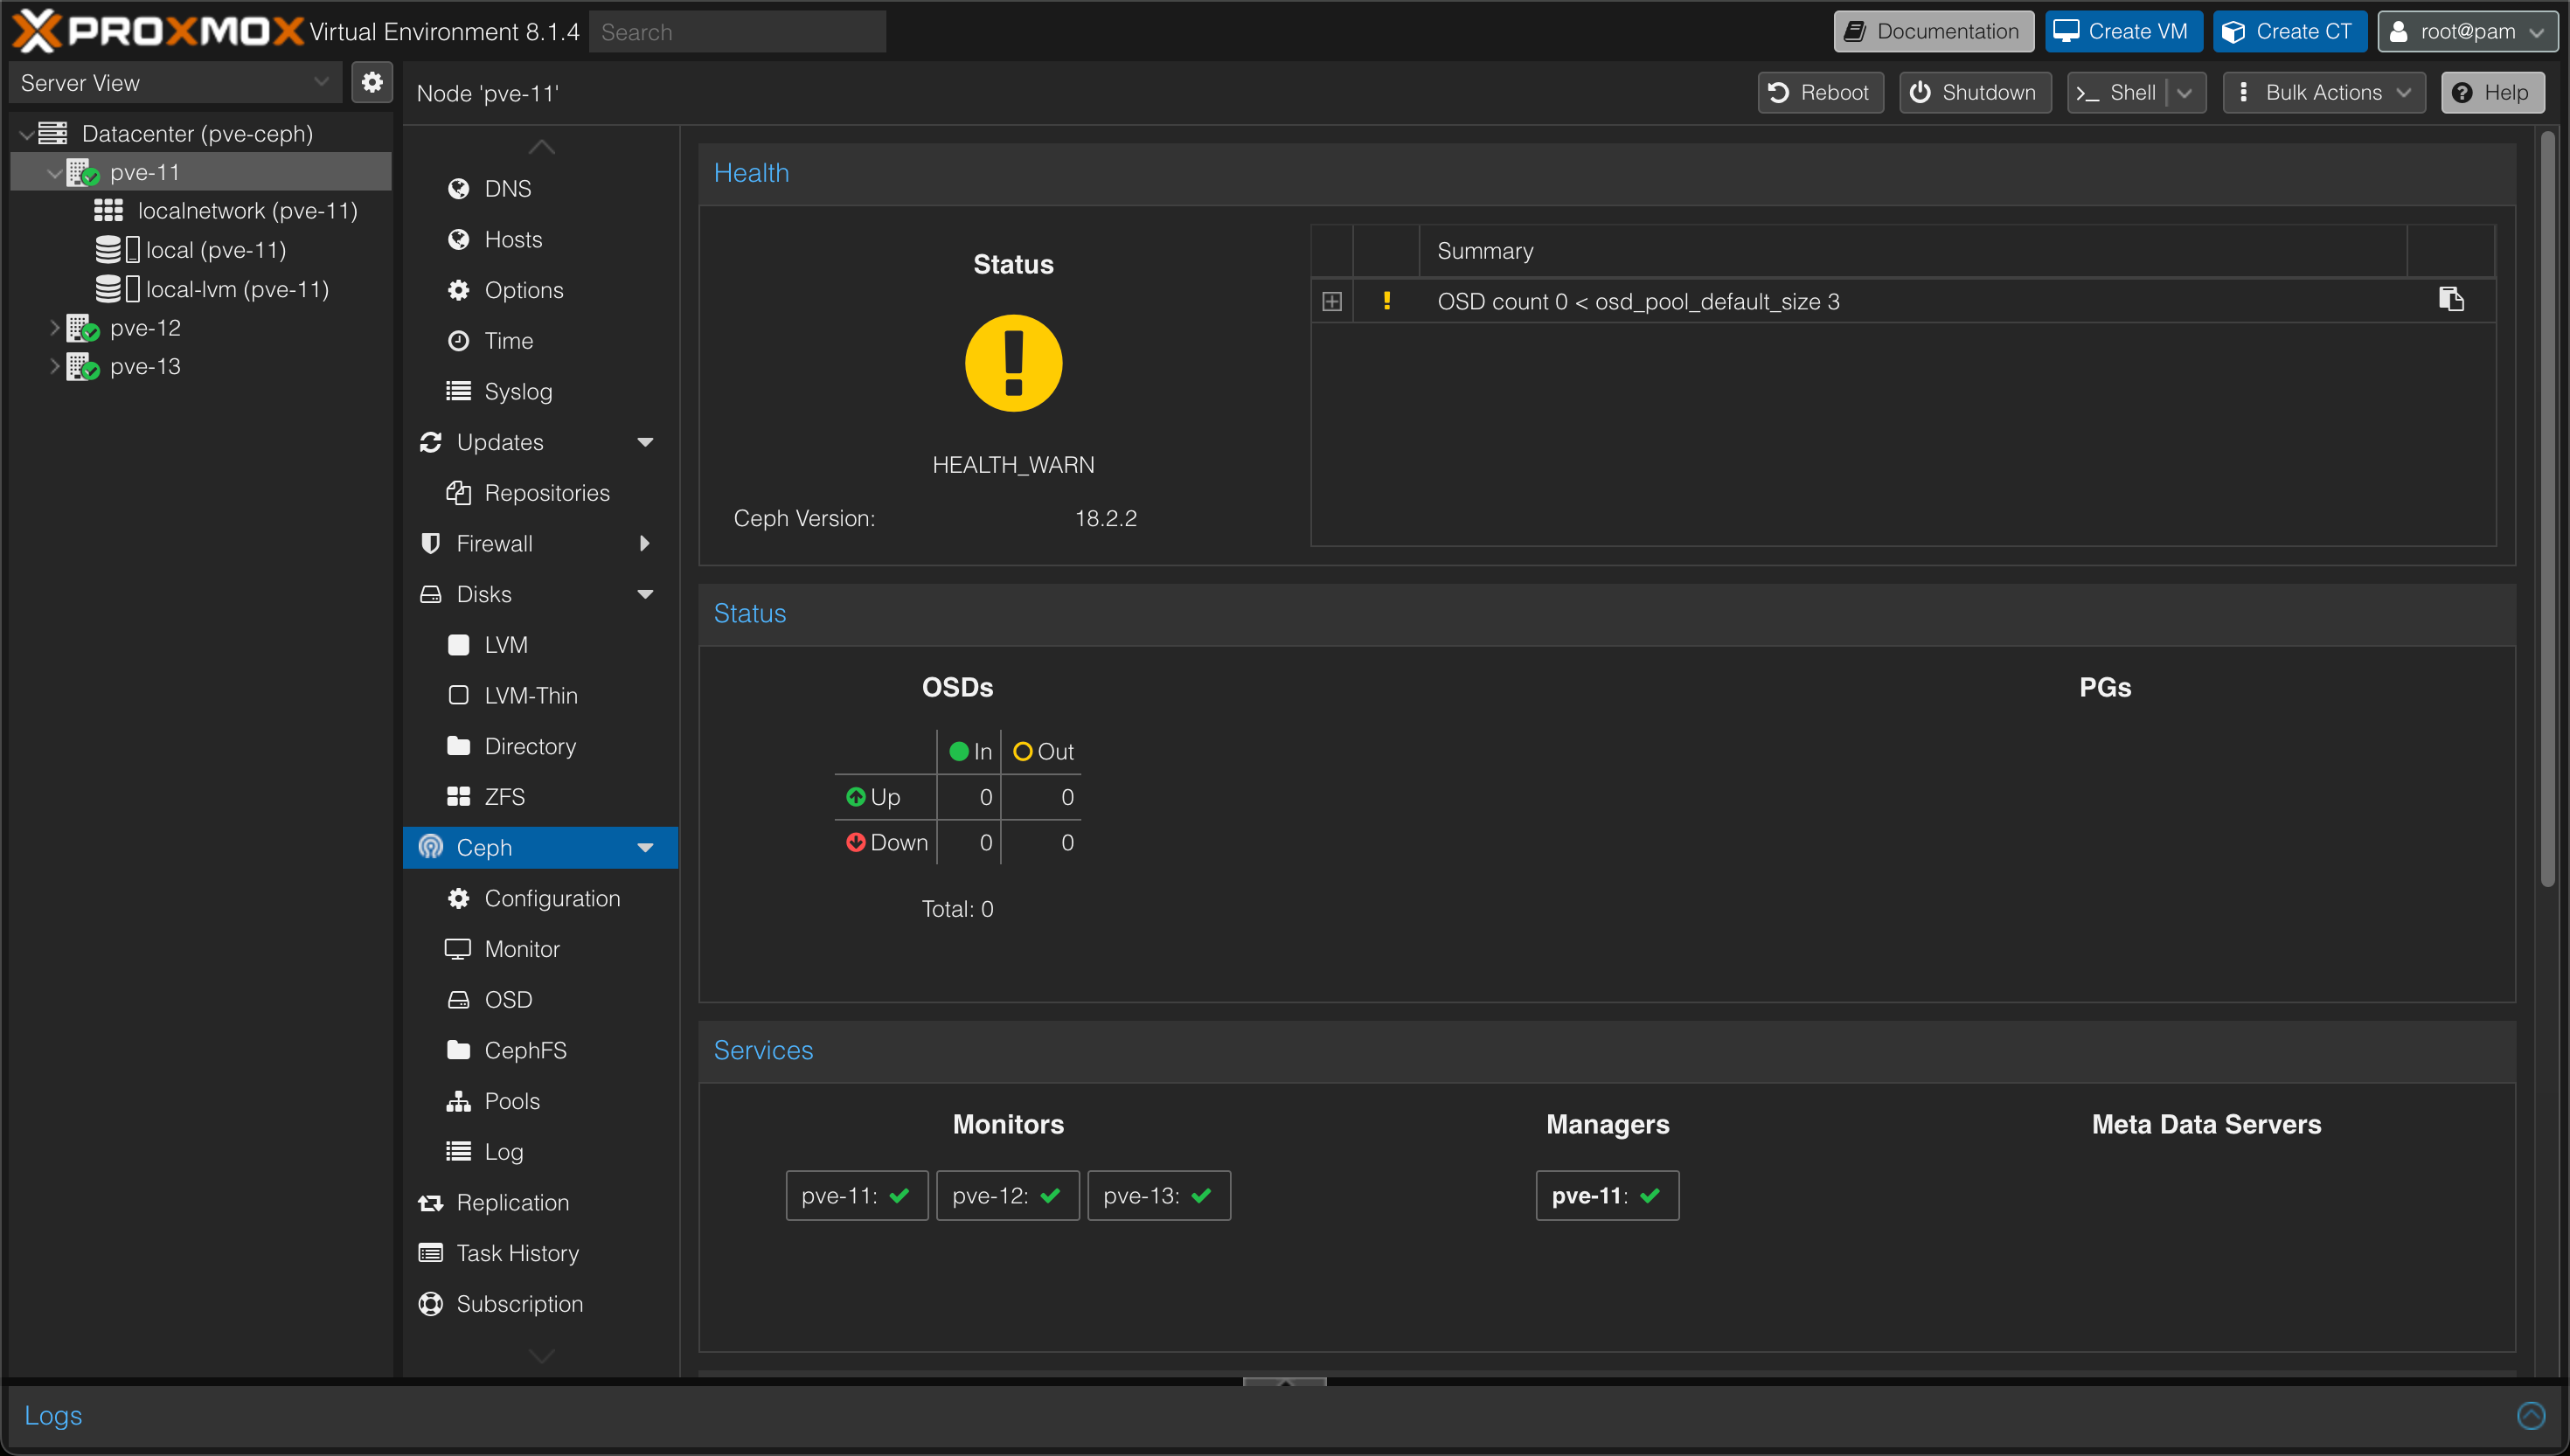
In my environment I got a warning on clock skew between the three nodes. Ceph is very sensitive on this
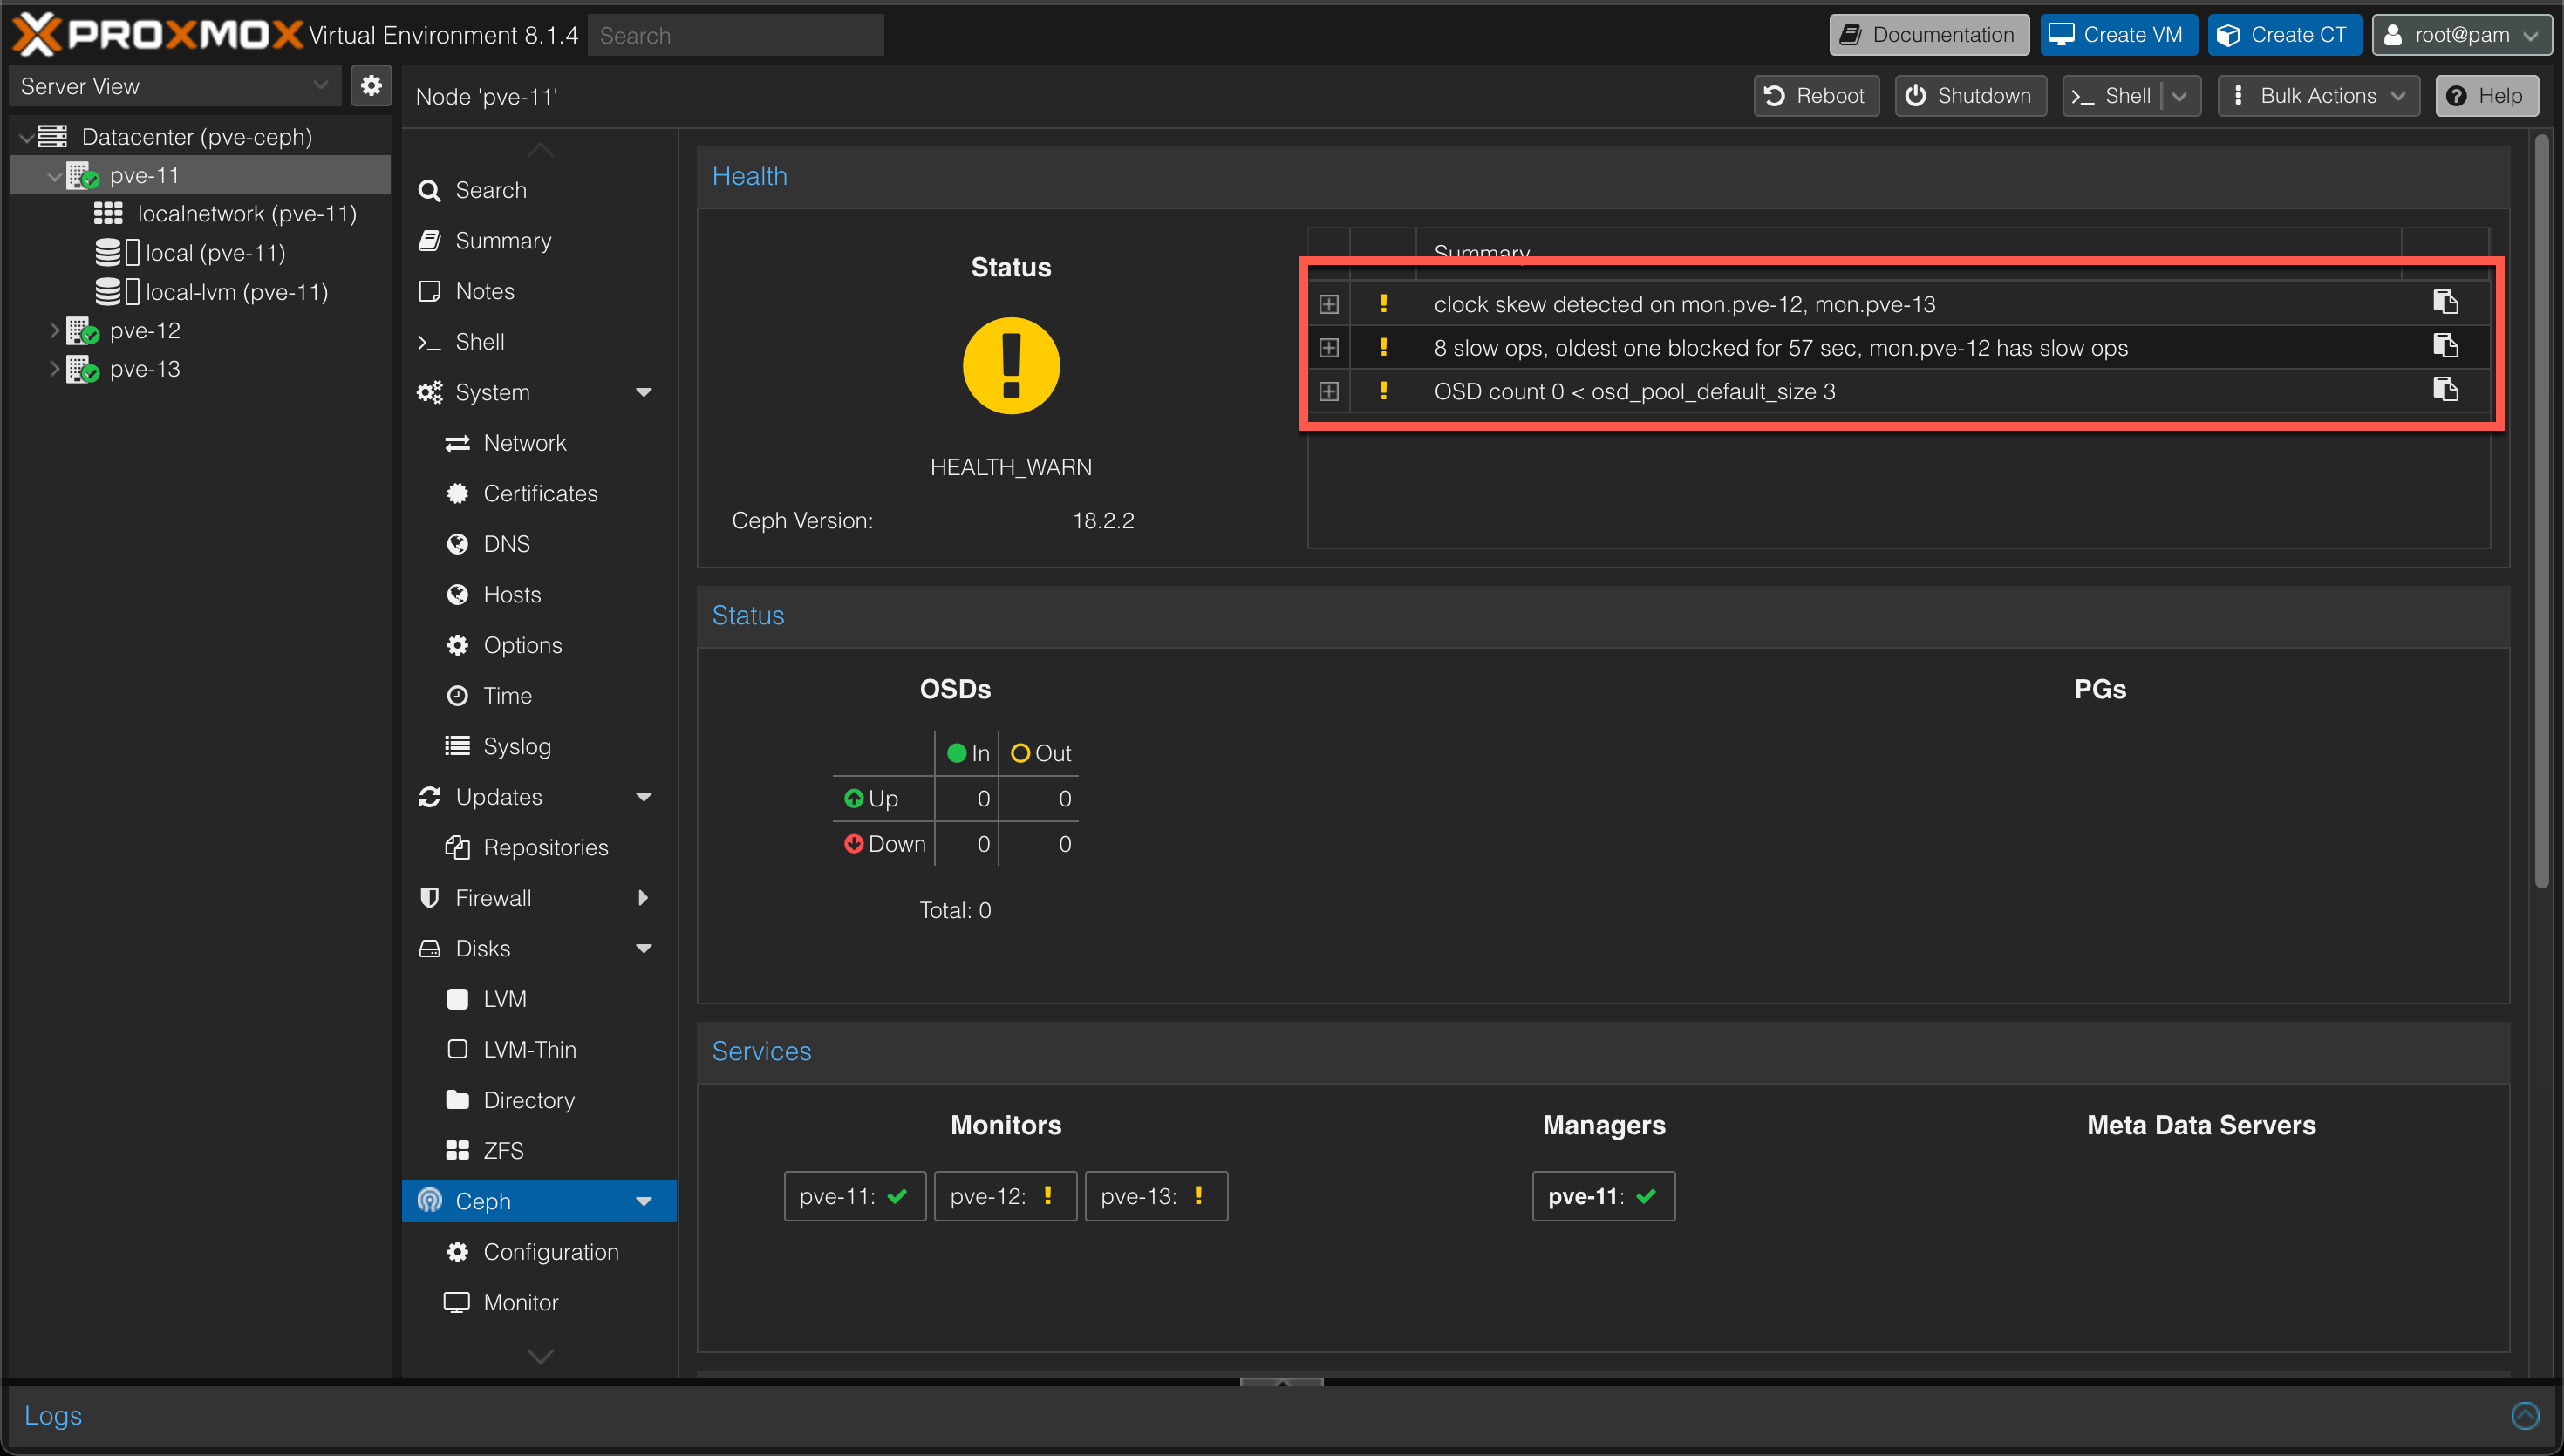
After correcting the time synchronization on my three hosts the status warns about the fact that there's no "OSDs" and that the expected count is 3. We'll fix this next.
Add managers
In addition to monitors we can also choose to add the Manager role to the nodes. Our cluster would work with the manager role on just one node, but I added the role to all of them just in case. Only one manager can be active, hence two managers will be in Standby

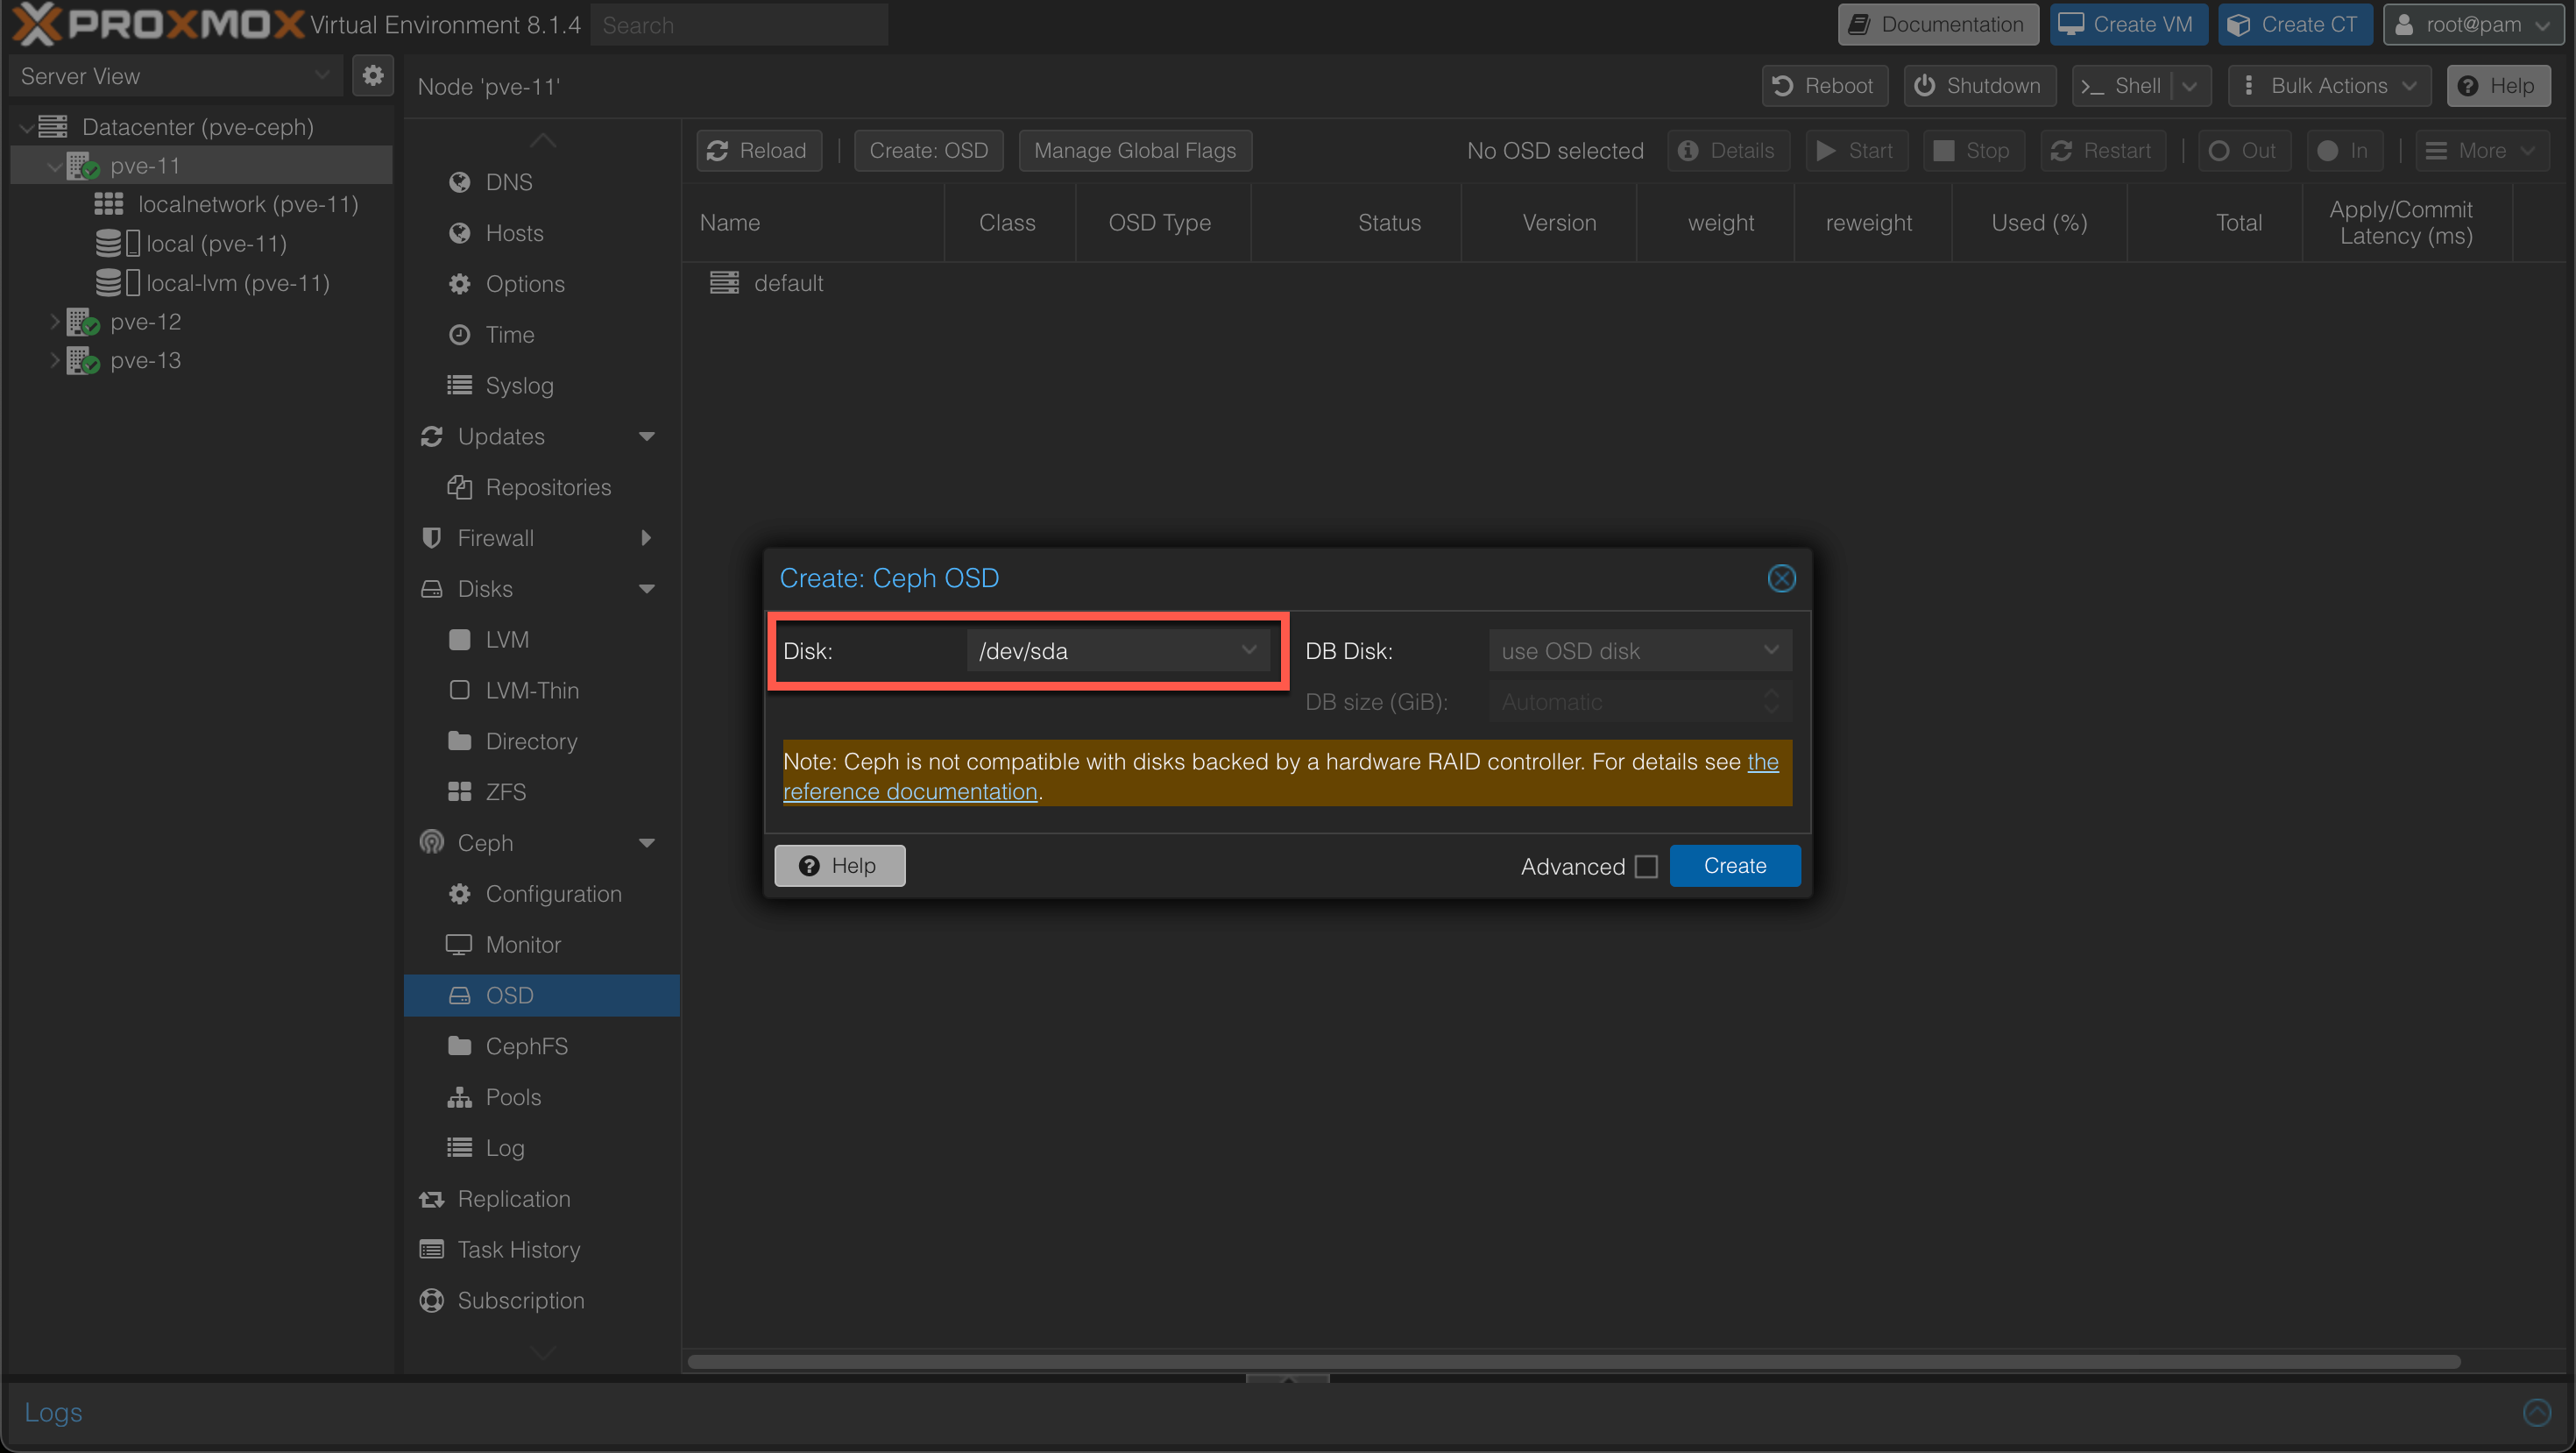
Create OSDs
An Object Storage Daemon (OSD) is a daemon that interacts with logical disks and to make those available to the Ceph cluster.
As a minimum three OSDs are recommended in a cluster hence we'll create one OSD backed by a SSD disk on each of our hosts.
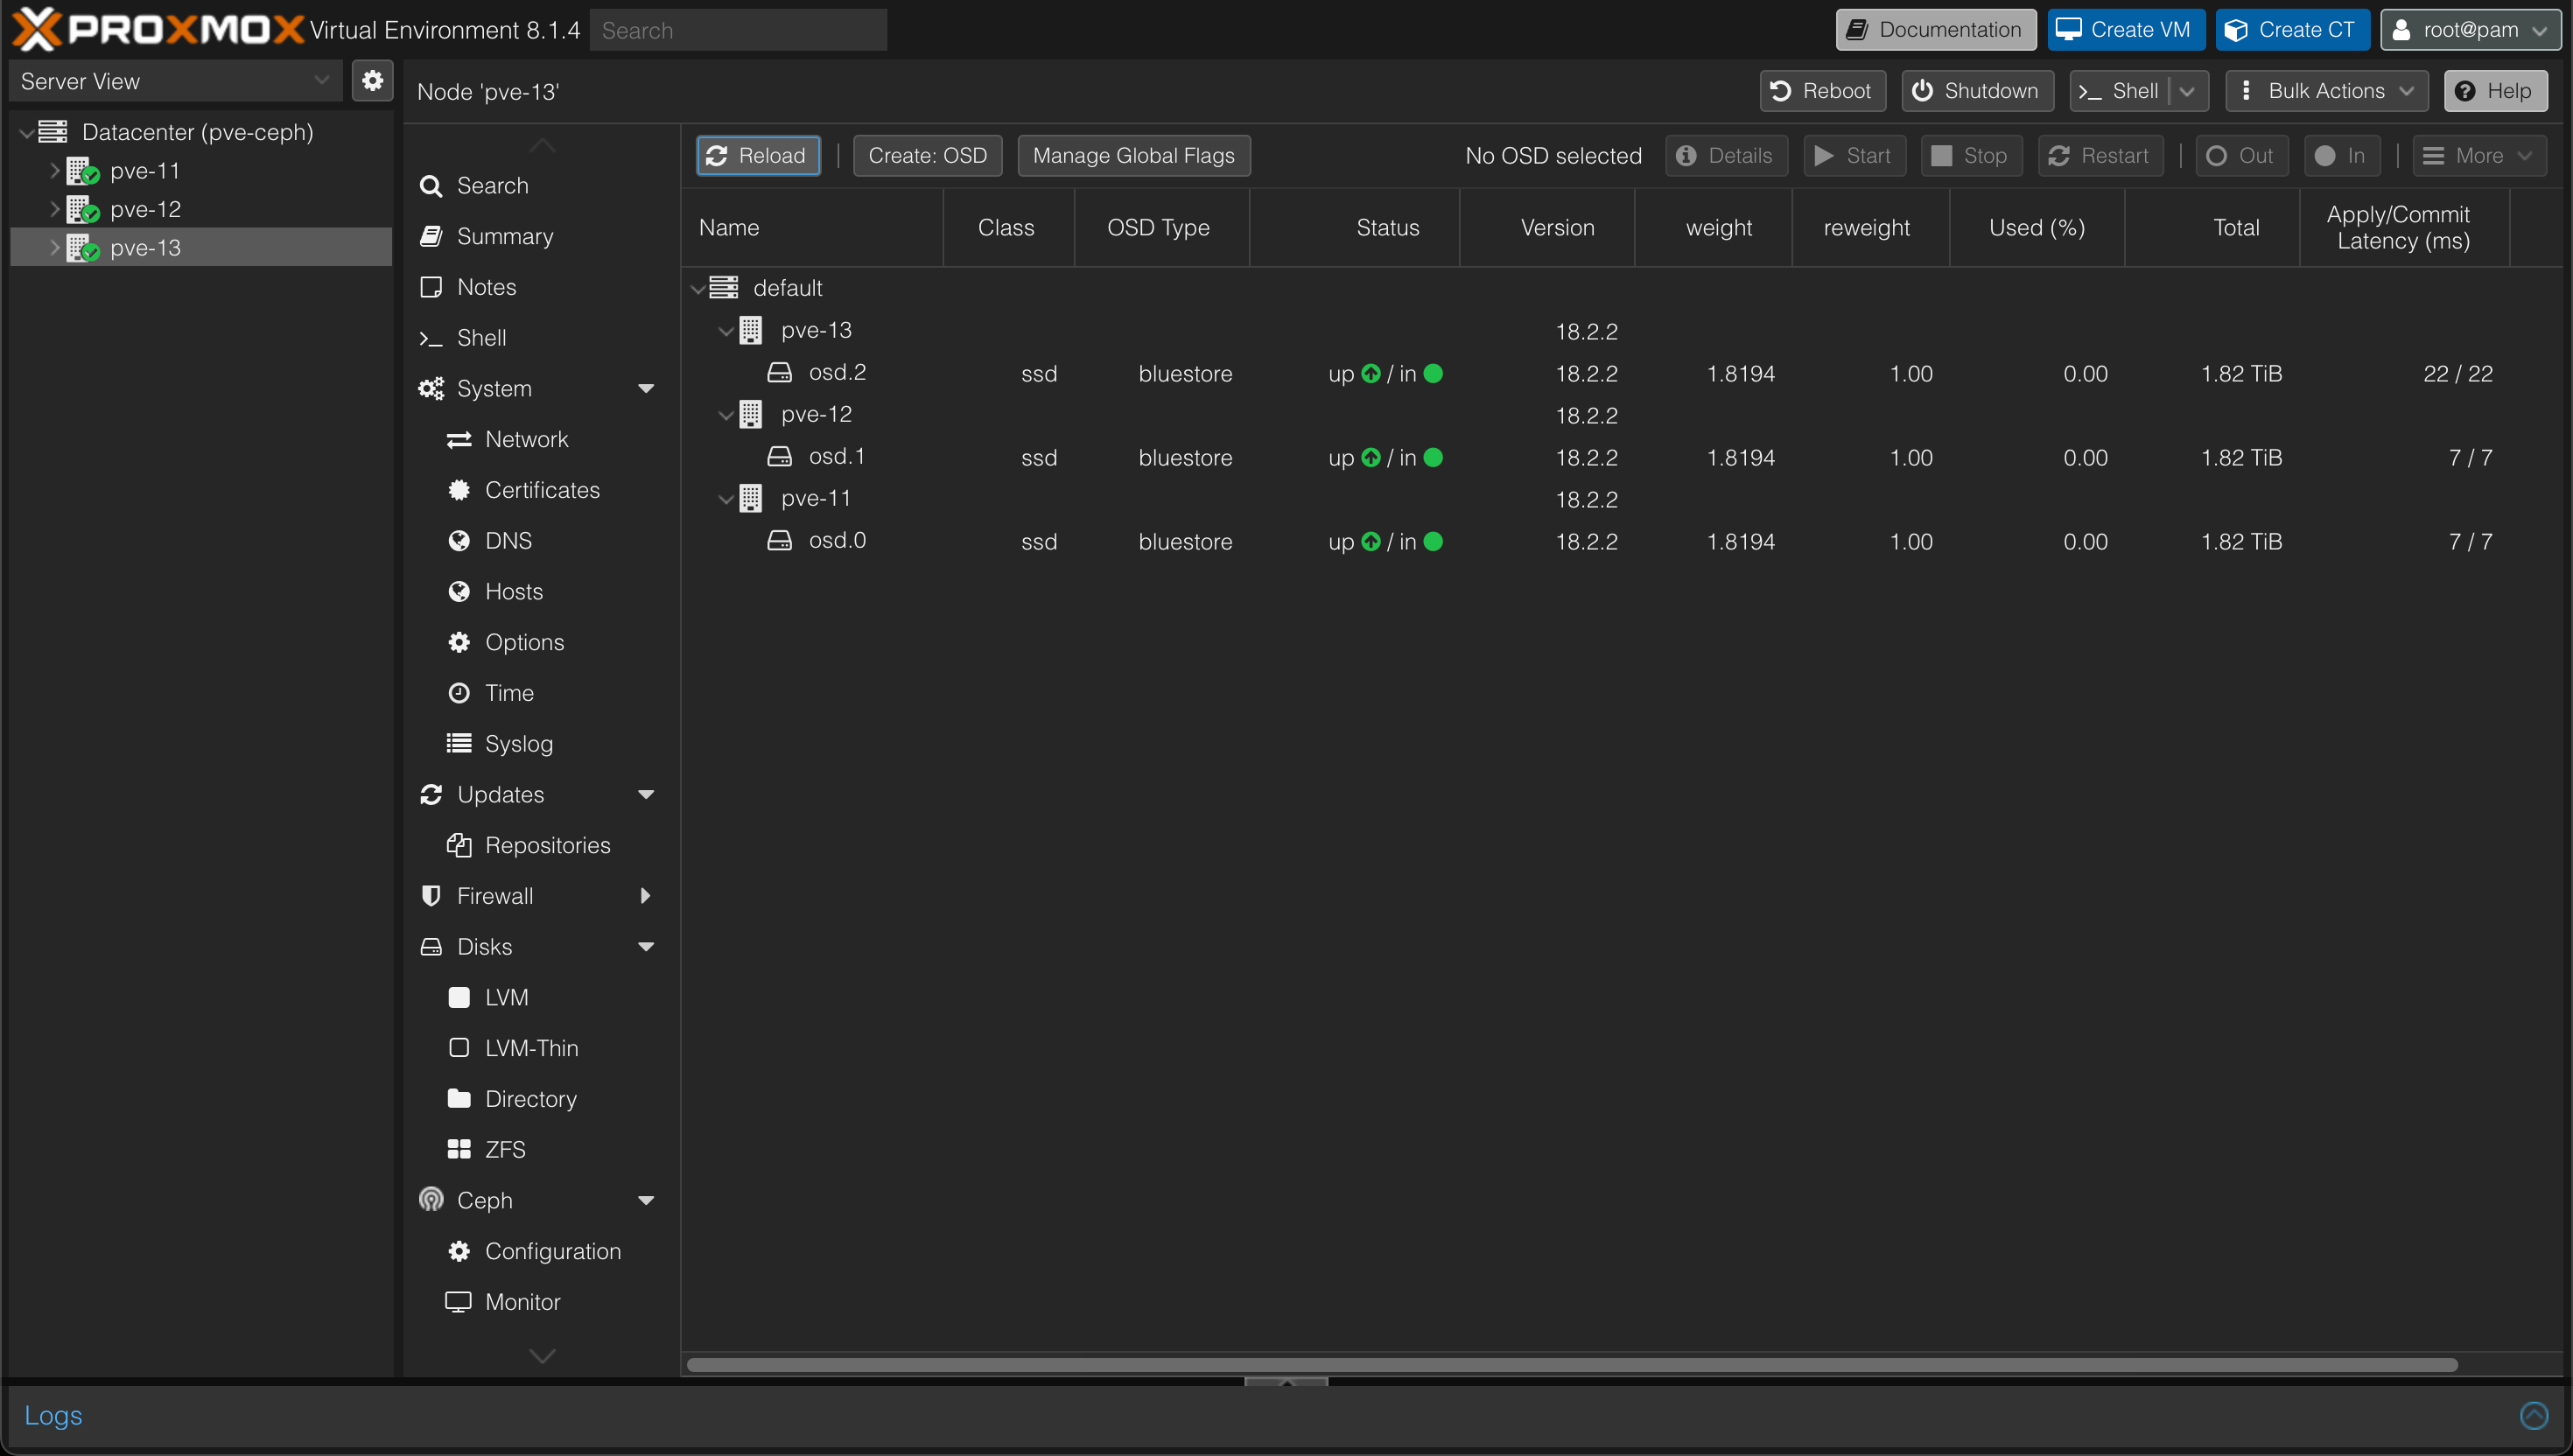
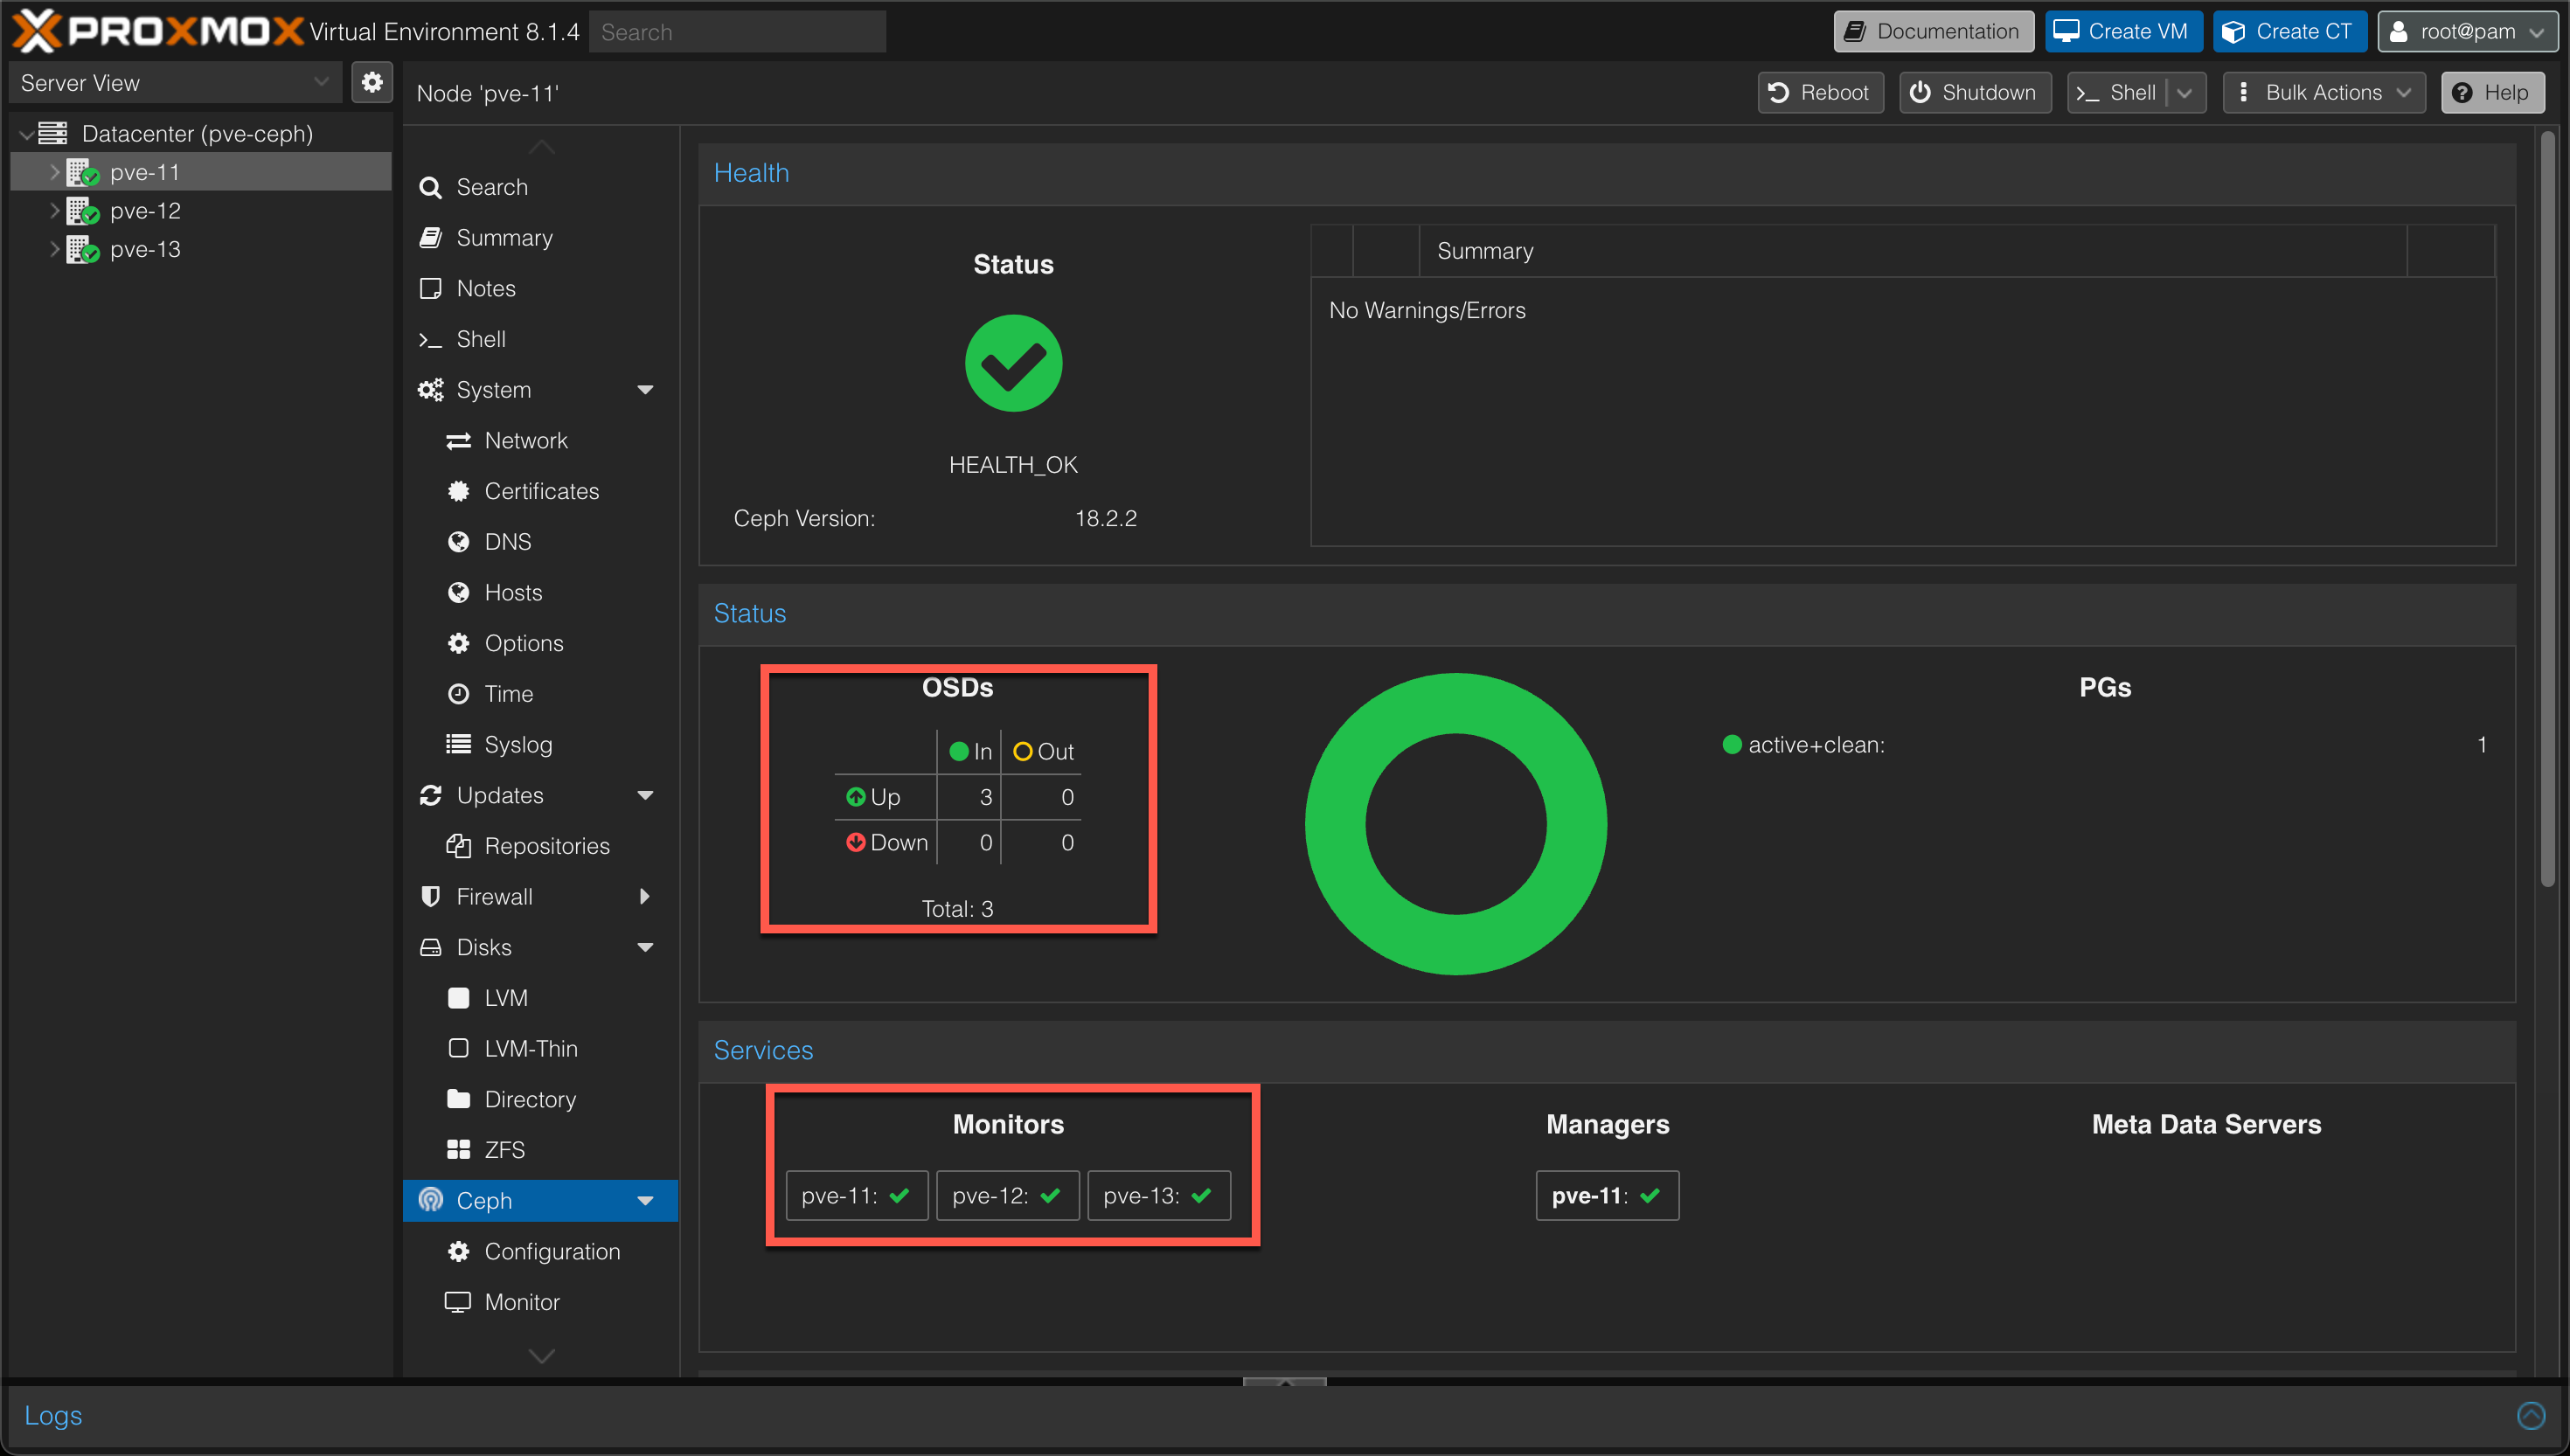
After creating OSDs on all hosts we should have one OSD on each
And our Cluster status should be Green
Create Pool
Now to make the storage available to our cluster we'll create a Ceph Pool. A Pool is a logical group for storing objects.
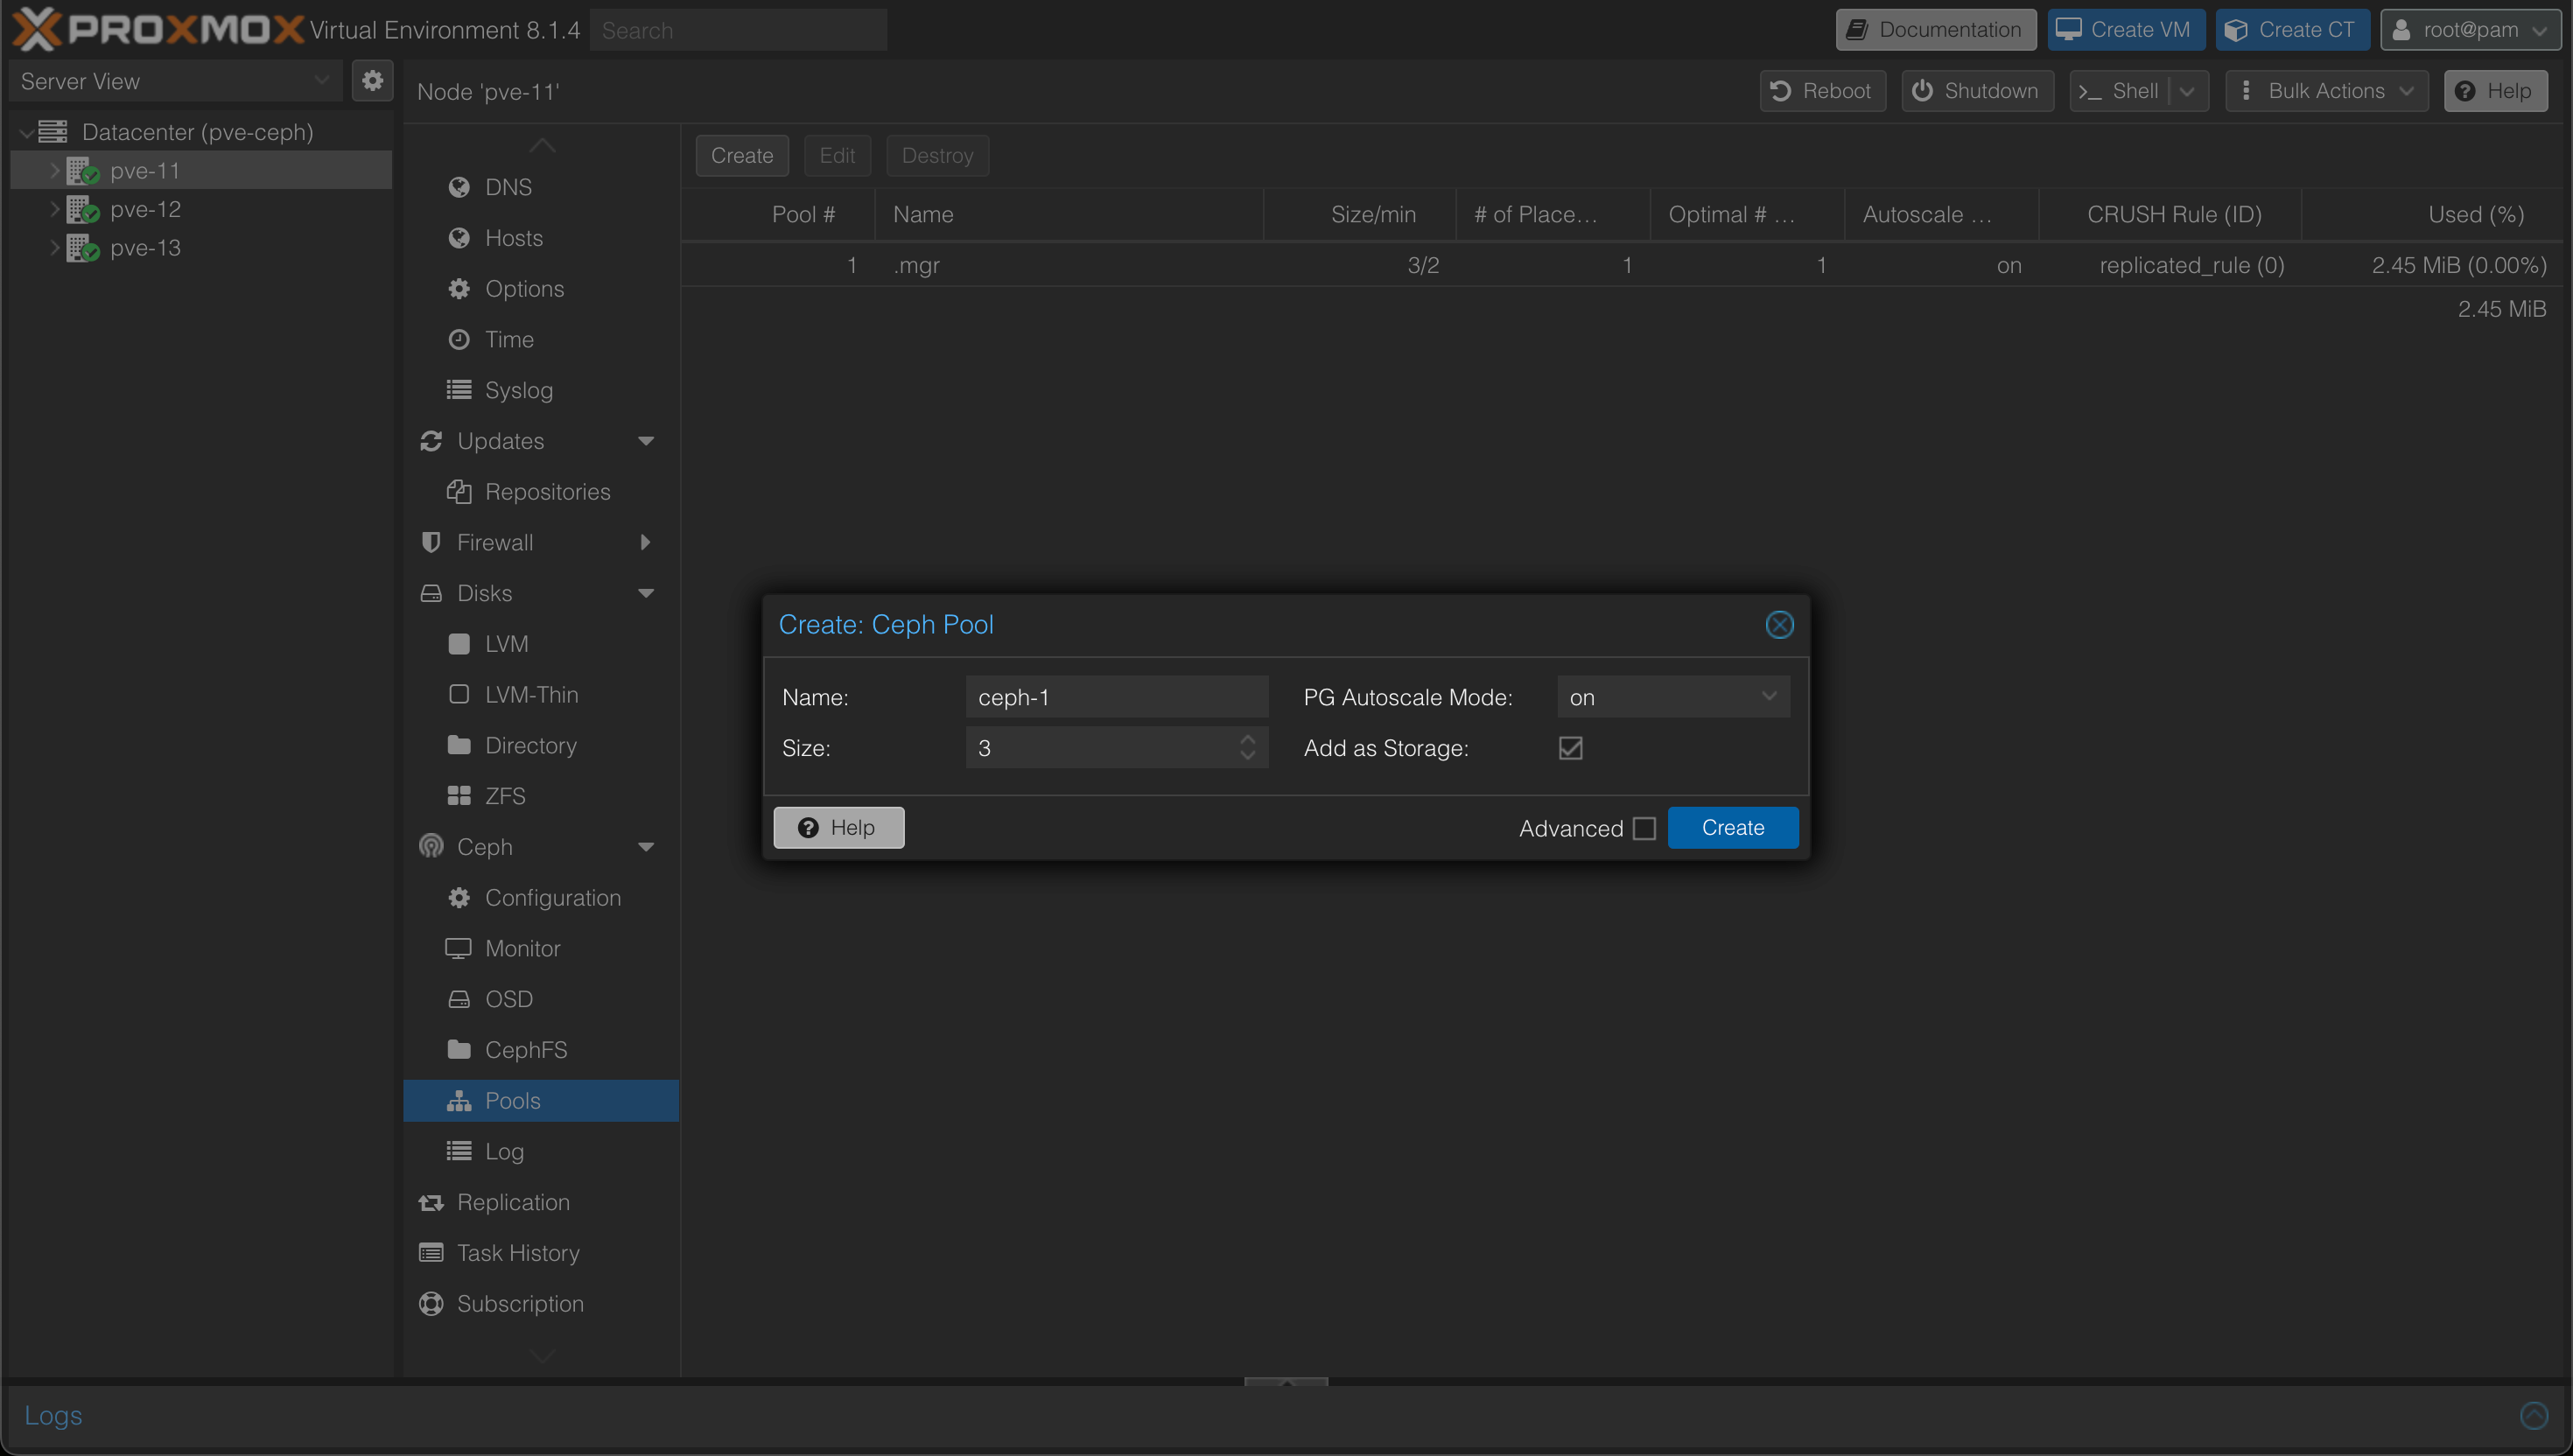
The size specified is the number of replicas to use for each object. The default is 3. The min_size, i.e. the minimum number of replicas, is by default 2 and can be overridden in the Advanced settings. We'll leave the defaults which ensures that even if one of our nodes (or disks) encounters a failure the object will still be functional and our workloads should work.
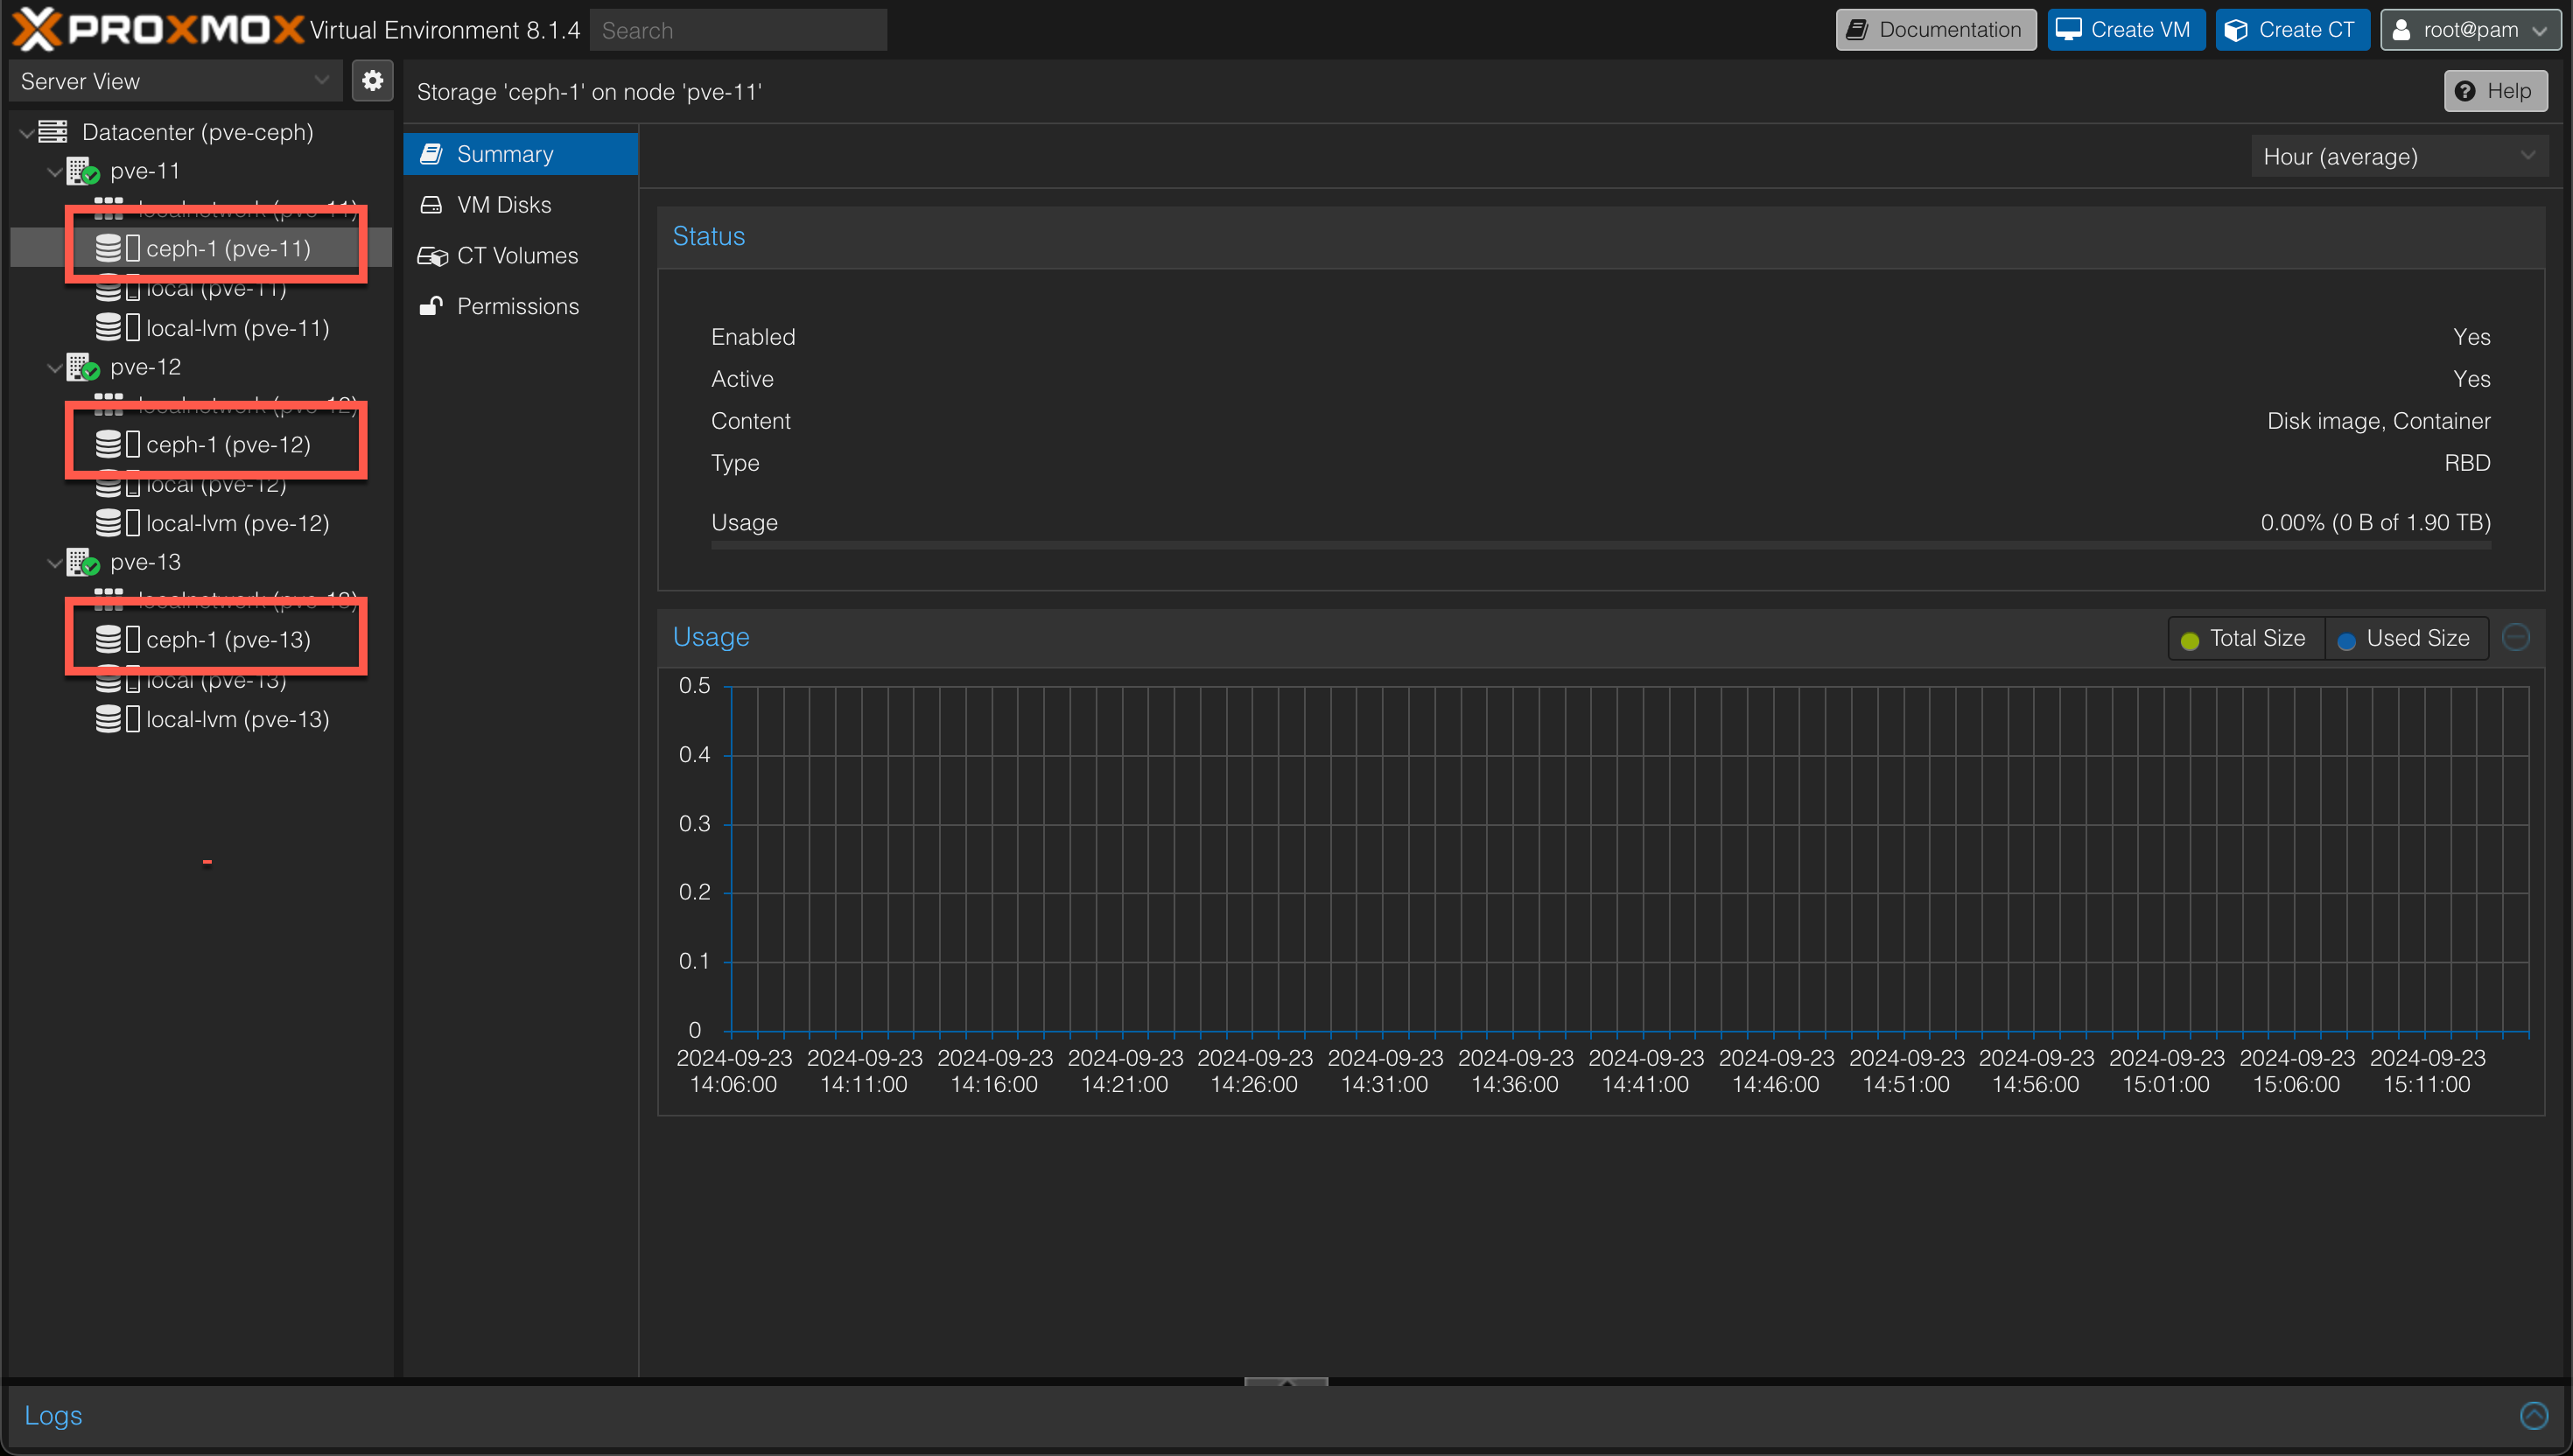
And after pool is created we should now have the Ceph backed storage pool connected to each of our hosts and we can start utilizing it in our cluster
Deploy workloads
Now to test our storage let's deploy some workloads. We won't go in to any details on how to deploy virtual machines in this post. The process is very straightforward and there's plenty of resources out there that goes through the steps. I've also shown an example of this in one of my previous posts.
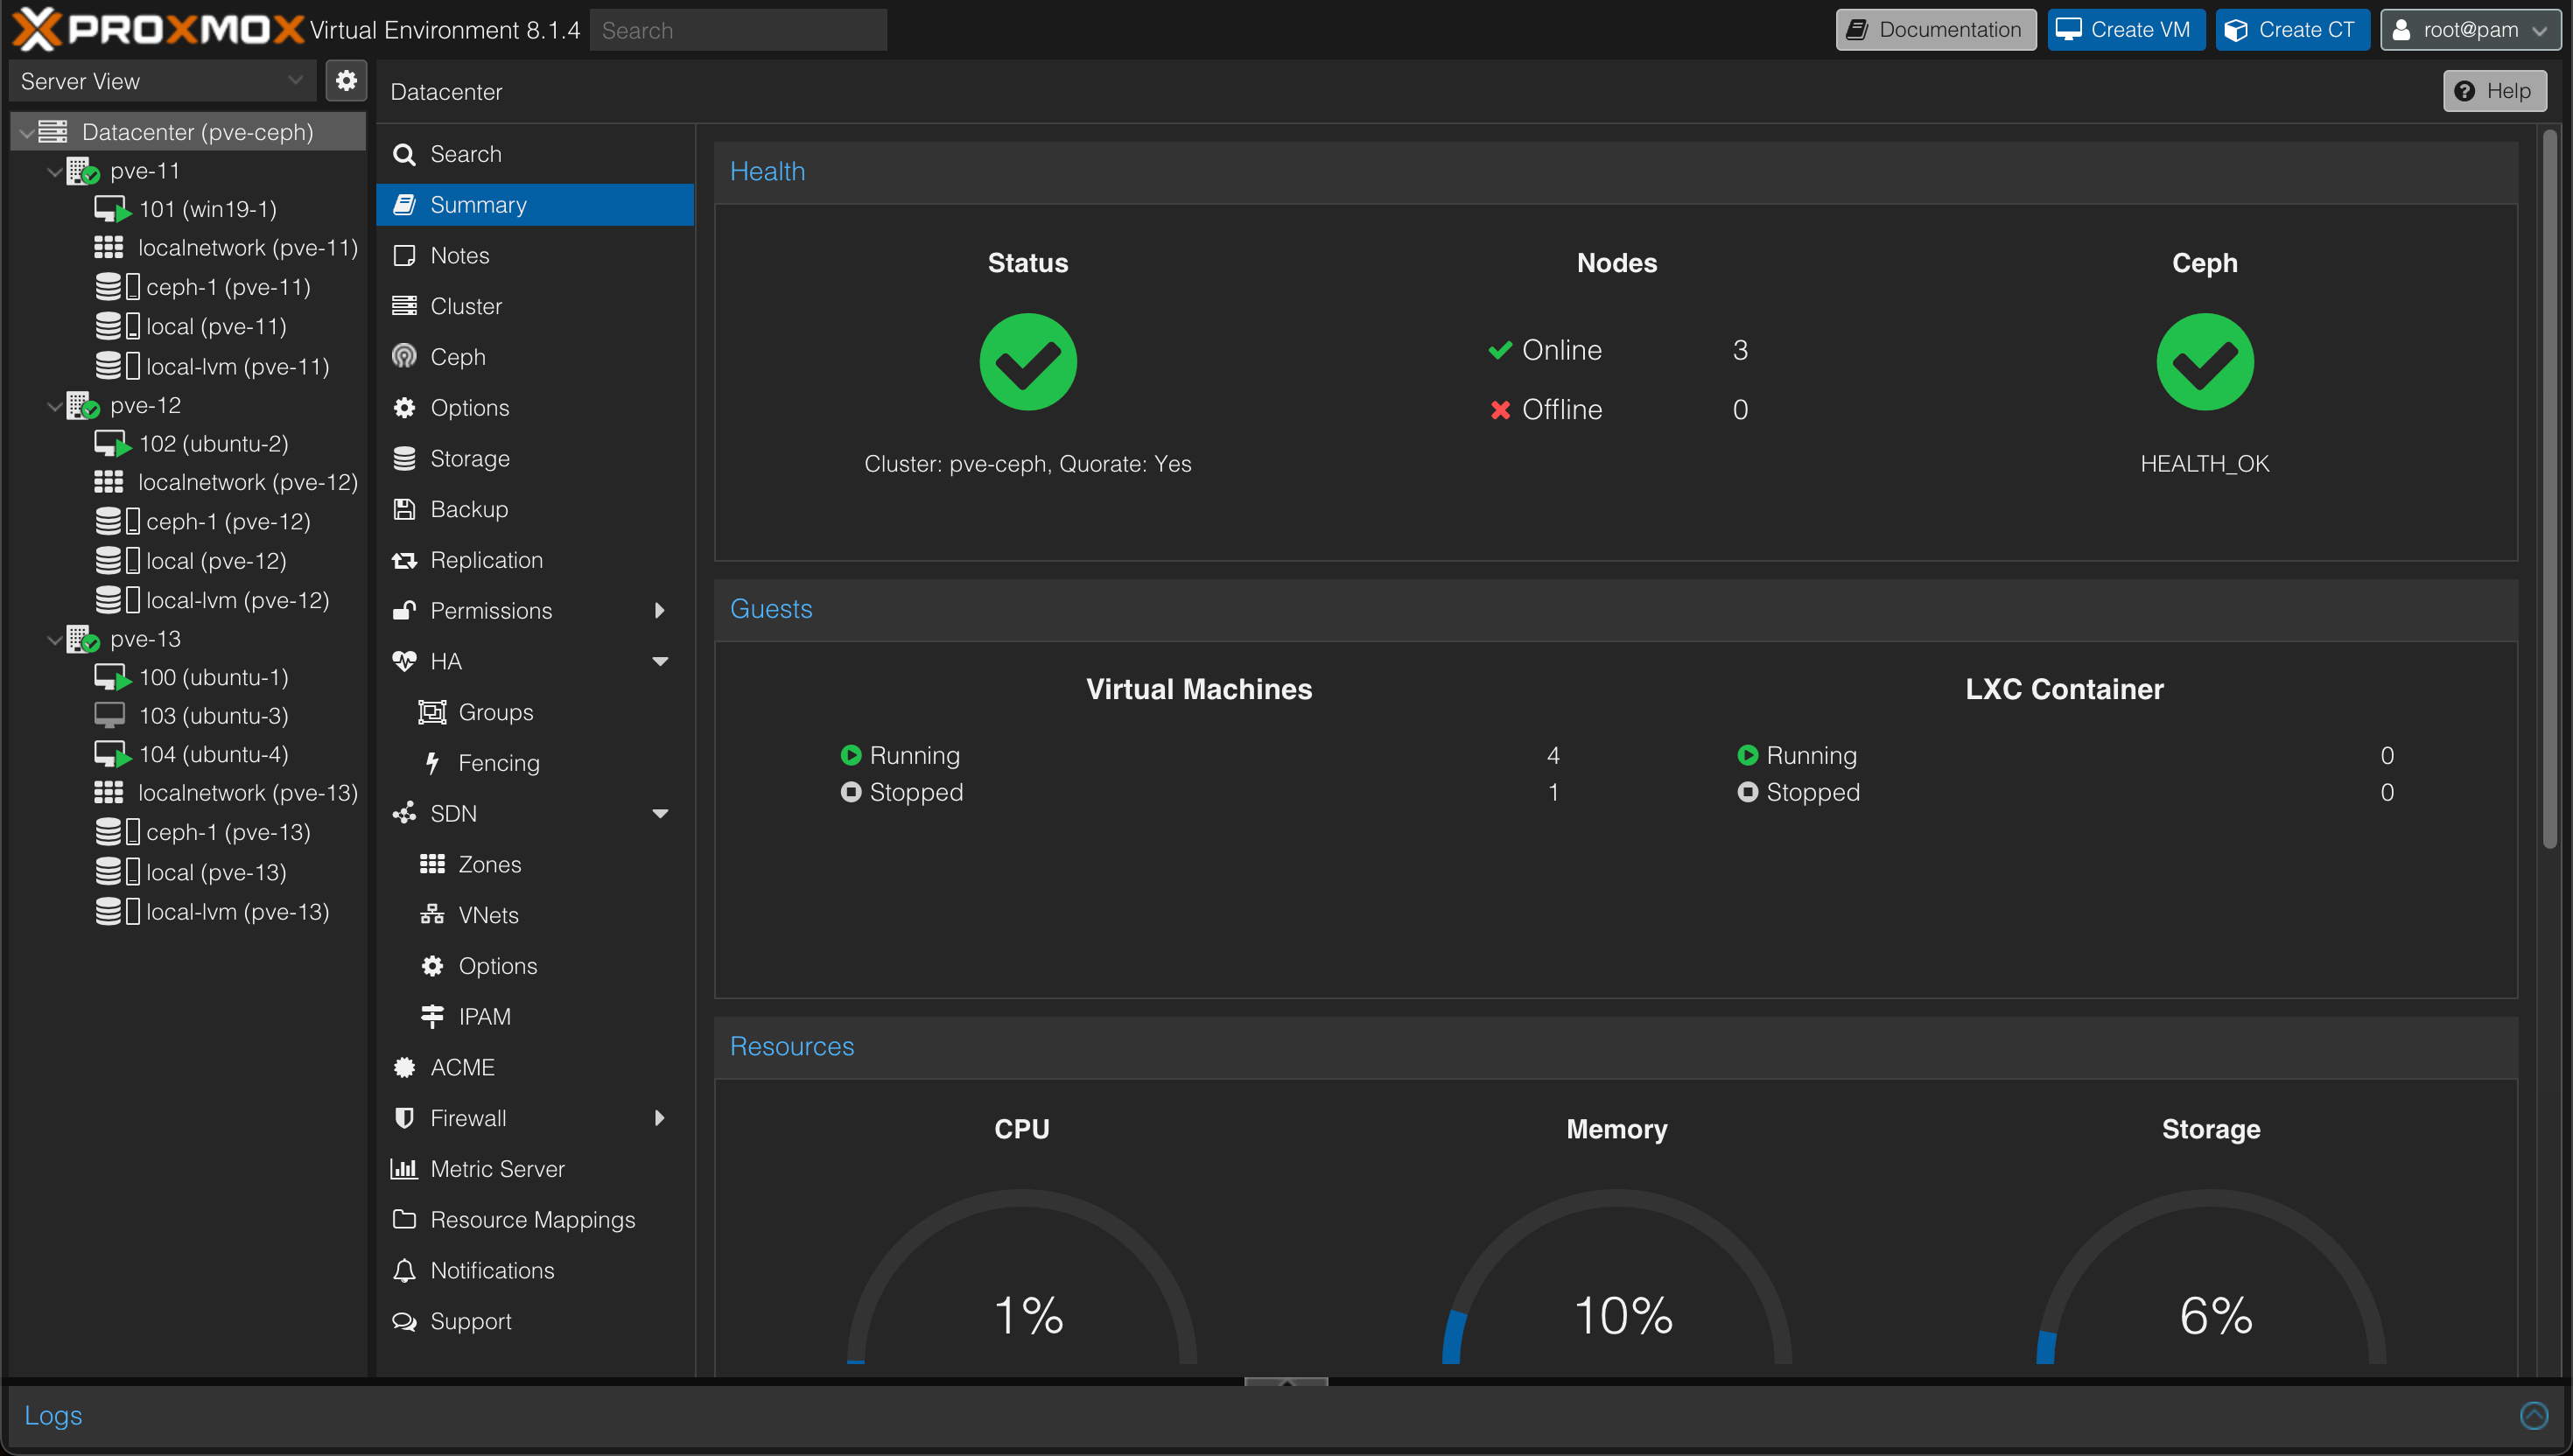
At this point we have a few machines running. 3 Ubuntu VMs and 1 Windows VM. We also have one VM that is powered off.
Test failover
Now, without any further configuration let's see what happens if one of the three nodes suffers from an outage
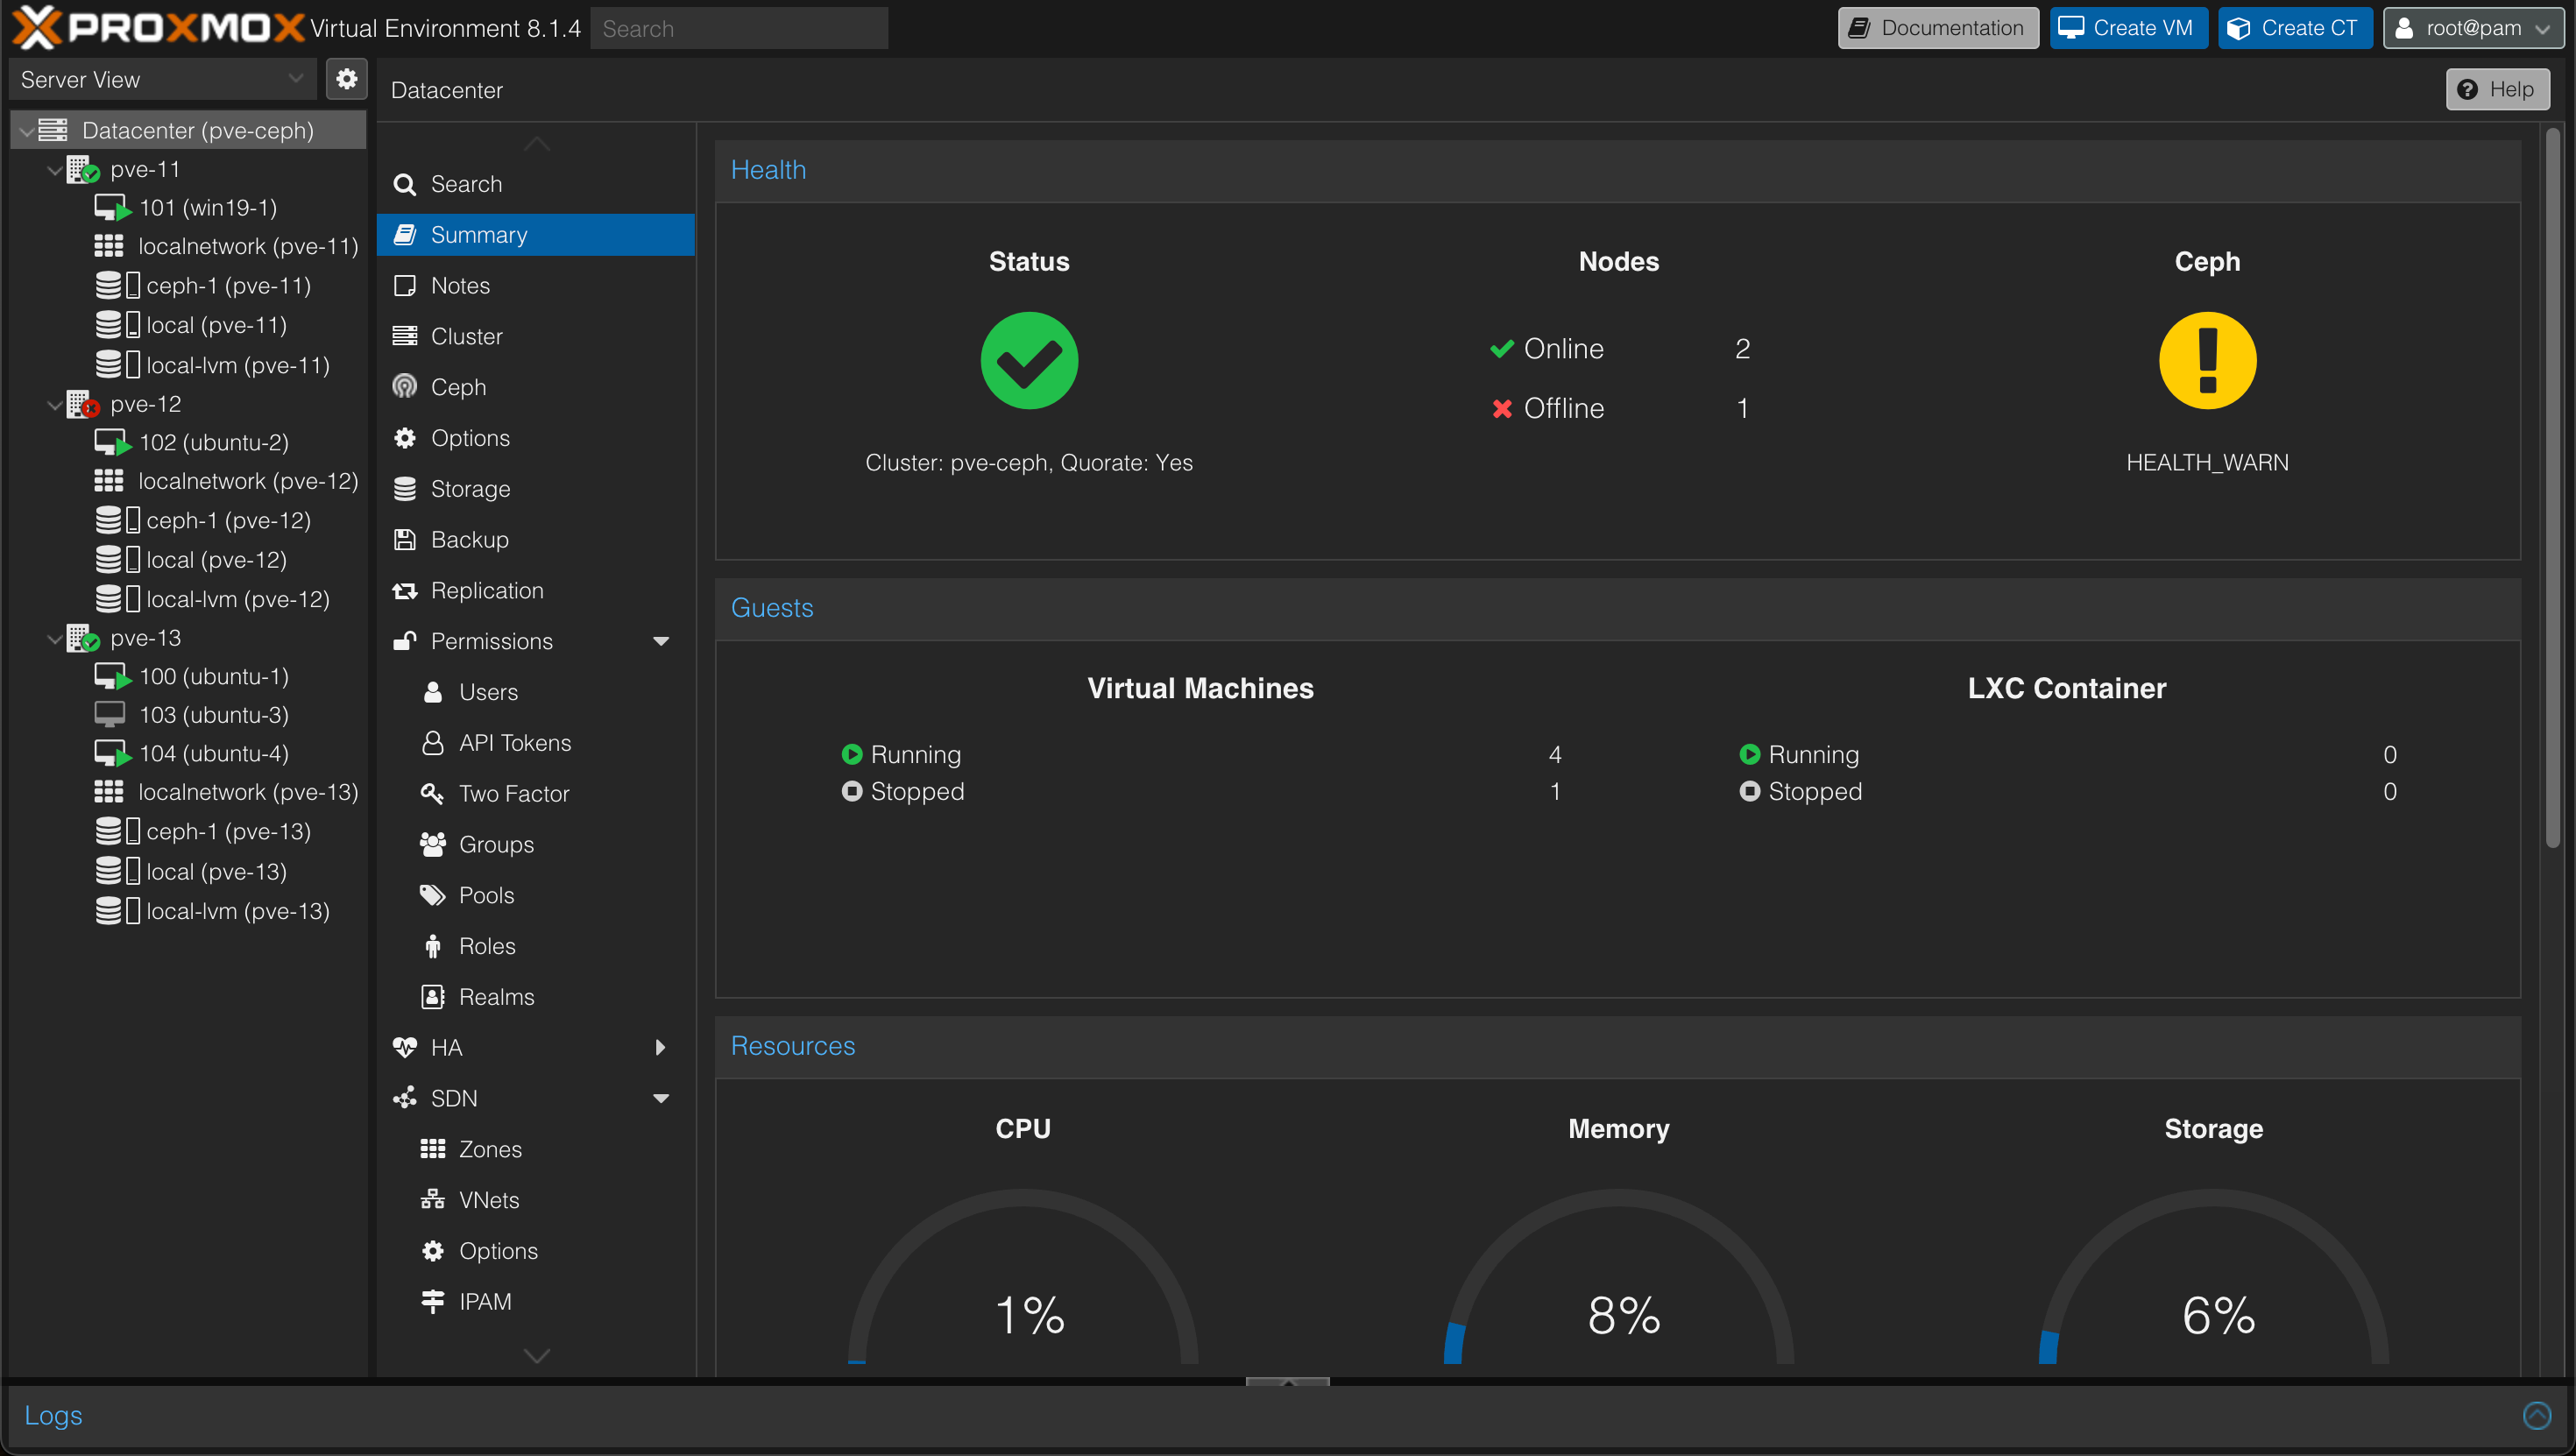
One node is down, the cluster status is still Ok and we have a warning on Ceph
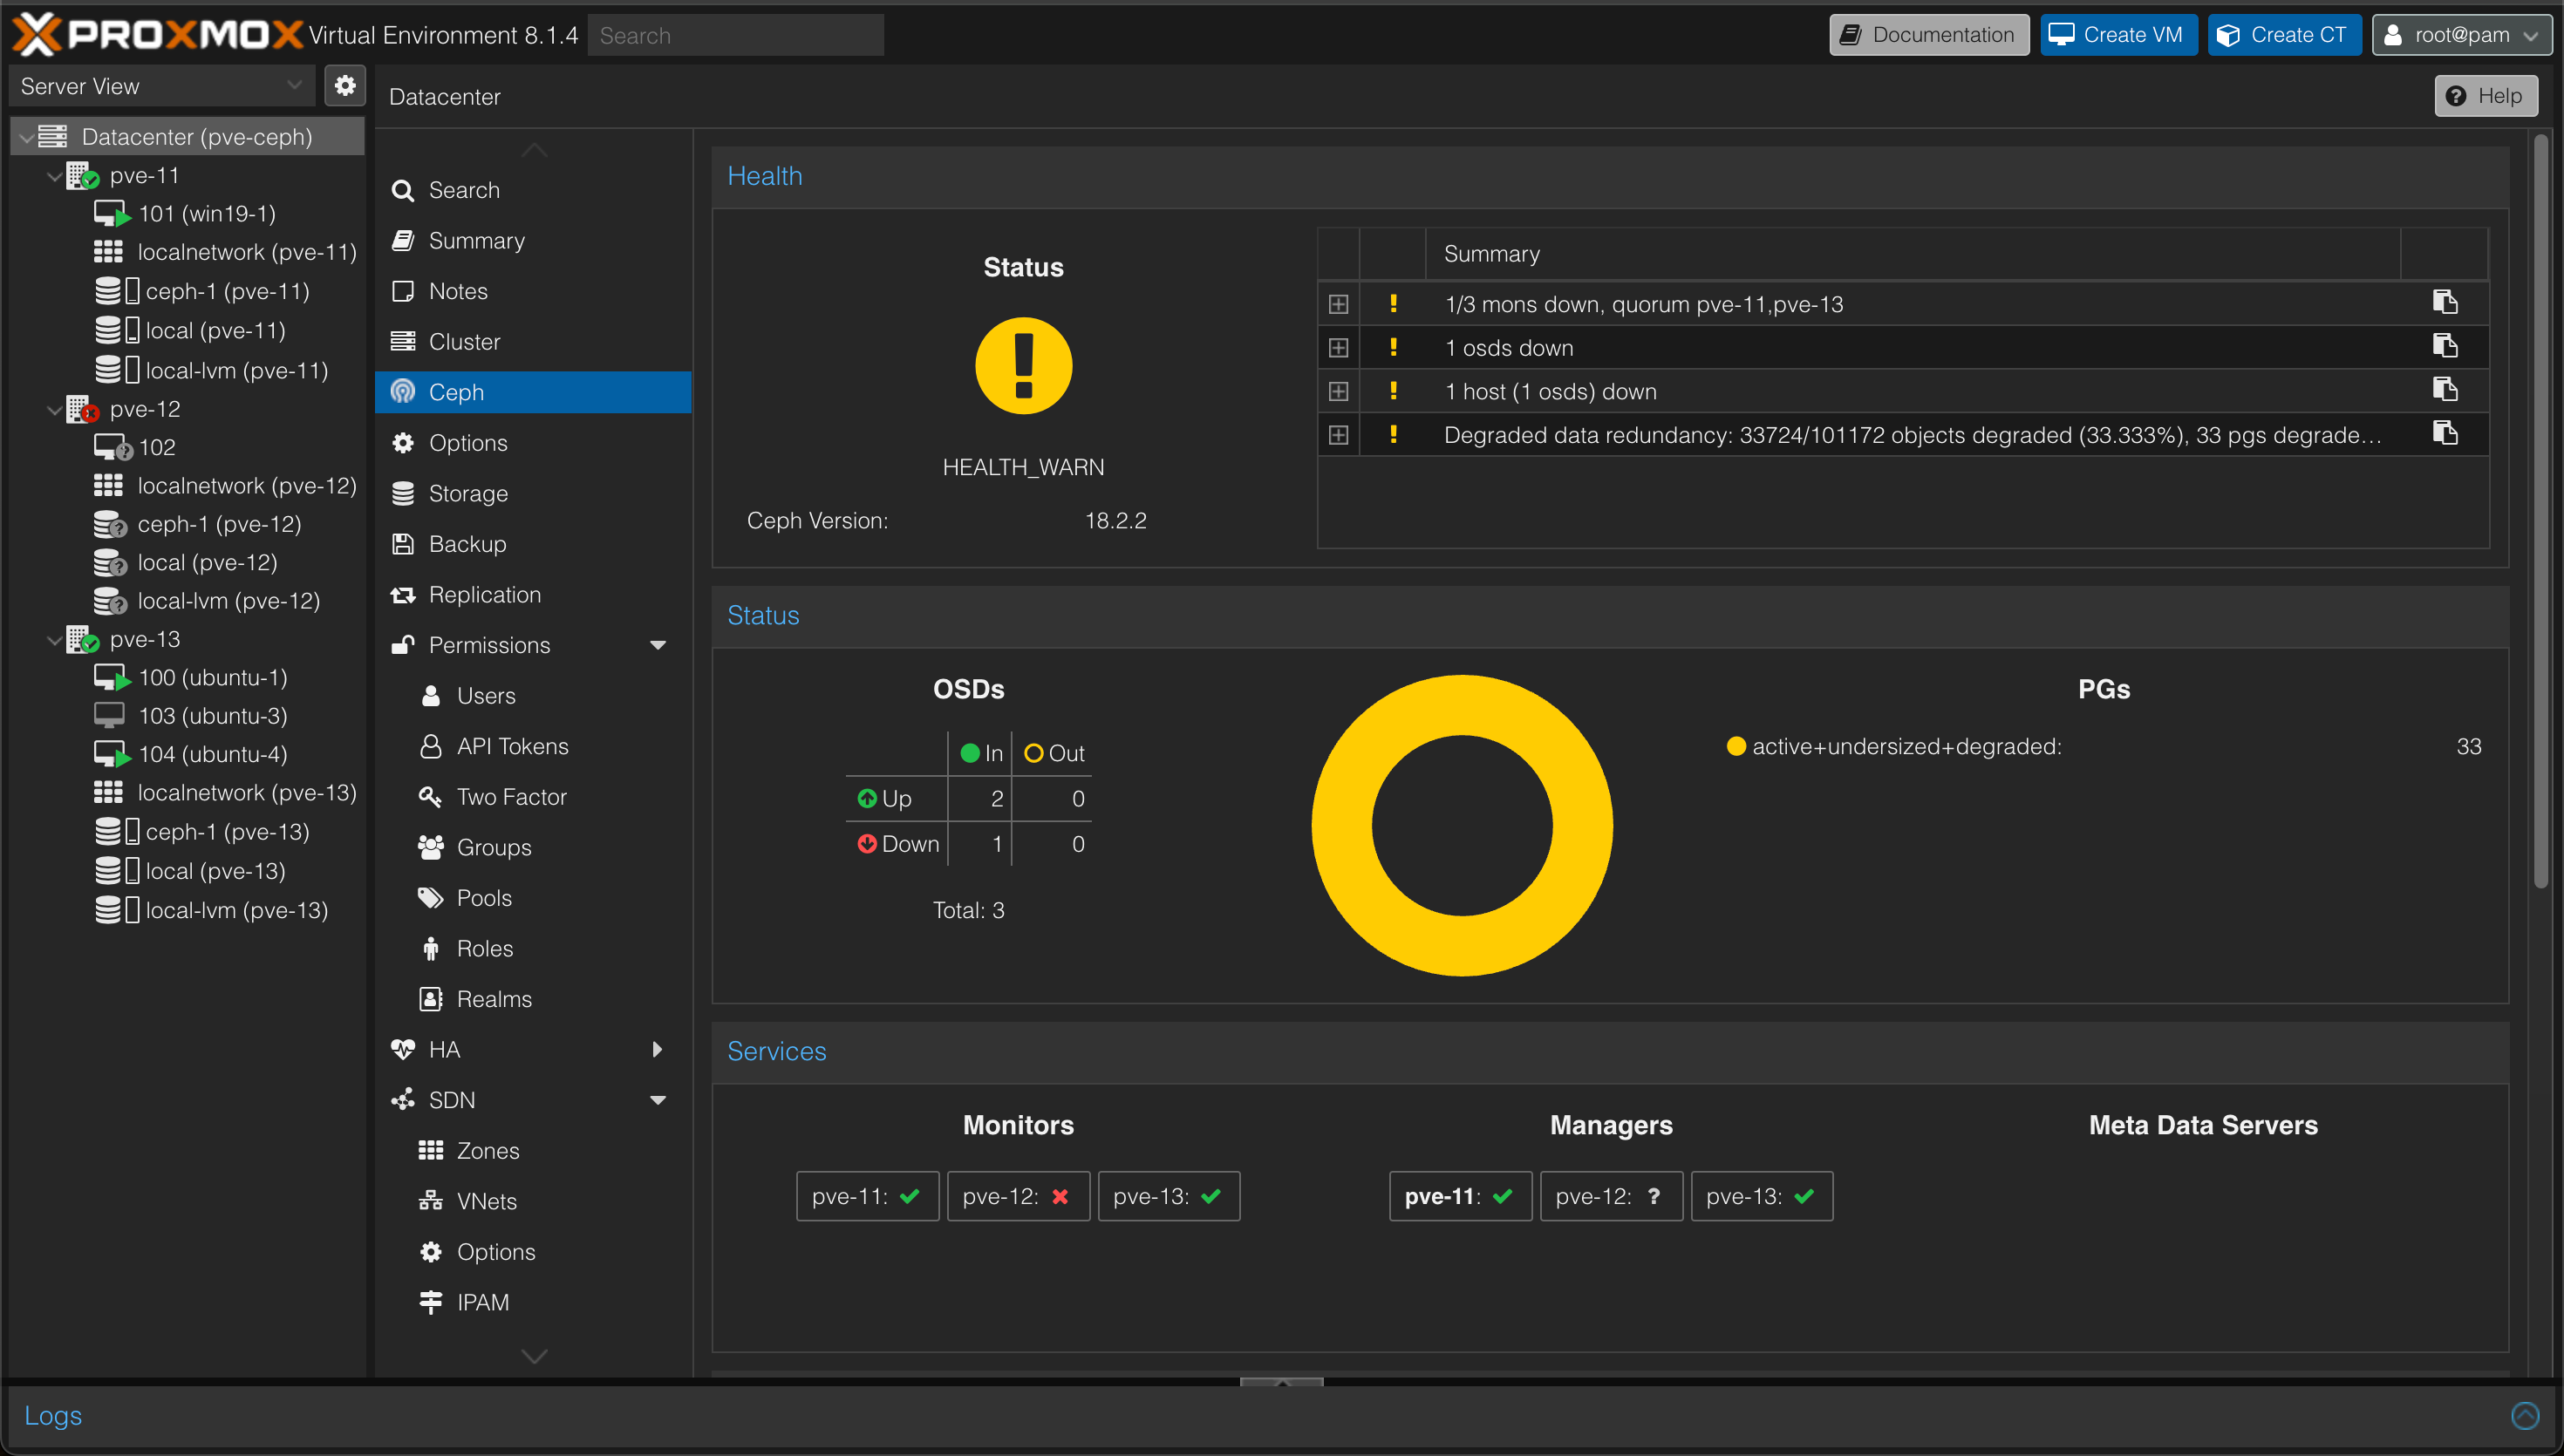
So as we can see the Ceph cluster is still operational, but with a degraded data redundancy.
What might seem strange is that the virtual machine that was running on the failed node is not migrated/failed over to any of the other nodes. This is because we haven't configured any HA (High availability) yet.
Let's bring that failed node back online and look at how we can configure HA
Configure HA
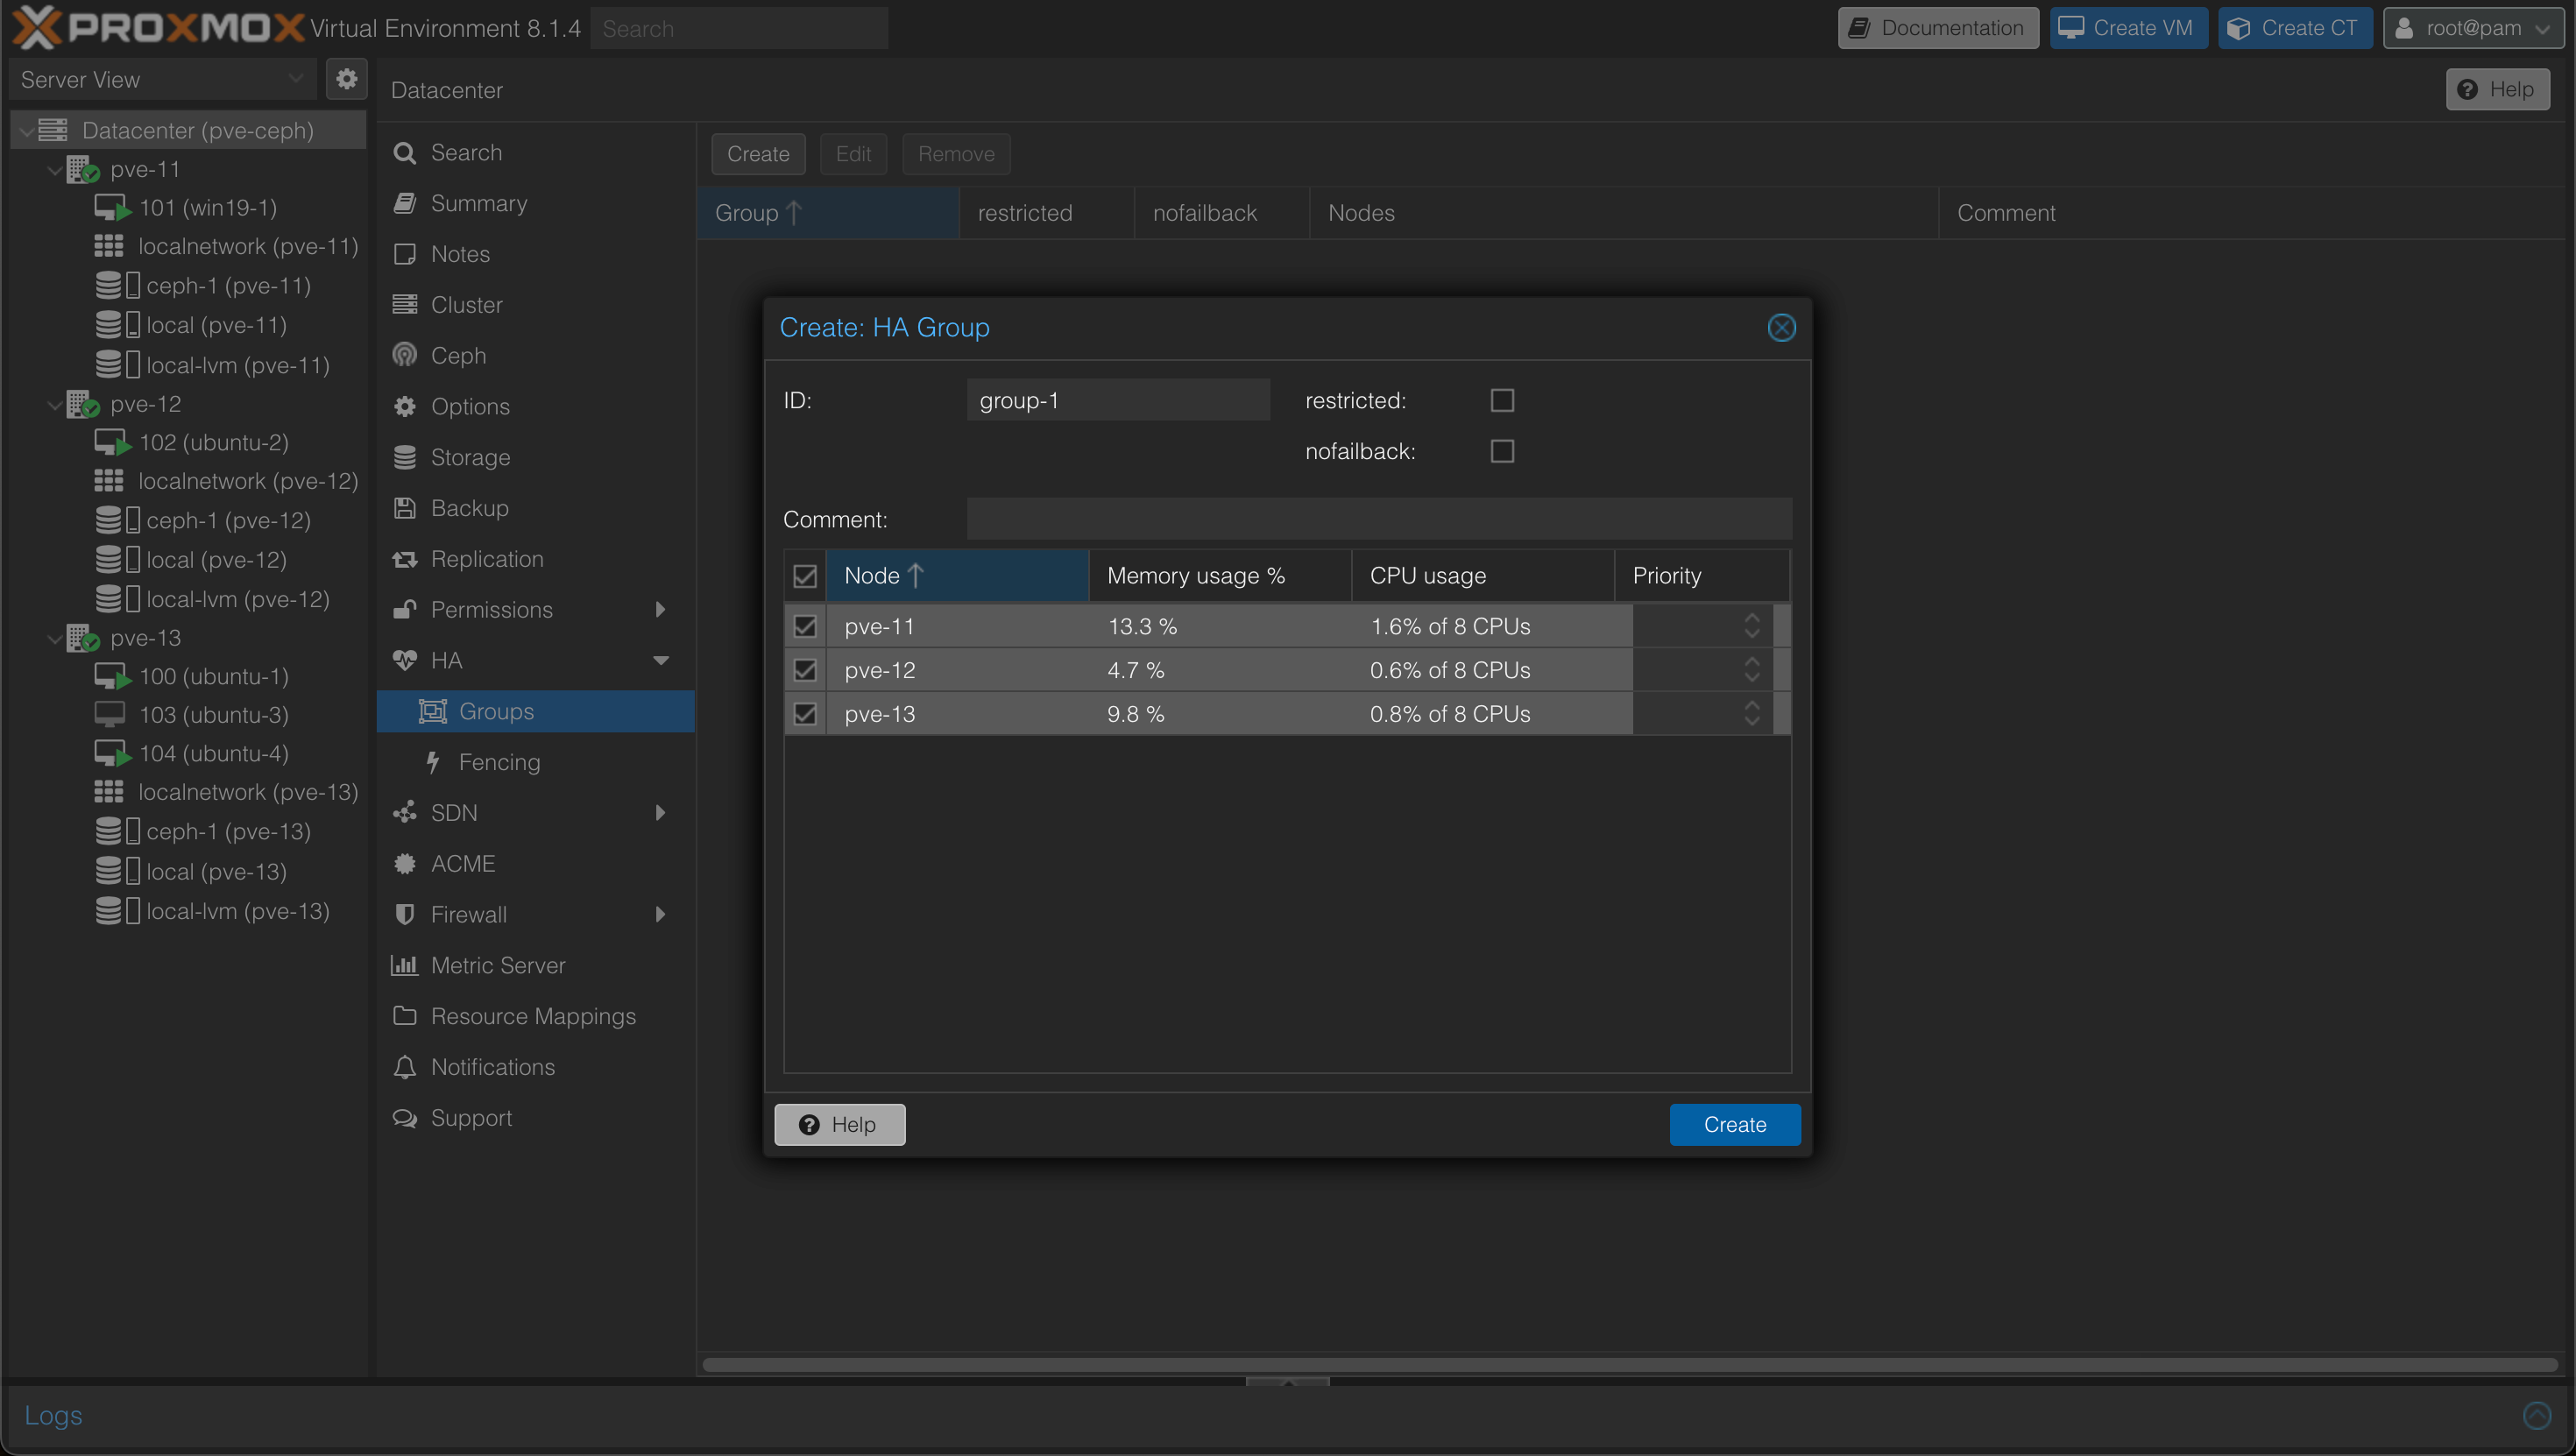
To configure HA for hosts we'll go to the Datacenter object and the HA tab. We'll create a group and select our three nodes
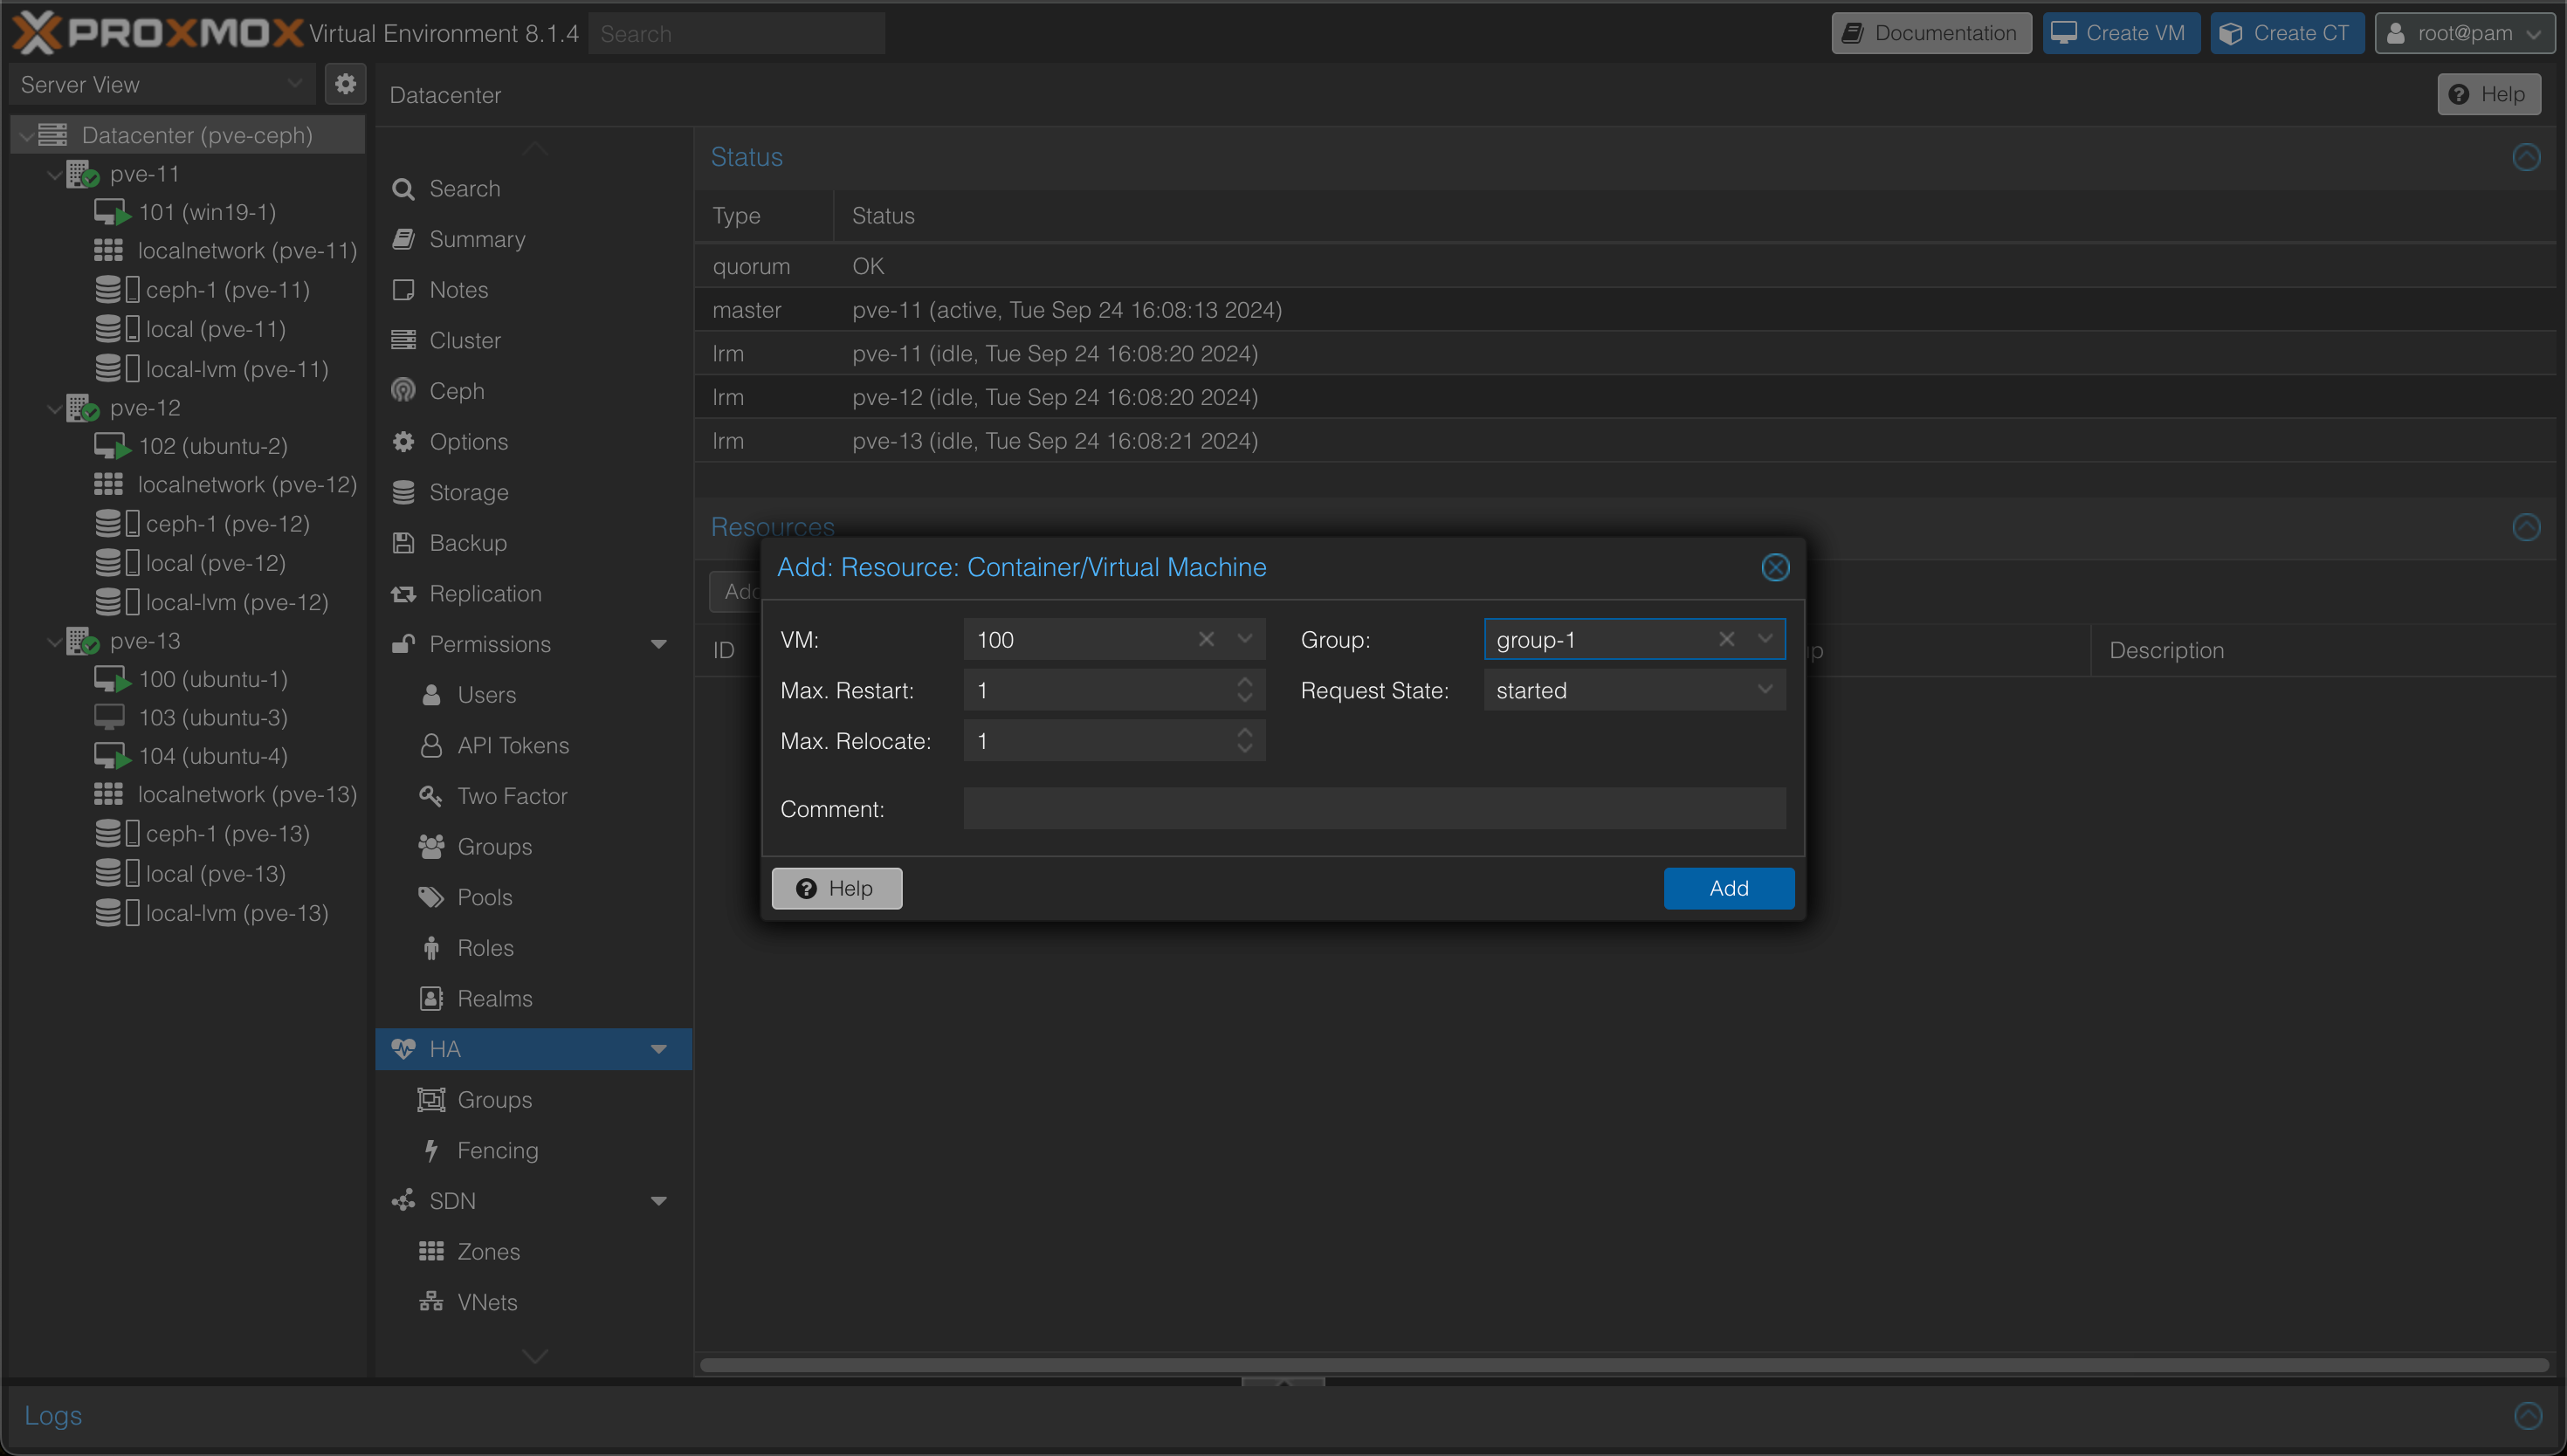
Next we'll have to specify which VMs should be part of HA, and to what group the VM belongs to. Coming from a VMware world this might seem like a cumbersome step, but it also gives some flexibility.
After specifying the resources I want to protect, my HA config looks like this
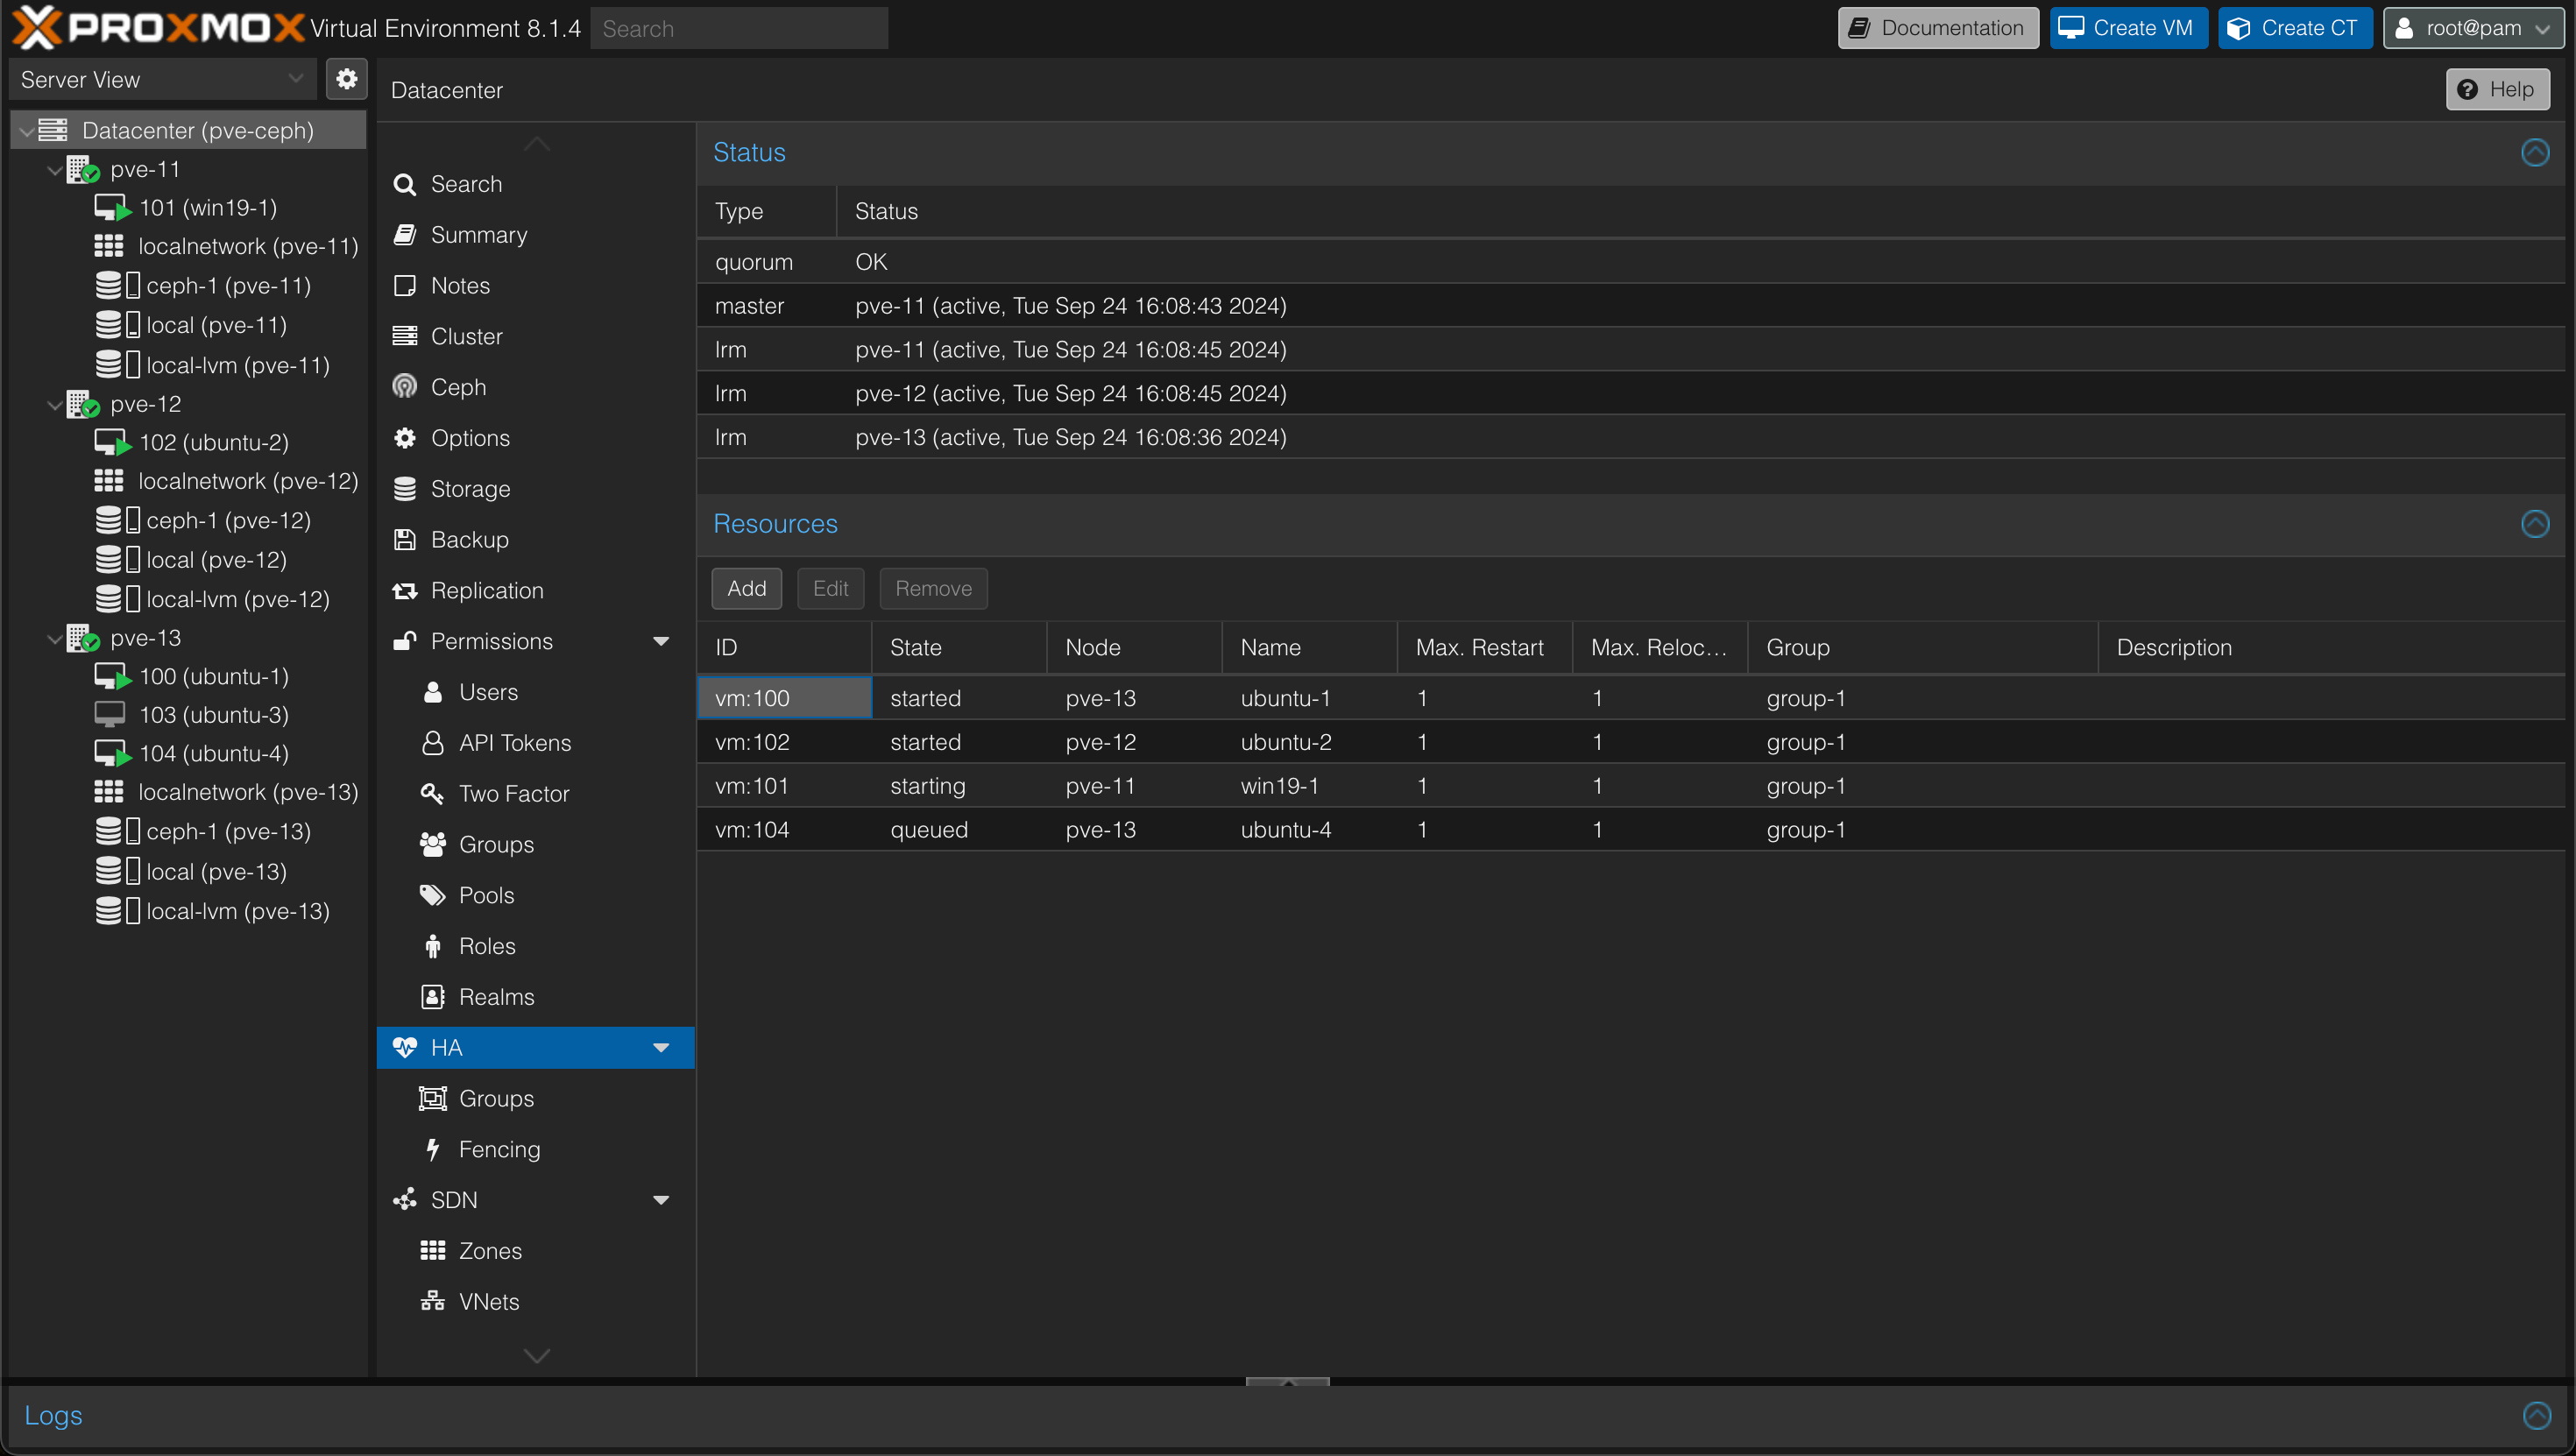
As we can see all VMs apart form the powered off one, 103, is protected.
Test failover with HA
Now let's test another failover and see what happens to our VMs. This time we'll simulate a failure on node pve-13 which has three VMs.
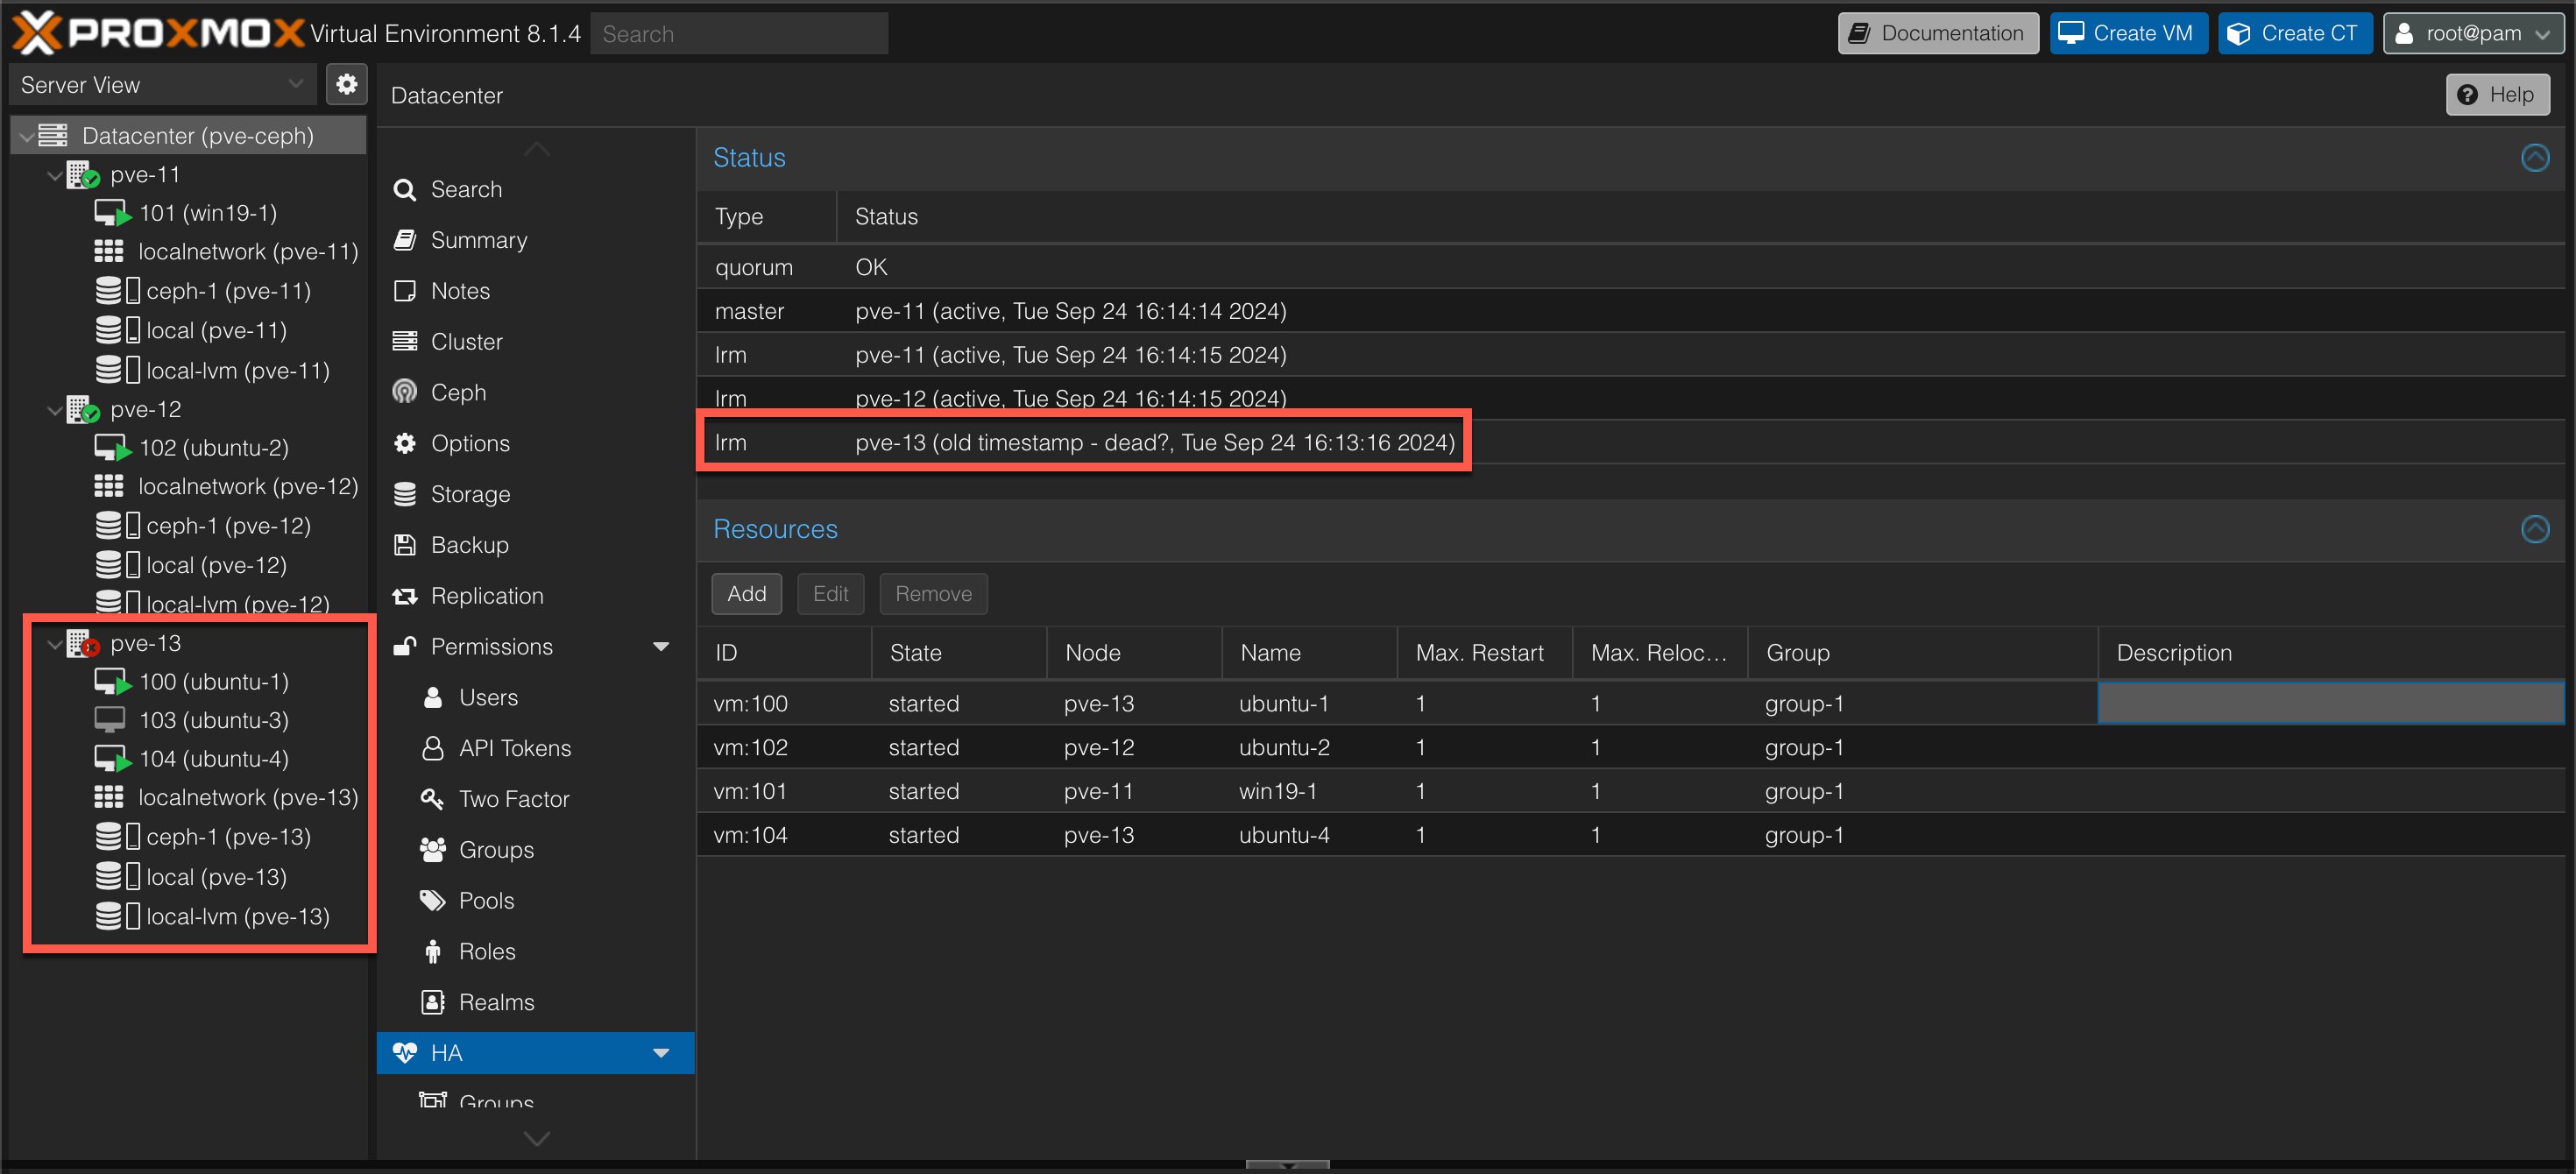
Although our host has encountered a failure, our VMs doesn't immediately fail over to our working nodes. In this example we can see that it took just over two minutes before our VMs are started up on the working hosts after the last timestamp of the failing node
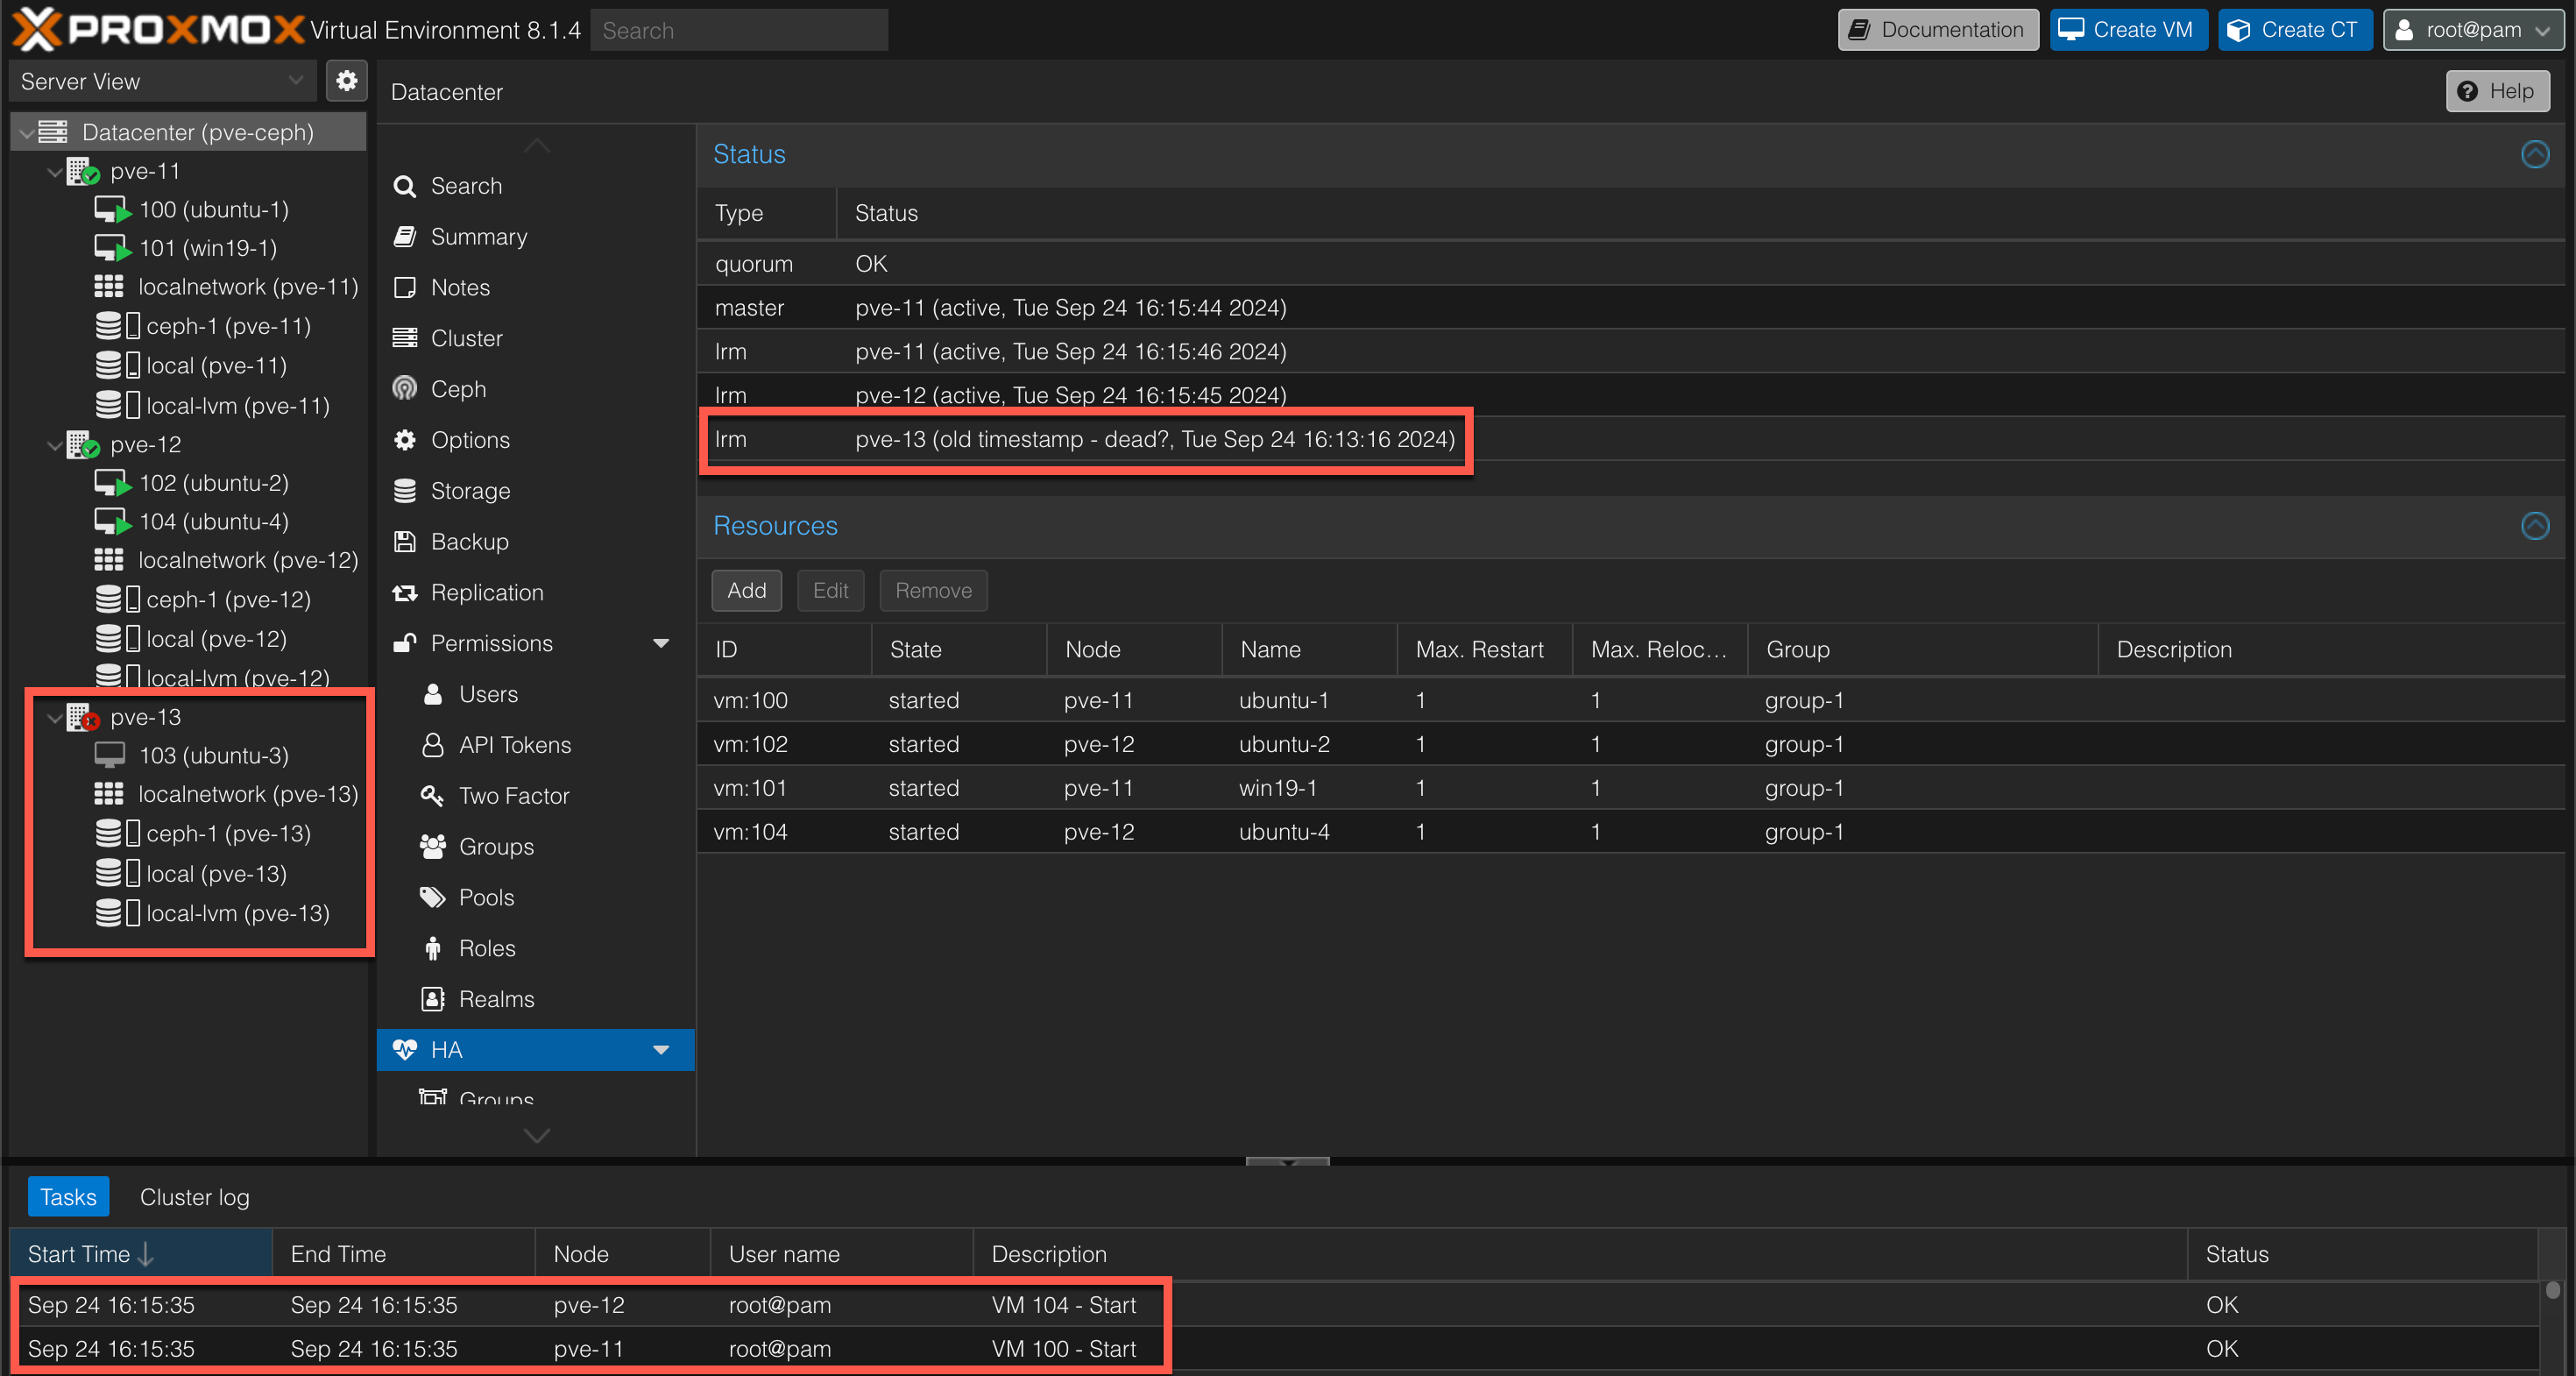
We can also see that the VM with ID 103 is not failed over which is expected since this VM was not part of the HA resources config.
More information on High availability can be found in the Proxmox documentation
Summary
In this post we've seen how to deploy a Proxmox cluster with Ceph as the shared storage solution. We've also seen how to configure High availability so that VMs automatically can be failed over to working nodes in case of a failure.
There's obviously a lot more tweaking and configuration that can (and should?) be done in a more production like environment, especially around Ceph, but hopefully this post can show some of the cababilties built in to the Proxmox Virtual Environment platform. For more information about deploying a Hyper-Converged Ceph cluster, please check out the Proxmox documentation
Thanks for reading, and please reach out if you have any comments or questions