vSphere with Tanzu - Namespaces and Guest Clusters
Overview
This is the third in a mini-series of posts around vSphere with Tanzu in a vSphere 7 Update 3 environment. In the first post we deployed and configured the NSX Advanced Load Balancer (formerly Avi Vantage) for providing Load Balancing services, in the second post we enabled Workload Management in vSphere and with that we got a Supervisor Cluster which we will use to create Namespaces and Tanzu Kubernetes (Guest) Clusters.
This post is quite long with a lot of screenshots, please bear with me...
Lab environment
The vSphere environment we're working on is based on vCenter and ESXi on the 7.0.3 (Update 3f) version.
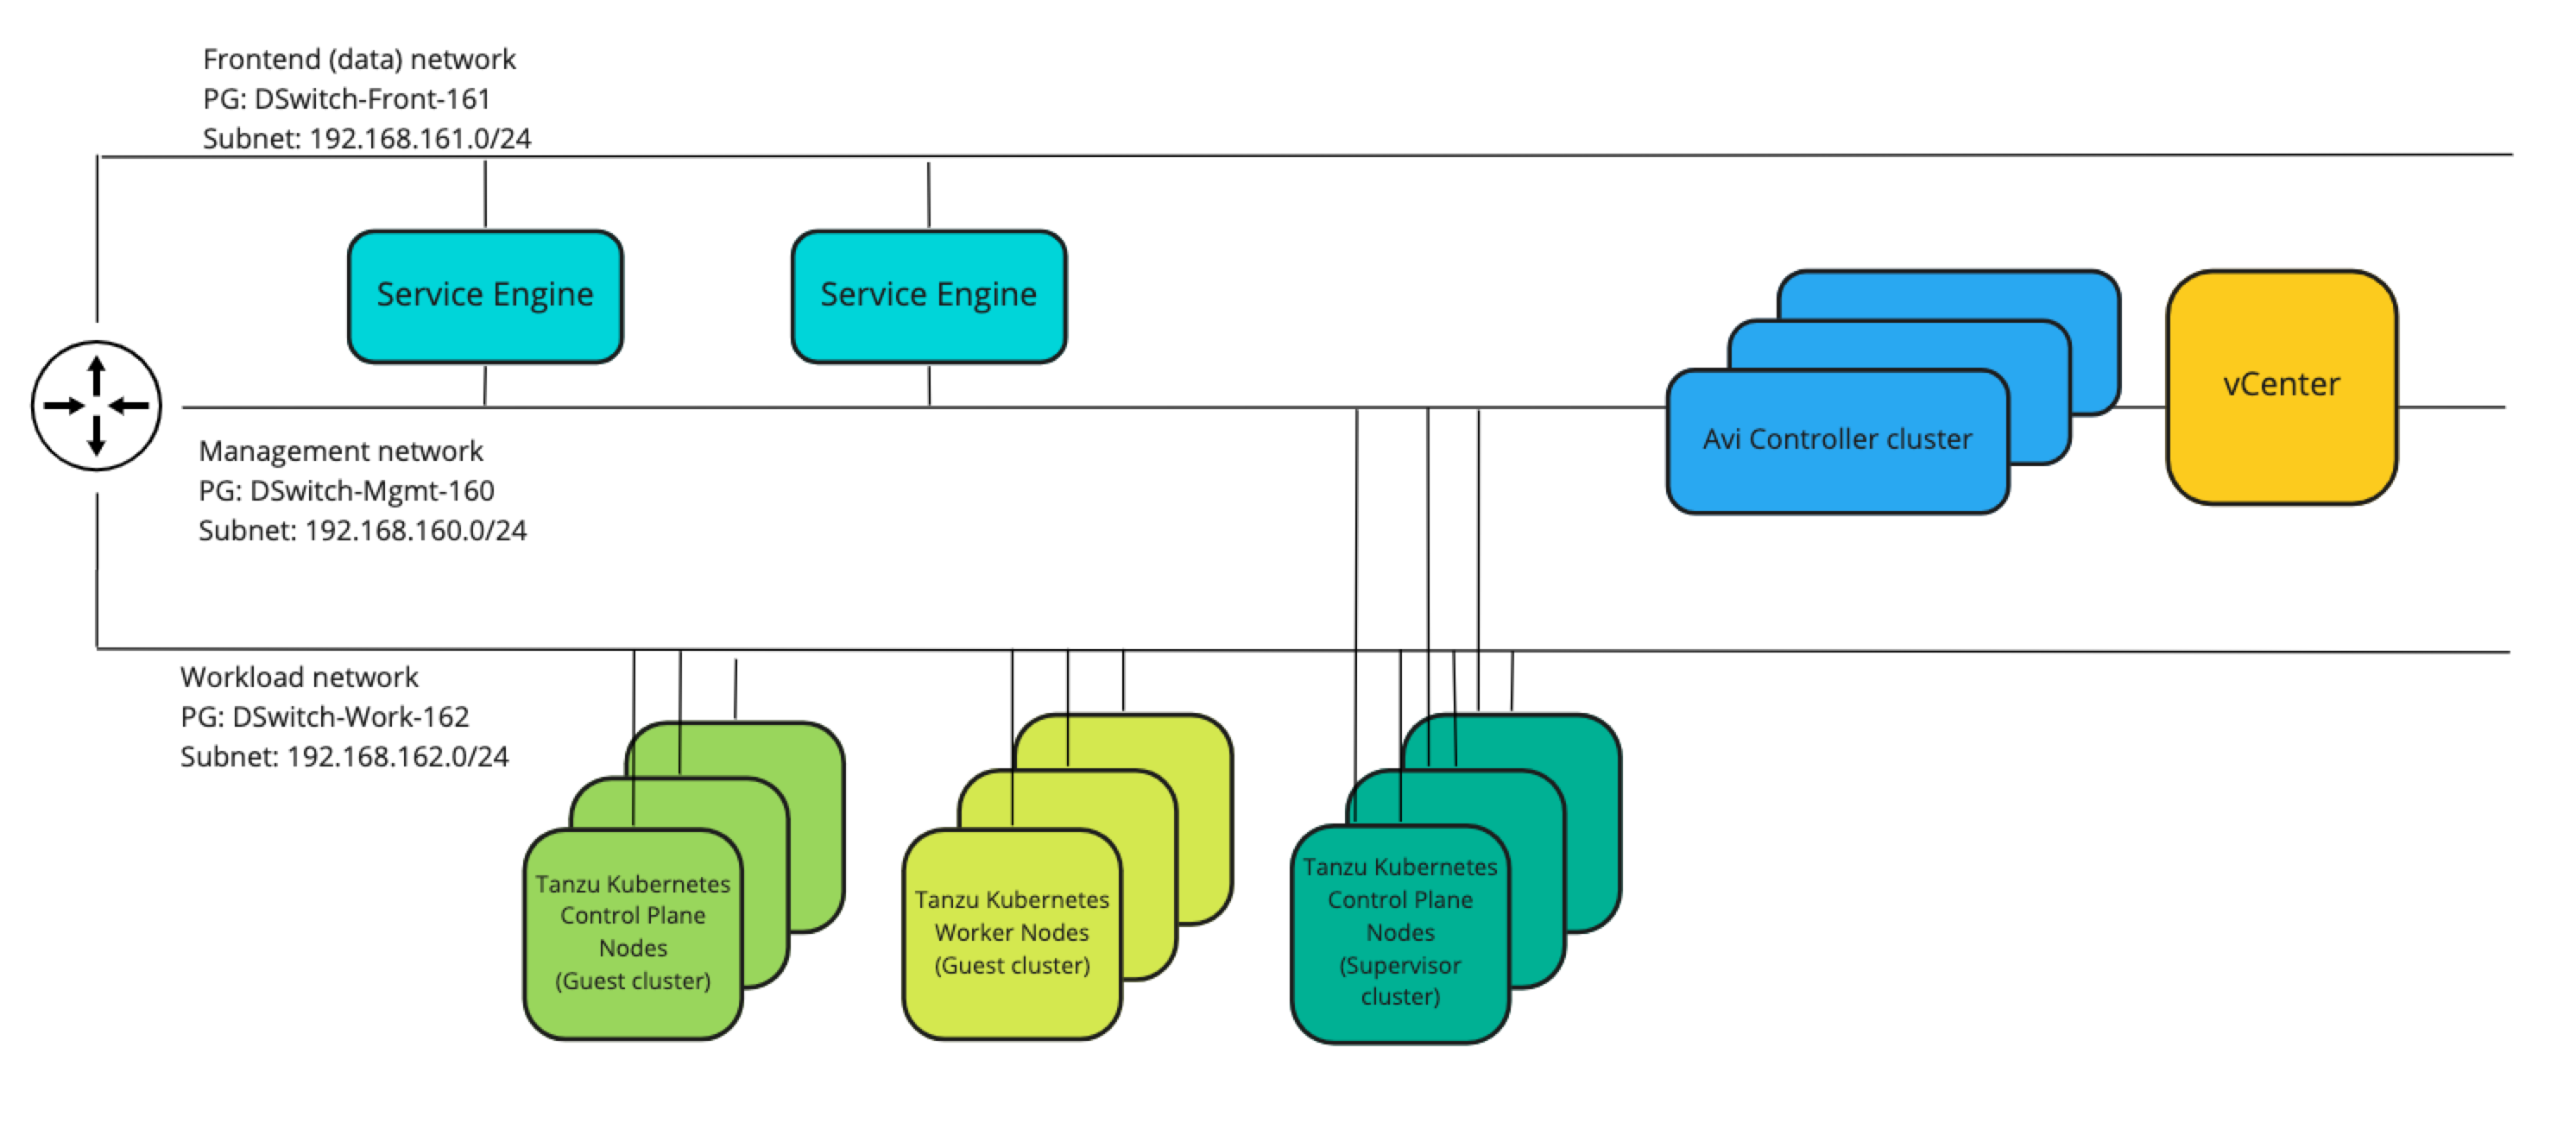
The networks in play here and where we'll see stuff being deployed are as follows:
| Subnet | VLAN | GW | Comment |
|---|---|---|---|
| 192.168.160.0/24 | 160 | 192.168.160.1 | Management network (vCenter, ESXi, Avi controller) |
| 192.168.161.0/24 | 161 | 192.168.161.1 | Frontend/load balancer network (Avi VIPs) |
| 192.168.162.0/24 | 162 | 192.168.162.1 | Workload network (Load balanced workloads/web servers) |
There's routing between these networks and also to the outside world. No firewall rules exists between these (that's for a later post).
A simple drawing of the network would be something like the following
There's also DHCP services available in all of the networks with a scope in each network with the IP range 192.168.16x.100-192.168.16x.199
There's one exception with regards to the networks in use, and that concerns my DNS server which is served from a different network. The three networks mentioned above have access to the DNS services on this server
There's three ESXi hosts running in the cluster we will use, and the storage is based on vSAN. Note that any supported shared vSphere storage works.
We have a Storage Policy created called tkgs and an (empty) Content Library also called tkgs.
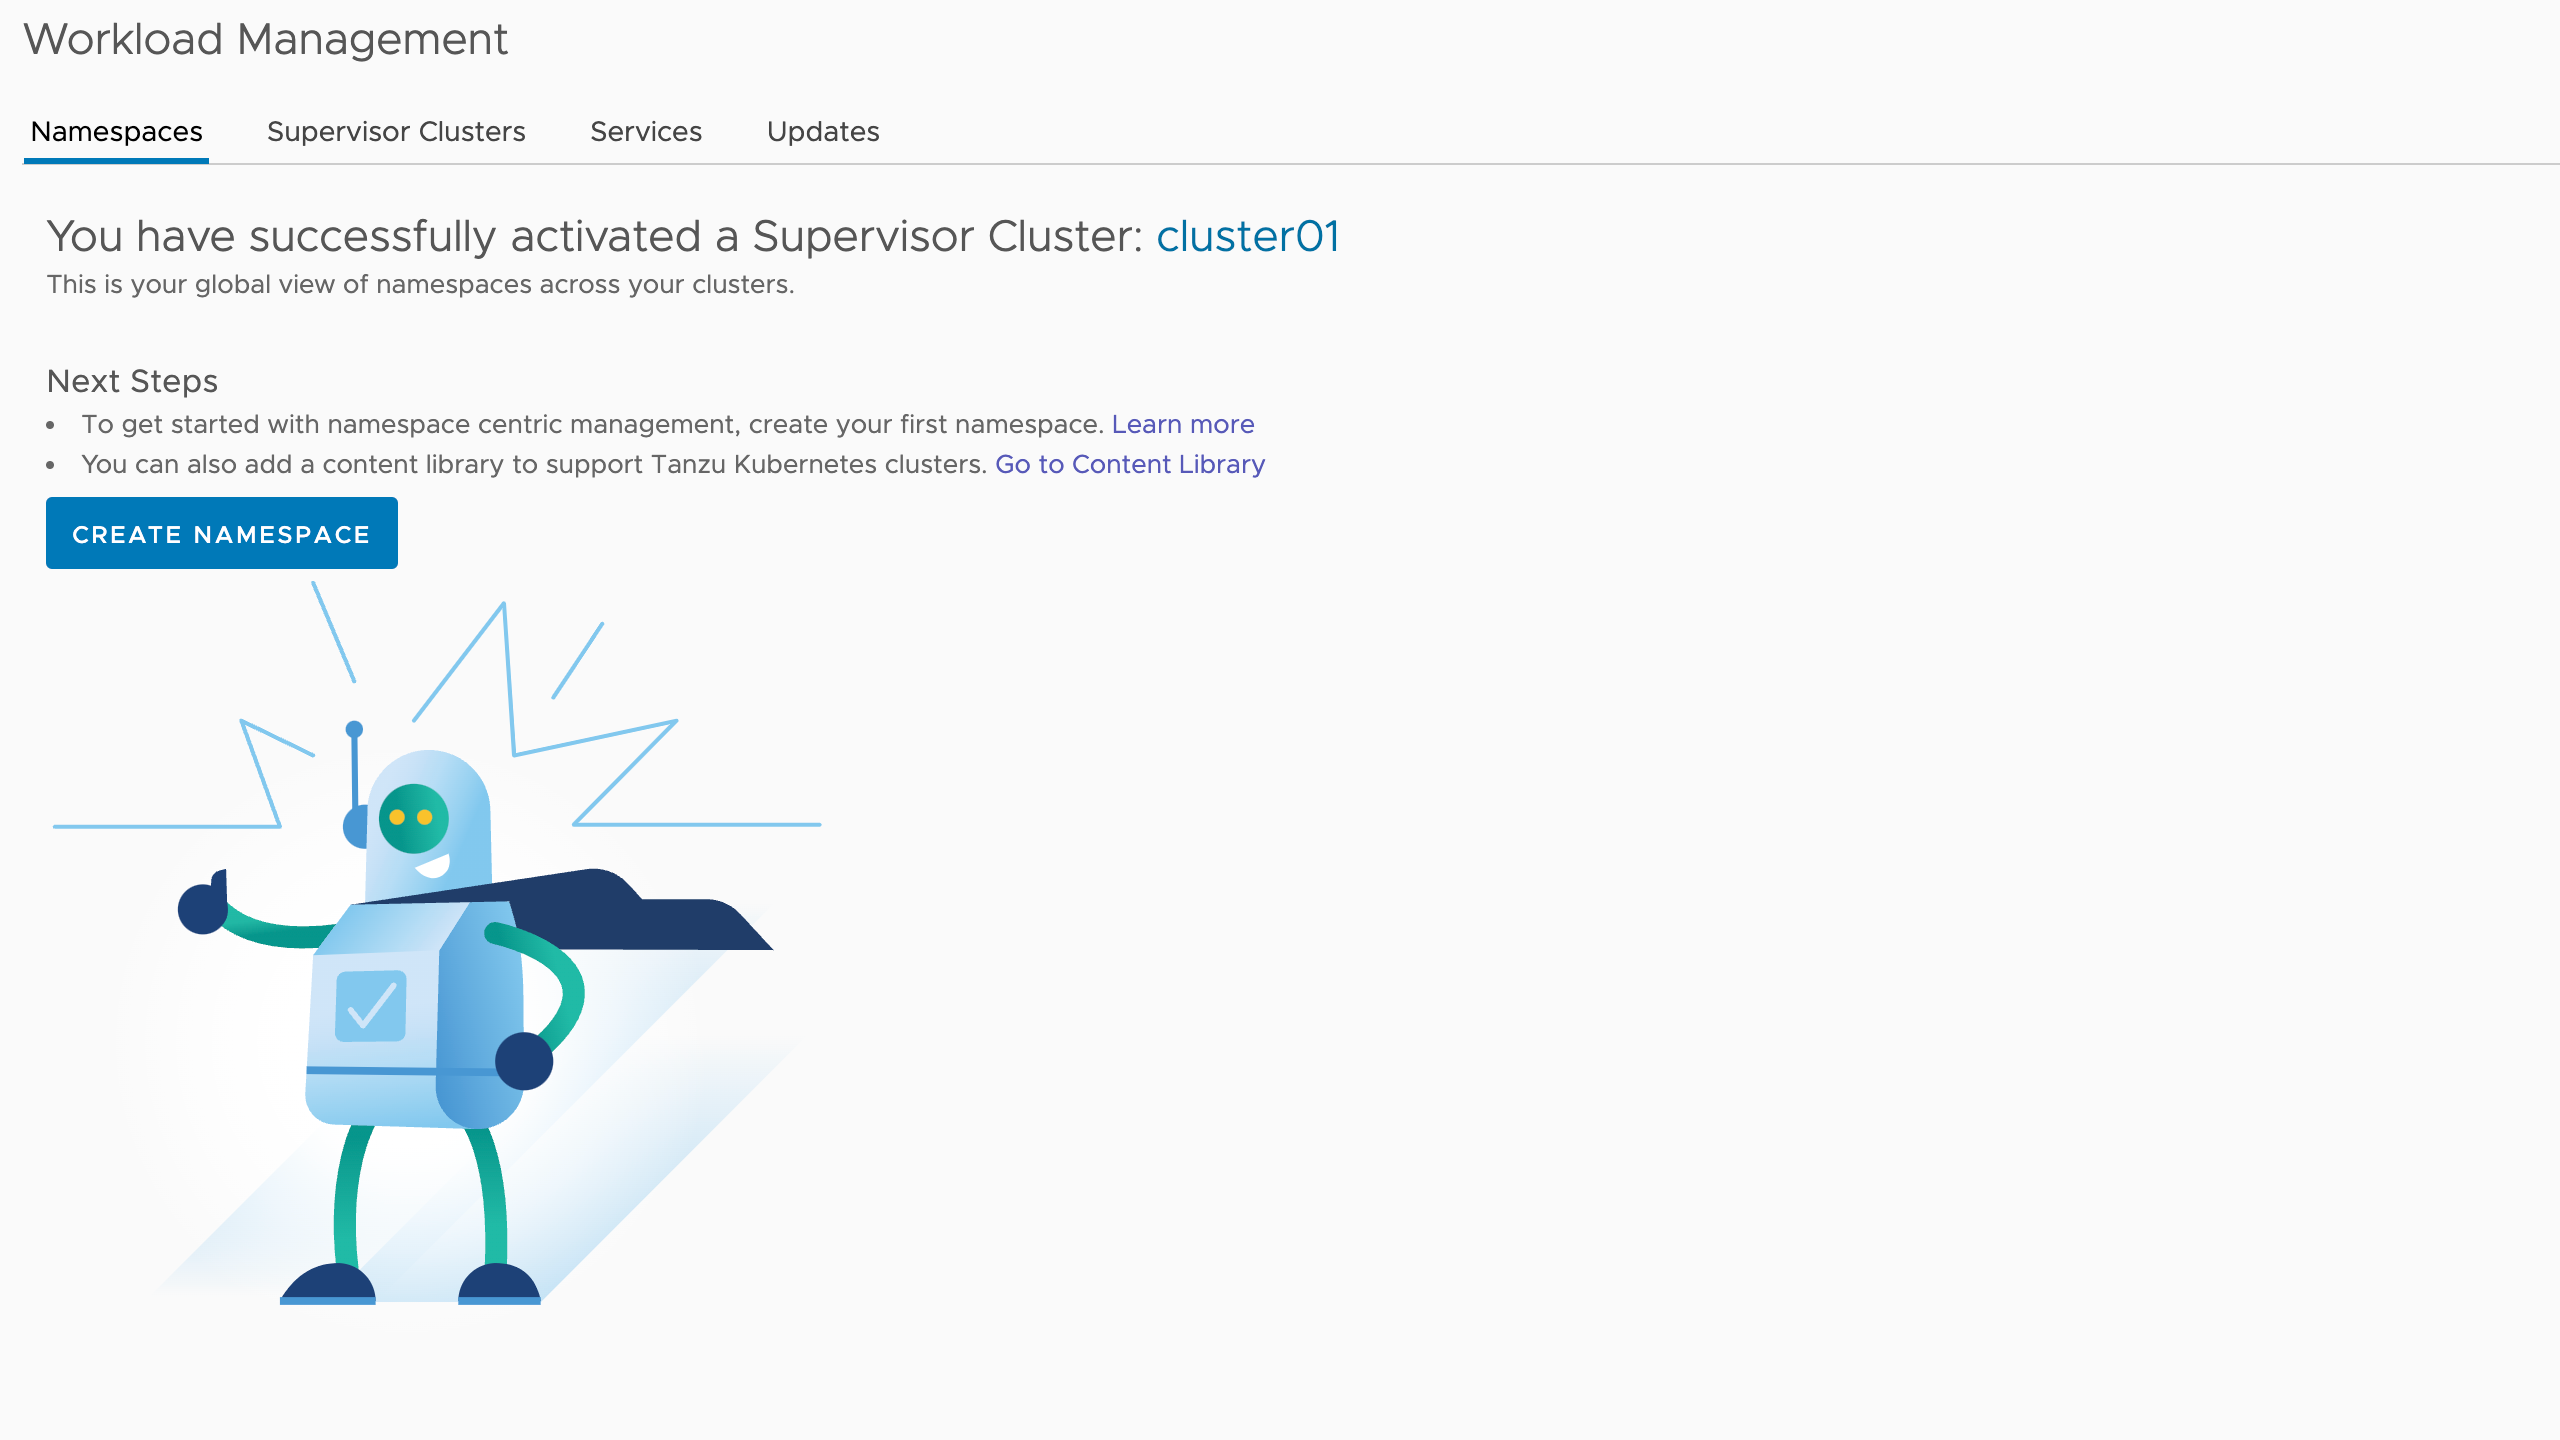
Creating Namespaces
After enabling Workload Management we're greeted with the Create Namespaces screen
Creating a namespace is more or less just creating a logical construct in the Supervisor cluster so it's very quick. A vSphere namespace is a vSphere construct, but it will also be created a Kubernetes namespace and this can be confusing.
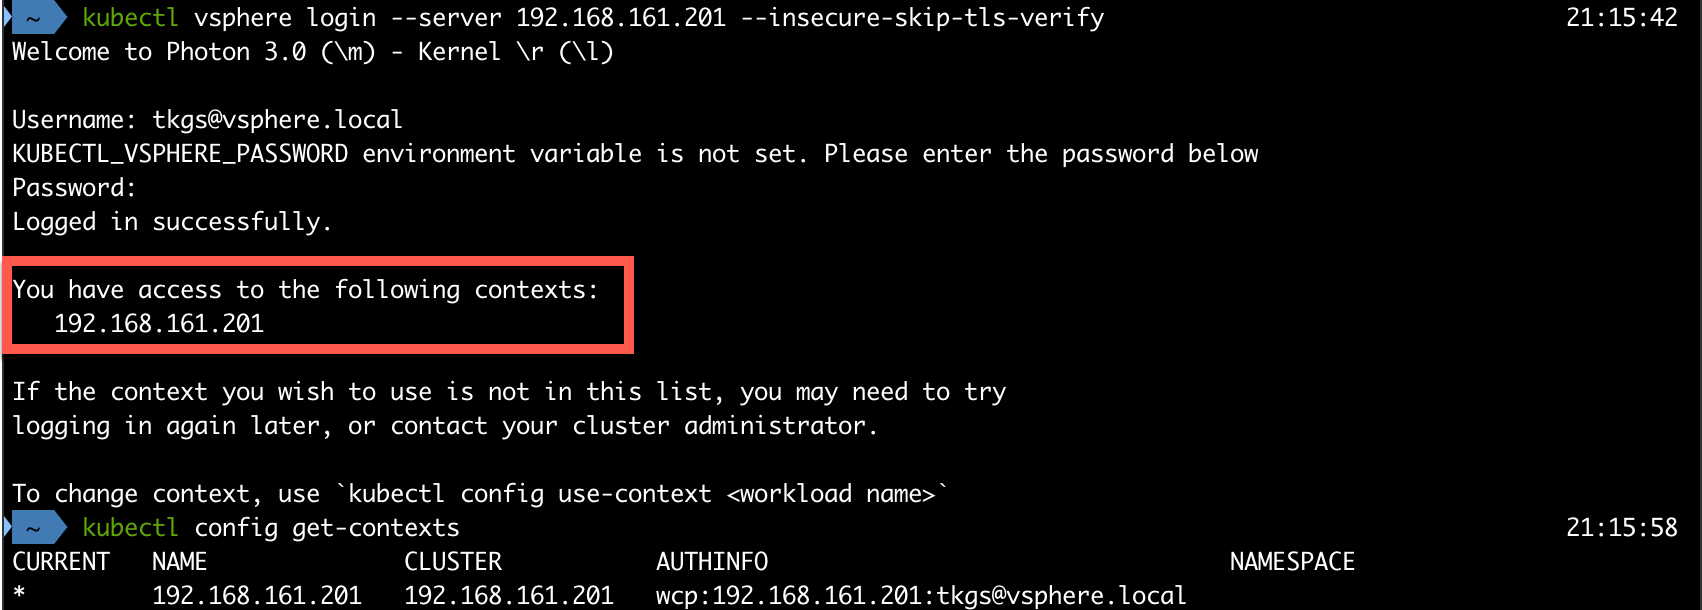
Before we create our first namespace let's take a quick look at our Supervisor cluster.
After logging in to the Supervisor cluster we'll get information about which contexts we have access to. In our case we'll only have the Supervisor Cluster it self
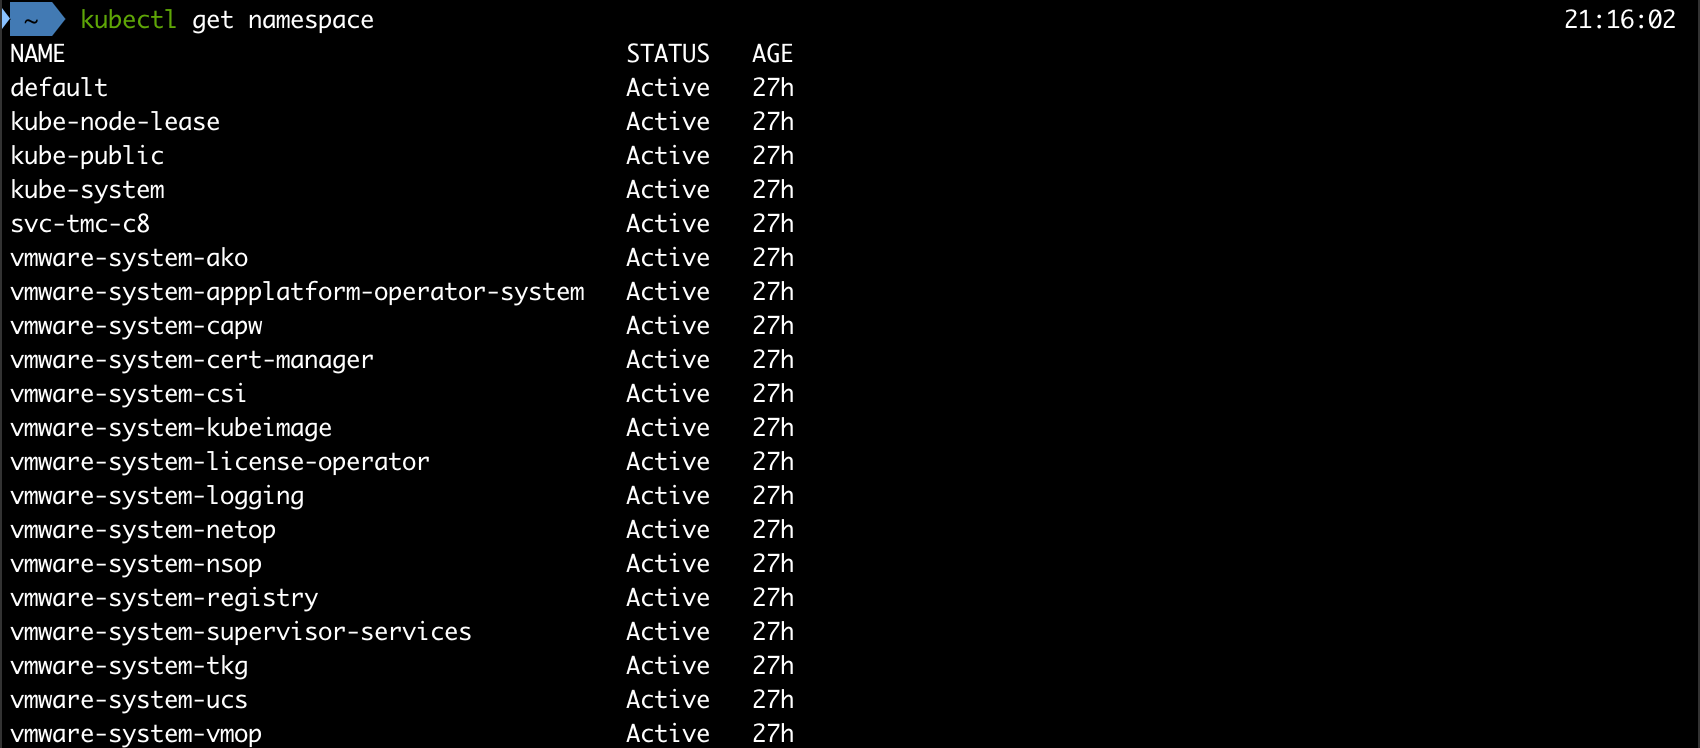
As mentioned Kubernetes has it's own namespaces so let's take a look at what we have
Now, let's create our first namespace!
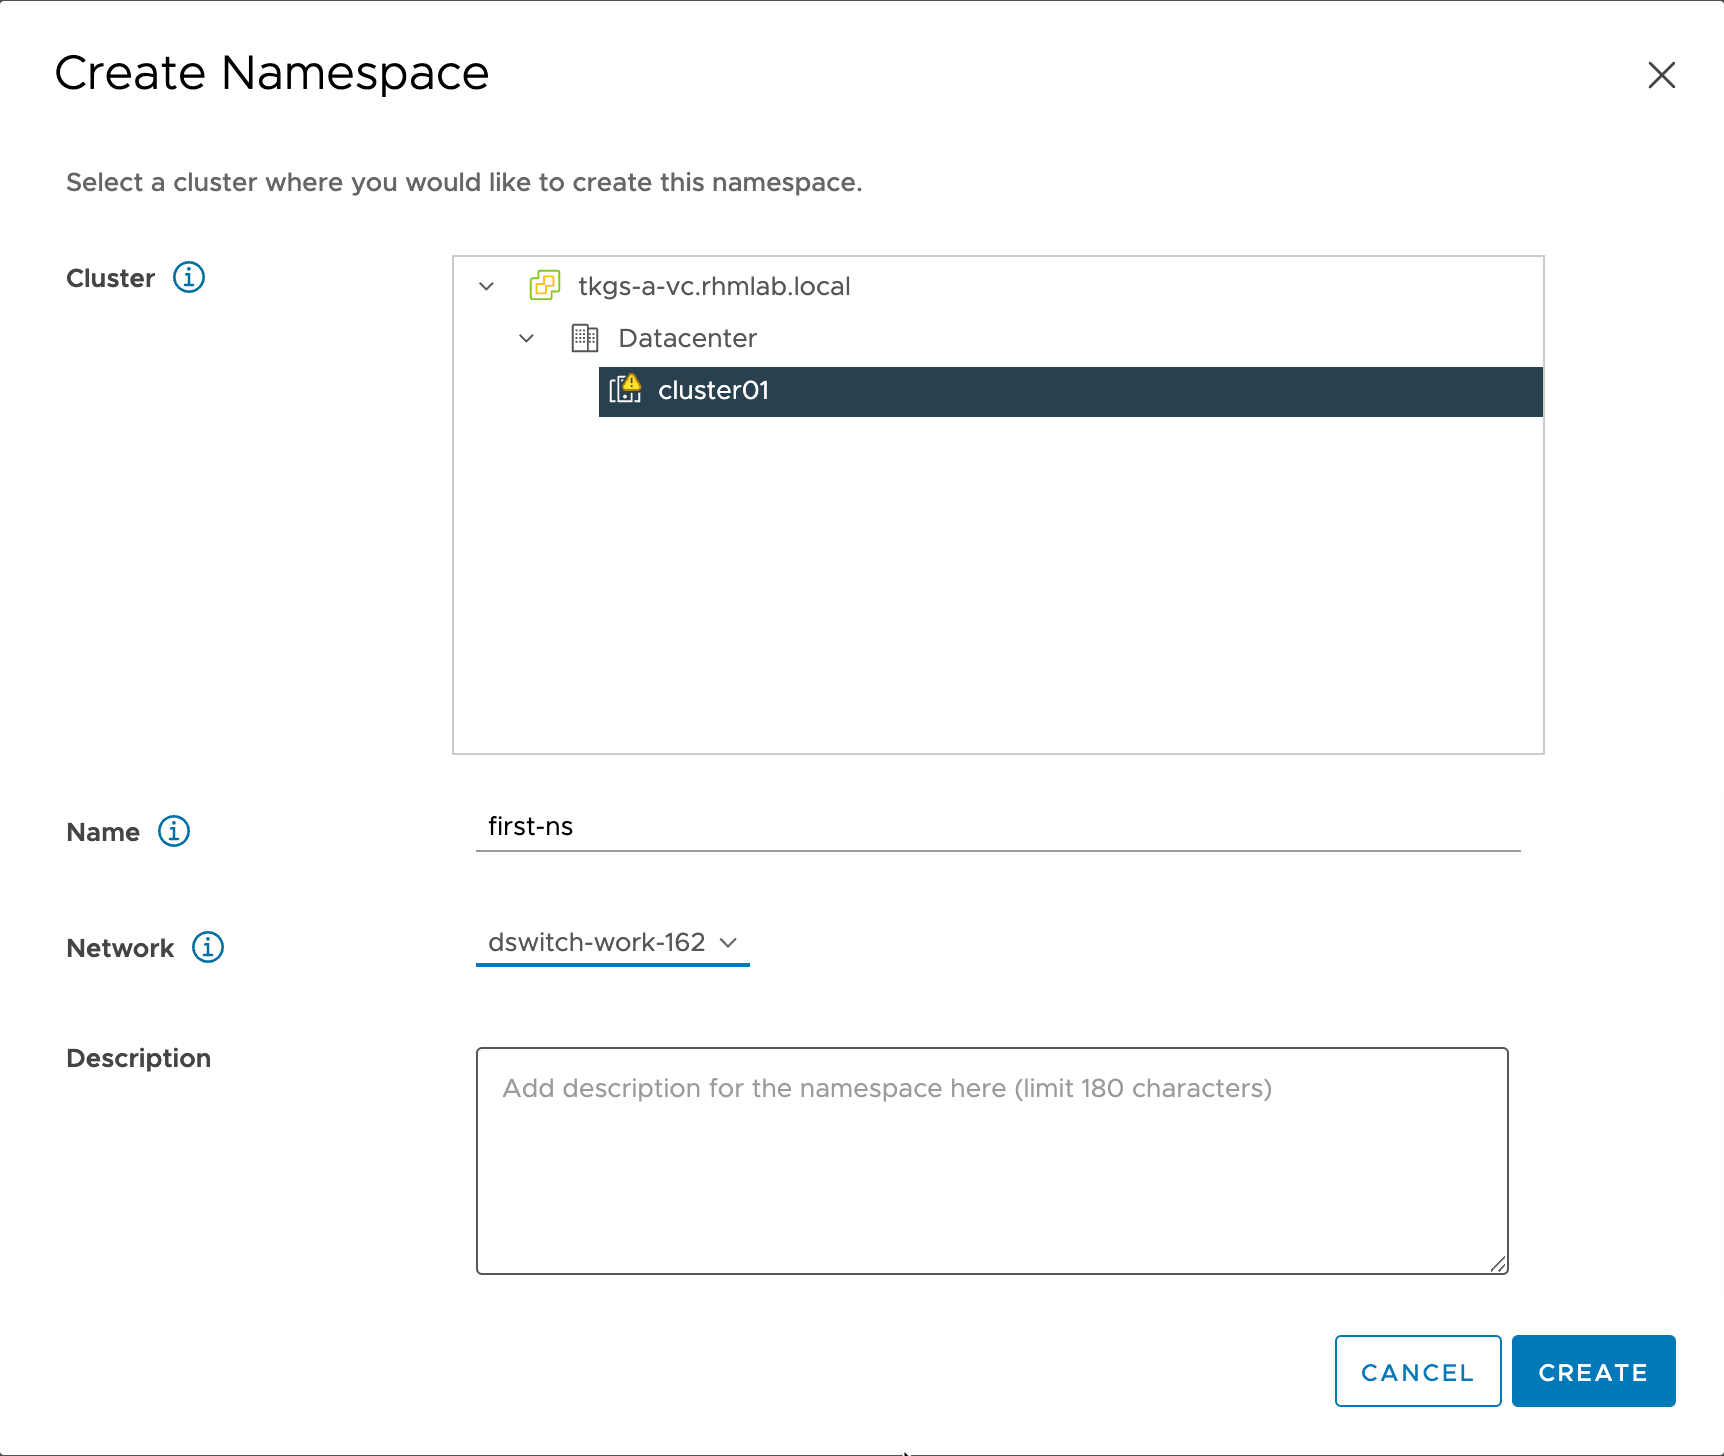
The Create Namespace wizard let's us select the cluster, give it a name and select a network
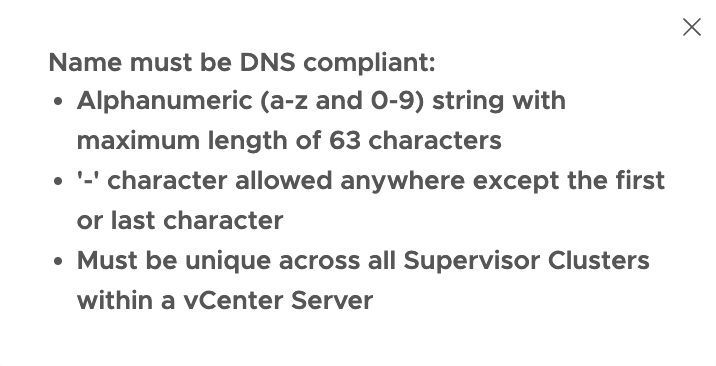
Since the vSphere Namespace also will create a Kubernetes namespace it has to follow Kubernetes standards and be DNS compliant
The network selected is our Workload network. For the purposes of this post we have only one Workload network, but here's where you would select different networks for network segregation on the namespaces level
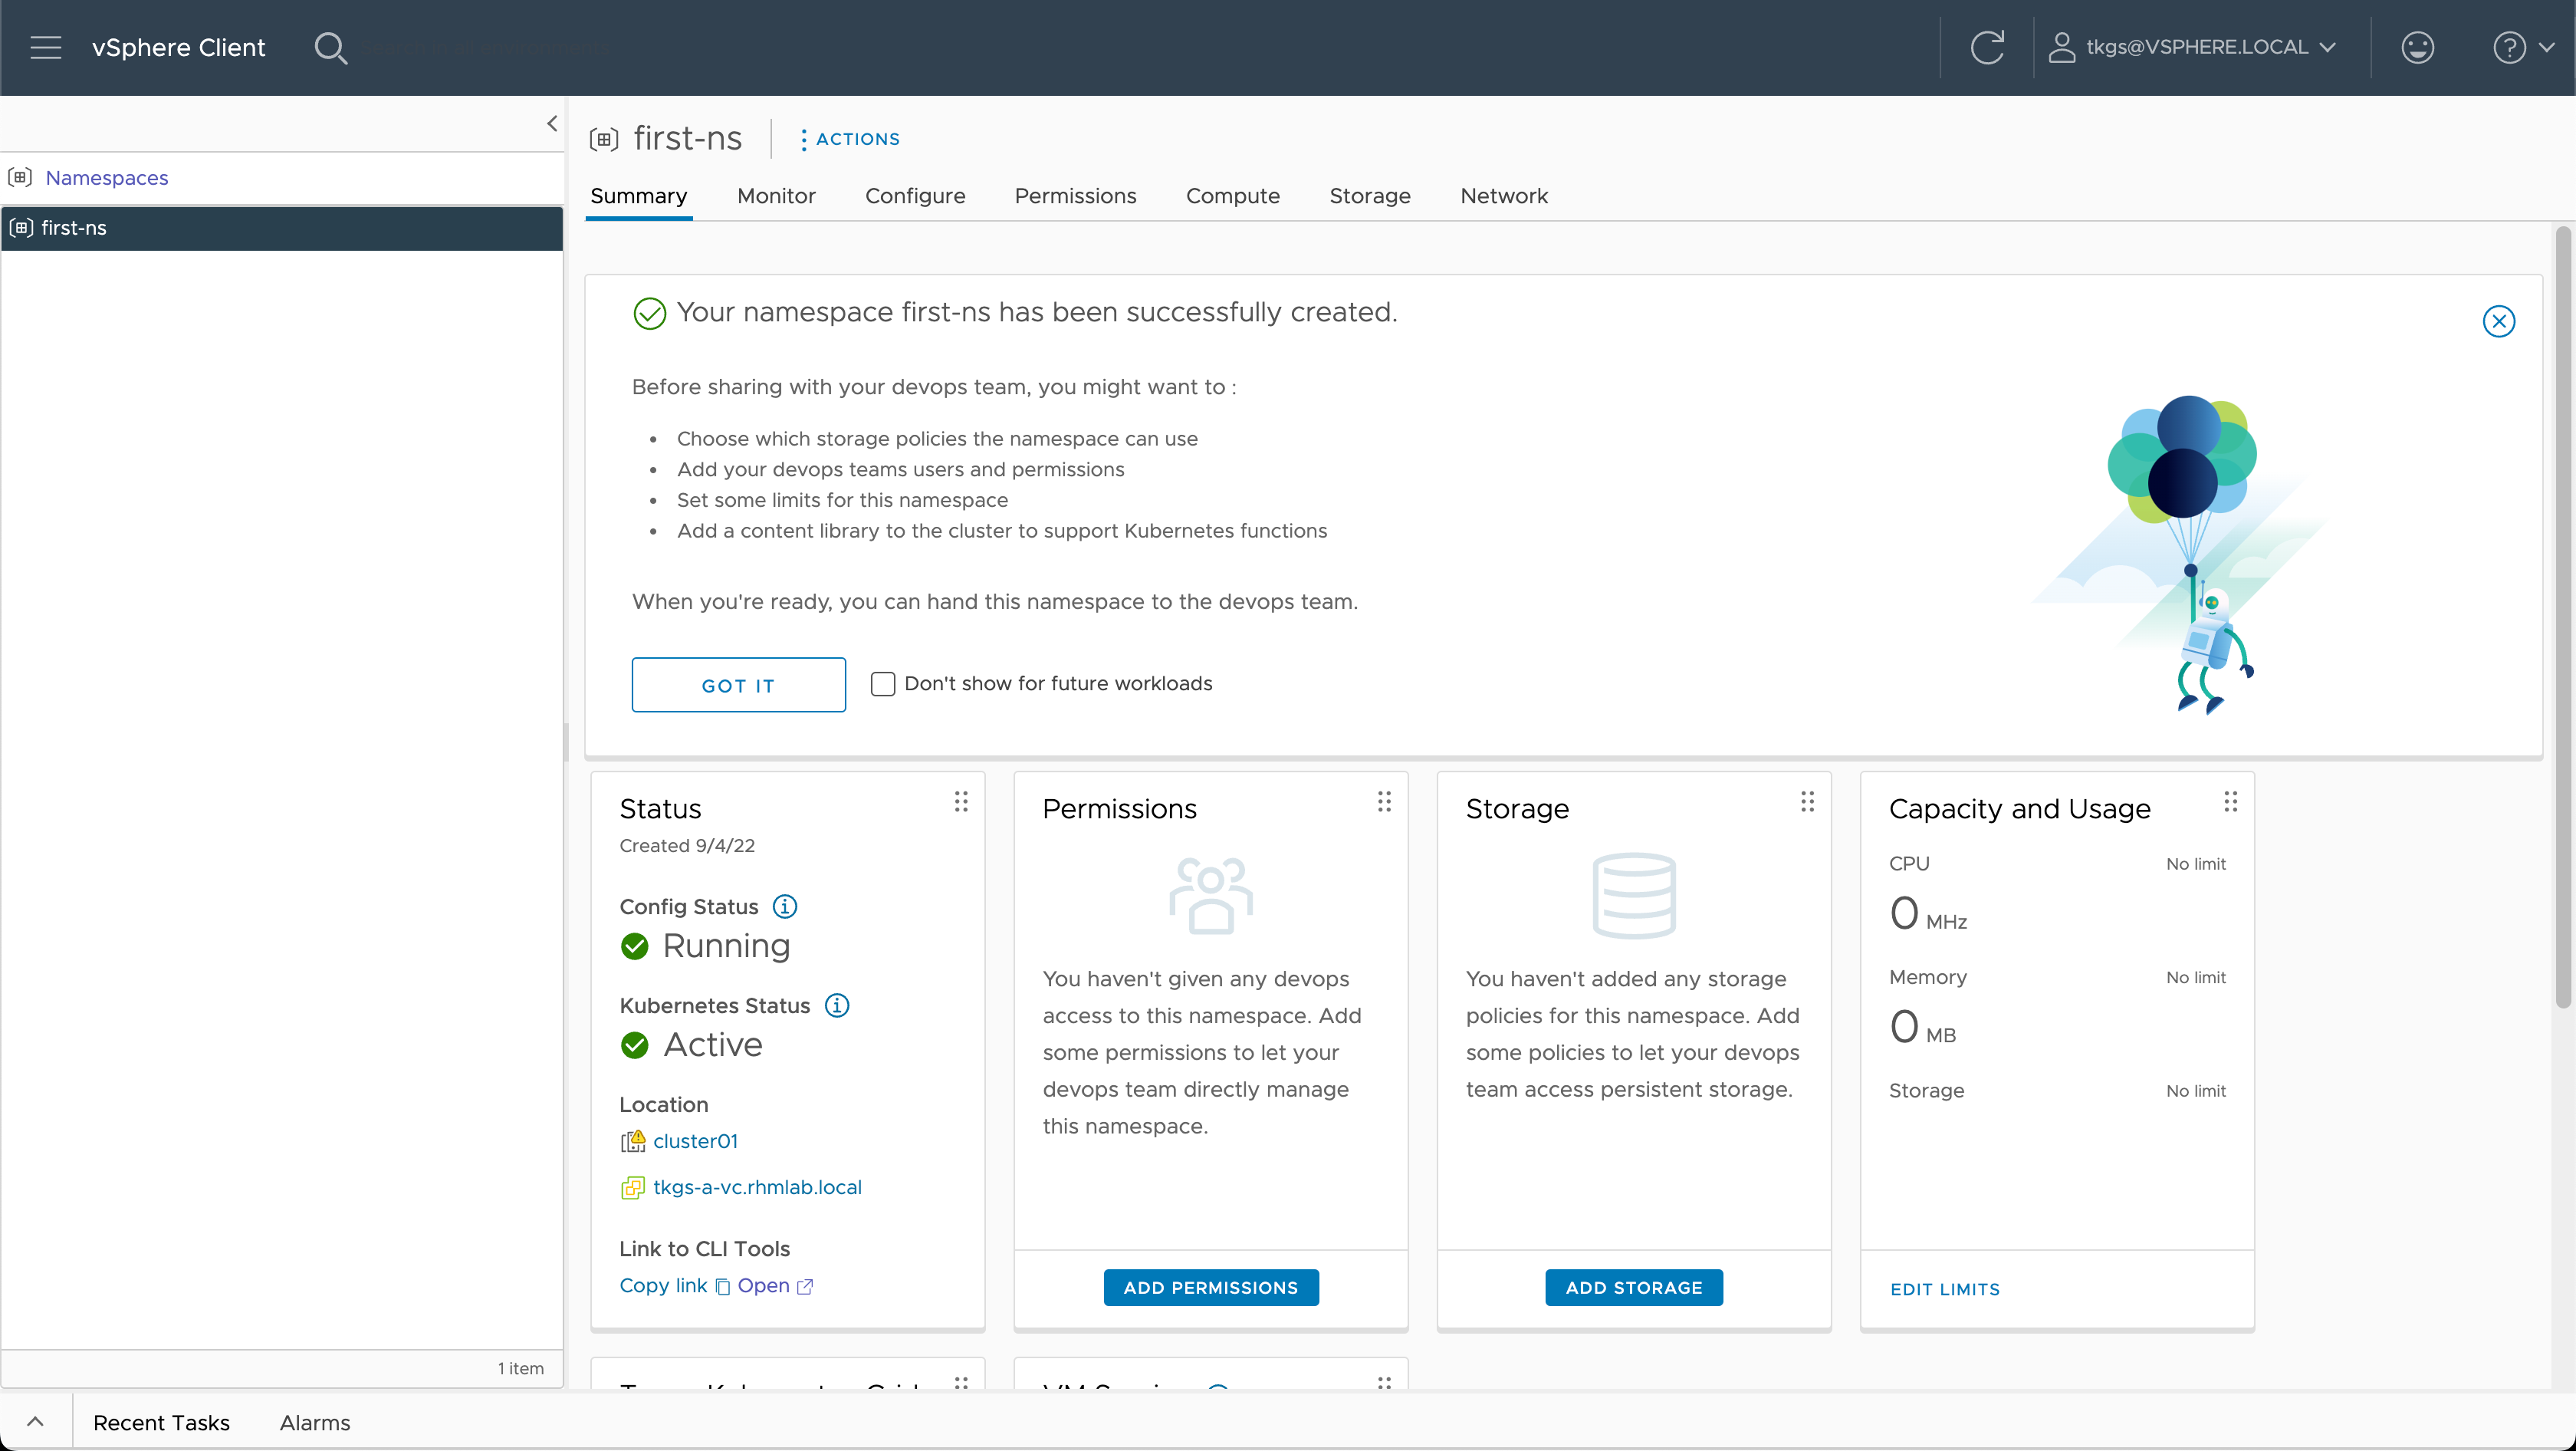
This creates a namespace for us, and we can configure things like Permissions, Storage, Limits and VM Classes
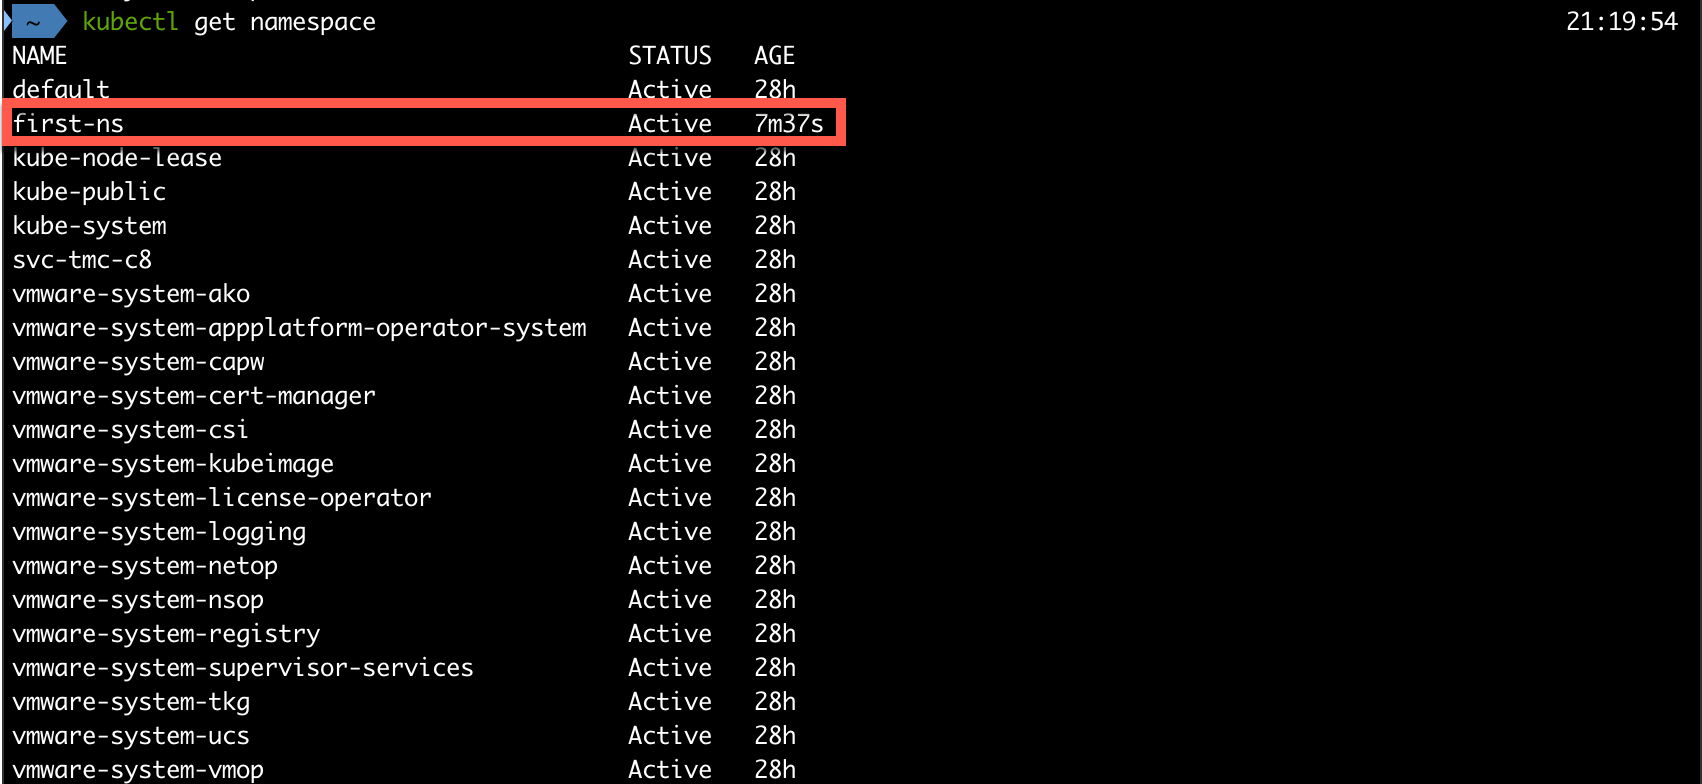
Let's head over to our Kubernetes cluster and see what's happened
Before we can provision Tanzu Kubernetes Clusters in our namespace we'll do some configuration.
Configuring namespace
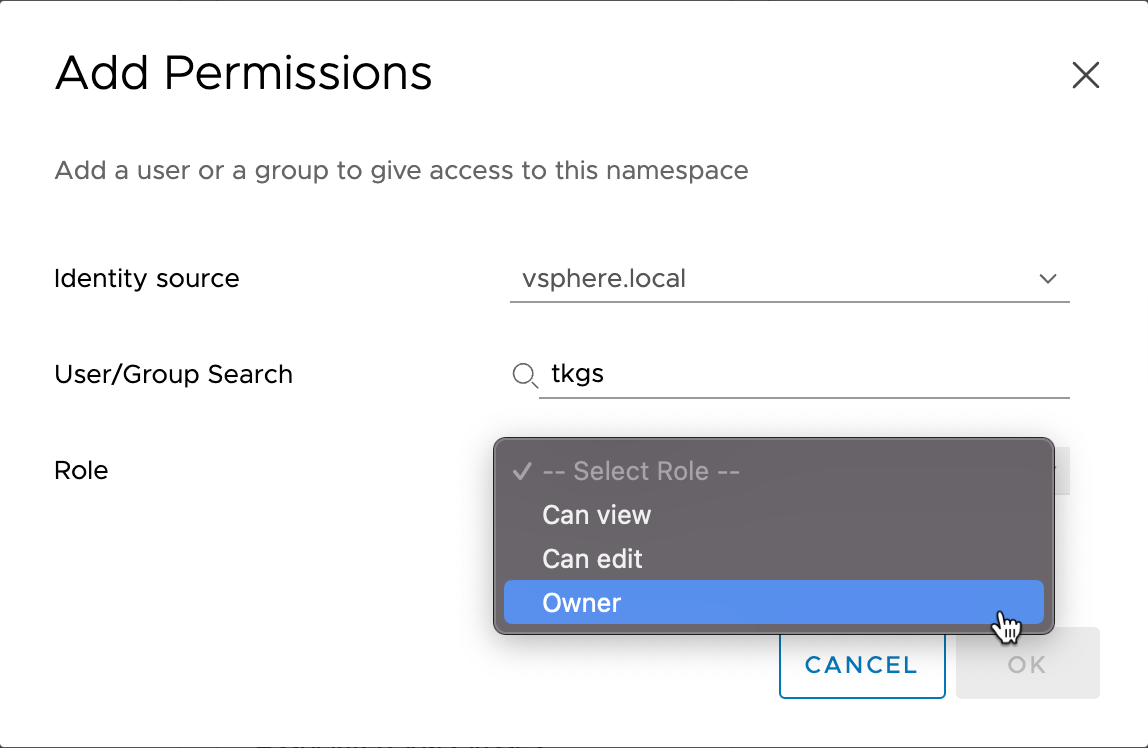
First we'll add in some permissions. Here we make use of vSphere SSO and we can use the same identity sources as configured in vCenter. The available roles are View, Edit and Owner. Note that these roles controls access to the vSphere Namespace. We still need to use Kubernetes RBAC to control access to the Kubernetes resources.
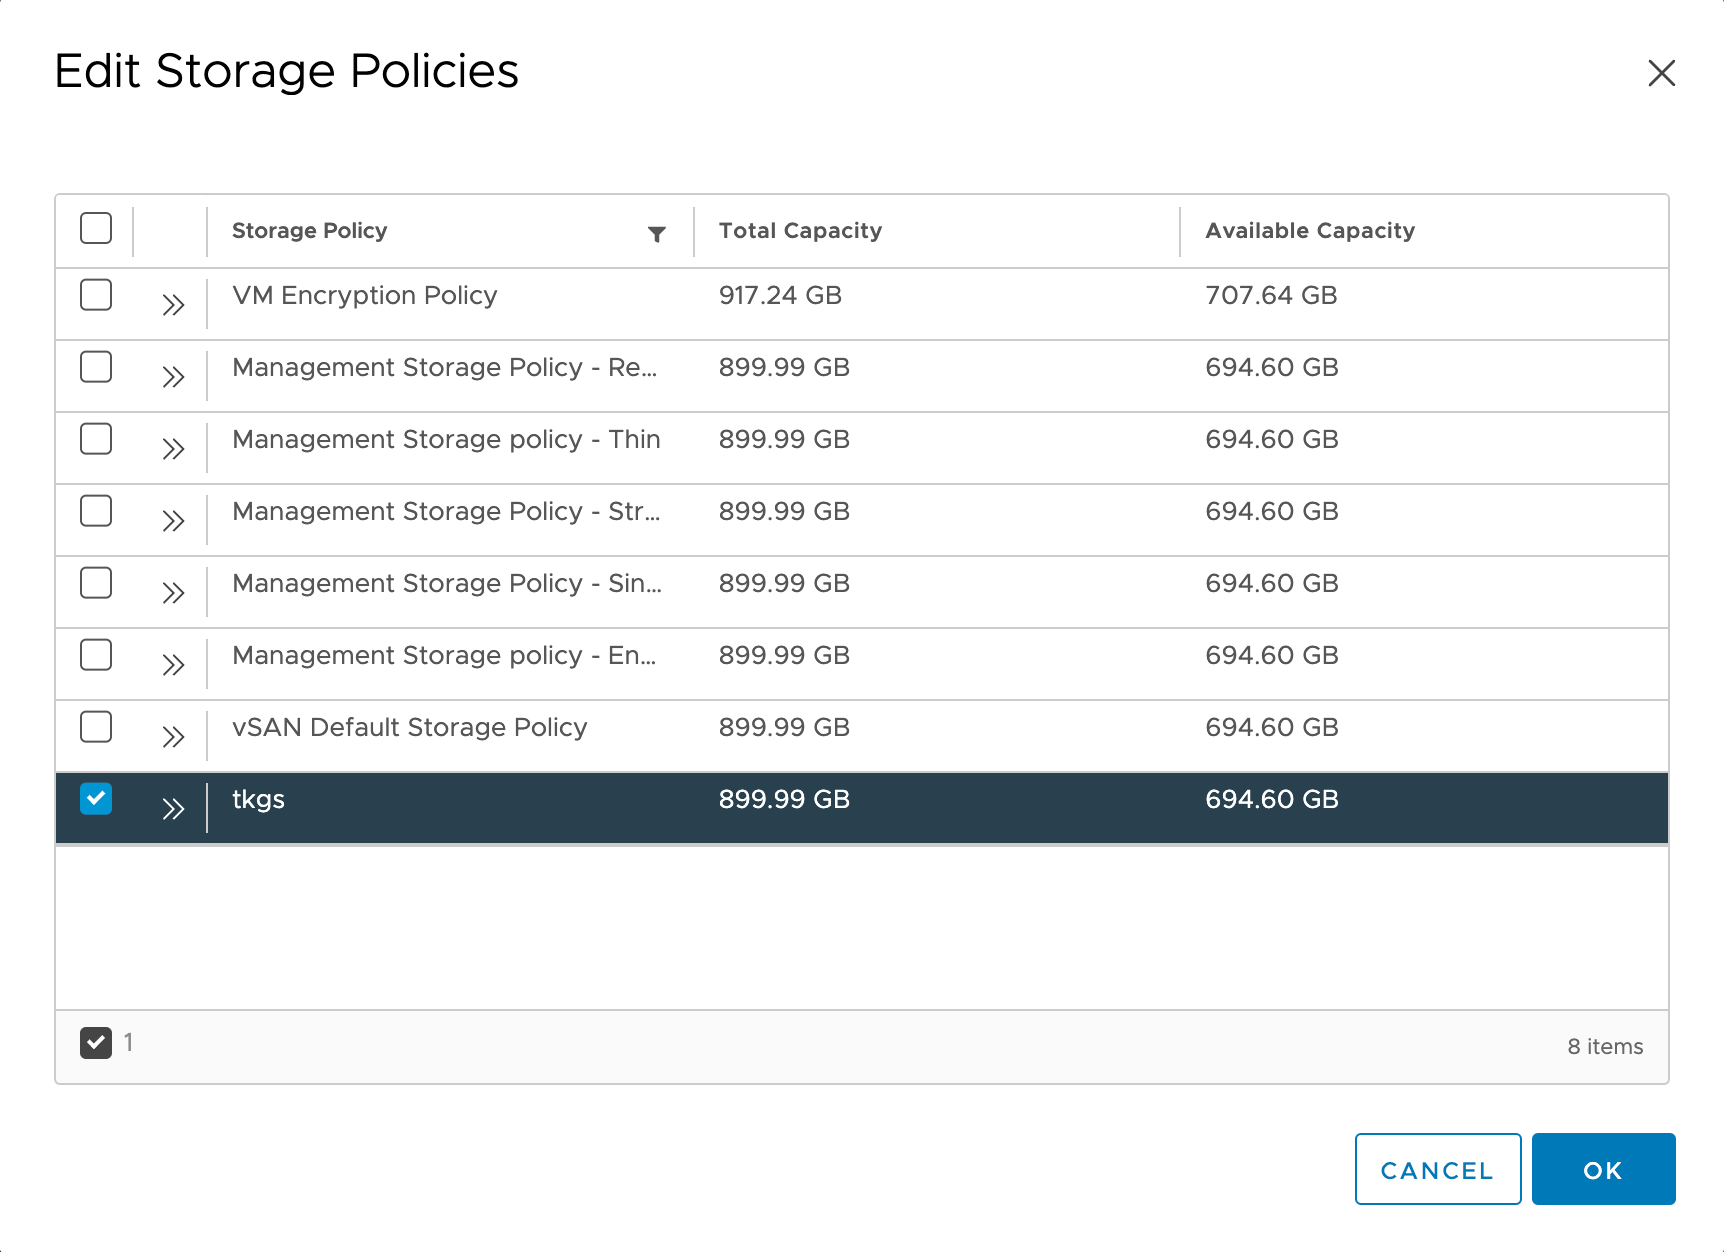
Next let's give the Namespace access to some storage. This is done with Storage Policies
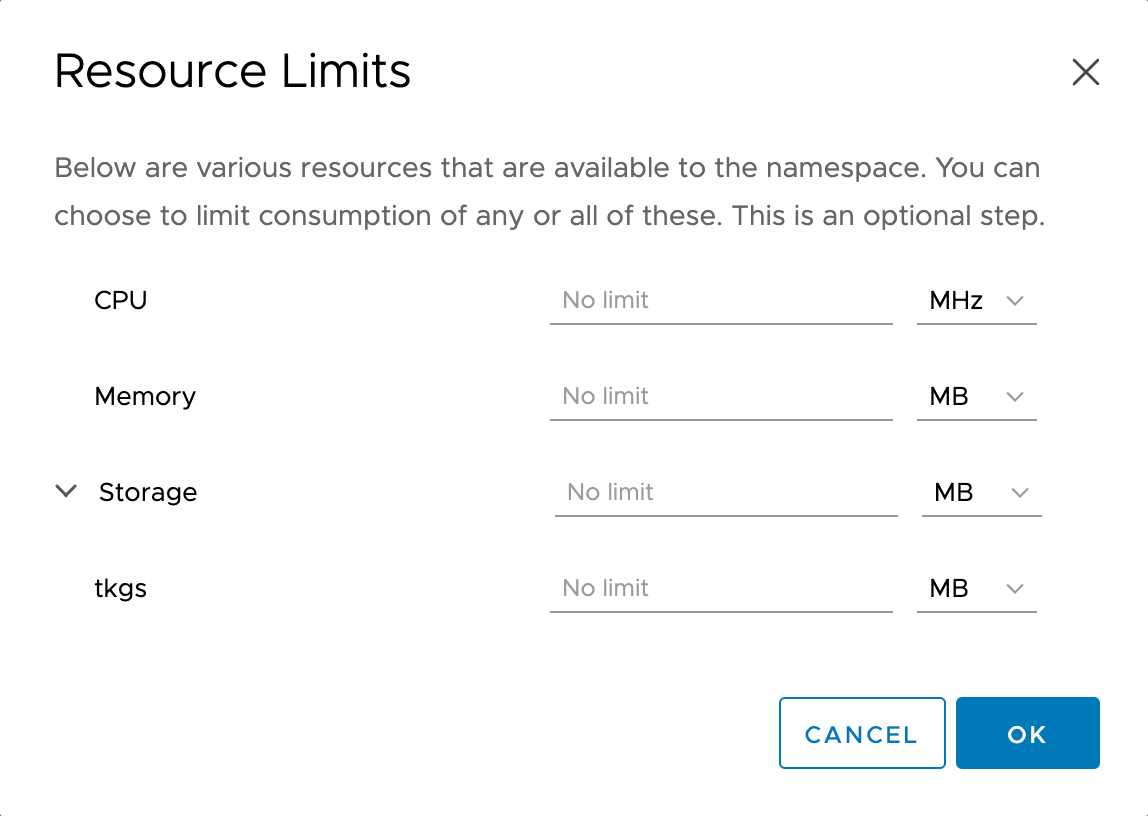
We can also add some resource limits for the namespace to control how much vSphere resources our developers can use
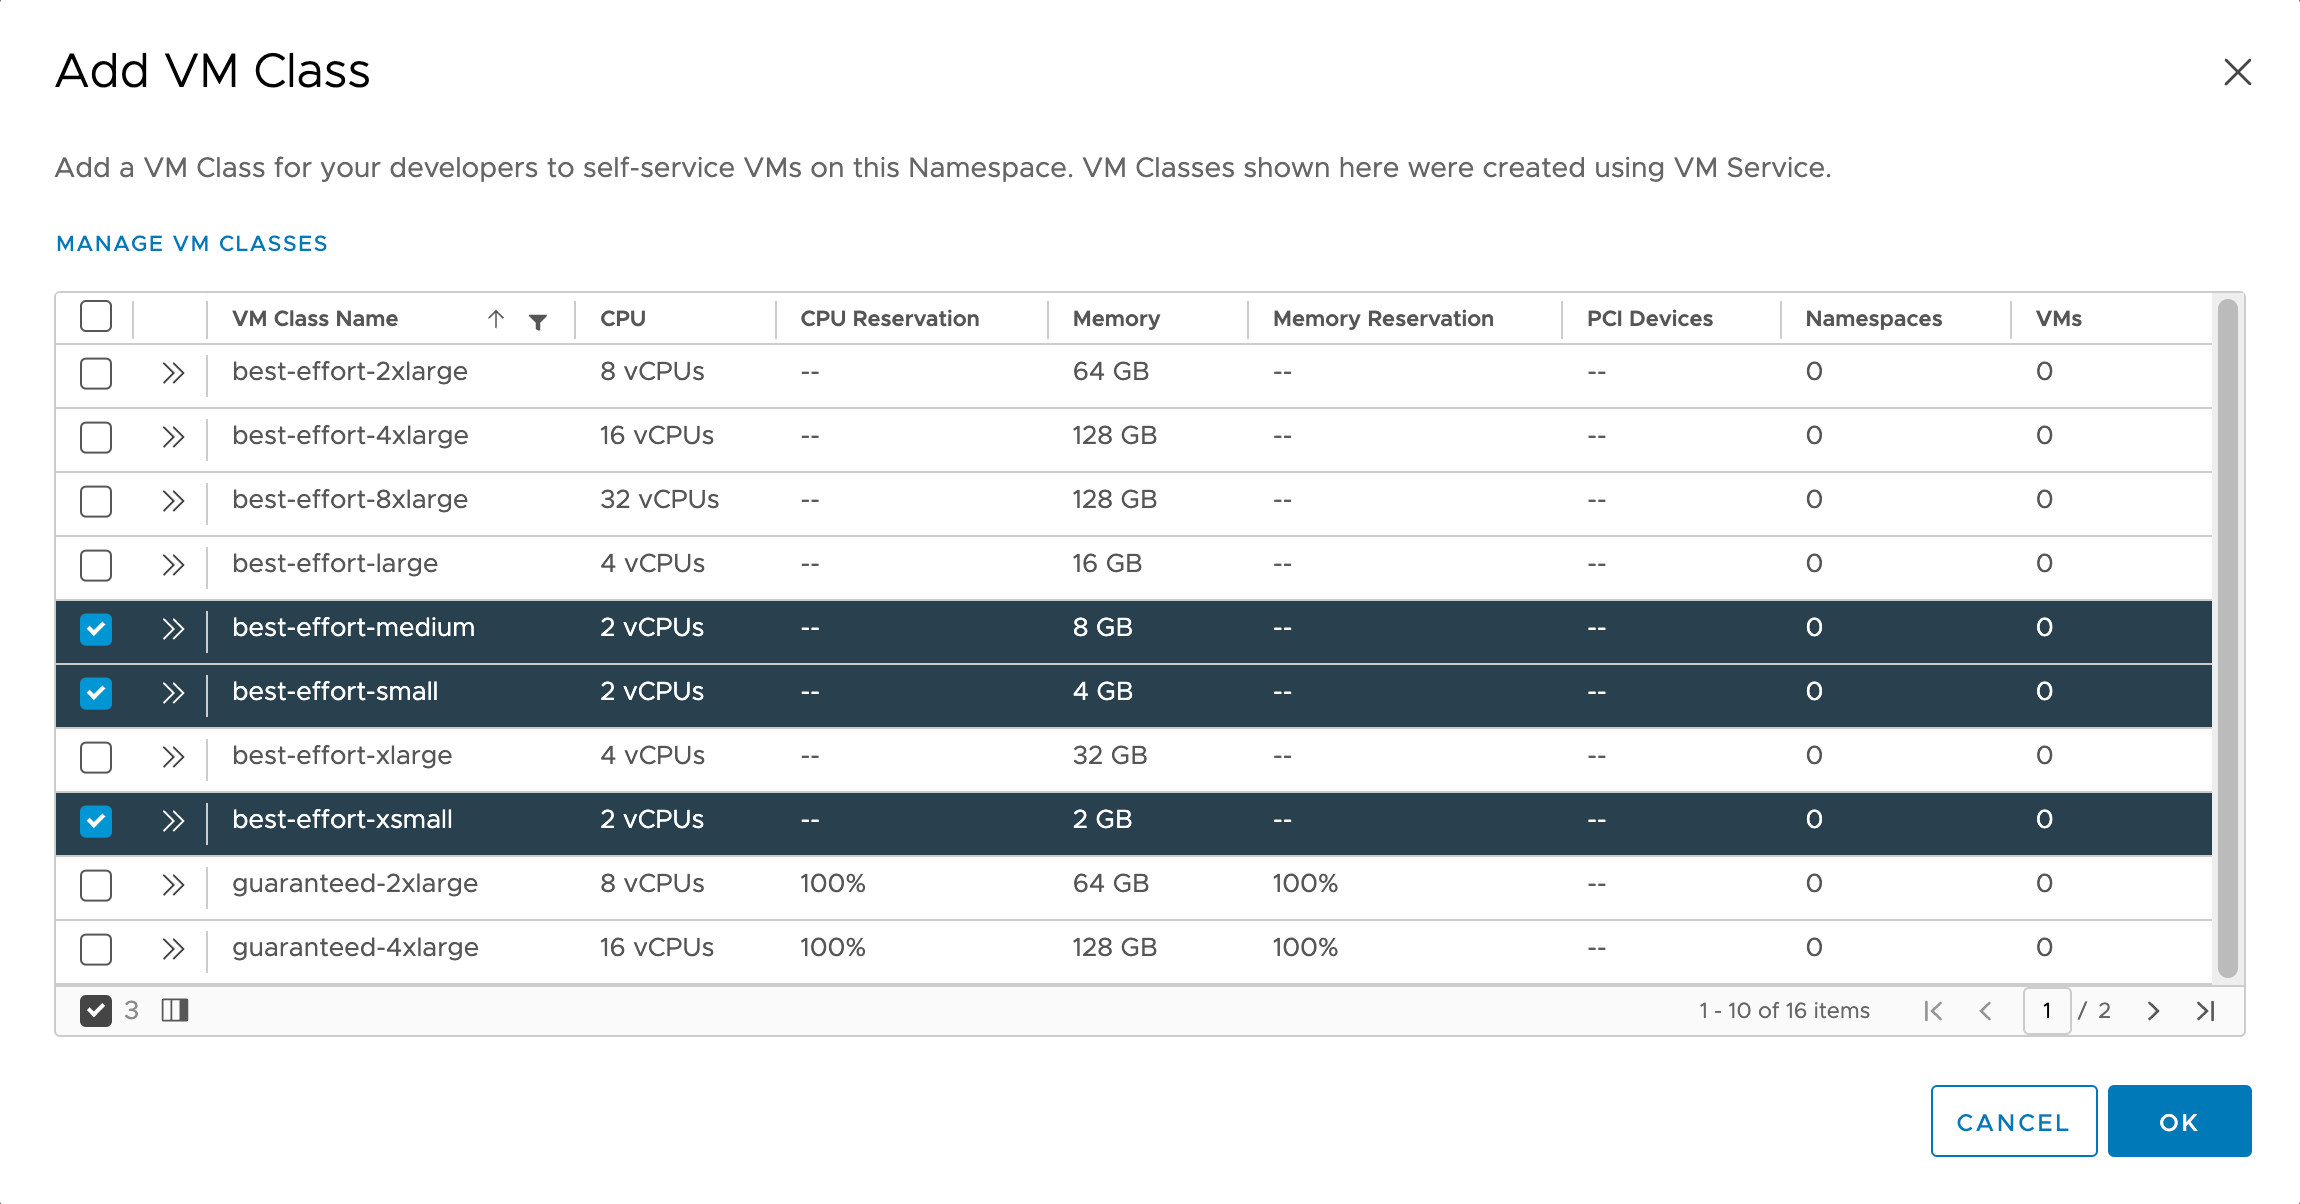
We also need to add one or more VM Classes that our developers can choose from when creating Tanzu Kubernetes Clusters. We'll select Extra small, Small and Medium in this case
Last but not least we need to work with our Content Library.
Content Library
When we enabled Workload Management we had to select a Content Library. As mentioned in the previous post we added an empty library. This is all fine, but before we can deploy Tanzu Kubernetes Clusters we need to populate the library with Kubernetes node templates.
The easiest way of populating the Content Library is to subscribe to a public library from VMware which can be found here
A synchronized library can download the templates and keep it synchronized. This will however potentially download a lot of Tanzu Kubernetes templates we'll never make use of.
An alternative is to upload just those templates we want to make available. Note that this would also make us have to keep it synchronized as well.
In our case we will make use of the manual way, with only uploading a few templates to our library.
We will head over to the public library provided by VMware and find the versions we want to download
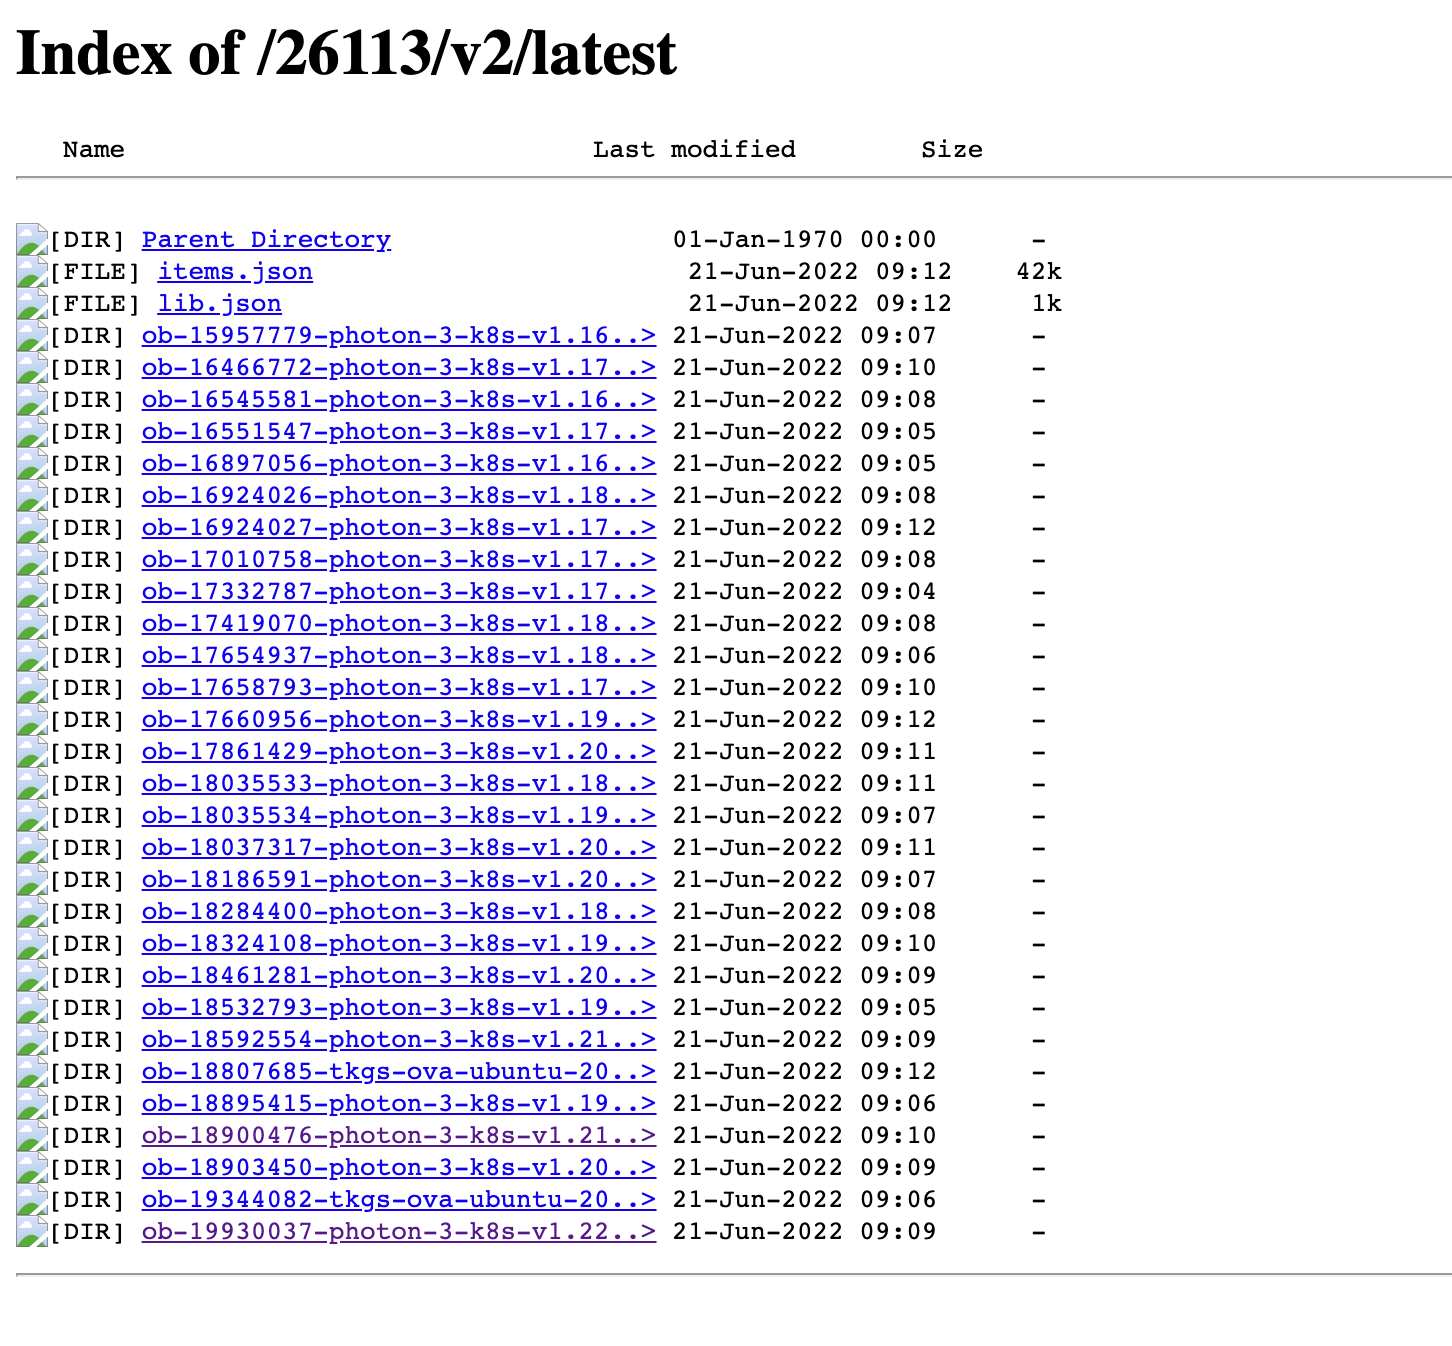
If we navigate into one of the folders we'll see the files that makes up a Tanzu Kubernetes release
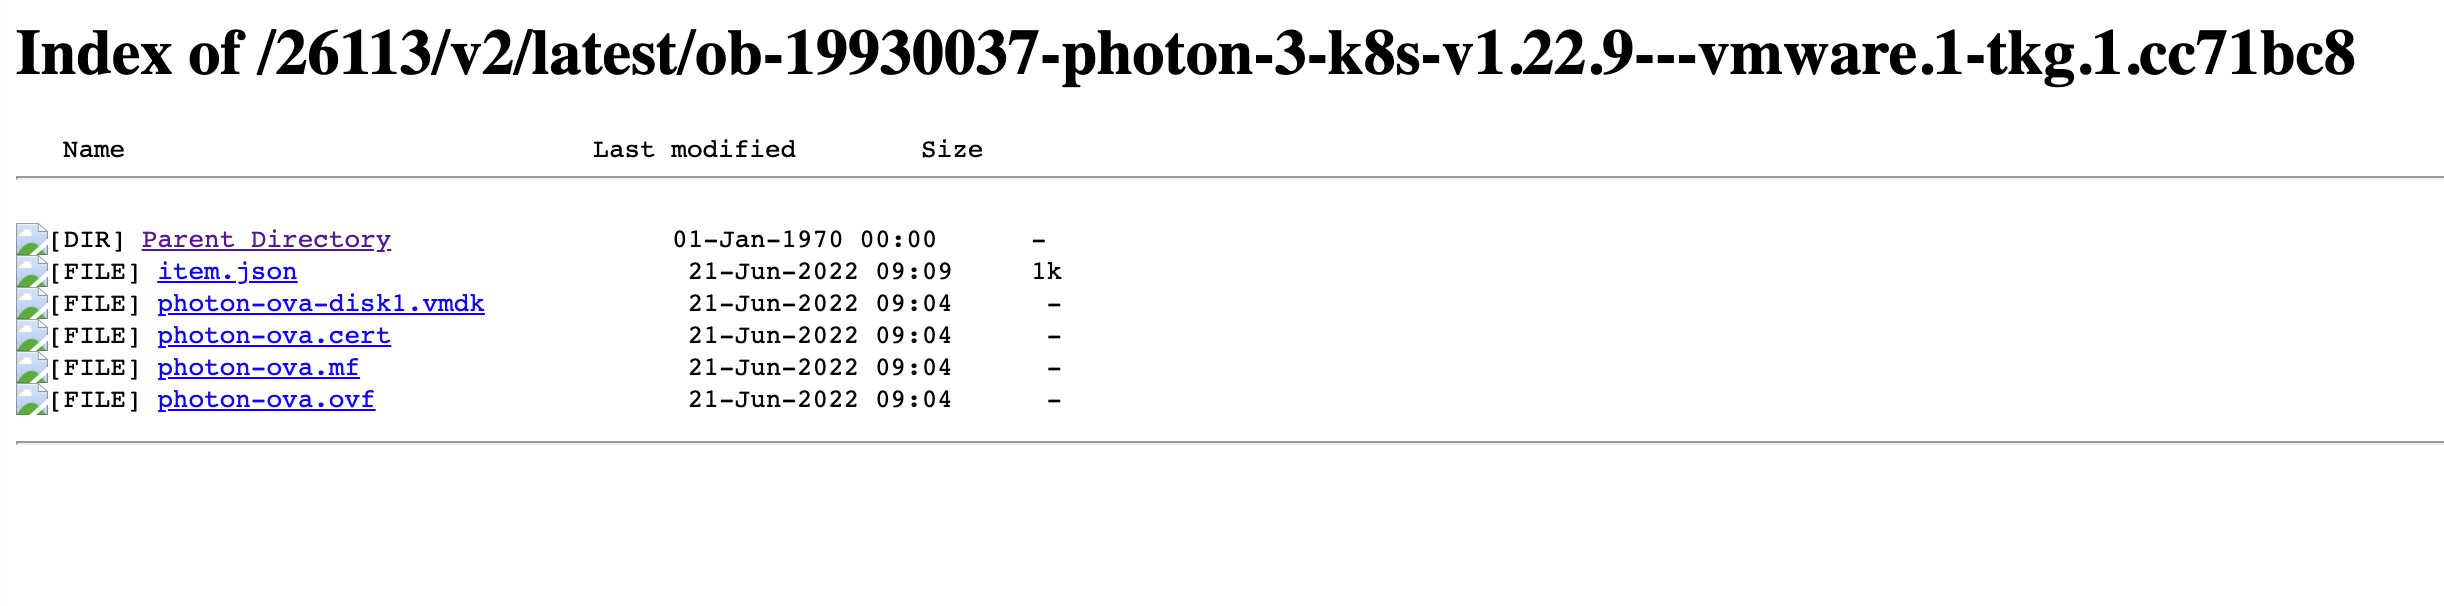
We'll download the following files:
- photon-ova-disk1.vmdk
- photon-ova.cert
- photon-ova.mf
- photon-ova.ovf
When uploading to our Content Library it's important that we need the full distribution name so make sure to make a note of the directory name from the public library.
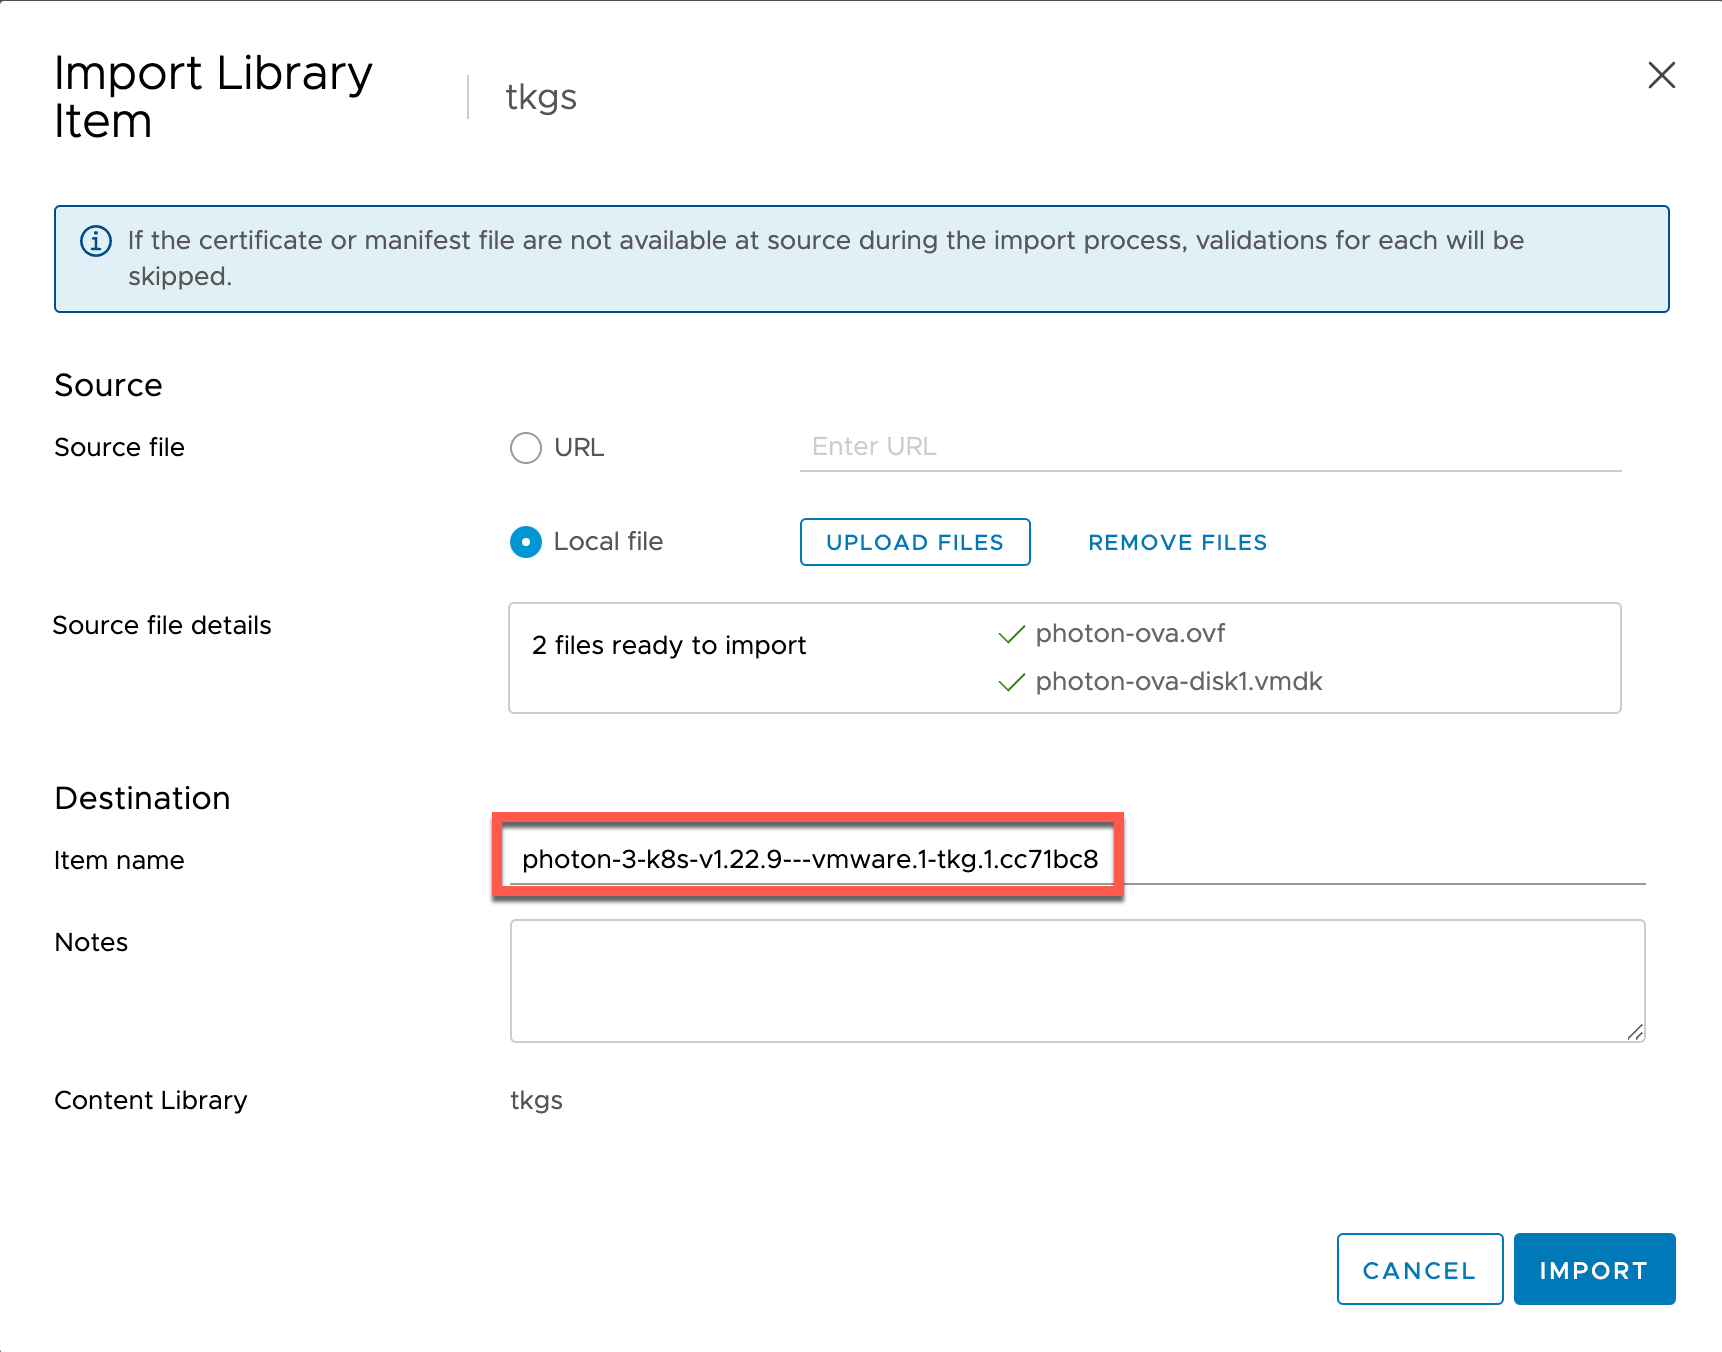
We'll head over to our Content Library and click Import item. In the dialog box we'll add the vmdk and ovf file (the two others needs to be present in your folder if working with Security policies in the Content Library). Note also that we add the full distribution name as the item name
This will take some time depending on your infrastructure.
When our first item has been imported we can use kubectl get tanzukubernetesreleases to check that it's available in our Supervisor cluster. Note that it might take a few minutes after a successful import before it's been sync'ed in the Supervisor Cluster

For more information about Local Content Libraries check out the documentation
Deploy Tanzu Kubernetes Clusters
With our Namespace set up with permissions, storage and VM Classes, and our Content Library populated with the Tanzu Kubernetes Releases we want to make use of, we're ready to deploy our first Tanzu Kubernetes Cluster
To deploy a Tanzu Kubernetes Cluster we'll specify it's configuration in a yaml file which is the way most Kubernetes resources are deployed.
Some examples of Tanzu Kubernetes Cluster yaml files can be found in the documentation
Note that the examples from the docs, and what we're using in this post uses the newer v1alpha2 API
Before we'll create our yaml we'll have to retrieve some details from our environment with regards to the VM Classes (which we selected previously), the Tanzu Kubernetes Release and the Storage class (which is the Kubernetes equivalent to the vSphere Storage Policy).
Note that in the example below we're still using the Supervisor Cluster context. Normally we would have done a new login and changed to the context of the vSphere namespace
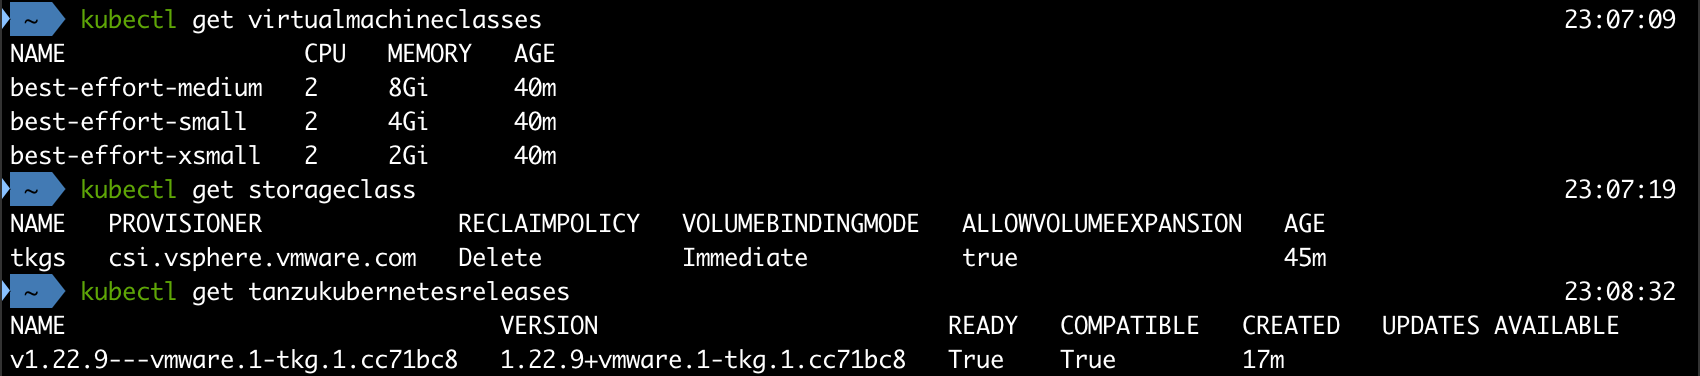
We'll use kubectl to get all of these details
1kubectl get virtualmachineclasses
2kubectl get storageclass
3kubectl get tanzukubernetesreleases
With this information we can create a yaml file for our first cluster!
 1apiVersion: run.tanzu.vmware.com/v1alpha2
 2kind: TanzuKubernetesCluster
 3metadata:
 4  name: tkgs-cluster-1
 5  namespace: first-ns
 6spec:
 7  topology:
 8    controlPlane:
 9      replicas: 1
10      vmClass: best-effort-small
11      storageClass: tkgs
12      tkr:
13        reference:
14          name: v1.22.9---vmware.1-tkg.1.cc71bc8
15    nodePools:
16    - name: worker-pool
17      replicas: 1
18      vmClass: best-effort-small
19      storageClass: tkgs
20      tkr:
21        reference:
22          name: v1.22.9---vmware.1-tkg.1.cc71bc8
We'll deploy this with kubectl to create our cluster
1kubectl apply -f path-to-file.yaml

Before we dig into the Kubernetes cluster we've just deployed let's take a quick look at what's happened in our infrastructure
vSphere environment
The Tanzu Kubernetes cluster we've deployed consists of one control plane node and one worker node. These are running as virtual machines based on the templates we uploaded to our Content Library, and specified in the cluster yaml.
We can use kubectl to get some information about the VMs
1kubectl -n <namespace> get vm

Let's also check our vCenter and see if we can find our VMs there
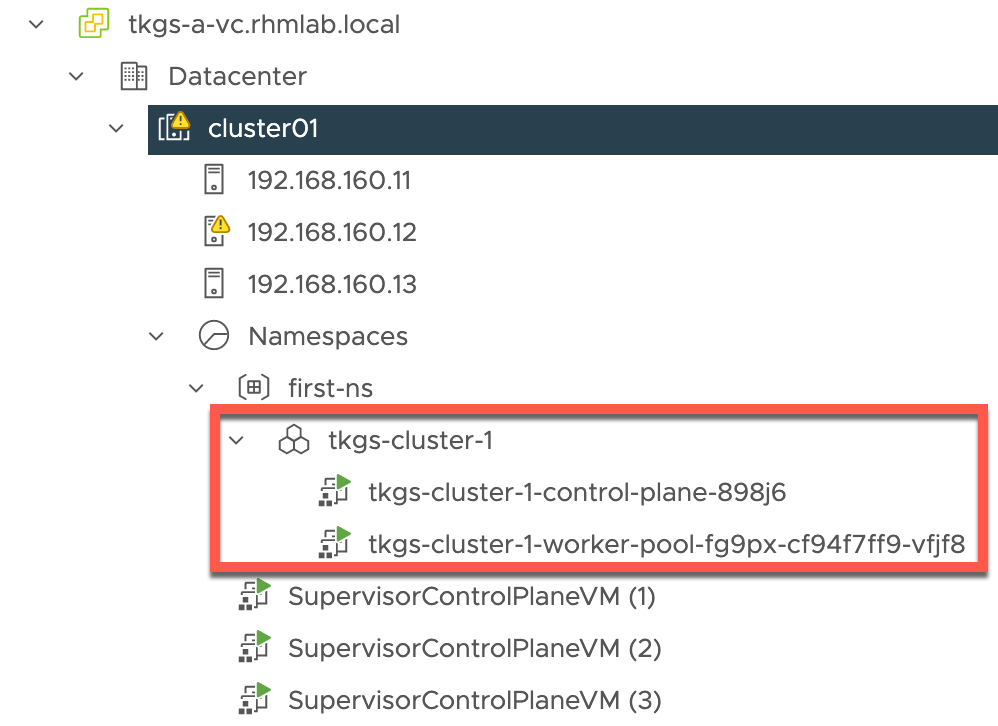
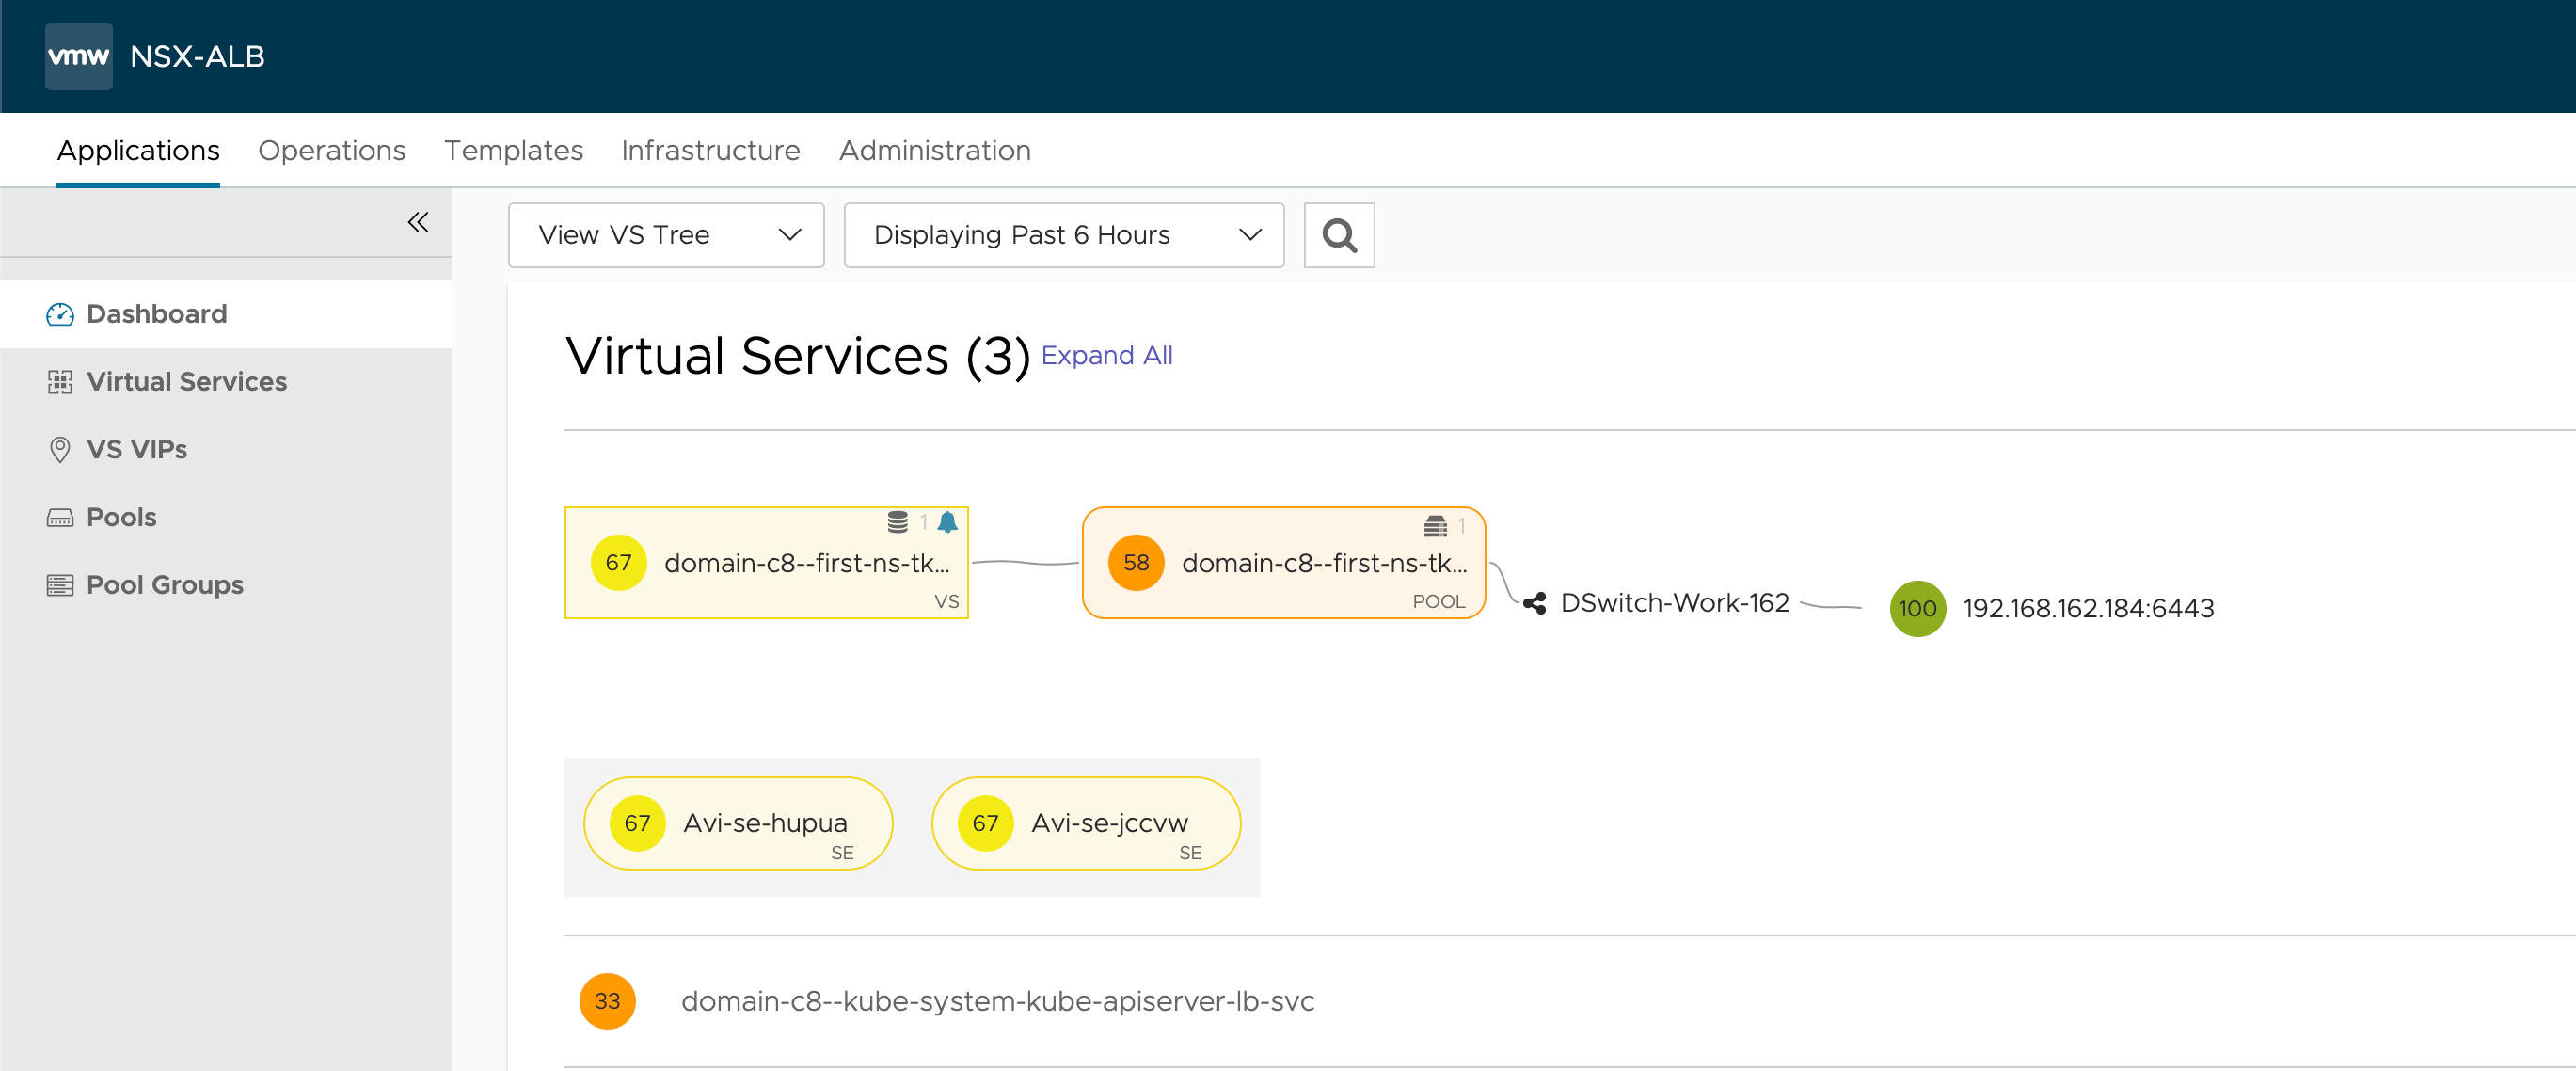
NSX Advanced Load Balancer
The Load Balancer will create a Virtual Service for the new cluster pointing to the control plane node we've deployed
Interacting with our new cluster
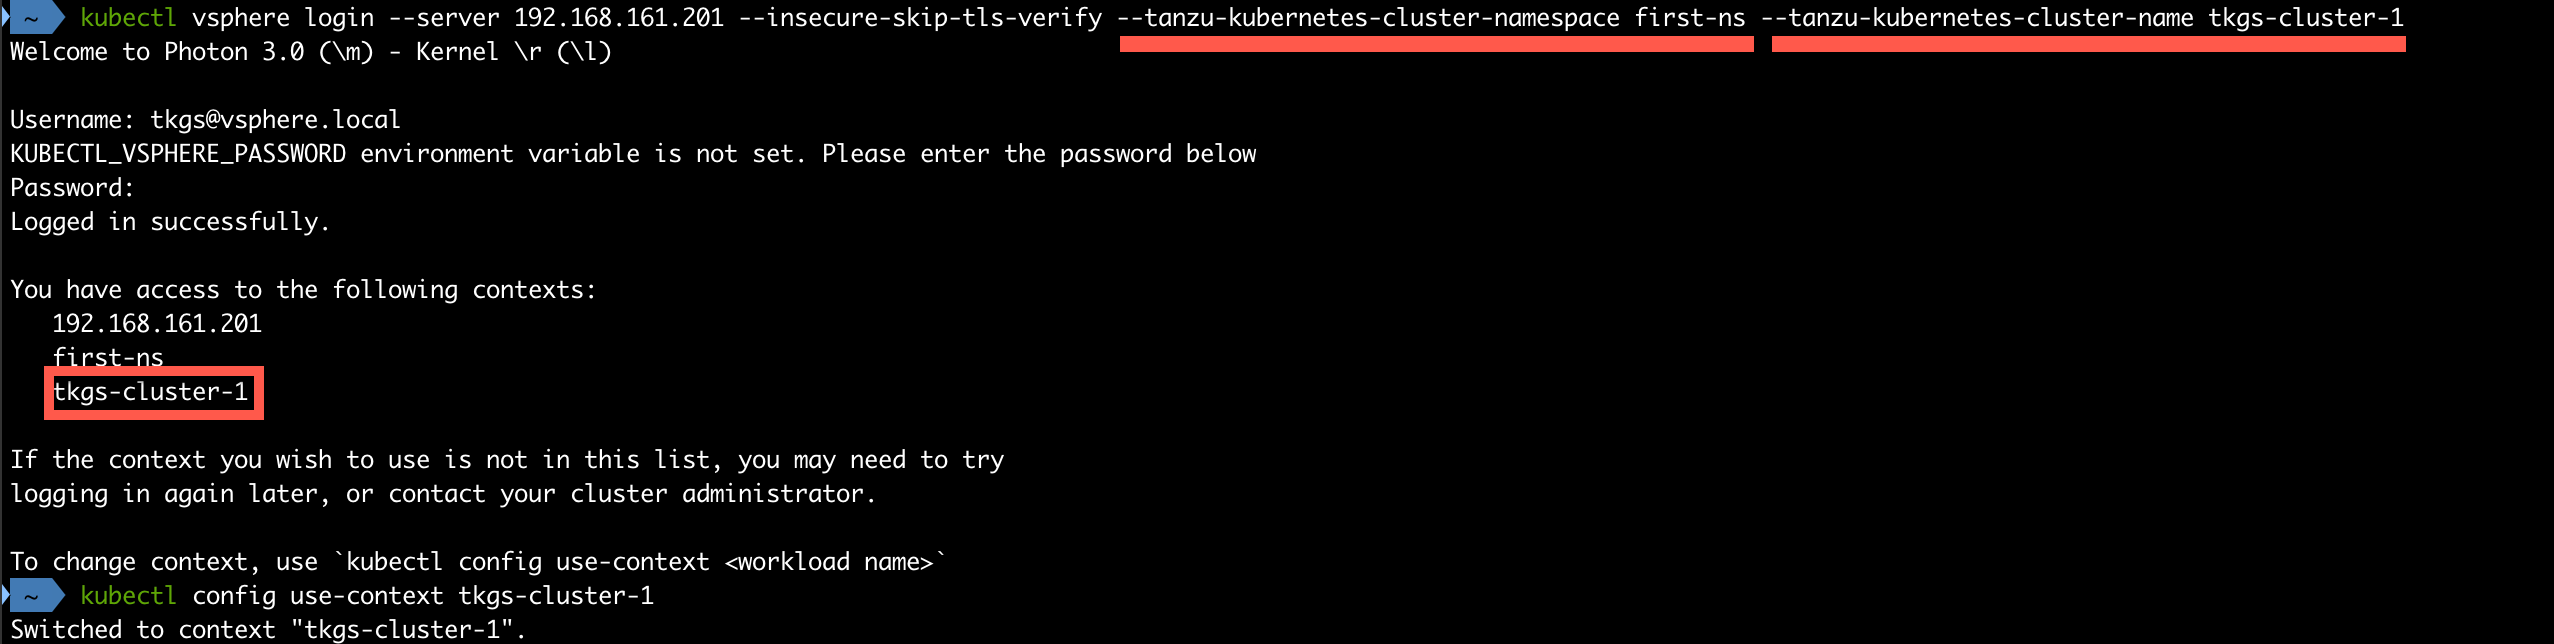
Log in to the cluster
To be able to interact with the new cluster we have to log in to the cluster it self. This is also done with kubectl vsphere and we'll still use the Supervisor control plane VIP, which might be a bit confusing at first.
1kubectl vsphere login --server <supervisor-vip> --tanzu-kubernetes-cluster-namespace <namespace> --tanzu-kubernetes-cluster-name <tkc-name>
Check cluster nodes and default resources
Now that we're in the new cluster and it's context let's run a command to check which nodes we have
1kubectl get nodes

Since we're not working in the supervisor cluster namespace we do not have access to the Supervisor Cluster nodes. We'll not see the VMs we saw previously either. Infact the cluster doesn't even know about the virtualmachine resource
1kubectl get virtualmachines

We do however have access to the storage provided through the Supervisor namespace
1kubectl get storageclass

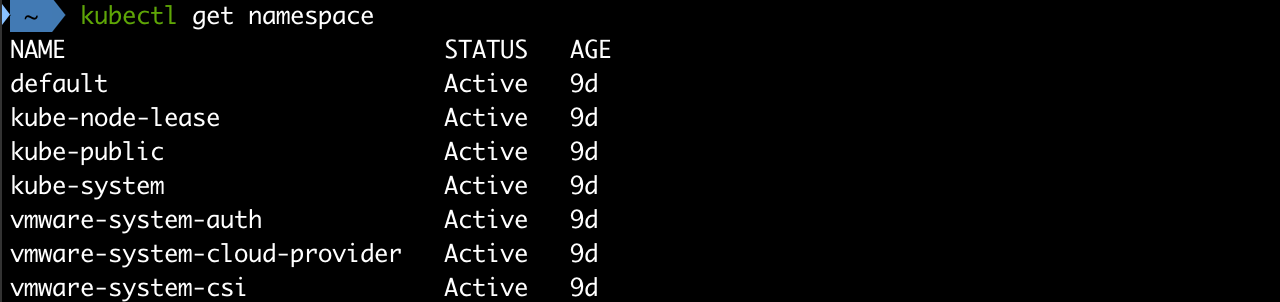
Let's also quickly check which namespaces we have in this Kubernetes cluster
1kubectl get namespace
Deploy a workload
Now, let's finally deploy a simple workload to our new cluster.
1kubectl create deployment nginx --image=nginx

One very important thing to note is that by default we won't get any pods deployed
1kubectl get pods
2kubectl get rs
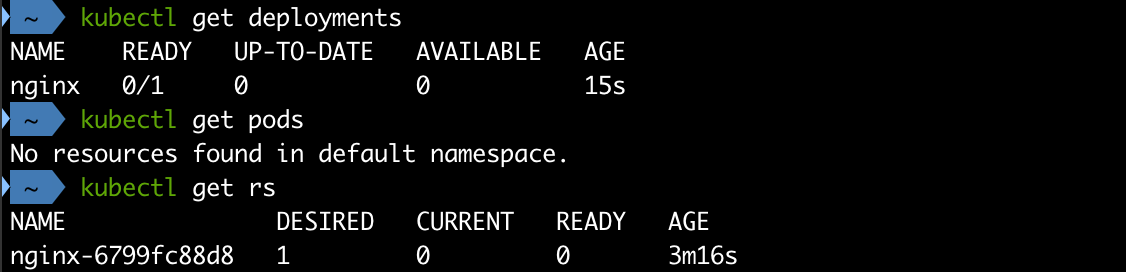
By investigating the Replica set we can find a message like the following
1kubectl describe rs <replicaset-name>
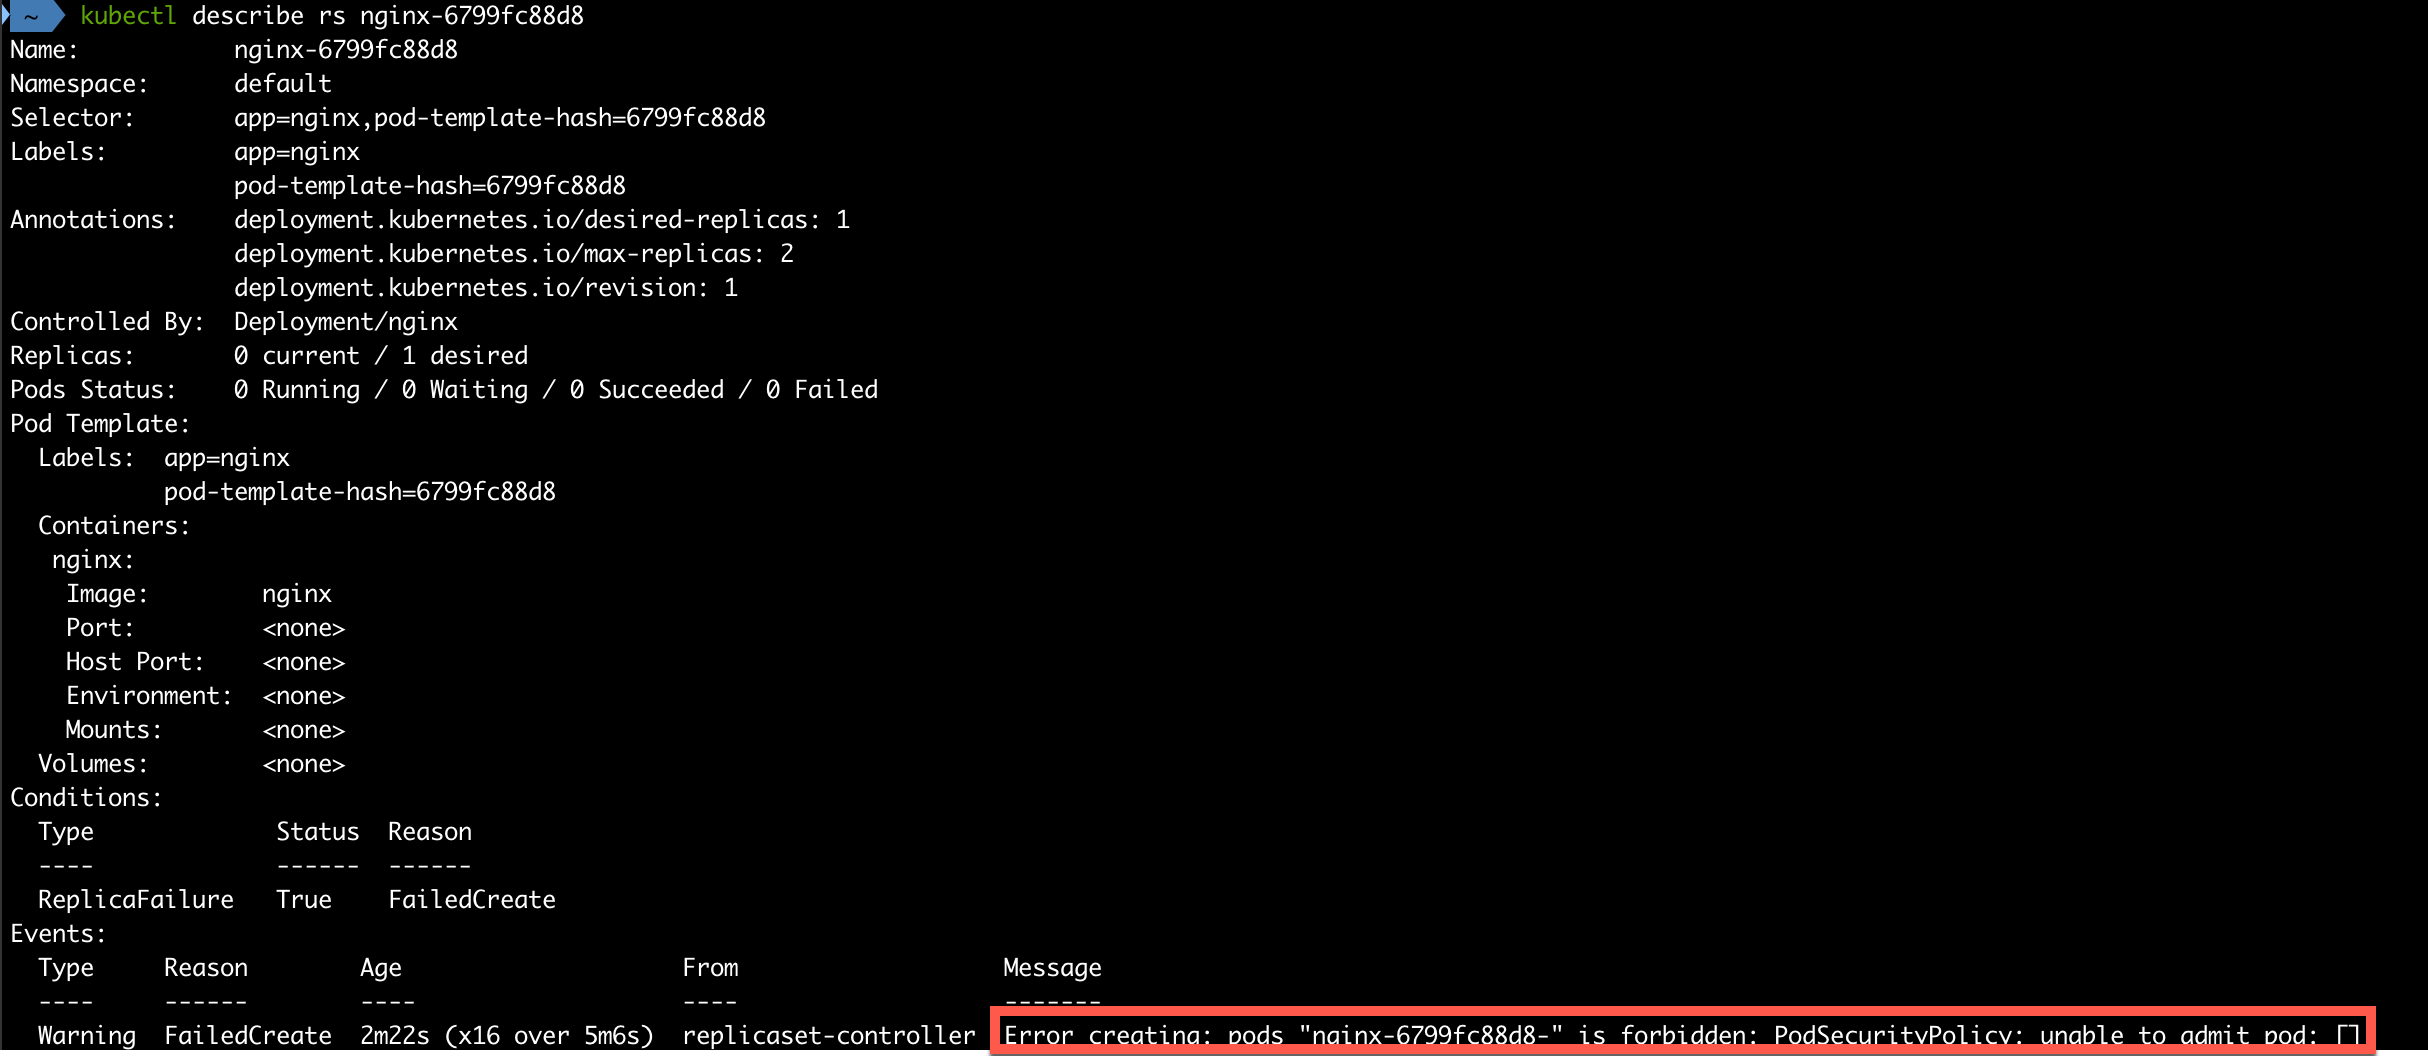
Tanzu Kubernetes Cluster uses Pod Security policies to control which accounts can deploy pods, and what types of pods can be deployed.
For more information about the Pod security policies check out the VMware documentation
Pod Security Policies are deprecated in Kubernetes v1.21.1 and removed in v1.25. Expect VMware to update their Tanzu clusters with an alternative
By default no Pod security policies exists which effectively stops us from deploying our nginx pod.
To be able to run pods in our cluster we'll create a ClusterRoleBinding which allows us to run workloads. For examples on different policies check out the VMware documentation. We're using example 1 in our demo which is the least secure alternative.
1kubectl create clusterrolebinding default-tkg-admin-privileged-binding --clusterrole=psp:vmware-system-privileged --group=system:authenticated

Still our pods won't deploy. We'll have to delete our Replica set and let the Kubernetes cluster deploy a new one for our deployment
1kubectl delete rs <replicaset-name>
2kubectl get rs
3kubectl get pods
4kubectl get deployments

With that our workload has been deployed!
Summary
This rather lengthy post has shown how to create vSphere namespaces, deploy Tanzu Kubernetes (guest) clusters and a simple workload in a cluster. Hopefully it has also shown how easy it can be for a vSphere administrator to provide a Kubernetes platform for developers.
As things move quickly in this space please be aware that things might change in newer versions of the product. Always refer to the VMware documentation for the latest.
Thanks for reading!