NSX-T 3.1 Home lab - Testing Setup
In the previous post in this mini-series I walked through how I've set up and configured NSX-T 3.1.1 in my home lab. This post will test the configuration to (hopefully) verify my work.
We'll also create a Tier-0 Gateway to get some external connectivity in and out of our NSX environment.
Test setup
With all the Fabric configuration done we can test our setup.
I'm creating two overlay segments in NSX connected to a Tier-1 gateway, and after that we'll create a Tier-0 gateway and connect the T1 gateway to it to get North/South connectivity to the overlay resources
Two VMs will be deployed, one VM in each of the two overlay segments
Create a Tier-1 Gateway
The Tier-1 Gateway will initially not be connected to a Tier-0 Gateway (I haven't configured a T0 gw yet) or an Edge Cluster.

Create Logical segments
We need two logical segments, both using the Overlay Transport Zone. I'm defining different subnets on them, 10.0.1.0/24 and 10.0.2.0/24.

Add VMs to Logical segments
We have two Photon VMs which should be added to the logical segments.
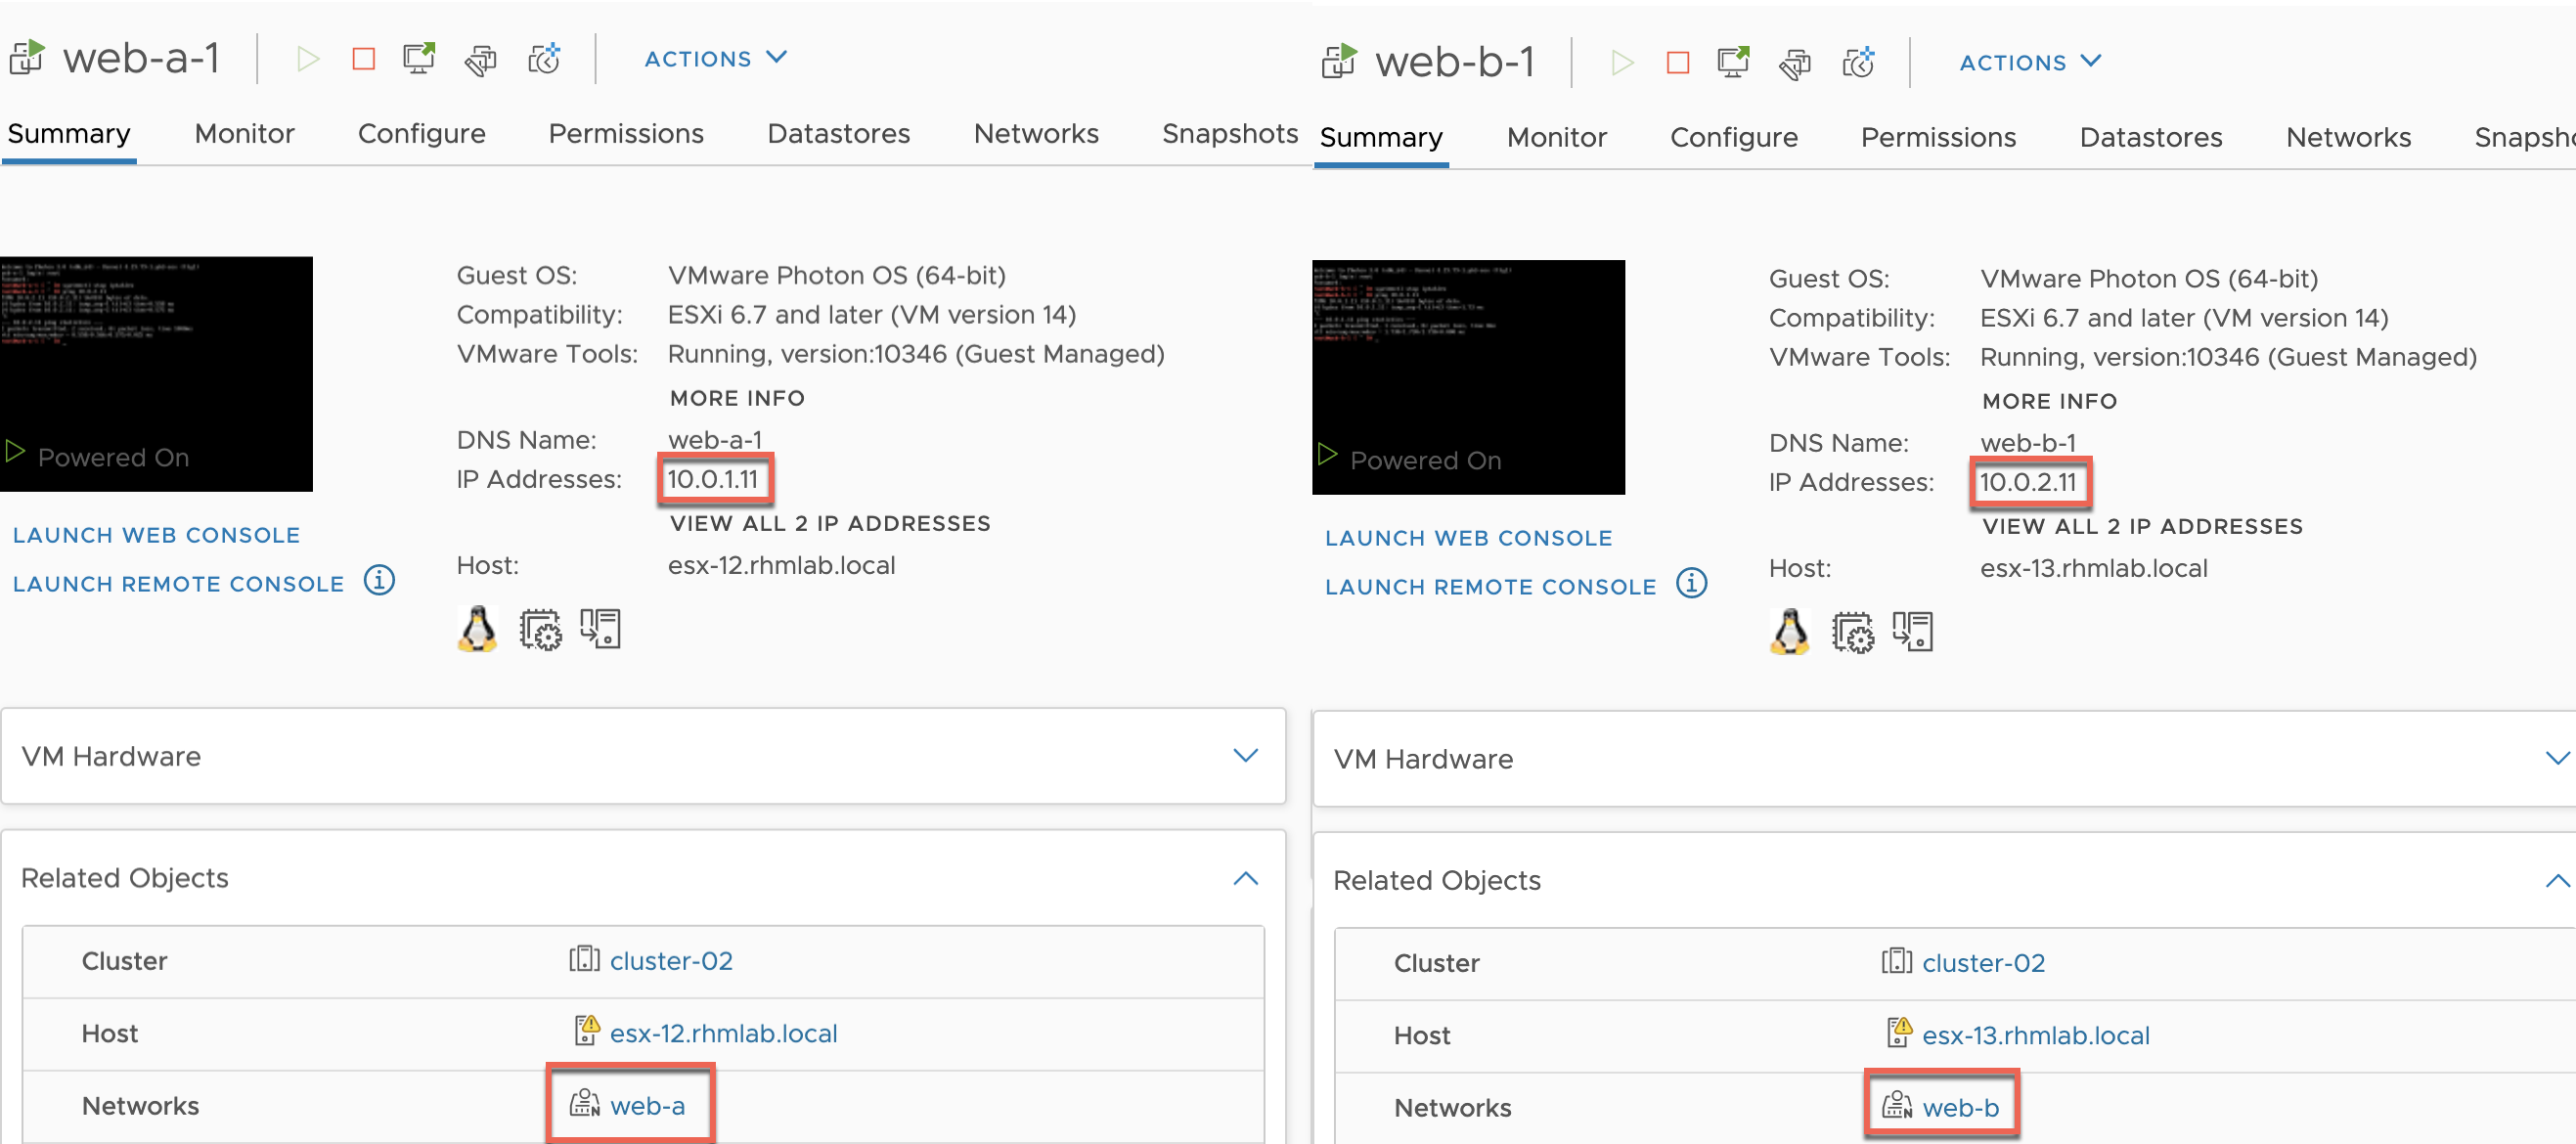
Test connectivity
Now let's verify that the two VMs can ping each other
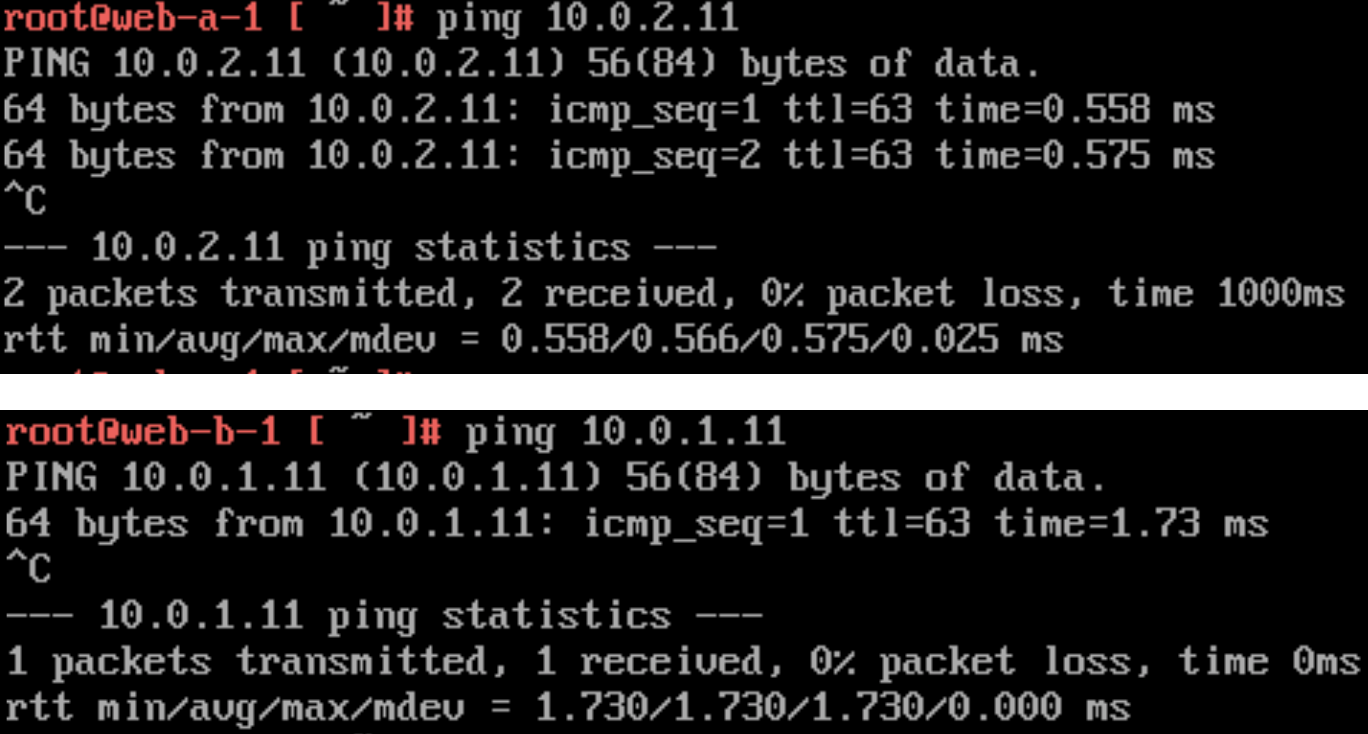
This shows that the overlay is working, and note again that the Edge VMs are not in use here.
Test Distributed Firewall
Let's also do a quick test of the Distributed Firewall feature in NSX-T.
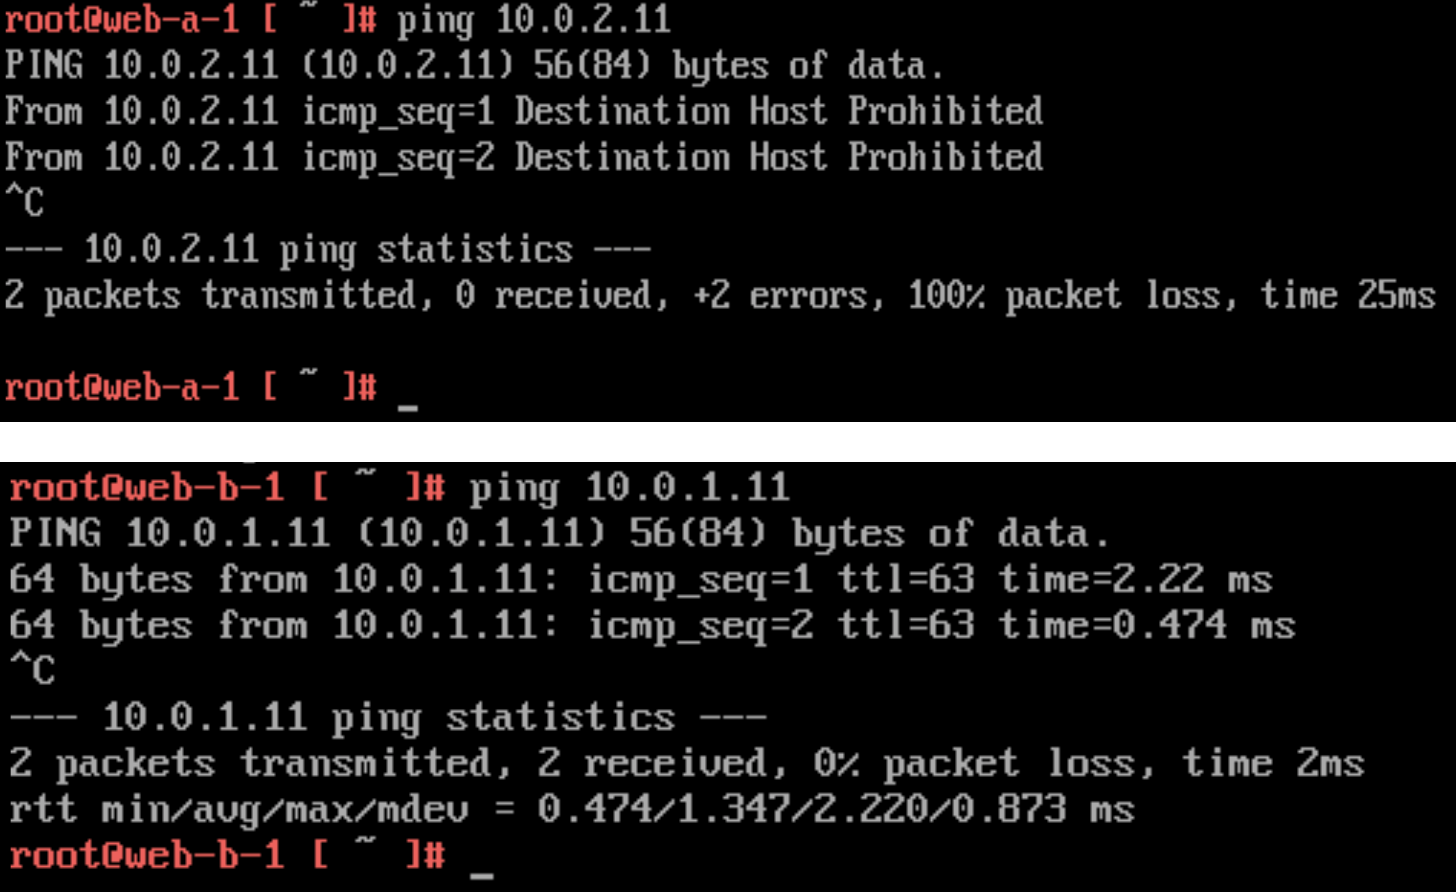
First we'll create a rule blocking ICMP (ping) from the web-a machine to any destination and publish the rule

Now let's test pinging from both of the VMs. web-a should not be able to ping web-b, but the other way around should still work
External connectivity
Traffic is flowing between VMs running on Logical segments inside the NSX-T environment, but what if we want to reach something outside, or reach a VM inside a NSX-T overlay?
Then we need to bring a Tier-0 Gateway in to the mix.
The T-0 gateway can be configured with Uplinks that are connected to the physical network. This is done through a segment which can reach the physical network, normally through a VLAN.
To configure the uplink interfaces we need to have Edge VMs so finally we get to bring those into play as well.
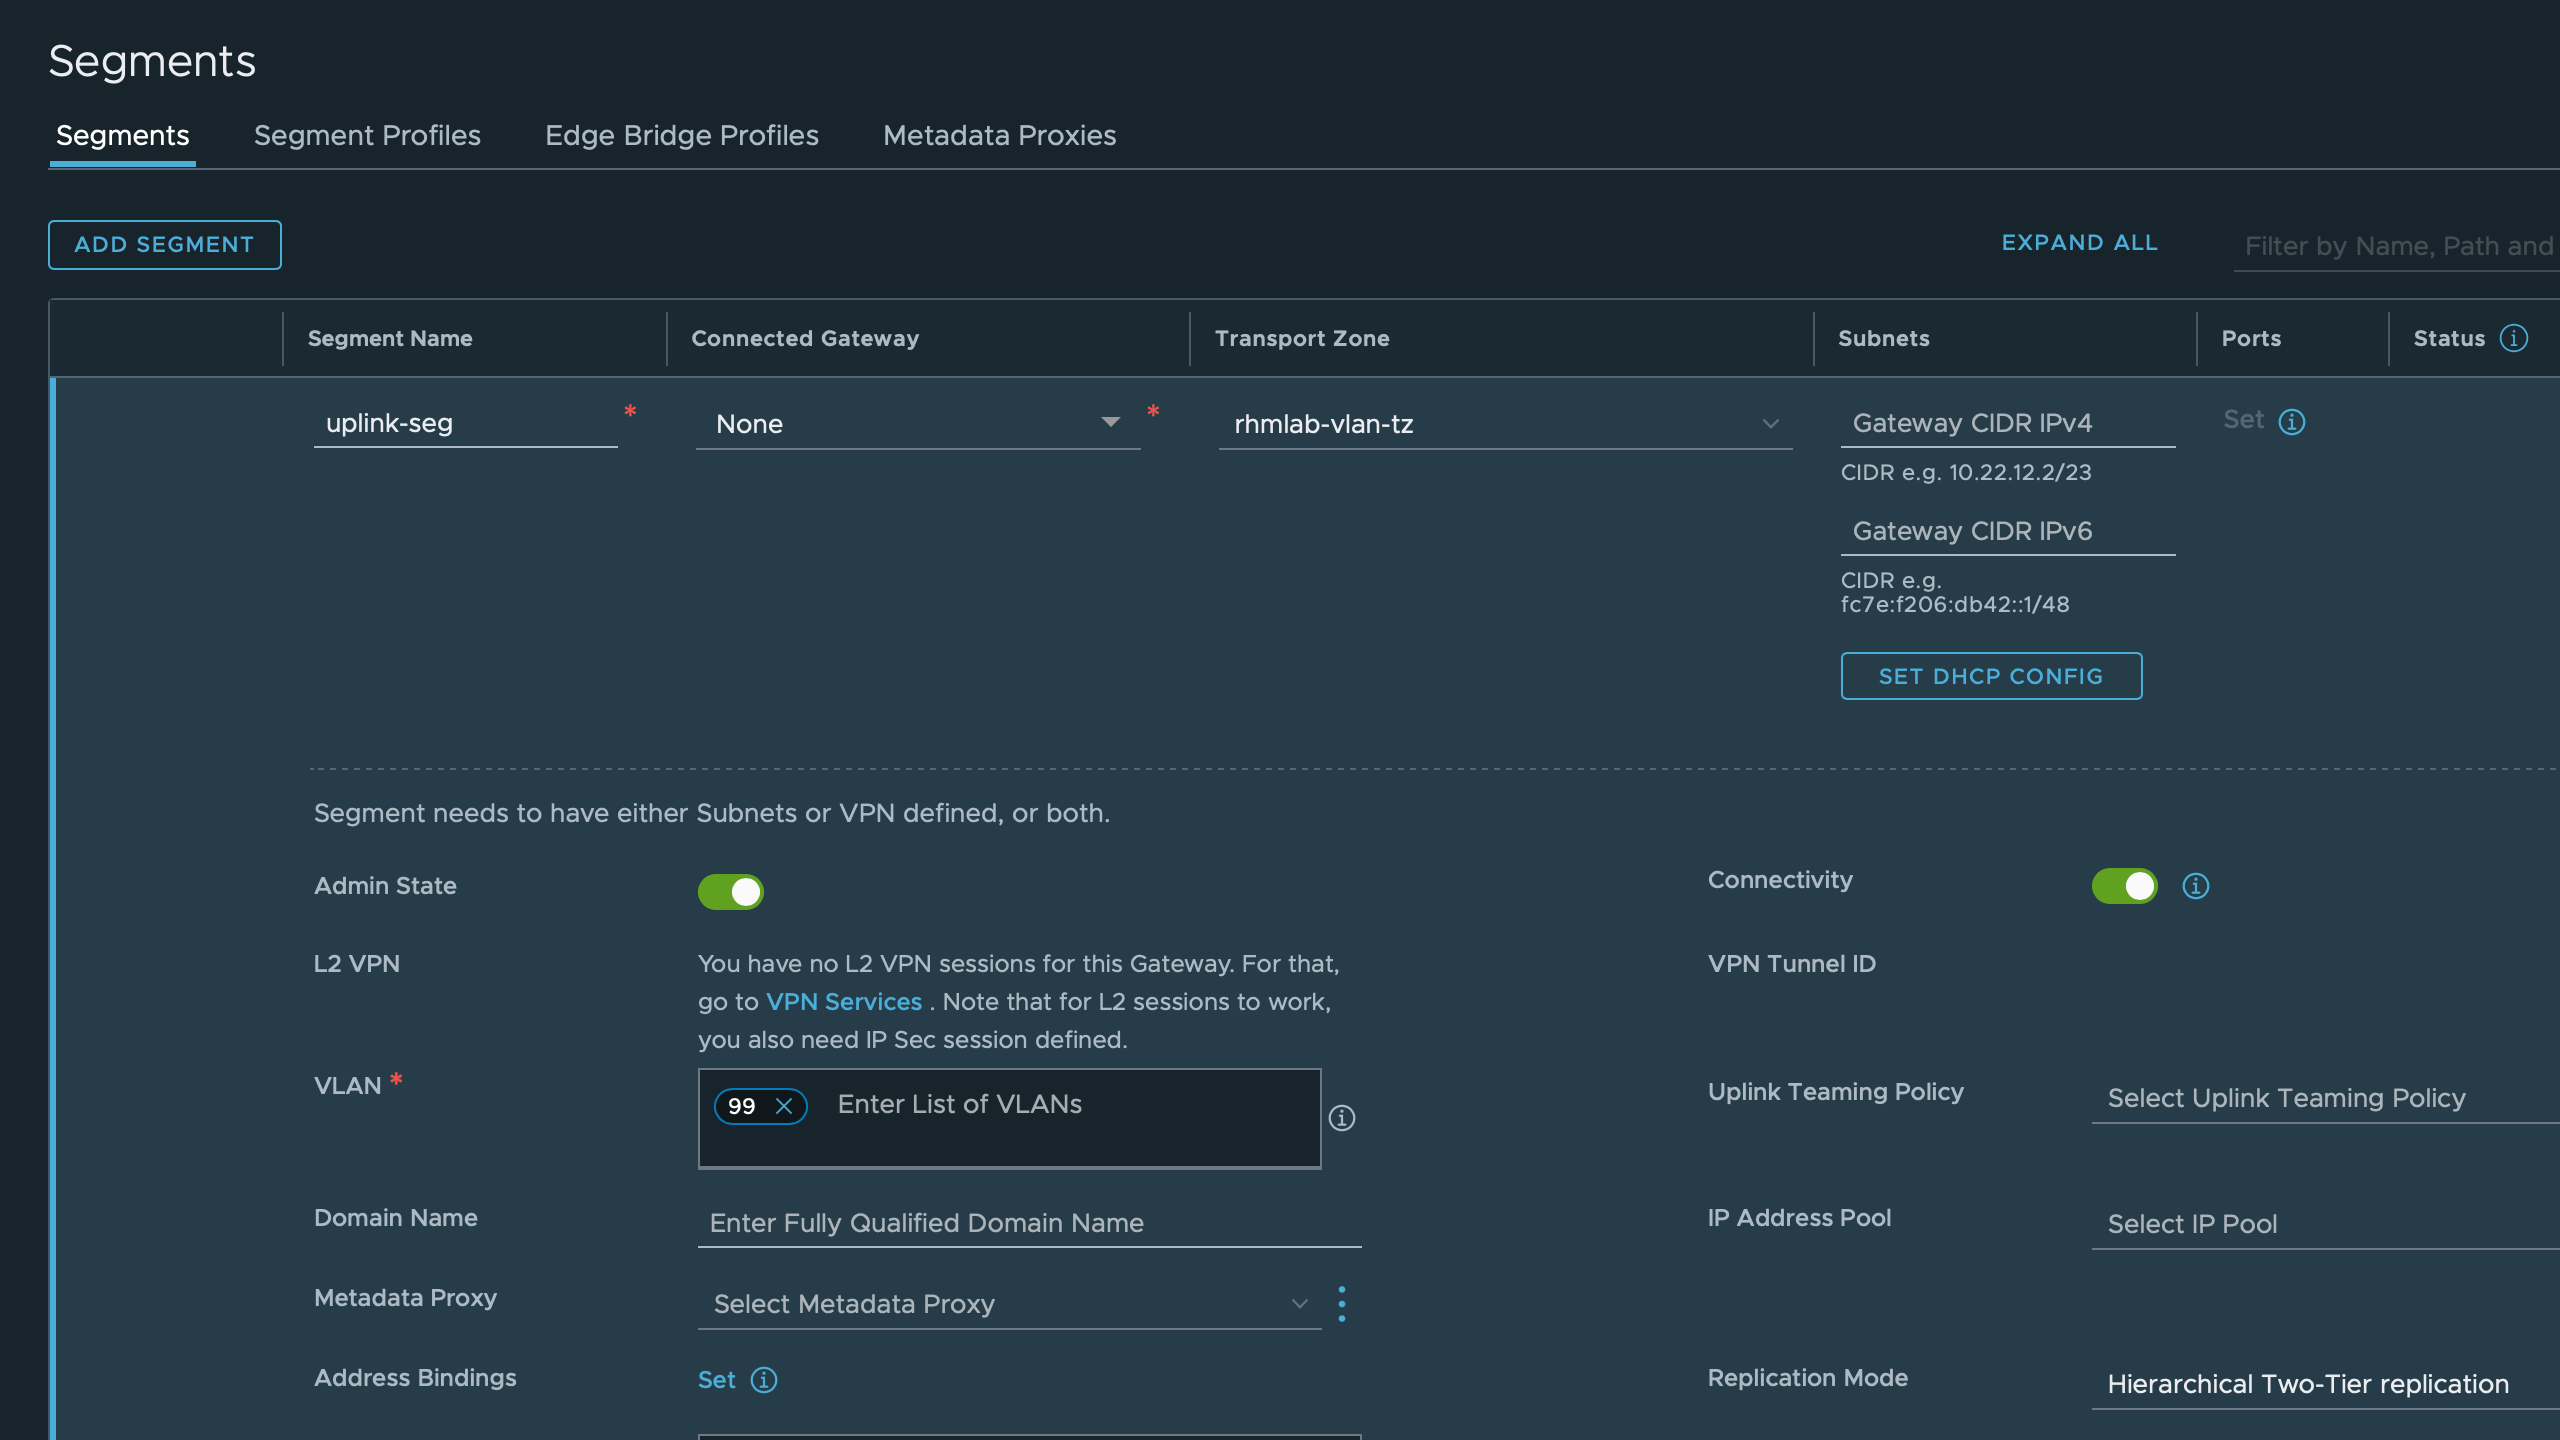
Create segment for uplinks
First I'll create a segment mapped to VLAN 99 in my lab. Note that I select the VLAN transport zone, and I do not connect the segment to a gateway
Create Tier-0 gateway
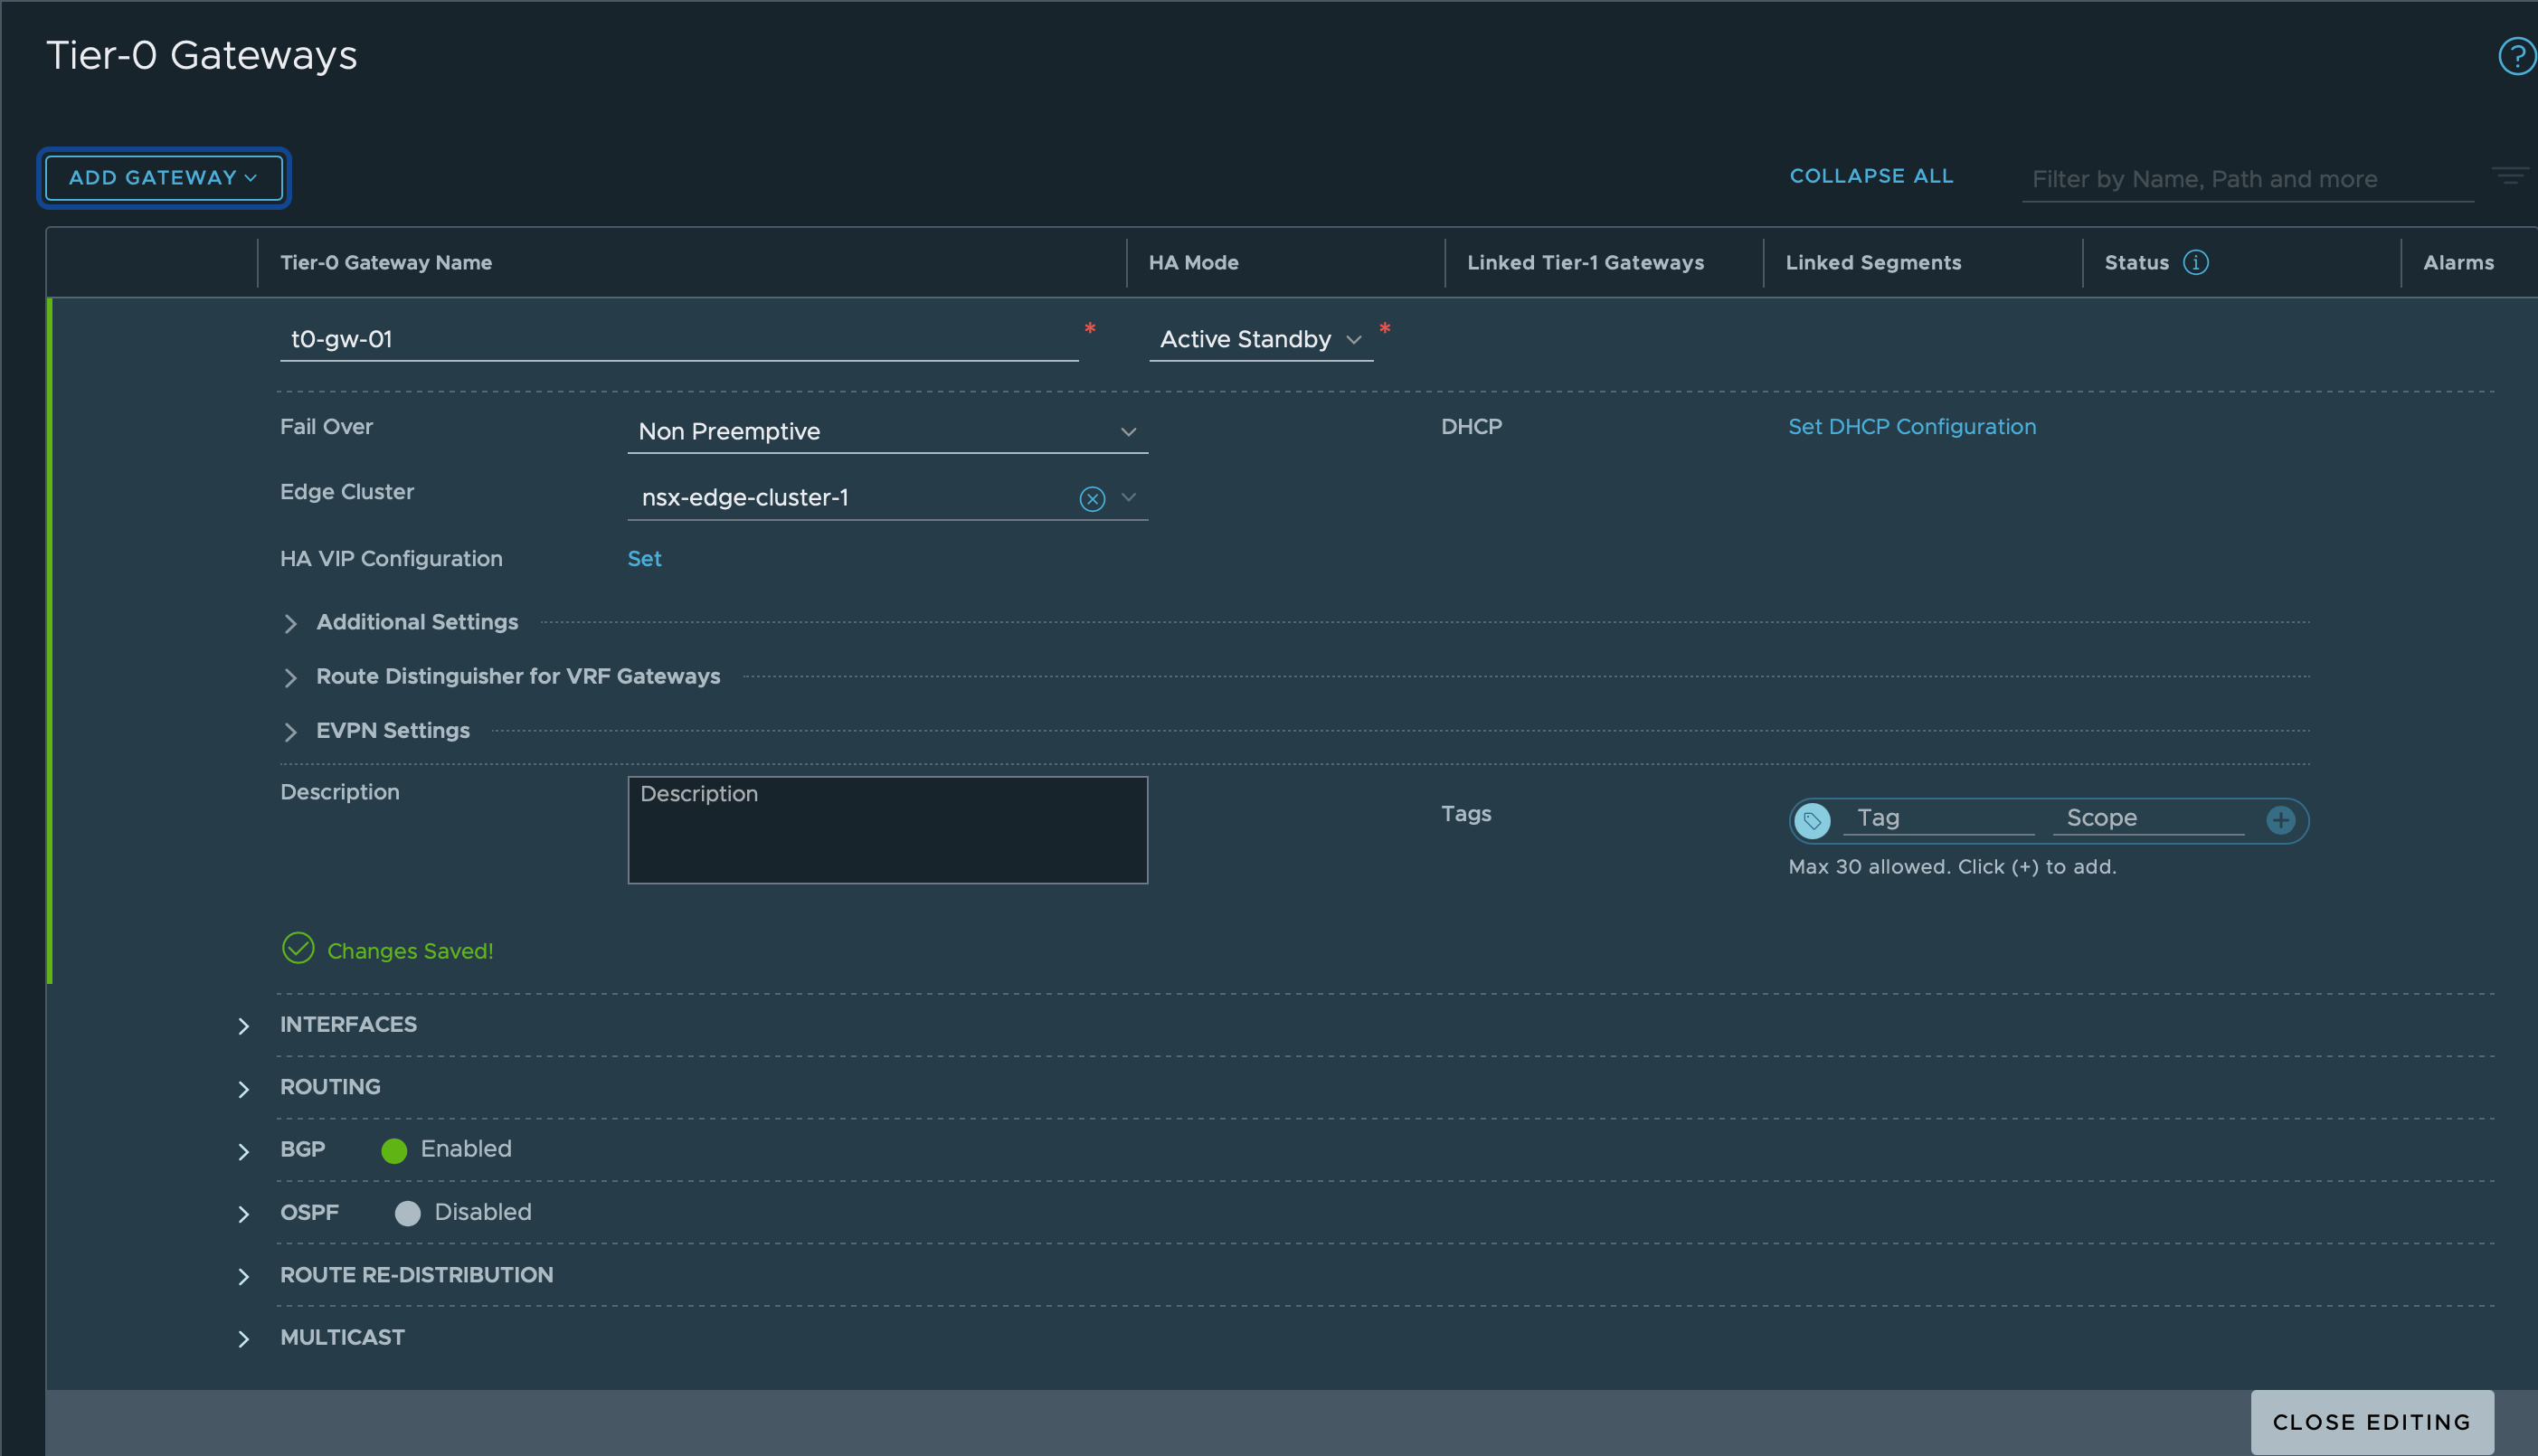
Now we'll create a Tier-0 gateway, note that I now also select my Edge cluster.
Create Uplink interface
We'll also create an uplink interface so that we can reach the T0 gateway. This interface is connected to a Edge VM from the Edge cluster we selected when we created the T0 GW.
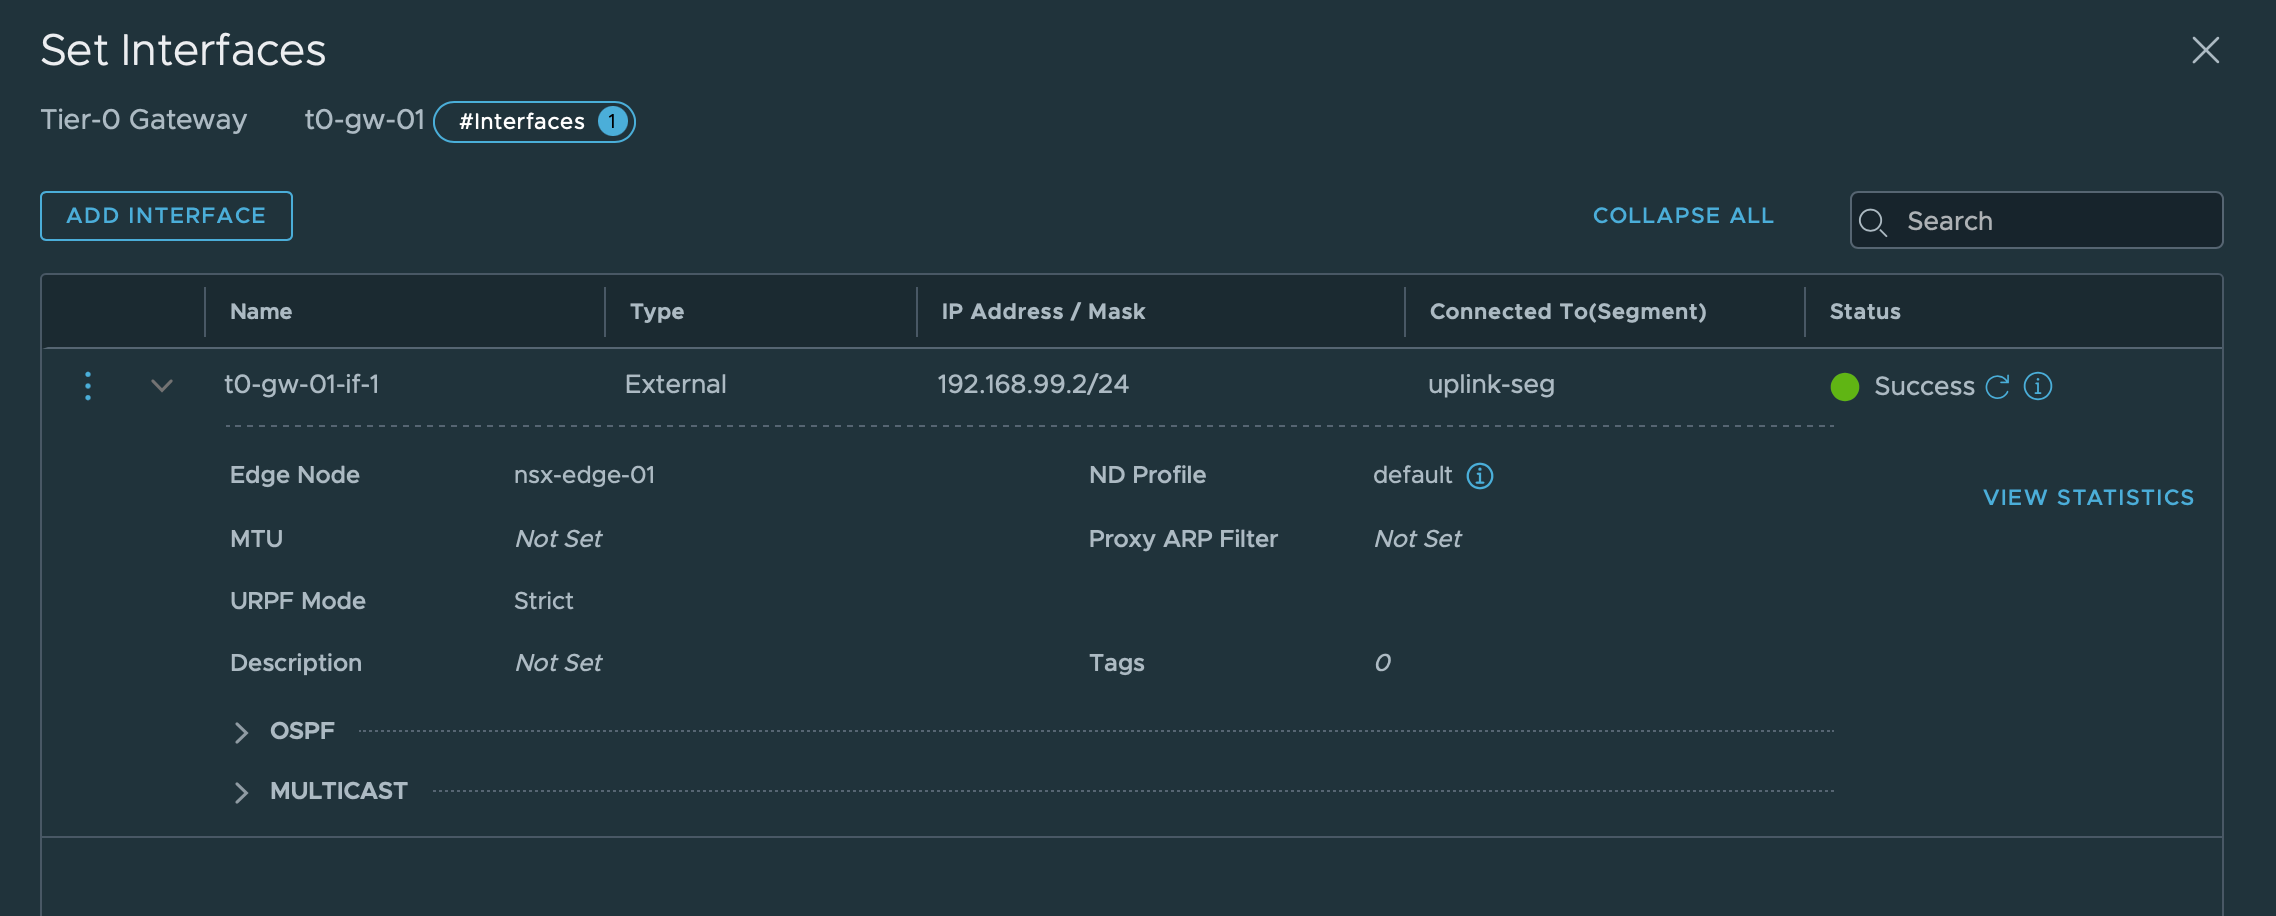
Normally we would have created two interfaces and then set a VIP address that we could use for the T0 GW, but in my setup I have currently only one Edge VM so it kind of makes no sense.
On my physical router I've configured a static route that forwards traffic to the Overlay networks (10.0.0.0/16) to the Tier-0 uplink interface address.
Static route
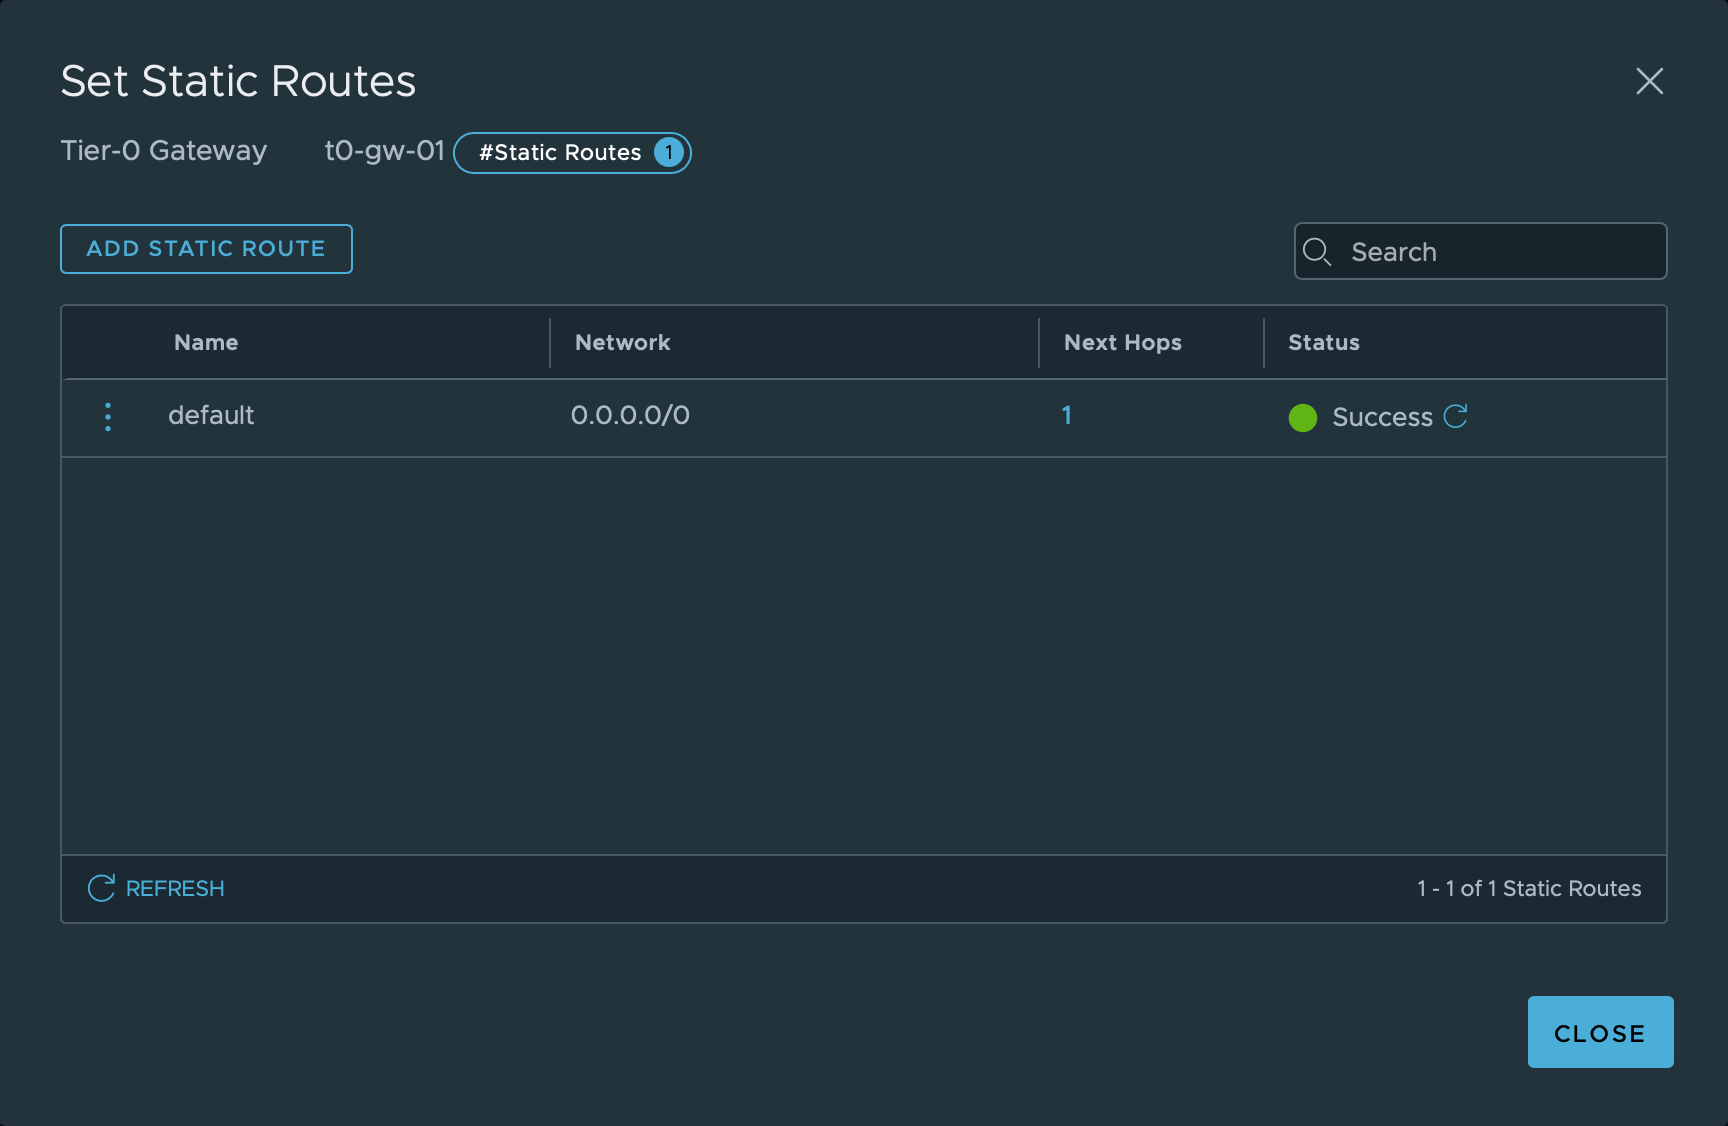
To be able to forward traffic out of the NSX-T environment the T0 gateway needs to know where to send queries for IPs it doesn't control. Normally you would want to configure a routing protocol like BGP or OSPF so that the T0 gateway could exchange routes with the physical router(s) in your network.
I've not set up BGP or any other routing protocol on my physical router, so I've just configured a default static route that forwards to my physical router. The next hop is set to the gateway address for the Uplink VLAN 99, 192.168.99.1
Link T1 gateway to T0 gateway
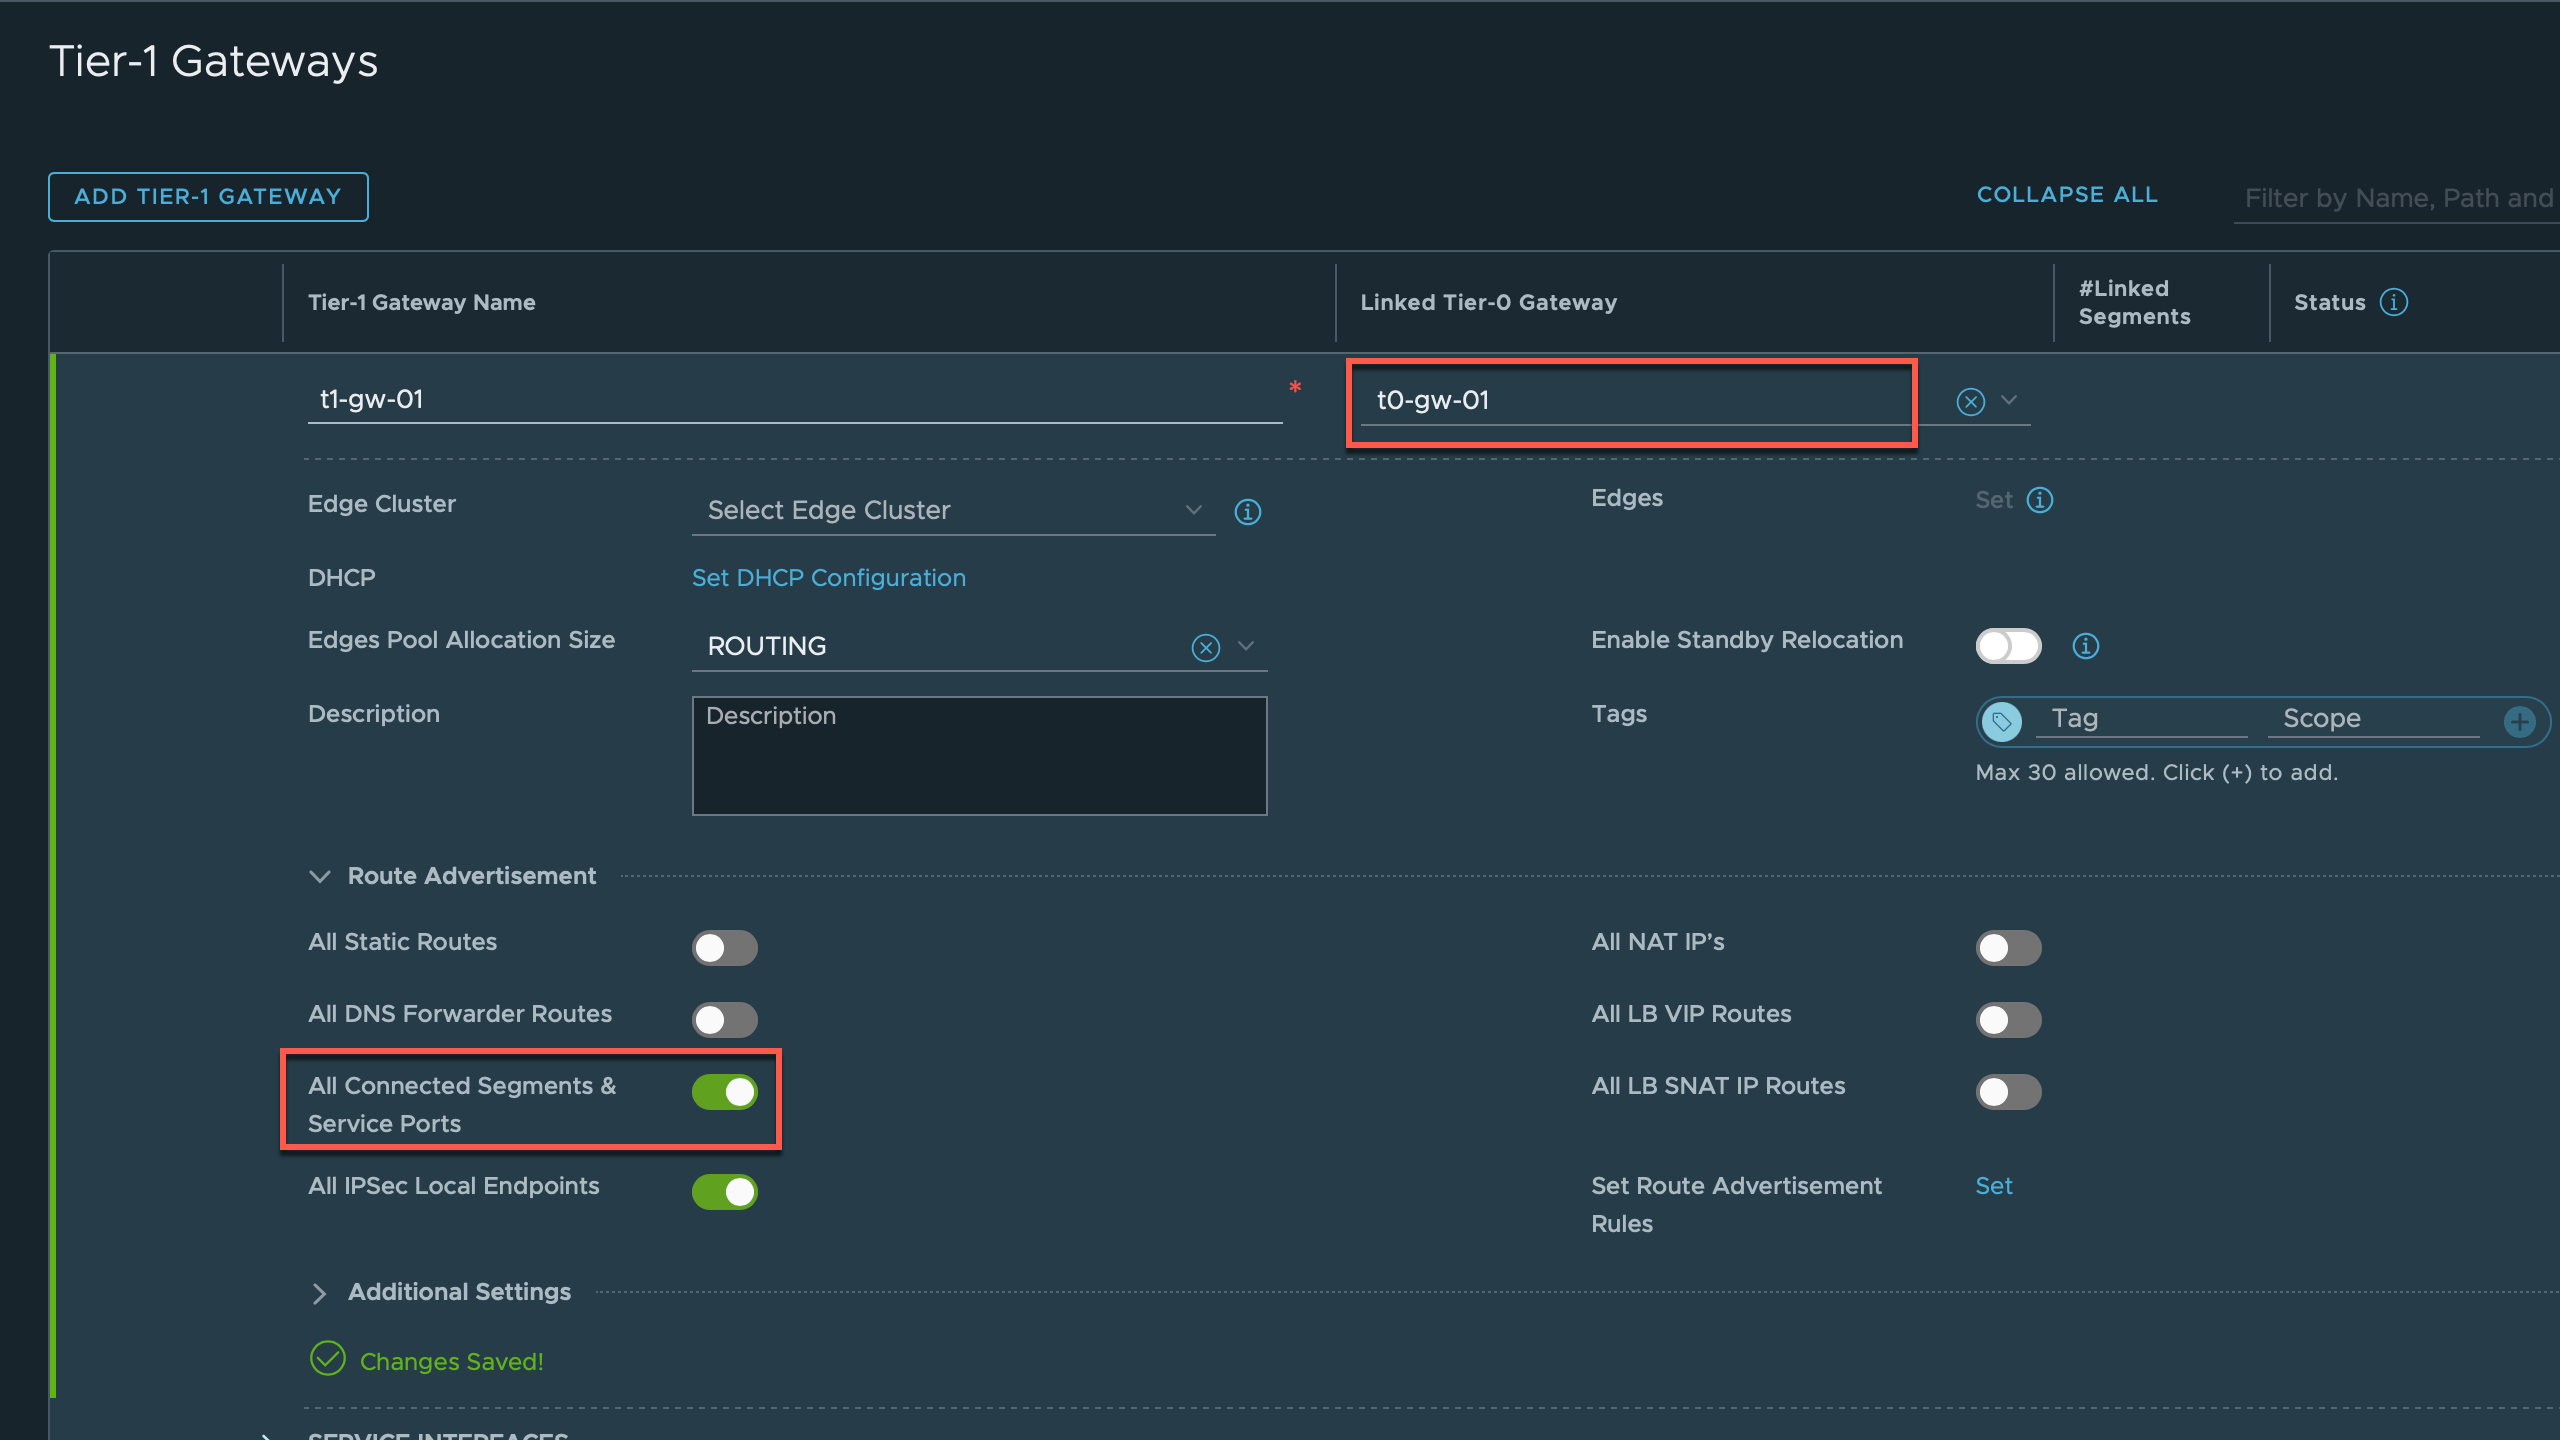
We've done a lot of configuring now, but still we've not got connectivity in or out for our VMs. The final step is to connect the Tier-1 gateway to the Tier-0 gateway, and we'll also activate Route Advertisement of Connected Segments and Service Ports
Test connectivity
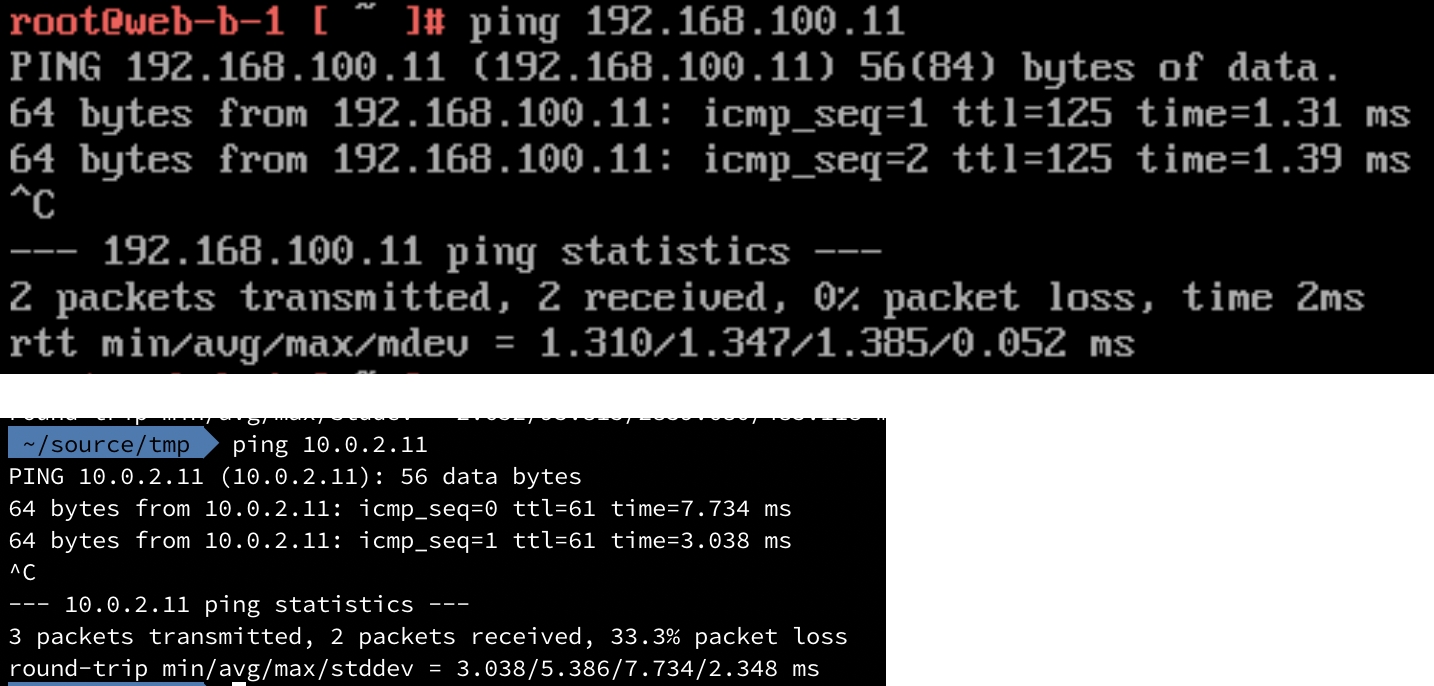
Score!
Summary
With all test successful we can move on to testing out a few of the services available in NSX-T like DHCP and Load Balancing. That'll be the focus of the third post in this mini-series.
Hopefully this post can help someone, if not it has at least helped me.
Thanks for reading!