Upgrading a Proxmox Virtual Environment (PVE) Cluster
This post will take a look at some of the steps needed for upgrading a Proxmox Virtual Environment (PVE). The environment consists of two PVE hosts running version 8.1.4 and will be upgraded to the, at the time of writing this post, latest version 8.2.7
The upgrade is done in a lab environment running test and development workloads. Please make sure you take appropriate steps before upgrading anything in production
In our current setup the hosts are joined to a cluster, they are both running internal storage configured with ZFS and replication is set up between them to support failover and migration. There's currently two virtual machines running in the cluster.
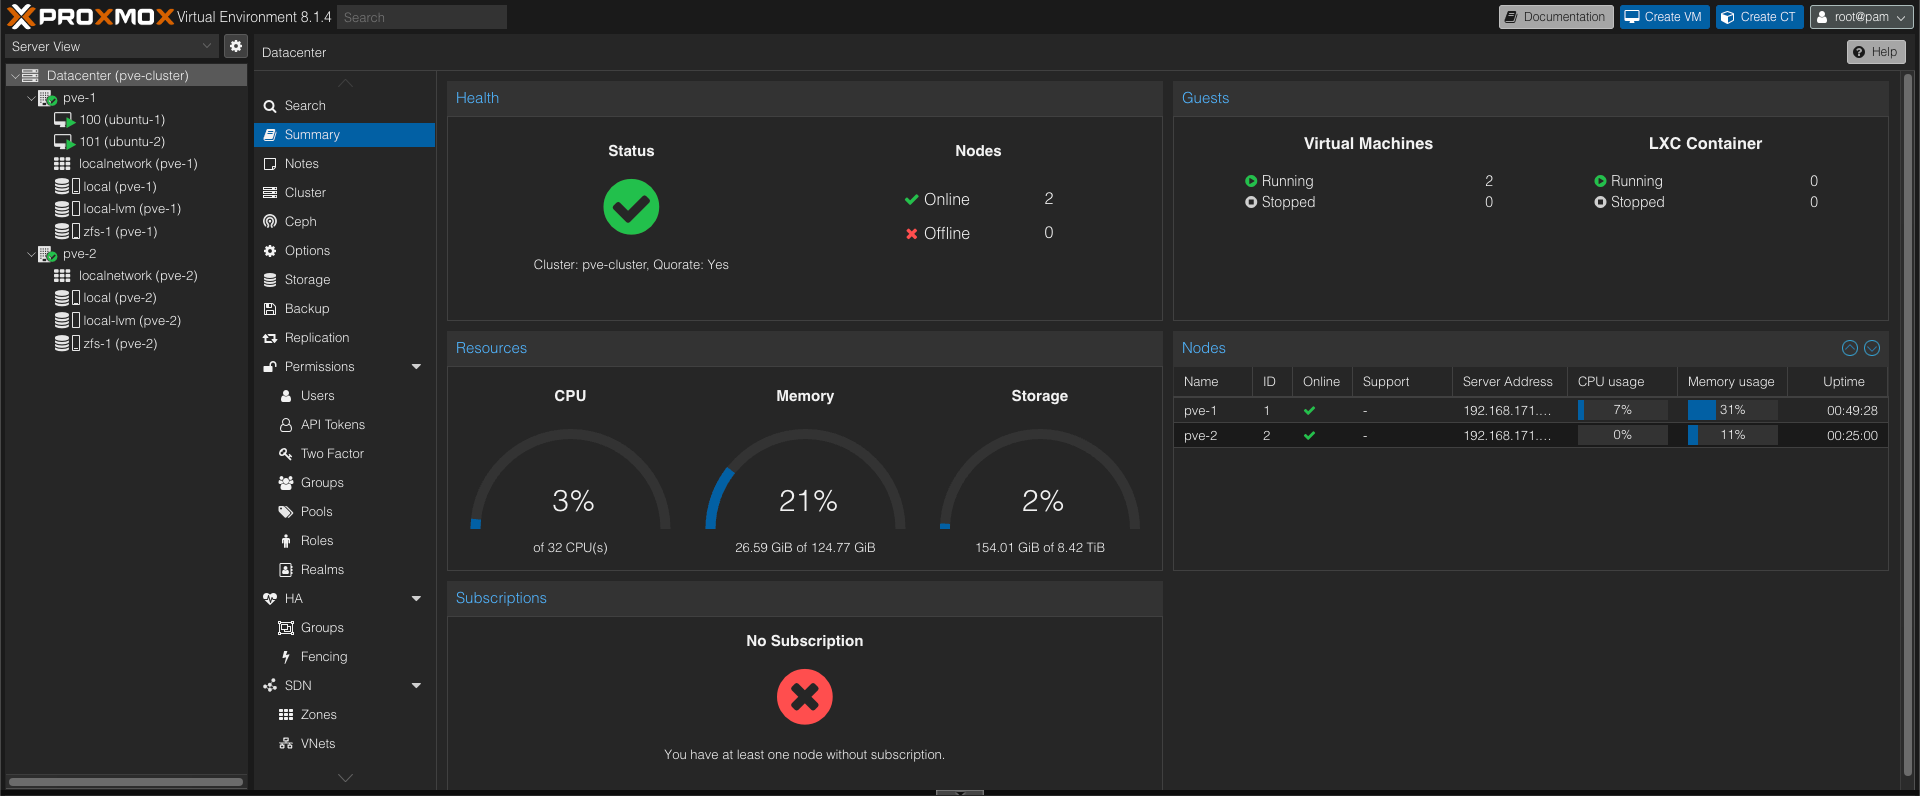
From the dashboard we can see that we are not running these hosts with a PVE subscription which is something one would do in production. The subscription gives access to the Enterprise repository which offers more stable and tested packages as well as support
Repository
From the PVE UI we can take a look at which repositories the host is configured to use. By default this is configured against the Enterprise repository, but as mentioned we're running these without a subscription so we'll change to the no-subscription repos
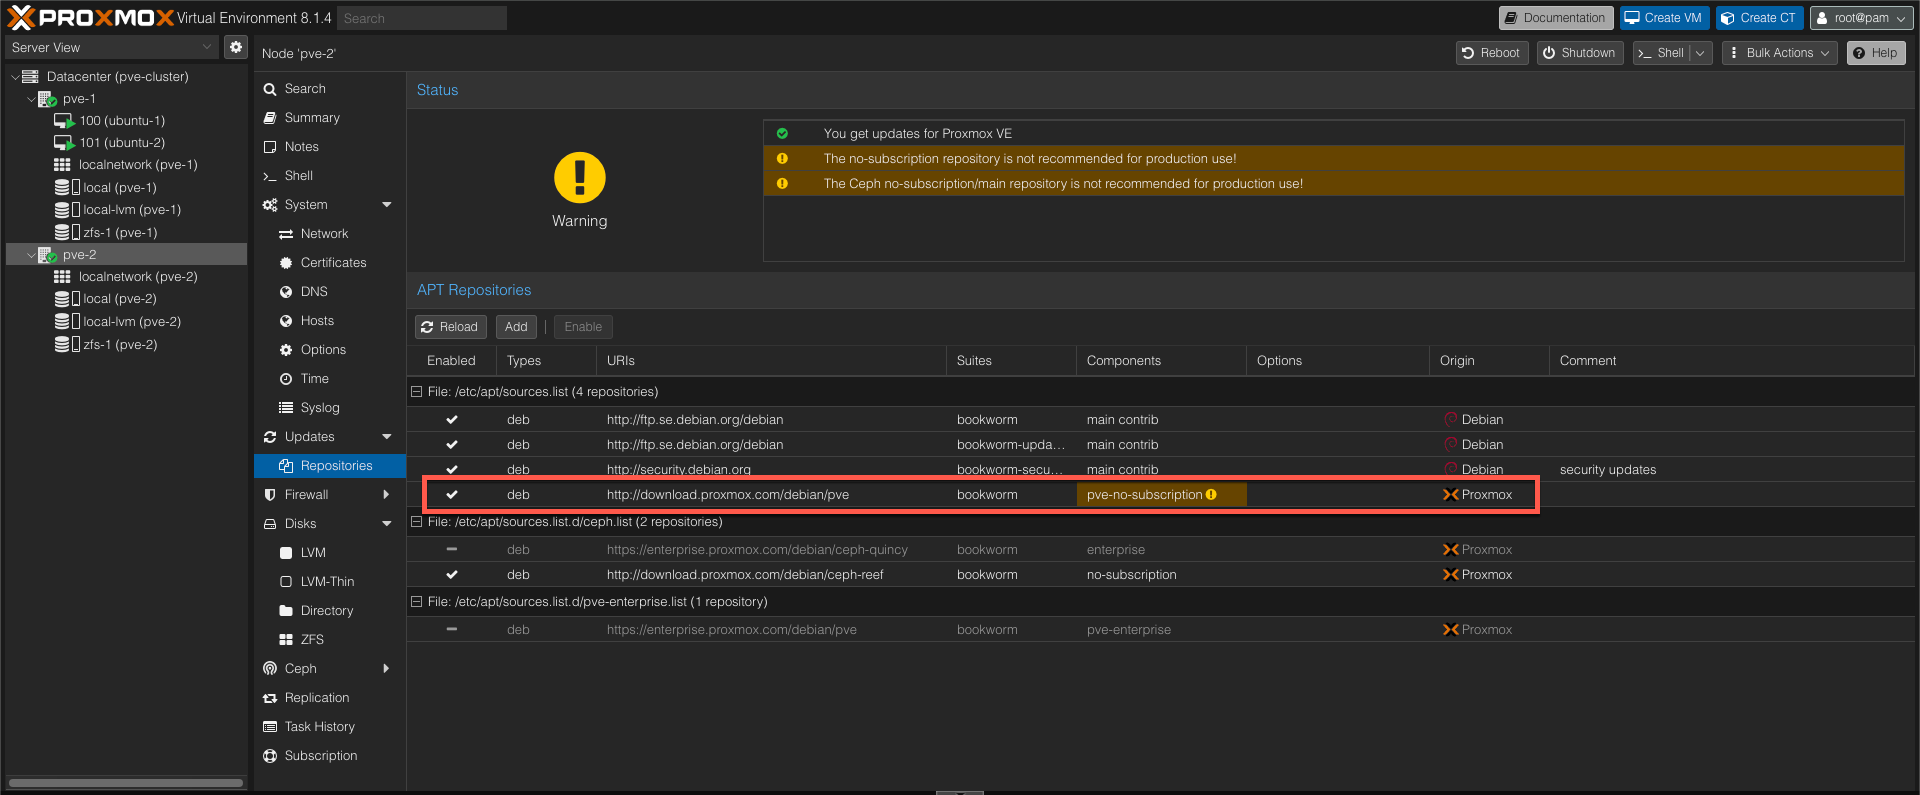
With these enabled we can go ahead and take a look at the Updates view
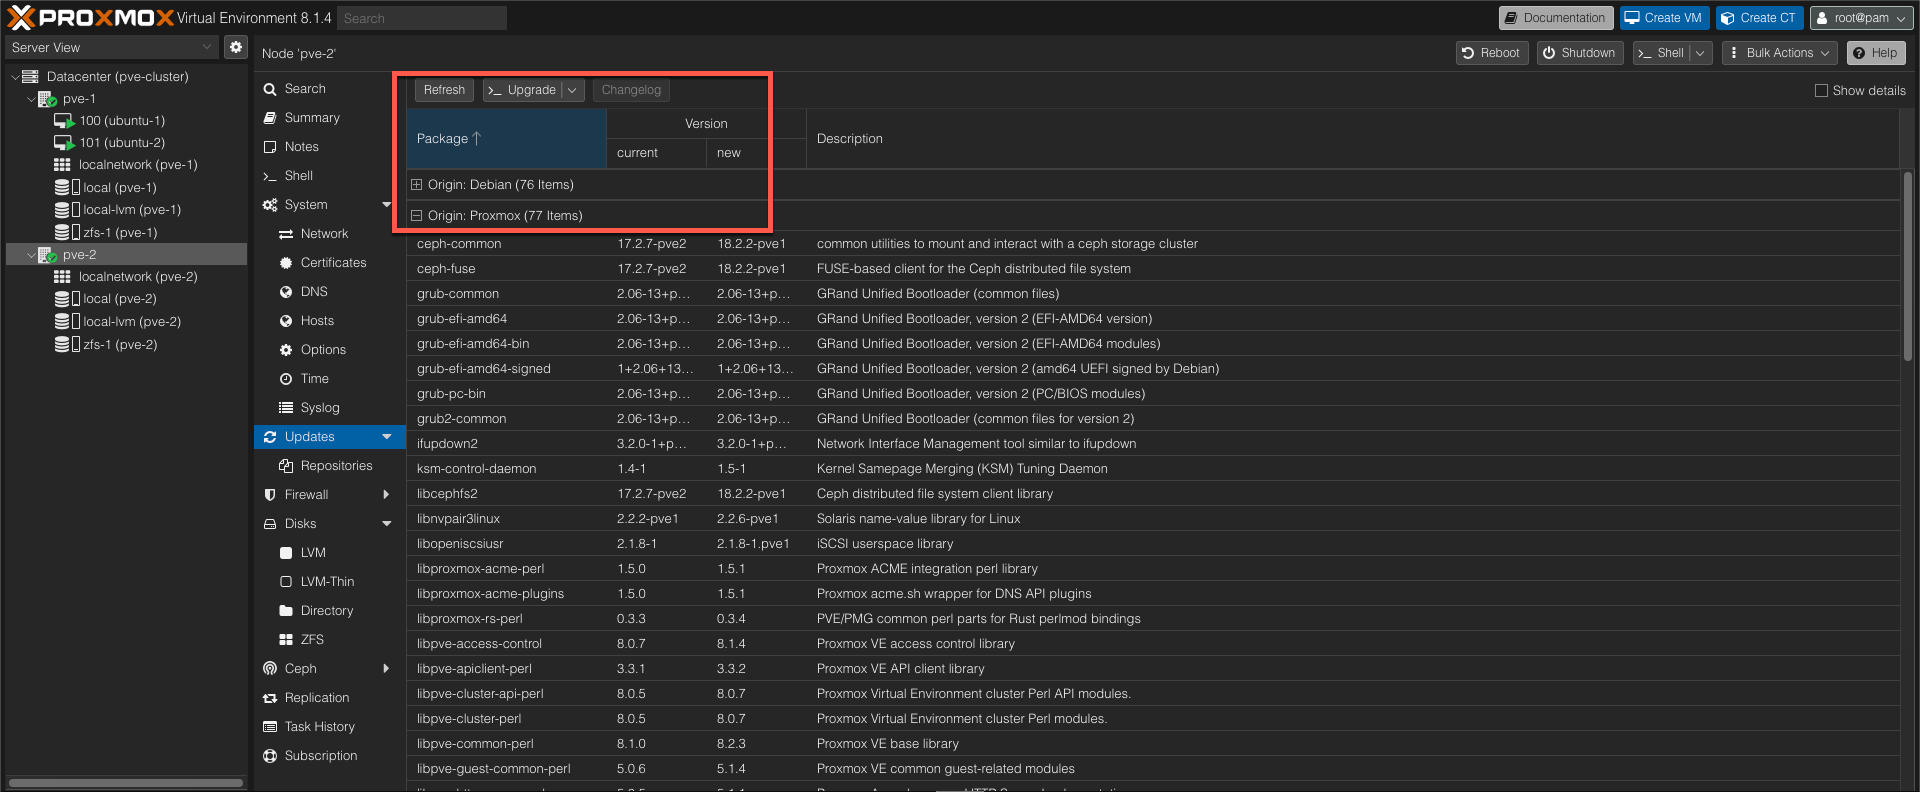
As we can see there's multiple updates available, both from the Debian sources and Proxmox it self.
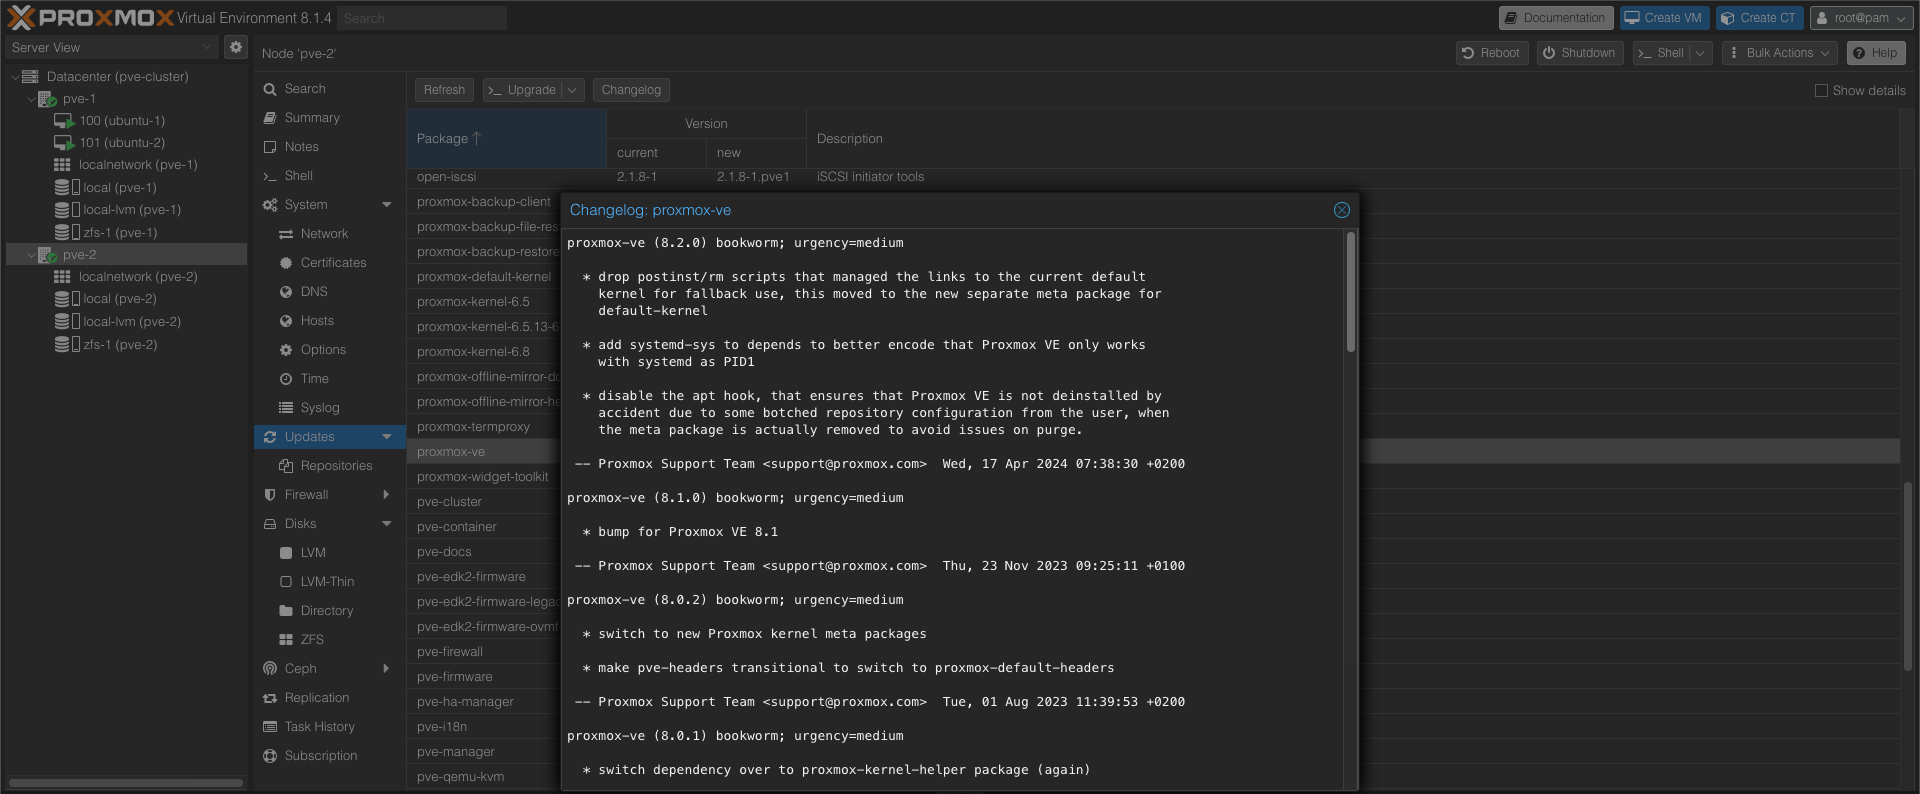
By selecting one of the packages that has an update we can also access the Changelog which is a nice feature
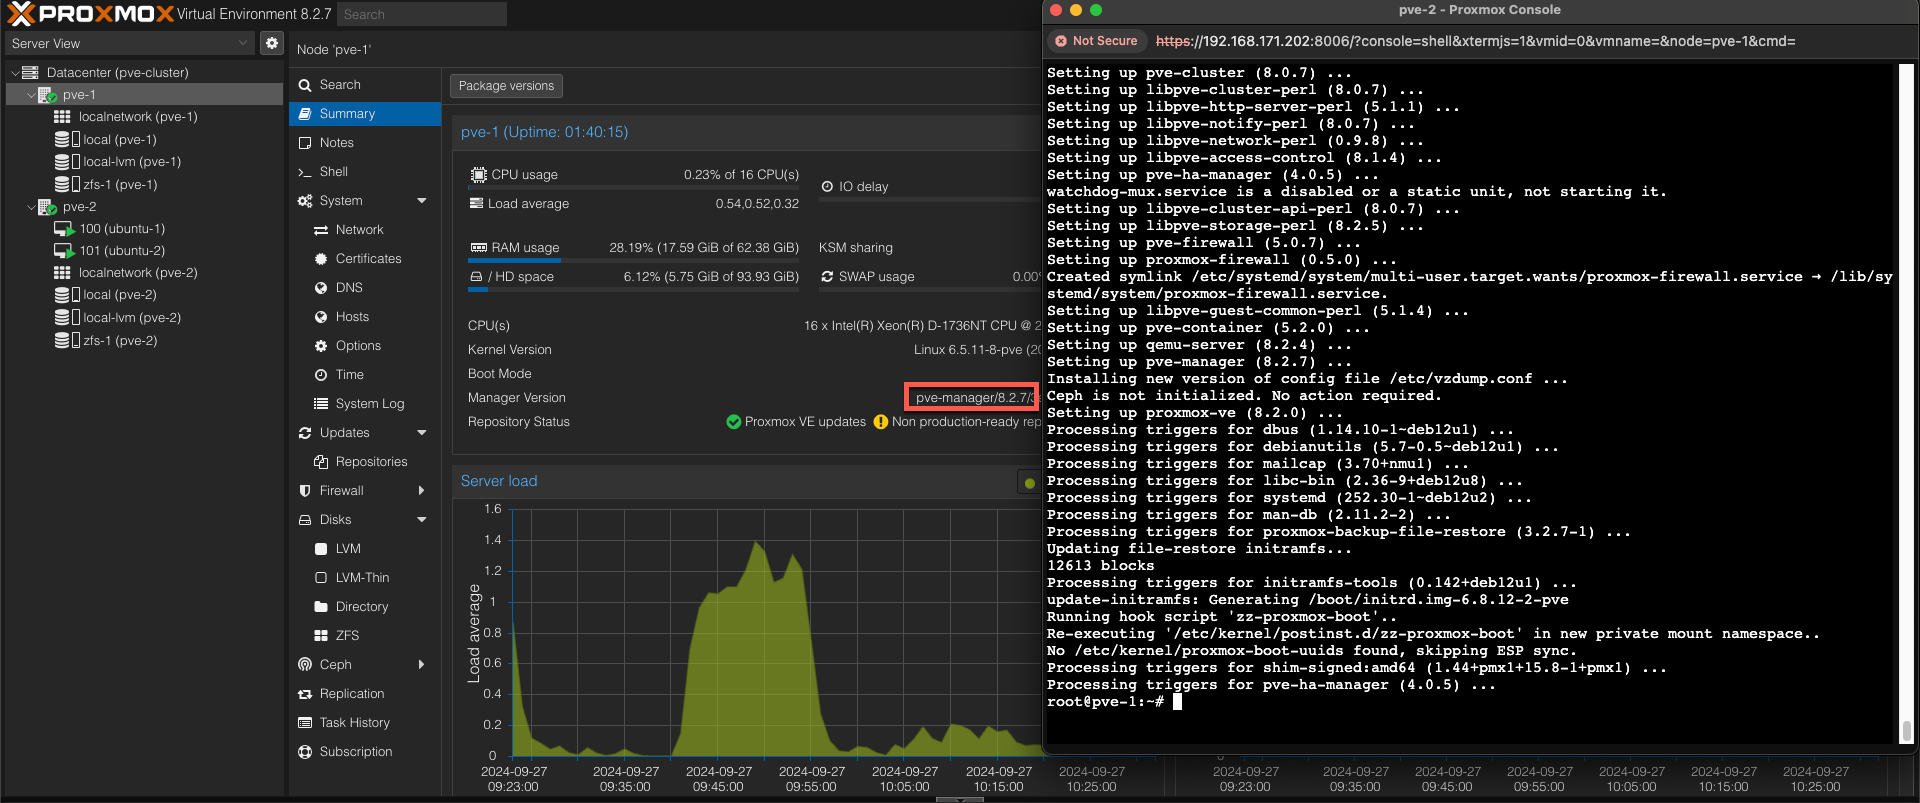
Starting upgrade from UI
By clicking the Upgrade button we get a console window where we can accept the upgrade of the packages
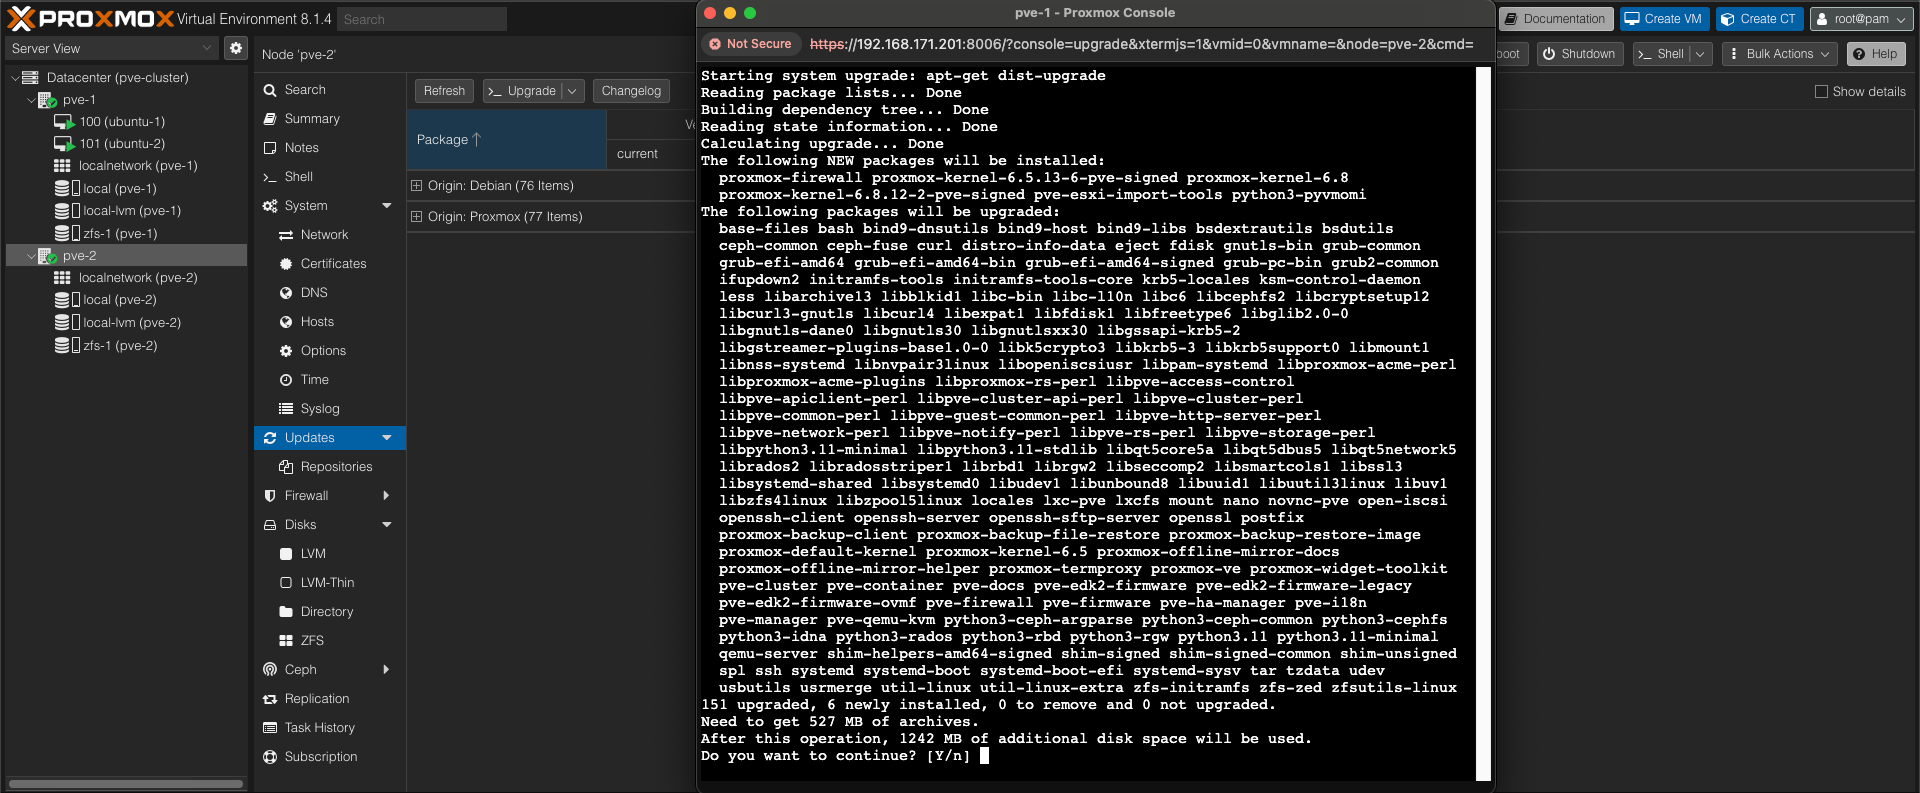
And after all packages has been upgraded we get a message stating that a reboot might be a good idea

Now, before rebooting let's make sure our node is updated

Upgrade from CLI
As we saw when starting the ugprade from the UI we infact got a CLI console that ran the upgrade. We can do this directly from ssh if that suits your needs.
But before we take a look at that let's first migrate our workloads to the upgraded node

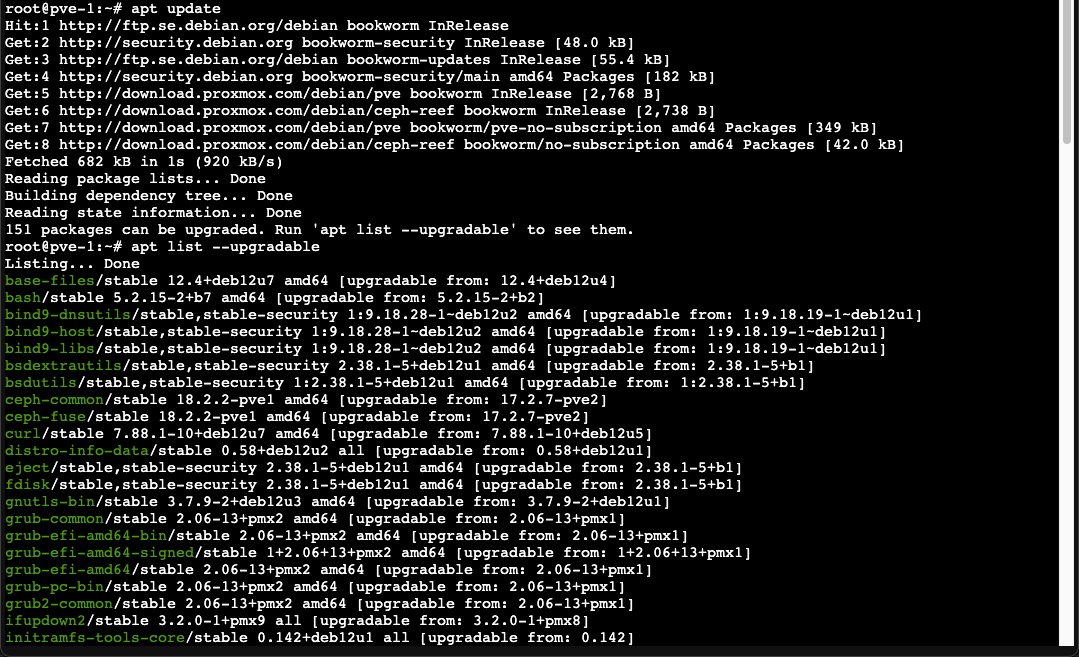
Now let's start the upgrade process. We can first update our repos, and then list the packages
1apt update
2apt list --upgradable
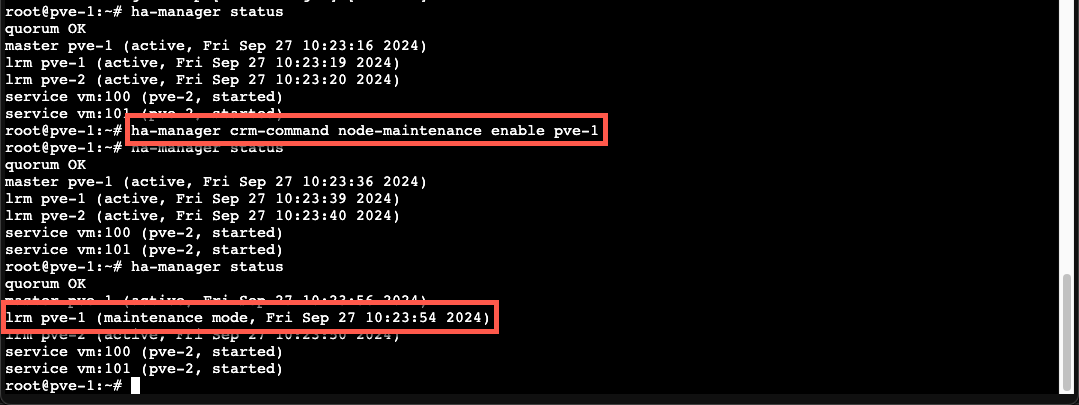
Now, before running the upgrade, let's also set the node in Maintenance Mode
This is something you might be familiar with from e.g. a VMware vSphere environment, and this will mark the node as not available.
1ha-manager crm-command node-maintenance enable <NODE-NAME>
After a few seconds we can also verify that the Local Resource Manager (LRM) on the node will be marked in maintenance mode
Now we can go ahead and start the upgrade
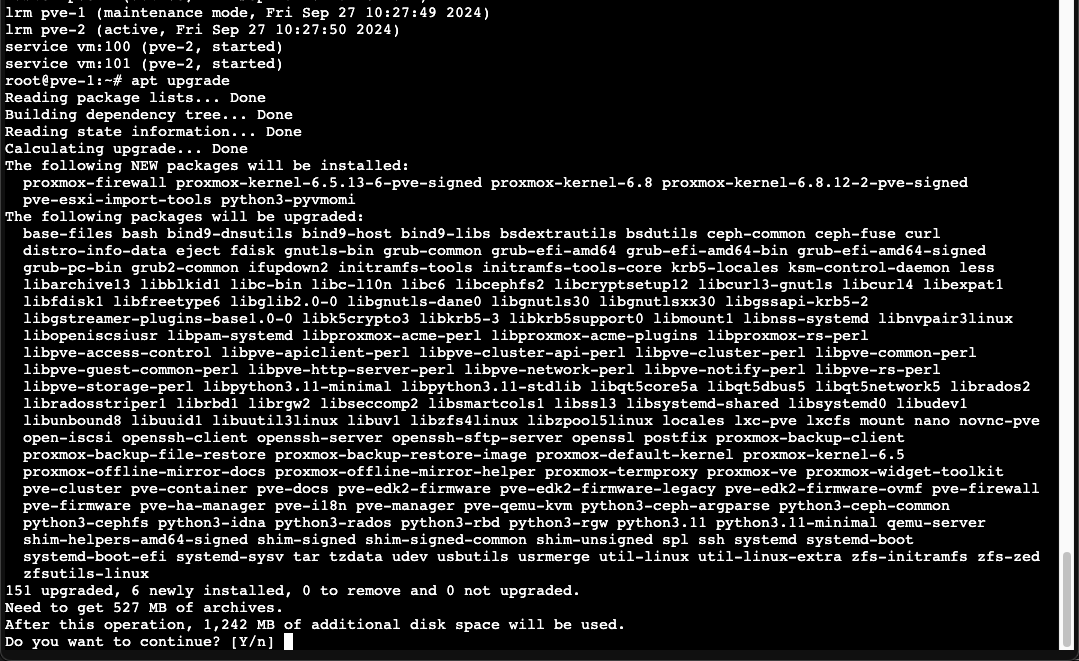
Again, a reboot of the host is recommended (even though the CLI doesn't mention it when updating from ssh)
After upgrading, remember to disable the Maintenance mode on the host
1ha-manager crm-command node-maintenance disable <NODE-NAME>
Summary
This post has shown how to perform an (minor version) upgrade of a Proxmox Virtual Environment (PVE) with two nodes. Note that we have not discussed hardware firmware and drivers in this post and that this is something you also would have to take a look at.
In a production environment you should use the Enterprise repositories (available with a subscription) to get the more stable packages, and that you test your upgrades in a lab environment before implementing them in production.
Please refer to the Proxmox documentation for more details on upgrading your environment
Thanks for reading and please feel free to reach out if you have any questions or comments