Proxmox Cluster with Witness component to support HA
In this post we will expand on one of my previous posts regarding Proxmox clusters. The cluster post showed how to build a cluster consisting of two nodes with storage replication between them utilizing the built-in ZFS replication feature. However the failover of a workload had to be done manually, as with two nodes there's no quorum.
To mitigate this we will take a look at adding a third component to the cluster which can help us in case of node failures.
The clustering functionality used in PVE is based on Corosync which uses a QDevice daemon on the nodes to handle the clustering communication. On our third node we'll install that QDevice daemon on a standalone device. In my example we'll use a small Raspberry PI running Debian 12.
Below is a high-level view of what the environment would look like
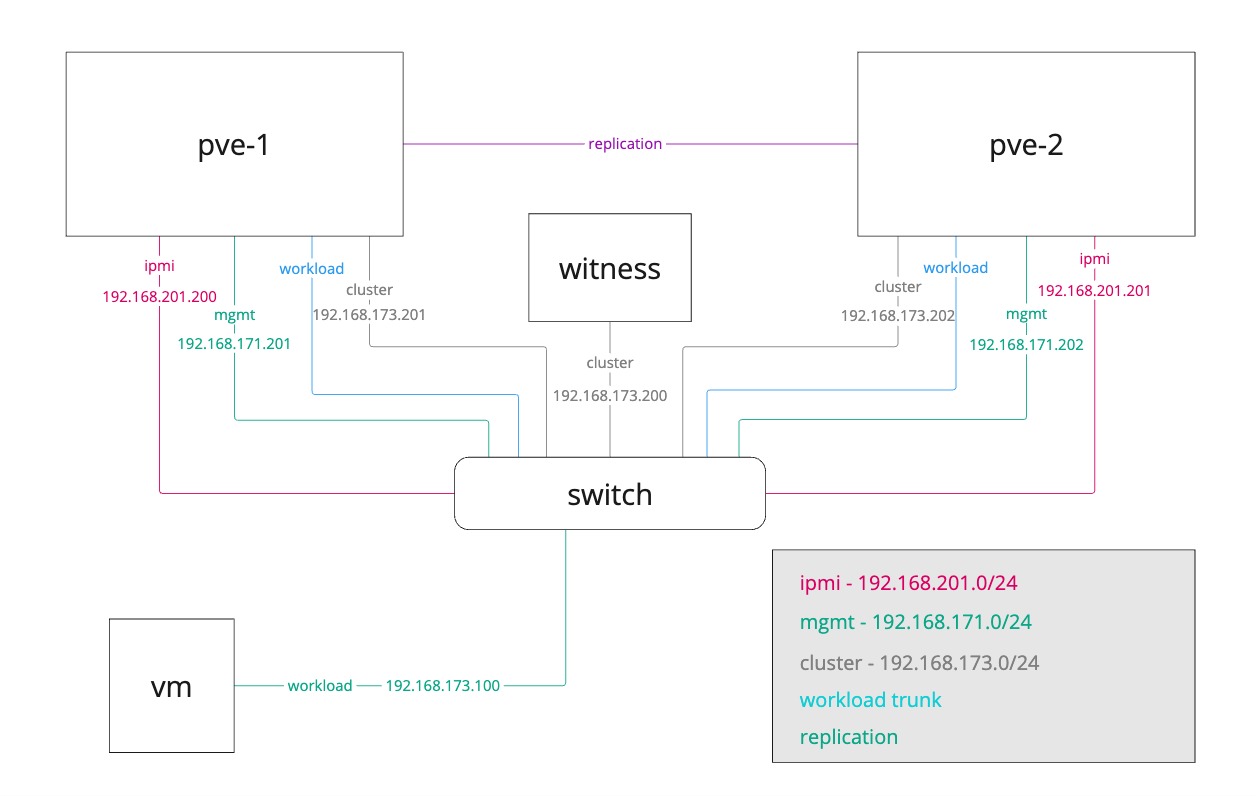
Our two nodes will still utilize a replication link directly between themselves, but we're adding a cluster network link on a separate nic which also our third component is connected to.
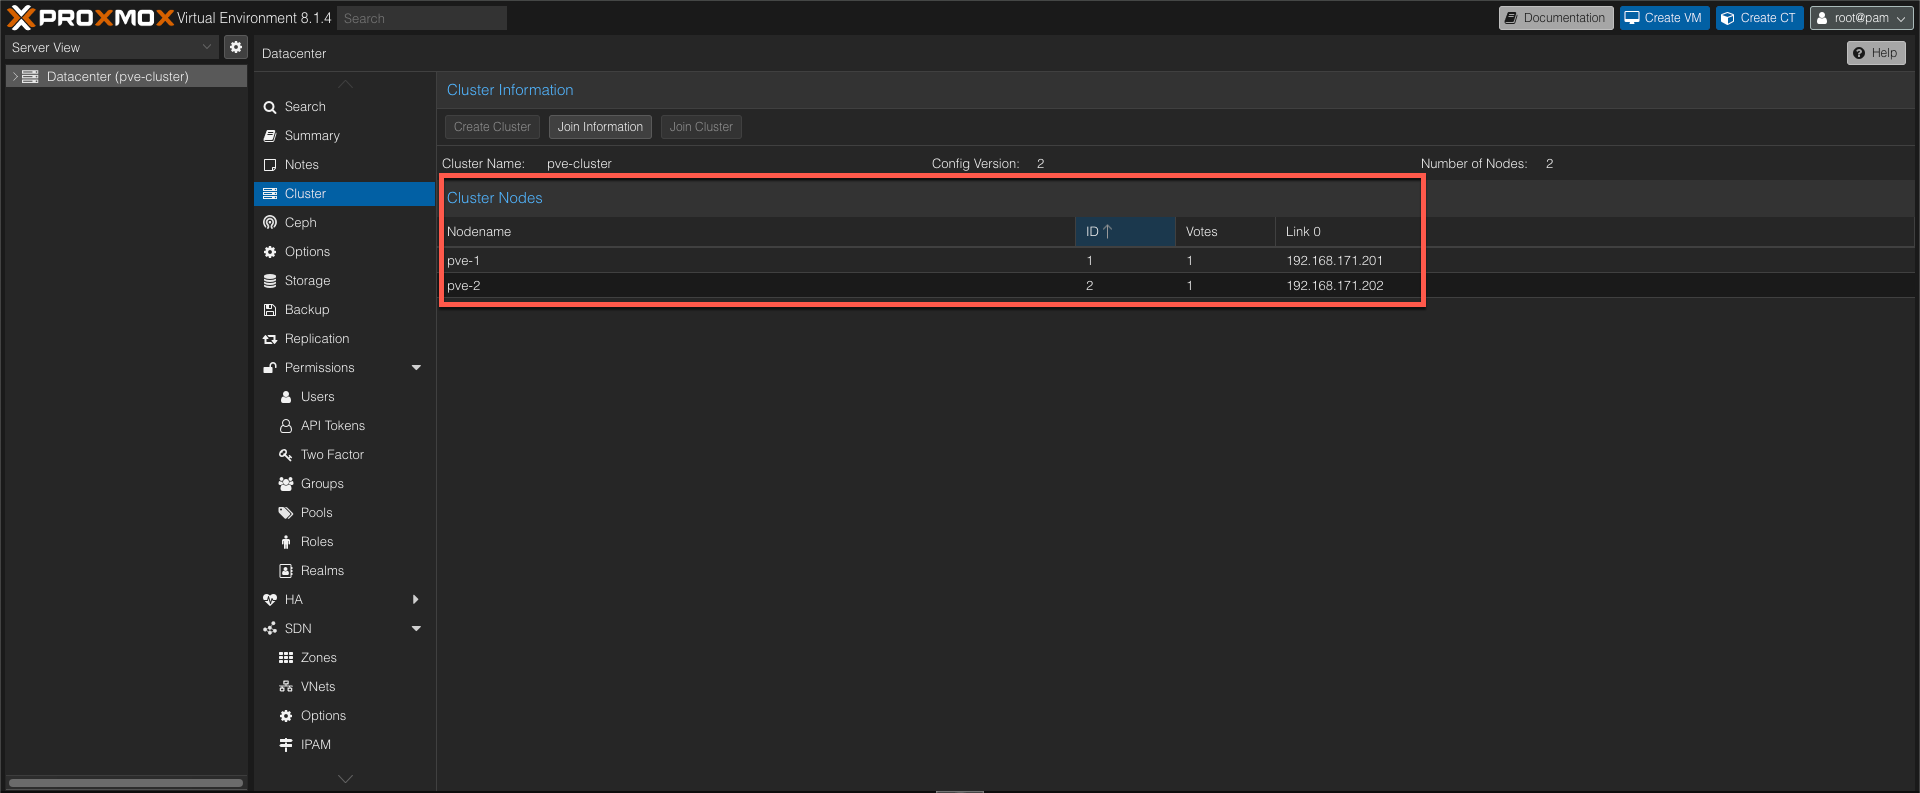
Existing setup
In our existing setup we have two nodes joined in a cluster. The existing cluster communication is happening over the management network which is not a best practice. We'll change this so that the communication is happening over the network on a separate VLAN.
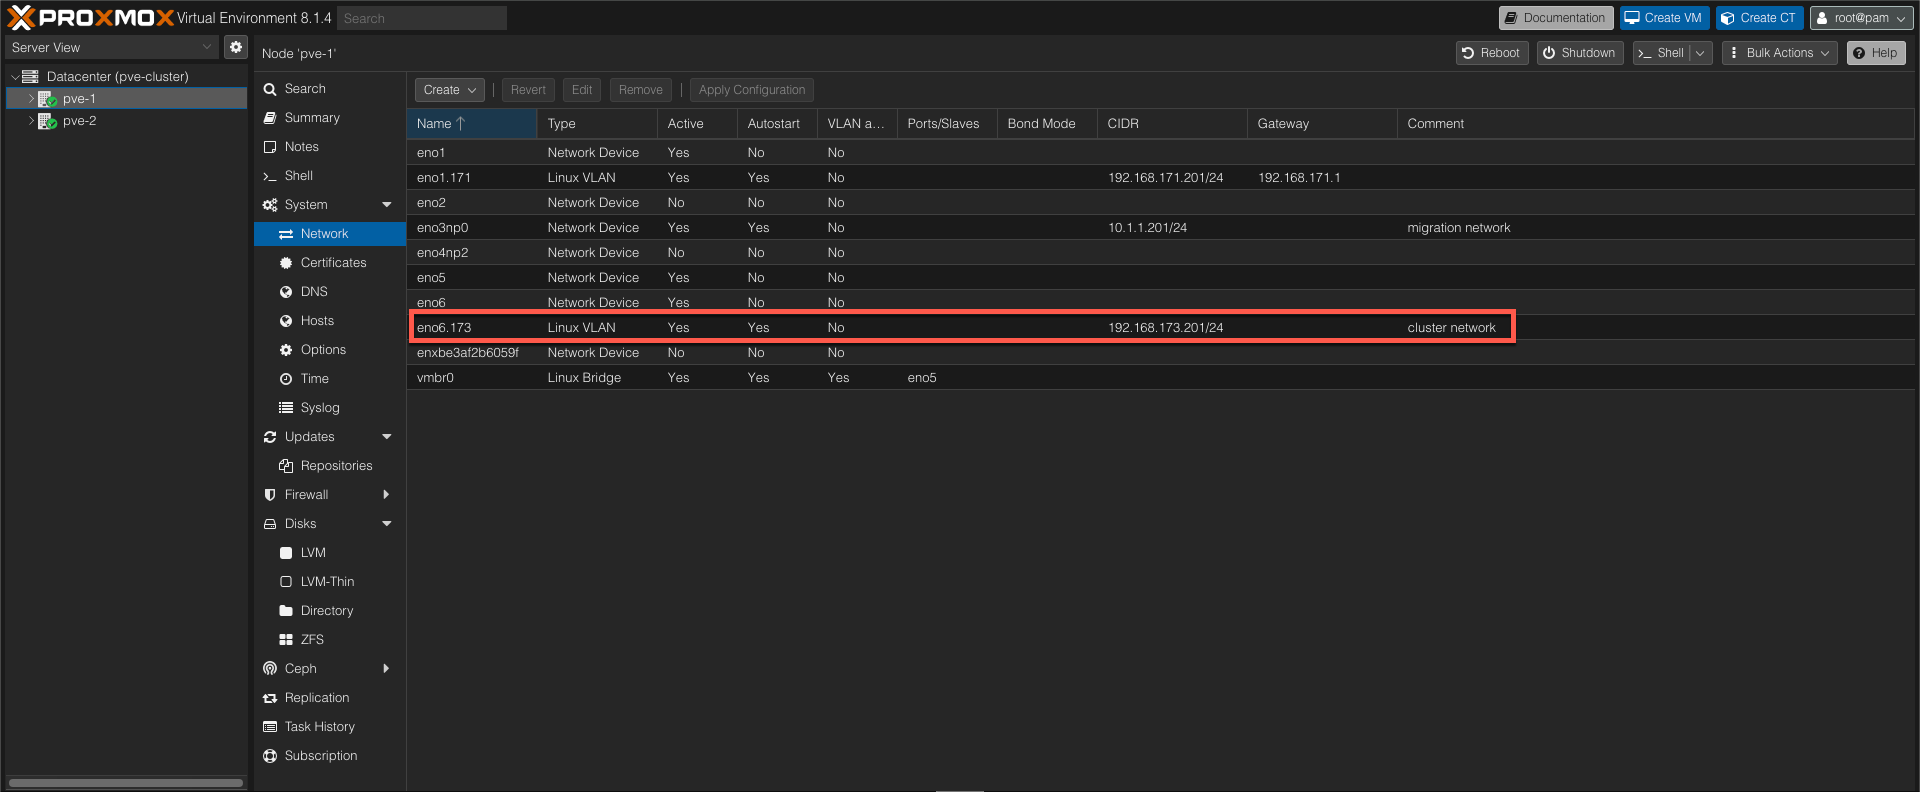
Host networking
On our server nodes we've prepared a NIC with the new cluster networking details, the 192.168.173.0/24 network in this example
Change cluster network
Before adding our third component, the witness component, let's change the cluster network and verify that it works.
The Proxmox documentation specifies how to separate cluster networking after Cluster creation and this process will be used to change the cluster network
We'll start by taking a copy of the existing corosync.conf file, and we'll also copy it to a .new file since changes to this file might be effective immediately.
1cp /etc/pve/corosync.conf /etc/pve/corosync.conf.bak
2cp /etc/pve/corosync.conf /etc/pve/corosync.conf.new
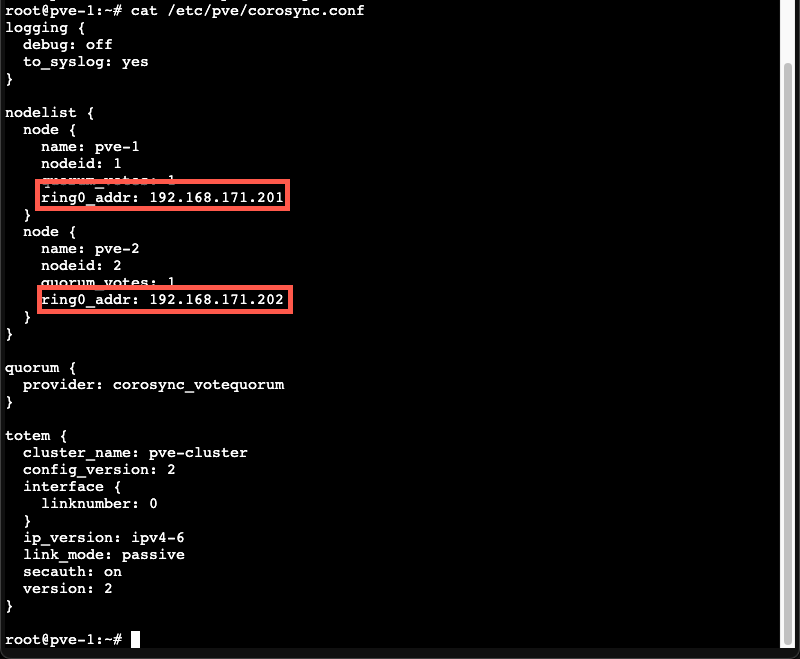
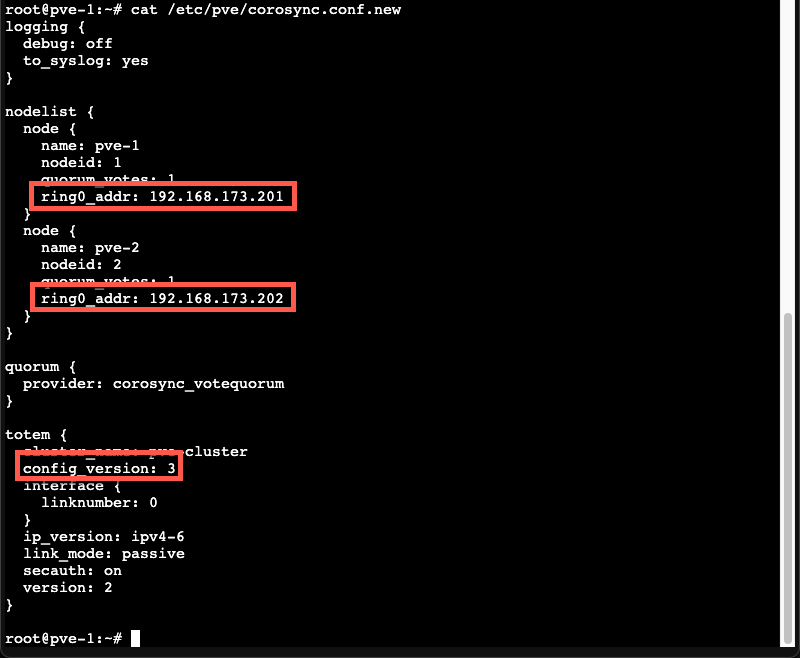
The current corosync configuration specifies the old network
Next we'll edit the corosync.conf file to reflect the new network. Note that we'll also have to change the config_version to reflect that there has been a change in the config
Now, we'll overwrite the existing config with the new. And check the status of the cluster
1mv /etc/pve/corosync.conf.new /etc/pve/corosync.conf
2pvecm status
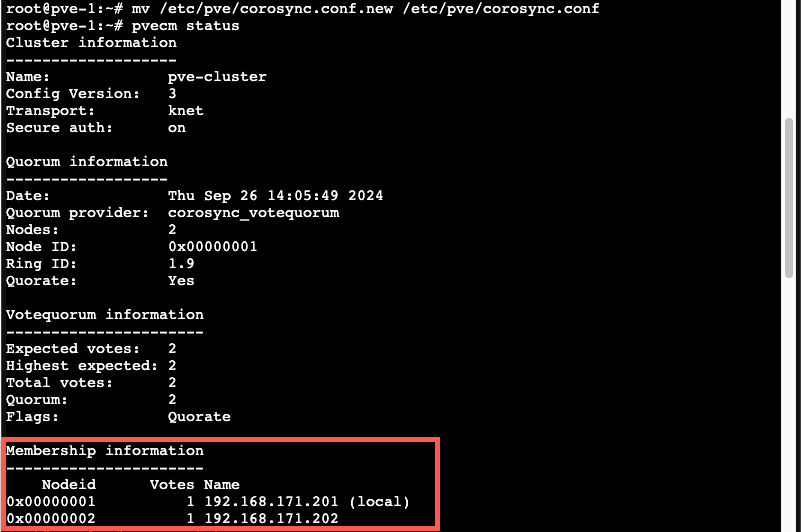
As we can see the old config is still used so we'll restart the corosync service
1systemctl restart corosync
2pvecm status

As we can see, after restarting the corosync service the IP address changes, but the second node is gone. Although the new config has synchronized over to node 2 we'll also need to restart the corosync service on that node to get things up and running
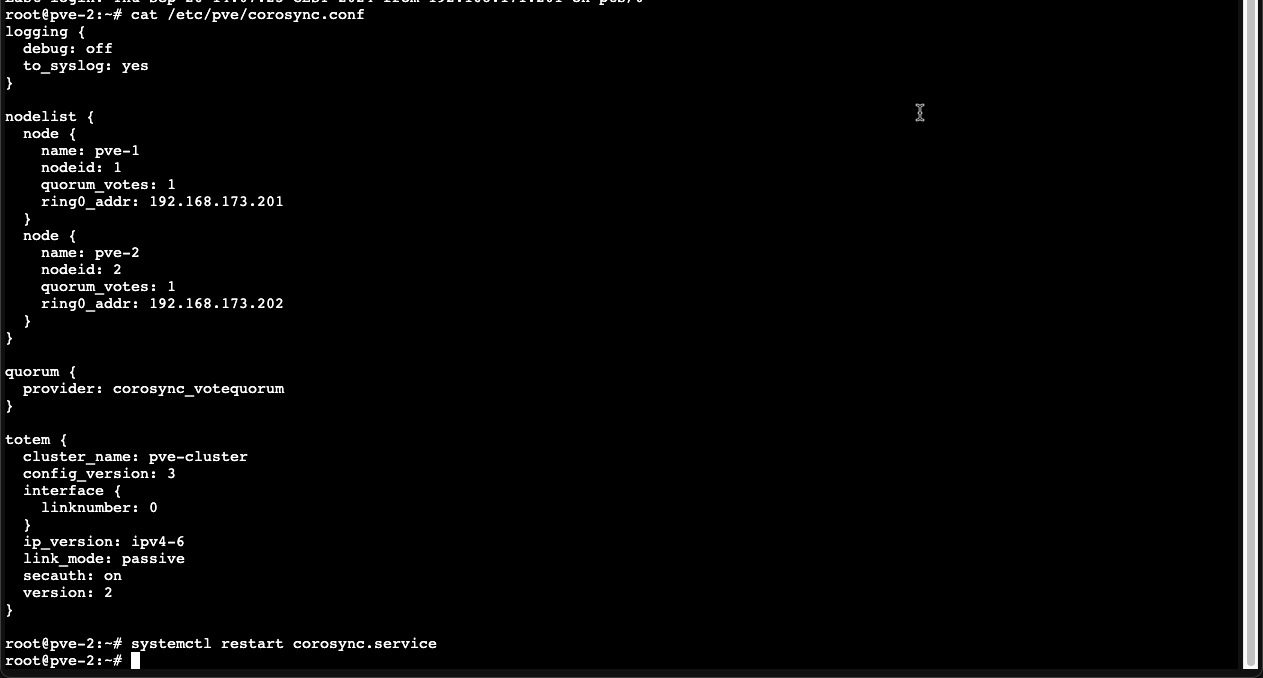
After restarting the corosync service on node 2 let's check the pvecm status command again

Add witness component
To reiterate, at this point we have two nodes with their own ZFS volume on internal storage which is replicated between them. This helps migrating VMs between the two hosts since the storage is already present on the other node, hence the only thing that needs to be migrated are changes since the last replication, and the VM memory.
In case of a failure on one of the nodes we can relatively easy get the VMs up and running on the other node, albeit with some data loss. This (i.e. the failover) is however a manual process.
Now, let's add a third corosync component and see if we can automate the failover by implementing Corosync external vote support
Our third component will be installed on a Debian machine running on a Raspberry Pi computer
A Raspberry Pi is obviously not something one might use in a real-world scenario, but it shows that the witness could run on pretty much "anything"
The node is running on the same network as the cluster network, this is not a strict requirement. The witness node can be on a separate VLAN and does not come with the same low latency requirements as the server nodes.
Install packages
To set up qdevice we need to install some packages.
On the witness node we'll install the corosync-qnetd package
1apt install corosync-qnetd
Next we'll install the corosync-qdevice on both the witness node AND the two server nodes
1apt install corosync-qdevice
After installing the qdevice package on all three nodes we'll add the witness node to the cluster
1pvecm qdevice setup <IP-of-witness>
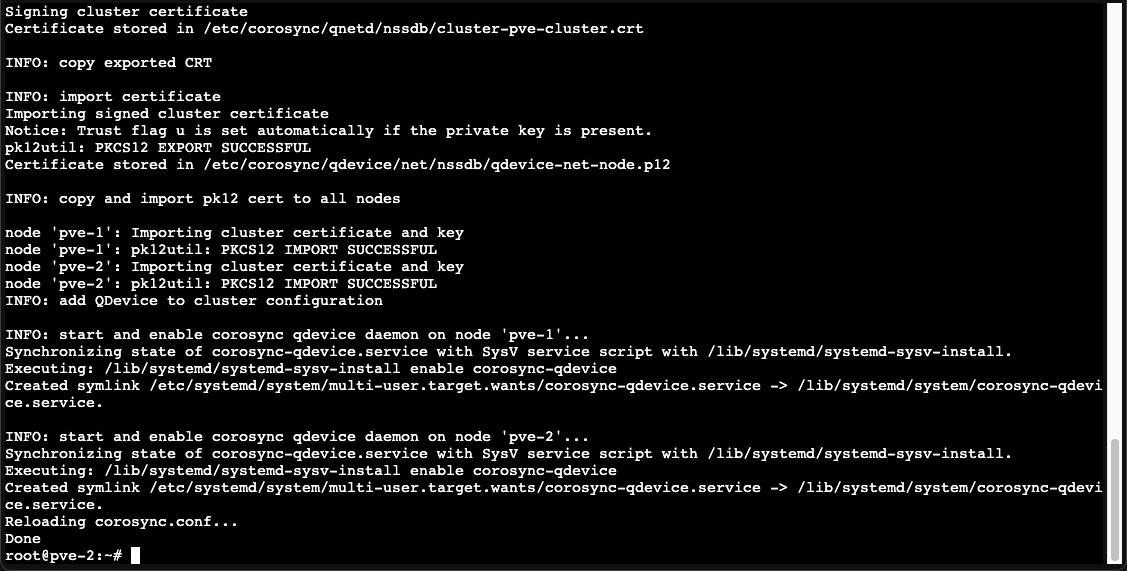
As we can see the setup will handle certificate distribution on all nodes and configure and start the qdevice daemon(s). Note that ssh is required for the root user so you'll need to enable this, at least temporarily
With qdevice setup we can check the cluster status
1pvecm status
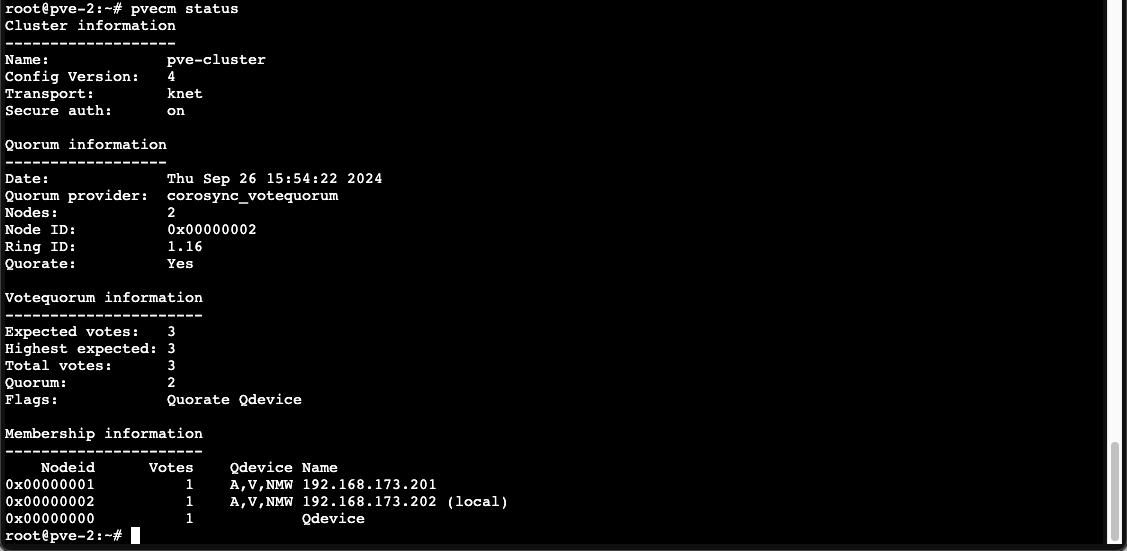
Our cluster now has 3 expected votes and is quorated. The quorum is set to 2 which means we should be able to test failure on a node to see if HA will help us failover to the working node
Configure HA
Before testing the failover we'll need to configure High Availability (HA)
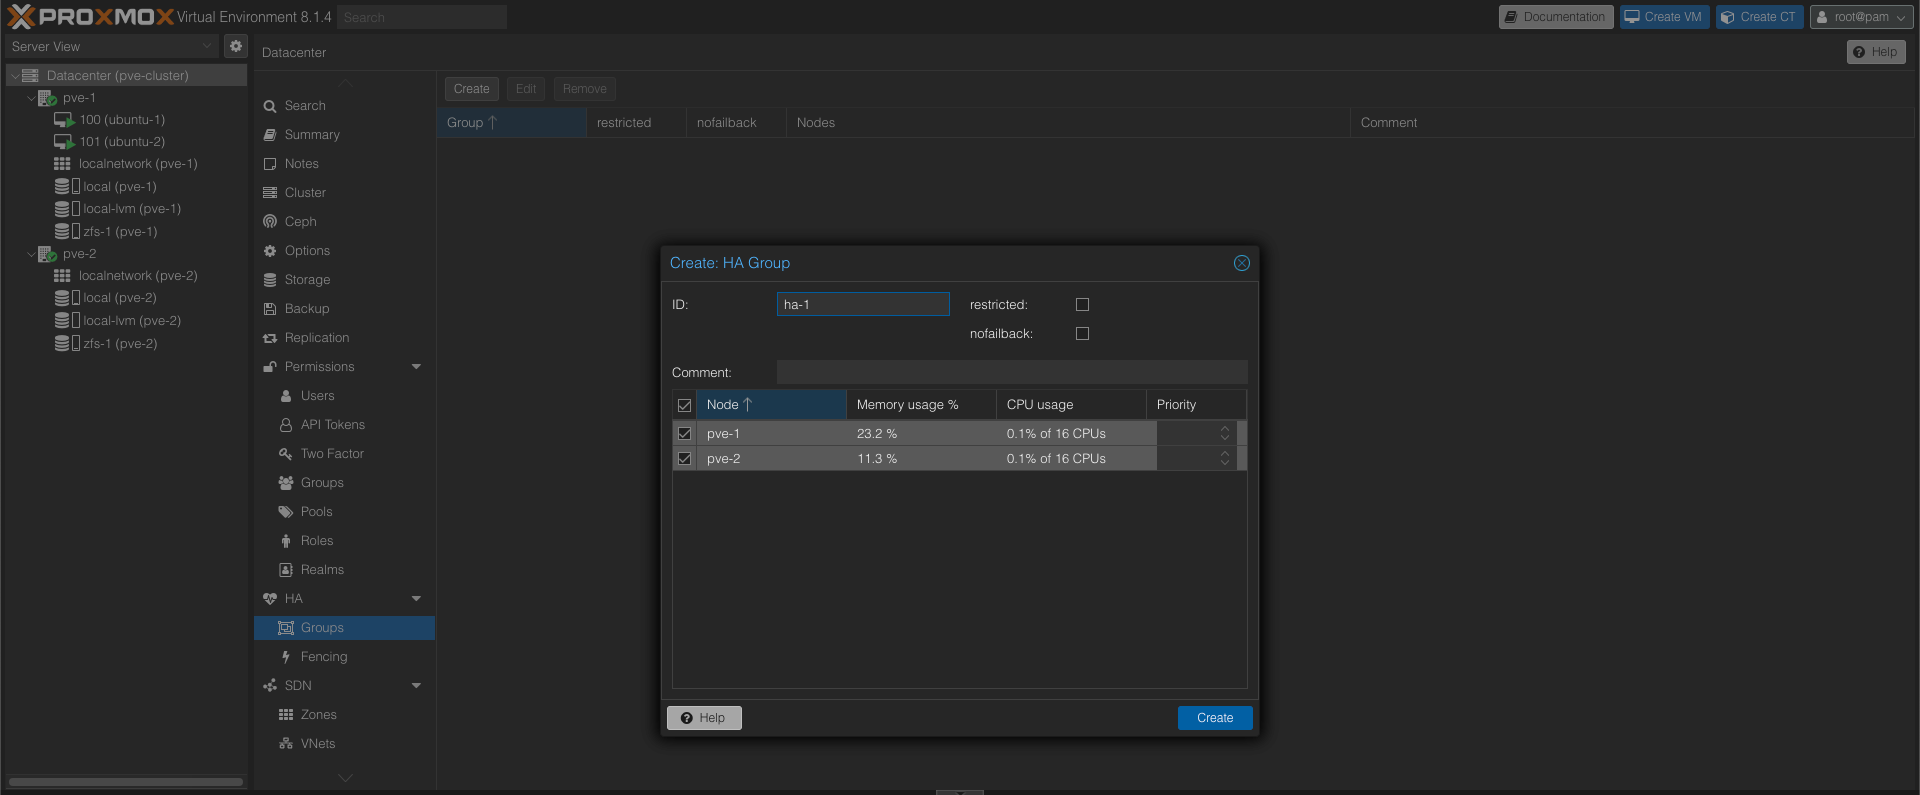
We'll start by creating a HA group with our two nodes
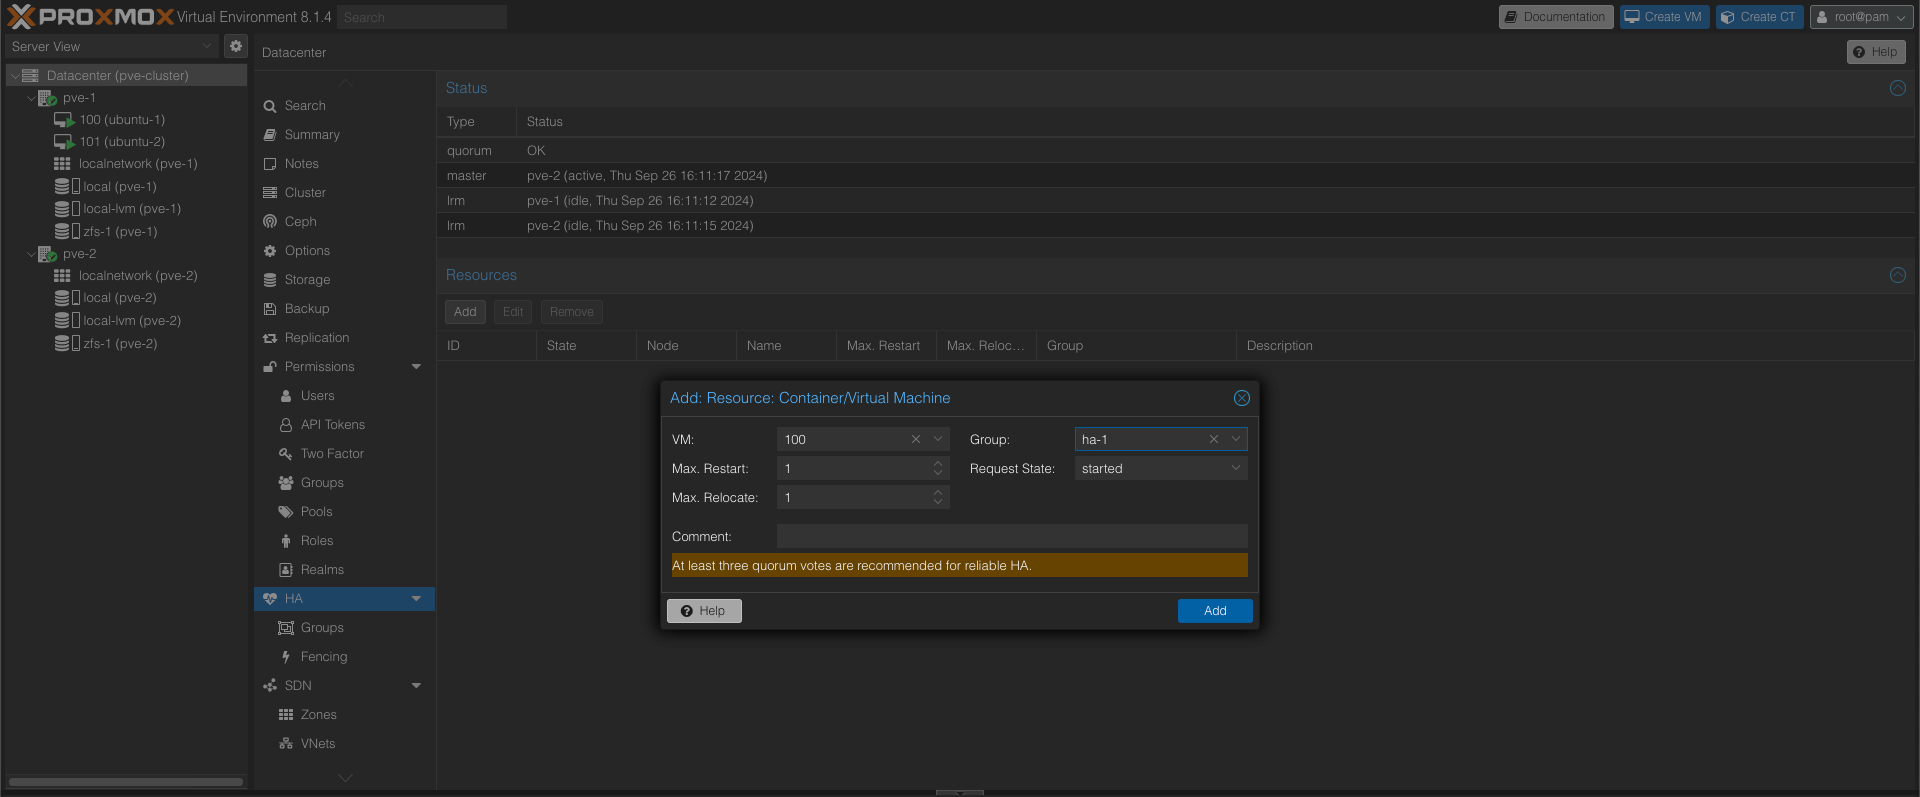
Next we'll add our VMs to the HA config and specify the HA group we just created
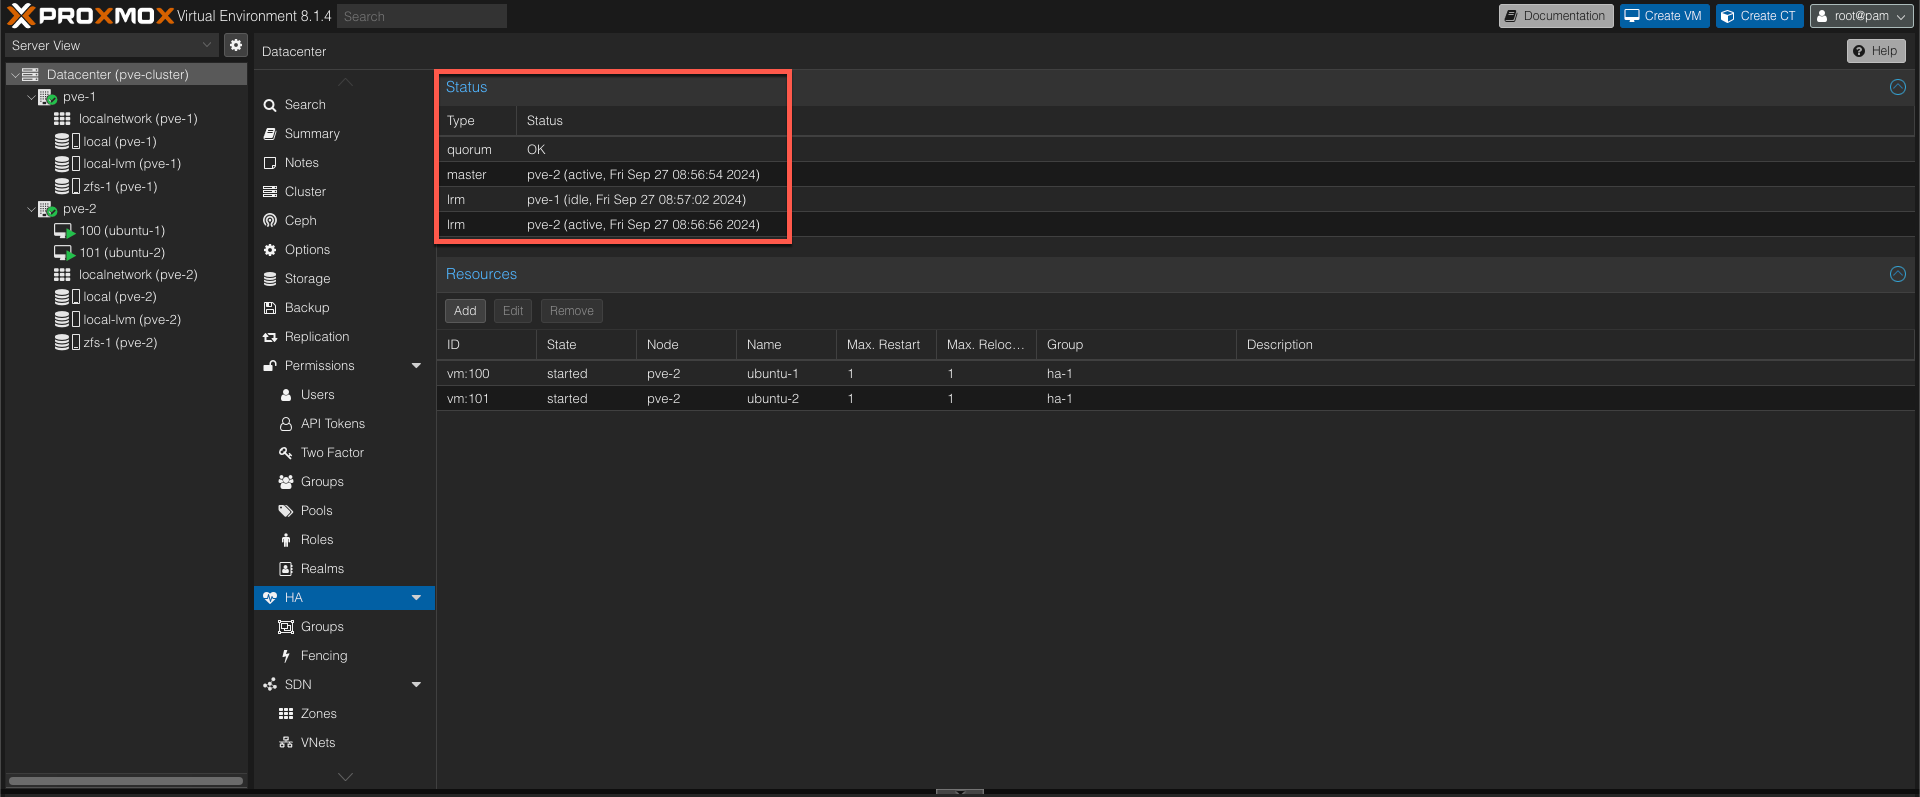
With both VMs added we can verify the HA config
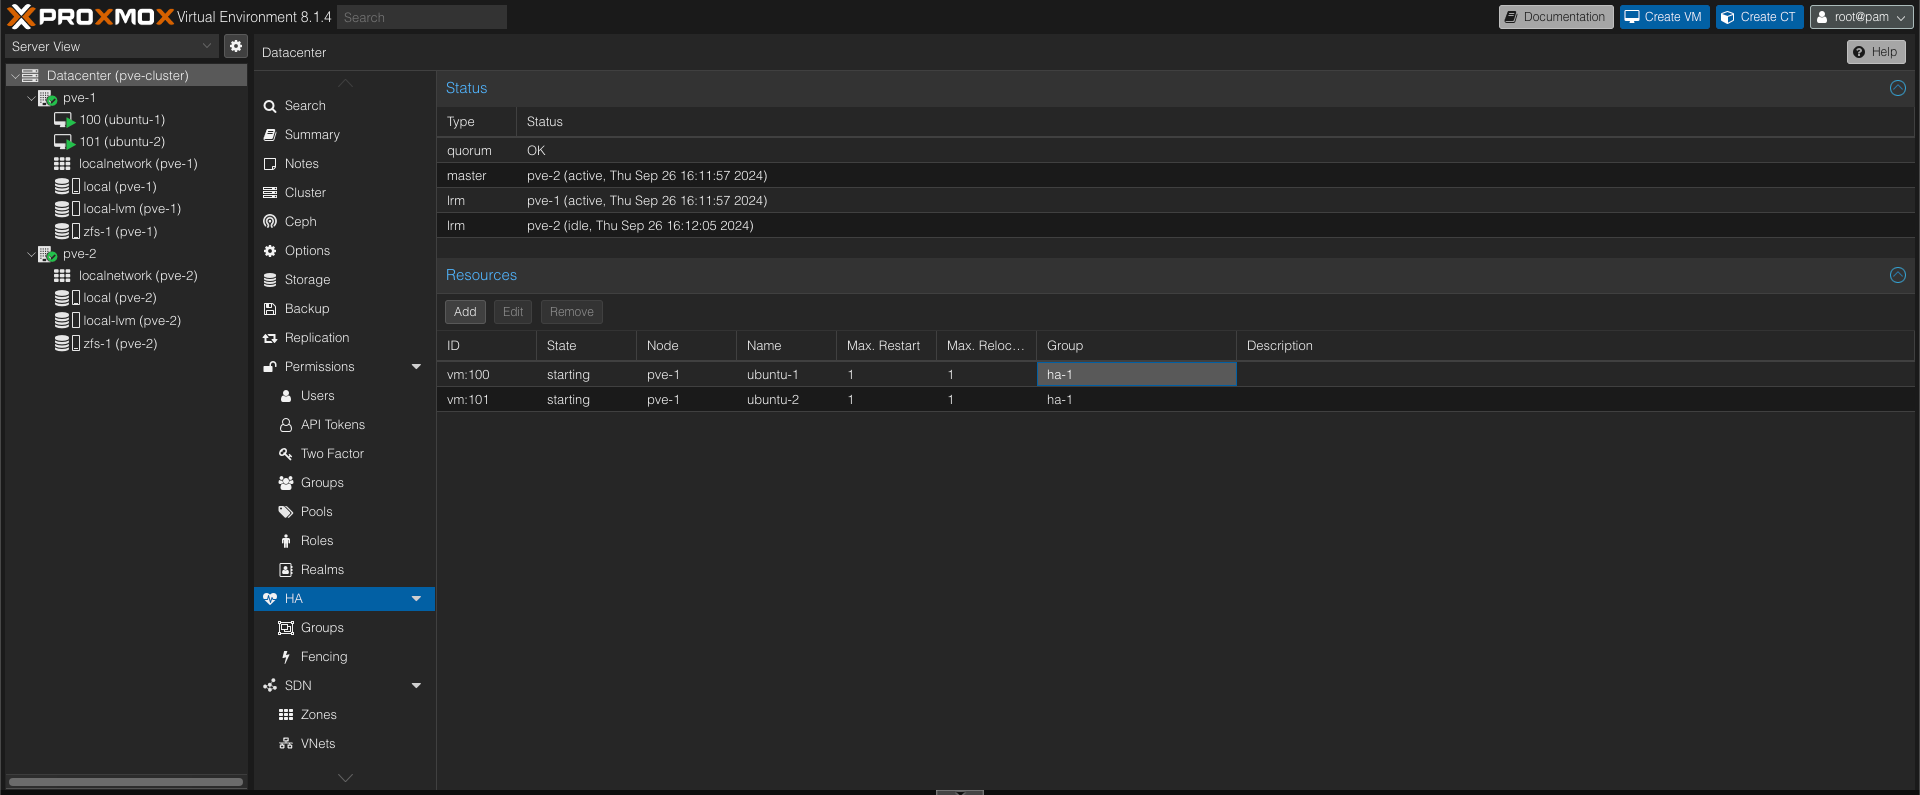
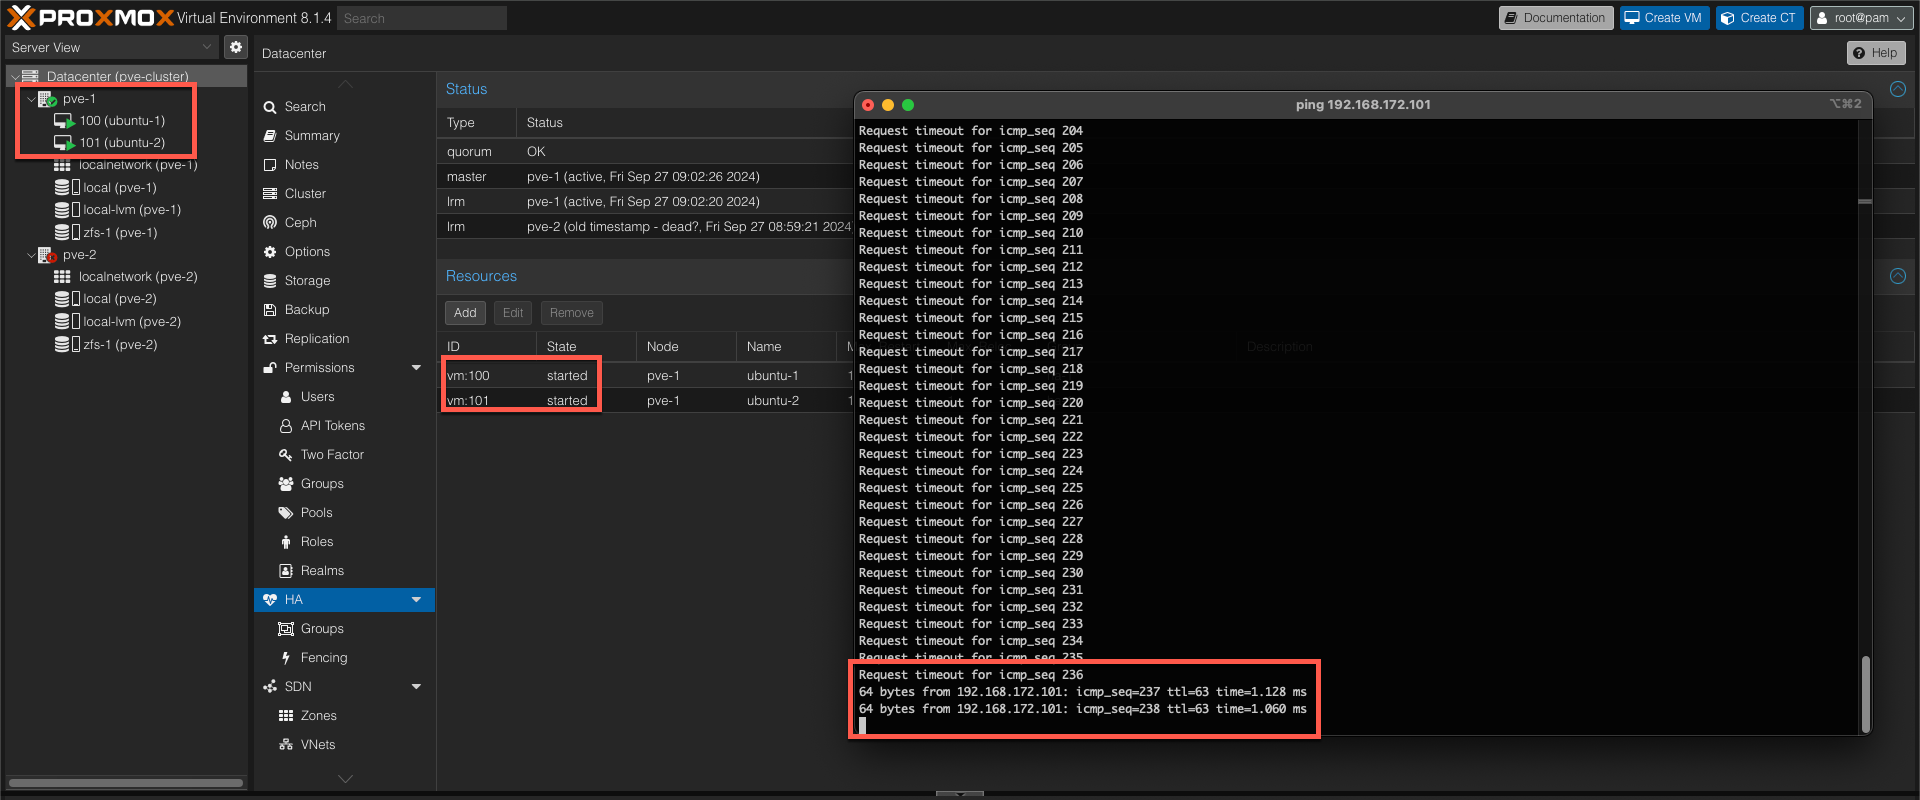
We can see that the quorum is OK, that the pve-2 host is the master, and that our two VMs are added as resources to the HA config and connected to the HA group we created.
Test failover
With this in place let's introduce a failure to the pve-2 host and see if our VMs get's failed over to the other node. Note that pve-2 is also the current HA master at this point
The pve-2 node will abrubtly get it's power cut, and our VMs will be offline.
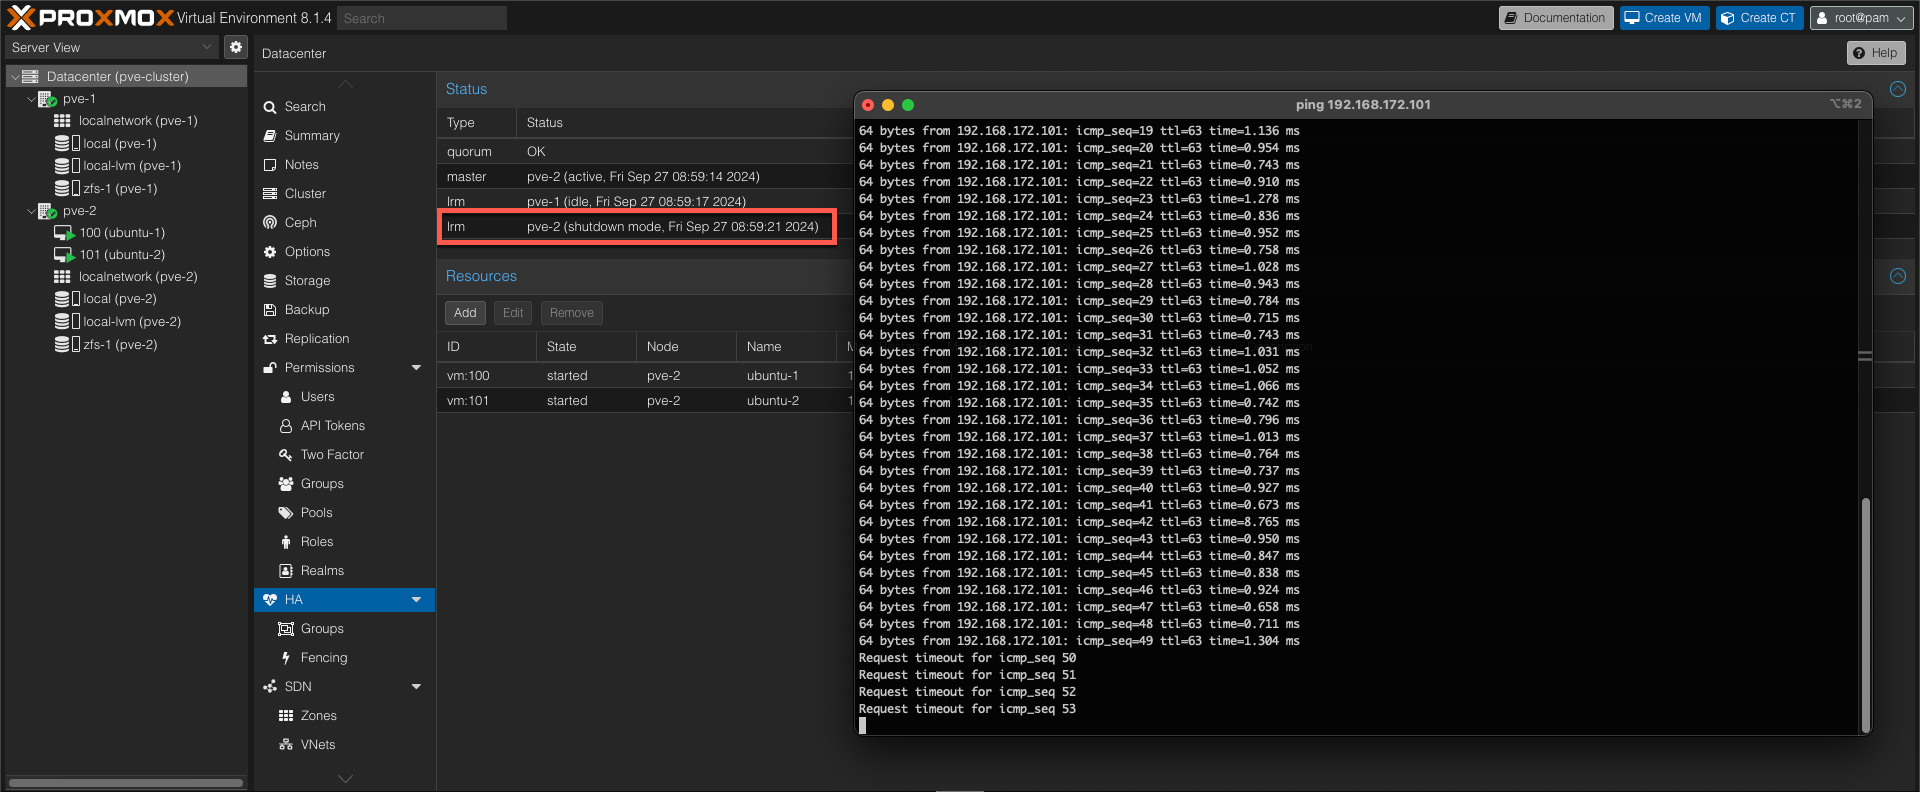
After around 20 seconds the server node is marked down
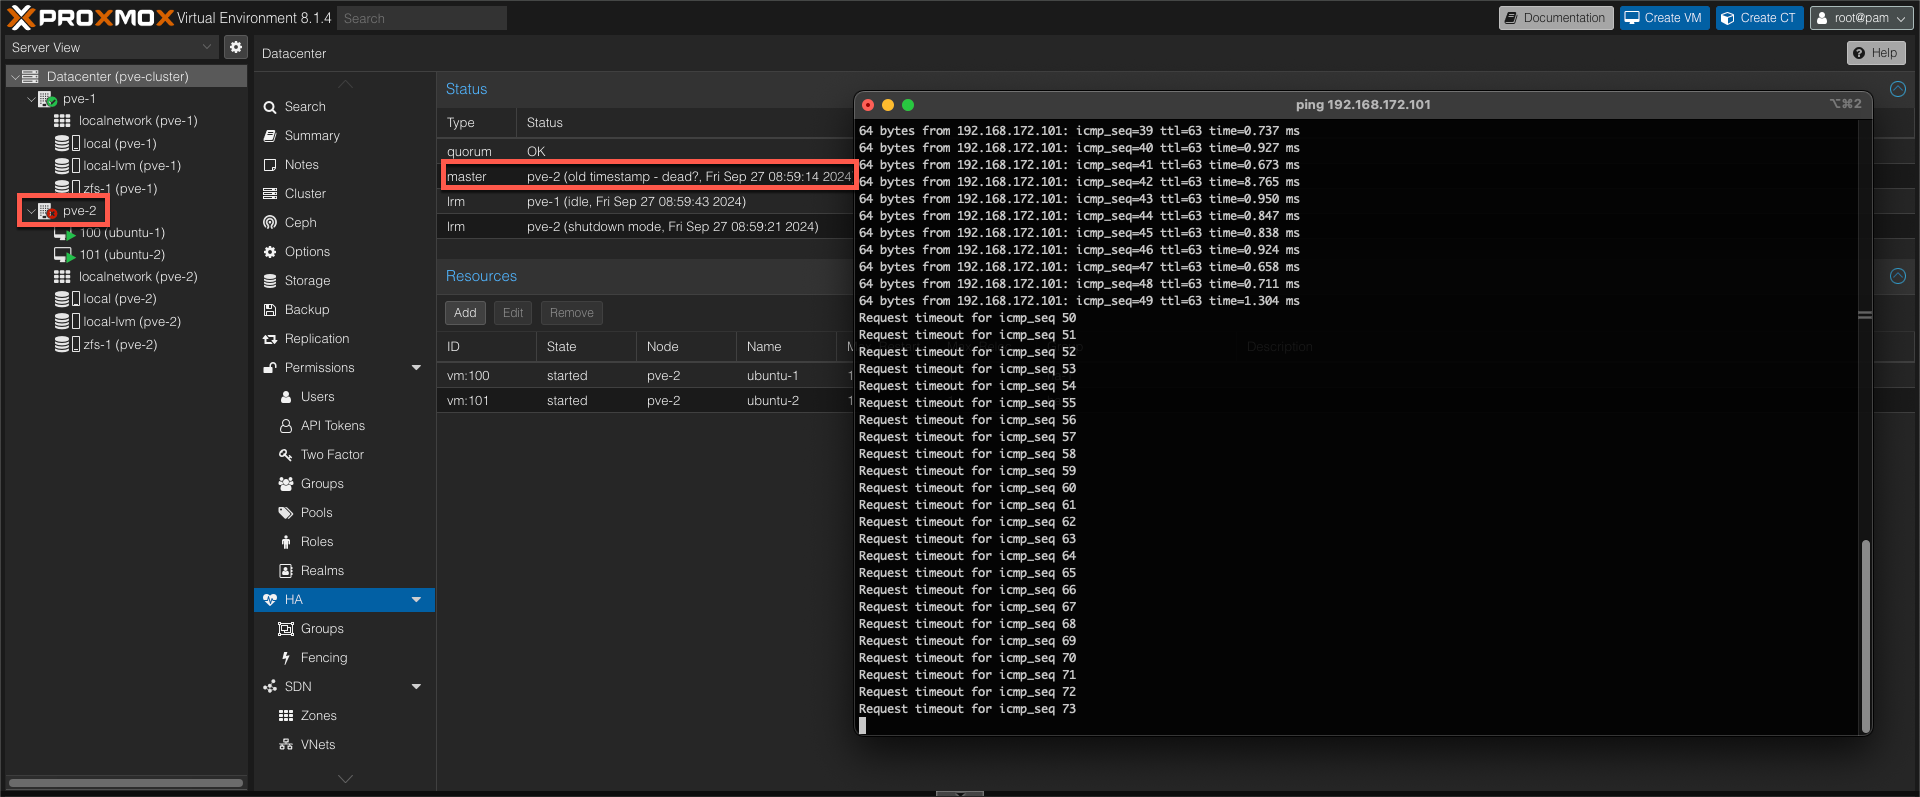
Around 60 seconds after the failure the HA master has changed to the working node

After approx two minutes the VMs are now starting up on the working node
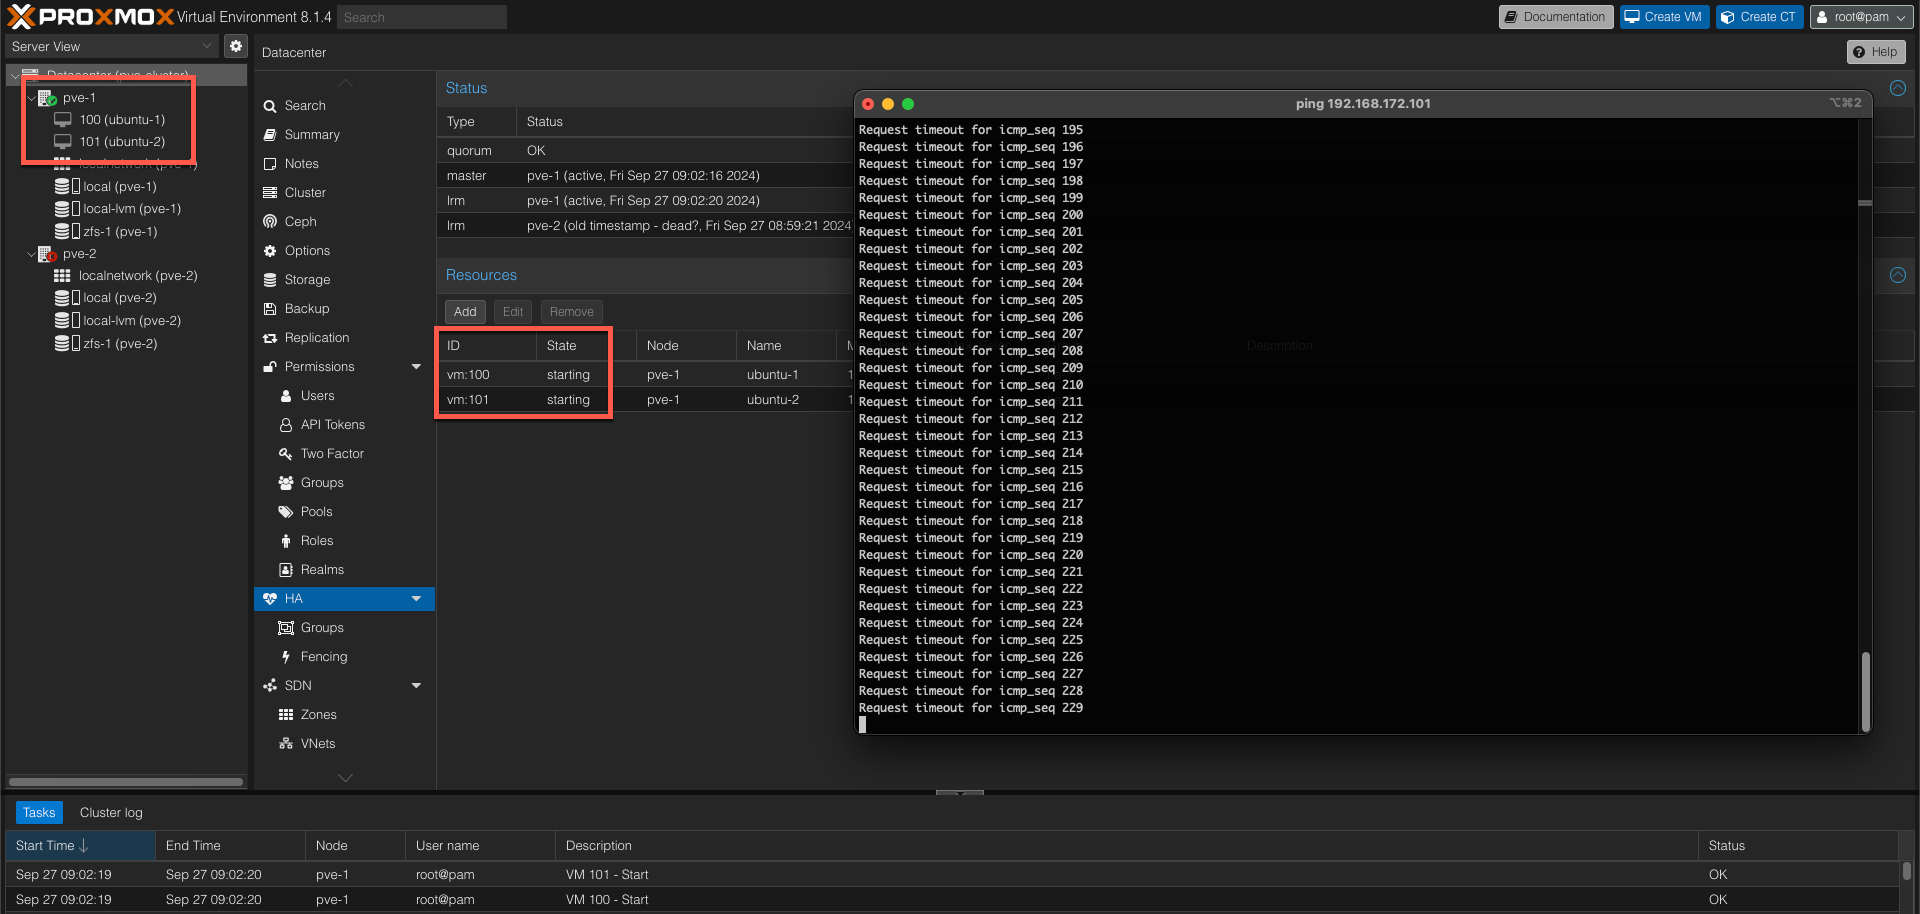
And finally we can verify that our VMs are started and that the VMs are online
Note that this failover will result in some downtime and possibly some data loss on the VMs, both because the failover isn't instant, but also since, in my environment, the VMs are not running on shared storage and are dependant on the replication interval.
The failover process takes some time because of a process called fencing. Fencing aims to ensure that the failing node is actually failed and won't come back up and cause race conditions and unwanted behavior.
Summary
This post has expanded on a previous post by adding a third device as a witness component to support automatic failover in a Proxmox Cluster
For more information about the High Availability (HA) manager, please refer to the Proxmox documentation
If you have any questions or comments, please feel free to reach out