Tanzu Backup and Restore with Standalone Velero
Overview
In this post we will take a look at backup and restore of workloads inside of vSphere with Tanzu. In this setup where we have vSphere with Tanzu setup with vSphere networking, we will use the Standalone Velero and Restic solution as opposed to the more integrated Velero operator that can be utilized when using NSX-T as the networking stack.
Backing up and restoring vSphere with Tanzu
First a note on backups of a vSphere with Tanzu environment..
vSphere with Tanzu consists of multiple components. Currently there's no solution that does a complete backup of all these components in one go (and maybe we'll never have one).
We have vCenter it self, and it's configuration, that will have it's own backup process, you'll have the Load Balancer if using the vSphere networking stack that should have it's backup process, NSX-T will have it's own process, and you'll have the Tanzu stuff which is handled differently based on what type of object (and a few other things).
VMware provides a table of the different components and the Tools that can be used which explains in a high-level what considerations we must take when implementing a backup and restore strategy
Note that, as mentioned, there are differences in the plugins/tools that can be used based on if we're using vSphere networking or NSX-T in our environment. The latter uses a Velero Plugin for vSphere which is more integrated than the standalone version we'll have to use without NSX-T, but this will also tie it to Tanzu and backups cannot necessarily be ported to other clusters. For a run through of using the Velero plugin, check out this blog post by Cormac Hogan
The focus of this post will be on backup and restore of workloads running in vSphere with Tanzu, i.e. what is running inside a Tanzu Kubernetes Cluster (TKC).
The environment
The environment used in my setup consists of a cluster of three hosts running on vSphere 7.0 U2. There's a couple of vSphere Namespaces configured, and there's also a couple of Tanzu Kubernetes Clusters (guest clusters) running in the environment. The load balancer used in the environment is the NSX Advanced Load Balancer (Avi Vantage).
Velero
The tool used for doing backup and restore inside the TKC clusters is Velero. This is an open-source, Cloud Native Computing Foundation backed project for performing disaster recovery of Kubernetes cluster resources. It is also used for migrating resources and persistent volumes.
Velero supports a few storage providers, but again since the vSphere provider requires NSX-T as the networking stack we'll go for an object store and in this setup we'll use MinIO as the object store provider
Note that to run the Velero commands we'll see later on in this post we'll have to have the Velero CLI installed. And be aware that to be eligible for support from VMware we'll have to use the VMware signed binary. Check the VMware documentation for more information
Installing MinIO
MinIO can be installed in a container, on bare-metal or on virtual machines. In this setup we'll install it on a Ubuntu 20.04 VM.
VMware provides documentation on how to configure it, but we'll go through it step-by-step with a few additions and clarifications.
First we'll download the MinIO executable
1wget https://dl.min.io/server/minio/release/linux-amd64/minio
We'll create a directory for storing the MinIO data
1mkdir /MINIO-DATA
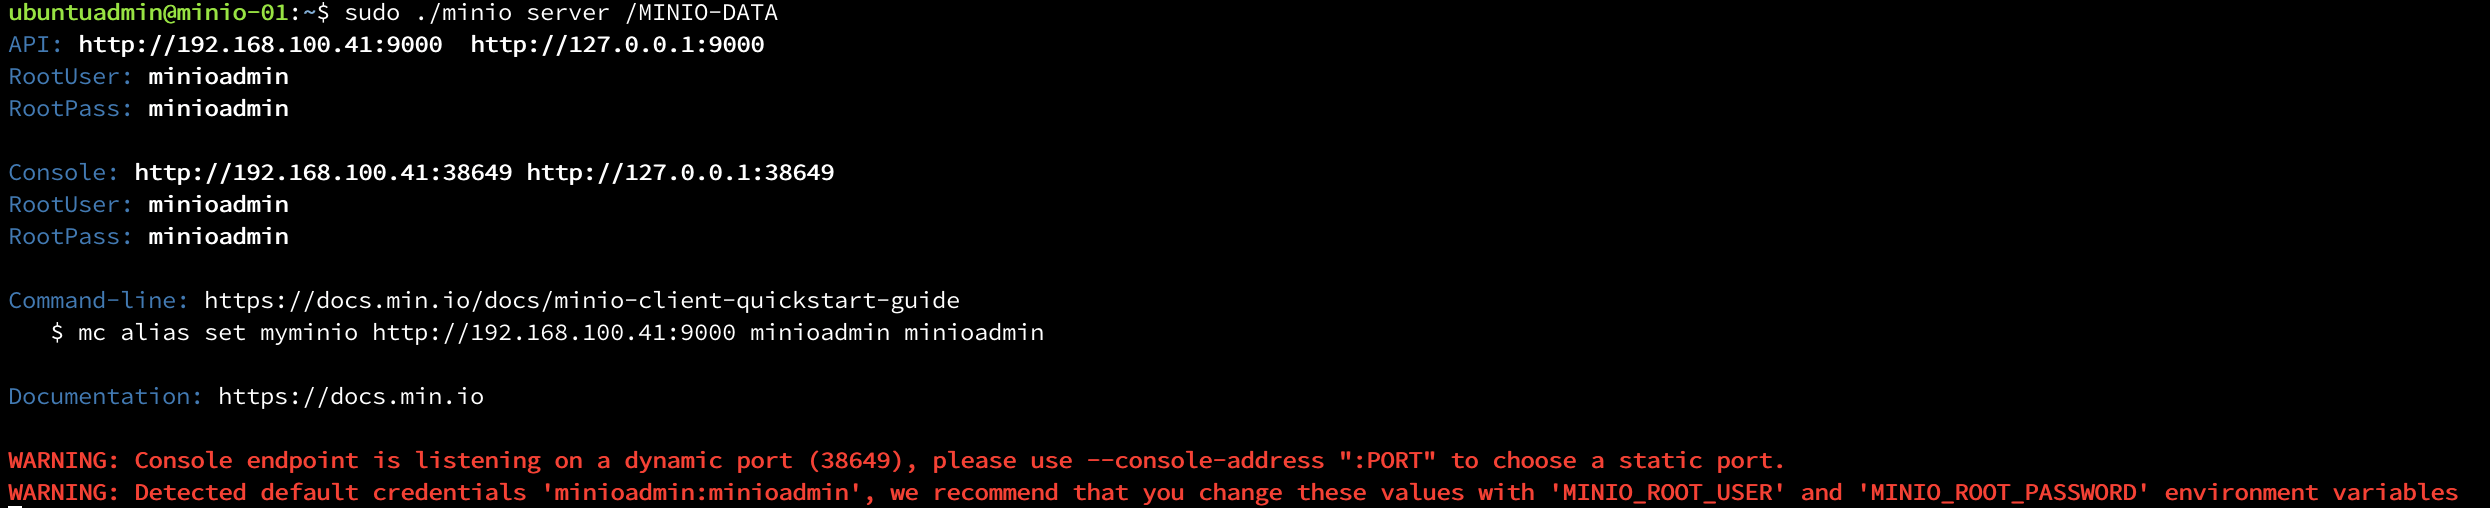
We'll start MinIO manually first, later on we'll create a service for it
1chmod +x minio
2./minio server /MINIO-DATA
The output will give us the root user and password which we'll need. Note that this can be set with environment variables, which also is true for the console endpoint port. In my lab environment I'll leave it with the defaults. In a production environment this should taken care of.
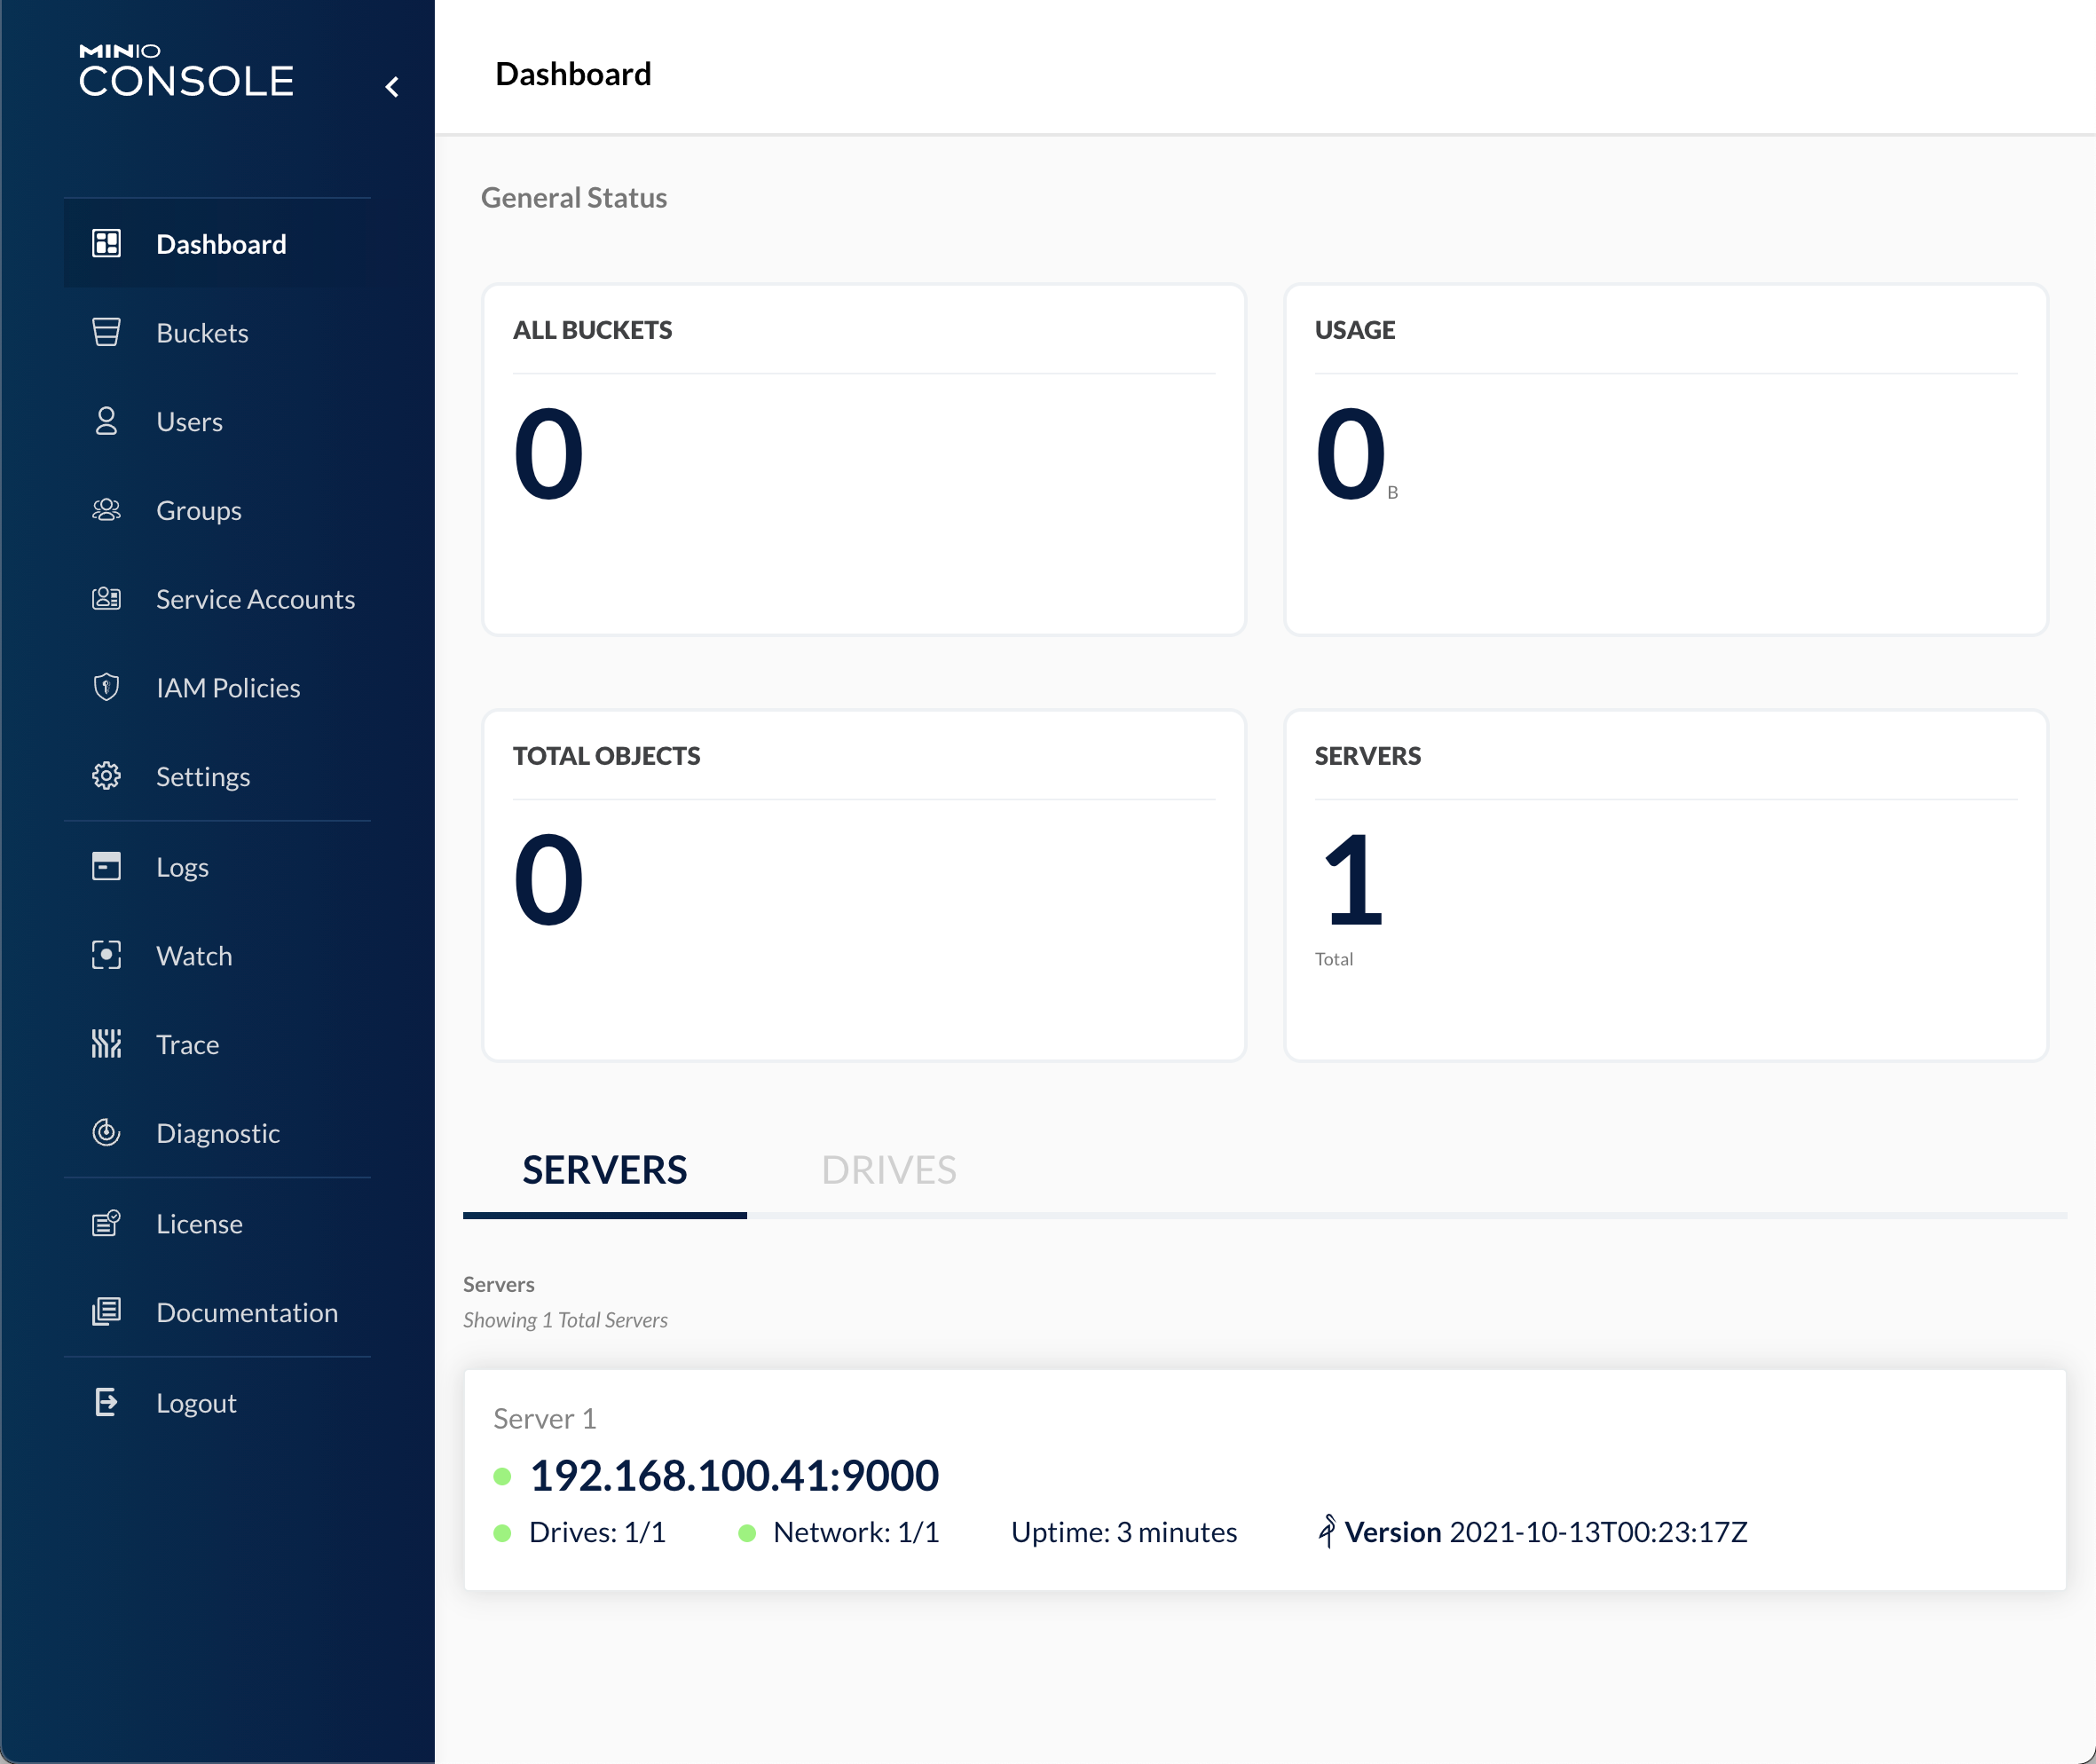
We can verify the MinIO server by navigating to the console address (if you use the 9000 port you'll be redirected). Use the credentials recorded from the console output to log in
Let's stop the server and prepare a service for it.
First we'll create a user to run the service
1useradd -M minio-user
Set the minio-user as the owner of the data directory
1chown -R minio-user:minio-user /MINIO-DATA
Copy the executable to /usr/local/bin
1cp minio /usr/local/bin
Create a service file
1touch minio.service
Add the following to the service file
 1[Unit]
 2Description=MinIO
 3Documentation=https://docs.min.io
 4Wants=network-online.target
 5After=network-online.target
 6AssertFileIsExecutable=/usr/local/bin/minio
 7
 8[Service]
 9WorkingDirectory=/usr/local/
10
11User=minio-user
12Group=minio-user
13ProtectProc=invisible
14
15ExecStart=/usr/local/bin/minio server /MINIO-DATA
16
17# Let systemd restart this service always
18Restart=always
19
20# Specifies the maximum file descriptor number that can be opened by this process
21LimitNOFILE=65536
22
23# Specifies the maximum number of threads this process can create
24TasksMax=infinity
25
26# Disable timeout logic and wait until process is stopped
27TimeoutStopSec=infinity
28SendSIGKILL=no
29
30[Install]
31WantedBy=multi-user.target
Copy the service file to /etc/systemd/system
1cp minio.service /etc/systemd/system
Reload service daemon
1systemctl daemon-reload
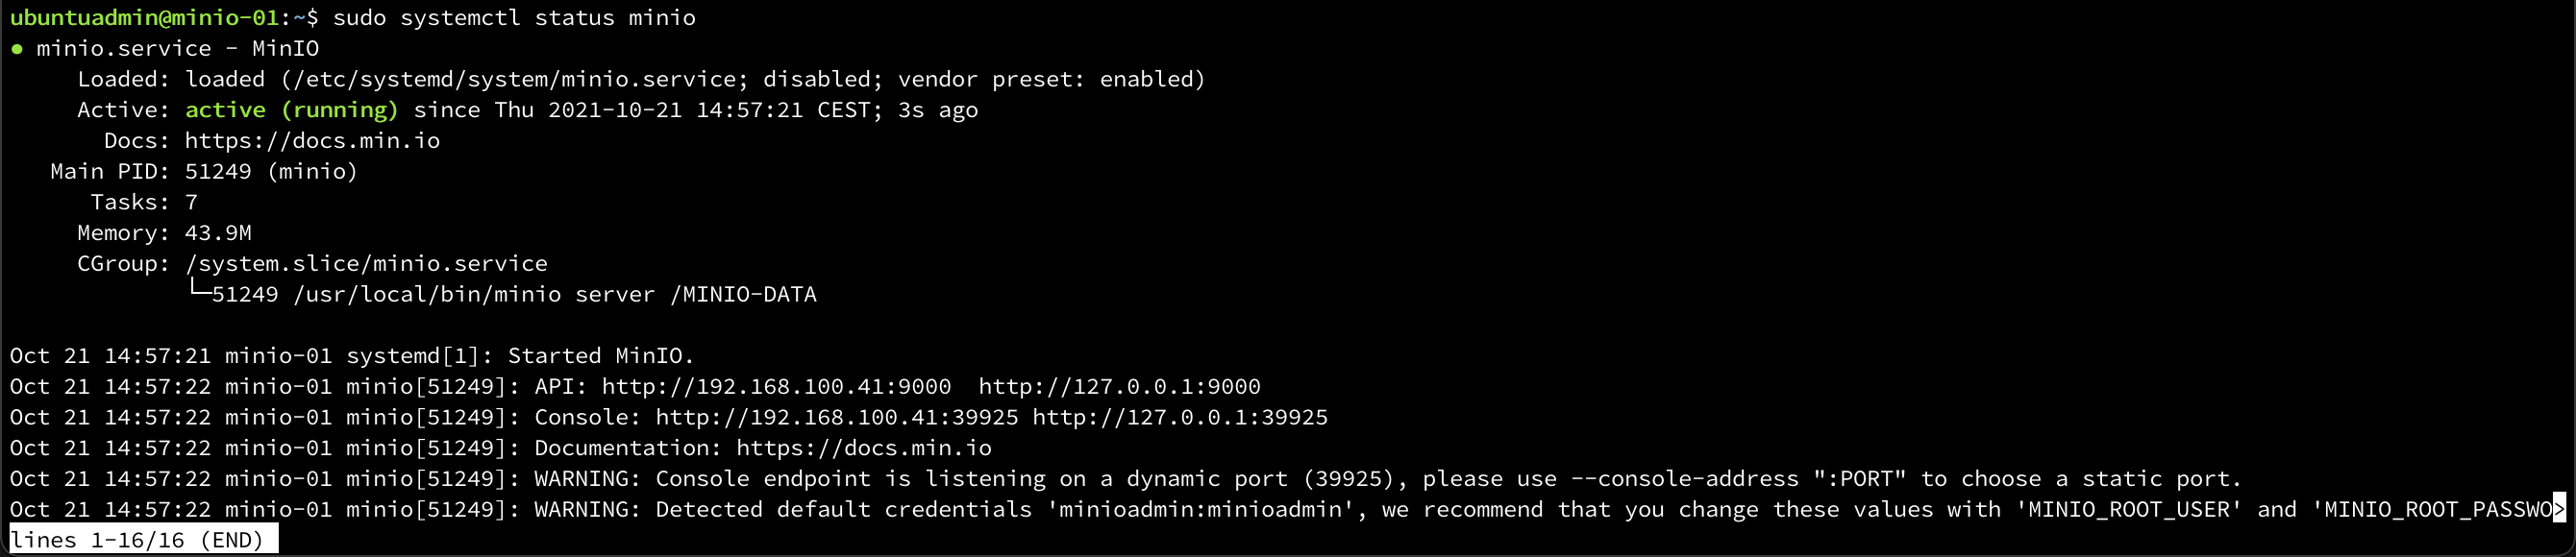
Start the MinIO service and check that it's running
1systemctl start minio
2systemctl status minio
Verify that you can access the MinIO UI and let's create a user account and a bucket to be used for our Tanzu backups!
Create MinIO user and bucket
Note that this could easily be done with the MinIO CLI tools, but we'll use the UI for demonstration purposes
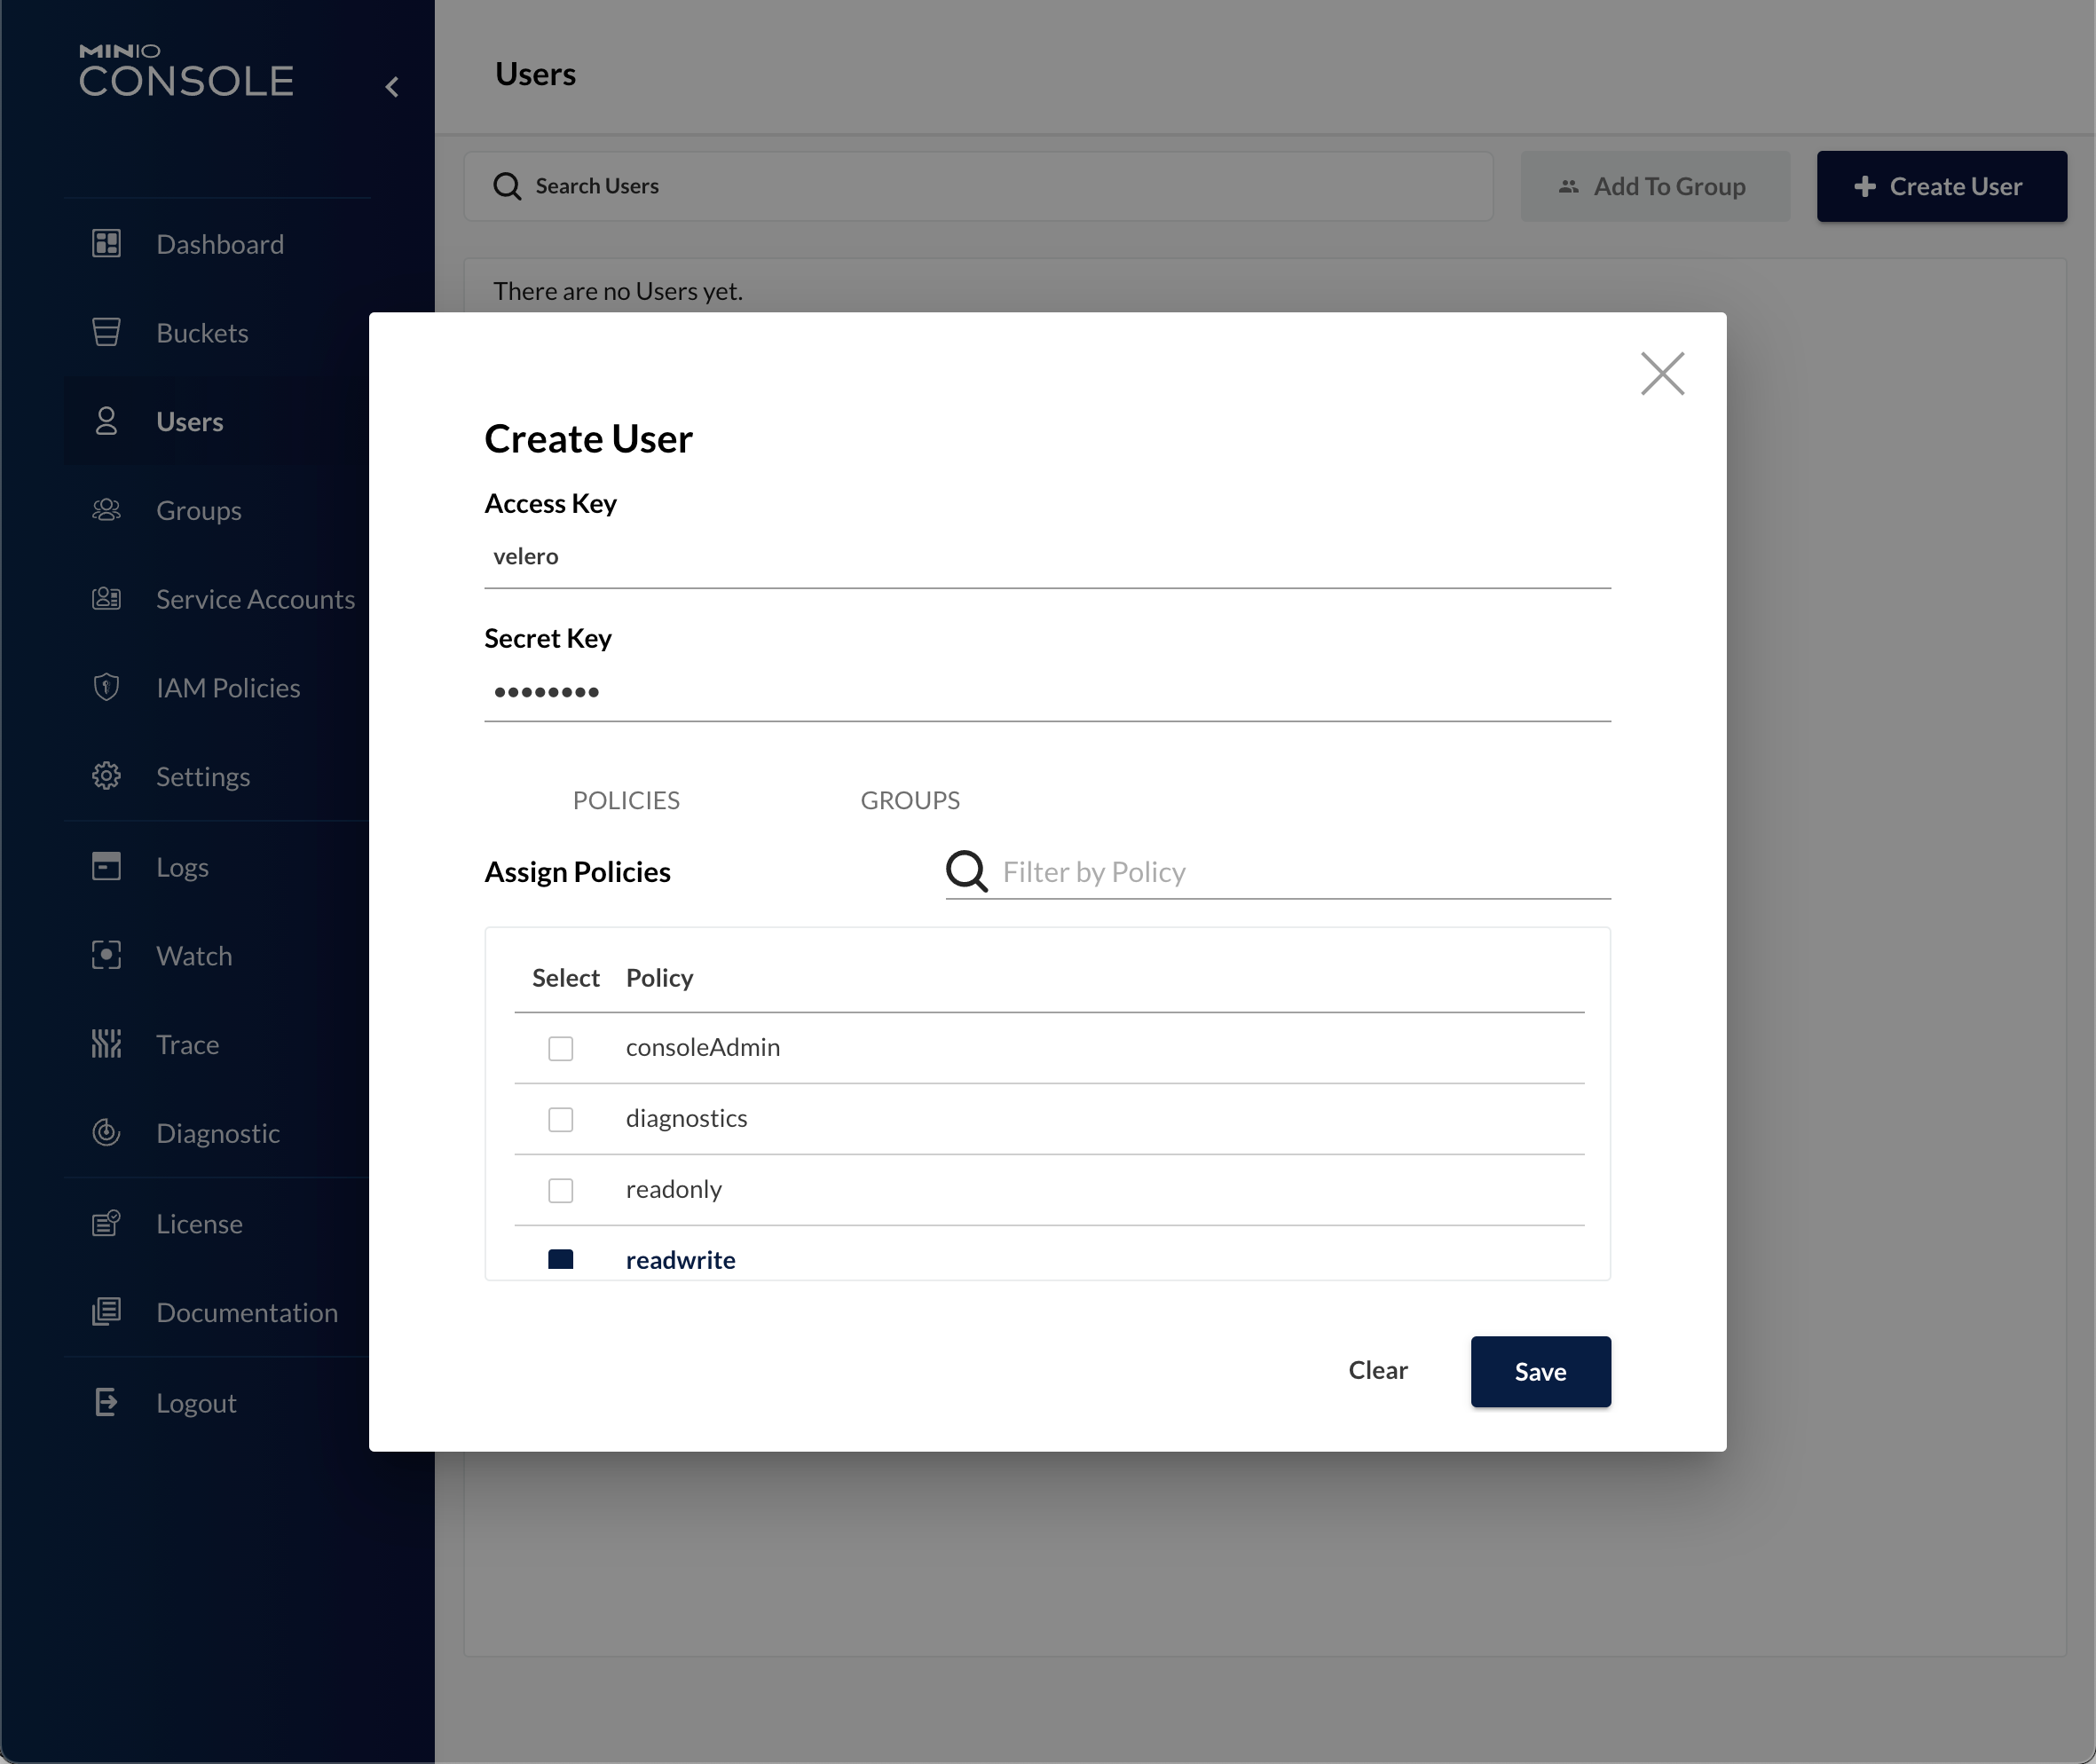
First we'll create a user named velero and give it readwrite access. We could (and in prod should) restrict it to only the buckets used for backups, but for now I'm find with a generic access
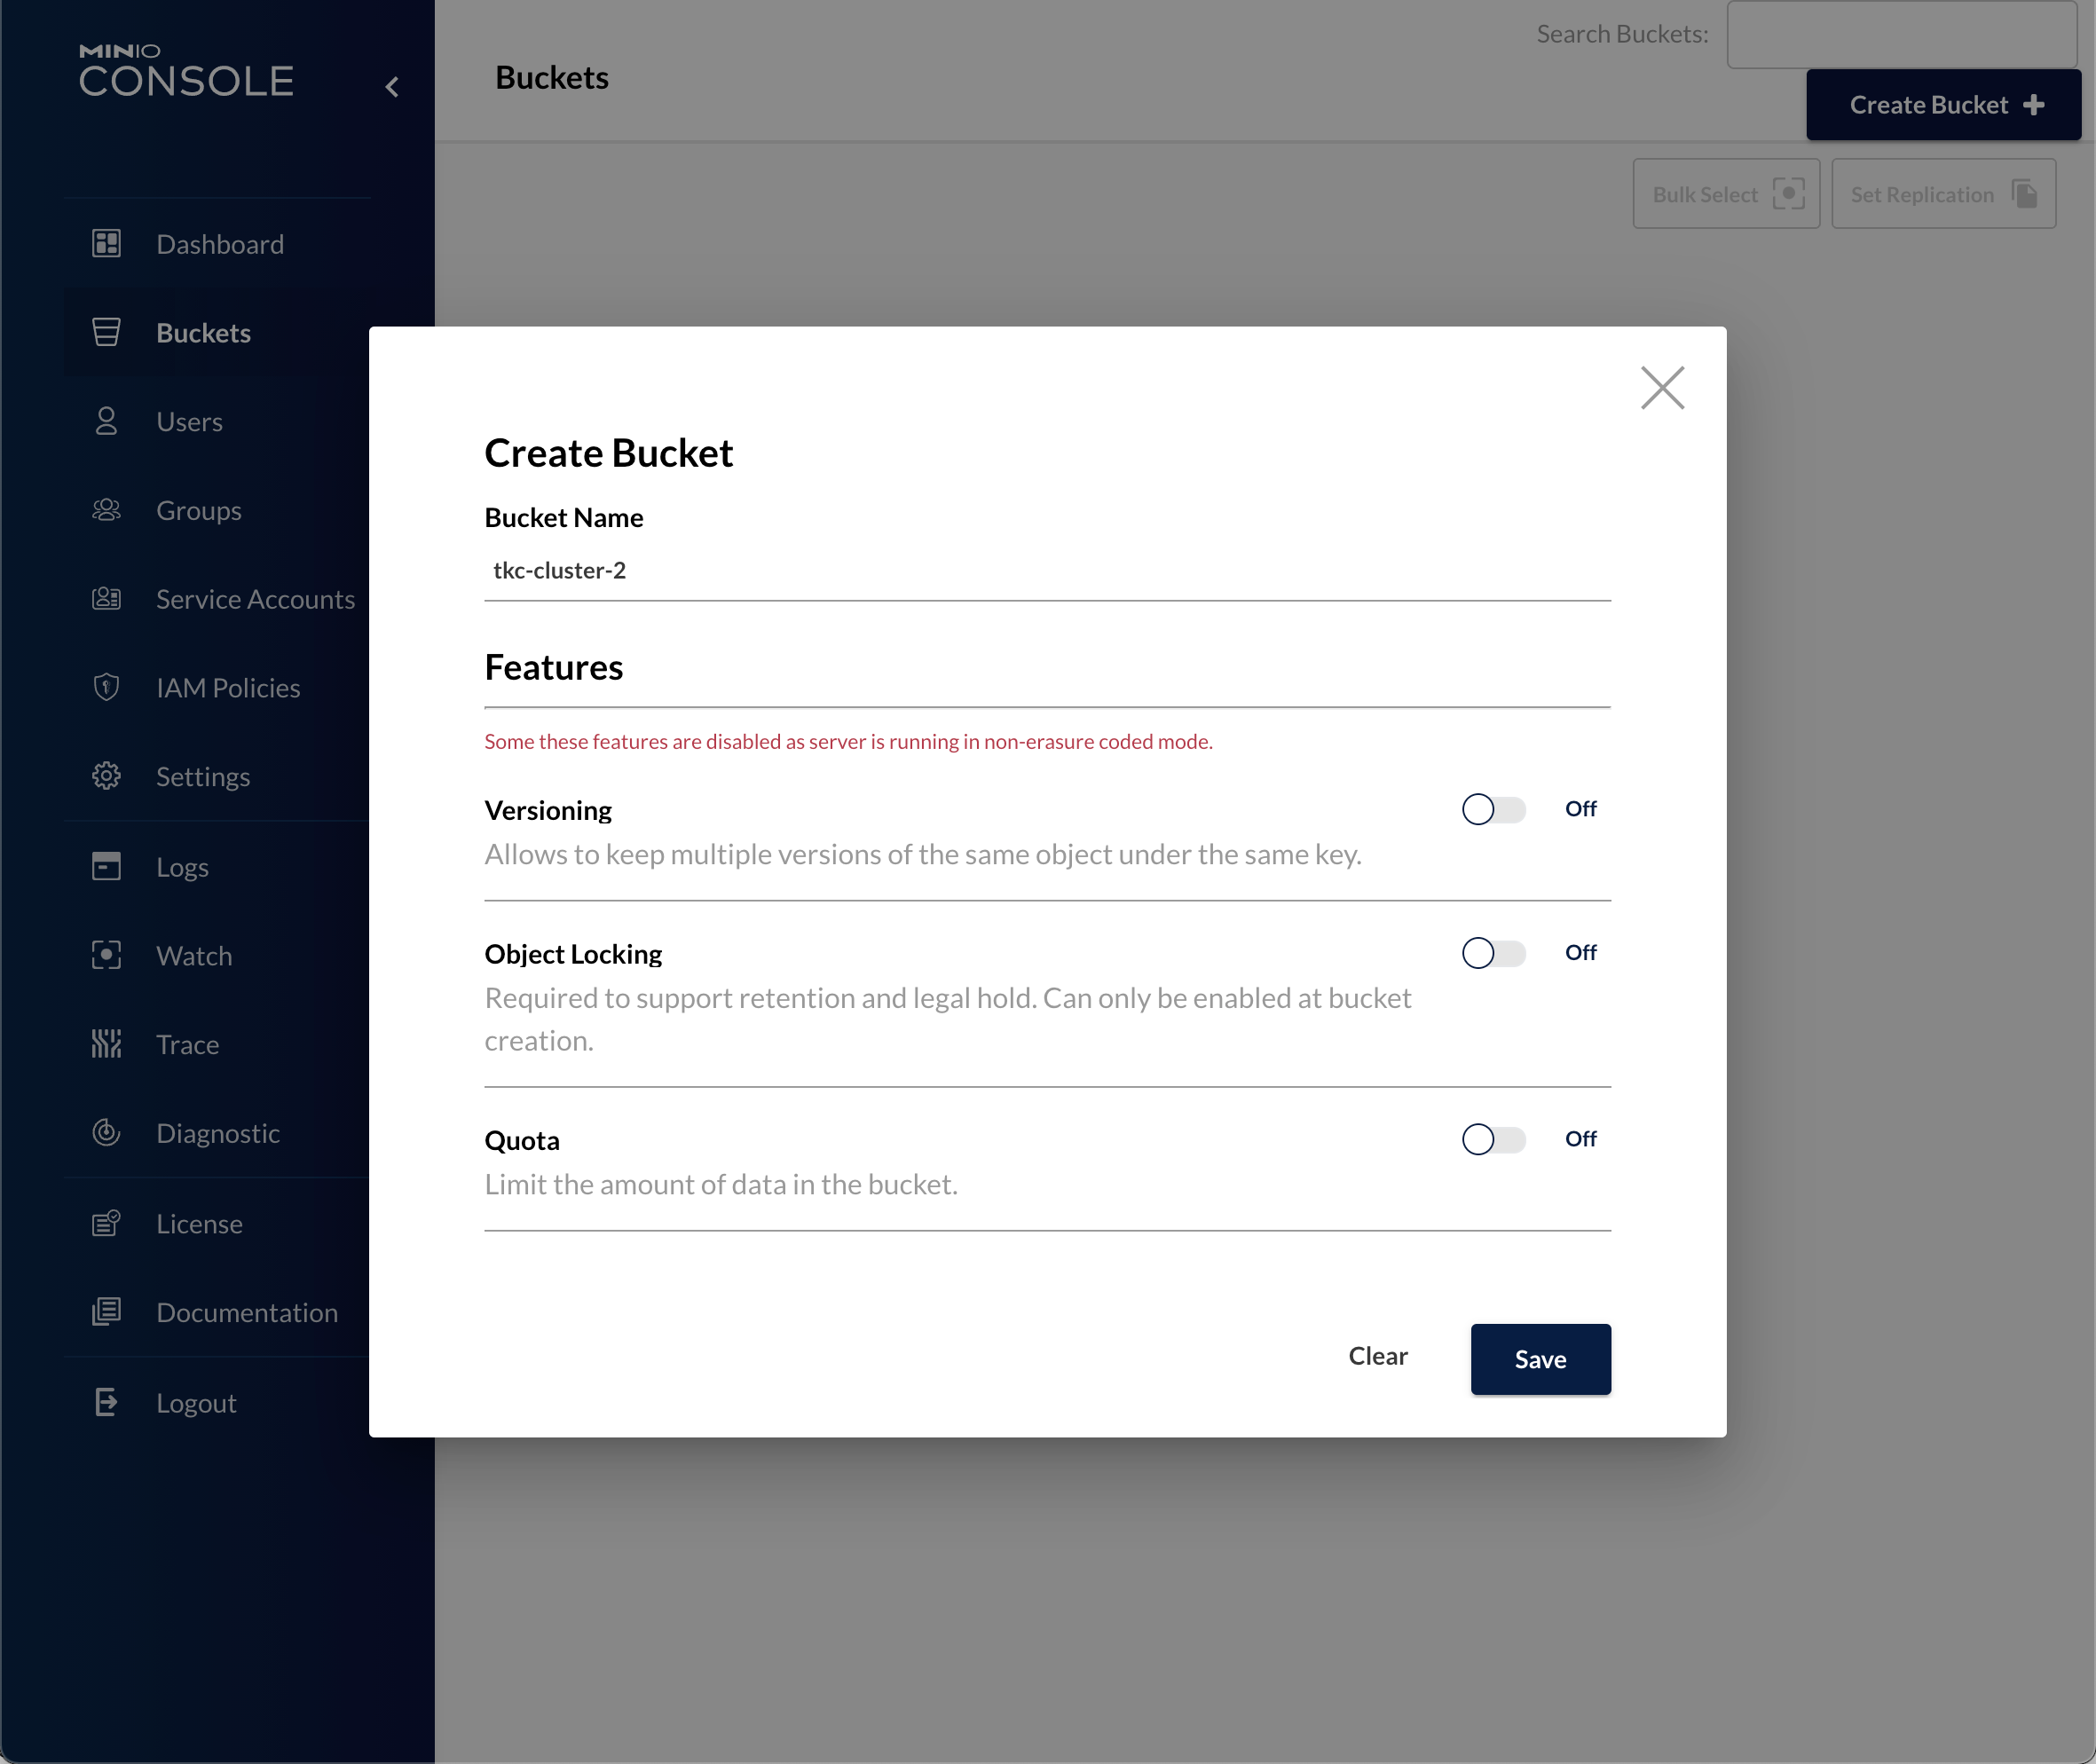
Now, we'll create a Bucket for our Tanzu backups.
Before you go ahead and create the buckets, you might put some considerations into our bucket structure.
In this post I'm doing a Velero install per TKC cluster so a bucket per cluster could be a strategy. Likewise, if you want to utilize the MinIO server for more than just backups then maybe you want to separate backups from other data and will end up with a specific backup bucket per cluster. In short, do some thinking before creating buckets for all of your clusters!
In this case I'm creating one bucket per cluster and I'll give the bucket the same name as the TKC cluster
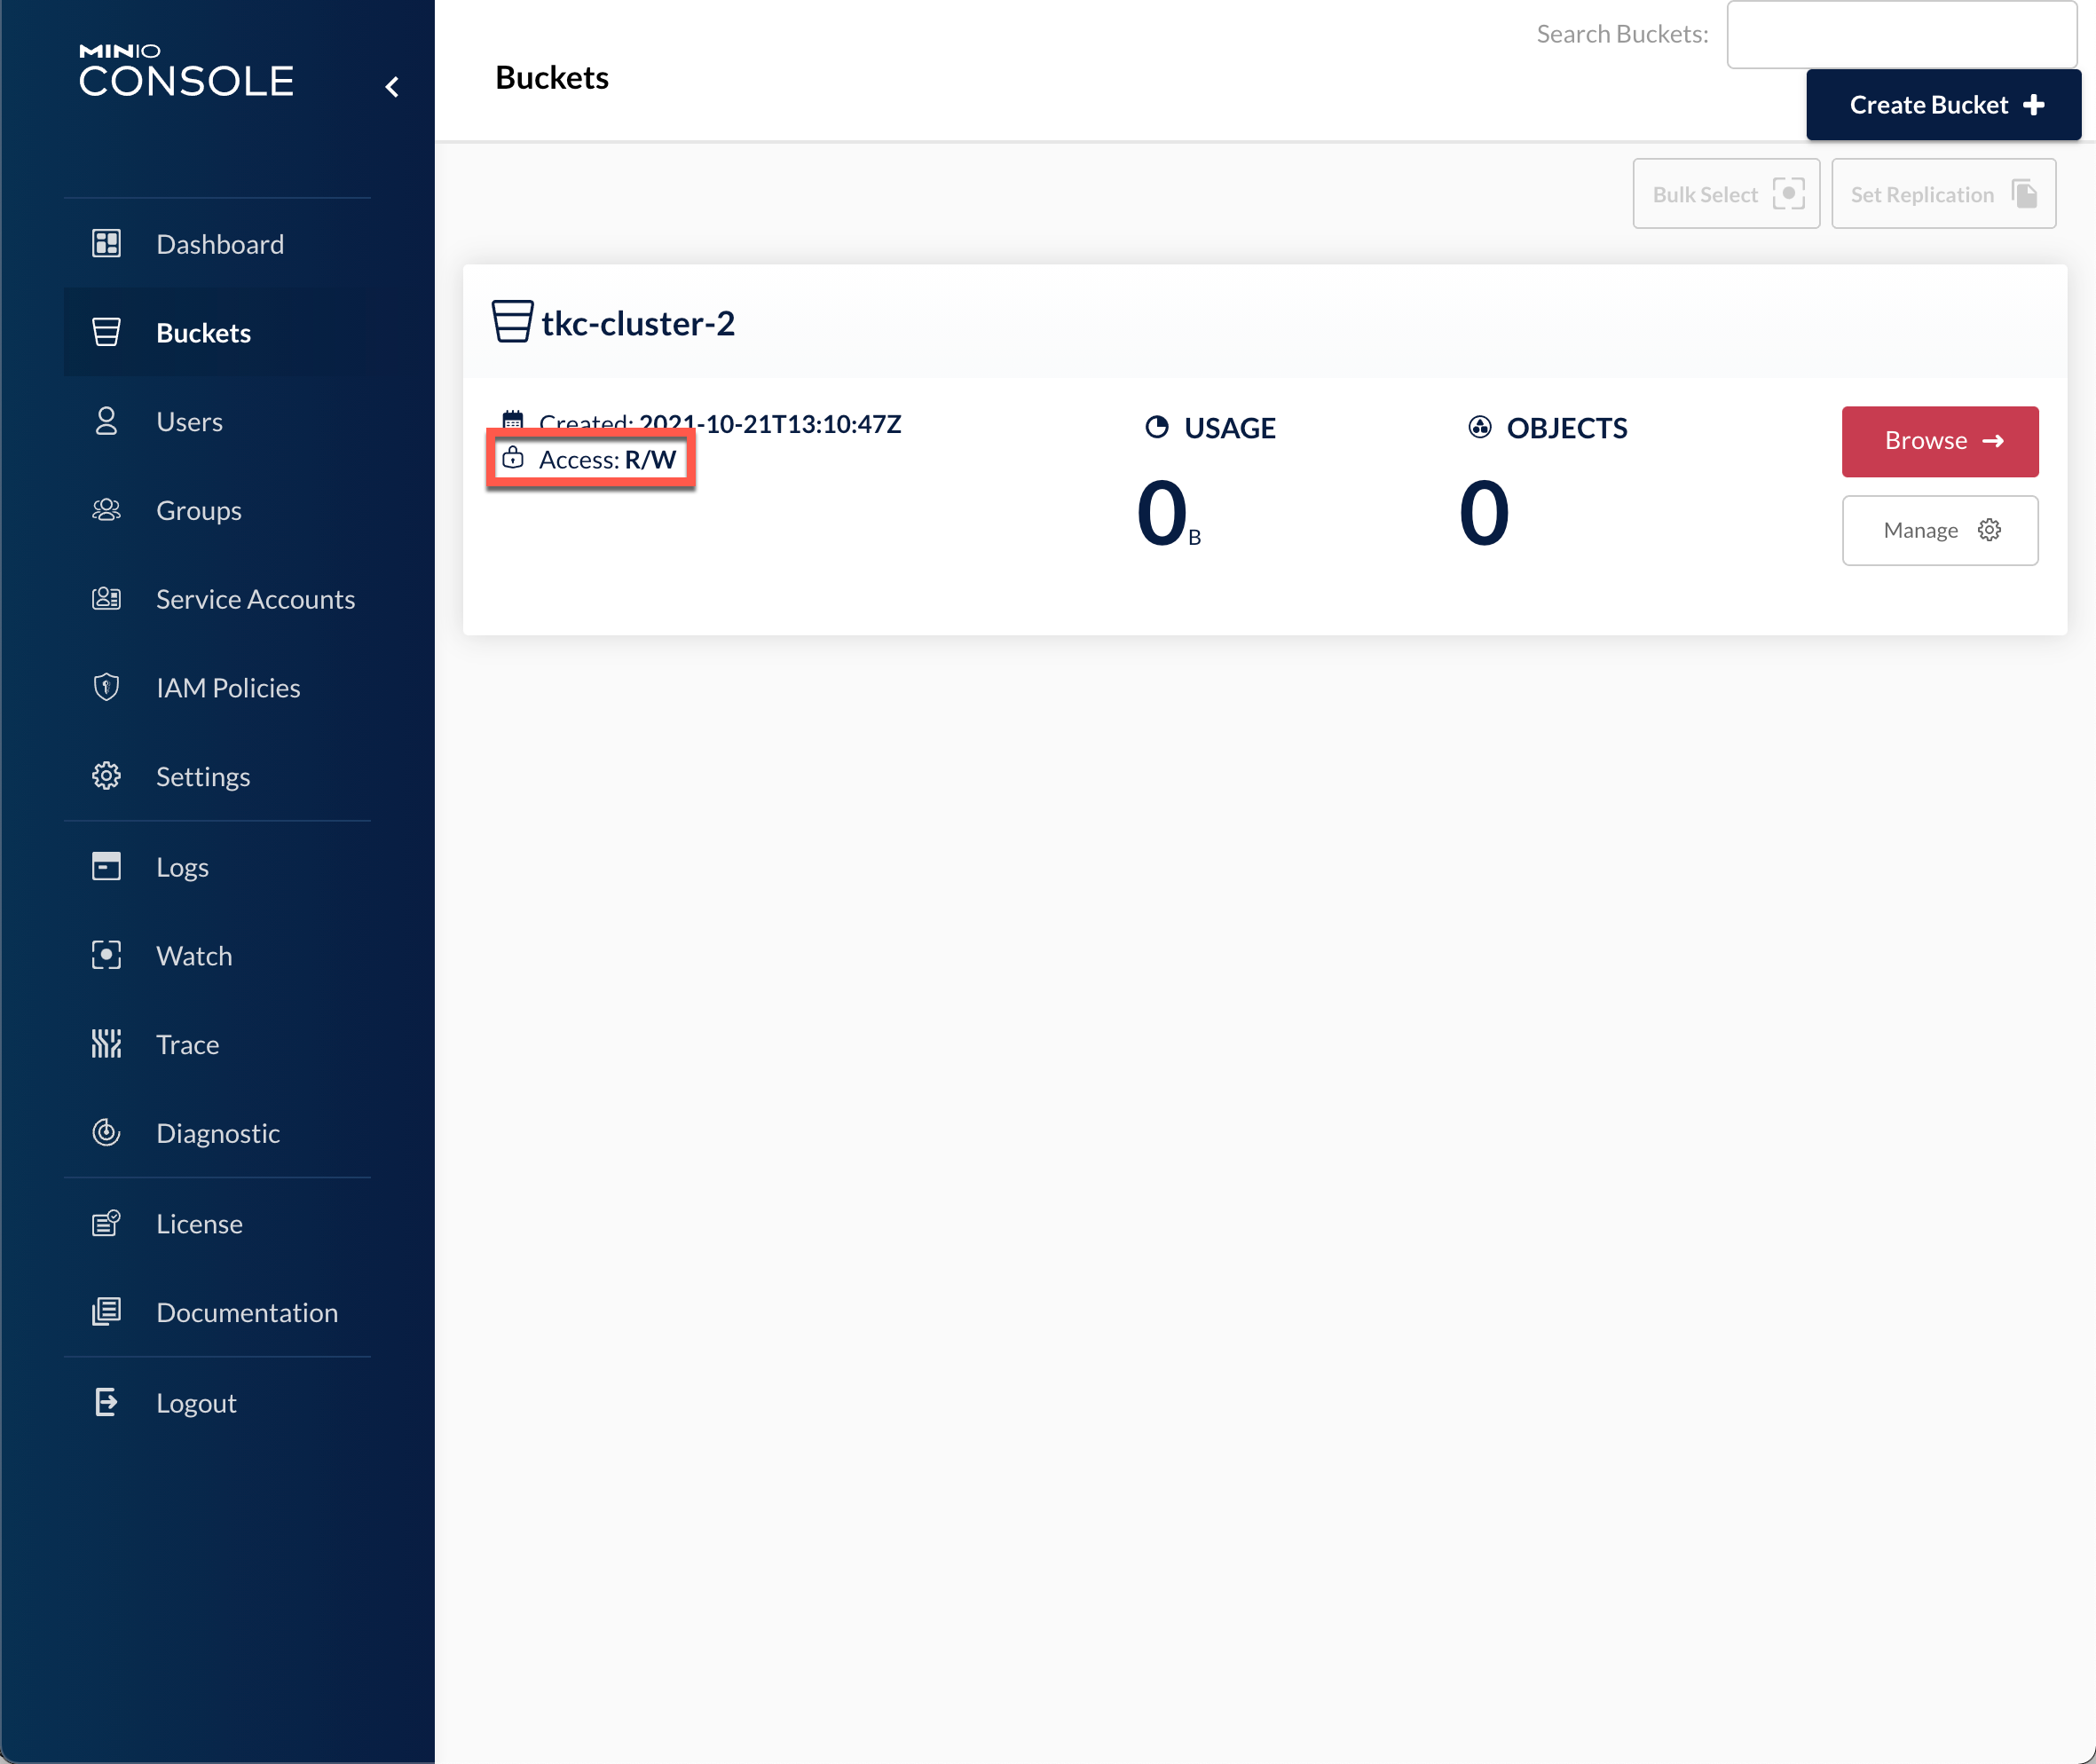
Also, verify that the bucket access is R/W
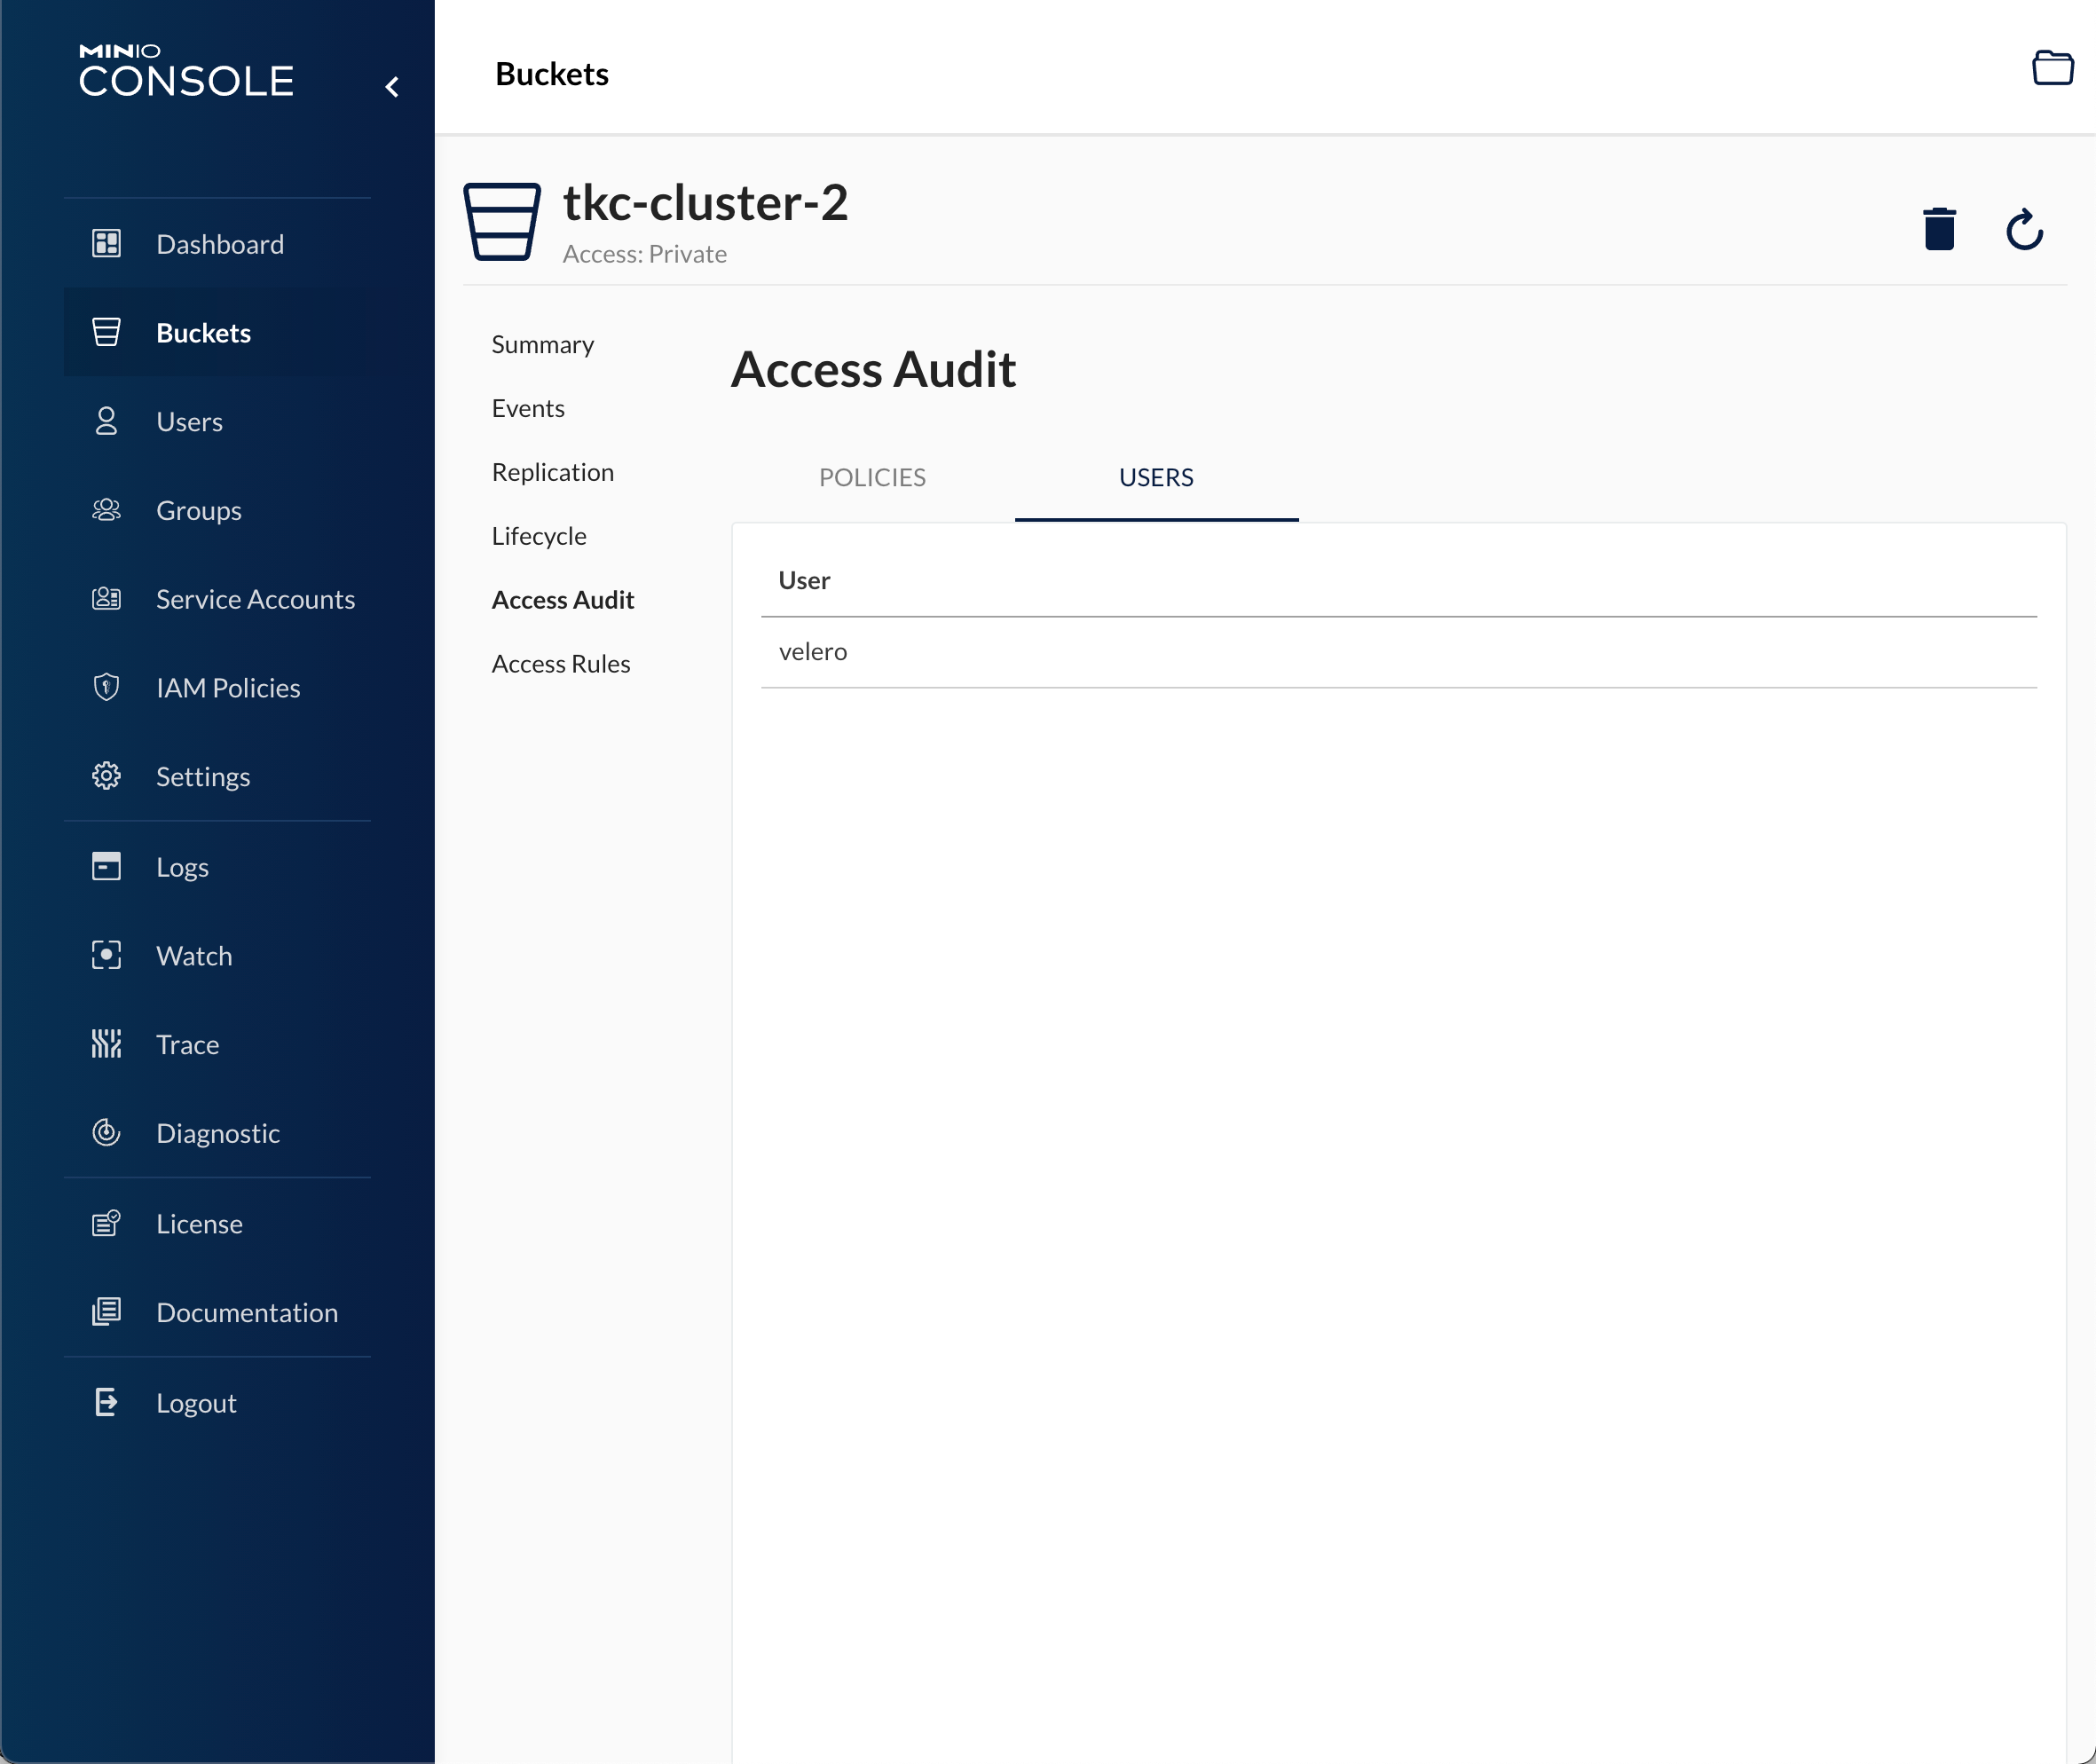
And lastly that the user account we created has access to it
Now we can carry on with installing Velero and Restic on our Tanzu Kubernetes Cluster
Install Velero
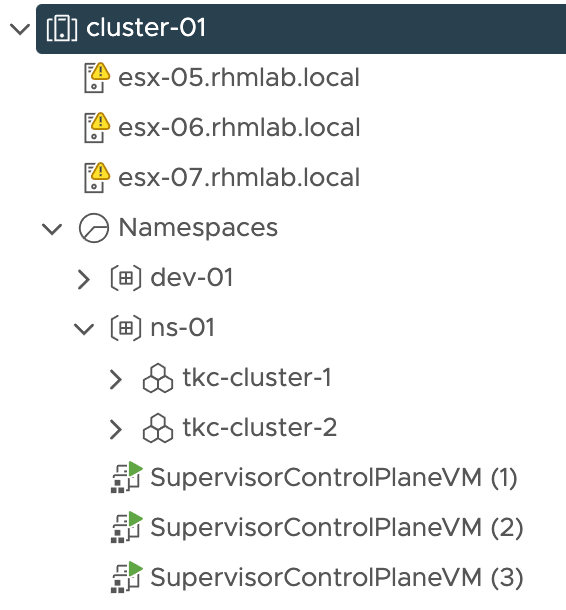
First let's take a quick look on the environment. We have two vSphere namespaces in this setup as we saw earlier in this blog post, and in one of the namespaces we have two TKC clusters

Let's install Velero in the tkc-cluster-2 cluster
First we'll change to/verify that we are working with the correct context. The Velero CLI will automatically work with the current context
1kubectl config use-context tkc-cluster-2
Let's also create a credentials file for the Velero installer to use where we specify the details for the user we created earlier
1[default]
2aws_access_key_id = velero
3aws_secret_access_key = <secret-key-for-velero-user>
I'm saving this in a file called credentials-minio
Note that the VMware documentation doesn't include that
[default]header in the credentials file. In my setup I got error messages like "Error getting a backup store" and "NoCredentialProviders: no valid providers in chain" if I left that header out. I got a clue from this discussion on Github on how to solve it
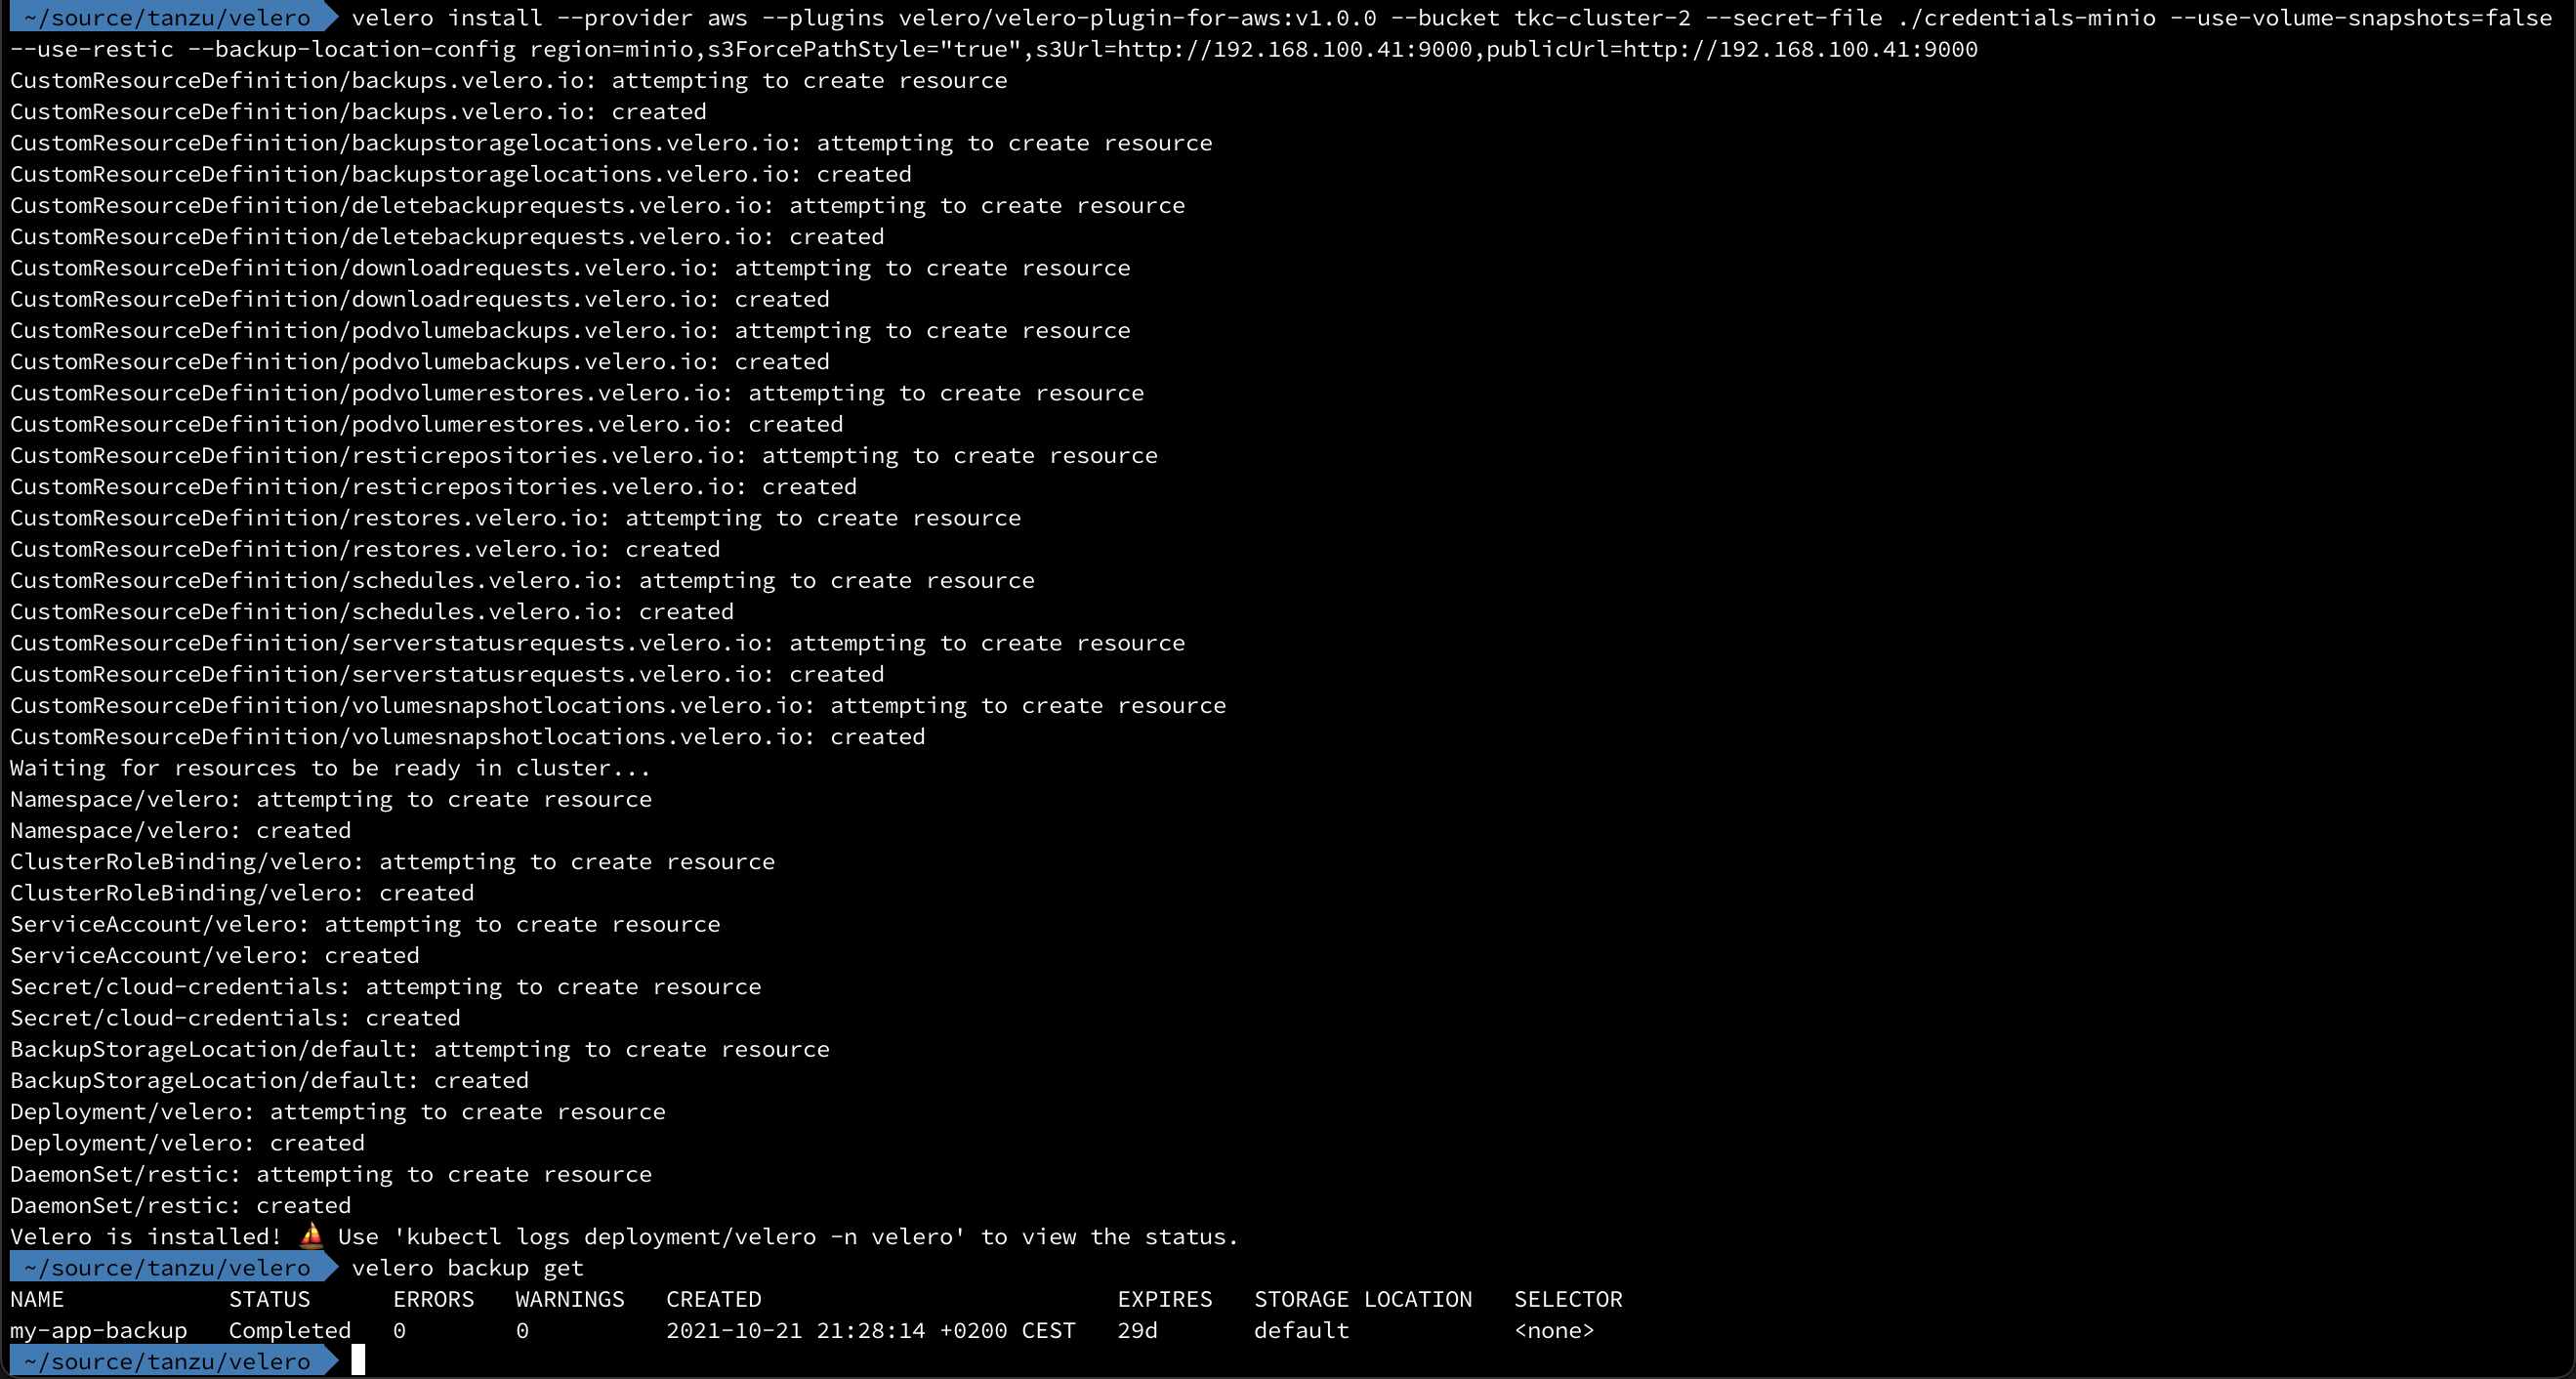
Now we're ready to install Velero and Restic in our TKC cluster. (Make sure you change the bucket, secret-file, s3Url and publicUrl parameters to reflect your environment)
1velero install --provider aws --plugins velero/velero-plugin-for-aws:v1.0.0 --bucket tkc-cluster-2 --secret-file ./credentials-minio --use-volume-snapshots=false --use-restic --backup-location-config region=minio,s3ForcePathStyle="true",s3Url=http://192.168.100.41:9000,publicUrl=http://192.168.100.41:9000
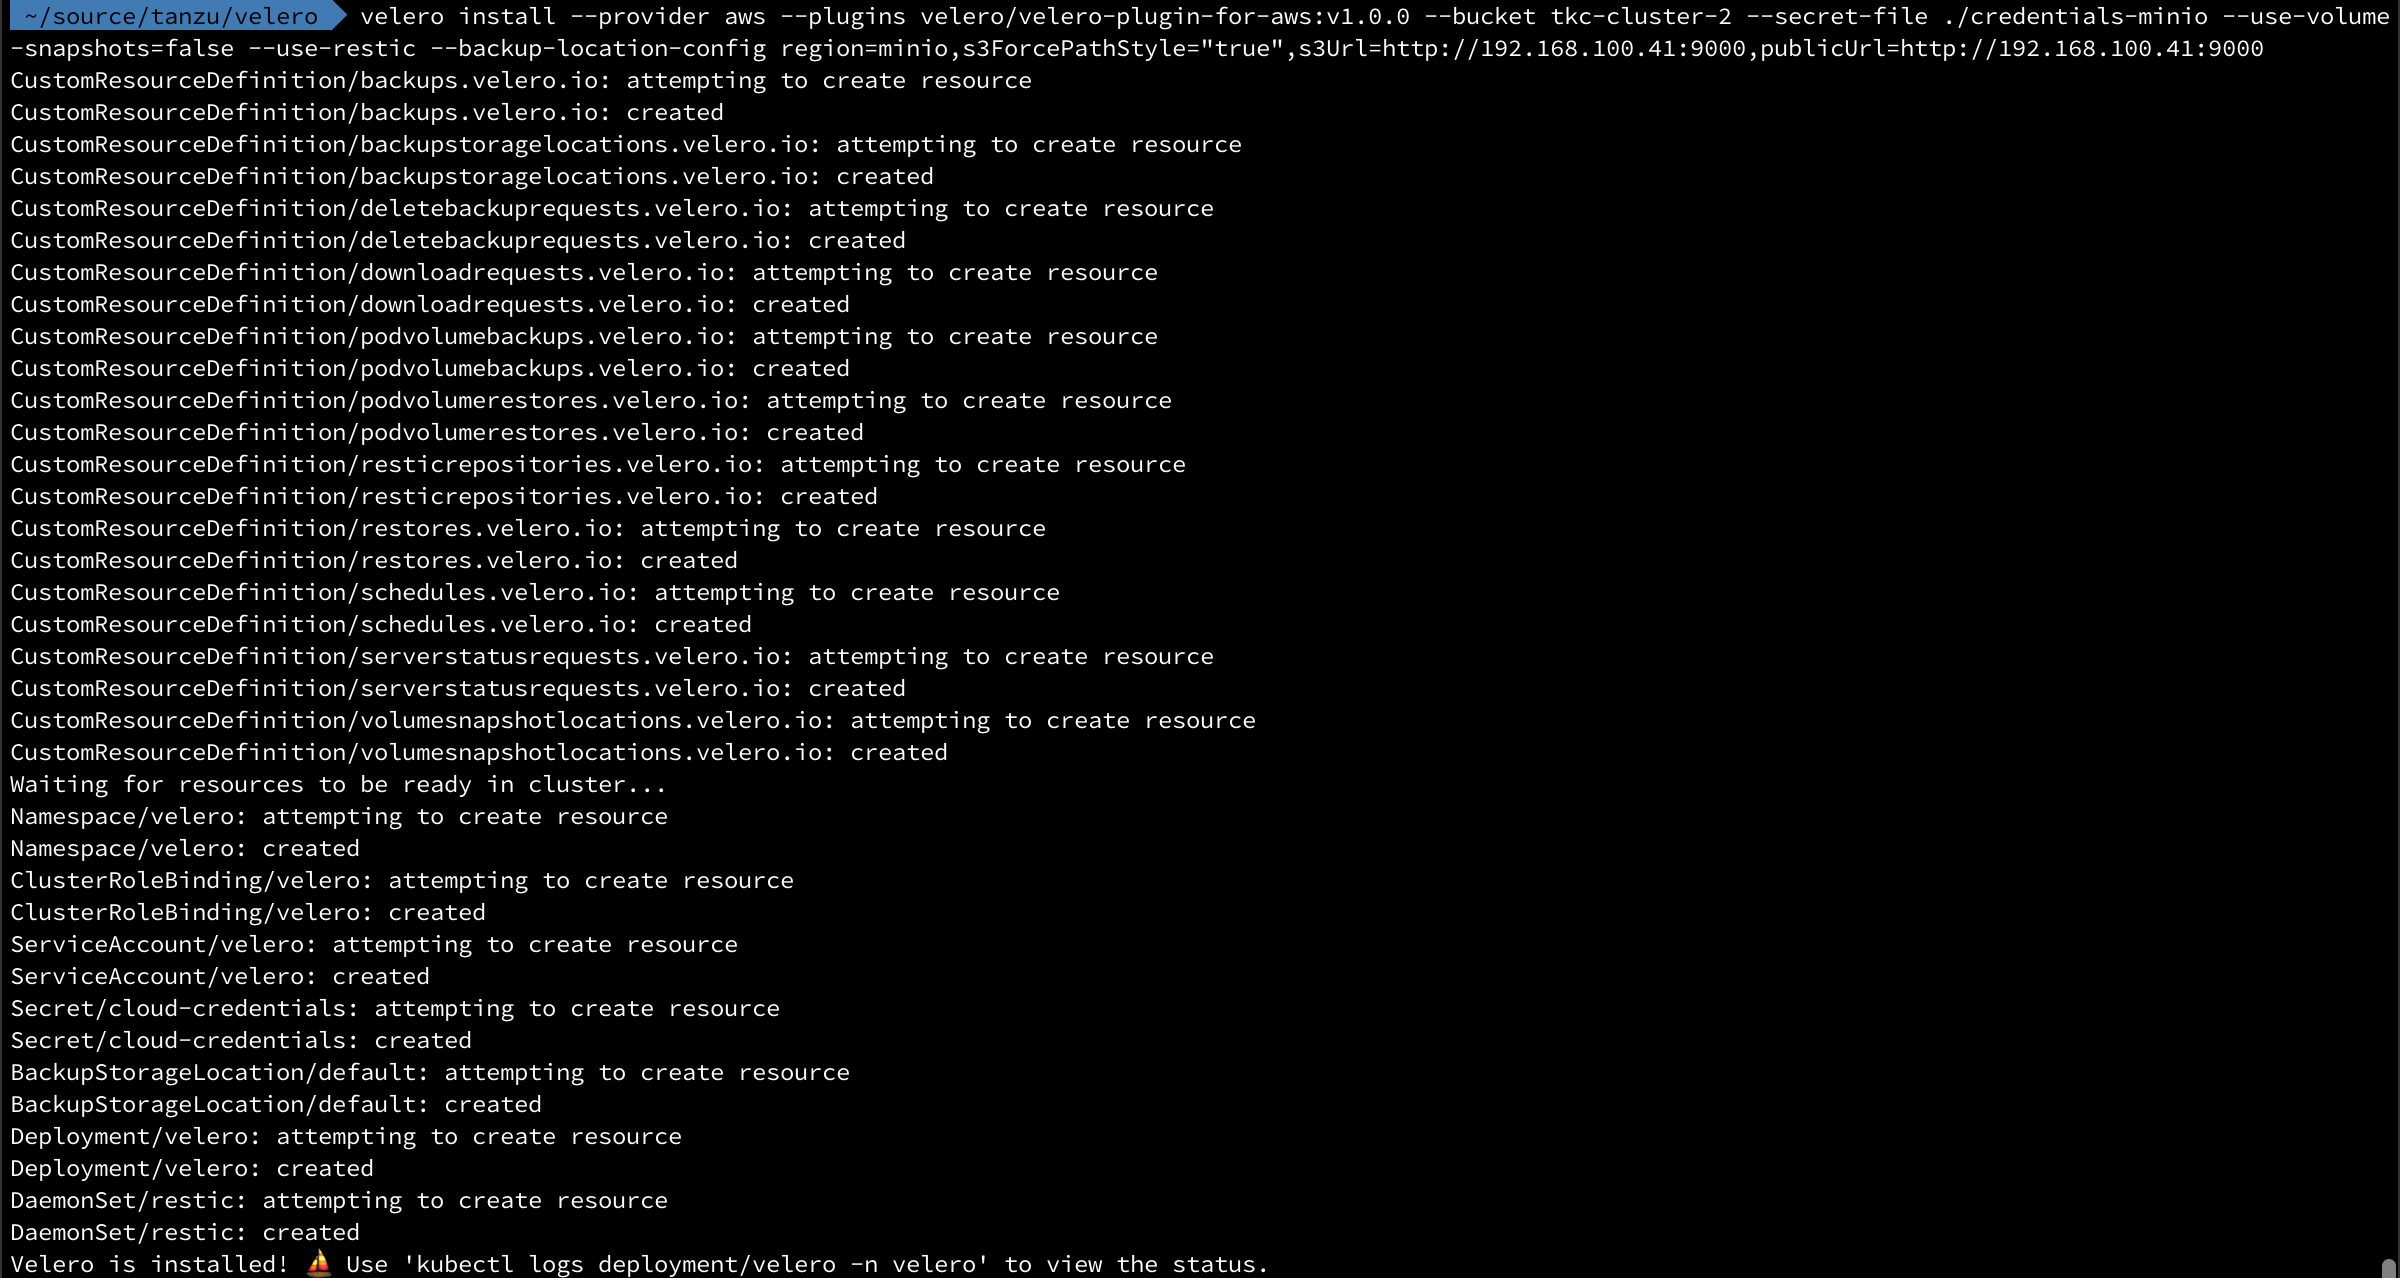
After a few minutes we can run the kubectl logs deployment/velero -n velero command to check the status of the install. The message we want to see is the Backup storage location valid, marking as available
With Velero installed we can try to run a backup in our cluster.
Create a backup with Velero
First, let's check out a simple workload that are running in our cluster
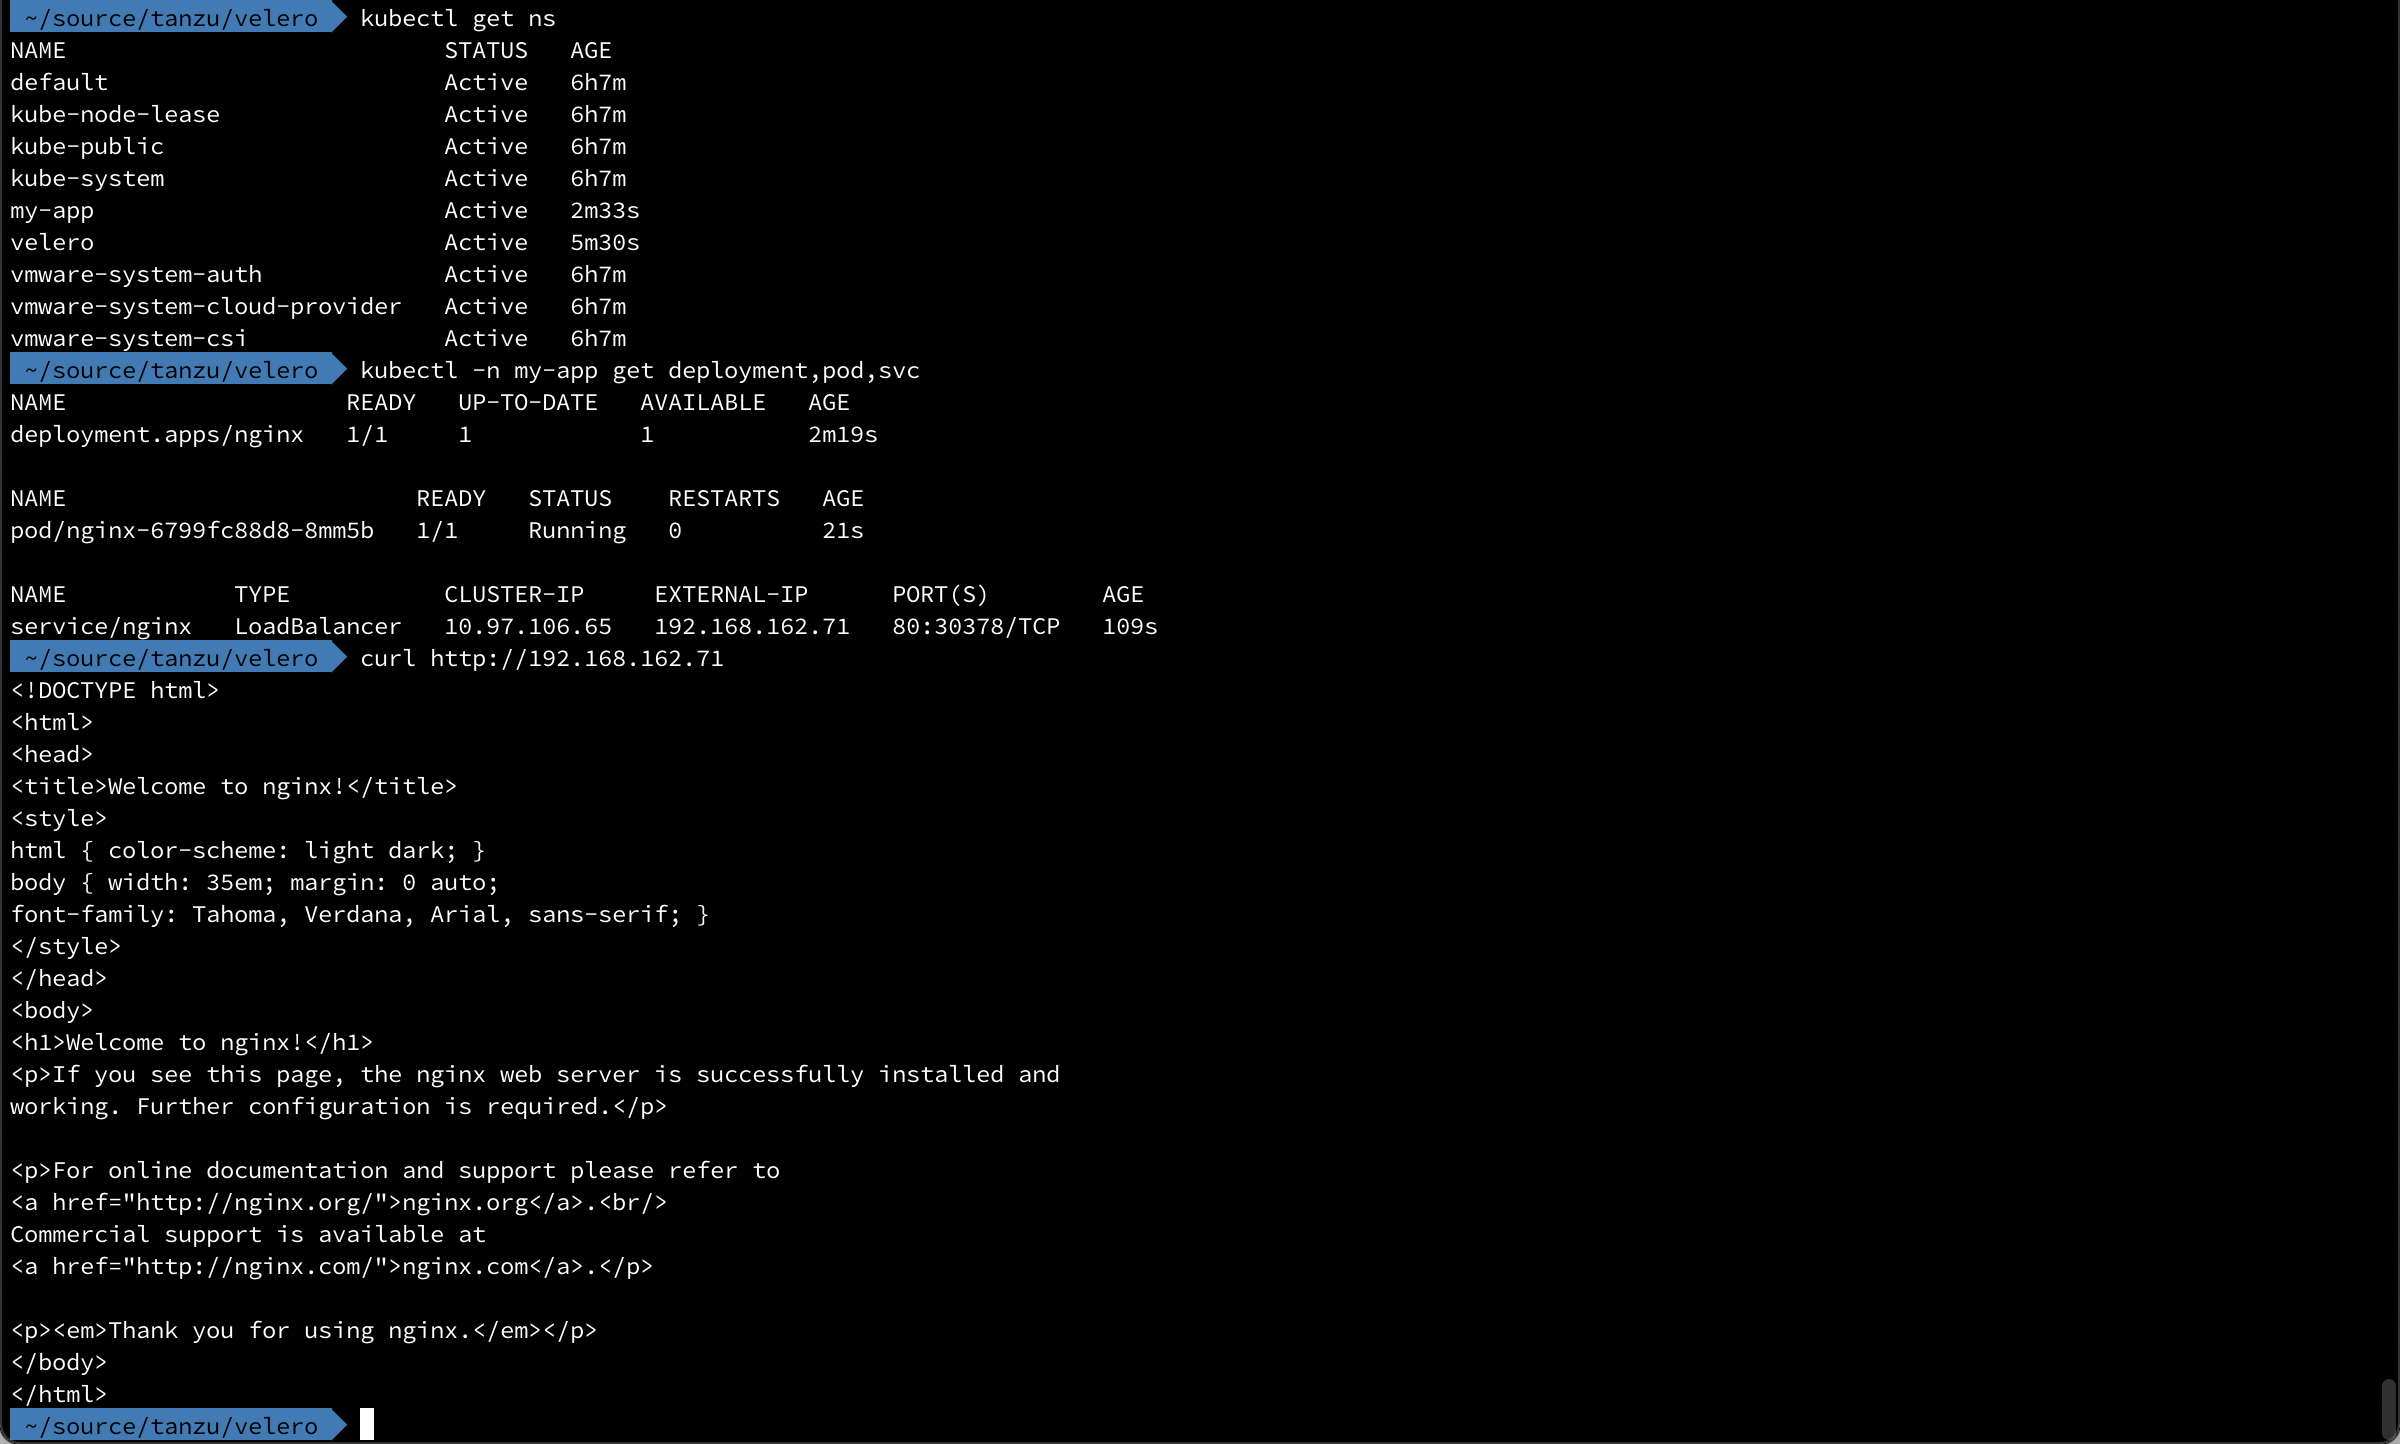
Now we'll create a backup
1velero backup create my-app-backup

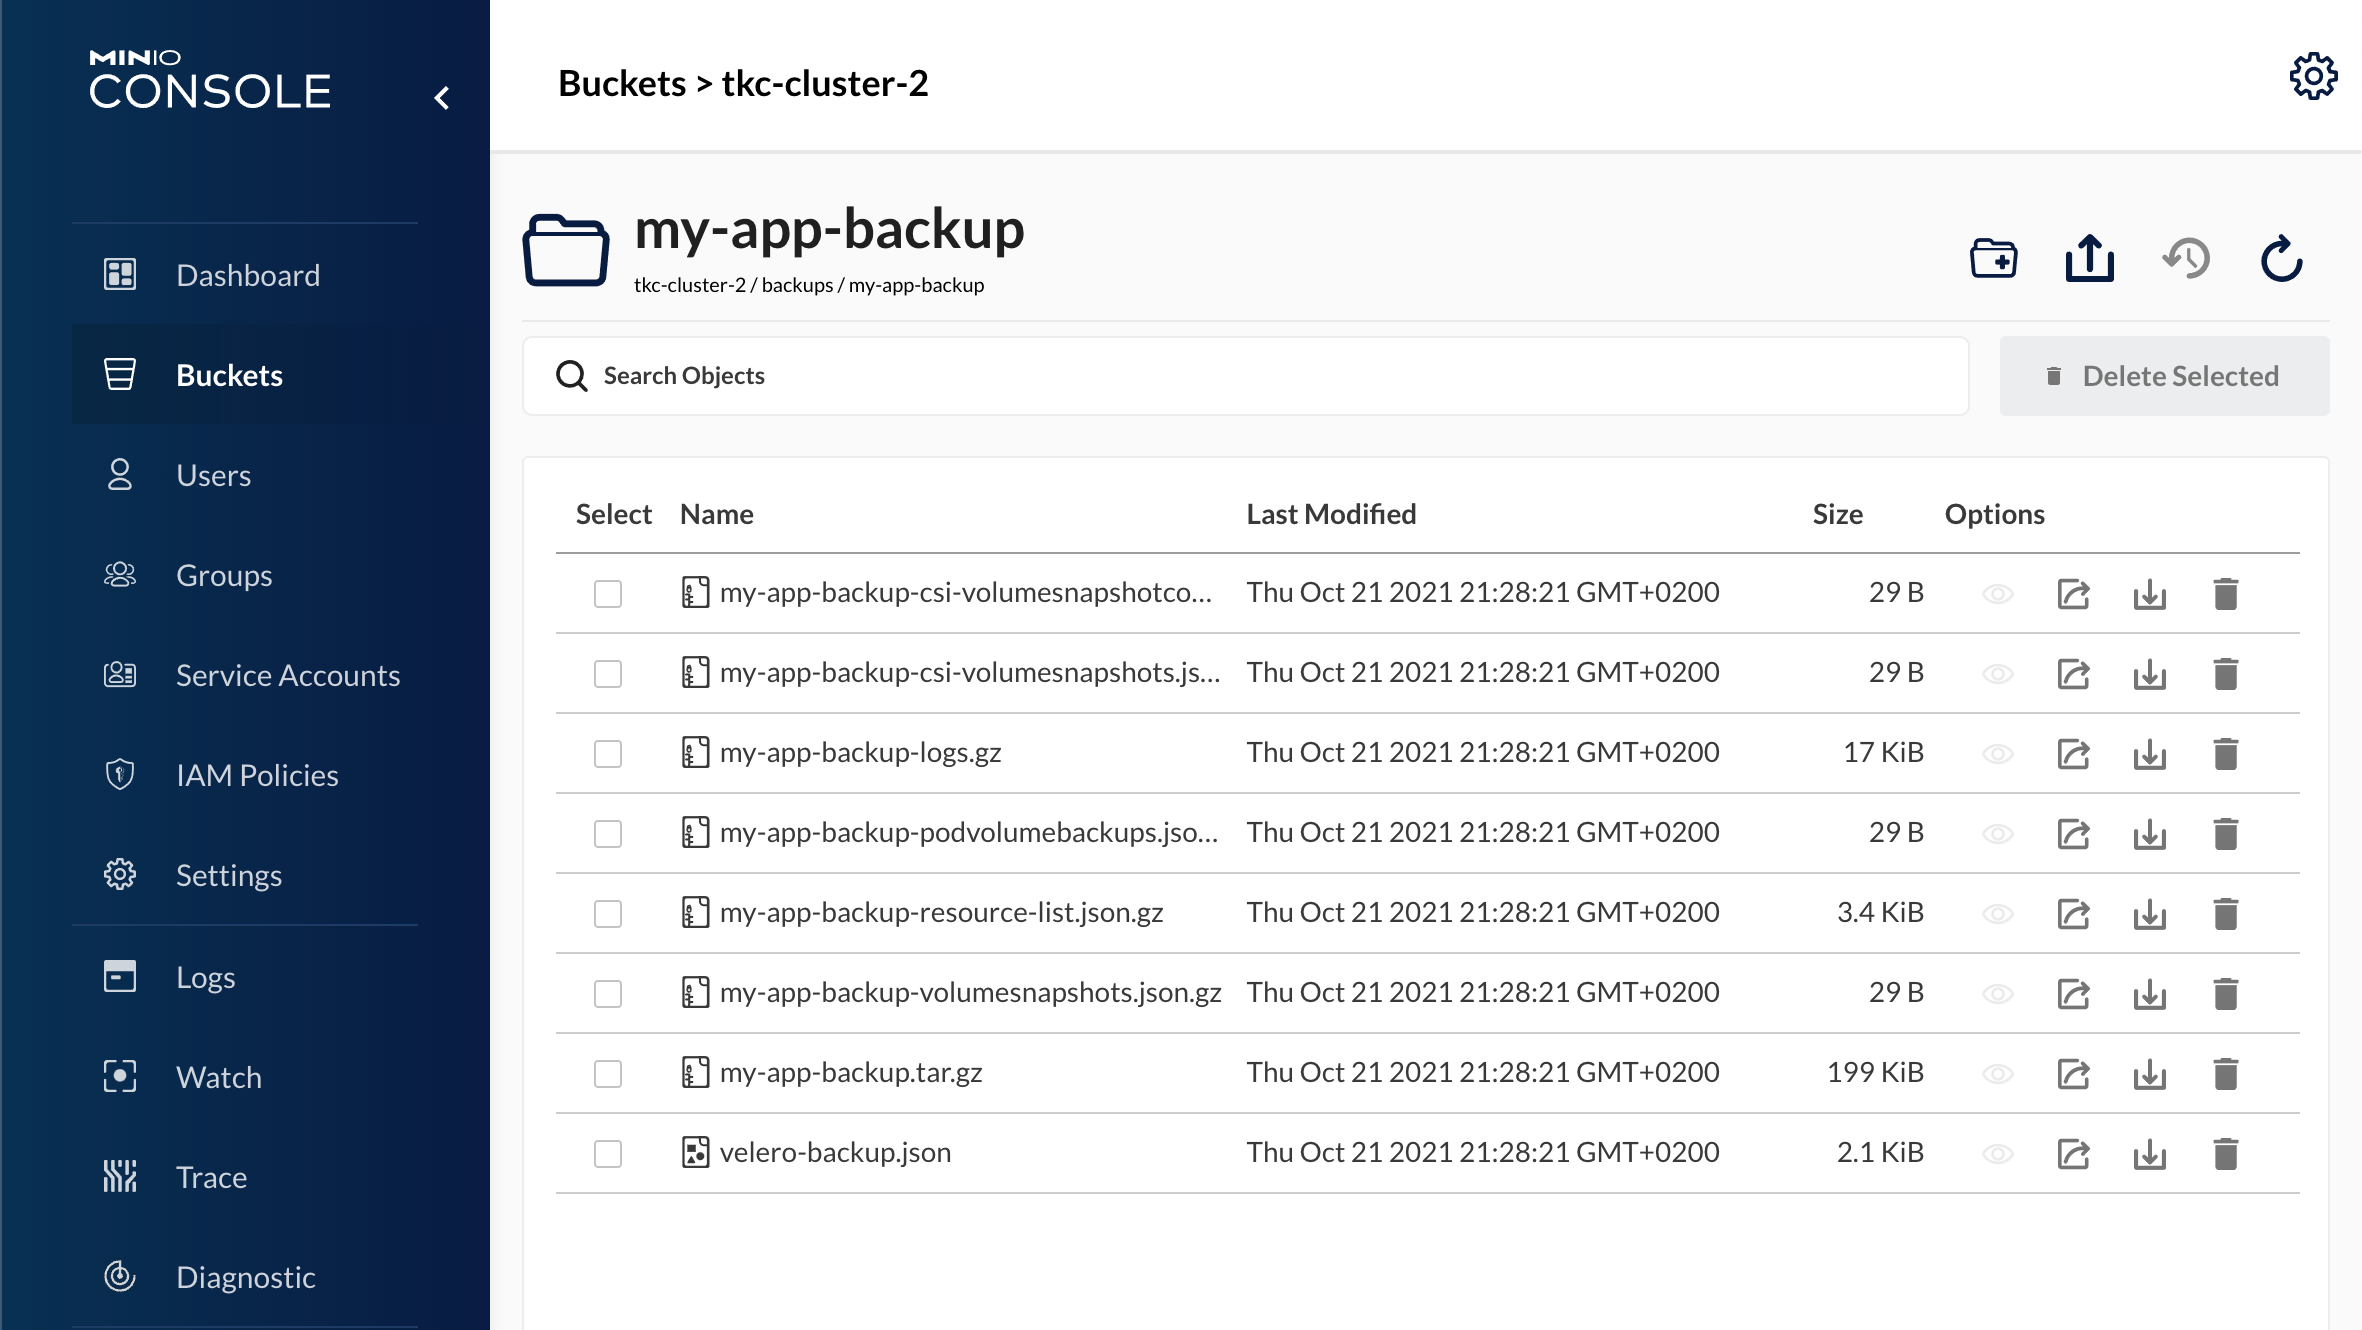
Over in our MinIO server we can check our bucket and see that our backup objects have been created there
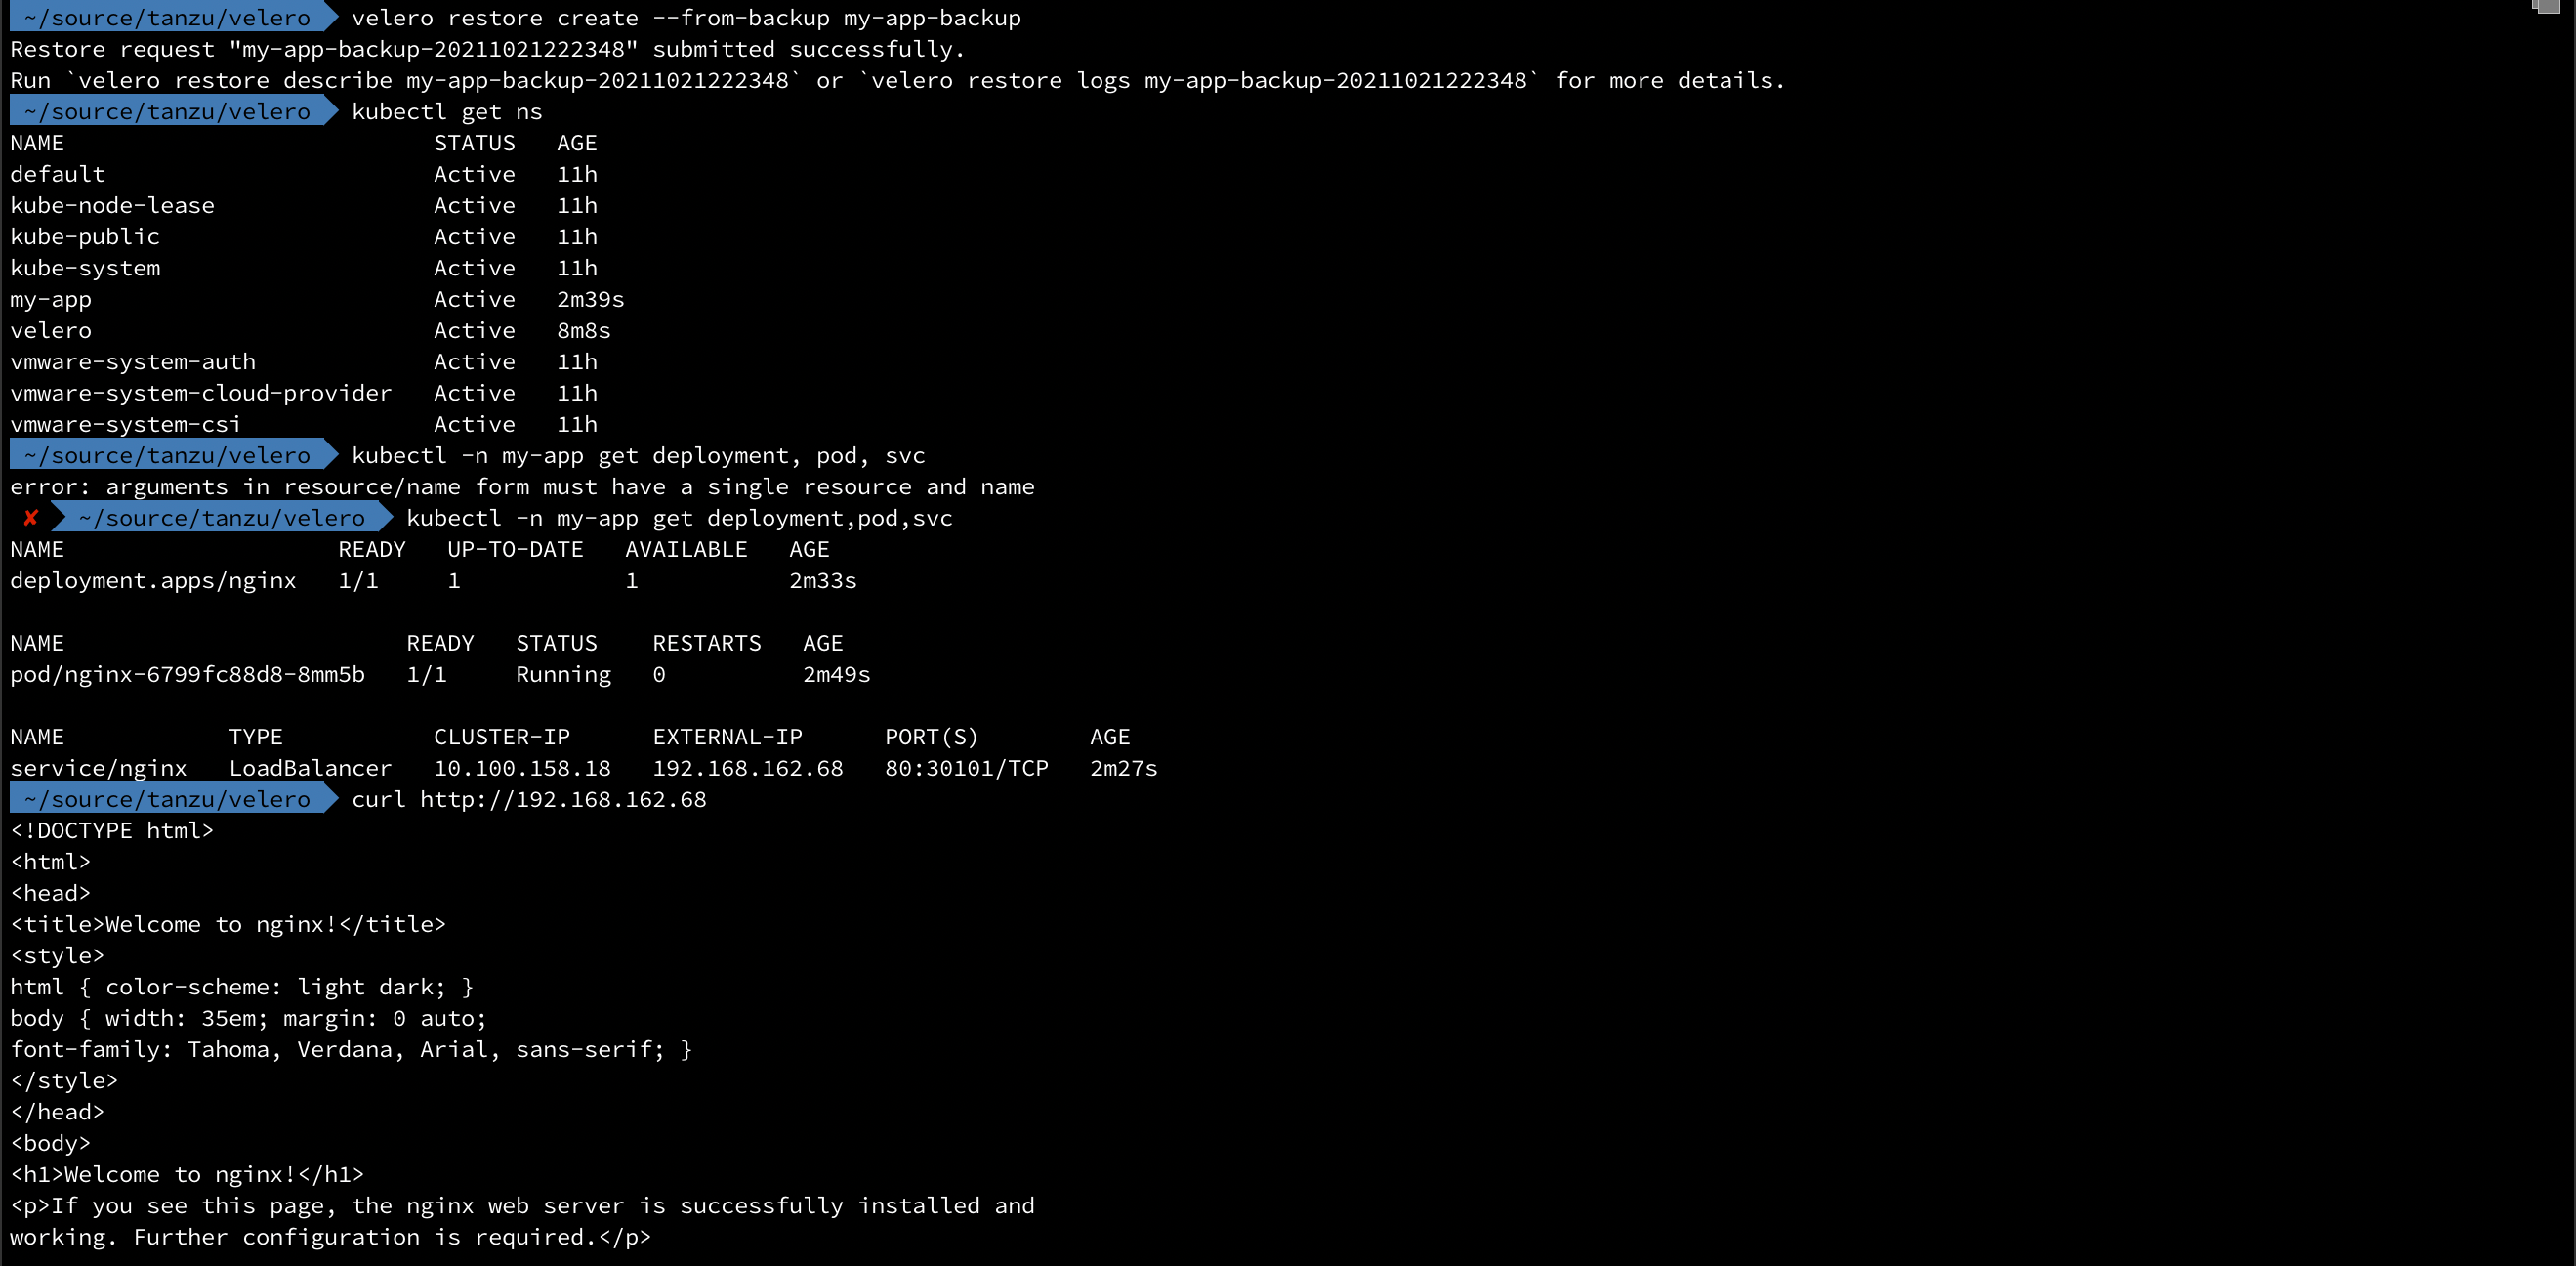
Delete app and do a restore
Now let's delete our namespace mimicing that our app has been deleted and needs to be restored
1kubectl delete ns my-app

Now let's run a restore and see if we can ge our app back
1velero restore create --from-backup my-app-backup
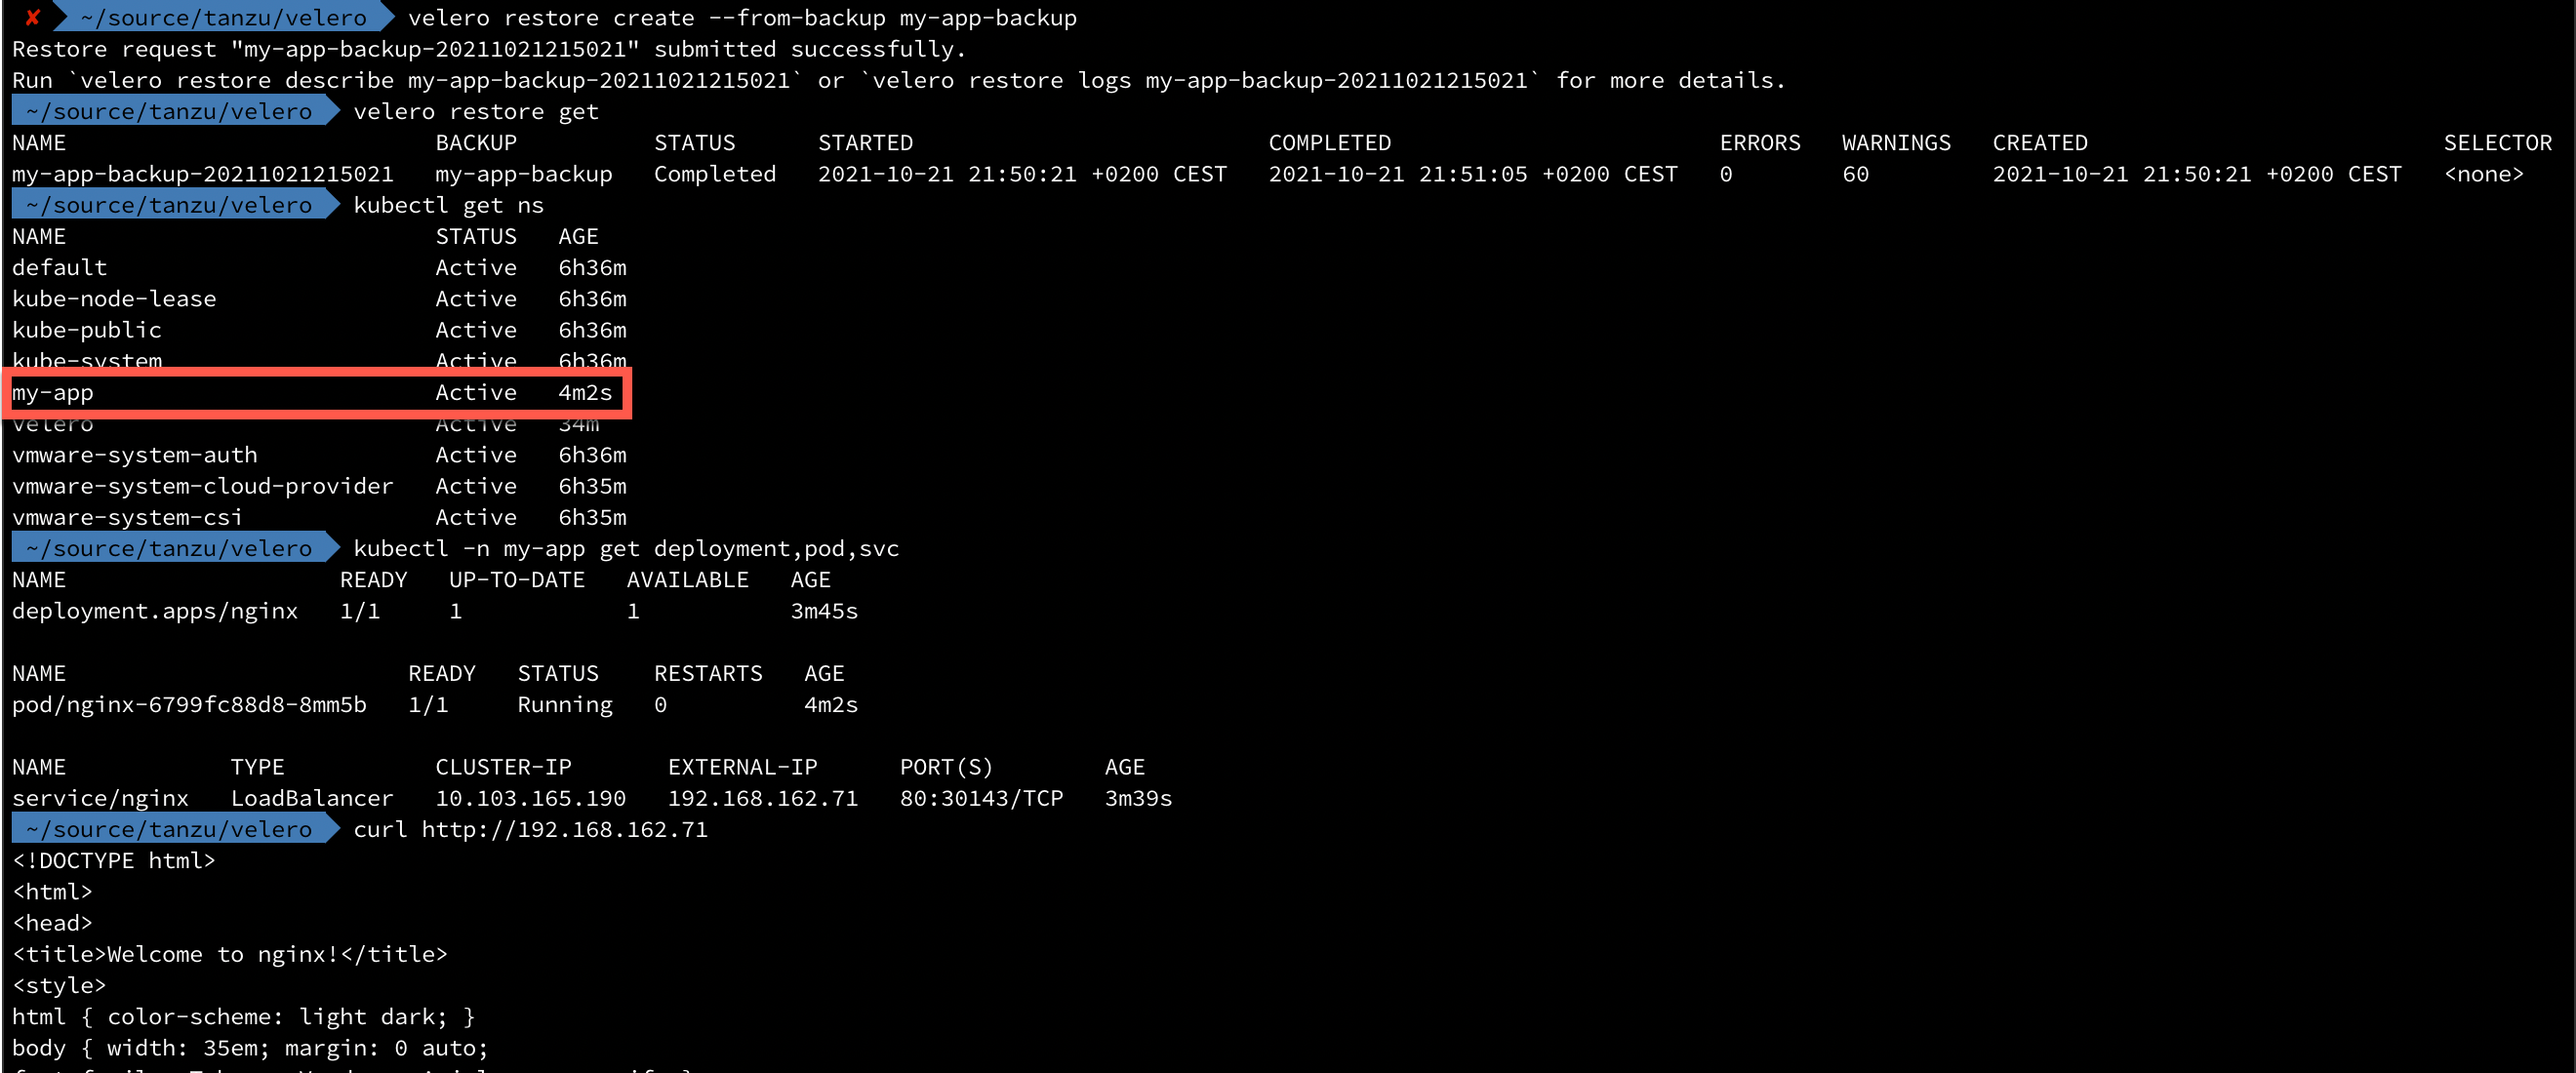
As we can see, our namespace is back and also our nginx deployment and the Load balanced service!
Ok, so what about losing an entire cluster? Or maybe we want to migrate our app to a different cluster?
Restore to different cluster
Well, let's take a look at our tkc-cluster-1 cluster

Now, if we'd want to restore our backup taken from the different cluster we'll just install Velero and point it to our MinIO bucket. In fact we can use the exact same install command as we did in the first cluster.
The cool thing now is that Velero will automatically sync our object store which we can verify by listing available backups
So, let's try a restore of that backup in this cluster!
It works!
Summary
There's a lot more to Velero (and Restic) than what we've looked at here, but hopefully this has been an intro to some of the capabilities in the product, and also shown that it's quite easy to get started with it.
Thanks for reading, please reach out if you have any questions or comments!