VMware Tanzu - Deploying the Advanced Load Balancer
Overview
I've had a couple of runs with the NSX Advanced Load Balancer (a.k.a Avi Networks) and Tanzu since vSphere 7 update 2 was released, but I thought I'd do it from scratch so I could document it for later reference. This will be quite a lengthy post with a lot of screenshots!
Update 2021-08-19: I've covered the deployment and initial configuration of the Advanced Load Balancer in this video
As a preparation for your deployment, please consult the official VMware documentation. We need to prepare a management IP address for the load balancer, and decide the network topology for the Service Engines and the Tanzu workloads.
I've used the following blog posts by Cormac Hogan and David Stamen for understanding the configuration steps. Cormac also has a good description and explanation of the network topology alternatives so be sure to have a look at that.
These two covers most of what I'm going through in this blog post, but I find that writing it up myself helps me gain a even deeper understanding. The version of the Load Balancer used in those posts is also an earlier version than what's available at the moment so the screenshots and configuration menus differ slightly. I'm using 20.1.5 in this blog post.
Note that as the time of writing this article the officially supported version of the Advanced Load Balancer is 20.1.3. Check the Interoperability matrix for details
Deployment and configuration of the AVI controller
After downloading the appliance we'll import it to vCenter and deploy it as any other OVF template. I won't go through the details on that, besides the standard compute and datastore placement details we need to fill in the management network details (IP, subnet mask and gateway)
After the import has finished we're ready to power on the appliance. Note that it default comes with 8 vCPUs configured, which is too much in my environment so I had to scale it down to 4. This makes a substanially larger footprint in your environment compared to the HAProxy alternative, but still probably less than the full-fledged NSX-T option
Initial configuration
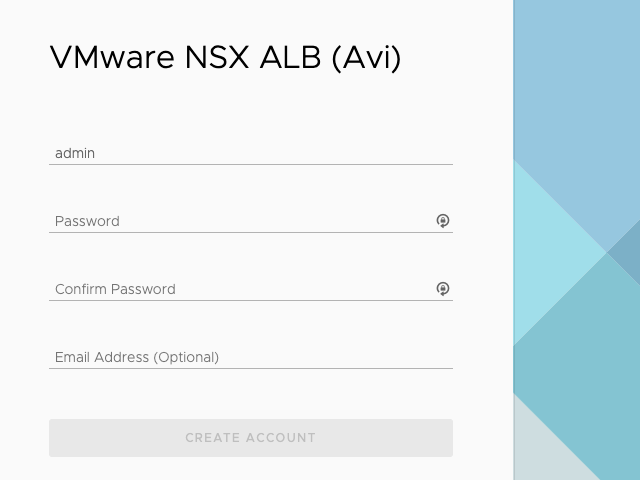
When accessing the administration web interface we first need to decide on a password for the administrator account
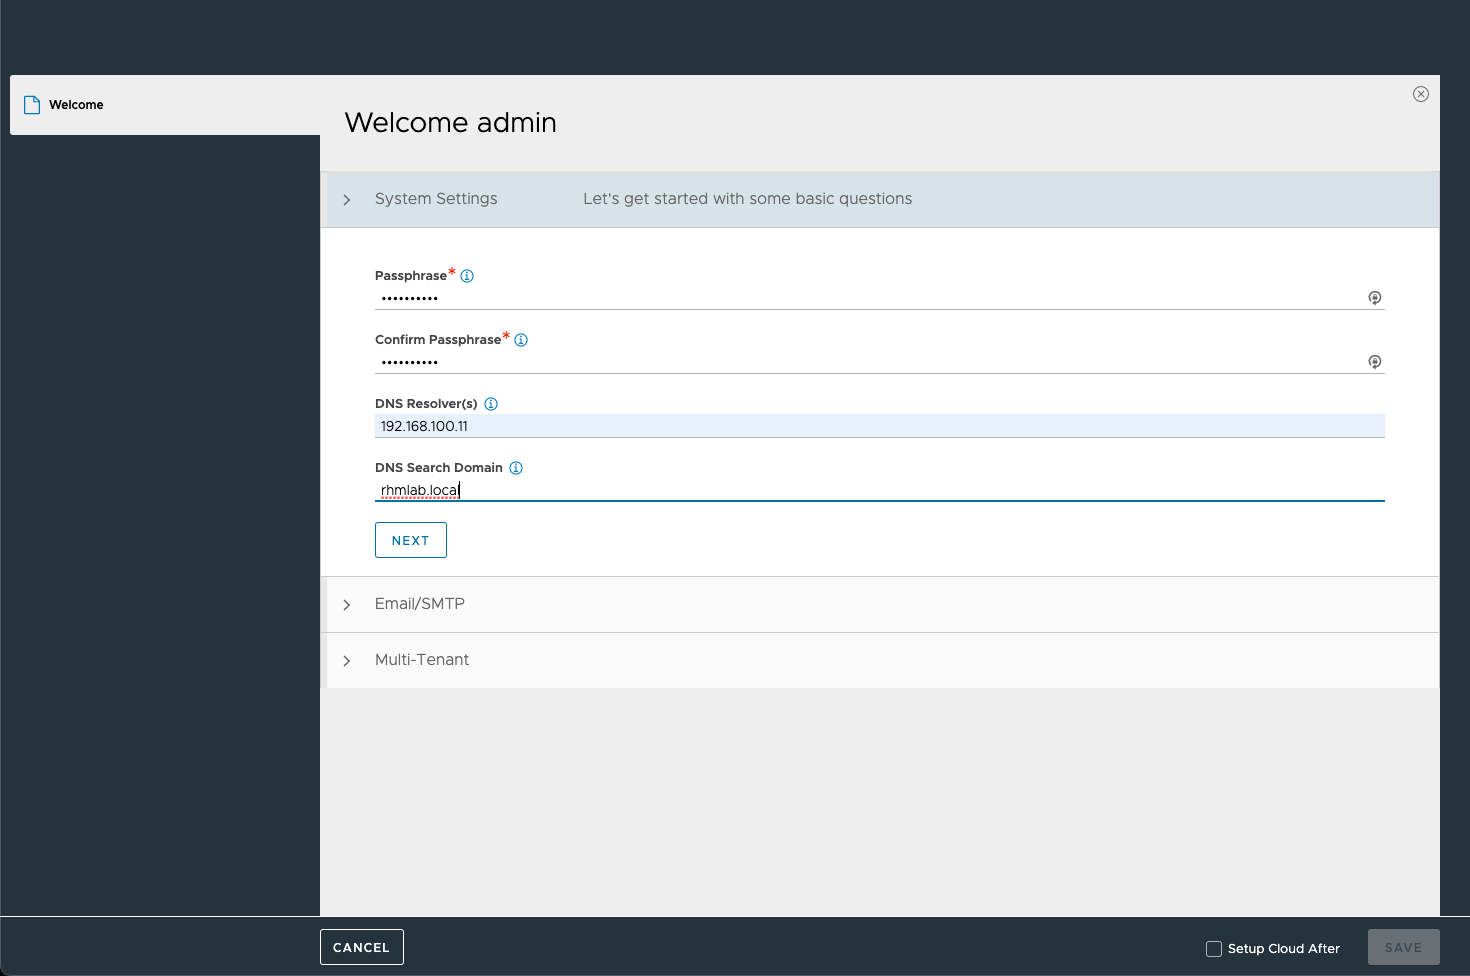
The initial system settings allows us to specify a passphrase (used export of config and backup) as well as the DNS servers and search domains
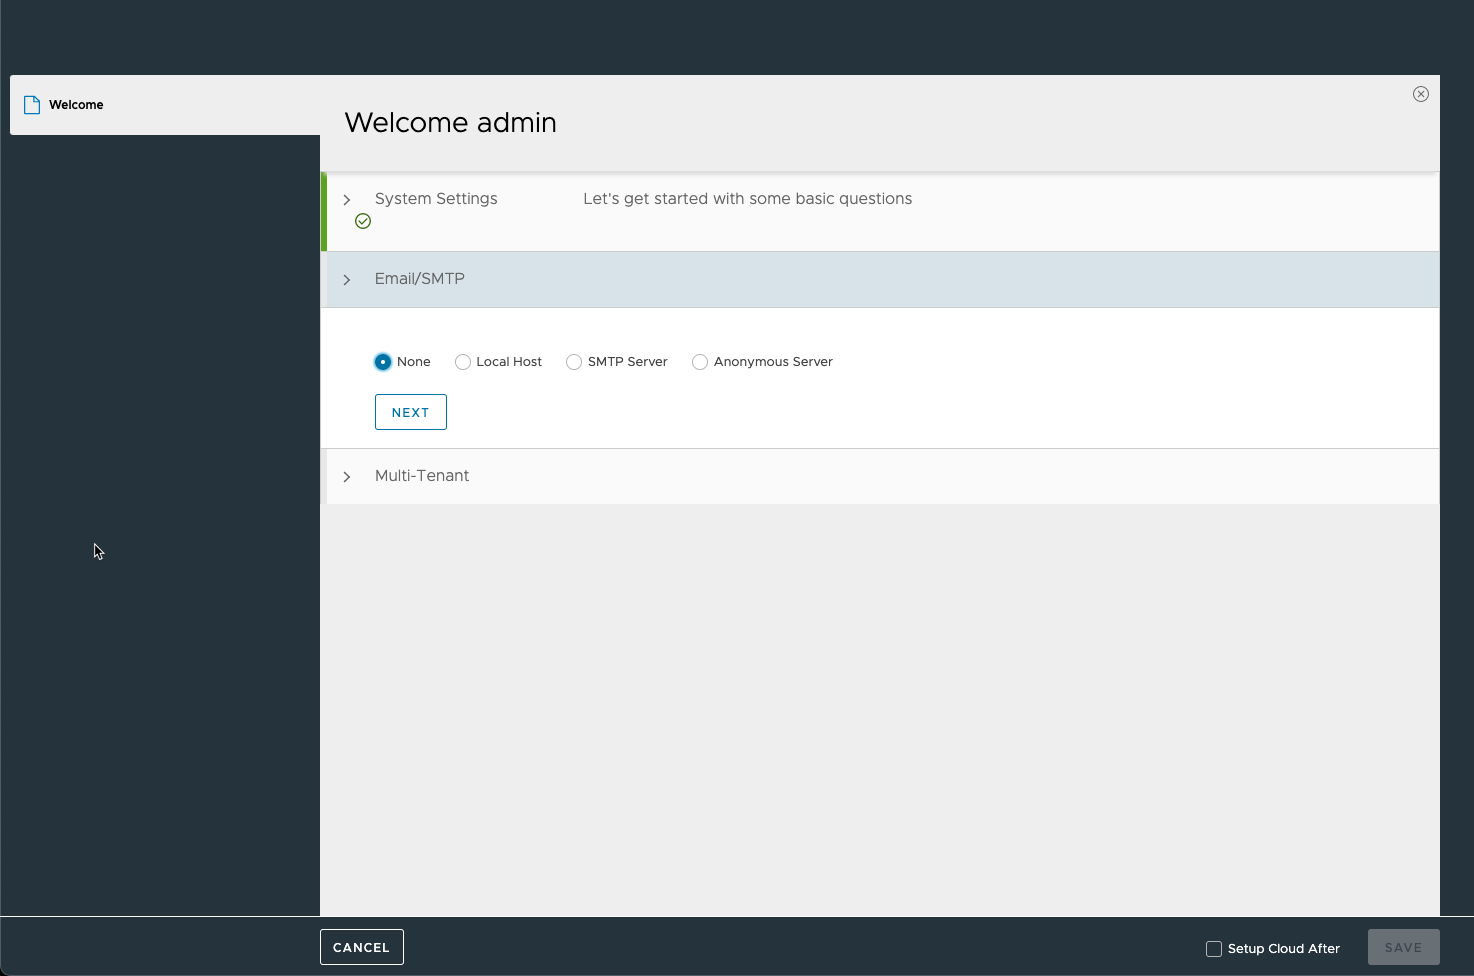
Optionally, configure SMTP
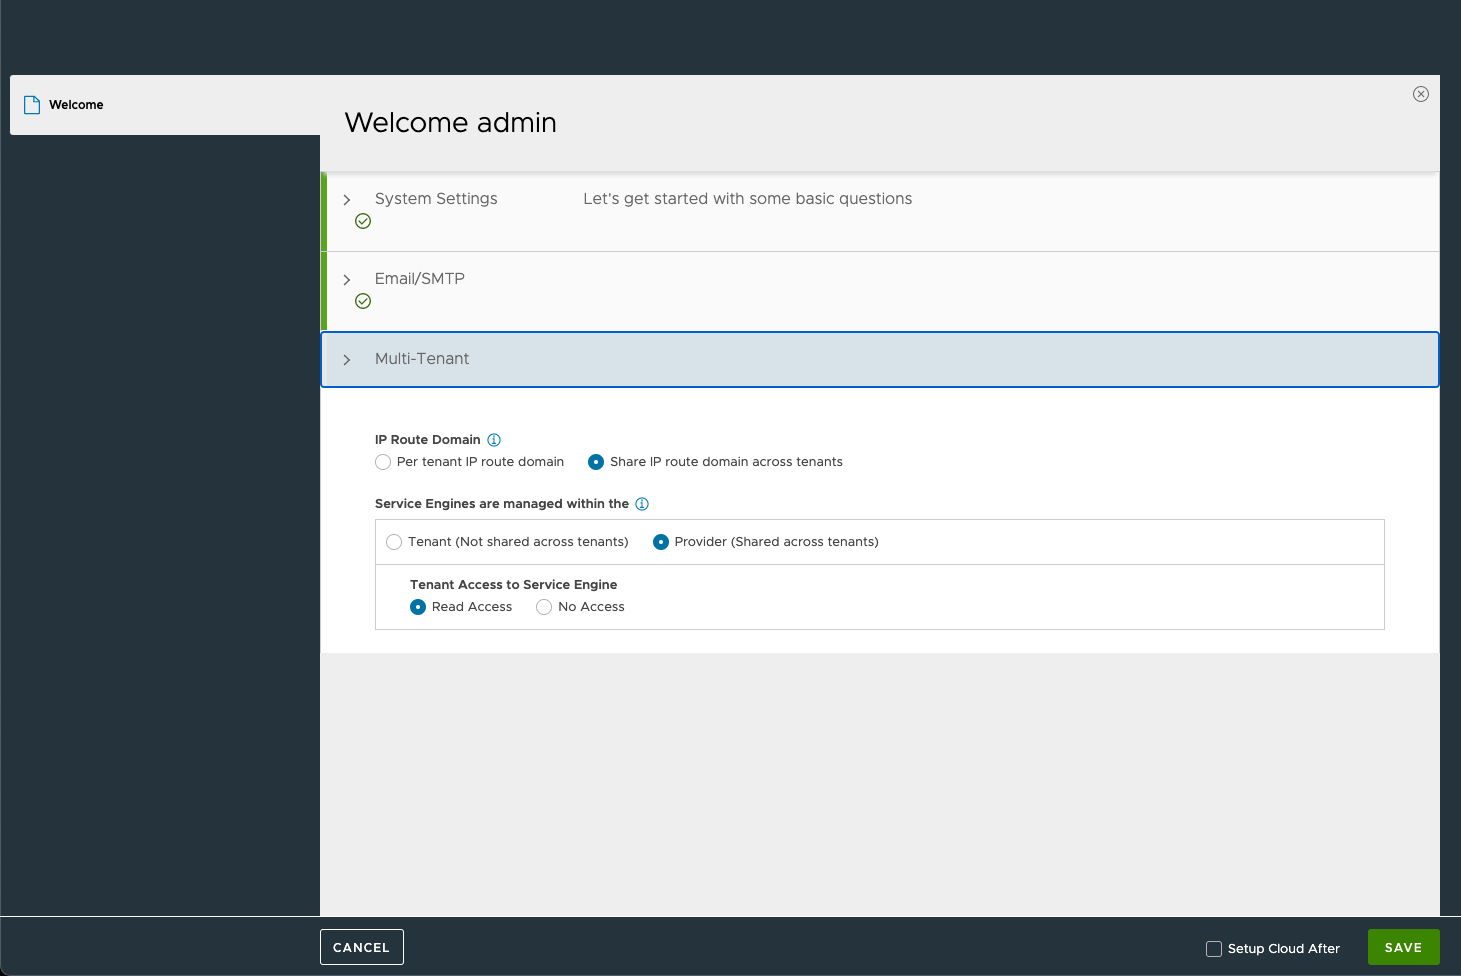
And configure Multi-tenancy. In my environment I'm leaving the defaults.
Before hitting Save we'll check the Setup Cloud after box to configure the integration with vCenter. If this is not checked you need to go to the Infrastructure menu and select the Clouds tab to configure the integration.

Cloud config
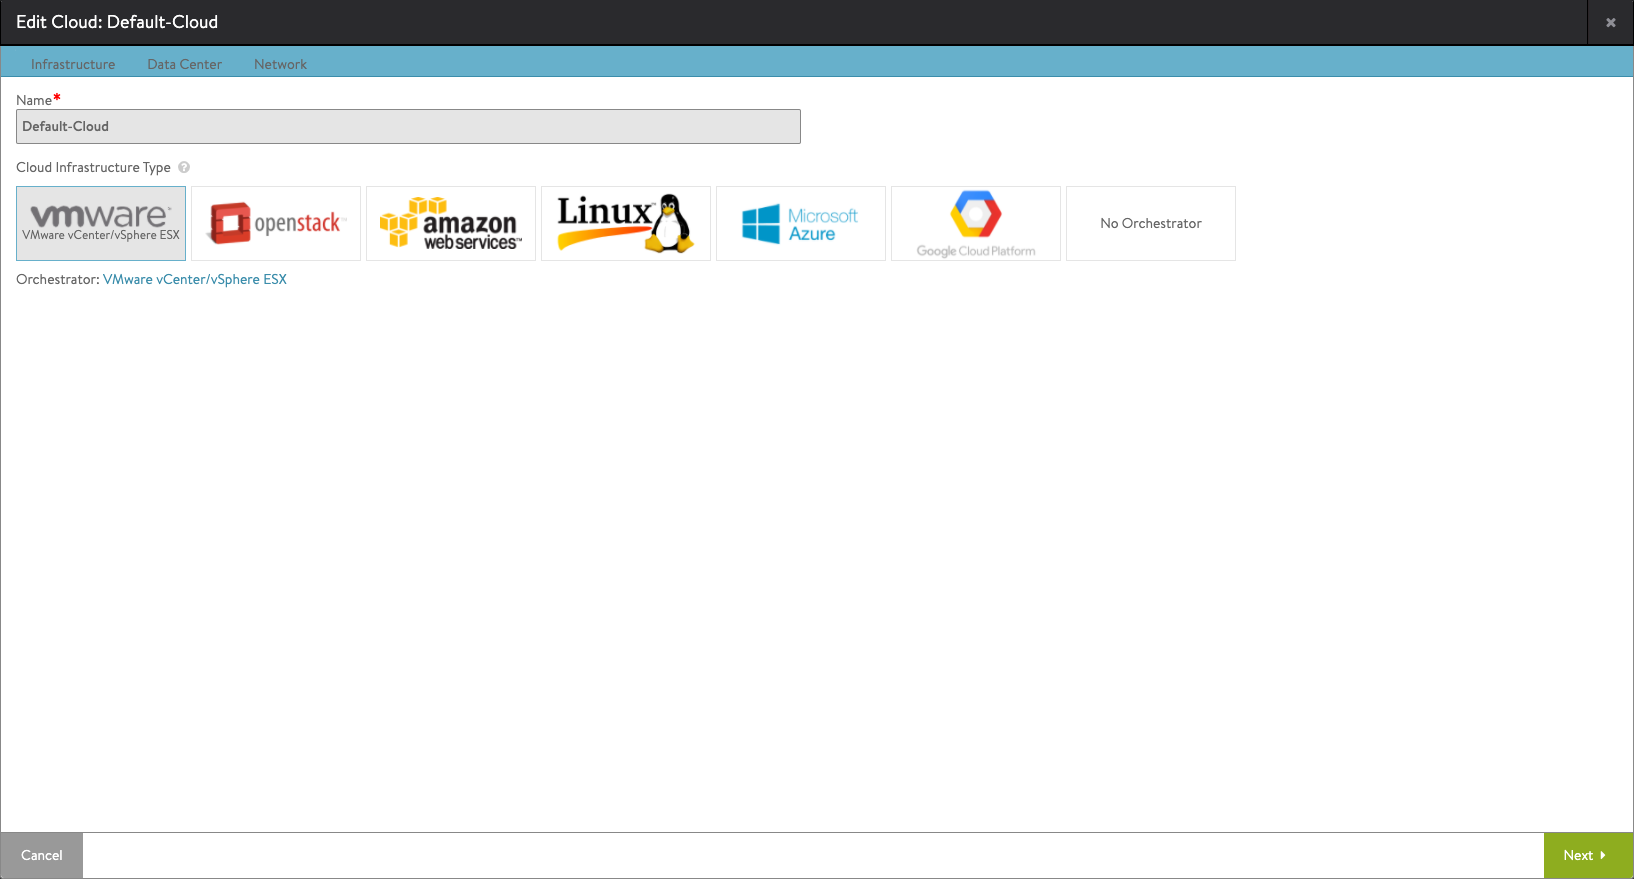
In the Cloud config wizard we'll select VMware vCenter as the Orchestrator/Cloud Infrastructure type. These settings are used for the Service Engines and their placement
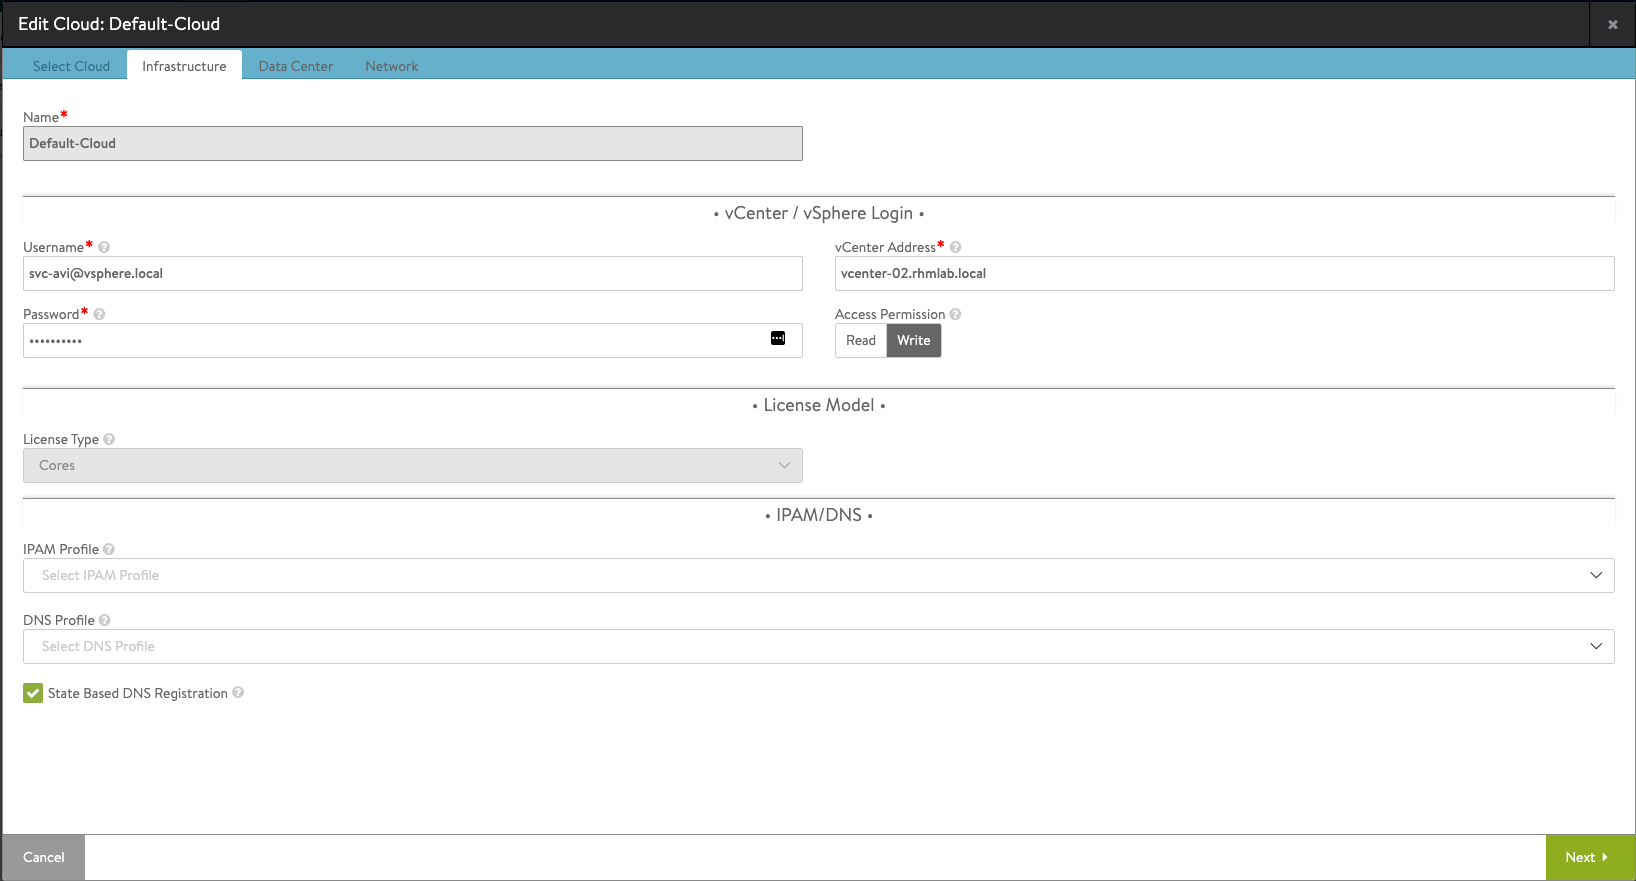
On the Infrastructure tab we'll add the details for the vCenter connection. I'm leaving the IPAM and DNS profile settings blank for the time being as we'll configure these later
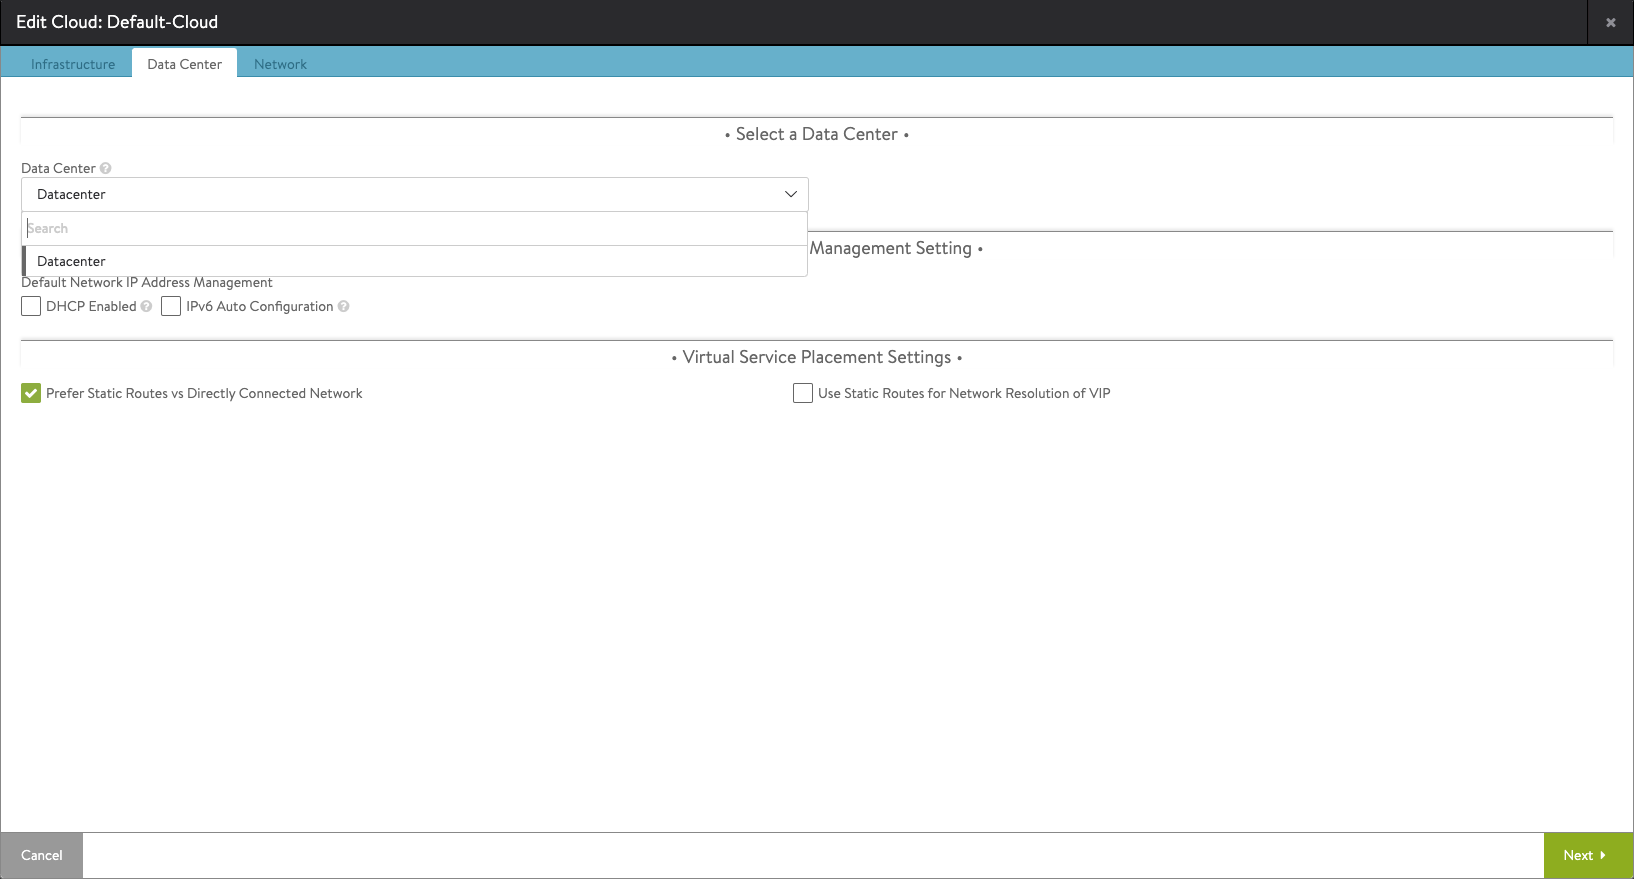
On the Data Center tab we'll select the Data Center where we want to integrate with as well as select the management settings. I'm not selecting DHCP as we'll use static addresses in this case. Note that I'm checking the "Prefer Static Routes vs Directly Connected Network" setting which we'll see later on where we define a static route for our SE's
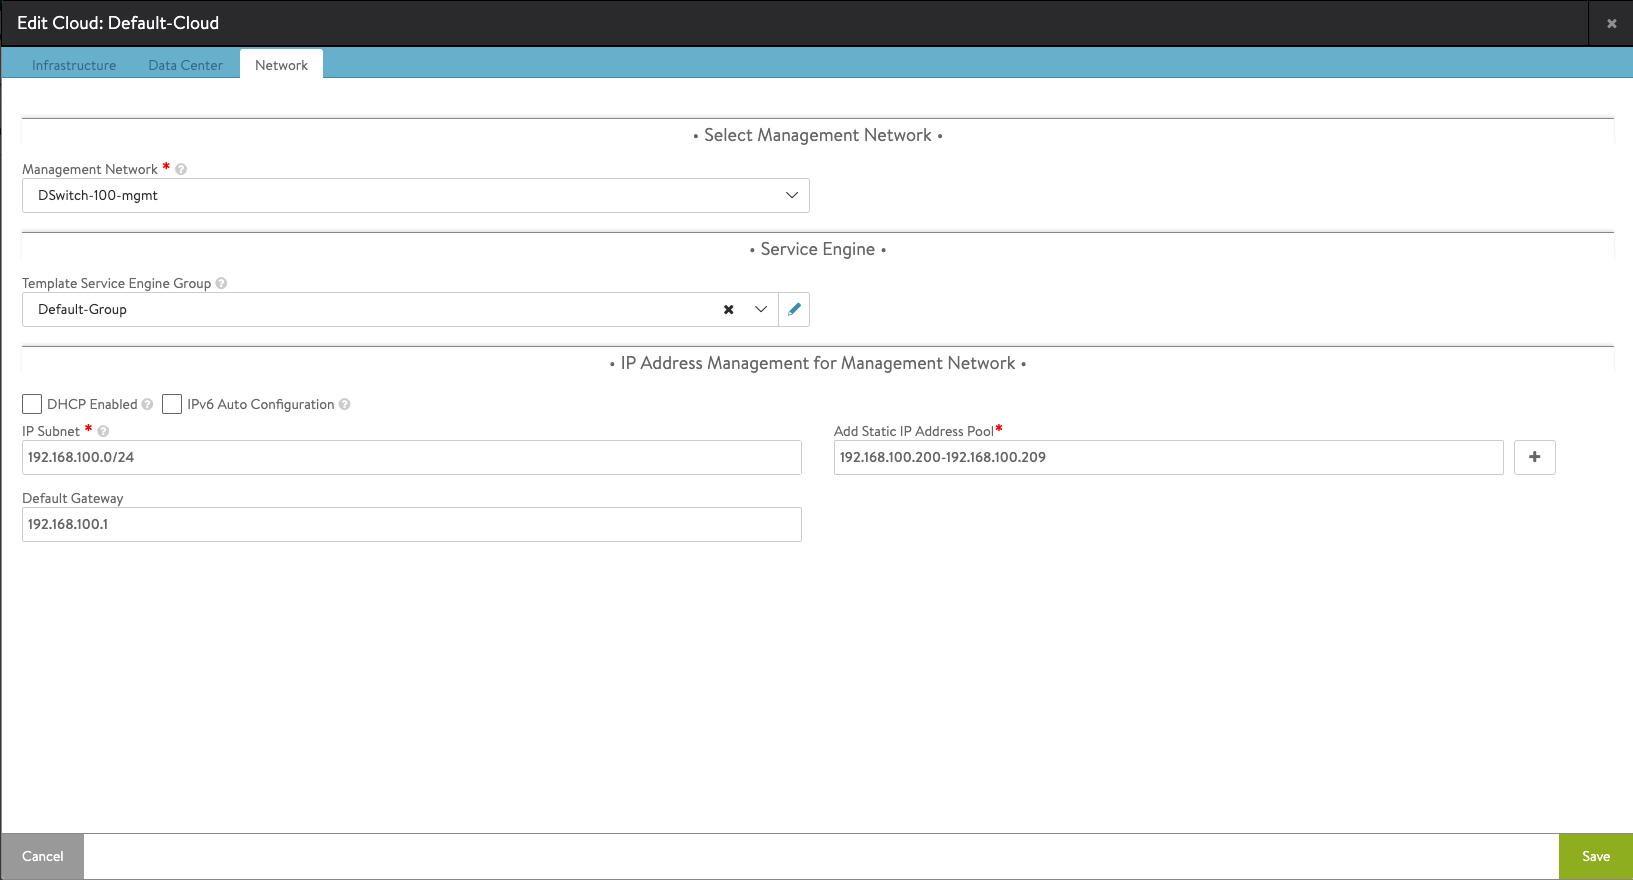
Finally the Network tab where we add the details for our management network. Note that I'm adding a static IP address pool for the SE's
After saving out of the wizard the Default-cloud should be created and with a Success/Green status (note that it might take a minute or two before it changes status)

License
Next step per the VMware documentation is to assign the license for the ALB. If not specifying a license the Load Balancer will function with an Evaluation license.
Certificate
Next we'll remove the default certificate and assign a new certificate. Note that I'm still using self-signed certificates, but we could have imported a CA signed certificate if we wanted.
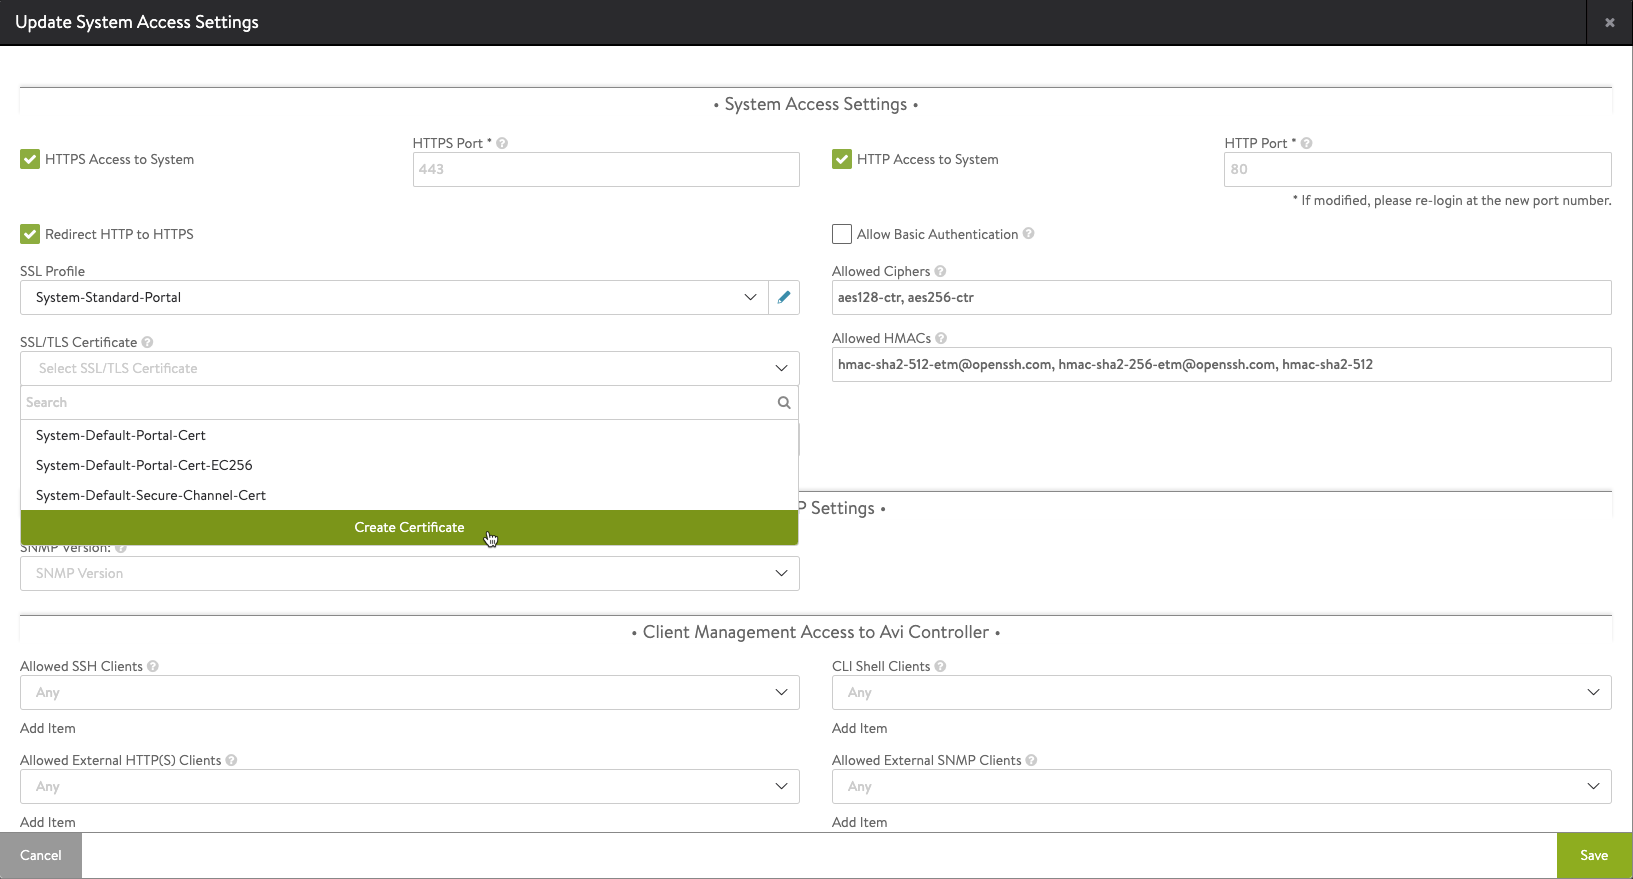
We'll go to Administration->Settings->Access Settings and enter the edit mode. We'll remove the existing SSL certificate and select to Create Certificate
We'll fill in the details for the new certificate, note that I'm adding the IP of the load balancer as a SAN
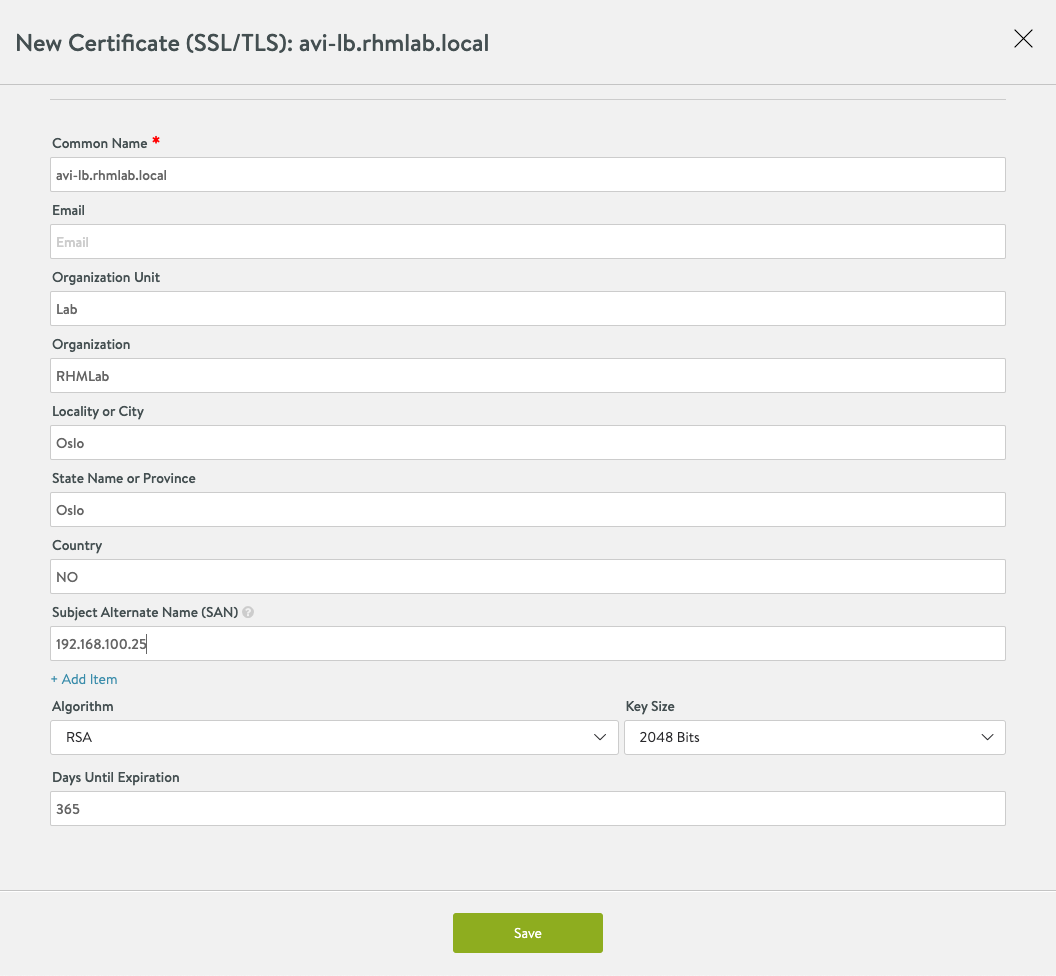
Note that after we hit save the controller will change the certificate and restart the web interface. You might need to refresh the page and accept the new certificate to continue.
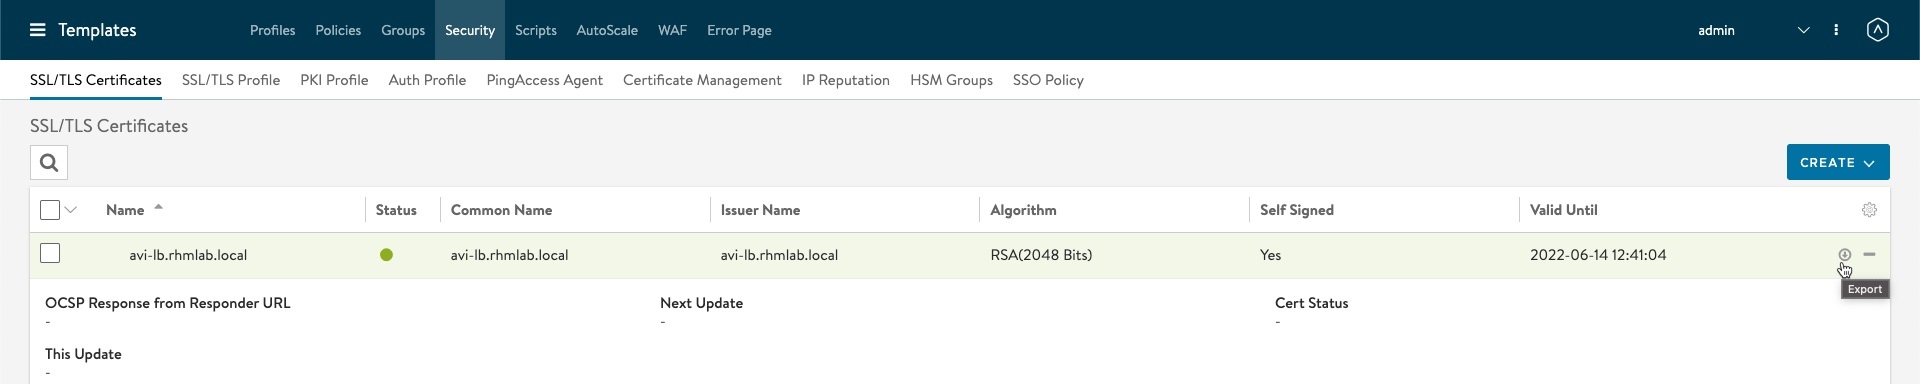
After the certificate has been created we'll download the cert as we need it later when configuring workload management in vSphere.
We'll go to the Templates menu, and then select Security and SSL/TLS certificates, find the newly created certificate and hit the Export button/link
Service Engine Group
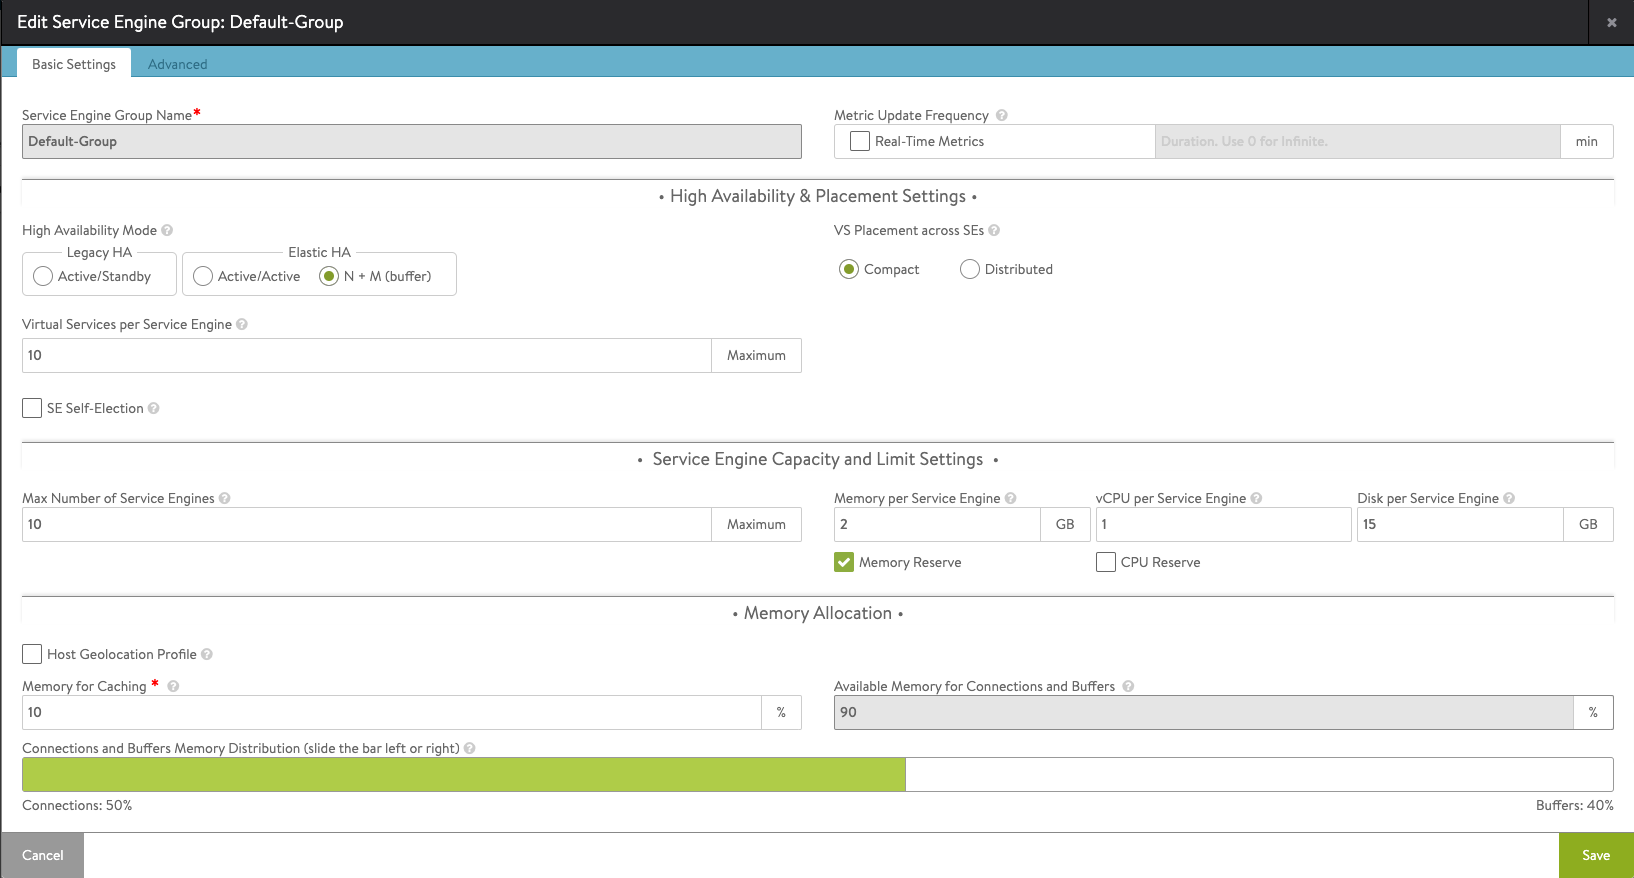
The Service Engine Group is where we define how our Service Engines will be deployed and configured. The Service Engines are what actually does the Load balancing work, and they will be deployed as VMs in the environment. All of this will happen automatically based on the settings of the Service Engine Group which can be found in the Infrastructure menu and the Service Engine Group page.
The Basic settings should be fine for most, but note that depending on your ALB license you might not be able/allowed to use the default HA settings of N+M. The essentials license allows the Active/Standby functionality.
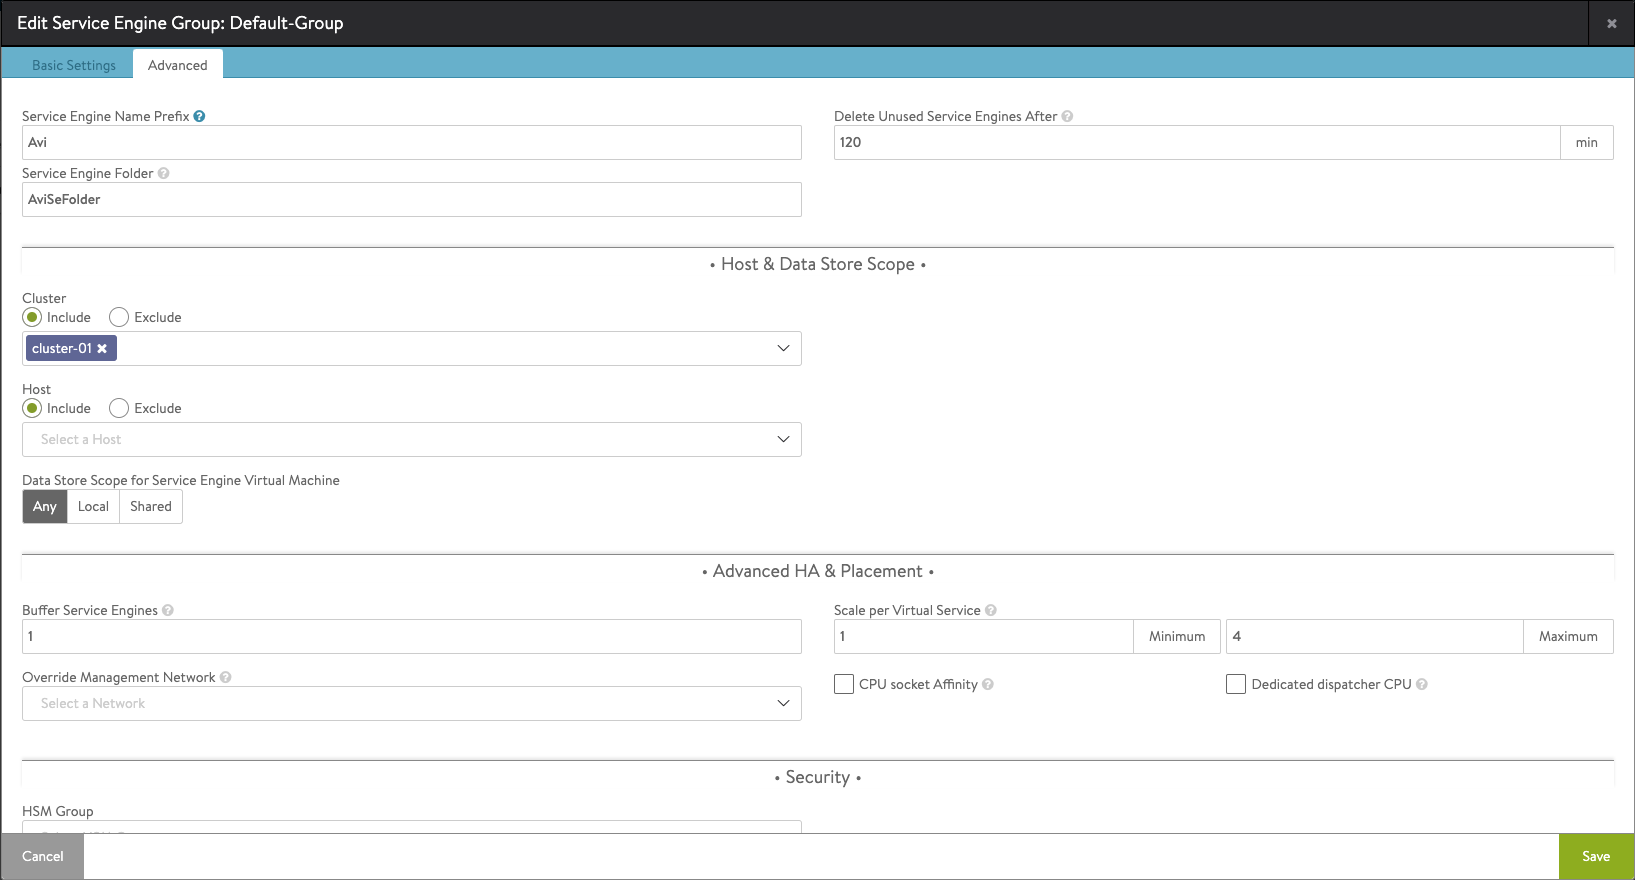
In the Advanced settings we can specify the vCenter host cluster to use for the Service Engines and optionally the datastore to use, as well as other Advanced settings. In my deployment I'll only set/change the Cluster setting
Network config
Now of to the Network settings. The network settings for Tanzu can be quite confusing and differs based on the Network topology selected. As for the initial deployment with HAProxy we can select to either use two networks, management and a combined workload and frontend/data network, or three networks with separate management, workload and data/frontend networks. Either way they must all be routable.
What the ALB brings here when comparing with HAProxy is a somewhat easier configuration of it. At least we get a visibility and a UI behind it which we wouldn't with HAProxy.
We have already configured the Management network for the Service Engines, with the range of 10 addresses in my case. The network left to configure are the frontend/data network where the actual Load Balancer/Virtual IP addresses (VIPs) will be placed. Meaning that every Service engine will have IP addresses on both the Managment network as well as the frontend/data network
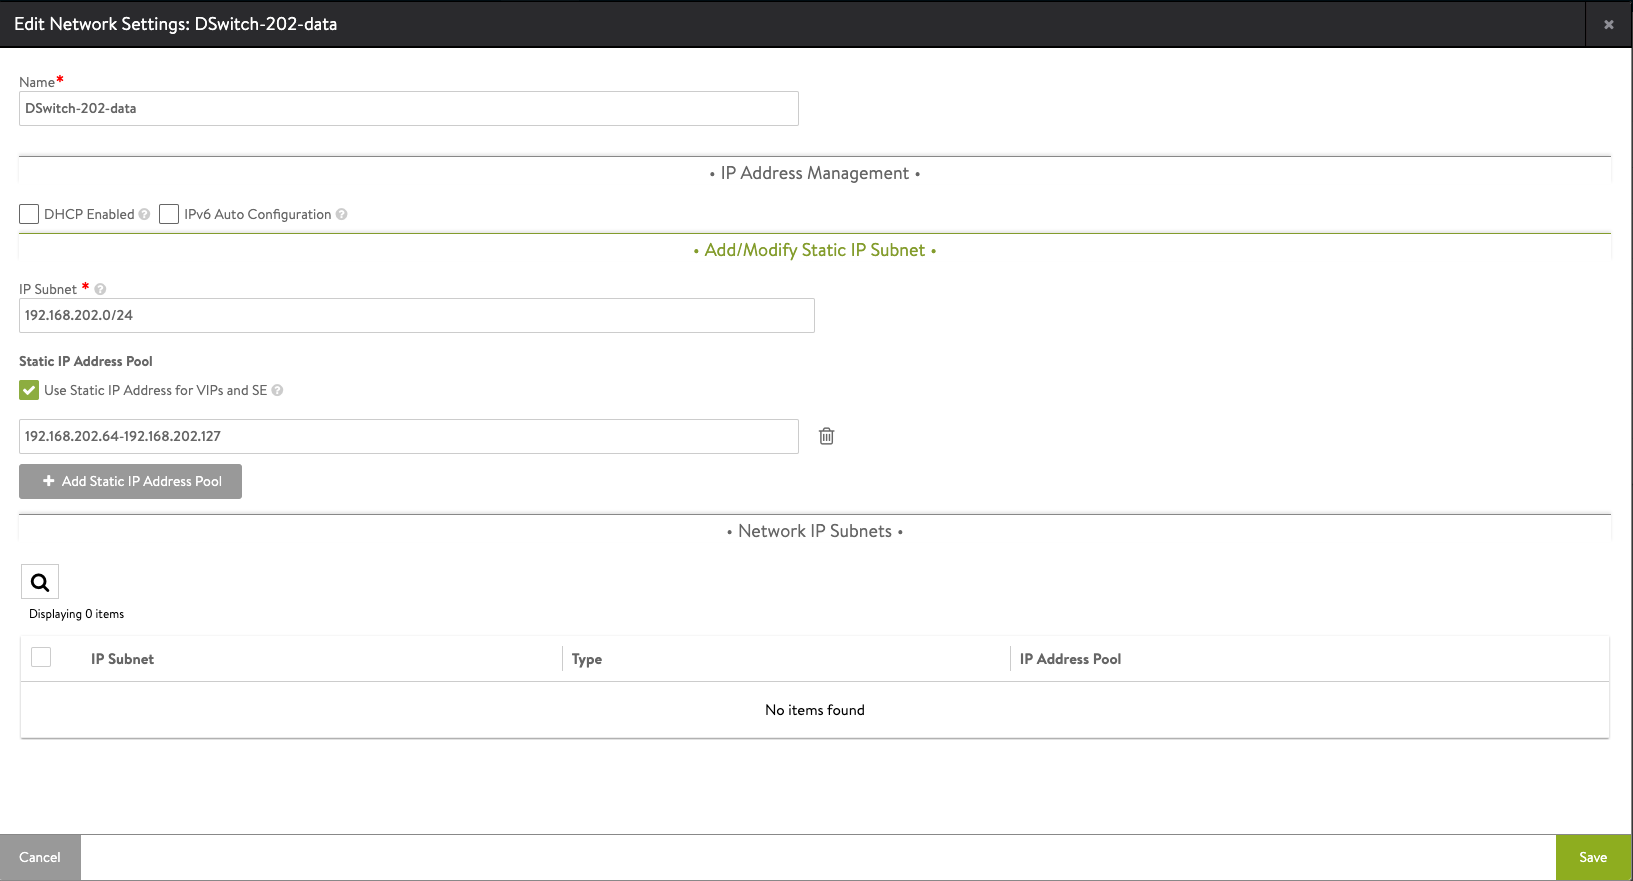
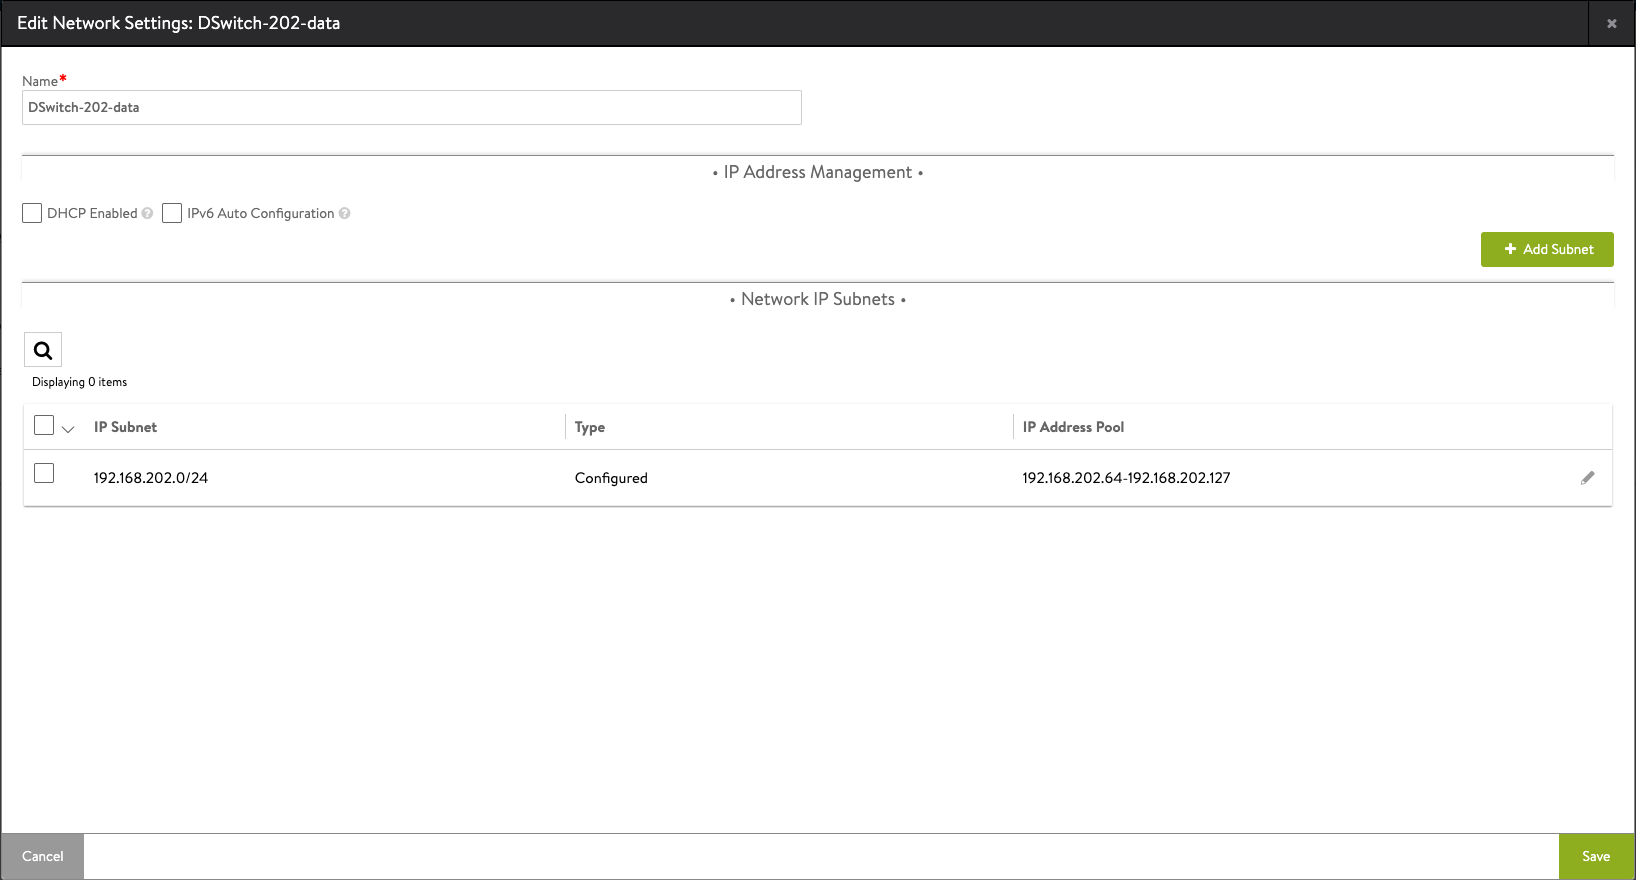
We'll go in to edit mode for our frontend/data network and add in a subnet and a static IP address pool. Note that if you have DHCP enabled for the cluster you can use that.
Also note that the IP pool must be a CIDR range, in my case I've specified the range to be .64-.127
Static Route
Now we've come to the part where we add in the Static Route between the frontend/data network and the Workload network. This is for the VIPs to reach the workload network(s)
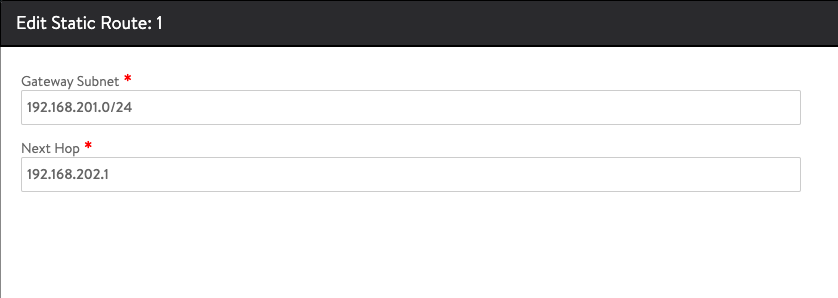
If you have multiple workload networks you can configure multiple routes here
IPAM and DNS profiles
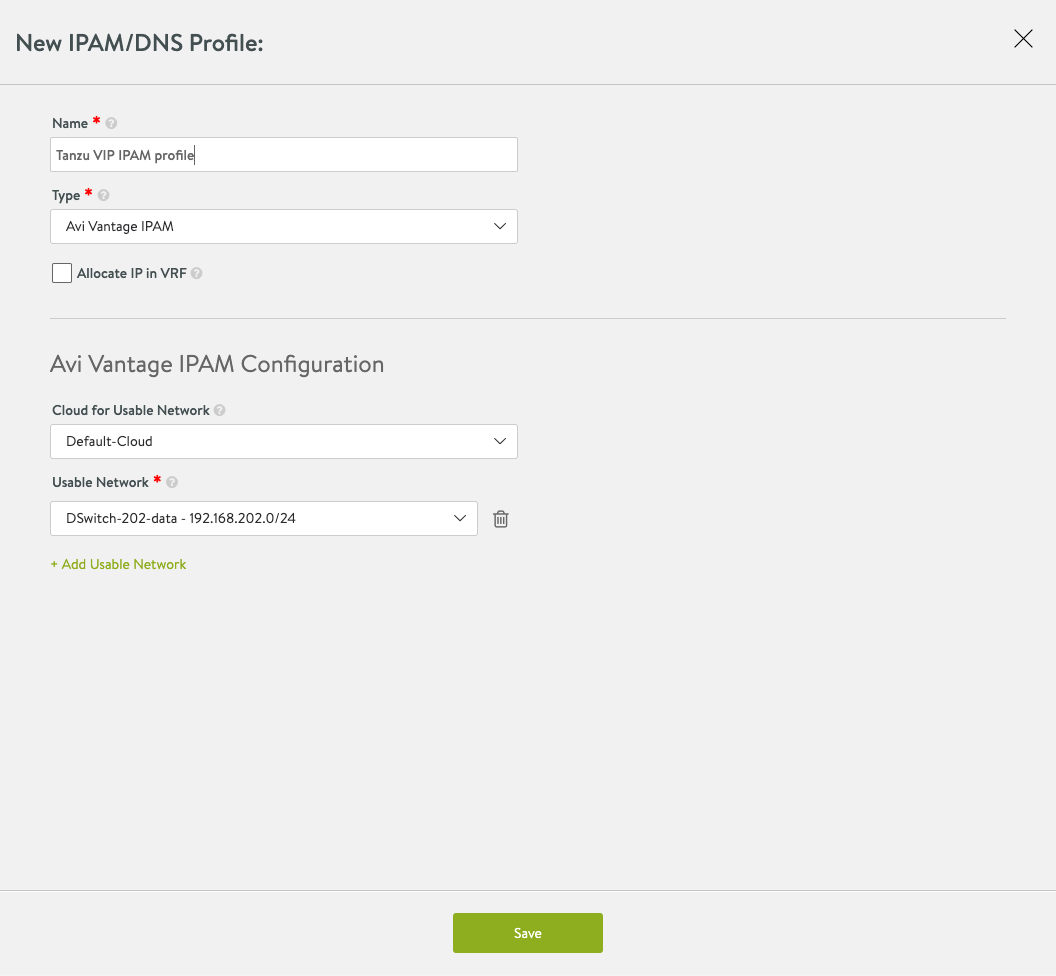
Finally we'll configure profiles for IPAM which will be used by our Service Engines

The IPAM profile will be used for assigning IP addresses for the VIPs
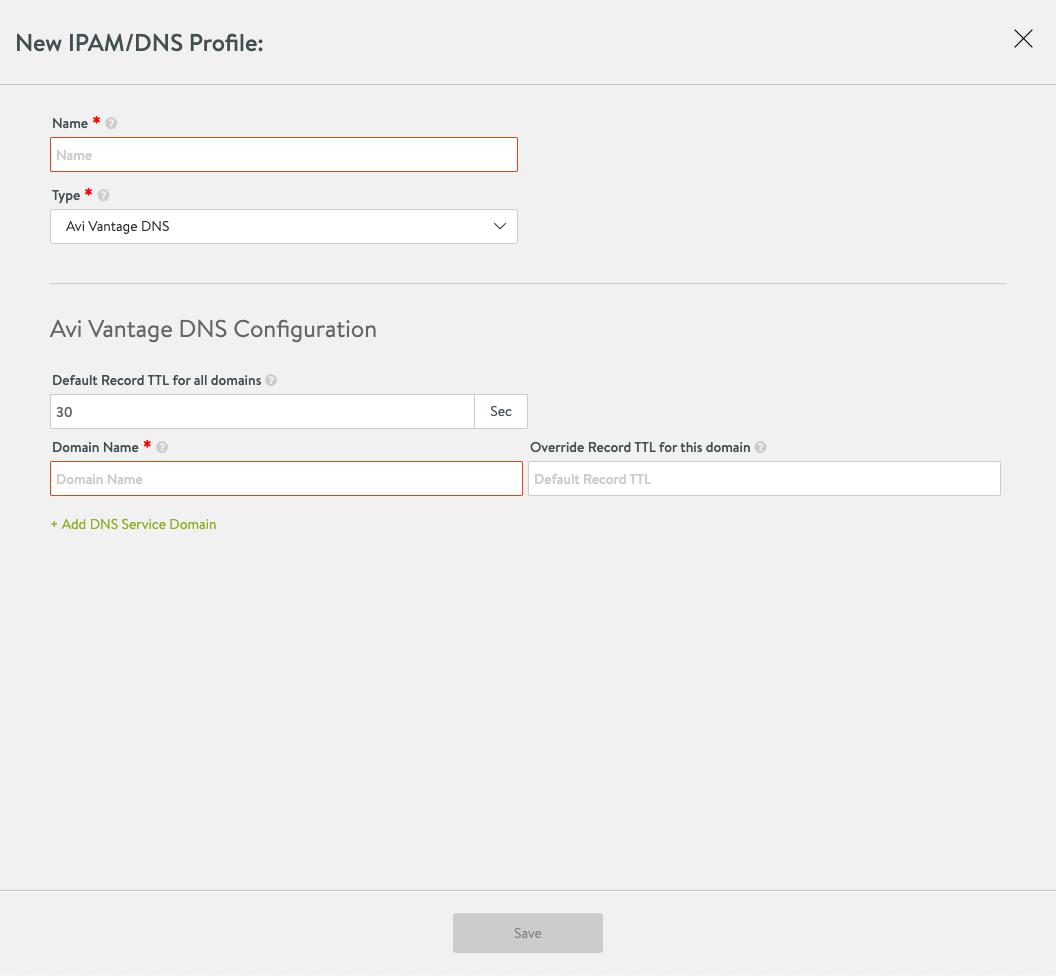
A DNS profile could be created for setting DNS configuration. I'll not be using that in my environment at this point.
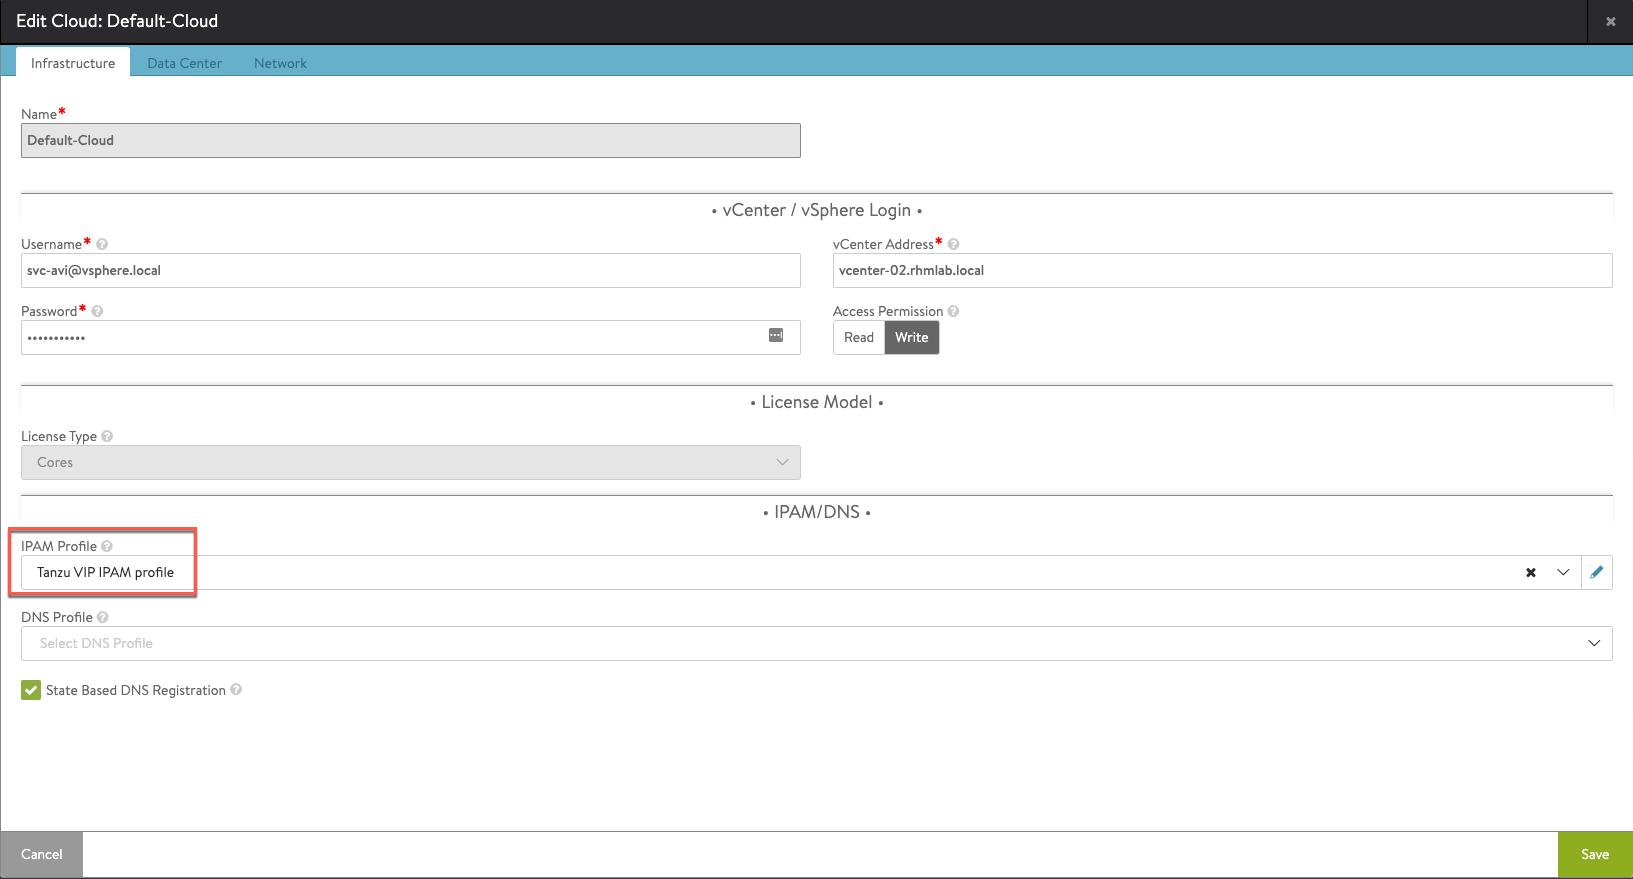
To use the newly created IPAM profile we'll go to Infrastructure and the Clouds tab and edit our Default-cloud
Enable Workload Management with the AVI Load Balancer
Now, after quite a lot of configuration, we're finally ready to enable workload management on our cluster
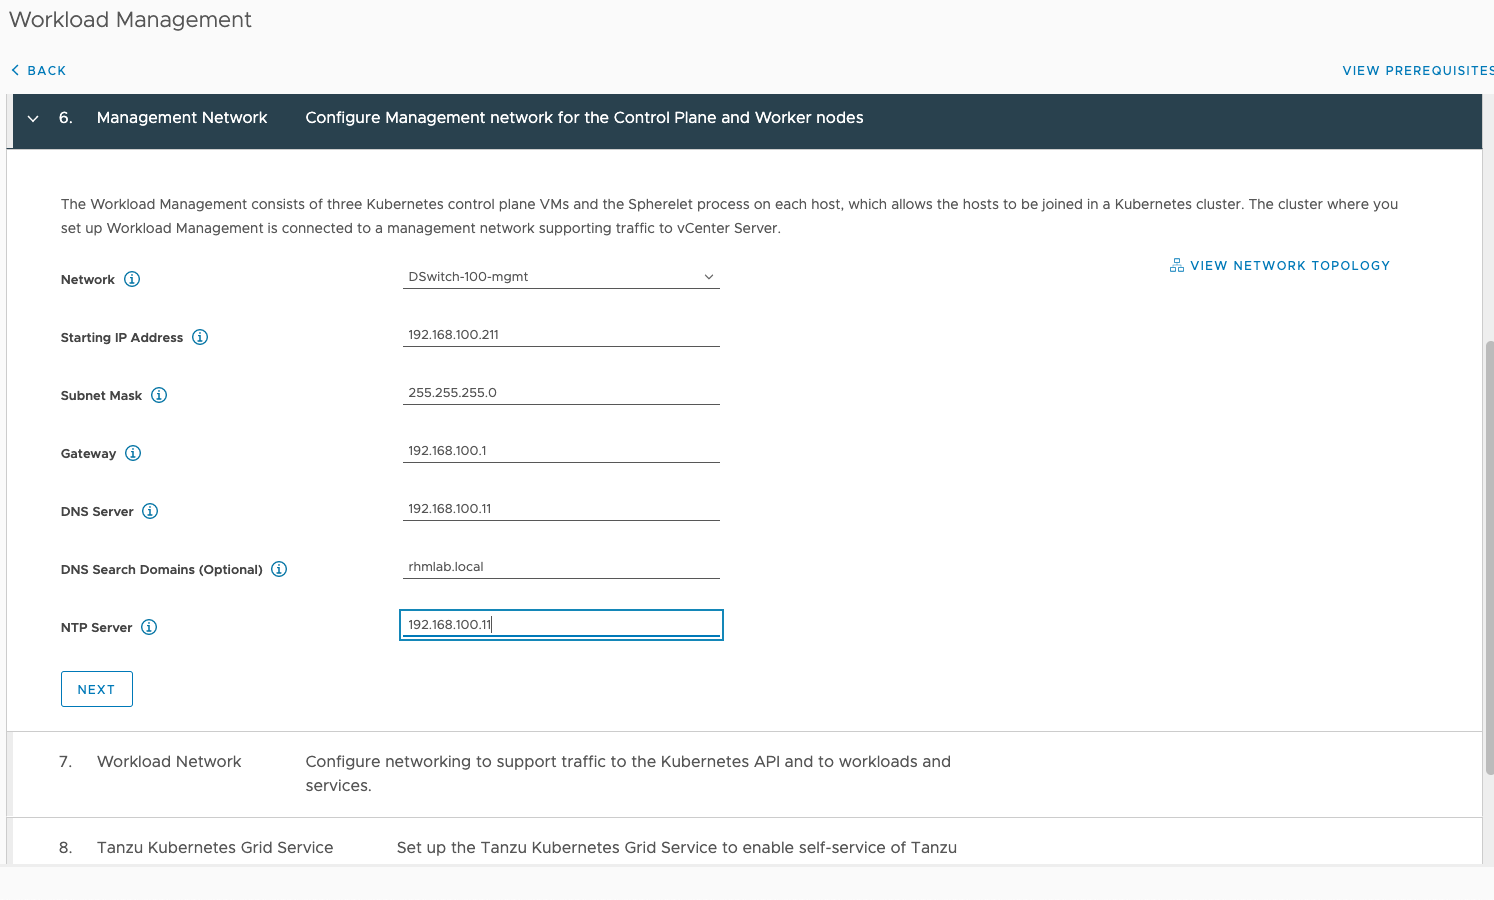
In the Workload Management wizard I'm skipping to the parts where the Load Balancer is configured. First we'll add in the type of Avi, the IP, the credentials and the Certificate we retrieved earlier

For the Management network settings we're specifying the network and IP details for the Control plane nodes. This has nothing to do with the ALB as such
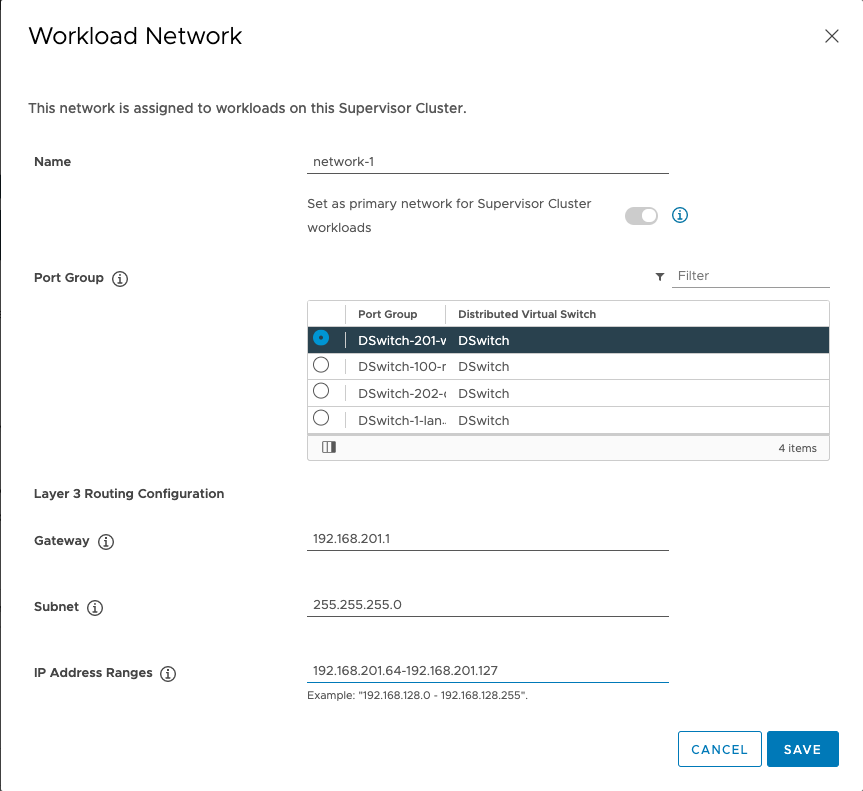
Next up is configuring the Workload network. Note that here we're specifying one workload network and this network corresponds with the network we specified the Static Route to previously
And after specifying the Content Library we can see that the Workload Management service is getting configured. Note that this might take quite some time based on the environment this is deployed in
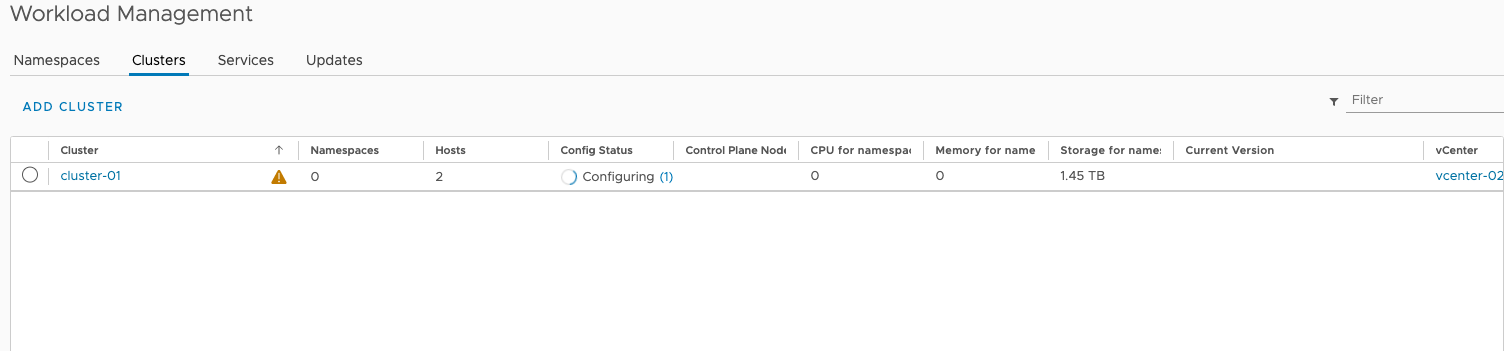
There will be a lot of error messages also, but be patient. In my case I have had deployment times of 40-60 minutes.
Verify AVI resources
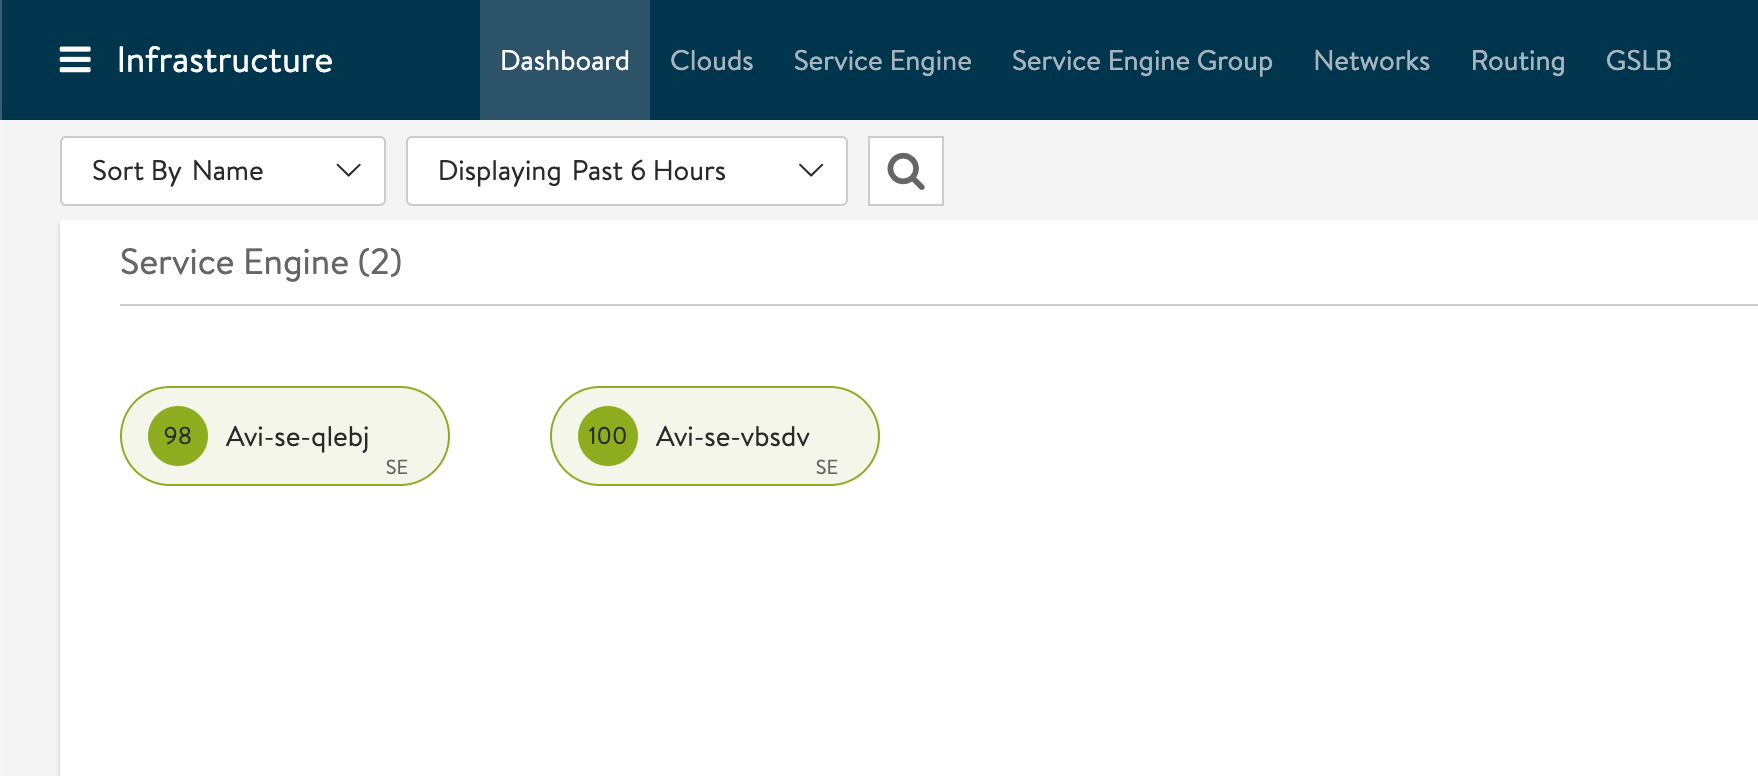
After a while the Control Plane VMs should be deployed and configured and the Workload Management service should have instructed the AVI controller to deploy Service Engines to support a Virtual Service for the Supervisor cluster.
Service Engines deployed
Note that the Service Engines will not be deployed until Workload Management instructs Avi to create a virtual service.
Virtual services
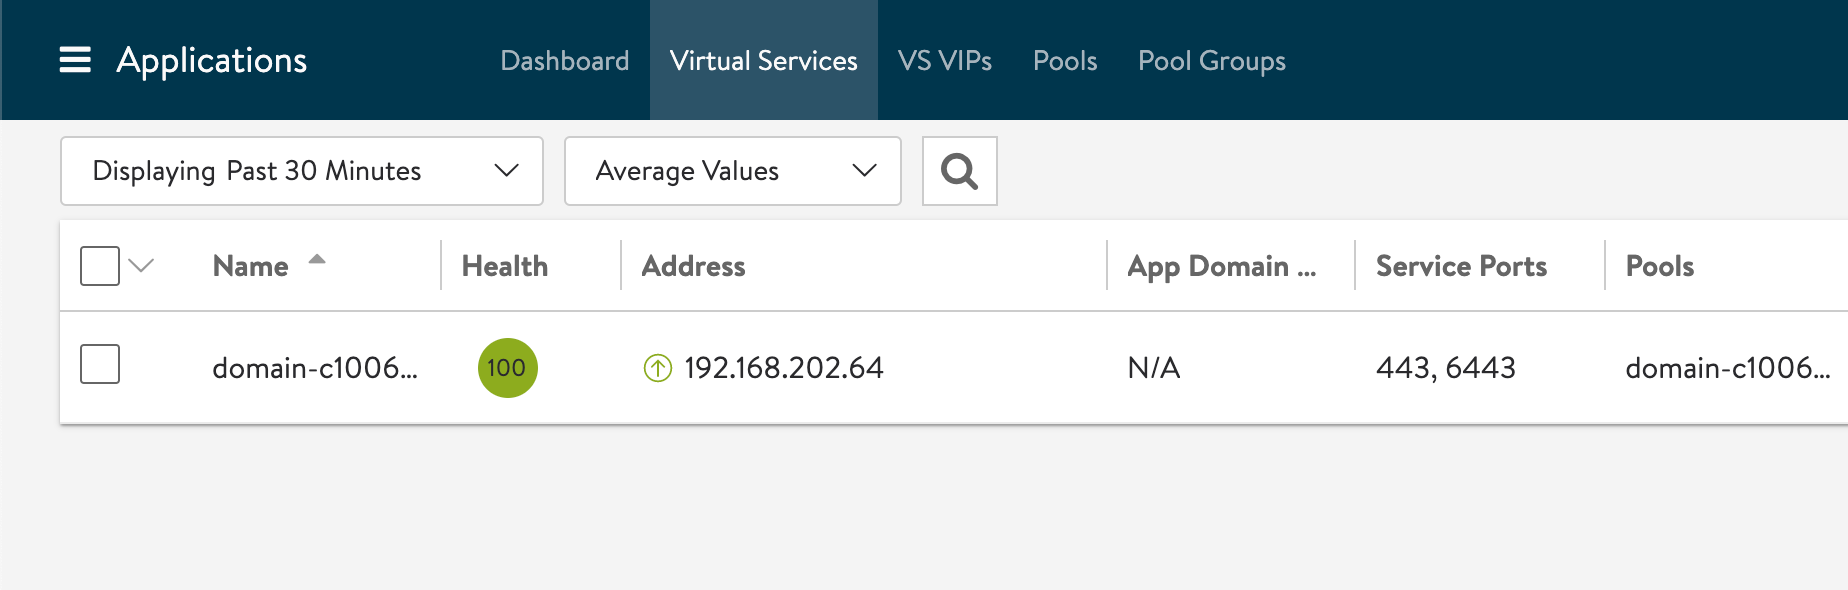
With the service engines running let's check the Virtual service which is what users will acces.
Hopefully they're not in this status
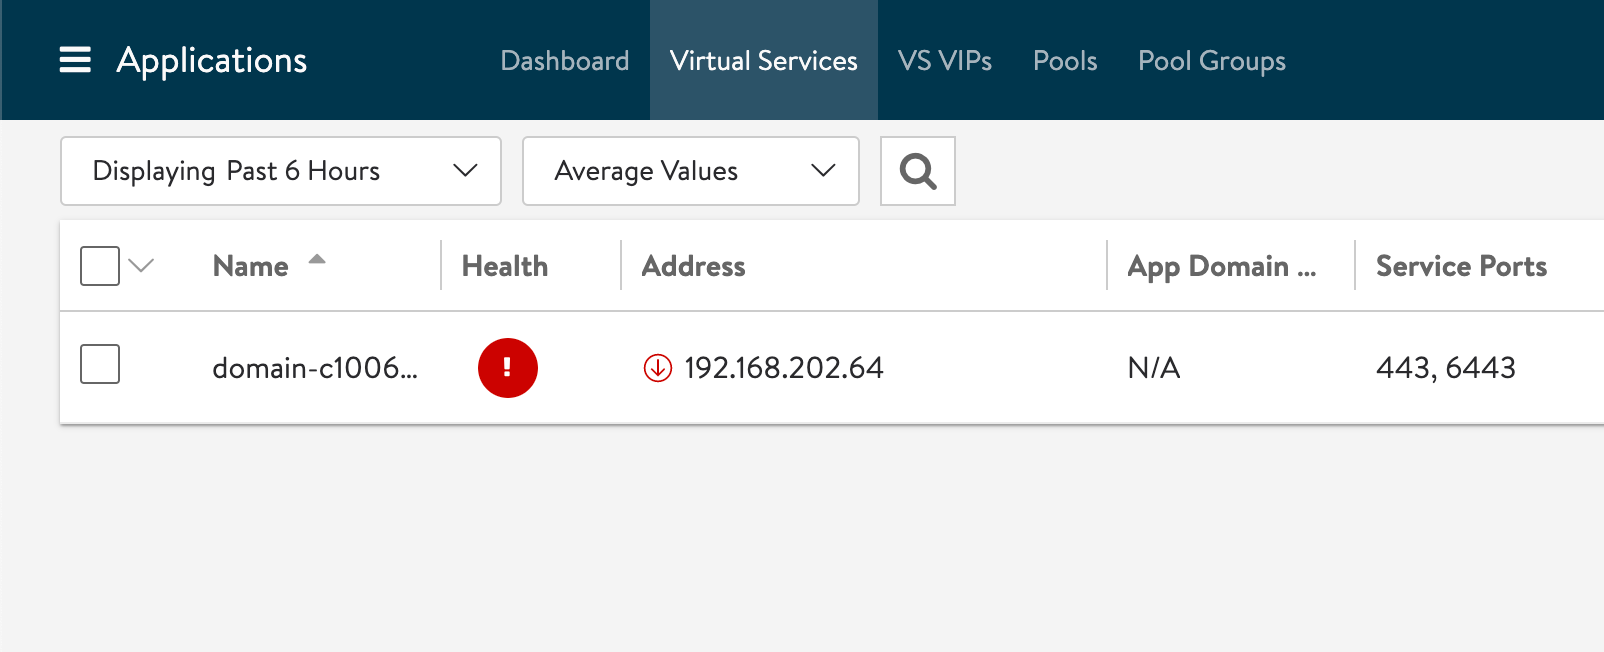
In my case this has been because of a misconfigured static route to the workload network. I've also seen that the Service Engines has had some kind of issue with the virtual nic connected to the VIP network. This has been resolved by rebooting the Service Engines
What we want is the following
Summary
This was quite a long blog post, but hopefully it can be useful as a reference for deploying the NSX Advanced Load Balancer and use it with vSphere with Tanzu.
In upcoming posts I plan to discuss a bit more about how the ALB is used with Tanzu and the capabilities of it. We'll also take a look at how to use AVI outside of Tanzu.
Thanks for reading!