ESXi on ARM - Installing ESXi on a Raspberry Pi
Ever since the keynote on VMworld 2019 when Pat Gelsinger and Ray O'Farrel showed off ESXi running on a Raspberry Pi the hype around it has been huge
\
Together with the release of vSphere 7.0 U1 on October 6th VMware released it's newest fling which finally gave us the ability to run ESXi on ARM!
In this post I'll run through the steps it took me to get ESXi up and running on a Raspberry PI 4 8GB and added to vCenter.
Credits due where credits due:
Most of this is taken from the documentation available for the ESXi-ARM fling so be sure to check that out for more screenshots and more details, also for different scenarios.
The documentation can be downloaded from the same place where you download the ISO

0. Requirements / BOM
- Raspberry Pi 4
- In my case I'm using the RPi 4 8GB, you can get the 4GB to work as well (I have tested both), but the 8GB is better if you want to run anything on it.
- SD card
- You need a SD card which will be used for the UEFI firmware needed to boot. This can be small and cheap, I've used a 1GB card in my setup, but you might get away with a smaller one
- Note that you might be able to include the UEFI firmware to the ESXi installation, but for simplicity it's easier to have it on a SD card
- USB stick (or other install media)
- Next you'll need an install media for the ESXi bits. This could be a USB stick and in my setup I'm using the same USB stick for booting the installer and as the actual install destination.
- I'm using a 16GB SAN Disk Ultra Fit stick (which I'm also using for the Intel NUCs I have in my homelab).
- Note however that you will not be able to use this (<128 GB) for storing anything other than the ESXi system data so you'll want to have an additional USB device for storing data, or connect your PI to a NAS of some sorts. This was changed in vSphere 7.0. There are flags available that let you play around with this. Check out this post by William Lam for more info
In the current setup I'm also using a display and a keyboard and mouse, so no headless setup for now.
Also my laptop is a MacBook Pro so I'm using the tools available for macOS. I'll mention some Windows equivalents where applicable. More details are given in the Fling documentation
1. Prepare Raspberry Pi OS SD card and run eeprom update
This step is about updating your Pi before booting up with ESXi on UEFI. In both my RPi 4's the eeprom has not needed updating so I guess I could've skipped this part, but hey we're following the manual here
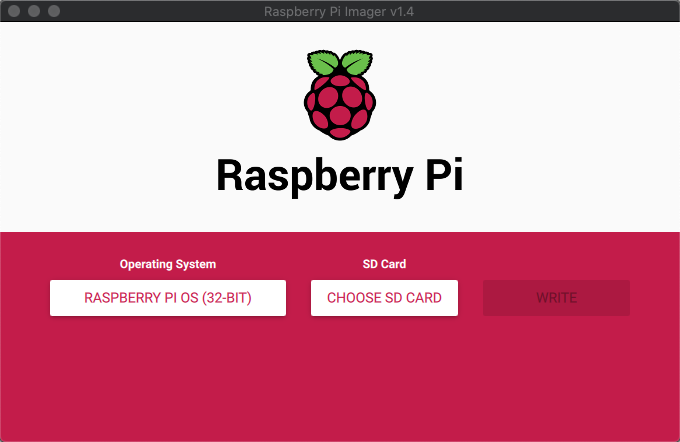
To flash the SD card I'm using the Raspberry Pi Imager where you can choose the OS and the SD card. Note that I'm using the Raspberry Pi OS (32-bit), this could've been done with the non-UI option also.
After booting up the first time I'm stepping through setting the language and regional settings, set the password and then run the software update. After the software updates are done I'm accepting the option to reboot the Pi.
After reboot I'm opening up the Terminal to run the commands for updating the eeprom
1sudo rpi-eeprom-update
This will check for available updates. If there's update available go ahead and update with the -a switch
1sudo rpi-eeprom-update -a
If you've updated reboot the device.
With the device up-to-date we can shutdown the Pi and continue with preparing the UEFI firmware.
2. Prepare UEFI firmware SD card
To be able to UEFI boot the Pi we need to put the UEFI firmware on the SD card.
There's two bits of firmware which needs to be downloaded:
Extract the two zip files on your laptop (in my example I have extracted them to ~/tmp) and continue with formatting the SD card.
The SD card needs to be formatted with the FAT32 filesystem. For Windows you can simply right-click your SD card and click format. For macOS I'm using diskutil.
First identify the disk id of the SD card, note the device name (i.e. /dev/diskX)
1diskutil list
Now we partition the disk with the MS-DOS format and I'm naming the partition UEFI. You can choose another name if you want, just be sure to use that name later on when we're copying the firmware to the SD card.
1diskutil partitionDisk /dev/diskX 1 MBRFormat "MS-DOS" UEFI R
After partitioning the disk we can copy the necessary firmware bits to the SD card.
First we remove all kernel*.img files from the firmware-master/boot directory, and then copy the entire boot directory to the SD card.
1rm ~/tmp/firmware-master/boot/kernel*.img
2cp -rf ~/tmp/firmware-master/boot/* /Volumes/UEFI
Then we can copy the UEFI firmware files to the SD card.
1cp -rf ~/tmp/RPi4_UEFI_Firmware_v1.20/* /Volumes/UEFI
For the 4GB only we also need to edit the config.txt file on the card
1echo "gpu_mem=16" >> /Volumes/UEFI/config.txt
Finally we eject the SD card which is now ready to use.
1diskutil eject /dev/diskX
3. Configure UEFI firmware
Now let's boot the Pi with the SD card and configure the UEFI firmware to be ready for our ESXi installation. (I'm skipping pictures of my screen here, check the Fling documentation for screenshots if needed)
The most important piece to change at this point (in order for ESXi to install) is to disable the 3 GB memory limit
- When the Pi splash screen appears hit ESC to enter the setup
- Open Device Manager -> Raspberry Pi Configuration -> Advanced Configuration
- Change the "Limit RAM to 3GB" setting to Disabled
- Hit ENTER and then F10 to save. Confirm the change with Y and hit ESC until you're back on the home page.
- Select Continue and hit ENTER
- ENTER again to reboot
The Fling doc covers some more graphics settings, but I'll not mess with those.
Now we can continue with the USB stick which will hold the ESXi installation files and subsequently be used for the destination of the installation.
4. Preparing the USB stick with ESXi install files
Again I'm using macOS and will stick to terminal for the configuration of the USB stick. In Windows you can make use of a tool like Balena Etcher to flash the USB.
If you haven't already, download the ESXi-ARM ISO from MyVMware (use the link through the flings site)
First I'm identifying which device id (i.e. /dev/diskX) my USB stick has with diskutil and make sure it's unmounted
1diskutil list
2diskutil unmountDisk /dev/diskX
Now I can write the content of the Fling ISO to the USB stick
1sudo dd if=~/tmp/VMware-VMvisor-Installer-7.0.0-16966451.aarch64.iso of=/dev/rdiskX bs=$((16 * 1024 * 1024))
And finally eject the disk
Note that you could add in a kickstart configuration here to set network configuration etc, but that's standard ESXi installation stuff so I'll leave that for now.
5. Install ESXi
Now put the USB stick into your RPi and power it on.
When the splash screen hits go to Boot Manager and select your USB stick as the boot option
Our beloved ESXi installer screen should now appear to start the ESXi install process.
The ESXi install is same as always. As the install destination I'll select the (only) USB stick which happens to be the same that holds the install media.
After the install has finished let the RPi boot
6. Configure UEFI boot order
Now let's set the boot order so that the USB stick will be the first option. Again, I'm skipping screenshots. Check the Fling documentation for details if needed.
This is more of an optional step, but it might be worth doing to save some boot time. Especially if you have multiple USB devices.
- When the RPi is booting hit ESC at the RPi splash screen.
- Go to the Boot Maintenance Manager -> Boot Options -> Change Boot Order
- Hit ENTER
- Locate your USB device containing the ESXi data. Hit the + key until it's at the top of the list
- Hit ENTER and F10 to save, confirm the save and now hit ESC until you're back at the home page
- Finally select CONTINUE and now your ESXi OS should boot!
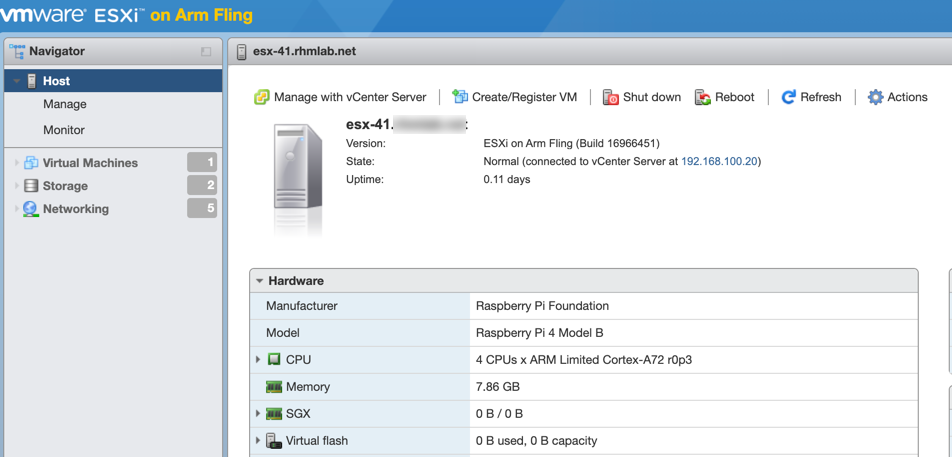
7. Configure your ESXi
Now you should have a ESXi server installed! If you have a working DHCP server the ESXi server should also have got an IP address which you can use to further customize your server through the UI.
One important thing to configure is NTP, if not you'll probably not be able to add it to vCenter

Summary
That's it for this post. If you're interested in keeping track of what folks are doing with the fling be sure to follow the ARM blog on vmware.com and follow ESXi-Arm on Twitter and check out the #esxi-arm-fling channel in the VMware code Slack
Stay tuned for more posts on this exciting new fling!