Setting Up a Kubernetes Cluster on virtual machines
Overview
Intro
This post is a write up of steps needed for setting up a simple Kubernetes cluster running on (vSphere) VMs. I'm in the process of learning Kubernetes and studying for the Certified Kubernetes Administrator (CKA) exam where hands-on experience is key.
Update dec 2023: This post is over three years old and some things have changed since then. An updated version of this post can be found here
A lot of material focuses on getting started with Kubernetes through a Cloud provider or with stuff like Minikube, but as I have access to a home lab I wanted to practice using my own environment. With that said, the cloud provider route is a great one if you want to get up and running quickly, or haven't got access to a lab environment. The Kubernetes katacoda playground can also be a good place to start
A big warning right of the bat: This post should not be used for anything production and it is not a comprehensive write up of Kubernetes
I would also argue that if you're using your own environment for bringing up Kubernetes clusters you should probably look at doing it with something like Ansible that can automate the setup.
I'll not go in to lots of detailed around the different Kubernetes components in this post. Use the official Kubernetes documentation for that.
As I'm preparing for the CKA exam I'll also put in references to the documentation as we work our way through this post. The Kubernetes documentation is one of the resources allowed in this exam.
Prereqs
A Kubernetes cluster consists of master and worker nodes. Best practice is to have three or more master nodes for High availability and a set of worker nodes based on the cluster needs. I will go with three masters and three workers in my cluster.
The initial part of setting up the cluster will use one master and two workers, whereas the remaining nodes will be brought up later on to mimic a scale-out of the cluster (covered in an upcoming post).
I will also install haproxy on a Ubuntu VM to act as a loadbalancer when we are scaling out the cluster.
If you want to scale down you can skip the extra masters and workers and go with one master and one worker. Normally the master nodes won't run anything other than administrative cluster loads, but we'll see how we can get around this later on so the master also can act as a worker.
You can use multiple Linux distros for the nodes (and even Windows for the worker nodes). I'll use Ubuntu 18.04 in this setup.
The Kubernetes nodes will have 2 vCPUs and 8 GB RAM, and the HAproxy node will have 2 vCPUs and 4GB RAM. You can probably scale this down if you're not planning on running anything special in the cluster.
As the network add-on to the Kubernetes cluster I will use calico
My vSphere environment consists of three vSphere 7 hosts in a vSAN environment, but the underlying environment won't make much of a difference in this write up, you could probably do this with bare-metal or any other environment as well. Like RaspberryPIs for instance
We'll not do anything fancy with storage or network in this post to keep it simple
Build VMs
So with the prerequisites out of the way let's bring up some VMs.
In total I have 7 Ubuntu 18.04 VM's, all running on the same subnet and with static IP addresses.
| VM name | Role | IP address | CPU | RAM | Disk |
|---|---|---|---|---|---|
| kube-a-01 | Kubernetes master | 192.168.100.151 | 2 | 8 GB | 20 GB |
| kube-a-02 | Kubernetes master | 192.168.100.152 | 2 | 8 GB | 20 GB |
| kube-a-03 | Kubernetes master | 192.168.100.153 | 2 | 8 GB | 20 GB |
| kube-a-04 | Kubernetes worker | 192.168.100.154 | 2 | 8 GB | 20 GB |
| kube-a-05 | Kubernetes worker | 192.168.100.155 | 2 | 8 GB | 20 GB |
| kube-a-06 | Kubernetes worker | 192.168.100.156 | 2 | 8 GB | 20 GB |
| haproxy-a-01 | Load balancer | 192.168.100.150 | 2 | 4 GB | 20 GB |
VM preparation
There is some steps needed on every VM for preparing the installation of the Kubernetes cluster.
I deliberately go through this on each VM in my preparations for the CKA exam, normally you would build an image with this taken care of, or better yet use something like Ansible to automate the process.
Install packages
We need a few packages installed on each VM.
On all VMs I'll run
1sudo apt-get update && sudo apt-get install -y vim
On the Kubernetes VMs I'll also run
1sudo apt-get update && sudo apt-get install -y docker.io
On the Haproxy VM I'll run
1sudo apt-get update && sudo apt-get install -y haproxy
Now to install the Kubernetes binaries we need to first add some references to where to find them. This is also documented in the official Kubernetes documentation
On the Kubernetes nodes I'll run
1sudo apt-get update && sudo apt-get install -y apt-transport-https curl
2curl -s https://packages.cloud.google.com/apt/doc/apt-key.gpg | sudo apt-key add -
3cat <<EOF | sudo tee /etc/apt/sources.list.d/kubernetes.list
4deb https://apt.kubernetes.io/ kubernetes-xenial main
5EOF
6sudo apt-get update
7sudo apt-get install -y kubelet=1.18.1-00 kubeadm=1.18.1-00 kubectl=1.18.1-00
8sudo apt-mark hold kubelet kubeadm kubectl
Note that I'm specifying the 1.18.1 version of the binaries. This is because I want to practice updating the cluster later on. If you're just looking for the latest and greatest skip the =1.18.1-00 part
We're also marking the packages with hold to keep them from updating when you run apt-get upgrade on the VM
Endpoint name
Kubernetes documentation reference
When bringing up the Kubernetes cluster, and because we eventually want to have multiple masters, we will specify the endpoint name which is what the nodes will bring with communicating with the masters.
On all Kubernetes nodes I'll edit the /etc/hosts file with a reference to my cluster endpoint name kube-master
1sudo vi /etc/hosts
In my scenario I want to bring up one master first before later on scaling out. Therefore I'll use the IP of my first master as the reference to the endpoint name and in an upcoming post on we'll change this and point to the load balancer.
Add the following lines to /etc/hosts on all nodes
1#192.168.100.150 kube-master
2192.168.100.151 kube-master
Again, if you're sticking with one master you can skip the commented line #192.168.100.150 kube-master
Snapshot VMs
At this point it could be a good idea to create a snapshot of your VMs if you want to be able to come back to this state
Initialize the Kubernetes cluster
Kubernetes documentation reference
Now we're ready for installing the cluster!
We'll use the kubeadm tool with the init option to bring up the cluster. I'll also specify the endpoint we discussed earlier (control-plane-endpoint) and the subnet I want to use for the pod networking (pod-network-cidr). We'll see this in action shortly when we install a network add-on. You can use any network as long as it doesn't conflict with anything else.
1sudo kubeadm init --control-plane-endpoint kube-master:6443 --pod-network-cidr 192.168.150.0/23
This command takes some time, but in the end you should get a success message a long with some lines for joining more control-plane nodes (masters) and worker nodes.

The first thing however is to install a pod network in the cluster so the Pods can communicate. But before that I'll copy/paste the commands mentioned in the output to be able to use the kubectl tool as a regular user
1mkdir -p $HOME/.kube
2sudo cp -i /etc/kubernetes/admin.conf $HOME/.kube/config
3sudo chown $(id -u):$(id -g) $HOME/.kube/config
Shell completion
Kubernetes documentation reference
You might also want to set up shell completion which makes it easier to run kubectl commands. I'm using the following commands for this on my master node
1echo 'source <(kubectl completion bash)' >>~/.bashrc
2source <(kubectl completion bash)
Install Pod network add-on
Kubernetes documentation reference
As mentioned I'll use Calico as my network provider. Flannel is also a solution that is easy to get started with
The installation is done with the kubectl tool, but first we need to download a yaml file that describes how the network add-on should be run and we need to verify/change the Pod network CIDR to match what we used in the kubeadm init command.
The process is described in Calico's documentation. Note that if you're preparing for the CKA exam you won't be allowed access to this documentation.
1curl https://docs.projectcalico.org/manifests/calico.yaml -O
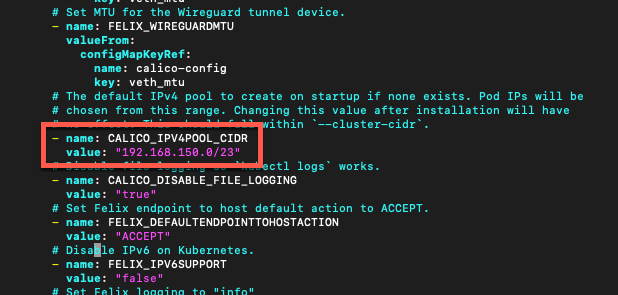
Find the CALICO_IPV4POOL_CIDR variable in the yaml file and replace the value with the same subnet you used in the kubeadm init command, save the file
1vi calico.yaml
Pay close attention to the indentation in the yaml file
1- name: CALICO_IPV4POOL_CIDR
2  value: "192.168.150.0/23"
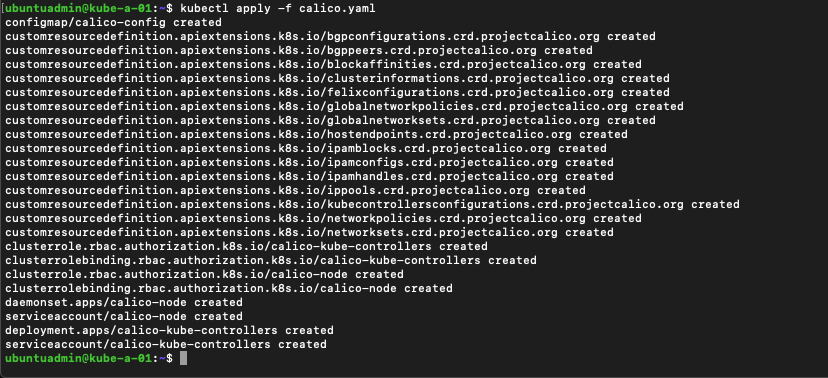
Now let's install Calico in our cluster
1kubectl apply -f calico.yaml
This should create a lot of resources in your Kubernetes cluster
Verify current state
Let's verify our current state, note that it might take some time before the node is Ready
1kubectl get nodes

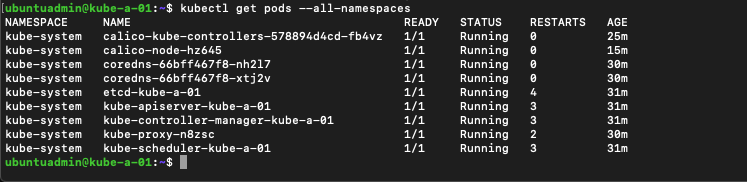
And we can take a look at the pods created in our cluster. Note that it might take some while before all pods are running
1kubectl get pods --all-namespaces
Add worker nodes
Kubernetes documentation reference
Now let's add some worker nodes to our cluster so we can deploy stuff.
The kubeadm init outputted the command for joining both control (master) and worker nodes to the cluster. You need to specify a token and some certificate hashes with the kubeadm join command.
The token mentioned however is only valid for 24 hours so if you're outside of that you need to generate a new token. Even though I'm inside of that in this example I'll regenerate the keys needed anyways
Generate token
Let's create a new token to use with when we join a new node
1sudo kubeadm token create

You can view the available tokens with the kubeadm token list command
1sudo kubeadm token list

Find certificate hash
To join a new worker node we also need the certificate hash of the discovery token. As mentioned this was outputted when we created the cluster, but we can also retrieve it with a openssl command
1openssl x509 -pubkey -in /etc/kubernetes/pki/ca.crt | \
2   openssl rsa -pubin -outform der 2>/dev/null | \
3   openssl dgst -sha256 -hex | sed 's/^.* //'

Update 2020-12-30 - Print join command
I came across the --print-join-command flag to the kubeadm token create command which actually prints out the kubeadm join command for you, i.e. no need to find the certificate hash and construct the command your self (although as in a learning process it's good to know that step as well)
1sudo kubeadm token generate #We need to generate a new token
2sudo kubeadm token create <TOKEN-FROM-GENERATE-STEP> --ttl 1h --print-join-command
3#This will output the full kubeadm join command for a worker node
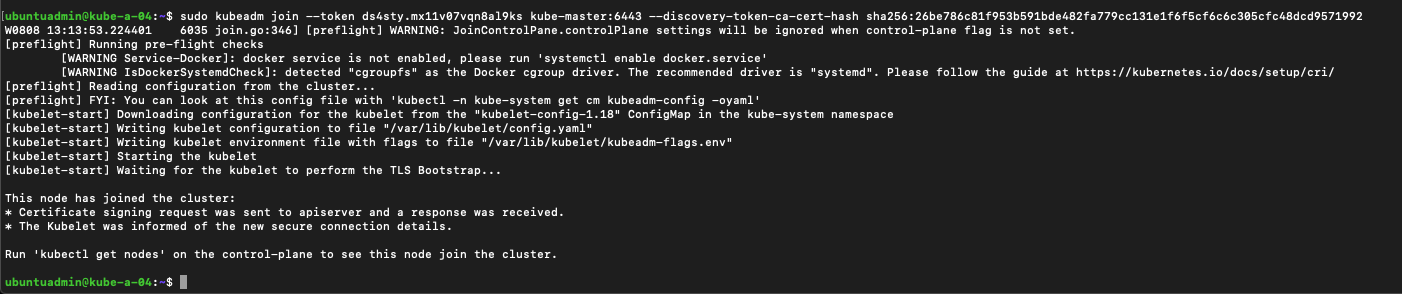
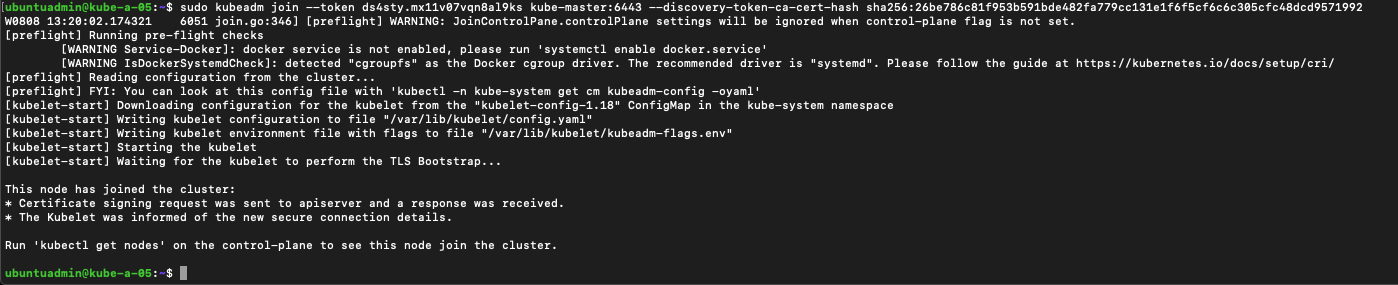
Run kubeadm join
Now we're ready to join our first worker node to the cluster with the kubeadm join command. Note that this command is for joining worker nodes
1sudo kubeadm join --token <token> <control-plane-host>:<control-plane-port> --discovery-token-ca-cert-hash sha256:<hash>
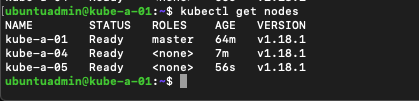
Let's verify by running the kubectl get nodes command on our master, again note that it might take some time before the node is ready
1kubectl get nodes

Now we can use the same kubeadm join command as on the first node to add our second worker
And once more, verify the nodes in our cluster
In an upcoming post we will add two masters and one more worker to the cluster, but this will do for now.
Running workloads on the master node
Kubernetes documentation reference
Normally the master nodes won't run normal workloads as they are reserved for cluster work. If you have limited resources and want to run workloads on the masters as well you can remove this restriction with the following command
1kubectl taint nodes --all node-role.kubernetes.io/master-
Deploying an application to the cluster
Lastly let's deploy something to the cluster to verify that things are working. We'll deploy a simple nginx webserver with no extra configuration.
1kubectl create deployment nginx --image=nginx

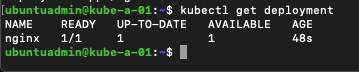
Verify the deployment, it might take a few seconds before the deployment is ready
1kubectl get deployment
Now let's scale the deployment to two pods to see if both worker nodes can handle workloads
1kubectl scale deployment/nginx --replicas=2

Now let's check our pods with the kubectl get podcommand with the -o wide parameter which gives more details
1kubectl get pod -o wide

As we can see the pods are running on both of the two worker nodes
Service
Finally let's see if we can reach the nginx webserver from outside of the cluster by exposing a service
We'll first expose the deployment as a service with the NodePort type and point to the pod's port 80 with the kubectl expose command, and we'll retrieve the service with the kubectl get svc command
1kubectl expose deployment nginx --type=NodePort --port=80
1kubectl get svc
Let's see how our service looks like

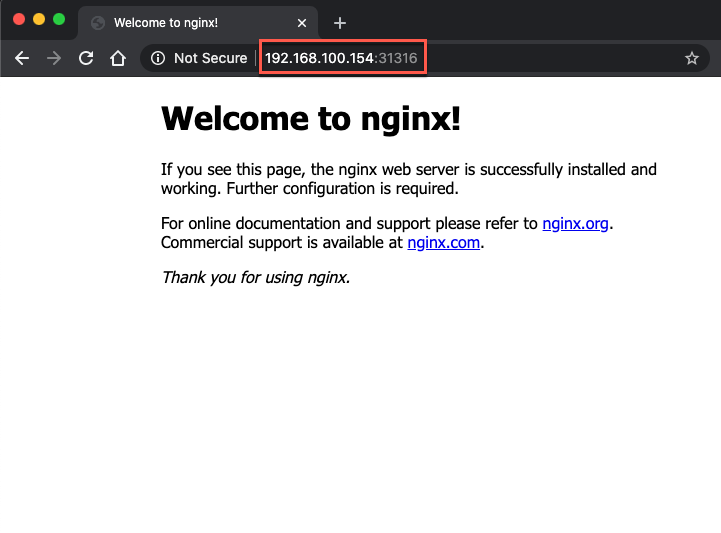
Notice how port 80 in the Pod(s) is connected to port 31316 which refers to a port on the nodes. Let's try to access that port from outside of the cluster
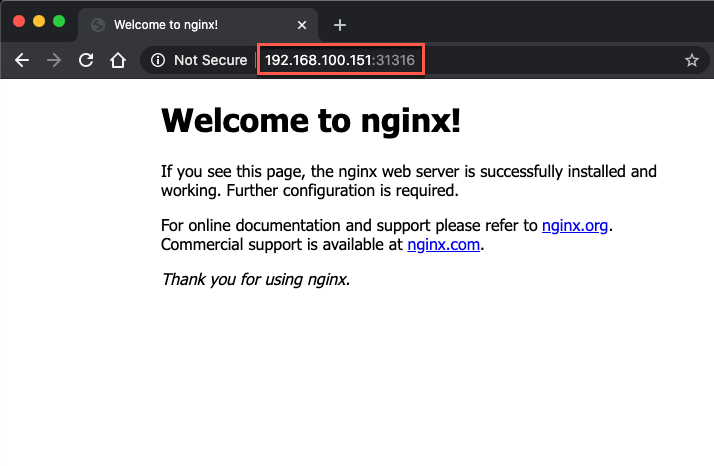
A couple of things to note here. First we're accessing the nginx application from outside of the network by pointing our browser to a port on one of our nodes. Second, the IP we're using is the Master node's IP. Remember that the pods are running on the workers not the master.
By using NodePort we can point the browser to any one of the nodes and get access to the application
Summary
This post has been a write up of how to set up a simple Kubernetes cluster on virtual machines. By no means a comprehensive guide, but it helps me in learning and preparing for the CKA exam.
There's of course much much more to Kubernetes than this, but there's plenty of material out there to go deep diving in. I suggest to start at kubernetes.io.
I'll continue this setup in another blog post where I'll add two more masters and a third worker node to the cluster.
Thanks for reading!