Running Grafana on the Red Hat Openshift Container Platform
Last year we started building our own solution for Performance Monitoring of our Infrastructure platform with the focus on the VMware vSphere environment. The components used for this solution is PowerCLI for extracting the metrics, InfluxDB for storing the metrics, and Grafana for presenting the metrics.
I did a Blog series on this project which explains in detail what we did when building the solution.
The solution has been very well received and are used daily by many of my colleagues, and we frequently update the solution with new metrics and dashboards.
In my initial tests before deciding to build the solution with InfluxDB and Grafana I ran these components in Docker containers locally on my laptop. I'm not very experienced with developing on containers, but both components has ready Docker images on GitHub making it really easy to start playing. So when I started out the project I initially planned to run at least Grafana on containers, but since we didn't really have a Container solution production ready in the environment I installed it on a Linux VM.
Recently we launched a Container platform in our environment based on Red Hat Openshift. This product is built on Kubernetes and it makes it easier for developers to get started with their projects as they won't need to worry about setting up the container hosts, storage and so forth. These parts are already taken care of by the Openshift admins.
So with the launch of a production ready container solution I decided to move my Grafana installation over to Containers!
Because we have some settings we needed to have in place I did a lot of testing and experimenting locally on my laptop with Docker for Windows. We need to set some of the configuration options in the grafana.ini file, as well as setting up the LDAP integration and have some plugins and additional datasources added.
What I discovered after some trial and error is that Grafana will allow for all of the settings in Grafana.ini to be configured via environmental variables. With that you could leave the default ini file untouched and just set everything through env.
The LDAP part is somewhat more tricky. These settings can just be done through the ldap.toml file. While you can copy your own version of that file when you create your image you'll have to keep track of that file, and you might struggle with specific settings on different environments. And the worst part for me was that I didn't find an easy solution as to how to deal with the LDAP Bind password which needs to be present in that file (Note that the documentation specifies that the Bind user should only have read permissions in the directory so you might accept that risk). I did some tests with setting it during creation of the image with the password as an ENV parameter in the dockerfile, but I couldn't get that to work.
Luckily Grafana supports OAuth and we have Azure Active Directory available to us so our solution was to ditch the LDAP entirely and just go with Azure AD.
Azure AD integration requires a few settings in Grafana and some configuration in Azure. It's nicely documented on grafana.com so I won't go in to more details around it. One thing to remember is to specify your root_url in grafana.ini or through env variables so the redirect during the auth process works.
Finally as we where going with the latest and greatest version of Grafana (5.0.2 as of this writing) I also wanted to test some of the new Provisioning stuff. I created a yaml file with all our datasource configuration and had that copied over to the image created.
Dockerfile
So, for creating your container with your own settings you could use a Dockerfile. Mine looks something like the following (when experimenting locally)
FROM grafana/grafana:latest

COPY grafana.ini /etc/grafana/
#COPY ldap.toml /etc/grafana/ #Not needed as we do Azure AD auth
#COPY ldap.crt /etc/grafana/ #Not needed as we do Azure AD auth
COPY datasource.yaml /etc/grafana/provisioning/datasources/

ENV GF_SECURITY_ADMIN_USER=changed
ENV GF_SECURITY_ADMIN_PASSWORD=different
The first line of the Dockerfile specifies the base image we'll use, namely the latest official Grafana image availbale on Docker hub. As you can see we also have some COPY commands which essentially copies a file from your local folder in to the given folder inside the image that is being built. In this case I have a grafana.ini and a datasource.yaml file in the same folder as the Dockerfile and these two files are being injected in to the image in the correct folders. Remember that the grafana.ini file isn't necessary if you do all the settings through environment variables. In the Dockerfile I'm also putting up an example of bringing in environment variables, namely the Admin user and password. The settings brought in through the env variables will overwrite what's in grafana.ini.
Building an image and running a container
So let's test it out. First I'm building my image and tagging it with "grafana-blog", then I'll run it with the -p 3000:3000 parameter which instructs Docker to map port 3000 on the host to port 3000 on the container. Note that you can also put the environmental variables in your docker run command with the -e parameter.

Now I can launch my browser and point it to localhost:3000 and try to log in with my admin user


Note that the admin user has changed
And verify that our datasources is in place
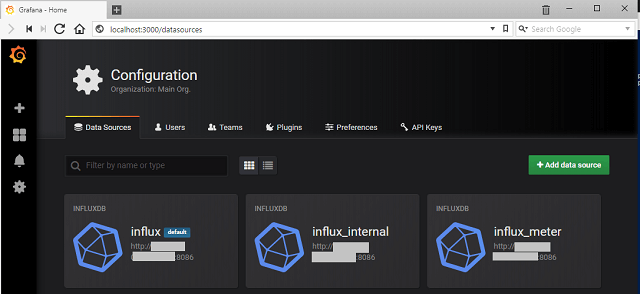
All looks good, and things seems to be working as intended. It's time for setting up things in Openshift.
Openshift
Openshift does a lot of the heavy-lifting for developers. In my case I pushed my Dockerfile (without the env variables) and the configuration files to a Git Repository, then after creating a project in Openshift I could use the oc new-app command to point to this repository and Openshift would pull the content, understanding that it should pull the Grafana image from Docker hub and then build the image for me as I did locally on my laptop. Magic!
While you can use ENV parameters in a Dockerfile, Openshift has a concept of Config Maps and Secrets. These can essentially be used as a place to store these environmental variables so that you won't have to have them in a file potentially available for others.
So inside the Openshift project I created several Config maps with the variables I wanted to set
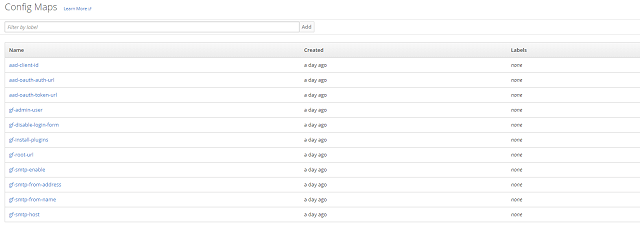
For example I can name the plugins I wanted to include. These can be installed through the environment variable GF_INSTALL_PLUGINS. This will pull the plugins through grafana.com / github which obviously requires internet connection. If you don't have internet connection from your environment you'll need to include these by copying them in to the image through other methods.

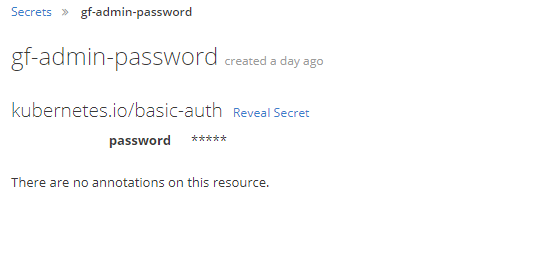
There are a couple of settings which includes a password or a secret. Openshift can manage these through "Secrets". These are only viewable for the Owner of the project and cluster admins making it less accessible than the settings in Config maps that could be more accessible based on user rights in your environment.
Buildconfig
So after defining all of these settings we'll tie them up to the build and deployment of the image and container.
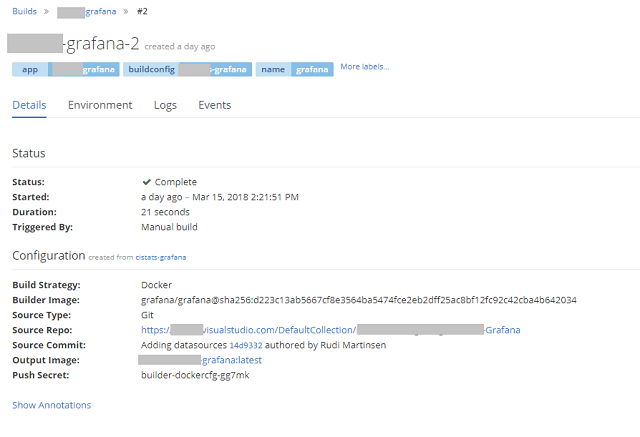
The admin user name needs to be defined when building the image so this will be included in the configuration of the Build config.

After putting in this we'll build the image
Deploymentconfig
The rest of the config is done under Deployment. Based on the settings you might have a Deployment running already after the Build completed. I normally turn off the automatic deployment when image or config changes initially as I do most things through the GUI and then every save might trigger a new deployment (if this is the case you'll end up with a lot of deployments...). Of course all of the configuration for build and deploy could be done through yaml files, but I'm still getting used to the concept of containers and Openshift so I'll stick with the GUI for now.
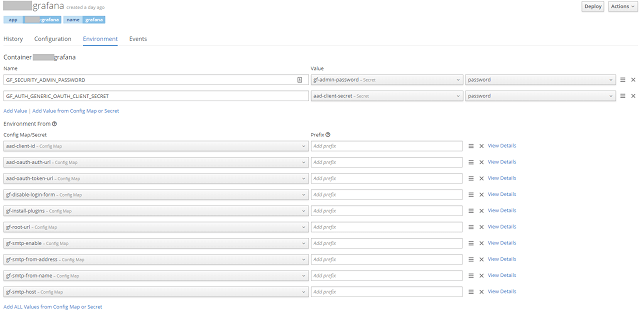
First we'll add in the rest of the variables. Note the two on the top being secrets and we are putting in the variable name directly and just pulling out the actual password from the secret
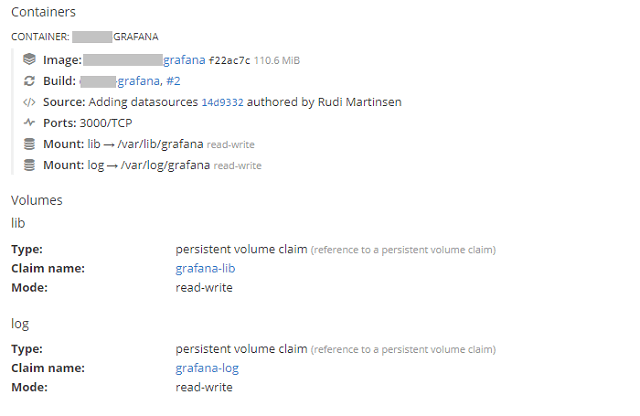
Finally we'll need to look into storage. We have some persistant storage available in the solution, and Openshift can present this as volume claims to the containers. For Grafana we'll set up two claims, one for the /var/lib/grafana folder and one for the /var/log/grafana folder. The Grafana image normally also exports the /etc/grafana folder, but in our case we're fine with this not being persistent as we copy in the file needed and do most of the settings through environmental variables.
We have two volumes created:

And in our Deployment config we have mounted the exported volumes from the image to these persistent volumes:
Deployment
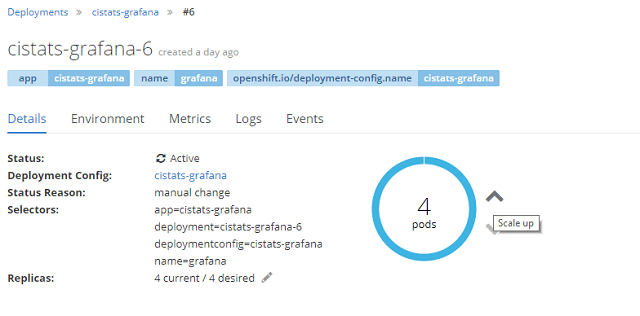
That's actually all that is needed for deploying our Grafana containers. Openshift allows us to scale our deployment if needed essentially creating more containers with the exact same image and config.
Route
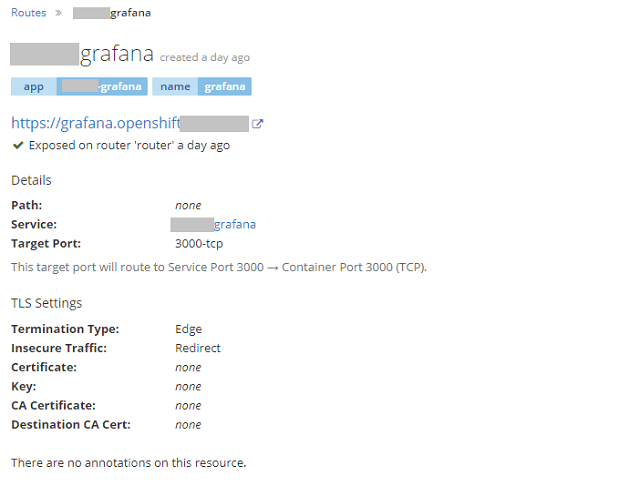
So the last Openshift piece to the puzzle is to expose a route to the container so that people can access it. If a route is not in place it would only be accessible on the container host which is kind of meaningless when talking about Grafana.
So with lots of magic happening in the background, by stuff put in place by the Openshift admin, we can just create a route by putting in a hostname, selecting https and redirect from http and we're good to go
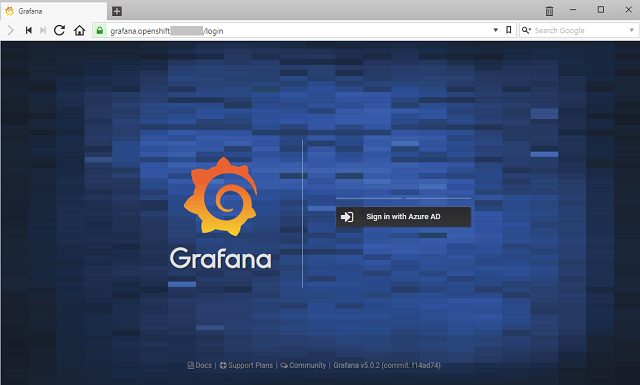
The only caveat at this point is that we have disabled the login form, and of course all users will come in as Viewers. As you can't assign roles (I haven't found a way at least) through the OAuth generic integration you need to somehow be able to assign the admin role to a user. I had to solve this by temporarily enable the login form, login as admin and give my self the Admin role. Then I disabled the login form again. Of course being that this is containers I changed the environmental variable and redeployed between these steps. This could be solved by having the same functionality as with LDAP where you can assign roles through groups. Hopefully this will be added later on.
Summary
There are a lot of steps here, but it was surprisingly easy to put together. Especially after deciding to go with Azure AD authentication only. Of course a whole bunch of things are happening in the background inside Openshift, but I would imagine that the process is similar for other platforms as well. And if you'll only want to experiment on your own you can just stick with the Dockerfile and running it locally on your machine or on a Docker host.
/ /
Now we'll enjoy all the new features in Grafana combined with the coolness of running it on containers.