Proxmox Backup Server
In this post we'll take a look at the Proxmox Backup Server (PBS) which is one of the open-source projects made by Proxmox and it has (obviously) a tight integration with Proxmox Virtual Environment (PVE) servers.
In my lab environment I have both a PVE cluster as well as a standalone PVE host which we'll connect to the PBS to get some backups started.
First of let's deploy our backup server.
Deploy Proxmox Backup Server
Proxmox Backup Server (PBS) consists of a server installation which can be done on bare-metal or as a virtual appliance. We'll fetch the latest ISO file from the Proxmox downloads site
At the time of writing the latest version of PBS is 4.2 and is the version used in this post
The requirements for PBS are detailed here. For a production system they recommend minimum 4 CPU cores and 4 GiB for the OS and the PBS daemons, and atleast one additional GiB per TiB backup storage.
In my lab environment I'm deploying PBS on a 2 vCPU and 4 GiB RAM virtual machine.
Next, either boot a bare-metal host or a virtual machine on the ISO to start the installation. The installation is very similar to the one for Proxmox VE where we enter details around the locale, storage and network and then let the installer run through.
After the installation is finished the PBS UI should be available on it's IP address and port 8007. Let's log in with the root user and the password set during the installation.
Run upgrade
The first thing we'll do after logging in is to switch from the Enterprise repo to the No-subscription repo. Or, if you have a license key, add the key so that we can utilize the repo.
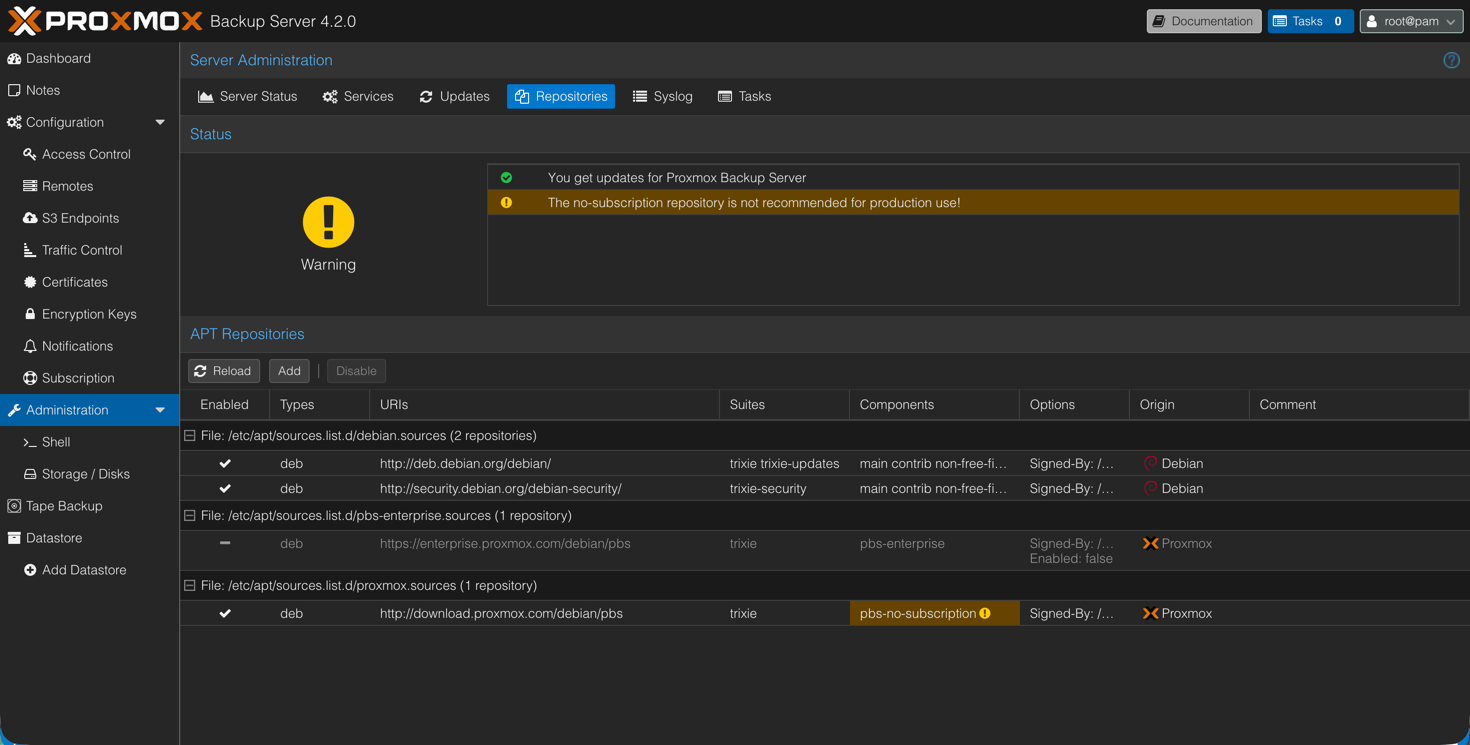
Now let's refresh and run through any updates so we make sure we're on the latest version.

Now might be a good time to reboot.
Create user for connecting to PBS
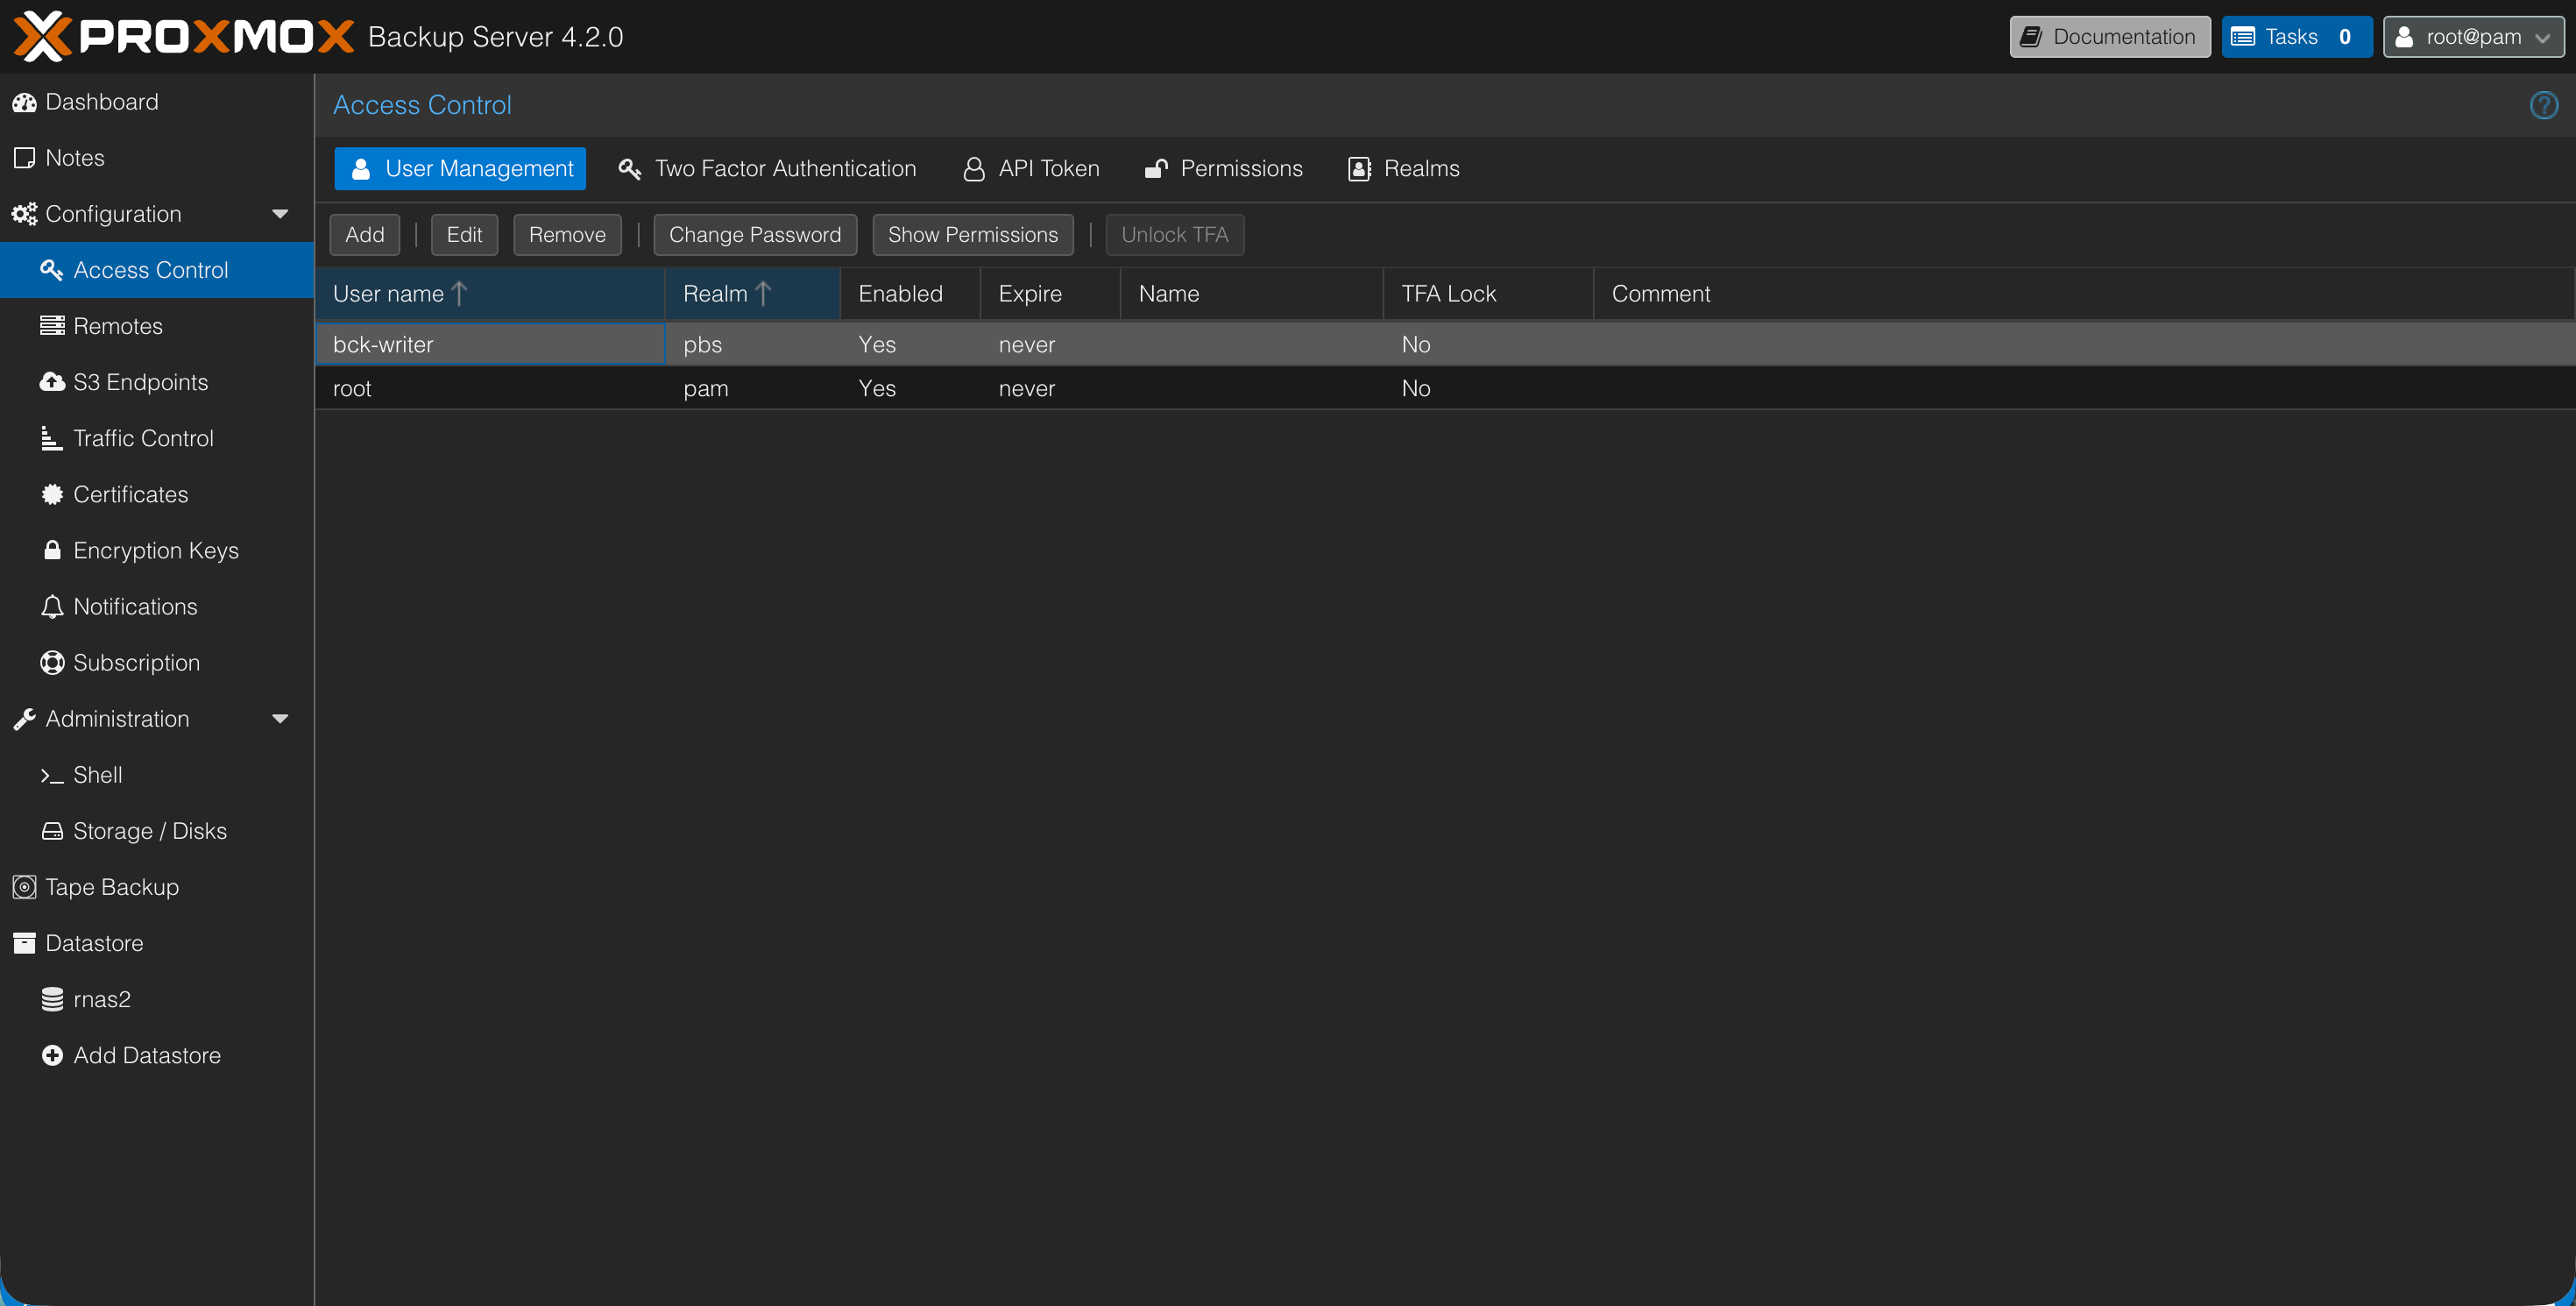
We'll create a specific user for connections and backup jobs
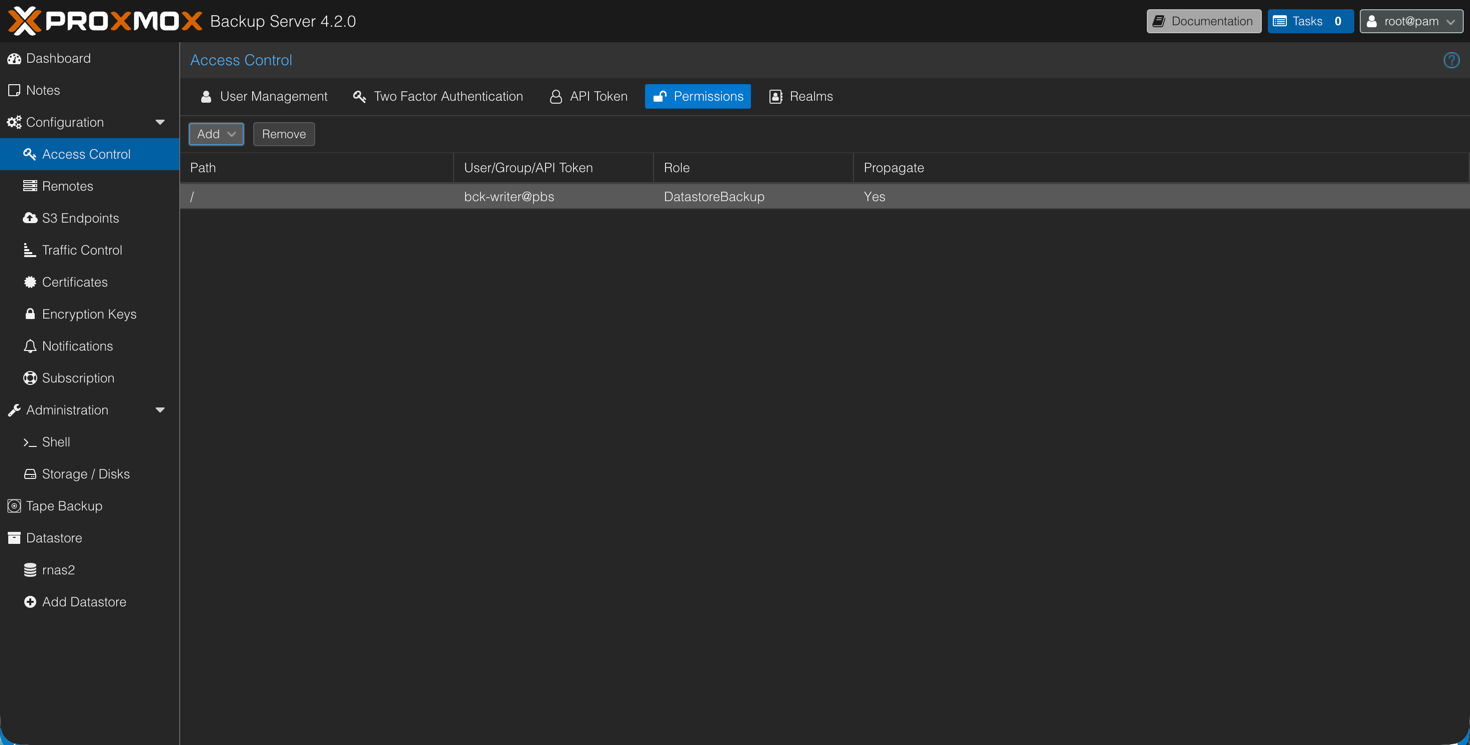
The user would also need permissions on the backup server
Mount nfs share to folder on PBS host
As backup storage I'm using a folder shared from a NAS through NFS. This needs to be mounted on the PBS server.
First we'll create a directory for it on the PBS server
1mkdir /<path-on-pbs>
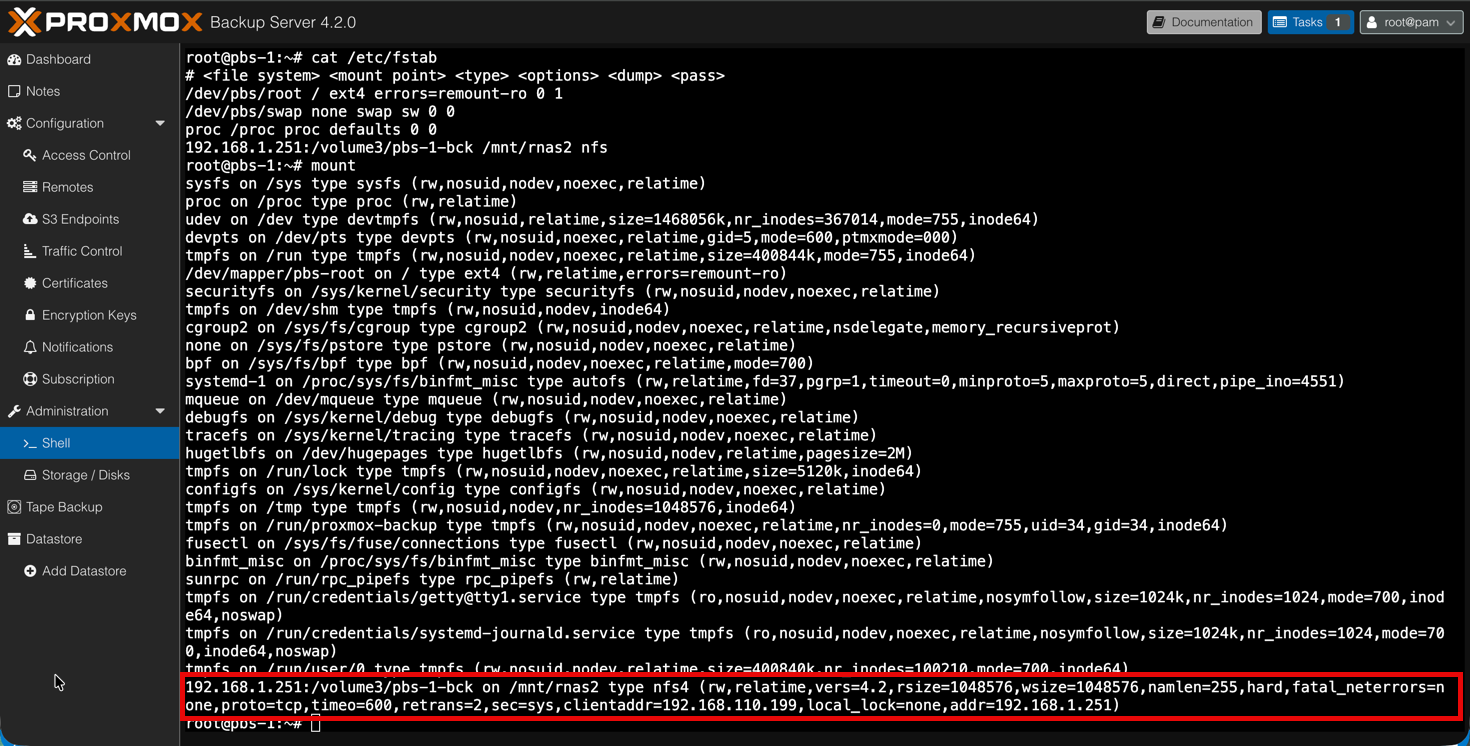
In the /etc/fstab file on the PBS host we'll add a line for mounting the NFS share at boot nfs-host-ip:/<path>/<on>/<nfs-host> /<path-on-pbs> nfs
1root@pbs-1:~# cat /etc/fstab
2# <file system> <mount point> <type> <options> <dump> <pass>
3/dev/pbs/root / ext4 errors=remount-ro 0 1
4/dev/pbs/swap none swap sw 0 0
5proc /proc proc defaults 0 0
6192.168.1.251:/volume3/pbs-1-bck /mnt/rnas2 nfs
Then we'll run mount -a and take a look at the mounts to verify that our NFS mount is present
Now we can go ahead and add this as a datastore in PBS
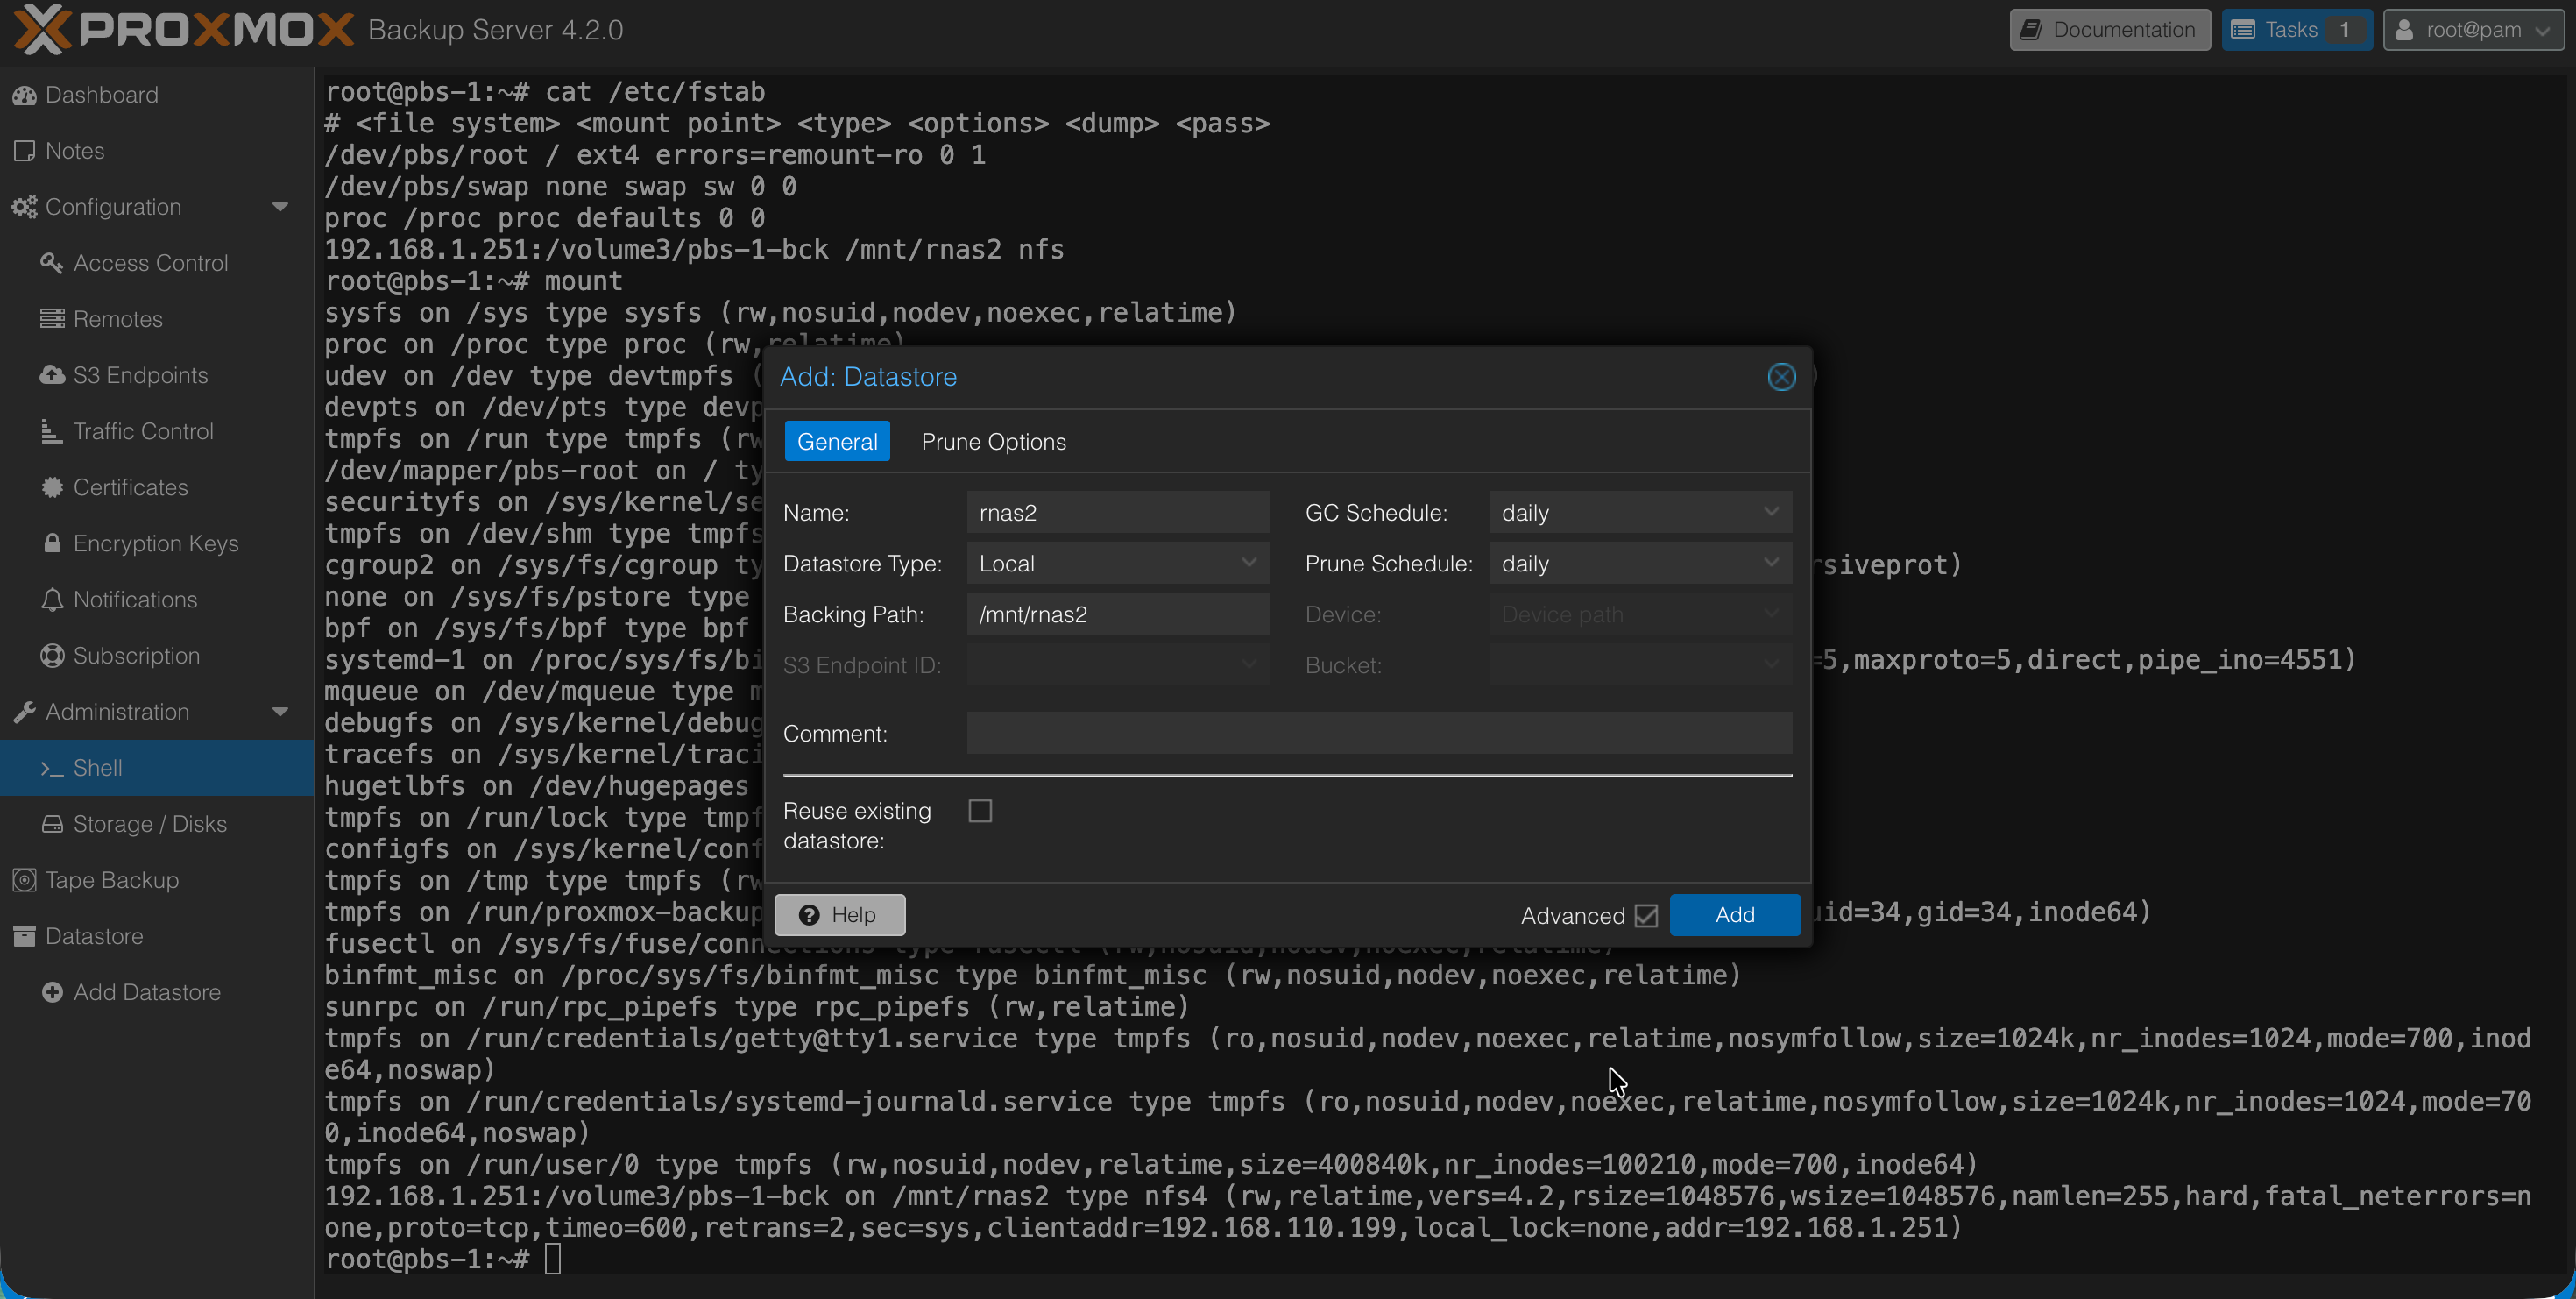
Note that the directory added needs to be empty
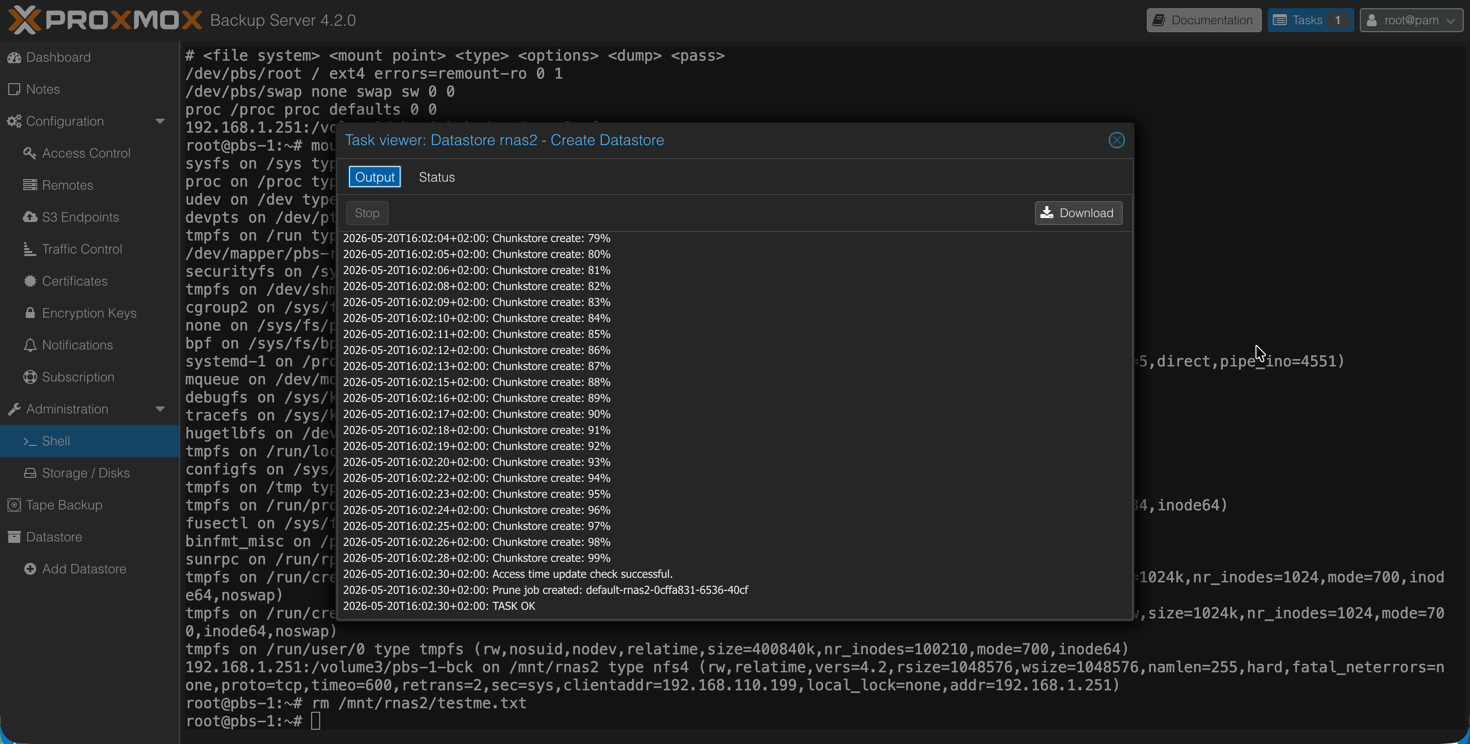
After a while the datastore should be ready
Test backup from PVE
Now we're ready to test a backup from a Proxmox VE host.
What might come as a surprise if you're new to Proxmox is that the backup server it self is not running the backup jobs, and is not responsible for initiating them either.
The backup job configuration is set from the PVE side. So no centralized backup job configuration if you have multiple PVE clusters or hosts to backup.
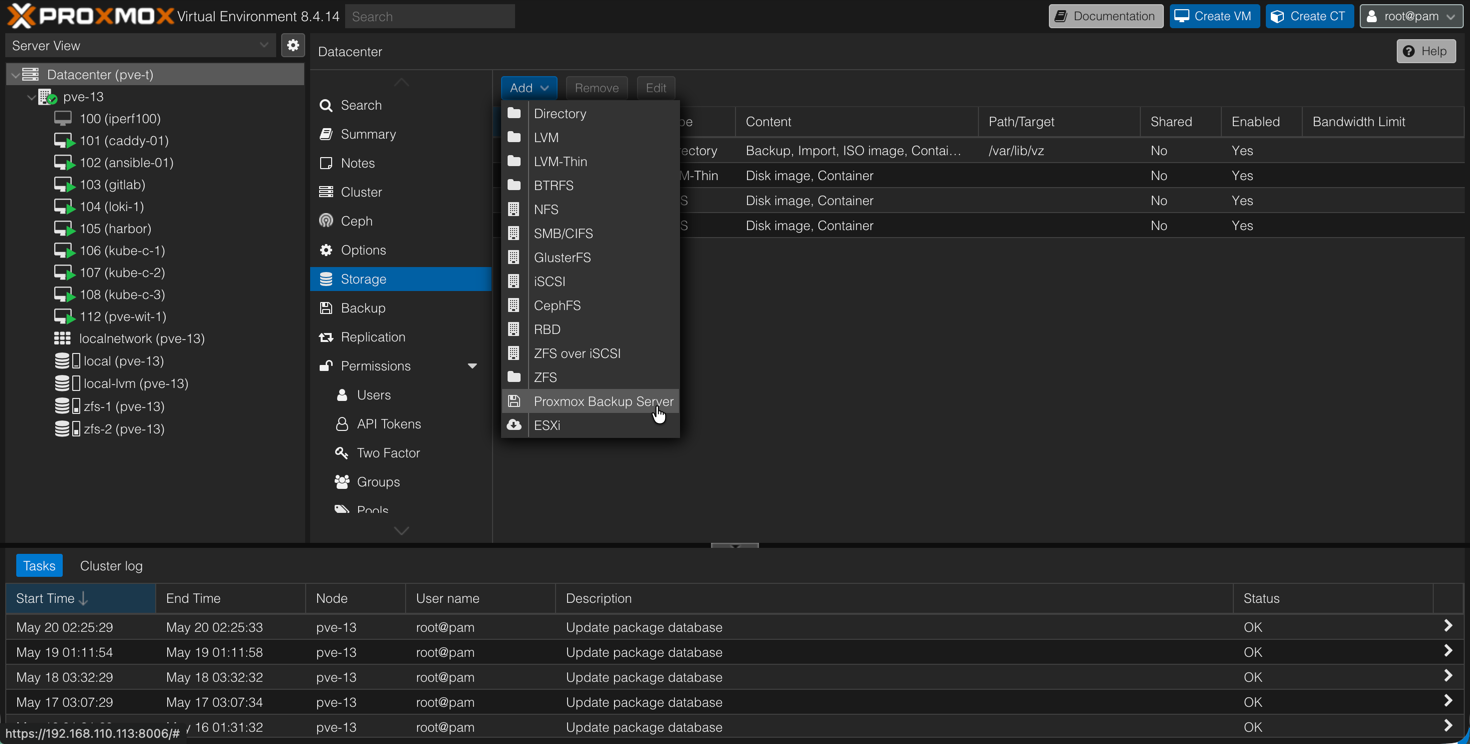
Before running a backup job we'll need to add PBS as a storage object in PVE. This is done from the Datacenter view
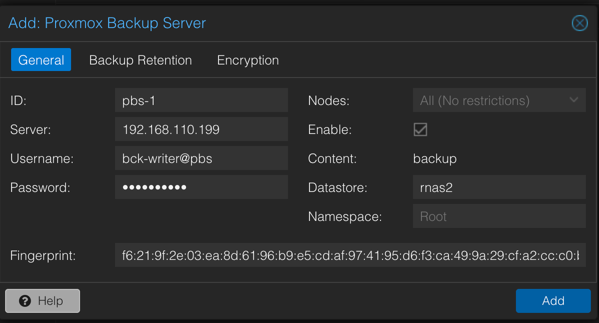
Fill in the details for the PBS server and click Add
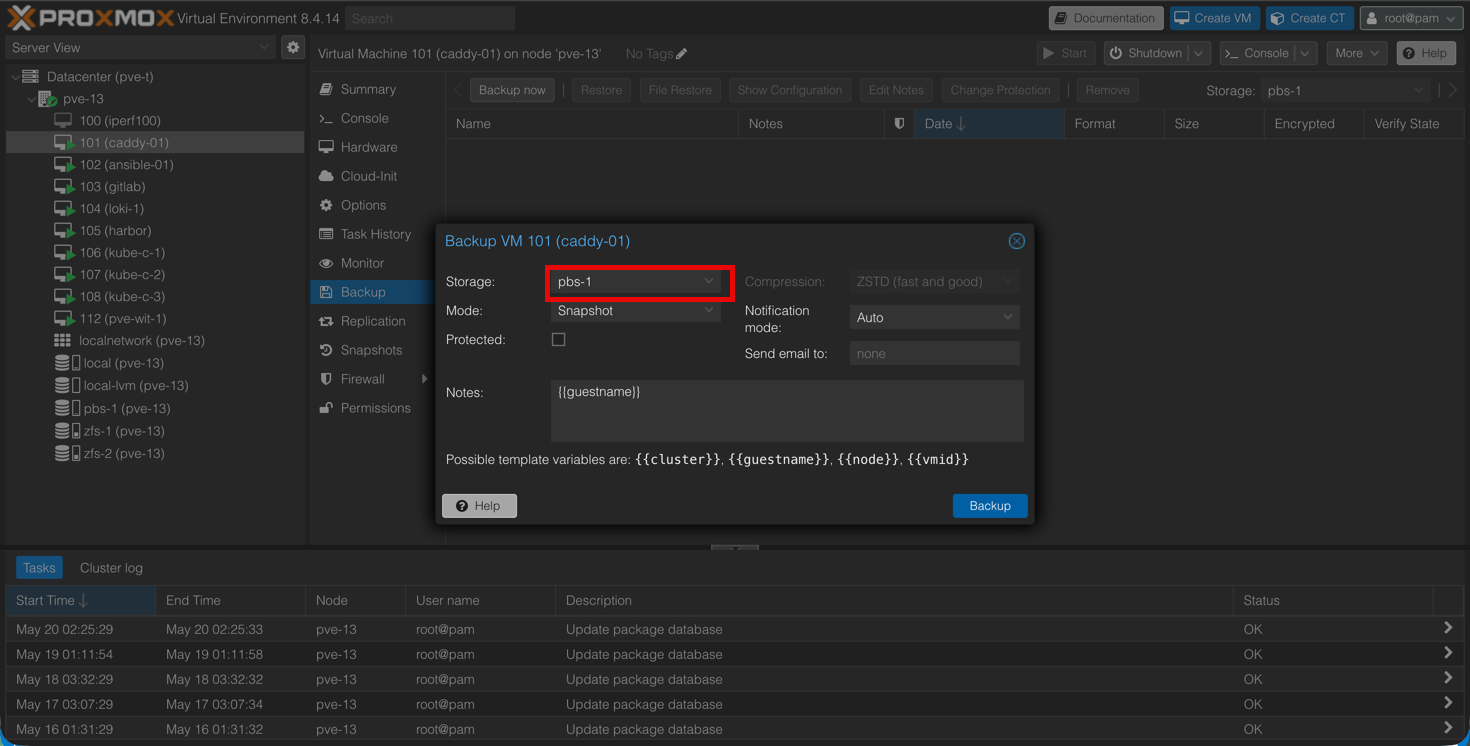
And that's it. Now we are ready to start a backup job of a virtual machine in Proxmox
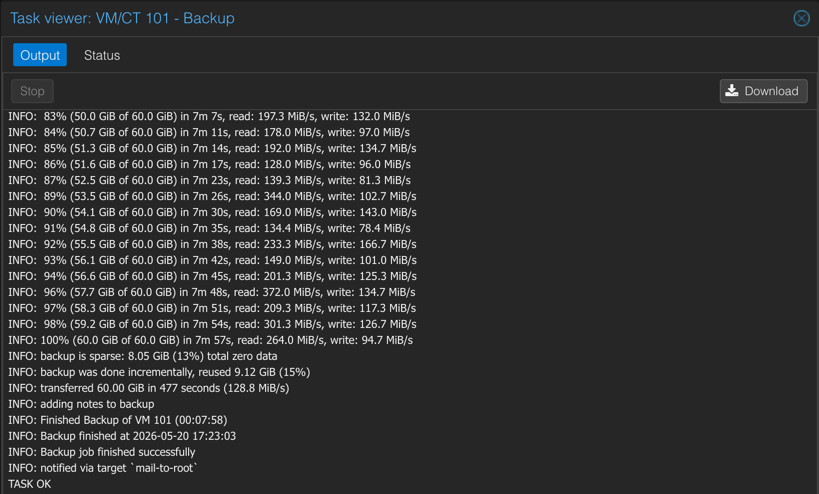
After a while the backup job should finish
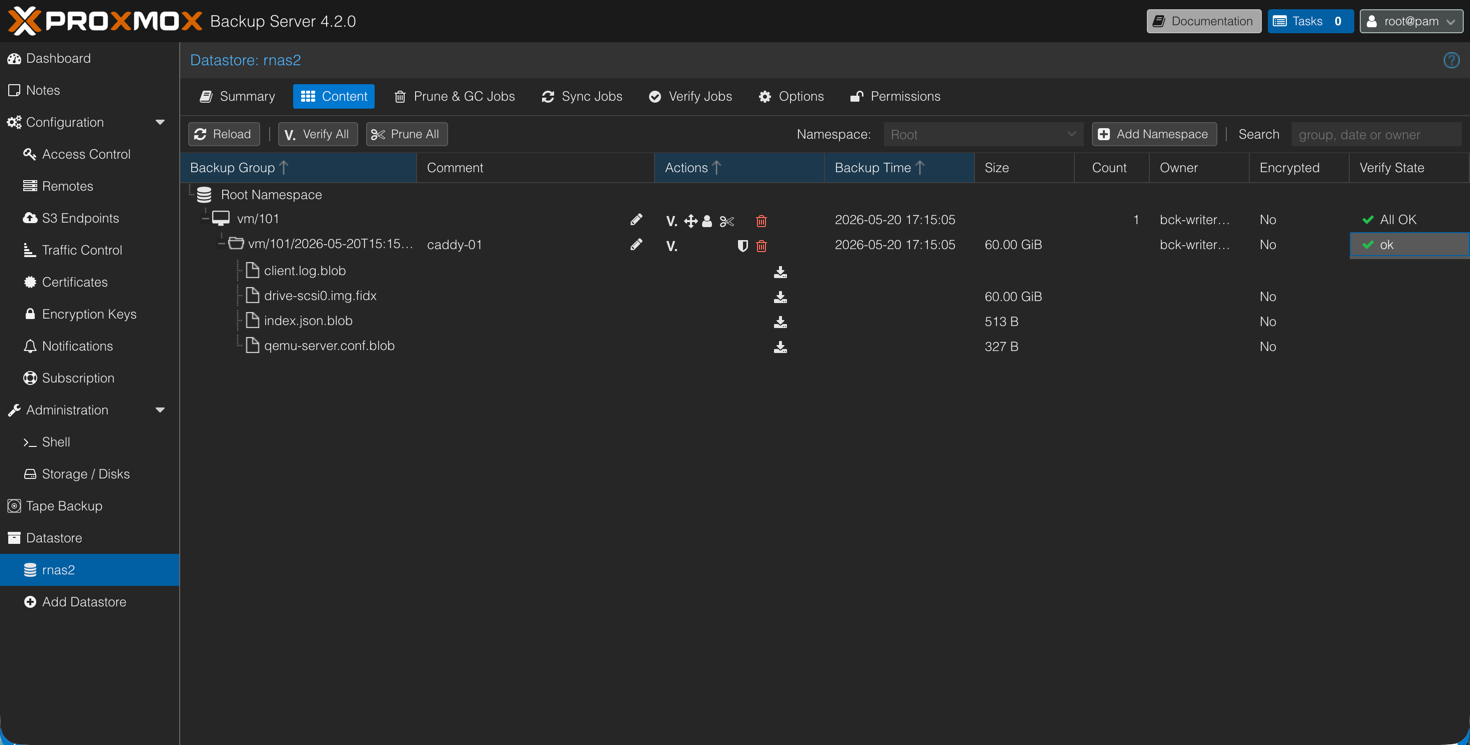
And it's visible over at PBS
Schedule backup jobs
Now, the next step would be to schedule a job for one or more VMs. Since we started the job from the VM one might think that one could schedule a backup also, but this feature is not available from the VM view.
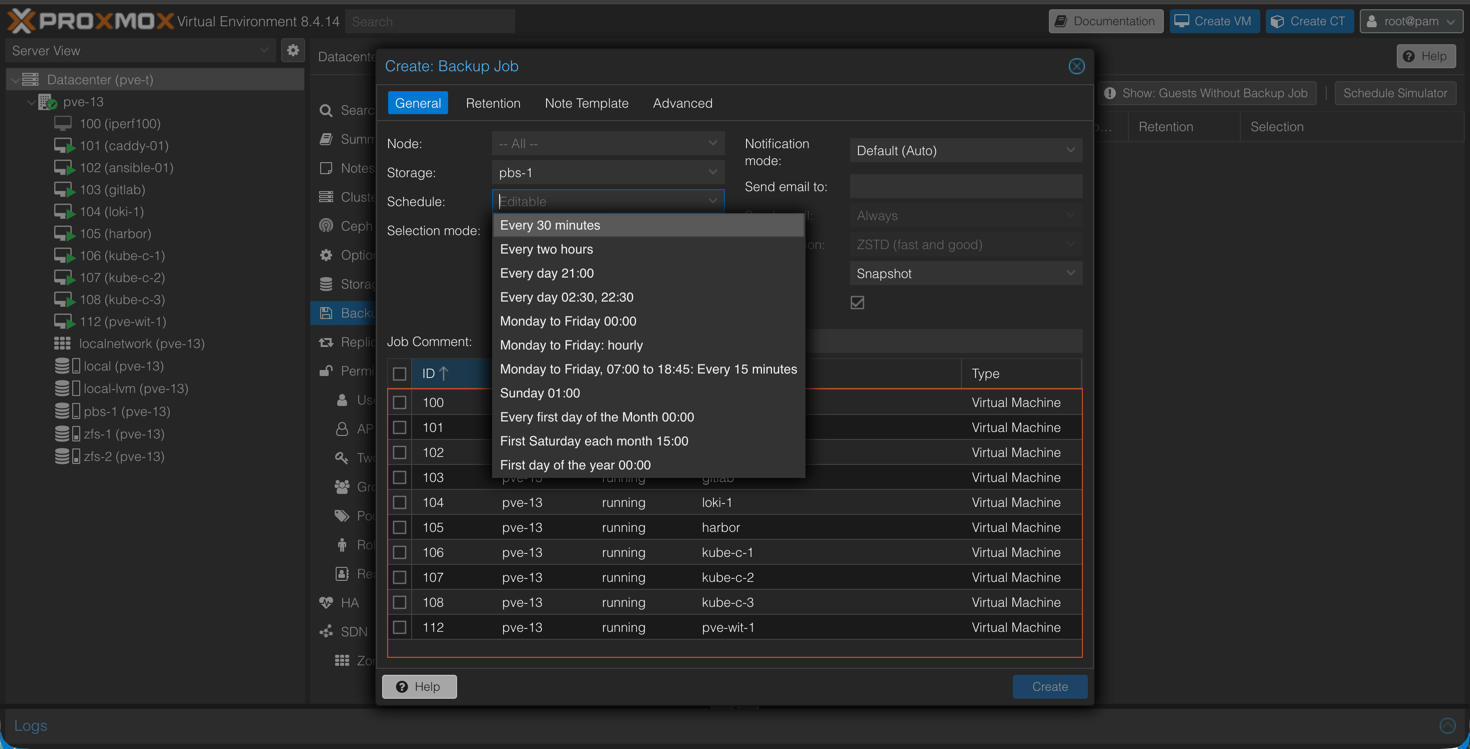
For scheduling we'll have to go to the Datacenter view and select Backup

From here we're able to schedule a backup job of one or more VMs
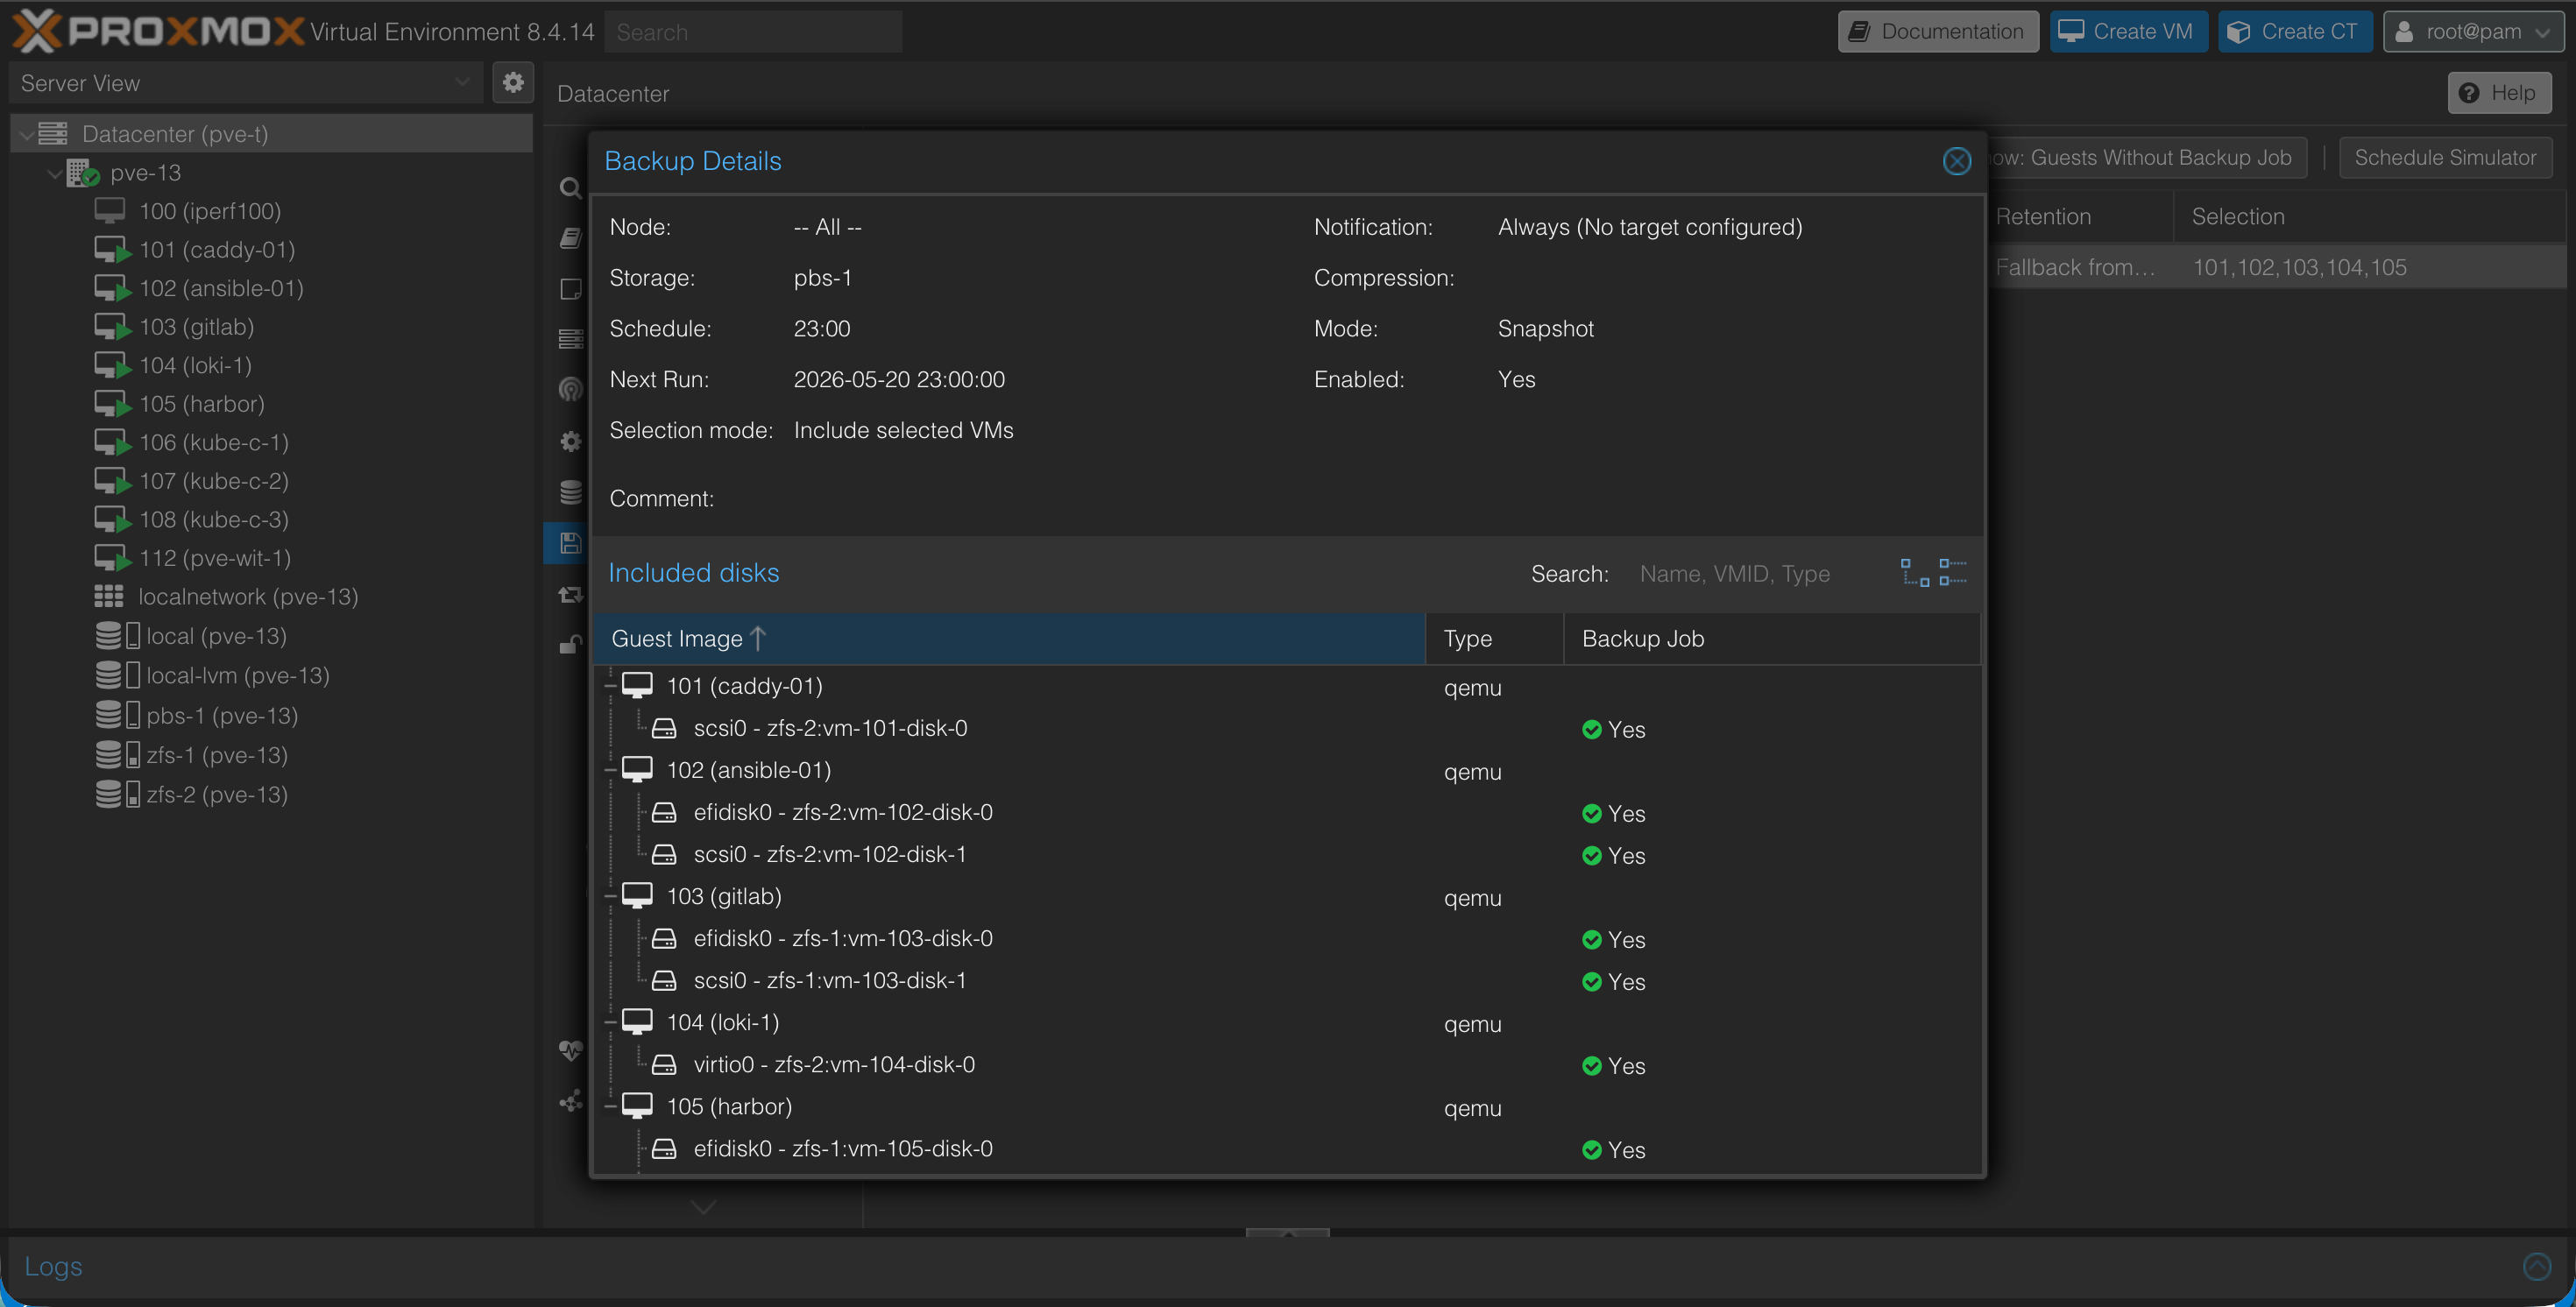
After creating a schedule we can check the details of the job
Testing restore
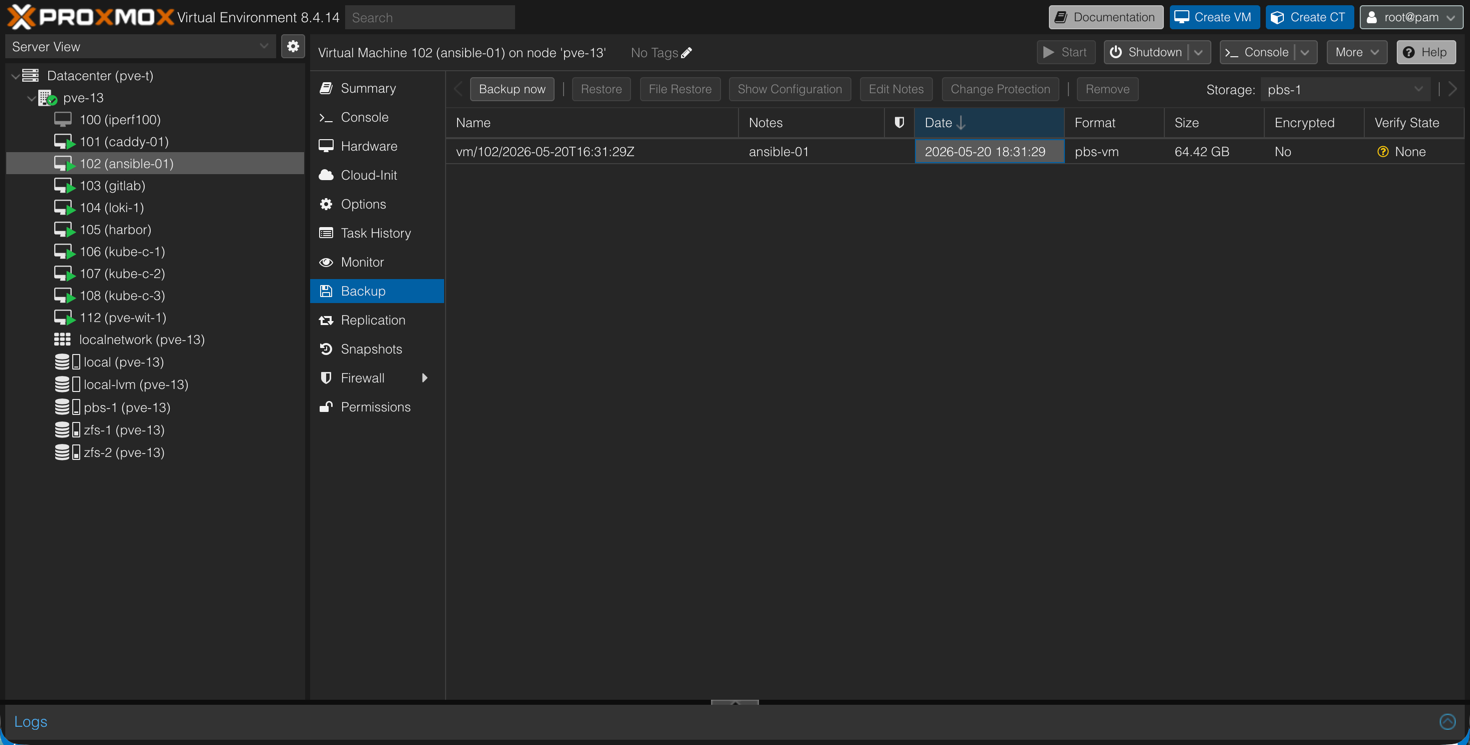
Obviously, we'll also have to test a restore. We have a VM with a backup performed already.
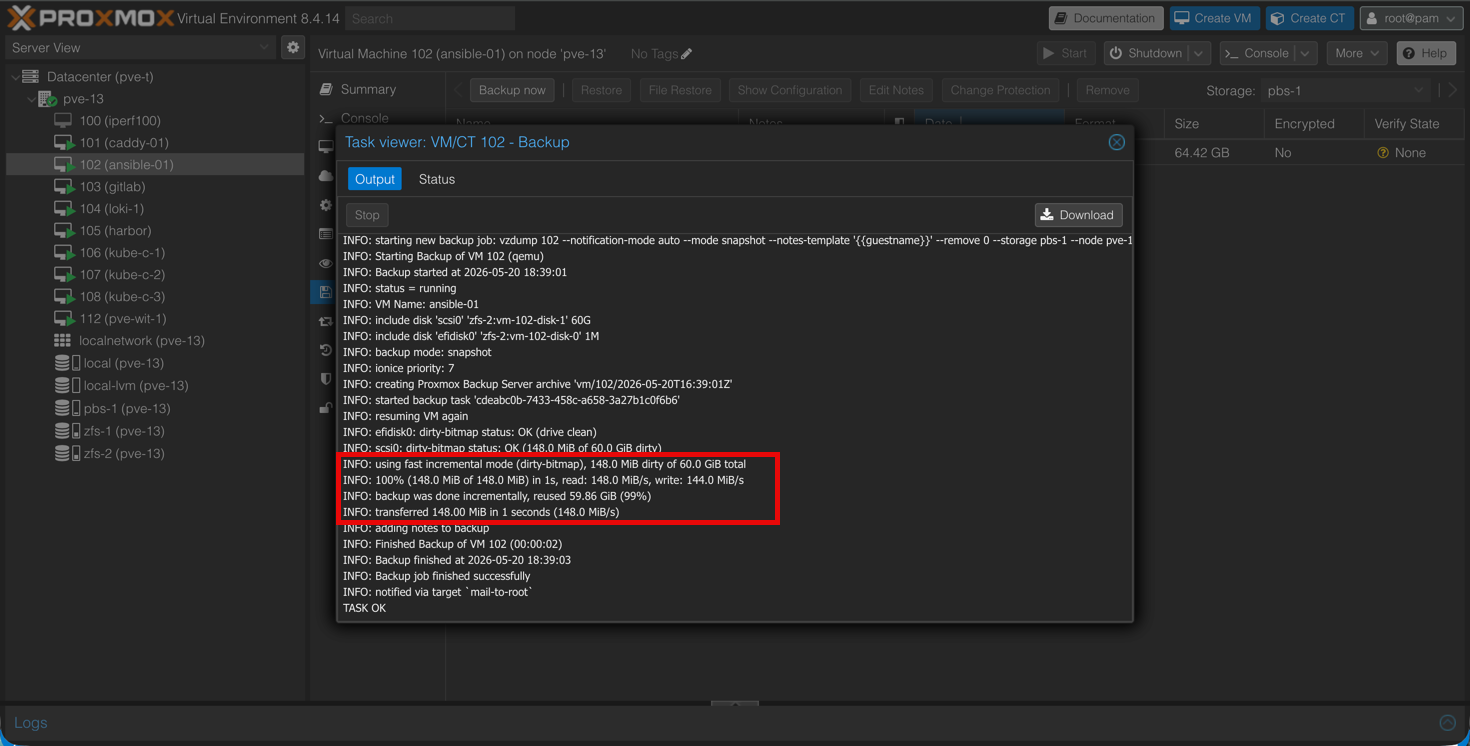
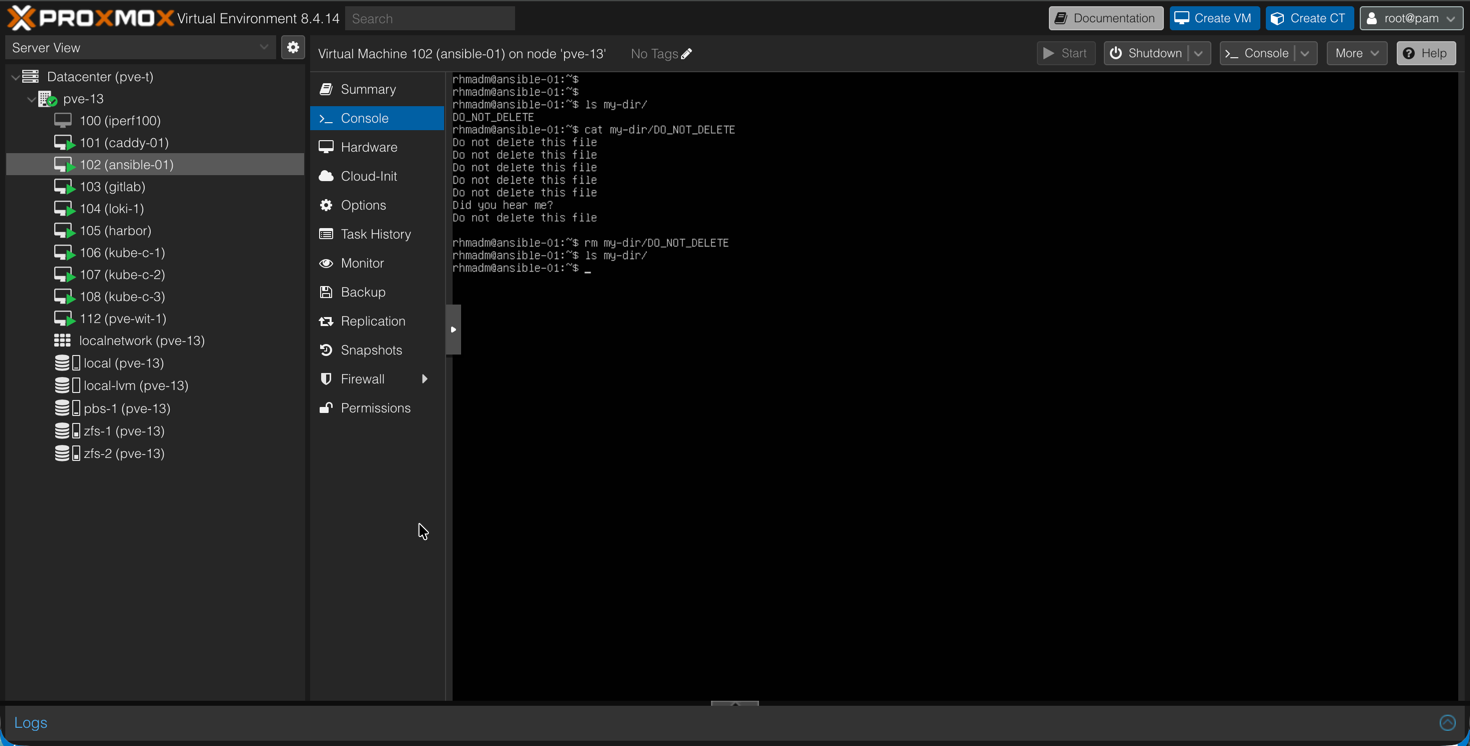
Now, let's add a file to it and run a new backup. Since backups are incremental it should be quite fast.

After verifying that this backup has run, let's delete the file.
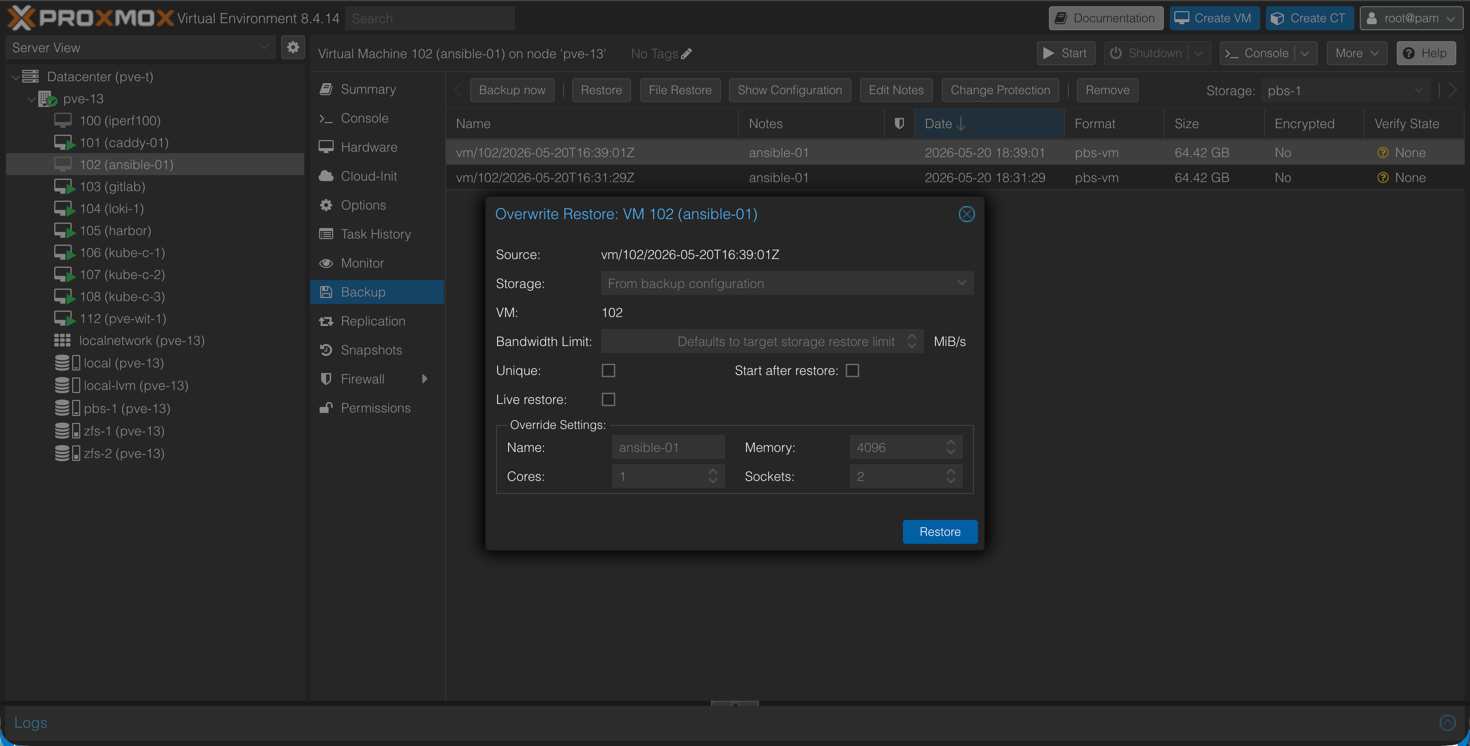
With the file gone, let's test a restore of the last successful backup. Note that the VM should be turned off at this point.
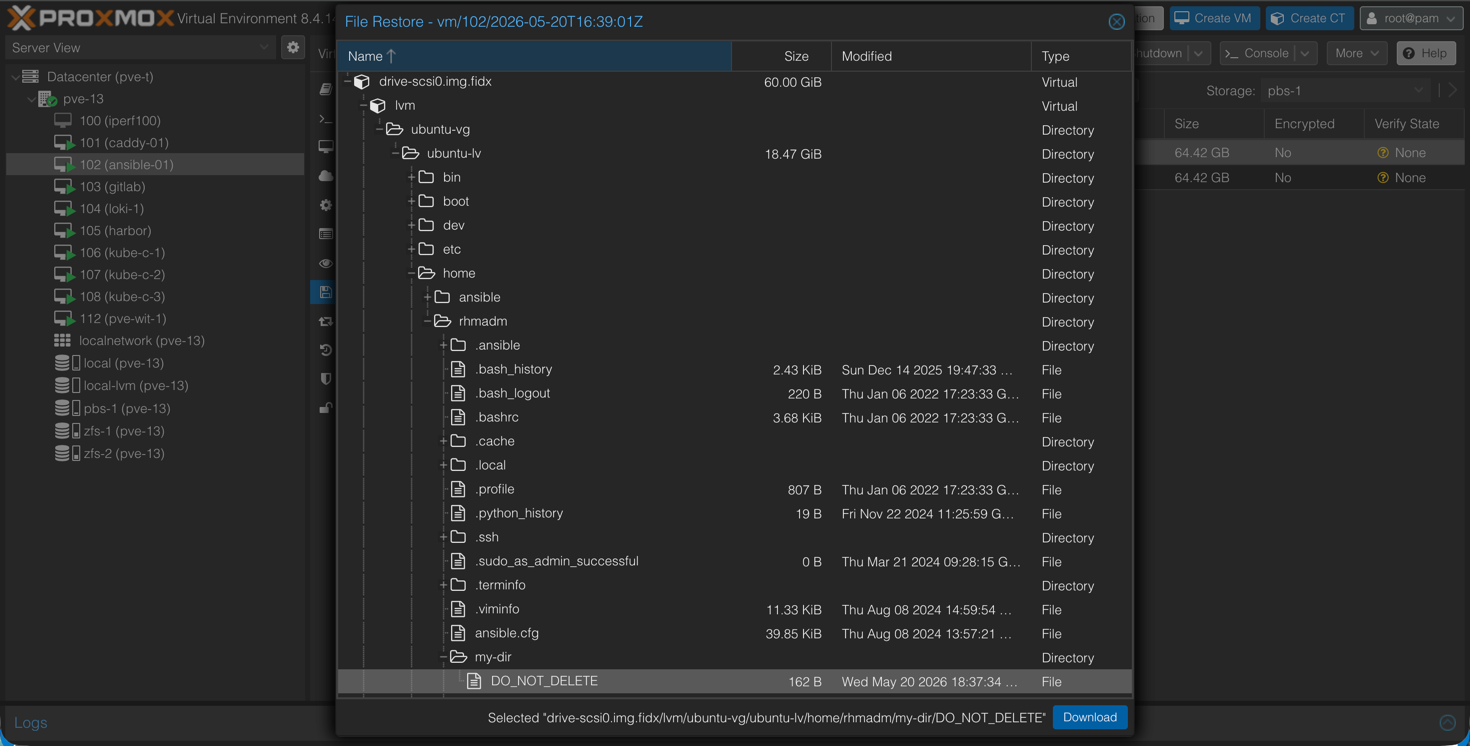
Instead of restoring the full VM just for one file, we'll could make use of the File level restore functionality. This will let us download the file locally.
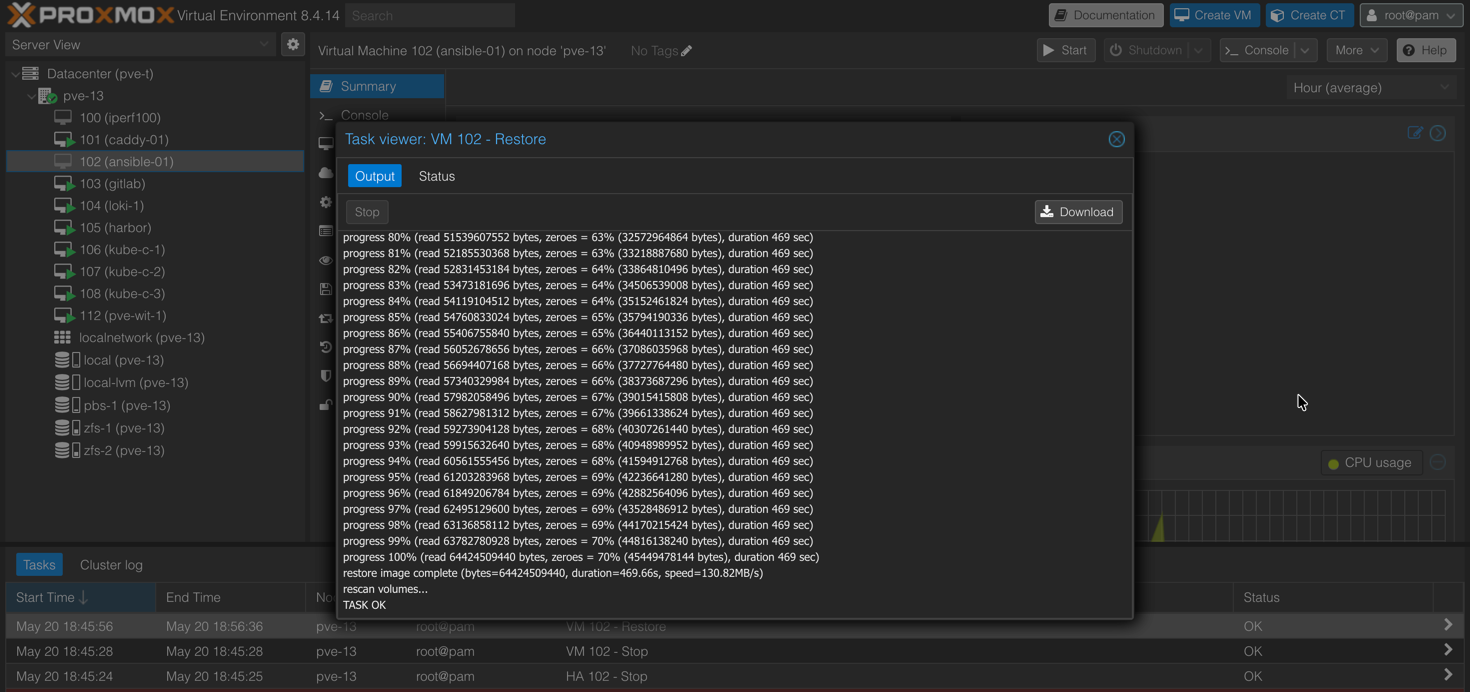
With the restore complete we can start the VM
And now let's verify that the file is back

Summary
This post has been a fairly quick walkthrough of basic backup/restore functionality with Proxmox VE and the Proxmox Backup Server. Actually most of the backup / restore stuff is happening in PVE, and we could've used local storage for that. Proxmox Backup Server acts more as a backup target, while there's obviously features like validation, protection and more which for many organizations should be something to consider.
Proxmox Backup Server is free as PVE is, but to get support, and validated updates, a subscription is needed which I believe most will do when running this in production.
In upcoming posts we will take a closer look at more of the functionalities in PBS.